This is a sub-page of Deltarune/Chapter 3.
Hometown & Castle Town#
Despite not being accessible in this chapter, every single room of Hometown and the Castle Town still exists, however they are identical to in Chapter 2. The only exceptions to this are the rooms containing the church and the shelter, which have been overwritten with the versions used in Chapter 3's ending cutscene. (Oddly, this isn't the case with the exterior of Kris's house, which has a separate cutscene version of the room.)
Debug Rooms#
room_cutscene_tester#
The cutscene tester room from Chapter 2 returns in Chapter 3 with some changes made to it. In terms of the cutscene, the characters now walk up to Lancer one at a time, with Ralsei becoming stretched and becoming his chef sprite with an explosion sound playing after he walks to his spot, and when Susie says "What the!?" after Lancer explodes, her face sprite becomes a magenta square. The issue where the cutscene caused the game to slow to a halt has also been fixed. The objects in the room were also changed, with an NPC and a sign being added to test Tenna's funny text, some of the conveyors being removed, and the door to Kris's hallway being removed, with it being replaced by a small pathway.
room_tennaCutsceneTest#
Based on the name, this room may have been used to test some kind of cutscene involving Tenna; however, all objects except for the player have been removed from this room.
room_tennaAnimTest#
A room used for testing Tenna's animations. Pressing the right or left arrow keys changes the current animation. Pressing the up arrow key seems to make it always go to the blooming flower animation, which can lead to some glitchiness if you switch the animation while Tenna is still small.
room_lerptest#
A room used for testing sprite linear interpolation using spade projectile sprites and Kris's sprite from the cooking mini-game. The numbers on the top and bottom represent the subtype being used for each column.
room_debug_tennatexttester#
A room presumably used to test Tenna's custom text, but all code has been removed from its scripting.
room_susiezilla_singleScreenMockup#
A level select for the different modes of the Susiezilla mini-game. There are 5 modes which can be selected with the up and down arrow keys or with the mouse and can be played by pressing Z or clicking on them, and there is a description for each of them.
- The first mode is "Protect the statue", with the description reading "Normal minigame version where you protect the statue from waves of enemies."
- The second mode is "Destroy the statue", with the description reading "Battle minigame where you have to hit the statue while enemies interfere." Beating this mode here has a chance of crashing the game.
- The third mode is "Protect Ralsei", with the description reading "Battle minigame where you have to protect Ralsei from the enemies."
- The fourth mode is "Vs. the statue", with the description reading "Battle minigame where the statue comes alive and you have to fight it."
- The fifth mode is "Vs. the statue TURBO", with the description reading "Battle minigame where the statue comes alive and you have to fight it, but it starts faster."
room_rhythmgame_editor#
A chart editor for the Rock Band mini-game. Playing and pausing the song is broken without debug being forced on, and the only way to pause the song otherwise is to press U to save the chart.
room_genanimtest#
A solid black room. Crashes if loaded. Curiously, it places obj_mainchara (Kris) out of bounds at X coordinate -120, with an object called obj_solidblock_32 (that, strangely, is marked as invisible and not solid) completely covering Kris. The room also contains obj_knight_swordtunnelanim, which seems to be related to the Knight's sword tunnel attack, so perhaps this room was meant to test how the attack looks.
room_perspective_testing#
A room featuring many spiraling balls that the player can walk through. It takes place in what seems to be a very primitive version of the Green Room with all interaction boxes and warps removed.
room_bullettest_new#
room_ch3_gameshowroom_tennatest#

An early version of the game show stage. The scale of the screen and stage are different than the final room, with the stage being longer and the screen being shorter. The curtains are also missing from the room. Going to the right will bring you to the right side of the Green Room. The objects for the pre-Board 1, post-Board 1, post Board 2, and pre-Doom Board cutscenes are all present in this room, though only the pre-Board 1 cutscene is able to fully play as the post-Board 1 and 2 cutscenes will automatically take the player to the final game's game show stage after the ranking screen, and the pre-Doom Board cutscene will crash due to the objects for the TV screen being missing.
room_CHEFS#
A level select for the Chef mini-game. You can choose which mode to play (referred to as "microgame" in the room) and whether or not to have music enabled. The options for microgames are:
- 0 NONE
- 1 DODGE FIRE
- 2 DEFEAT GUESTS
- 3 DODGE & FIGHT
- 4 FIRE WHIP
- 5 FIRE WHIP (HARD)
- 6 DODGE FIRE (EASY)
room_rhythmgame_tenna_test#
A room in which Tenna dances in sync with the song "It's TV Time!". Pressing Space causes the rhythm minigame to be started and function as if it were in the Tenna boss fight. Missing a single note when the rhythm minigame is active however causes the game to crash, due to it requiring Tenna's enemy object to be present.
room_dw_channelchange_test#
A room that tests the channel change effect seen at the end of the Tenna boss battle. If debug mode is enabled, pressing the B key will cycle the background between a game board room, the Lightners Live background, Toriel's house, and the Suziezilla background, as well as randomly change Tenna's current animation. Pressing V will change the animation used for the channel change. Pressing I will toggle the animation being permanently on the screen. Pressing F will toggle the animation being handled in draw end mode or draw mode. For whatever reason, the Roaring Knight is also here, doing absolutely nothing.
room_susiezilla#
An early different version of the Susiezilla minigame that had most of its sprites blanked out. The sprite names imply that it involved cars, zombies and buildings.
Backstage#
Rooms intended for a scrapped area of the chapter. It would have been accessible between boards, originally being required to be visited to start Board 2 and being opened further midway through the also-scrapped Board 3, where the party would need to find a keycard to finish the board. Several of these rooms contain the object to play the scrapped Sneaking song that was shared by Toby Fox in the September 2023 newsletter. This area was ultimately cut along with Board 3 due to them causing pacing issues, though a chunk of the rooms would be reworked into rooms in TV World. None of the game board puzzles in this area will turn off after the Shadow Mantle Holder is defeated, implying the concept didn't exist yet when these rooms were made. This lines up with the pre-Board 3 removal version of the Chapter 3 timeline given in the CHAPTER 3 and 4 LOOK BACK segment of the Winter 2025 Newsletter, as according to it the third S-Rank room was originally finished before entering the area.
room_dw_b3bstest & room_dw_b3bstest_big#
Two rooms used for testing the game board puzzle rooms, which were originally made for this section before being relocated to TV World. Going to the left of room_dw_b3bstest will take you to room_dw_b3bstest_big, and going to the right of room_dw_b3bstest_big will take you to room_dw_b3bstest.
room_dw_b3bs_intro#
The starting room of the area, which would have been accessible from the top door in the hallway between the Green Room and the stage before it was changed to be how the player enters the boards instead. When the global.plot variable is set to a value from 120 to 124 Lancer will be playing the game in the room, though speaking to him will softlock the game due as it tries to play a scene that had all its code deleted. The scene likely would have set global.plot to a value from 125 to 129, as those values will place lancer beside the game instead, allowing you to play it as him. You can enter the stairs on the left to go to the stairs on the right, and then dig up some stairs on the right to go to the stairs in the middle. There you can dig up the Mooncloud Keycard, which would have been needed for the elevator on the scrapped Board 3, which floats on the stream to further backstage. After that, Tenna makes an announcement saying that Board 2 is ready.
When global.plot is 200 or higher (which would have been done midway through Board 3 when the party is kicked out), Lancer will be gone and a save point will be placed in the room. If flag 1072 is set to 1, save point won't be there and a cutscene will play upon entering the room where Susie and Ralsei, already in the room, enter your party to go further backstage. This cutscene spawns the music object for the area and the save point, though the save point is placed too high on the wall and cannot be interacted with. Leaving and reentering the room fixes this.
Going to the left door will bring you to the first jail room in TV World, going to the right door will bring you to the room that introduces the stealth zone mechanic in TV World (originally room_dw_b3bs_zapper_a_old), and going to the bottom door will bring you to the hallway between the Green Room and the stage.
room_dw_b3bs_zapper_a_old#

This is an old version of the room where the sneaking mechanic is introduced in the final game, though this version would have had nothing to sneaking. In this room there is a Zapper who will catch you if you get close to him. When he catches you, you are given 2 dialog options to explain yourself. The first option is "Here to cheat", which will start a battle with the Zapper when selected. The second option is "Got Lost looking for Lancer", which will send you to room_dw_b3bs_intro when selected. The code for this Zapper indicates that he's also intended to automatically send you to the first jail room of TV World if the global.plot variable's value is less than 129, though this no longer works due to this room being renamed. There are also 3 doors in this room. Going into the left door will send you to room_dw_b3bs_intro, going into the top door will send you to room_dw_b3bs_shop, and going into the right door will send you to room_dw_b3bs_watercooler. The room doesn't have an old variant of its object so it uses the final one instead, which results in the stealth zone sign being misplaced and the door, whole stealth section, and cutscene from the final version being unintentionally present. Interestingly, the room object creates 2 black pieces of collision that, in the final version of this room, are formatted to cover a non-existent path leading to the right of the room, and shares a flag for appearing/disappearing with a similar black piece of collision covering the top left door in room_dw_b3bs_watercooler, implying that the final version of this room replaced this old version even before the backstage section was cut, which was then further altered later on to fit TV World.
room_dw_b3bs_shop#

This room contains a vending machine that softlocks the game when interacted with, presumably due to its object being deleted. There are also 4 doors. The door on the right leads to room_dw_b3bs_rabbick_a, the door on the left leads to the Lancer X/O puzzle room from TV World, the door on the bottom leads to the room where the stealth zone mechanic is introduced (originally room_dw_b3bs_zapper_a_old), and the door on the top leads to the room where you can get the Lancer controllers.
room_dw_b3bs_rabbick_a#

This room has 1 trash can and two trash bags. The trash can contains a blank glitched item, and walking in front of the first trash bag will cause a Ribbick to jump out, similar to Rabbicks from Chapter 1. Going into the door at the top will take you to the room that is after the final Ribbick room in the final game. Interacting with the second trash bag just gives the failsafe text for object NPCs. It is supposed to say that there is a Ribbick but it is shy, however the text was removed from the game and can only be found in the Japanese translation file. By default, the door at the top is open, but there's additional code that can be triggered by manually setting flag 1170 to 1 (there's no code that does this leftover in the files) that closes the door and puts a note on it, which gives you the option to knock, making a Zapper drop down from the ceiling upon doing so and warping you to the second jail room in TV World.
room_dw_b3bs_watercooler#
A large central area for this second half of the area. By default, you spawn in a Goulden Son in the middle of the map that uses error handling text. The path in the bottom left has you sneaking past 2 searchlights before entering a door that leads to the second jail area room in TV World. Going down, you will enter a door that leads to room_dw_b3bs_cheaterpippins. The path in the bottom right has you sneaking past 5 searchlights that rotate in a circular motion and one normal search light before going down and branching into 2 paths. You can go left past some more searchlights to find a Watercooler enemy and a chest that contains a blank, glitched item, or you can go right, which sends you to the 1 POINT chest room that is found right before getting back to the Green Room near the end of the chapter. Taking the path in the top left will lead you to a trash can that, like the chest in the Watercooler path, contains a blank glitched item. There is actually a door here that leads to the room that introduces sneaking, however it is oddly blocked off unless you get to the ice door in Board 2's sword version without having gotten the ice key in the Board 1, implying the flag controlling it was repurposed from one from this room. The path in the top right leads you to a door that brings you to room_dw_b3bs_sadshadowguys.
There's a variable called dostuff in the room's create event that controls whether or not all the stealth mechanics and searchlights will be present. This variable is permanently set to false upon opening the chest by the Watercooler. Additionally, there's code that's never called to spawn two Zappers in the room, which would comment on you battling the Watercooler.
room_dw_b3bs_cheaterpippins#
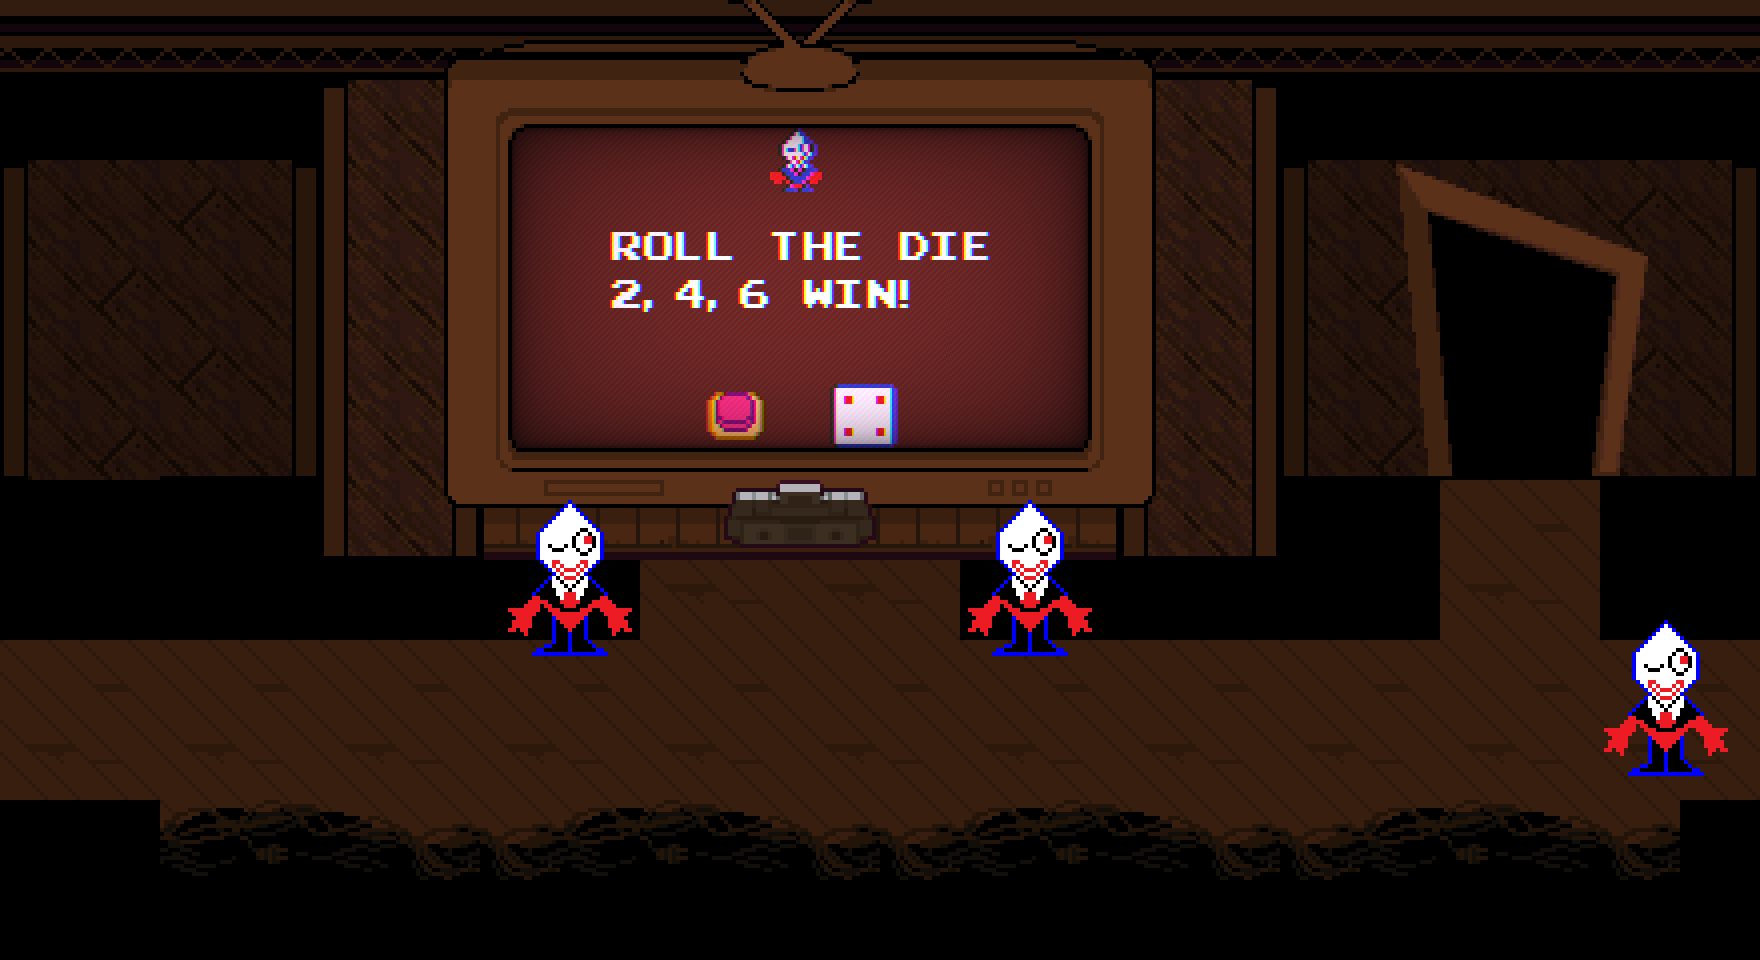
This room features a "money-making game" ran by some Pippins where you must roll a 2, 4, or 6 on a die. However, it is impossible to get those numbers, and instead you will get things that shouldn't be on a die like 7, 1/2, a roman numeral 3, and a 6 which then quickly reveals itself as an "upside-down 9". Going to the door on the left will bring you to room_dw_b3bs_camerareminder, and going to the door on the right will bring you to room_dw_b3bs_idcardpuzzle. To get to the ID card puzzle room, you must pick up the die as Susie and throw it next to the Pippins, and then take a picture of the die and the Pippins next to each other which will start a cutscene where the Pippins will run away. A reference to the "money-making game" ultimately did make it into the final release in the Island Board, but it can't be played since the Pippins hosting it will quickly run away either from Tenna's presence or taking an unsupervised break.
room_dw_b3bs_camerareminder#
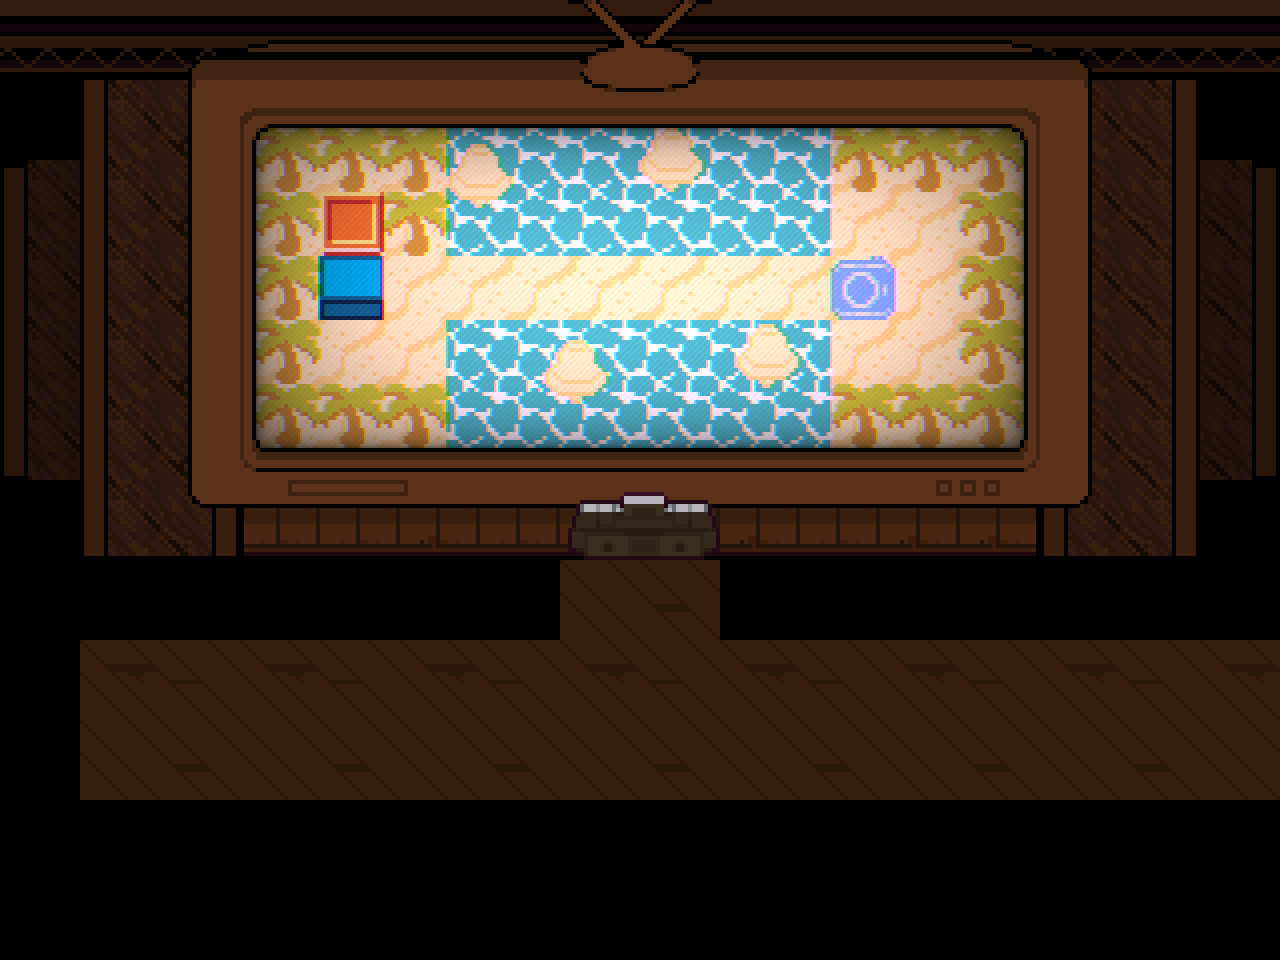
A puzzle room where you're supposed to use your camera to get rid of the camera block and get across the path as bells that reset you swing up and down, but for some reason you cannot use the camera here. Activating the camera through hacking or debug mode lets you do the puzzle, involving using the camera on the path which prevents the bells from resetting you. Pushing the block onto the switch spawns a spotlight on the left side of the room, along with a bunch of Zapper heads below the floor. If the player doesn't push the block and instead uses Susie to throw the block elsewhere and Ralsei's block form to trigger the switch, the spotlight and Zapper heads will be colored green. Going under the spotlight makes a Zapper jump up to the party and offer to take them back to the Backstage Entrance. If you choose to get taken back to the entrance, it sends you to the cage in the the first jail room of TV World, which was originally connected to room_dw_b3bs_intro rather than being the midway point of TV World. Additionally, there's an unused Zapper NPC in that room that would've given you the option to warp back here.
room_dw_b3bs_idcardpuzzle#
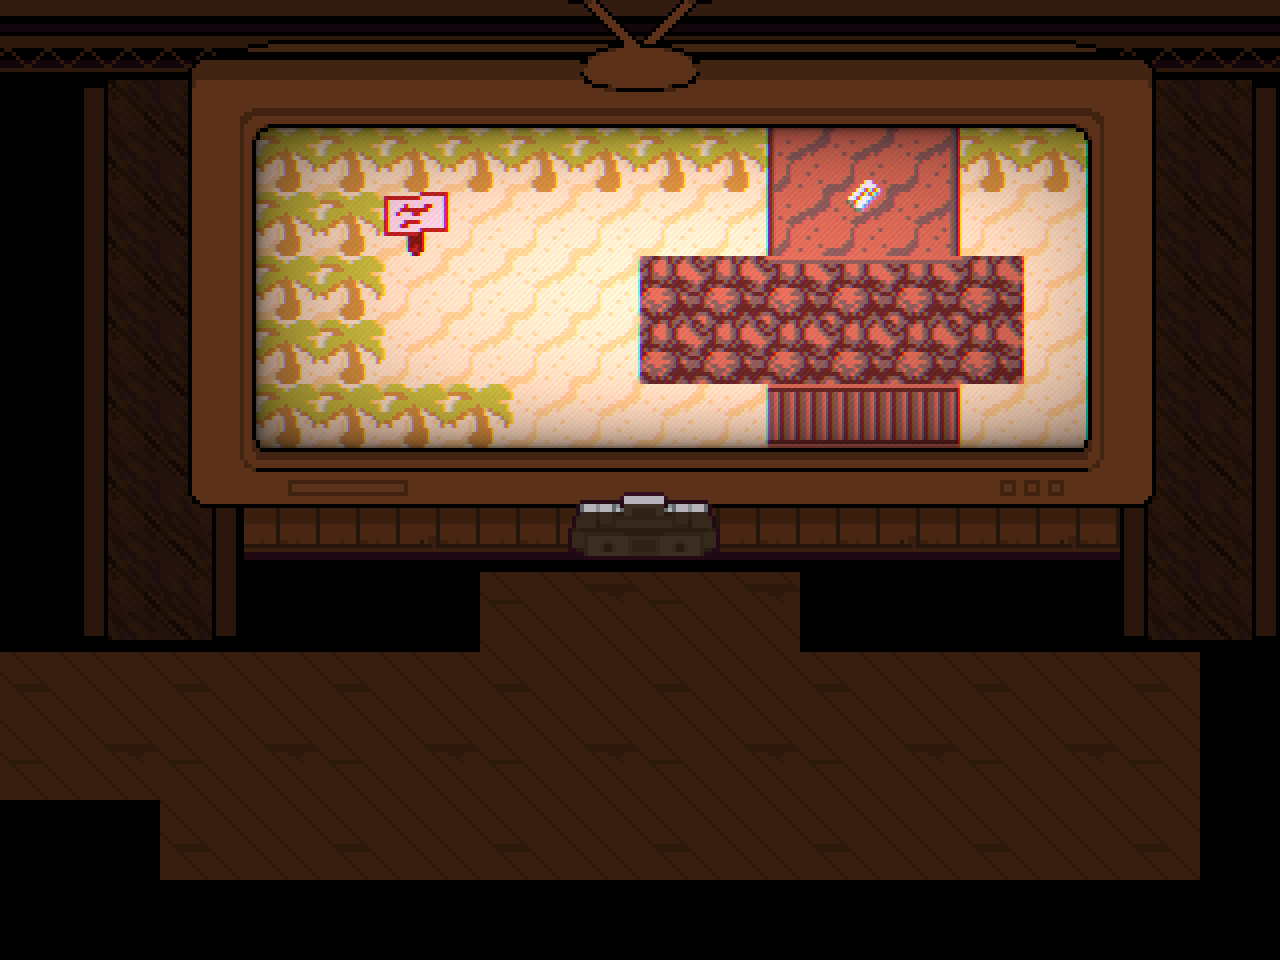
A puzzle room where you need to get the Mooncloud Keycard that was needed to progress Board 3 before it was scrapped. In order to get the keycard, you would need to fill up the river with water by crying as Elnina, whose controller was to be found in room_dw_b3bs_rouxls_lanina after fighting Rouxls Kaard. However, her controller was replaced with the OddController item, meaning you can't become her in this room, making it impossible to complete without hacking. Holding the E key upon entering the room in debug mode gives you one of Lancer's Controllers and the OddController, though it needs to be exited and rentered to have full effect.
room_dw_b3bs_sadshadowguys#
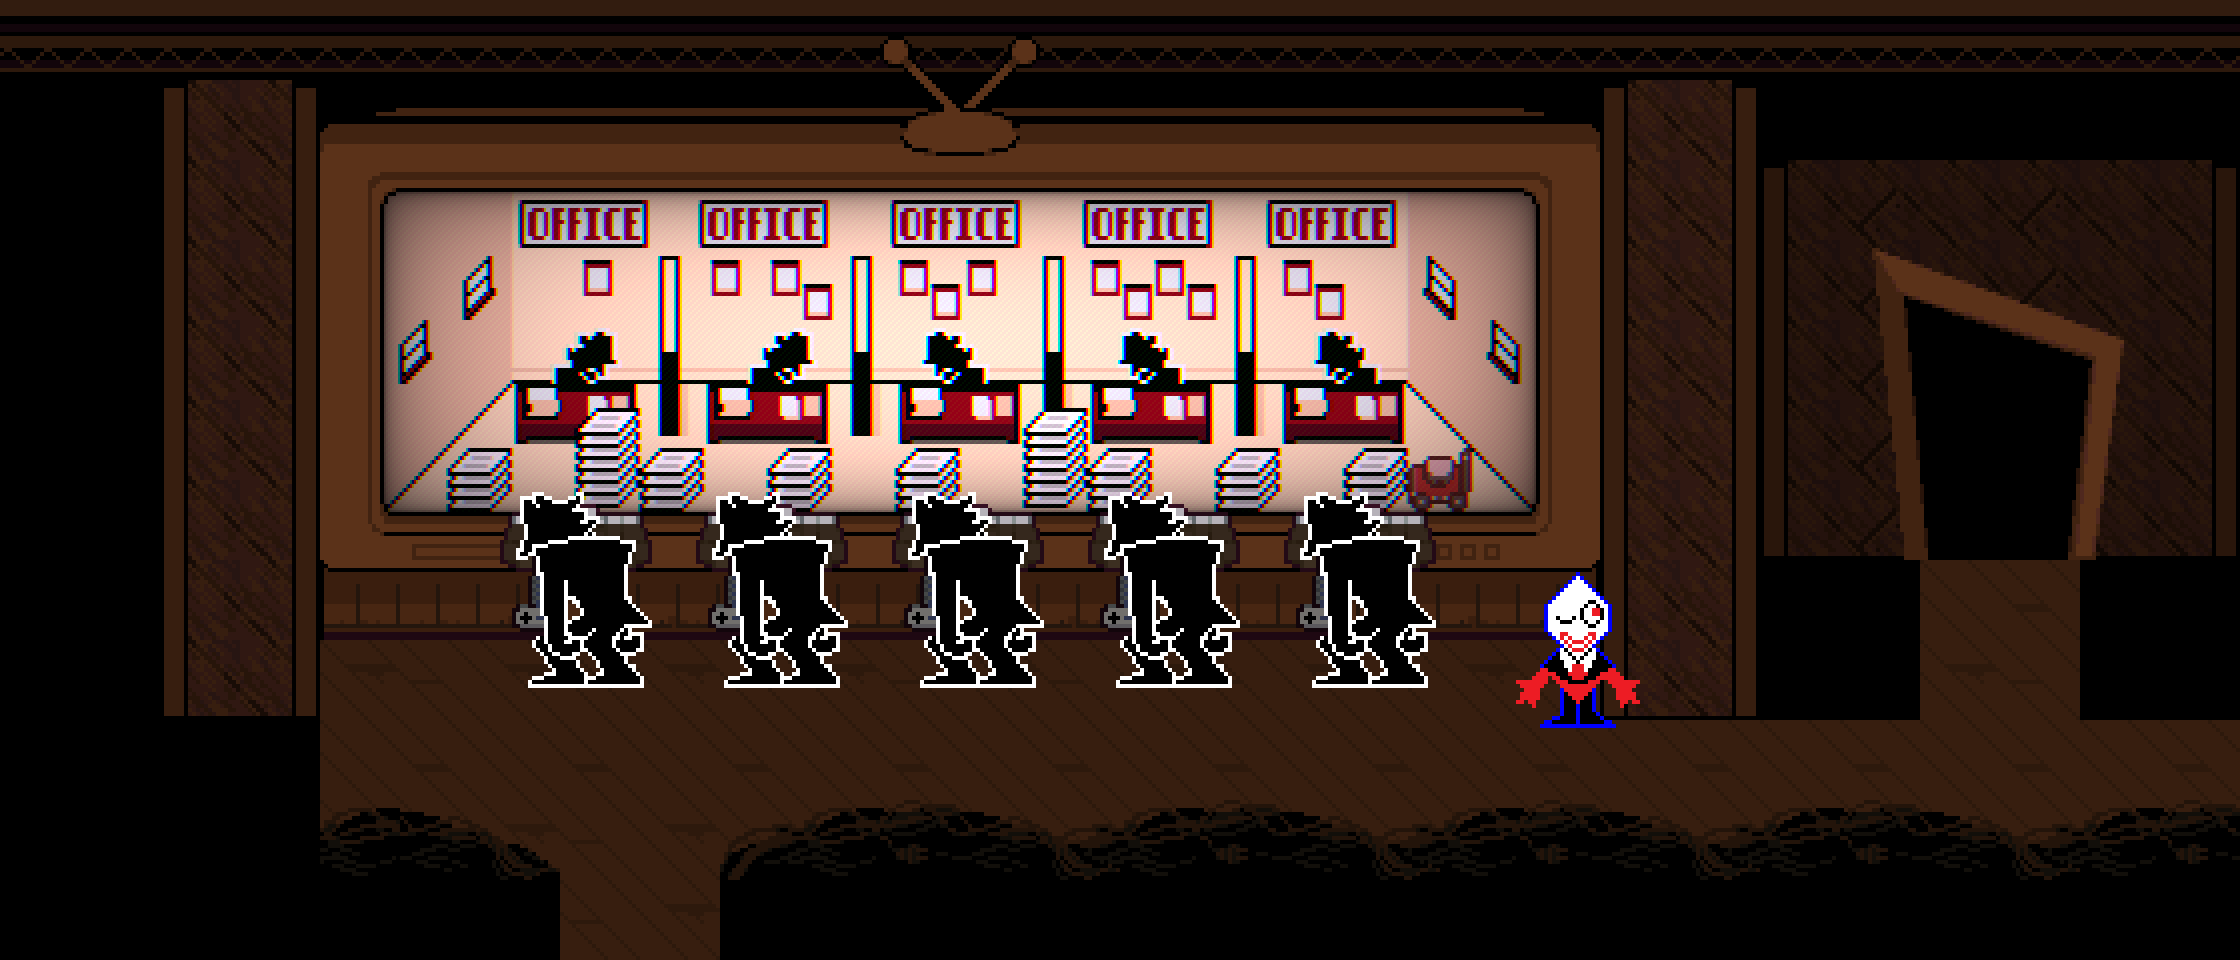
An early version of the room with the Shadowguys working. Unlike the final room, it is impossible to shred their papers with the lawnmower as there are no available controllers. Going into the door at the top will bring you to room_dw_b3bs_rabbick_b, and going into the door to the right will bring you to room_dw_b3bs_rouxls_lanina.
room_dw_b3bs_rabbick_b#

A room filled with multiple trash cans that contain a switch, dark dollars, and one Ribbick. The switch opens a door at the top, which takes you to the Cool Trashy room that is above the working Shadowguys room in the final game.
room_dw_b3bs_rouxls_lanina#
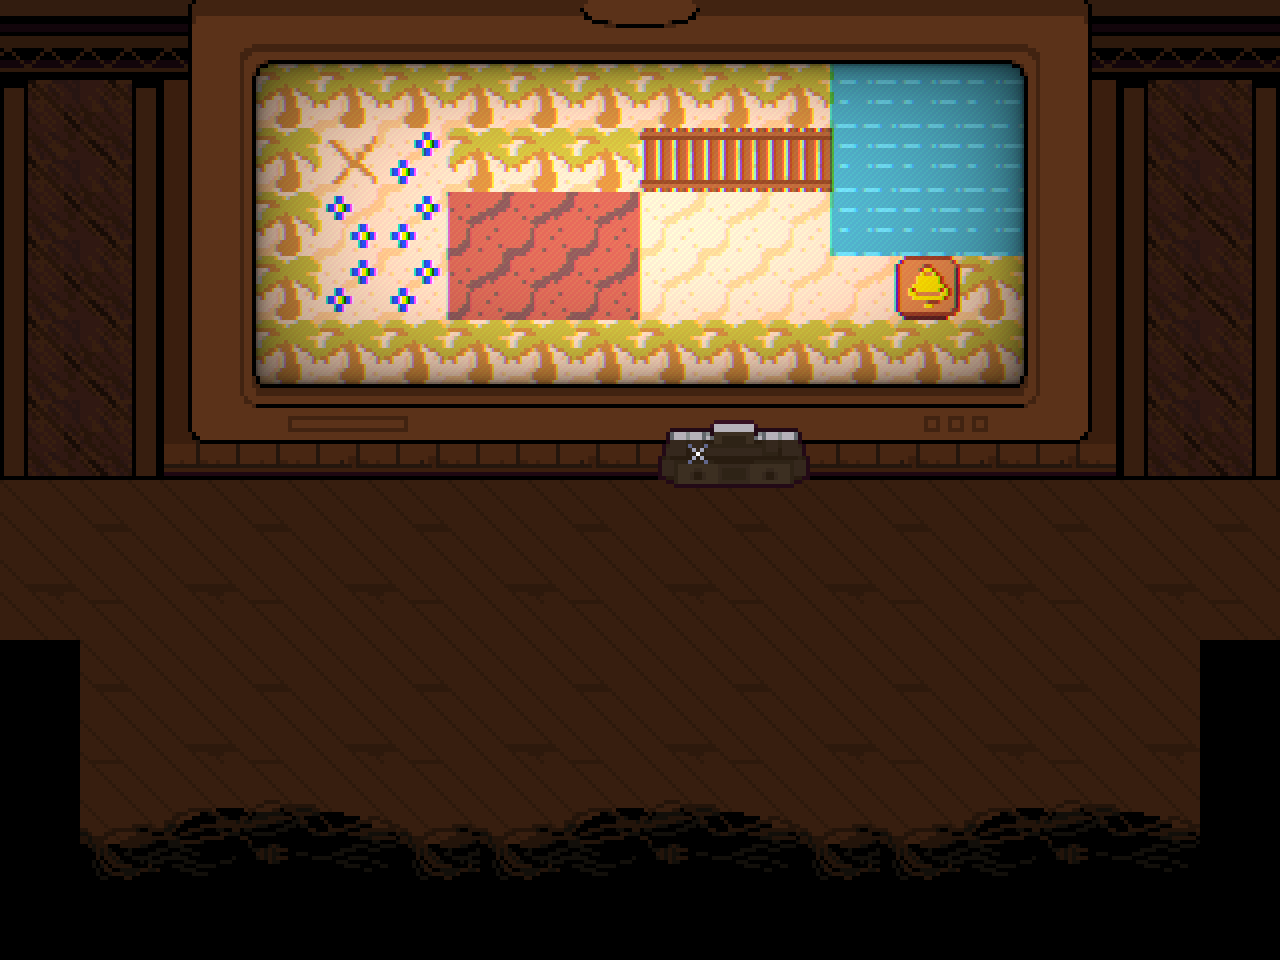
A puzzle game board where you can take Elnina's controller and become her. In order to complete the puzzle, you must take Elnina's controller and play as her to cry into the pond, filling it with water, become Susie and throw the 3 planks into the water to make a path, and become Lancer and dig the hole for 100 POINTs. Before you fight Rouxls Kaard, this room has Rouxls, Elnina, and Lanino all trying to solve the puzzle, but failing. There is also a Shadowguy in the corner. There was a cutscene that was intended to play upon entering this room, but all code for it was stripped from the game. However, text for it can still be found in the Japanese localization file, completely untranslated. It reveals that this room and the room after were reworked into the cooking show room where you fight Rouxls in the final game. You can only get Elnina's controller and complete the puzzle after Rouxls is fought, though it adds the OddController to your inventory implying it was changed at some point after this area was scrapped. Going into the door to the right will take you to room_dw_b3bs_rouxls_boss.
room_dw_b3bs_rouxls_boss#

This room has two NPCs of Lanino and Elnina. This is where the Rouxls Kaard boss fight originally took place. If the the global.plot variable is less than 215, then Lanino and Elnina don't appear, and code for starting a cutscene is ran, creating an object with the sprite of Rouxls in his chef hat, but nothing else happens as the rest of the code for this cutscene was removed. However, the dialog for this cutscene still exists in the Japanese text file but translated into Japanese.
room_dw_b3bs_template#
A completely empty room with one door out of bounds that leads to room_dw_b3bs_rouxls_lanina.
TV World#
room_dw_teevie_stealth#

A completely unused room that was replaced by dw_teevie_stealth_c. The top two rooms lead to two rooms below titled room_dw_teevie_failure_cage and room_dw_teevie_ribbick, while the right room leads to the Darkners Live concert like the final room. Despite having stealth in the name and seemingly having a room intended for failing, nothing in the room can "catch" you to cause this failure. It's possible that the crowds in this room (the pink squares) were intended to be used for this somehow. This room crashes on load due to its left entrance being set to a deleted room, room_dw_teevie_cutscene_01. This is interesting as the final version of this room simply contains the cutscene where Tenna calls Ramb, implying that it originally took place in the deleted room instead.
room_dw_teevie_failure_cage#

Empty room intended as a failure room for the previous room, but nothing exists that can cause this.
room_dw_teevie_ribbick#

Another empty room, likely intended to hold Ribbicks based on the name.
room_dw_teevie_maze#
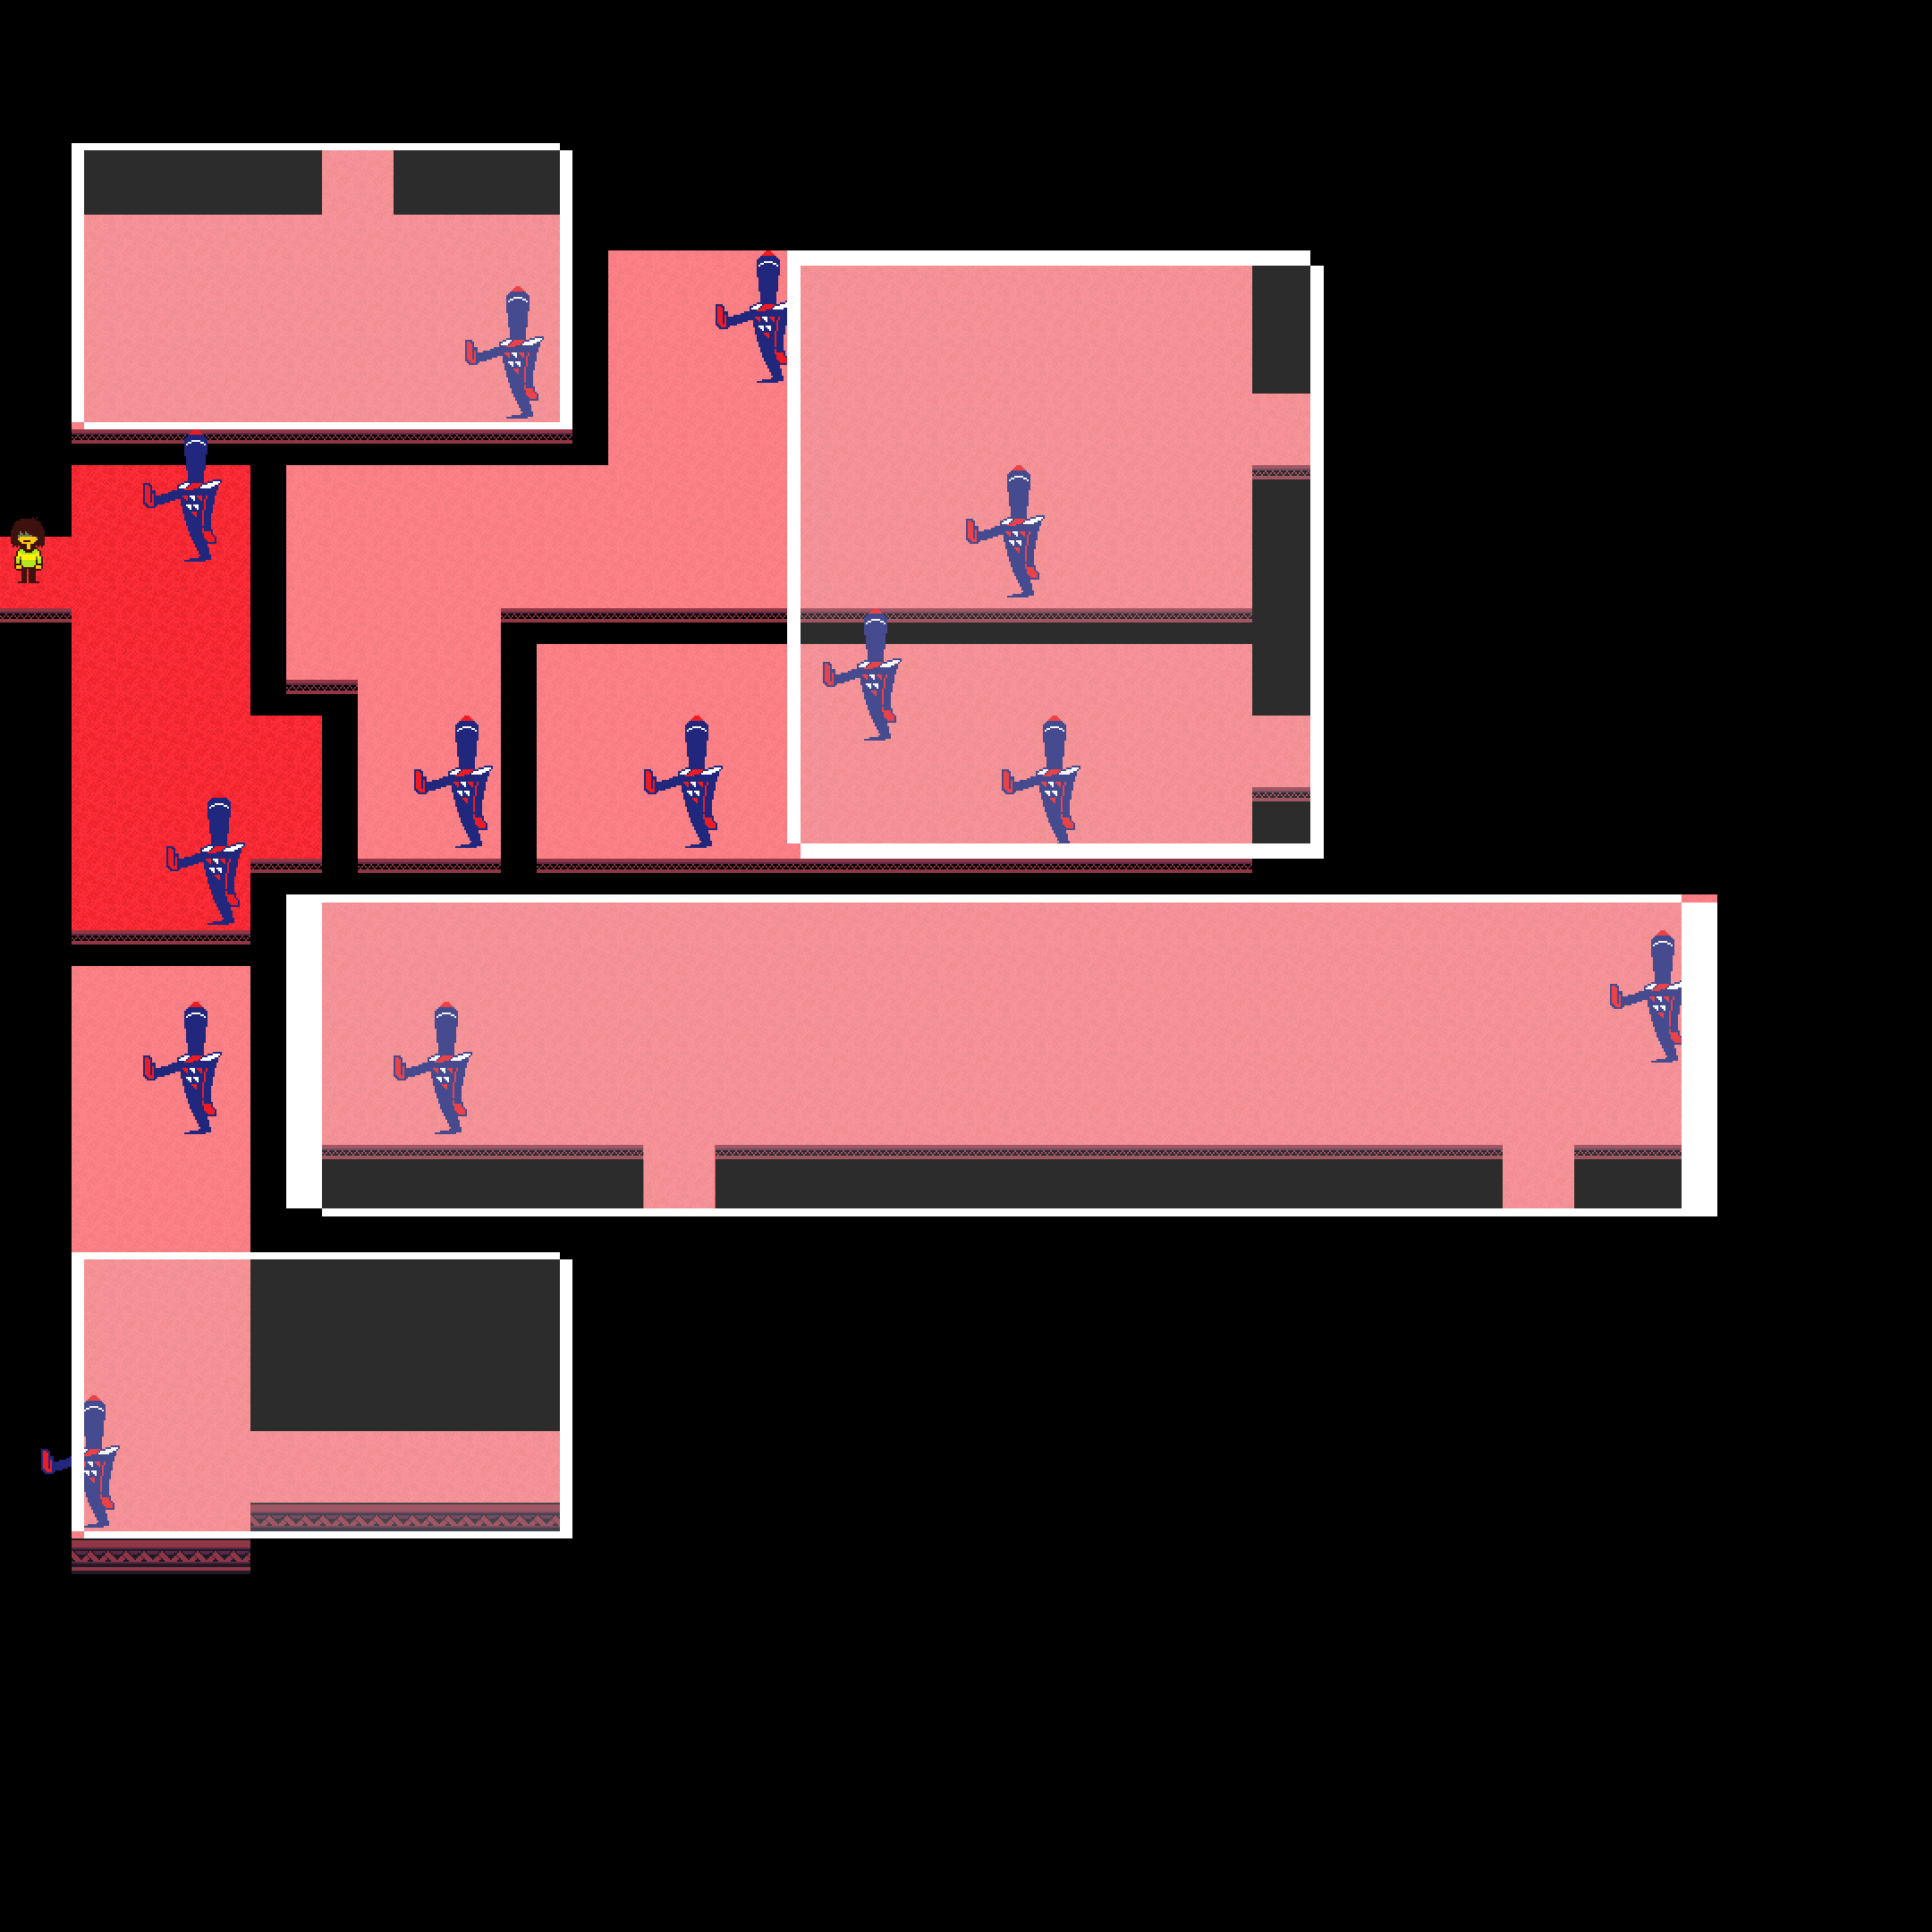
A maze that was intended to come after the Darkners Live concert. Nearly all the Zappers in the room have a color on them that matches another Zapper in the room, and they'll "change the channel" to take you to the corresponding Zapper. The top entrance and the middle right entrance have no doors, resulting in walking out of bounds when trying to use them, and the top right entrance leads to the secret room with the two Goulden Sams. All the bottom entrances take you to the room where you fight Rouxls Kaard, the middle and right ones taking you to where the save point is and the left one taking you to the room's normal entrance, hinting at an earlier layout for the room. The bottom-left Zapper has a short interaction before is starts a battle with it and a Pippins.
room_dw_teevie_maze_points#

Empty. Seems to have been intended to be connected to the maze somehow, but its corresponding door in the maze has been removed. Based on the name, there may have been plans for there to be a chest that gives you POINTs.
room_dw_teevie_maze_chef#

Also empty. Seems to have been connected to the maze, probably the middle right entrance with a missing door. Note that the room where Rouxls is fought is called "room_dw_teevie_chef".
room_dw_teevie_maze_final#

Also also empty. It's unclear where this room would have fit into the maze, but based on the filename it was probably intended to be the final room.
room_dw_teevie_cutscene_final#

An empty hallway. The left door leads to the Rouxls Kaard fight room and the right door leads to the the room below the Green Room, though its corresponding door has been removed.
room_dw_teevie_preview_south#
Another empty room that was supposed to be accessed from the bottom of the room below the Green Room according to the filename, but its corresponding door has been removed. This room is identical to room_dw_teevie_maze_final.
room_dw_teevie_audiencepits#
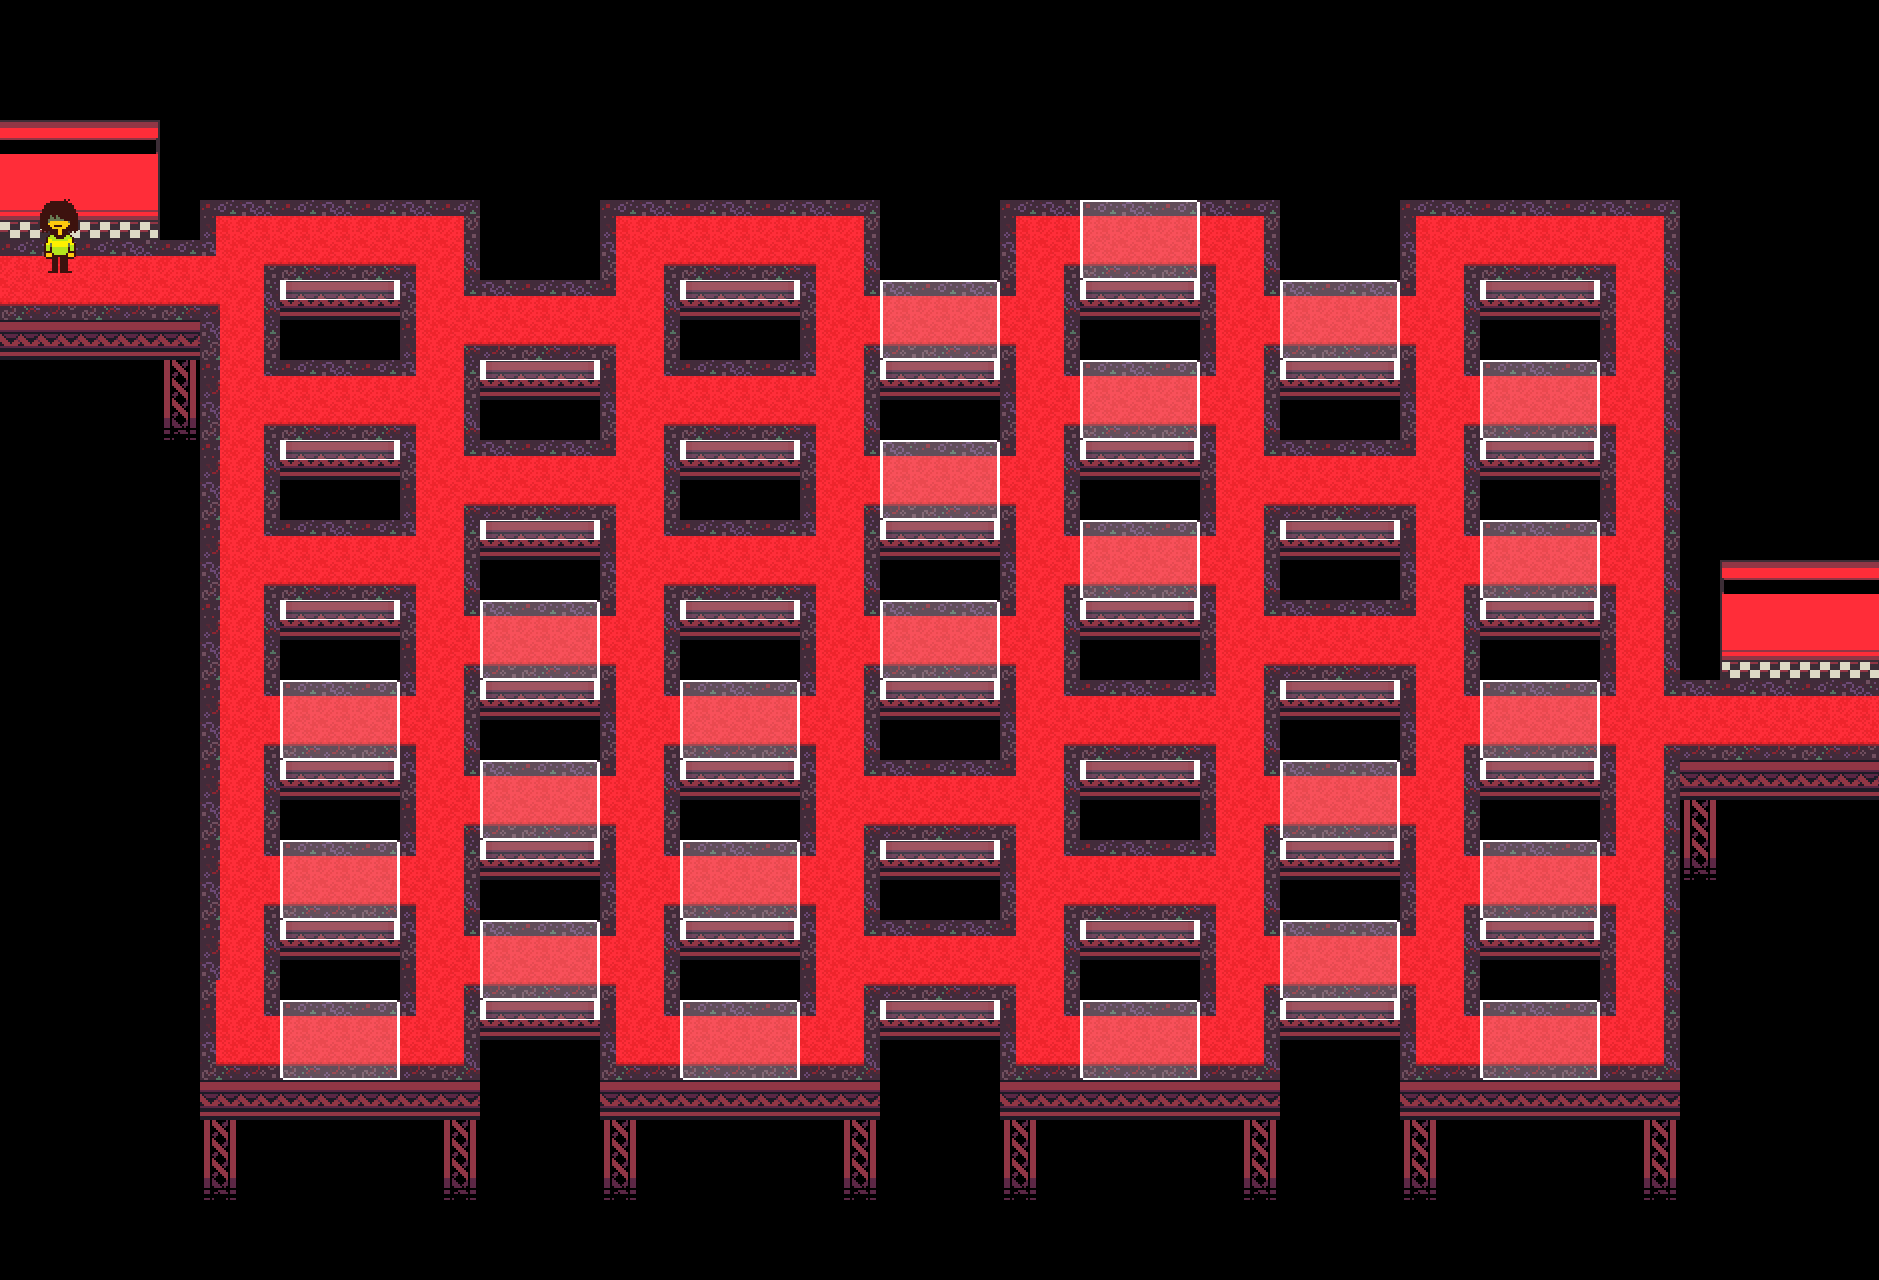
Seems to be an early attempt at replacing room_dw_teevie_stealth, as it also crashes due to the left door's destination being set to room_dw_teevie_cutscene_01 and the right door leads to the Darkners Live room. For some reason, the right door is far our of bounds to the right of where it should be, requiring the player to continue walking for a while until they touch it. If the player were to enter from the right, they would be sent near the top right of the room since that's where its door is for some weirder reason. This room is interesting as it features spotlights that will spawn a Zapper that attacks you when caught by one. The spotlights don't disappear after beating the Zapper, and getting caught again softlocks the game as another one never comes.
room_dw_teevie_lightmaze#

A room with no doors implemented that features a maze you have to traverse without getting caught... or at least you would have to if the spotlights didn't all come to you after 1 second of being in the room due to the treasure trigger automatically being set if you haven't checked Tenna's list of remaining employees (which was likely a different save variable at some point). Disabling this allows you to go through the room like normal. Like the previous room, a Zapper spawns and fights you when caught, but the spotlights disappear this time. A chest at the top left of the maze can be found which contains a White Ribbon, the default item for chests. There is a piece of cheese at the bottom, which when interacted with will trigger a cutscene with Susie and be eaten, making the spotlights follow you. At the end of the maze is a finish line, which when crossed will make a cheering crowd come out and for some reason make the spotlights follow you.
Boards#
room_board_3 & room_board_3b#

|
To do: |

A pair of rooms dedicated to a Tennafied version of board 3, room_board_3_sword being the used "original" version. The board is close to completion, but was scrapped somewhere in the middle of development due to pacing issues, so the rooms have a few missing or broken events and some things (such as NPC dialogue and flags) have been deleted. room_board_3b also softlocks the game unless "make" is set to false in obj_b3bintro's create event or you have done the sword route of board 3, as the intro cutscene for the normal version is dummied out. This board was intended to be left due to Susie spilling yogurt on her controller, after which the player would play through the also-scrapped backstage section. Interesingly, the tileset for the interior of the TV Tower resembles the early TV World tileset.
In board 3b, you are playing as Susie instead of Kris, as Susie presumably swaps her and Kris's controllers in the removed opening cutscene. The player is sent to the Susiezilla minigame upon completion, revealing it was originally part of this board prior to its removal. obj_room_green_room has code for sending the player to room_board_3b if its "con" variable is set to 42, but this is impossible. No code exists at all to send the player to room_board_3.
(Source: barofsoap418)
room_board1_oldtest#

A test room for the game boards. This, along with a few of the other game board test sprites, seem to be based on a completely different system of game boards that worked more like board games. The tiles where you would walk on actually correspond to two unique tiles that have no graphics associated with them. Crashes due to a script error in obj_caterpillarchara.
room_boardtest#

Another test room for the early game board system. The right screen of the main map seems to be based on an earlier version of the adventure board tile set, as there are some messed up tiles there. Crashes due to a script error in obj_caterpillarchara.
room_boardtest_old#

An old version of the previous map. By default, the layer containing every object instance is oddly hidden. There are some parts of this that have no tile data, and only collision data. Crashes due to a script error in obj_caterpillarchara.
room_board_designTest#

Yet another test room for the early game boards, this time being much larger. Crashes due to a script error in obj_caterpillarchara.
room_adventureboardtest#
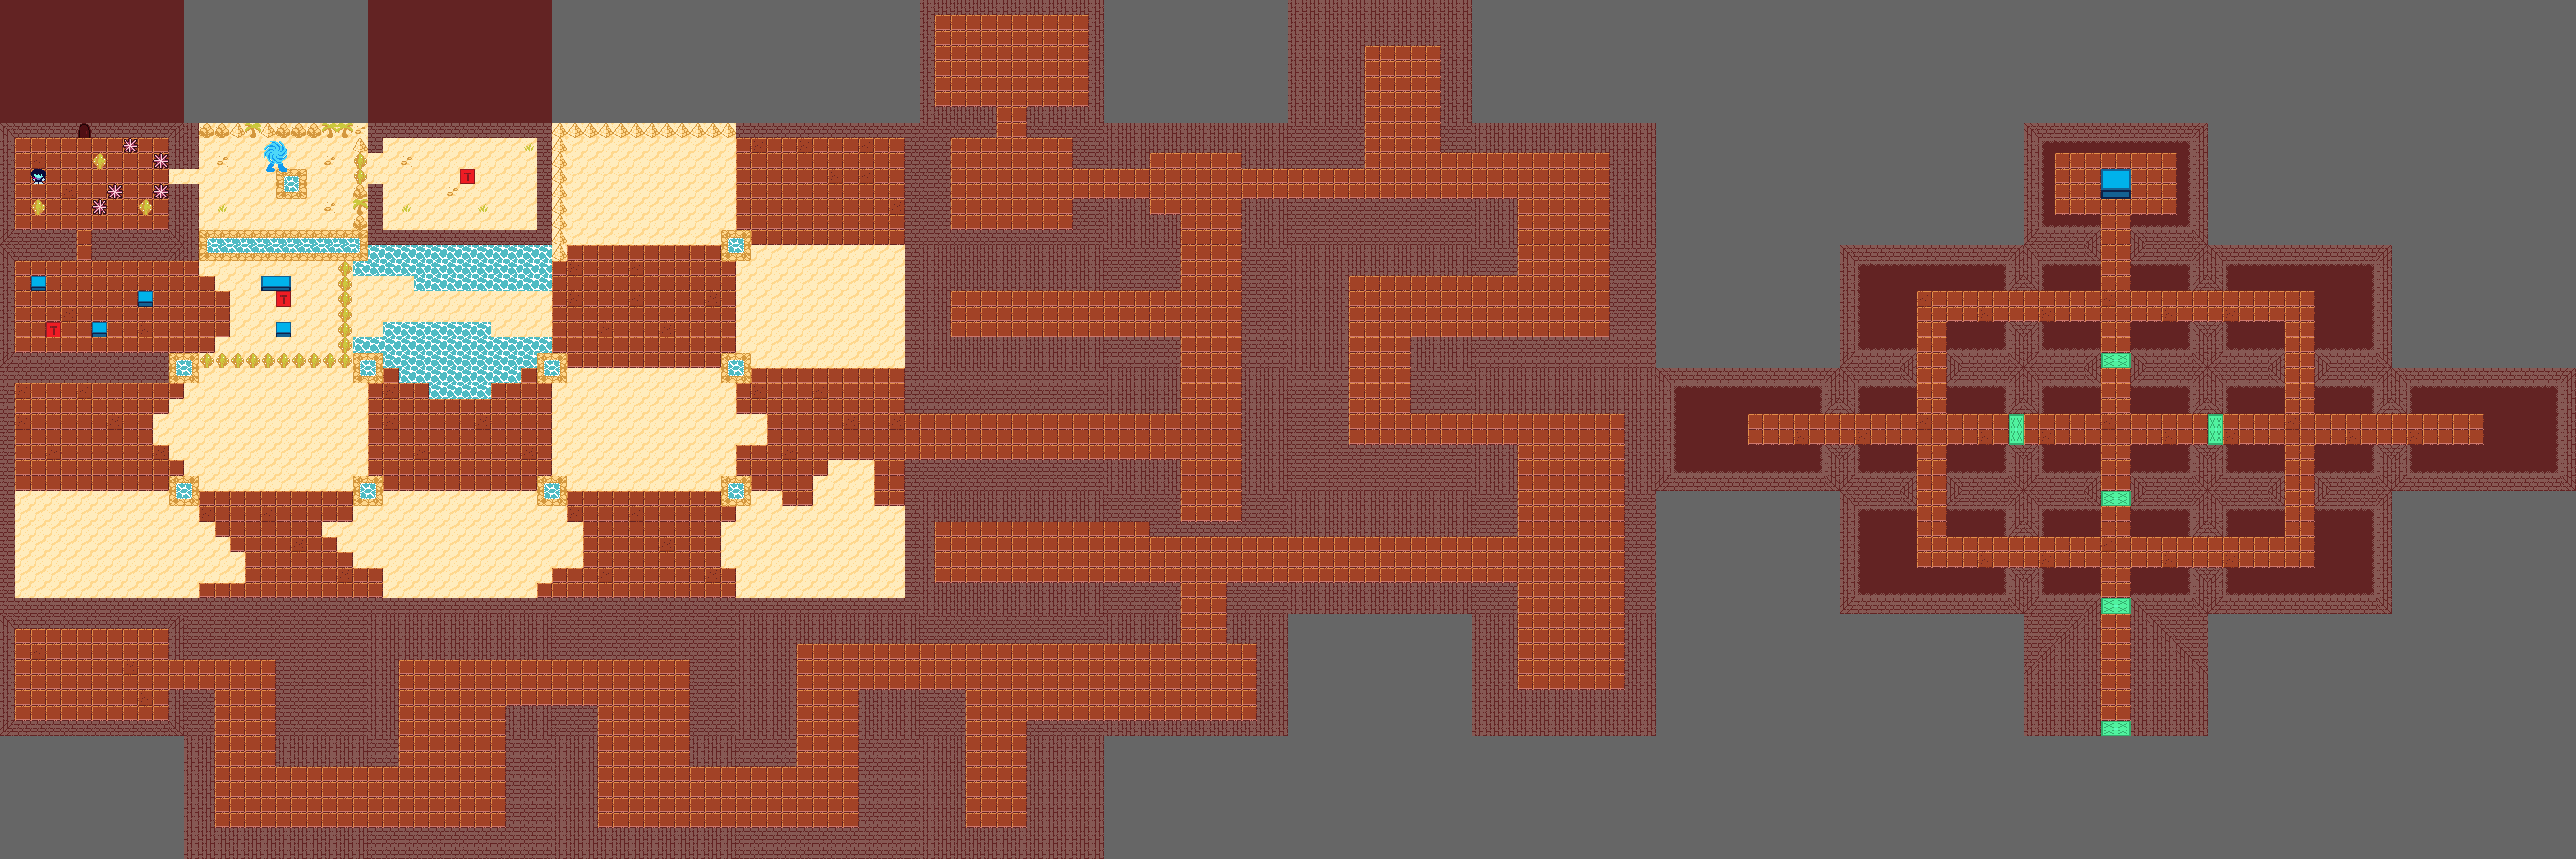
Tired of game board test rooms? Well too bad, because there's another! By default this room will crash the game as one of the objects, obj_board_hazard, doesn't have any "active" variable set and yet tries to call that non-existent variable. This map spawns you in a room with cactuses that don't hurt you and unused spike hazard objects that do hurt you. Going to the right will bring you to a room with the first quiz from board 1. Going down from the spawn will bring you to a room with 3 boxes and a Shadowguy enemy that brings you to a test battle with 2 Rudinns. Going right from there is a room with the same enemy as well as 1 normal box and 1 long box. Going into the door above spawn will bring you into a dungeon where you need to guess which 4 paths to take in a looping room, similar to the part of the sword version of board 2 where you need to go where the white cloak follows you, however here there are no indications as to which path is correct. This is done a total of 6 times until it stops, which the amount of times it has been done in total being displayed in the top left corner, including fails. The correct path is left, down, right, down, left, and up. After this, you can explore other rooms of this dungeon. Most are empty, however the very top room has a 2x2 pushable box in it. Despite not having the sword, this room has areas that require the sword. If the sword is added to the room, you are taken to a long maze, and need to make your way out. After you've gotten out, you can get back to the starting area, breaking cactuses that require 4 hits to destroy. You can use the sword to break 2 cactuses in the quiz room, which reveals a room with an enemy in it.
room_shadowmantle_movementExample#
A room used to test the projectiles of the Shadow Mantle boss.
room_board_boattest#

A large room used to test the rafts from the game boards. Also features a test NPC that uses a placeholder line and the lawnmower minigame from board 2.
room_board_tests#
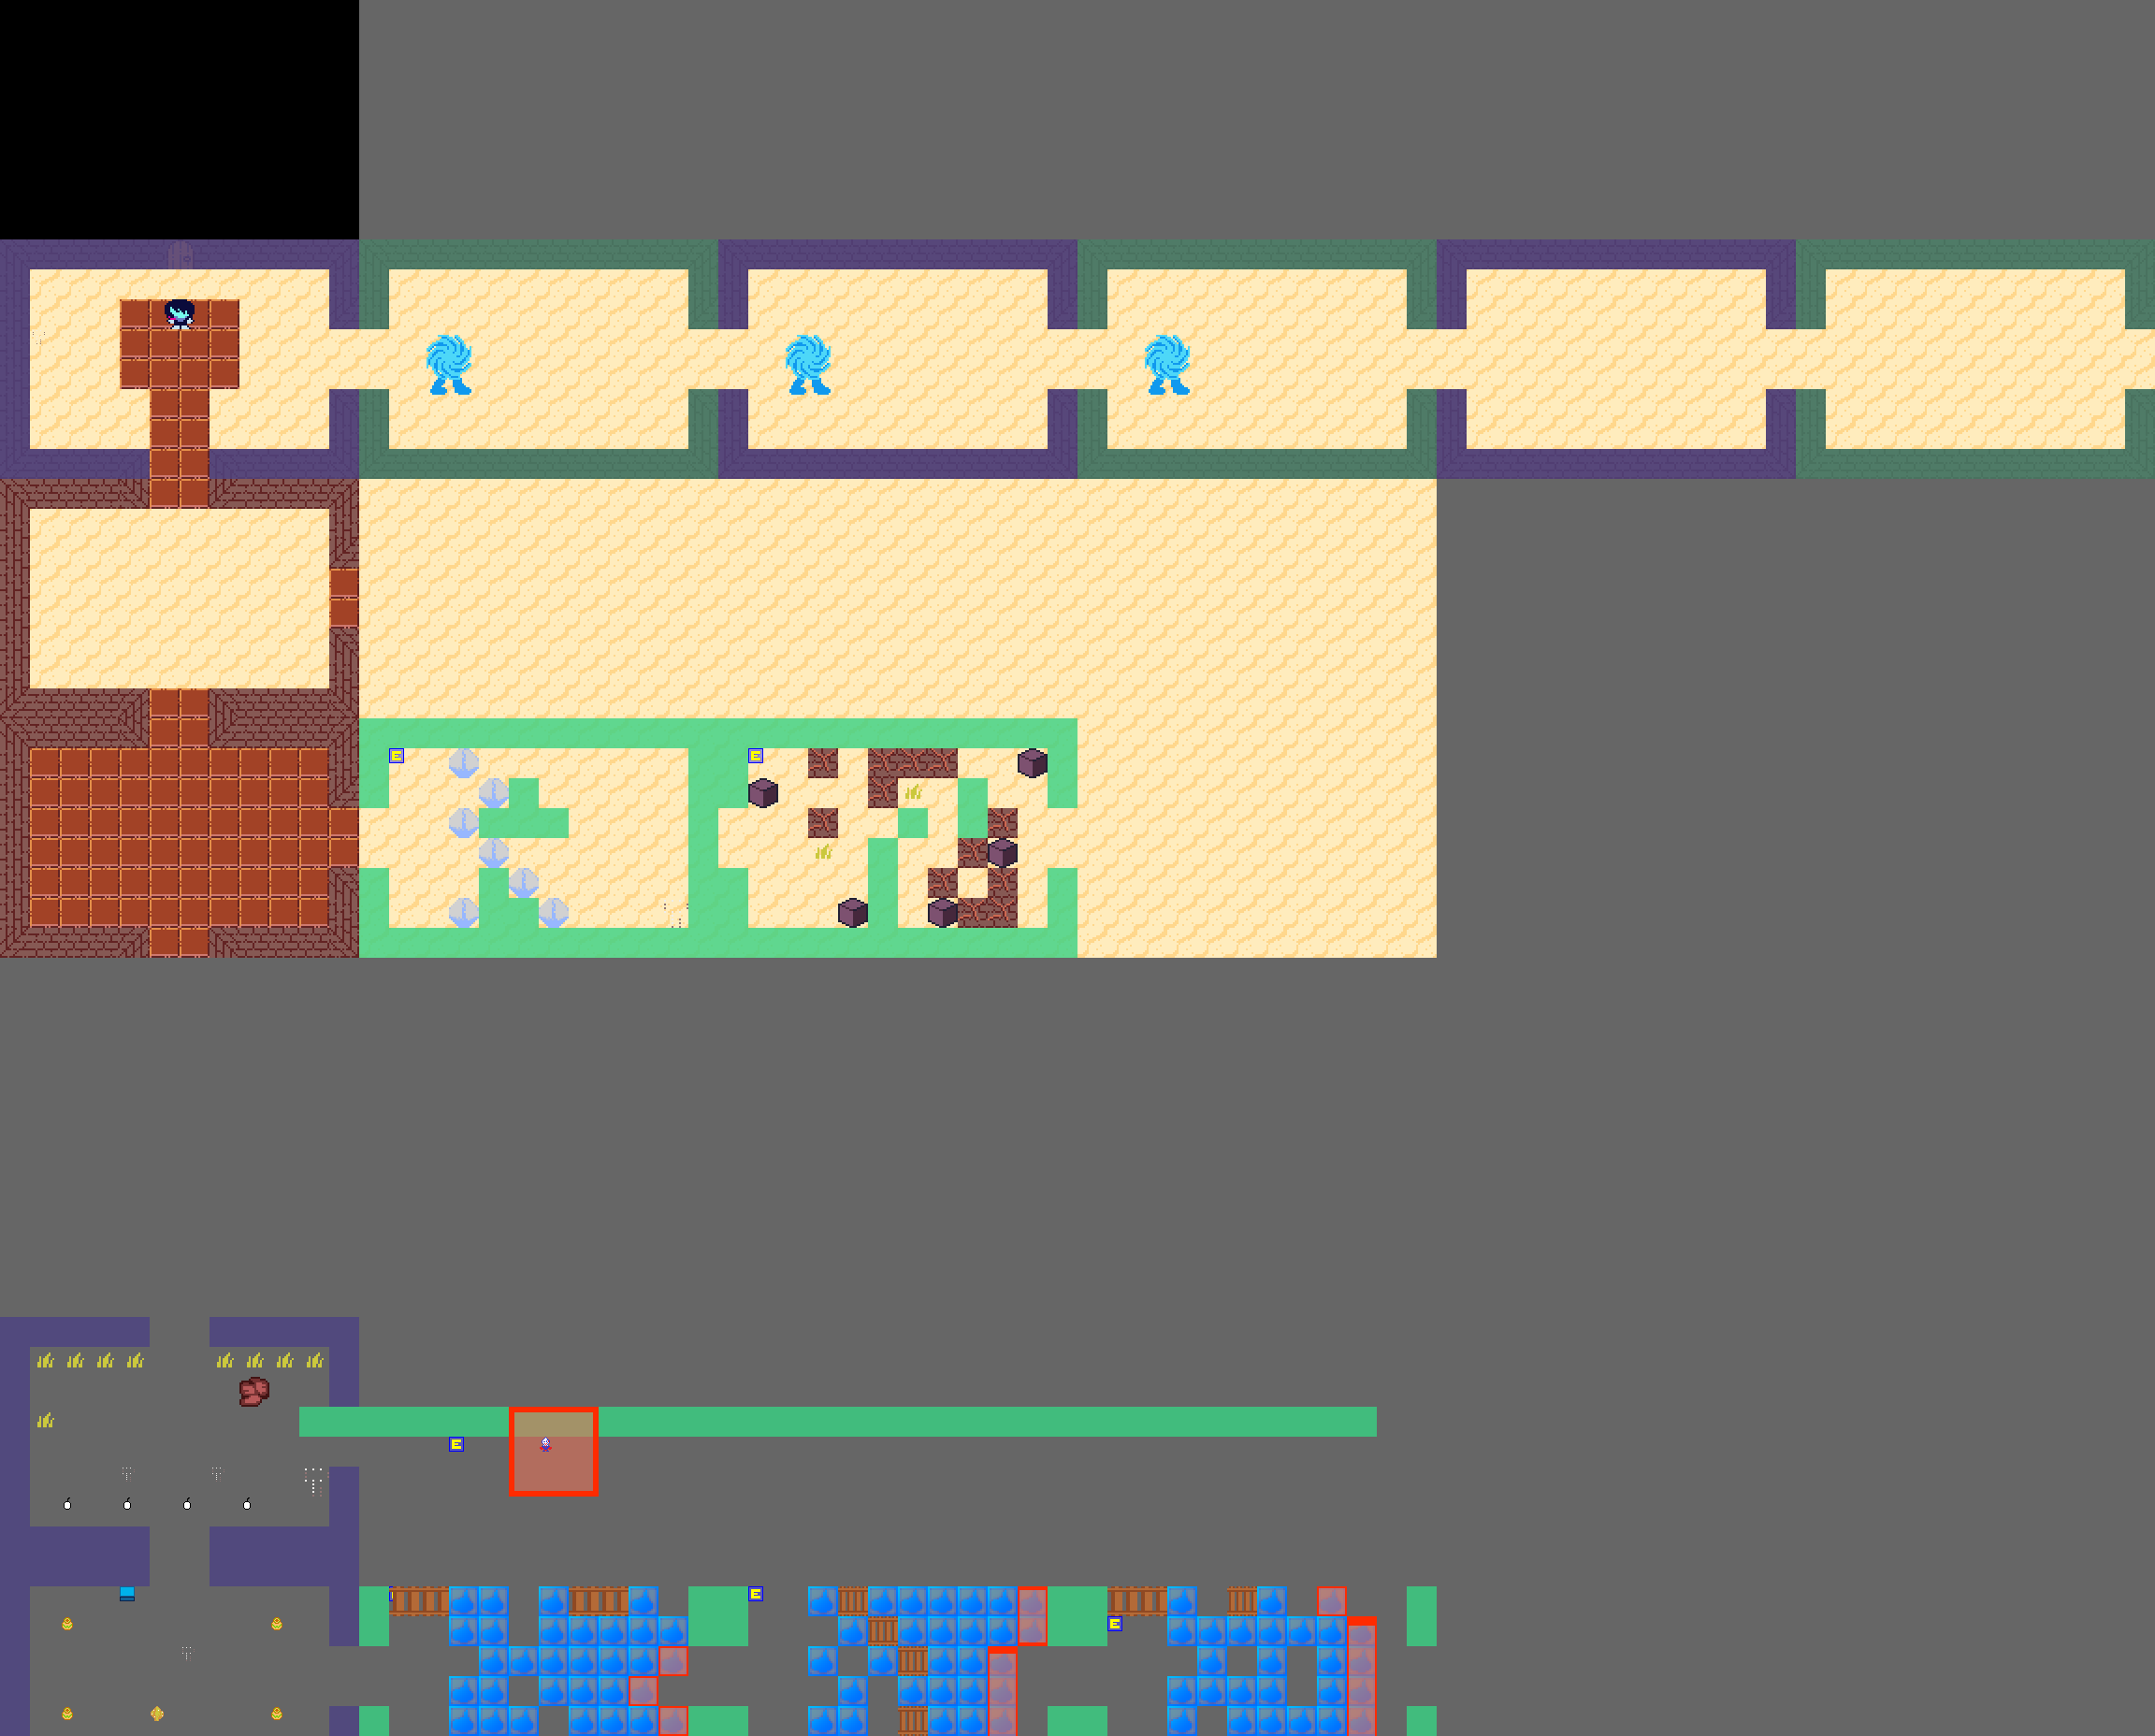
Another test map for the game boards featuring quizzes, all of which are just the used quizzes, and a couple puzzles.
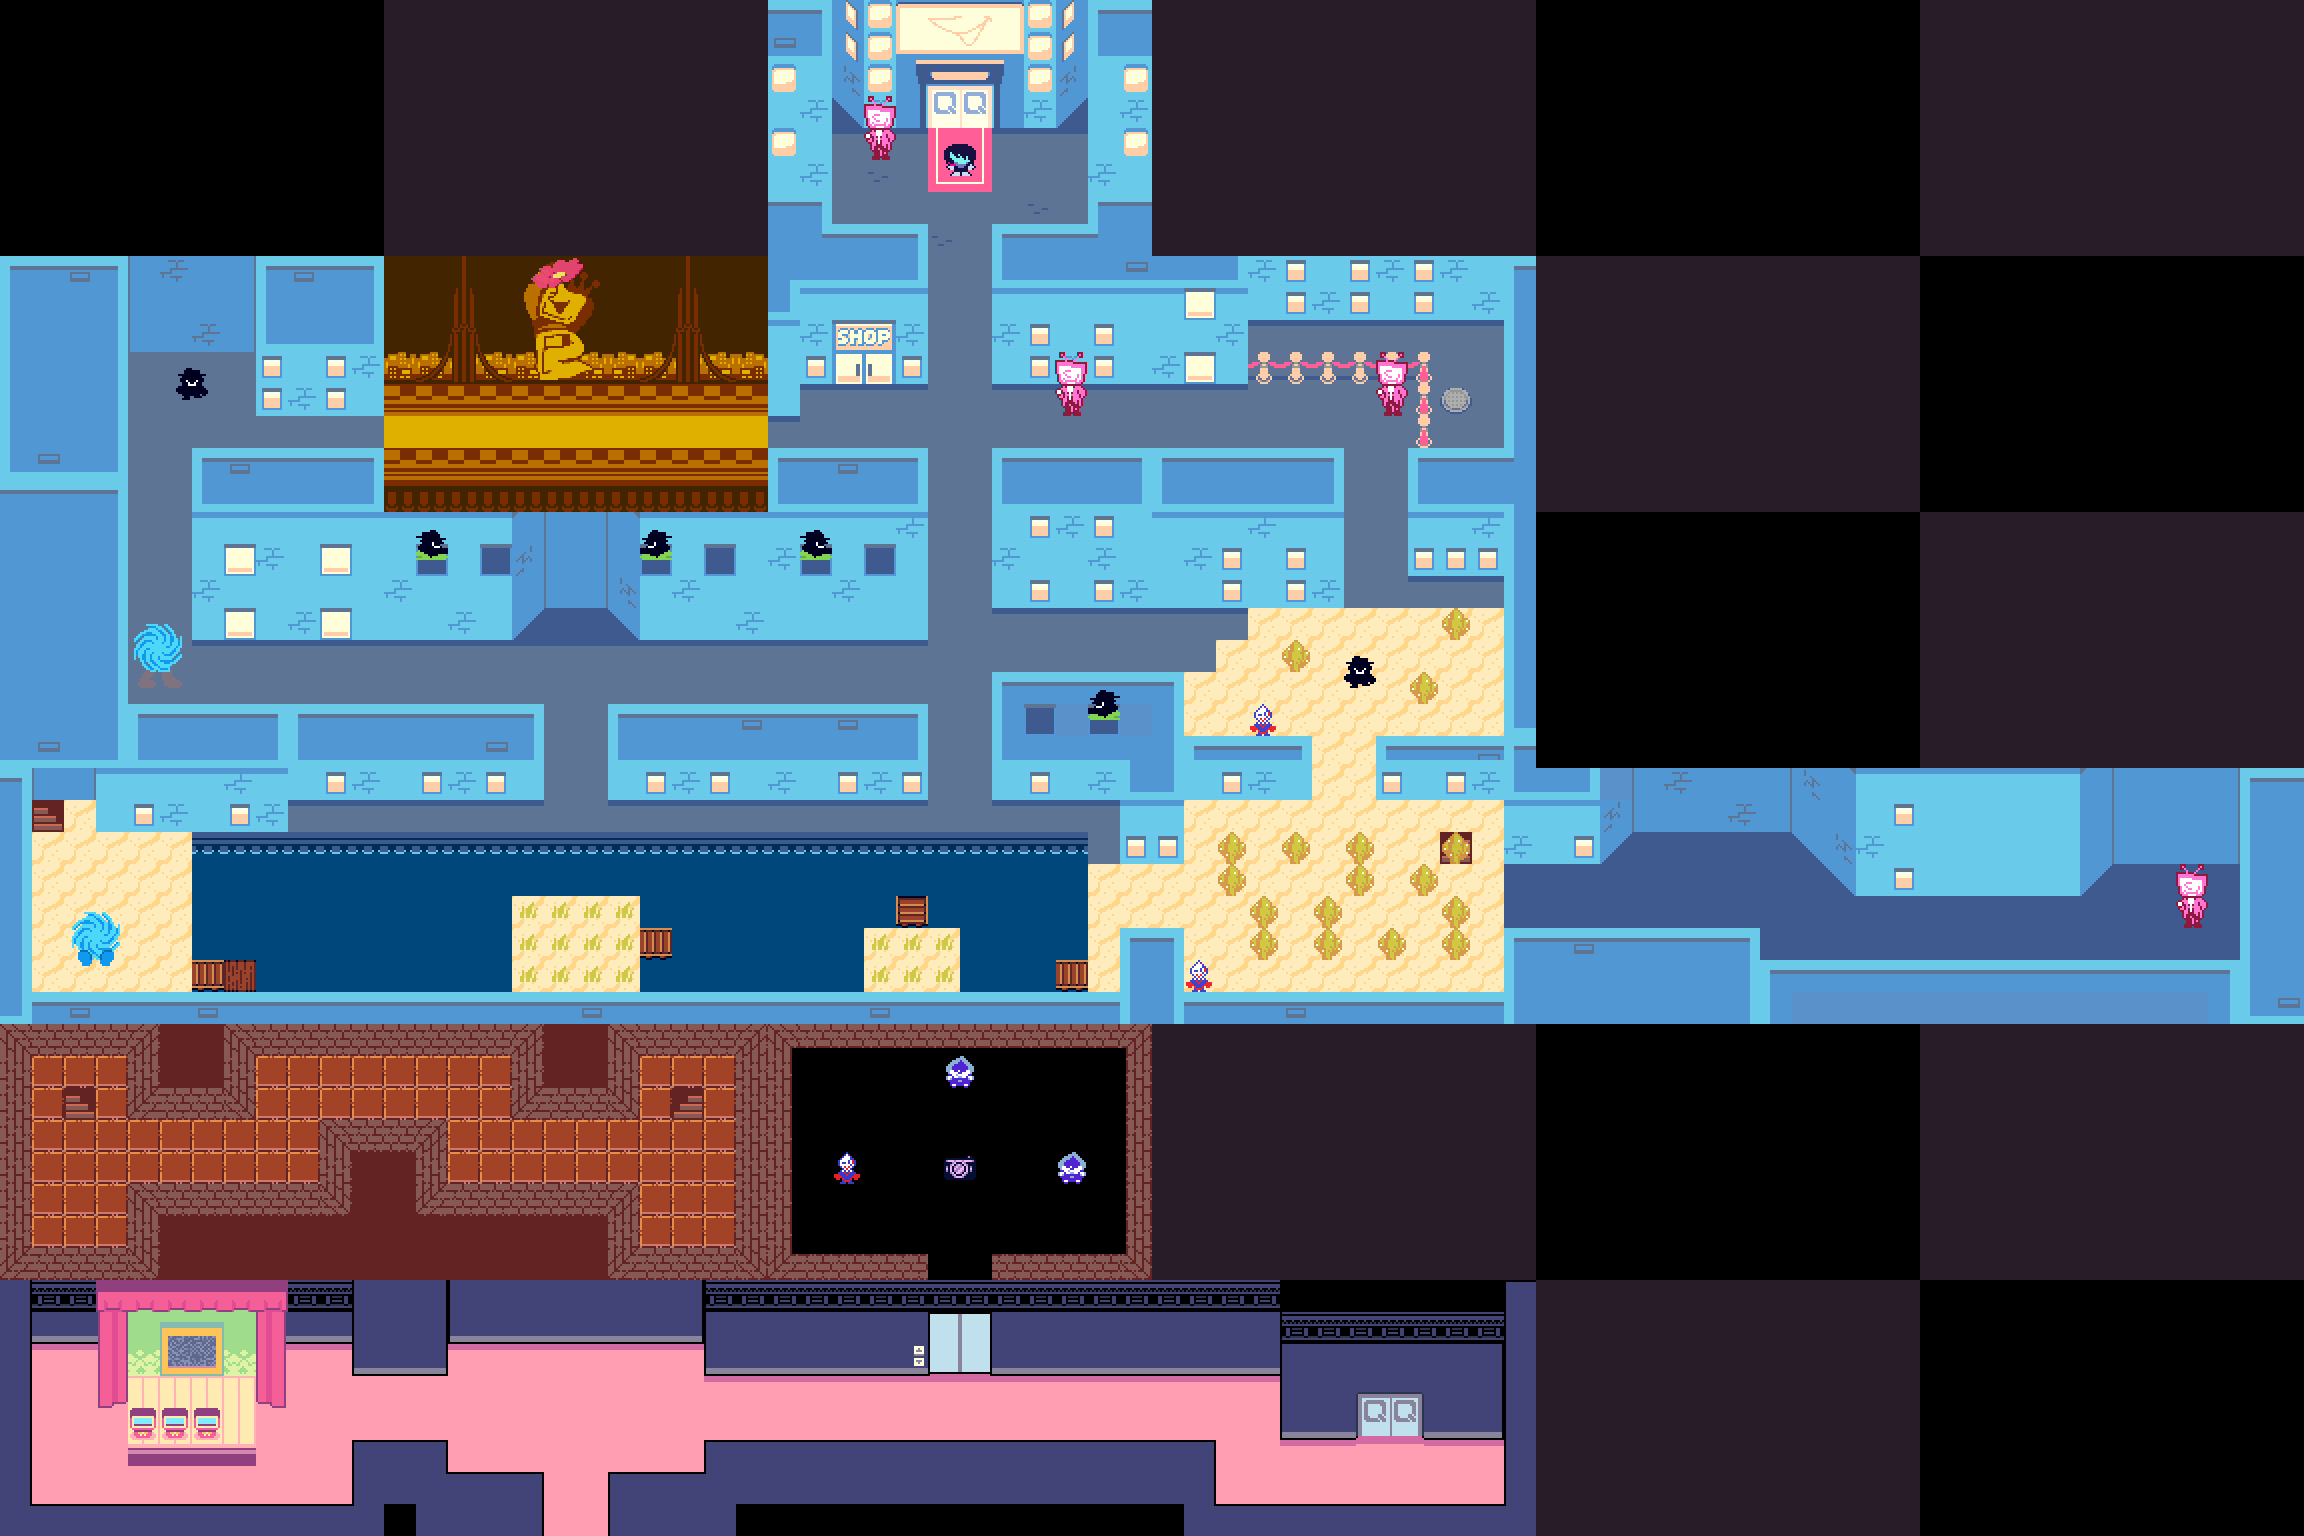
Oddly, at the bottom of the room and extending out of bounds is an earlier layout of the room that was seemingly moved down at some point. This layout features general objects, including the objects needed for the puzzles in the new layout, some bridge puzzles, a test NPC that uses a placeholder line, and a trigger for an early version of the scene where Susie switches her and Kris's controllers that freezes the game after it's finished. This old layout can be reached by simply walking down until it's reached, but it won't be properly centered for the grid system. The full layout looks like this:

room_board_postshadowmantle_test#
A test for the animation that plays if the player tries to use the small Kris to attack Susie after defeating the Shadow Mantle boss. When the player presses a button, Kris grabs Susie (with Kris's glow effect not being affected), and then it freezes. For some reason, Kris, Susie and Ralsei will appear at the bottom of the room sometimes, with Kris's glow effect in their place if Kris has grabbed Susie.
Manhole Dungeon Room#

Located near the top left of the Manhole Dungeon's map is a basic room, disconnected from the rest of the map. It may have been used as a template when designing the map's rooms, though it uses more generic tiles from other boards rather than the unique ones the final version of the dungeon uses.
Old Tile Layouts#
Several rooms in Chapter 3, mostly in TV World, have old tile layouts hidden in the map. All of the old TV World layouts use an older tileset.
Green Room Hallway#
|
Old |
Final |
|---|---|

|

|
The old layout uses a sprite to display everything rather than tiles, though the tiles from the Z and S Rank rooms were used to make the sprite. The final version uses special objects to display everything on the wall and make the floor pattern work instead. The "NEXT STAGE" graphic being present in the old layout suggests it's a leftover from when this room connected the player to the Backstage area.
Post-Doom Board Room#
|
Old |
Final |
|---|---|

|

|
The old layout features tiles from the old stage tileset and... several ICE-Es in place of the gacha balls.
Cowboy Zone Intro#
|
Old |
Final |
|---|---|

|

|
The old layout is very unfinished and has the entrance at the bottom rather than the left.
Dusty Area#
|
Old |
Final |
|---|---|

|

|
The old layout uses different tiles, has a slightly longer entrance and the room stops earlier.
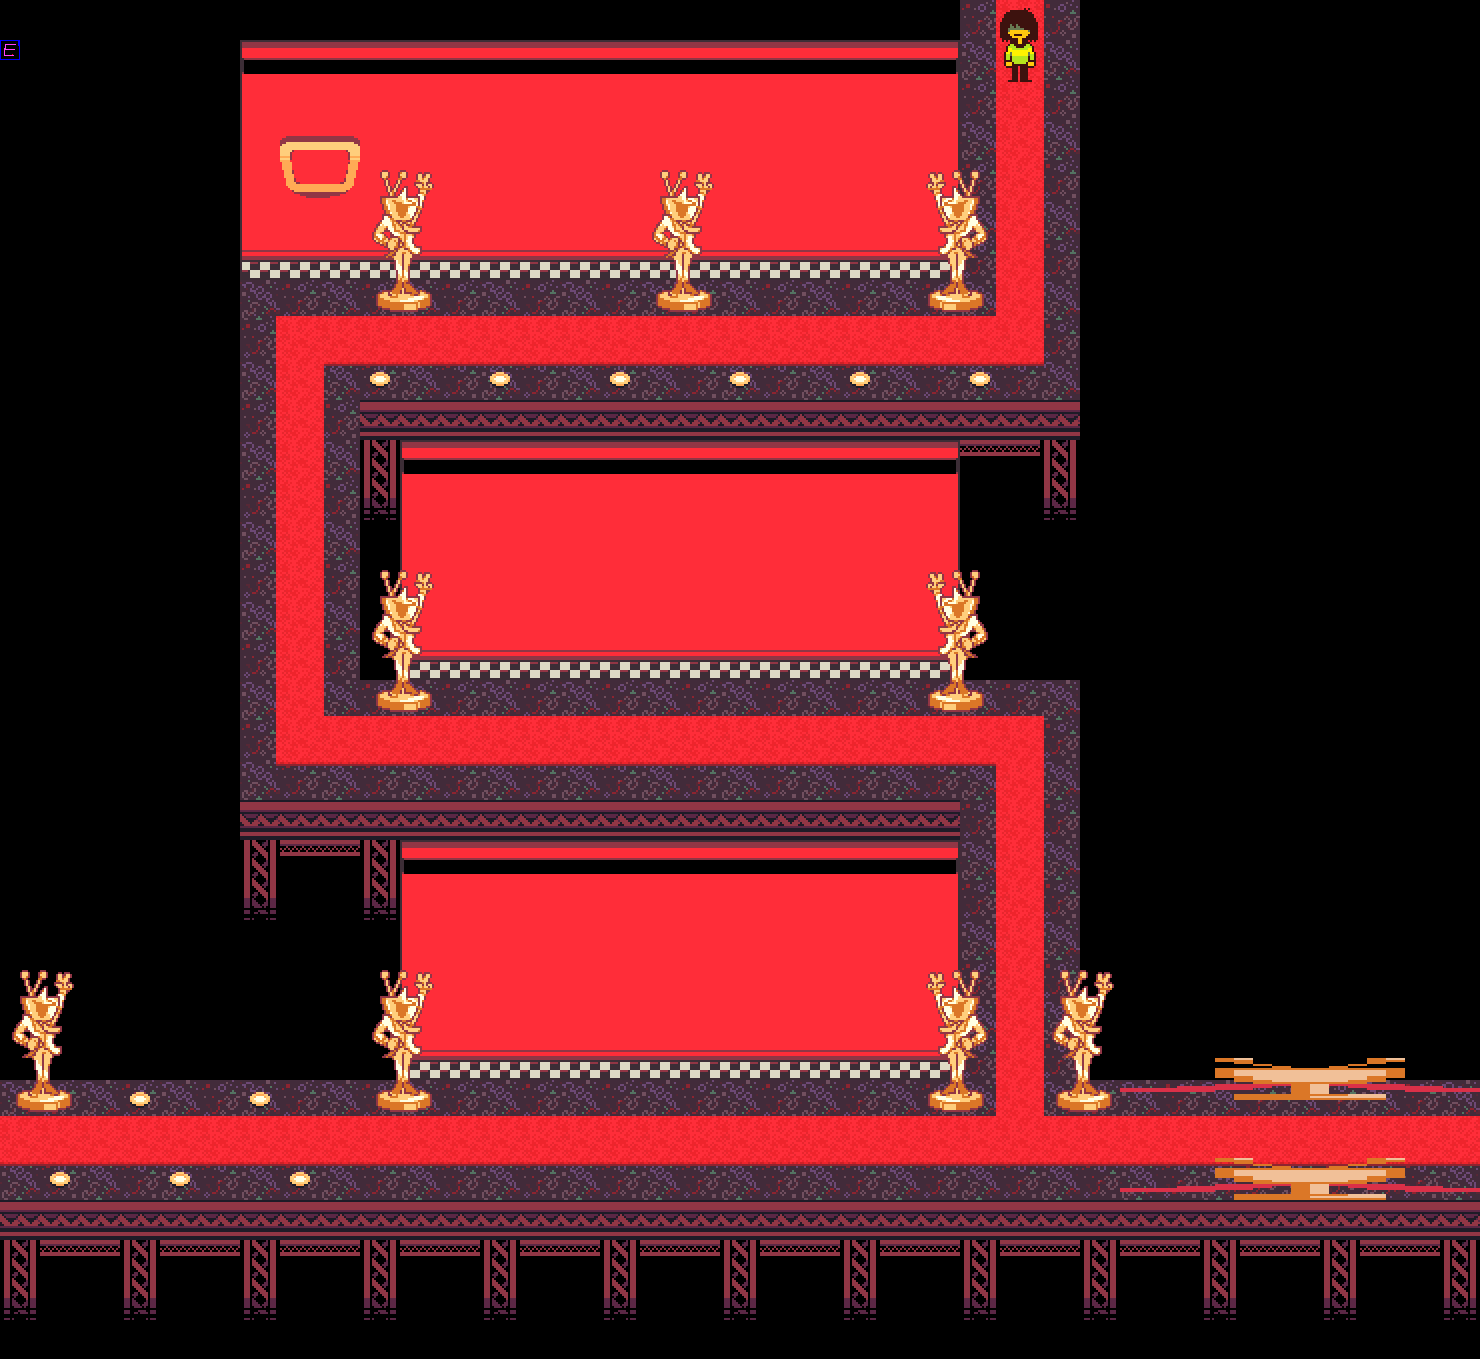
First Quiz Room#
|
Old |
Final |
|---|---|

|
|
The old layout is extremely basic.
TV World Susiezilla#
|
Old |
Final |
|---|---|

|

|
Hidden under the backstage tiles is an old right exit that mirrors the left one. Given that the second cowboy zone entrance room comes right after this one internally, it's likely that this room originally led into it rather than the second jail room further into TV World.
Stealth Room (Unused)#
|
Old |
Final |
|---|---|

|

|
The old layout seems to have barely been started before the new tiles started being used instead.
Watercooler Battle#
|
Old |
Final |
|---|---|

|

|
The old layout has the room being entered from the right. The room's placement in the game's internal room list places it very close to the first quiz room, suggesting it was originally connected to that room instead of the puzzle where Lancer has to dig holes to summon a box.
Secret Closet#
|
Old |
Final |
|---|---|

|

|
The old layout is shorter and uses different tiles.
MANCOUNTRY#
|
Old |
Final |
|---|---|

|

|
A much more basic MANCOUNTRY tile layout, also featuring an old tileset. The entrance to the tree room resembles the entrance to the Temple of Mana in Final Fantasy Adventure even greater than the final version does, and the tree room itself contains an odd structure not present in the final version, which would have had its bottom half partially obscured by the tree in-game. Interestingly, collision for the structure is still present in the final version.

Additionally, the room has a hidden layer named "reference" containing a reference layer for the Flying Aces and signs in the room, using real Rudinns and signs as placeholder. The bottom right room in this map has slightly different placement for the objects with an extra sign in the middle, while the bottom left one is missing a Rudinn, having a sign in its place that was moved lower in the final.
Manhole Dungeon Shelter#
|
Old |
Final |
|---|---|

|

|
An early version of the shelter path featuring different trees is located under the final version's trees, which are drawn with sprites rather than tiles. The early version uses a single tile that's mirrored multiple times, creating a rather odd look, although the colors are a closer match to the real world's trees than the final version's.