 This article has a talk page!
This is a sub-page of Prerelease:Super Mario 64 (Nintendo 64).

|
To do:
|
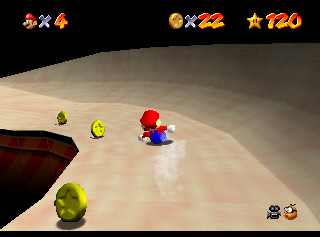
Little info is available about the specifics of these builds and their relation to the Shoshinkai build, but footage of them was interspersed with the Shoshinkai demo footage in promotional videotapes for the event that were given to visitors. More levels are available, and graphical tweaks have been made. These builds may show a more realistic view of how Super Mario 64 was developing at the time, instead of the demo, which only showed a specific set of levels. This footage was recorded approximately a month before Shoshinkai 1995, these builds are also from that time period. There are 3 main builds grouped here: The earliest build has "POWER" written on the health meter; the second build has "POW" on the power meter; the third and last build is a later iteration of the previous "POW" build that more closely resembles the Shoshinkai 1995 Demo. Unlike the first two, which were part of a promotional tape at Shoshinkai, this last build was shown in 20 screenshots released at the time of the event.
General Differences#
Gameplay & Physics#
B-Roll Builds |
Final |
|---|---|
 |
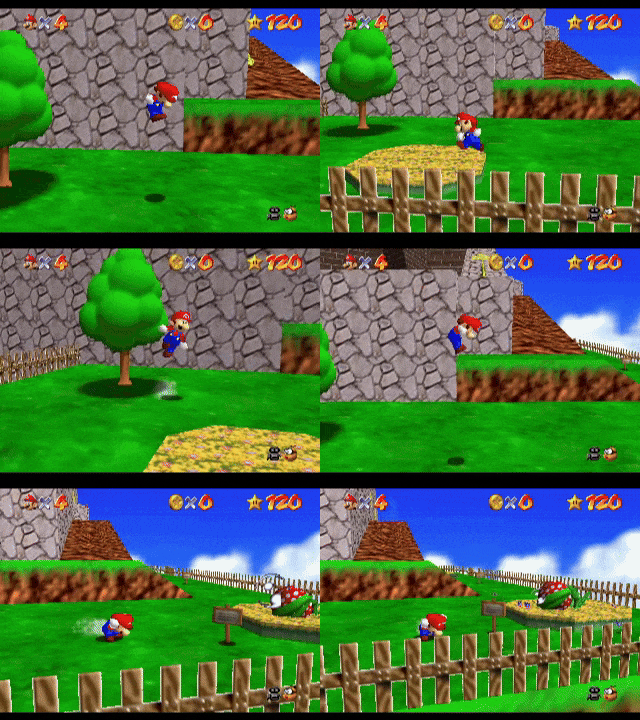 |
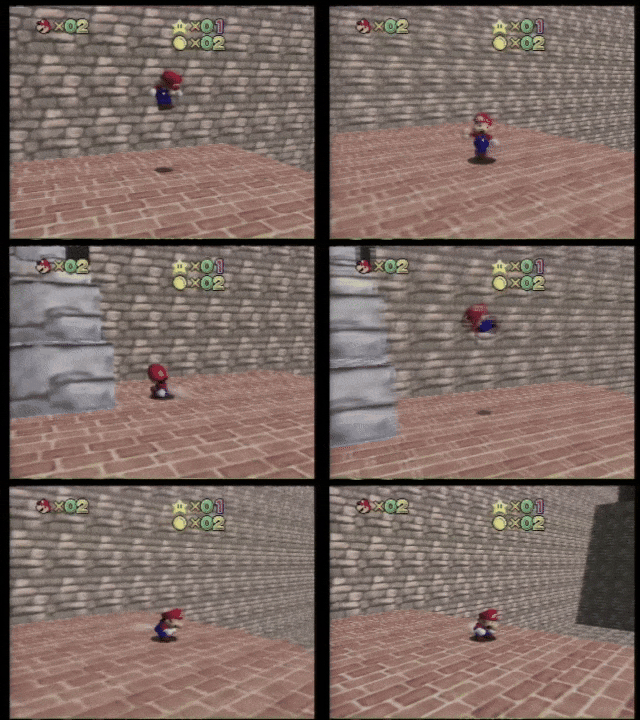
- Mario's torso stays upright when running.
- Mario's side flip gives much less height, it also uses a different, faster animation.
- The crouching animation is different.
- The camera is always laterally centered on Mario.
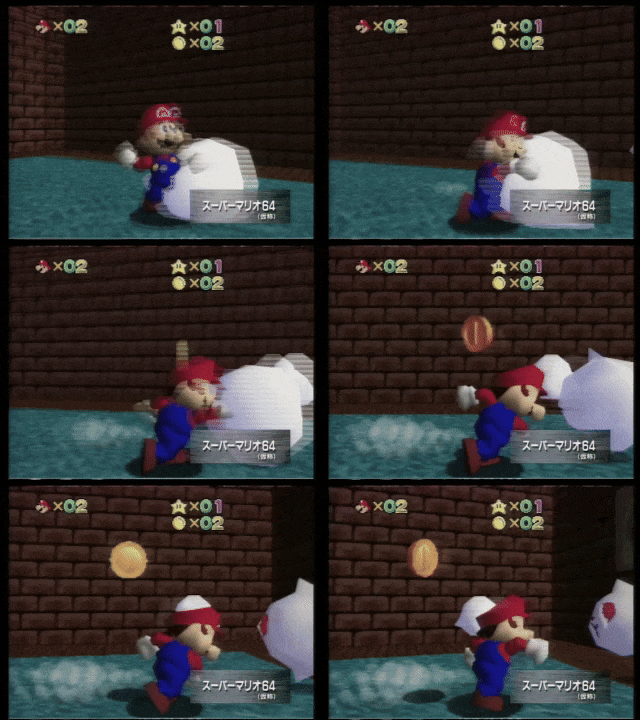
- Mario has a different model with harsher shading. This model can be found in the July 2020 Nintendo leak under the name Mario_old.
- Mario doesn't bounce back after punching enemies, such as Boos.
- Mario's hands don't grow when punching.
- Mario looks down while idle on a tree.
- Mario's dust particles use different textures and are ordered differently.
- Coins have different sounds and a different design, with RGBA16 textures, found in the gigaleak.
- Red coins and blue coins don't exist in this build.
- The burn smoke originally had eight frames, rather than just one.
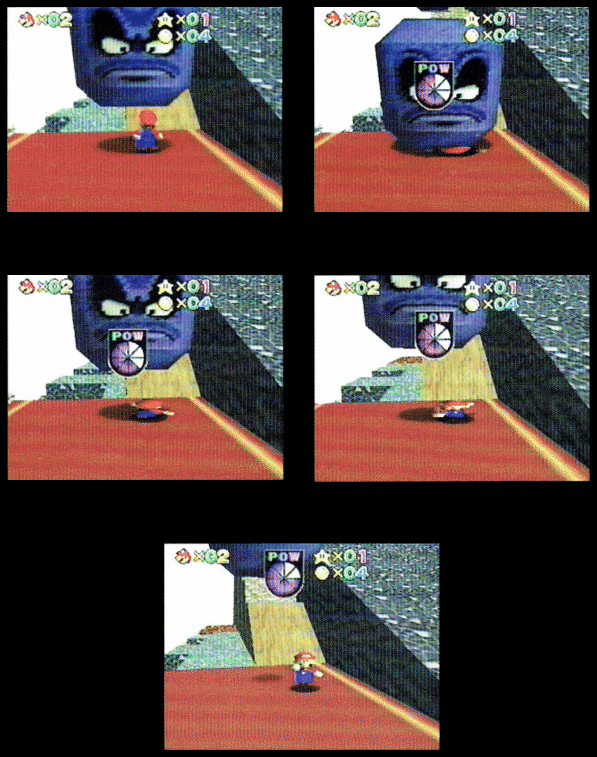
- After Mario has been squished, he can move at maximum speed instead of only being able to walk.

- The bubbles Mr. I shoots utilize the generic texture used in water levels and the sleeping Piranha Plant.
HUD#
"POWER" Build |
"POW" Builds |
Final |
|---|---|---|
 |
 |
 |
- The HUD looks drastically different in these builds. The icons and numbers use simple 2D sprites instead of downscaled 3D renders and gradients, and the numbers have different colors from each other instead of all being orange. The Xs are thinner and yellow, as opposed to the silver color of the final game. Lastly, the counters have two digits instead of one and the coin counter is placed below the star counter, the empty space on the right is due to a scrapped minimap feature seen in the Shoshinkai 1995 demo.
- Mario's health meter has a more basic design with a pie chart style similar to the final version. There are two iterations of this meter: one that says "POW" with the number of remaining health pieces overlaid on top of the meter, and another that says "POWER", lacking the overlaid number of available health.
- The meter changing in the footage suggests there were two different builds recorded, with "POWER" likely being the earlier of the two. As Mario's health decreases, the color of the meter changes from blue to red, similar to how the final meter works. The "POW" meter has slightly rougher edges on the lower part of the border compared to the "POWER" meter.
- Both of the early health meters decrease clockwise, unlike the final meter, which decreases counterclockwise.
- When Mario takes damage, the health meter appears slightly closer to the center of the screen.
Title Screen#
B-Roll Builds |
Final |
|---|---|
 |
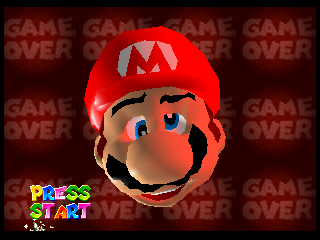 |
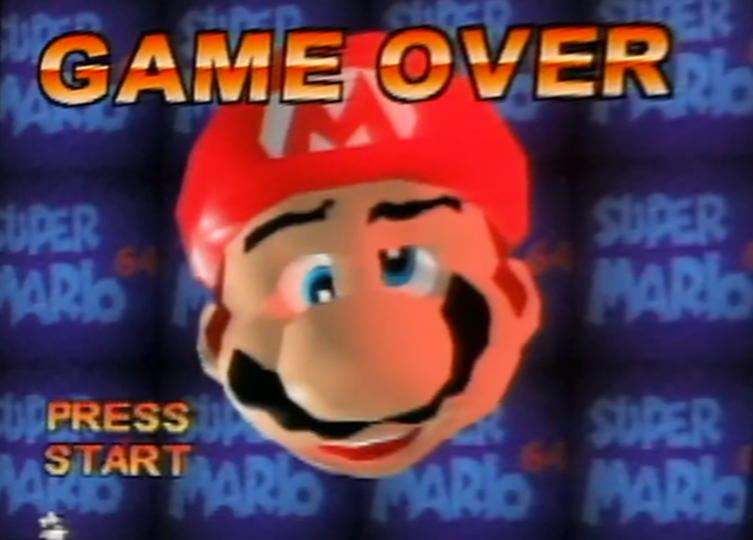
- The "Press Start" message on the title screen uses a more basic font that has an outline and a consistent color for all letters, that color being a gradient from orange to yellow. This early font can still be found in a couple of unused characters present in the final game. It is also ~12 pixels higher than the retail's text.
- Mario's head pops up closer to the screen, he's also appears more stable at the end of the animation, due to a different code setting. It was updated in the Shoshinkai 1995 demo, matching the retail game's animation.
- The cursor does not lock onto a certain area when a part of Mario's head was grabbed; instead it stays in the place where the cursor grabbed. The sparkles that appear when grabbing one of the head's parts in the final game are missing here. These two differences can be seen in this clip.
- In the Game Over screen, the normal blue background seen on the title screen is used instead of the red variant. Although the footage shows a "GAME OVER" prompt at the top of the screen, it appears to have been edited in.
- The lighting direction on Mario's head changes if it rotates 90 degrees. This was eventually changed so the lighting is consistent regardless of Mario's rotation.
Level Changes#
Castle Grounds#
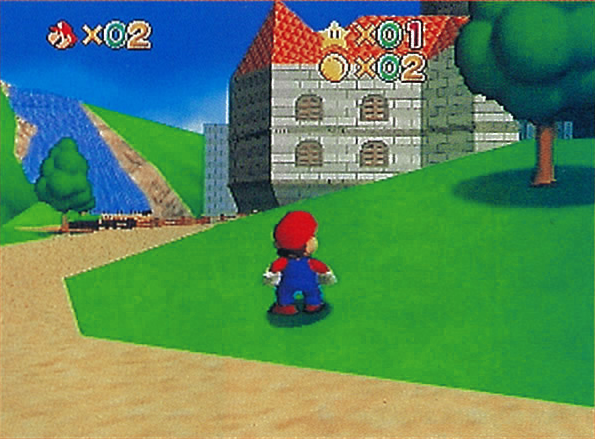
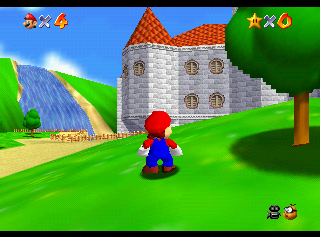
The Castle Grounds has a different model that is quite similar to the one seen in the November 22, 1995 patent screenshots, though it has been updated as the land behind the castle and cloud overlapping the tower have been removed.
|
"POW" Build |
Final |
|---|---|
|
|
(Source: Consoles + 050 (January 1996) - Page 26)
- The trees use a different texture with slight differences in shape and lighting. This texture can be found in the leaked source code. The trees are also positioned slightly differently.
- The castle has simpler geometry and different textures. The windows are not mushroom shaped.
- The skybox is different.
- The waterfall has a slightly different shape.
"POW" Build |
Final |
|---|---|
|
|
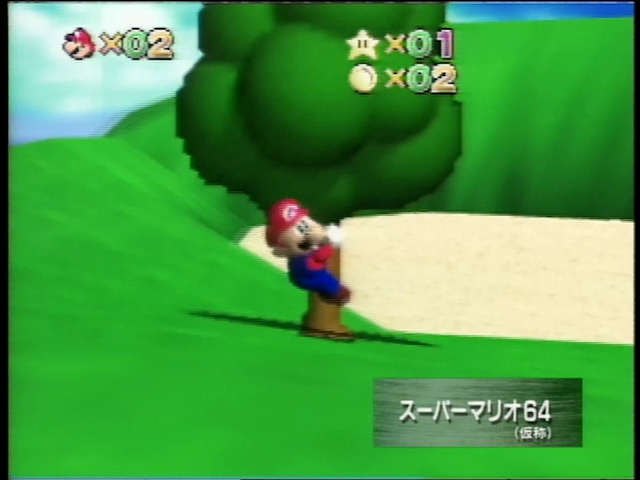
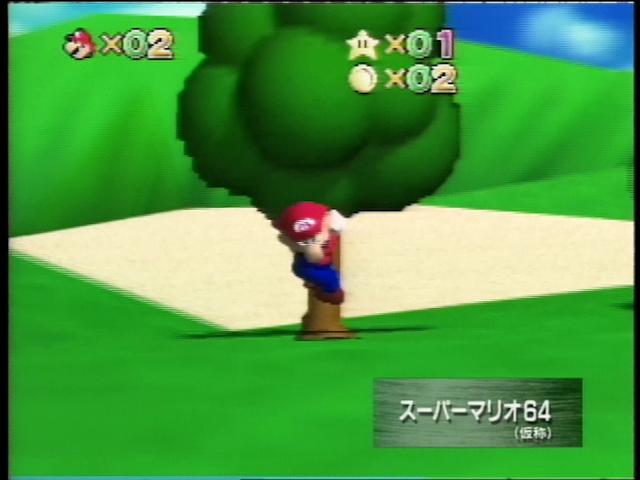
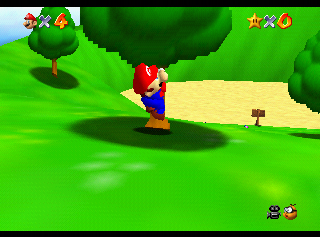
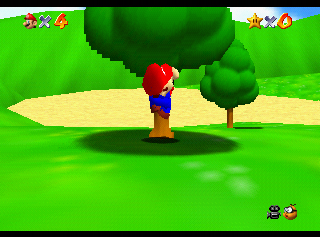
- The different tree placements can also be seen here. The leftmost tree seems to be missing.
- The tree shadows are placed higher, floating above the ground.
- The wooden signpost is missing.
Castle Interior#
|
"POW" Build |
Final |
|---|---|
|
|
(Source: MPEG Special Vol. 1 Video CD)
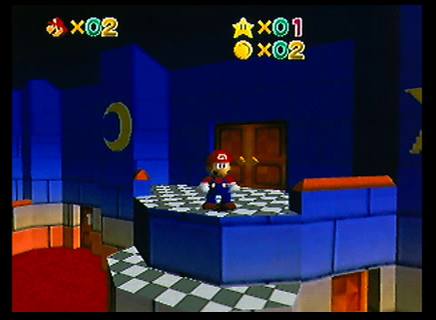
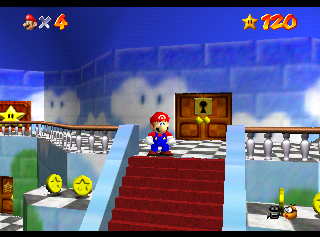
- The castle has a slightly different layout.
- There is a carpet on the entire floor, and the checkerboard texture is different. The checkerboard texture can be found in the gigaleak.
- The walls are mostly dark blue, with sections of orange and white along the bottom of the wall, and with a star-and-moon motif.
- Two large, stepped platforms lead to the double door, missing its keyhole, and there's an extra walkway in the final, leading to the two last doors.
- The doors have a different number texture, which can be found in the Gigaleak.
"POW" Build |
Final |
|---|---|
 |
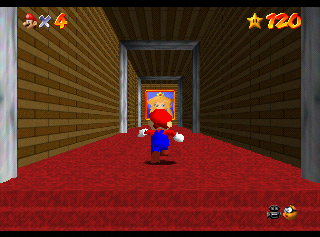 |
- The double door at the top of the foyer leads to the corridor with the Bowser/Peach portrait, instead of upstairs.
- The brick walls use a completely different texture, featuring cracked stone walls instead of offset wooden planks.
- The support beams are clustered together near the entrance to the corridor.
- The corridor tapers inwards, which doesn't happen in the final game.
Courtyard#
|
"POW" Build |
Final |
|---|---|
|
|
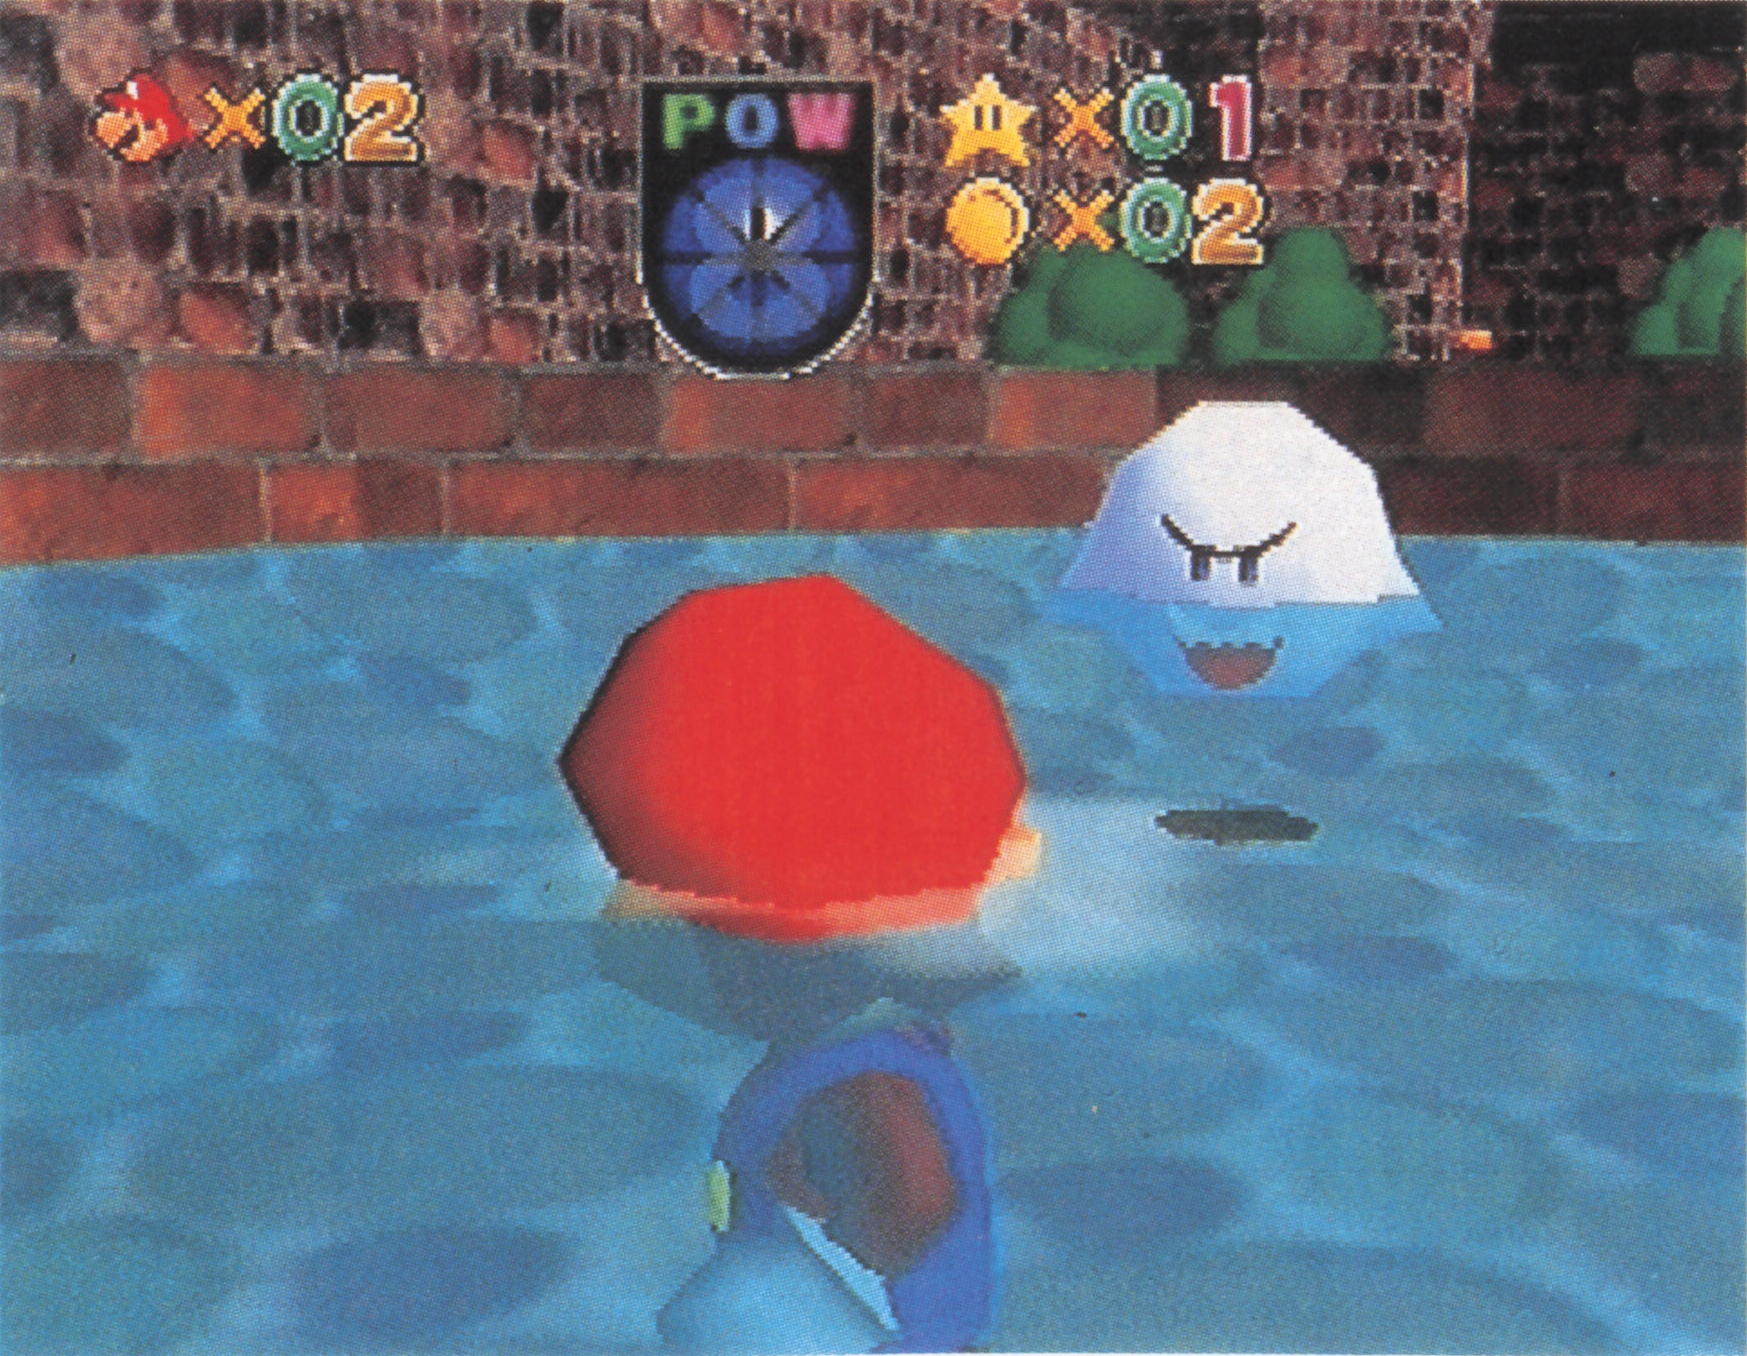
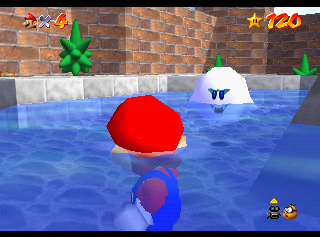
- Boos are present, but they use early textures that don't match the final version. These textures can be found in the July 25th, 2020 Gigaleak.
- The courtyard's walls use a different, more realistic texture. In the final game, these walls used what is the current fountain brick texture, and the fountain itself uses a gray, stony brick texture.
- There is no star statue in the fountain.
- The fountain is taller than the final, with its walls well above the water.
- The trees are positioned differently and reuse the Castle Grounds trees texture.
- The sky doesn't have a texture, instead being pure black. The playable demo would add a proper skybox.
Mountain (Whomp's Fortress)#
Although this stage has a similar layout to the final game, the textures and skybox are quite different.
"POWER" Build |
Final |
|---|---|
|
|
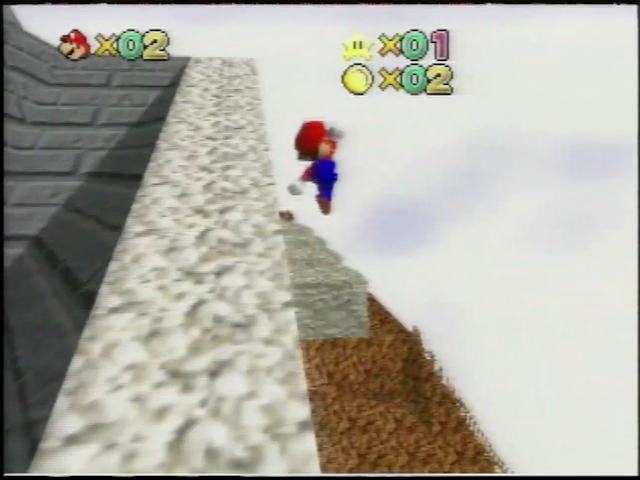
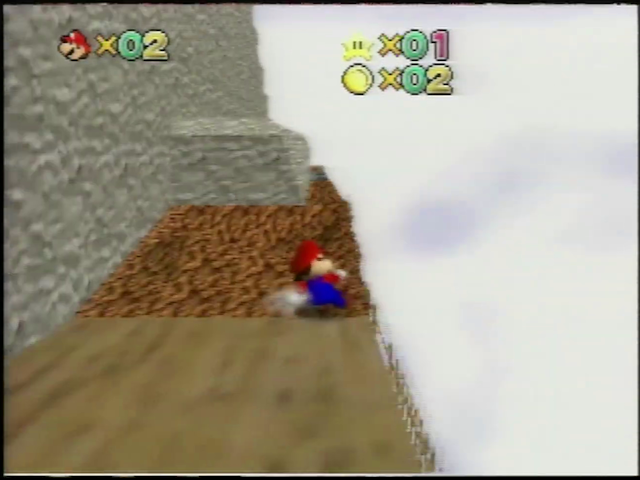
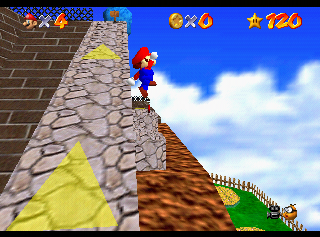
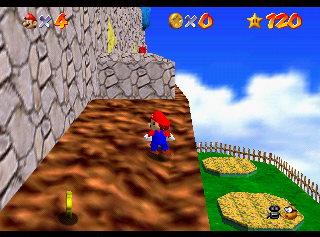
- The dirt area leading to the Bomps has a small extension of wood with fences on the side. There are four Bomps that are all synced, while the final game has three Bomps that are unsynced, with the middle one being wider.
- The starting grass area appears to be either smaller or missing entirely.
- All the yellow arrows present on the walls and floors are missing.
- The sign located near the ramp isn't there, and neither is the metal fence.
- The dirt texture's UV map is different compared to in the final.
|
"POW" Build |
Final |
|---|---|
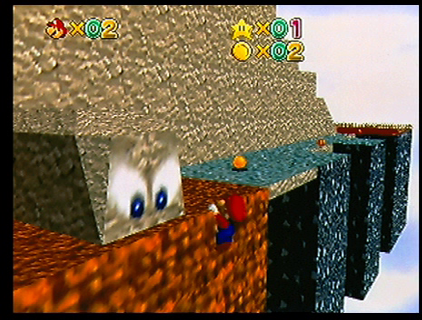
|
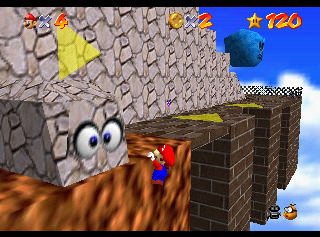
|
(Source: MPEG Special Vol. 1 Video CD)
- Bomps have a different design with simpler-looking eyes that are also bigger.
- Thwomps appear to have a lower draw distance.
- There is one coin above each of the sliding platforms.
|
"POW" Build |
Final |
|---|---|
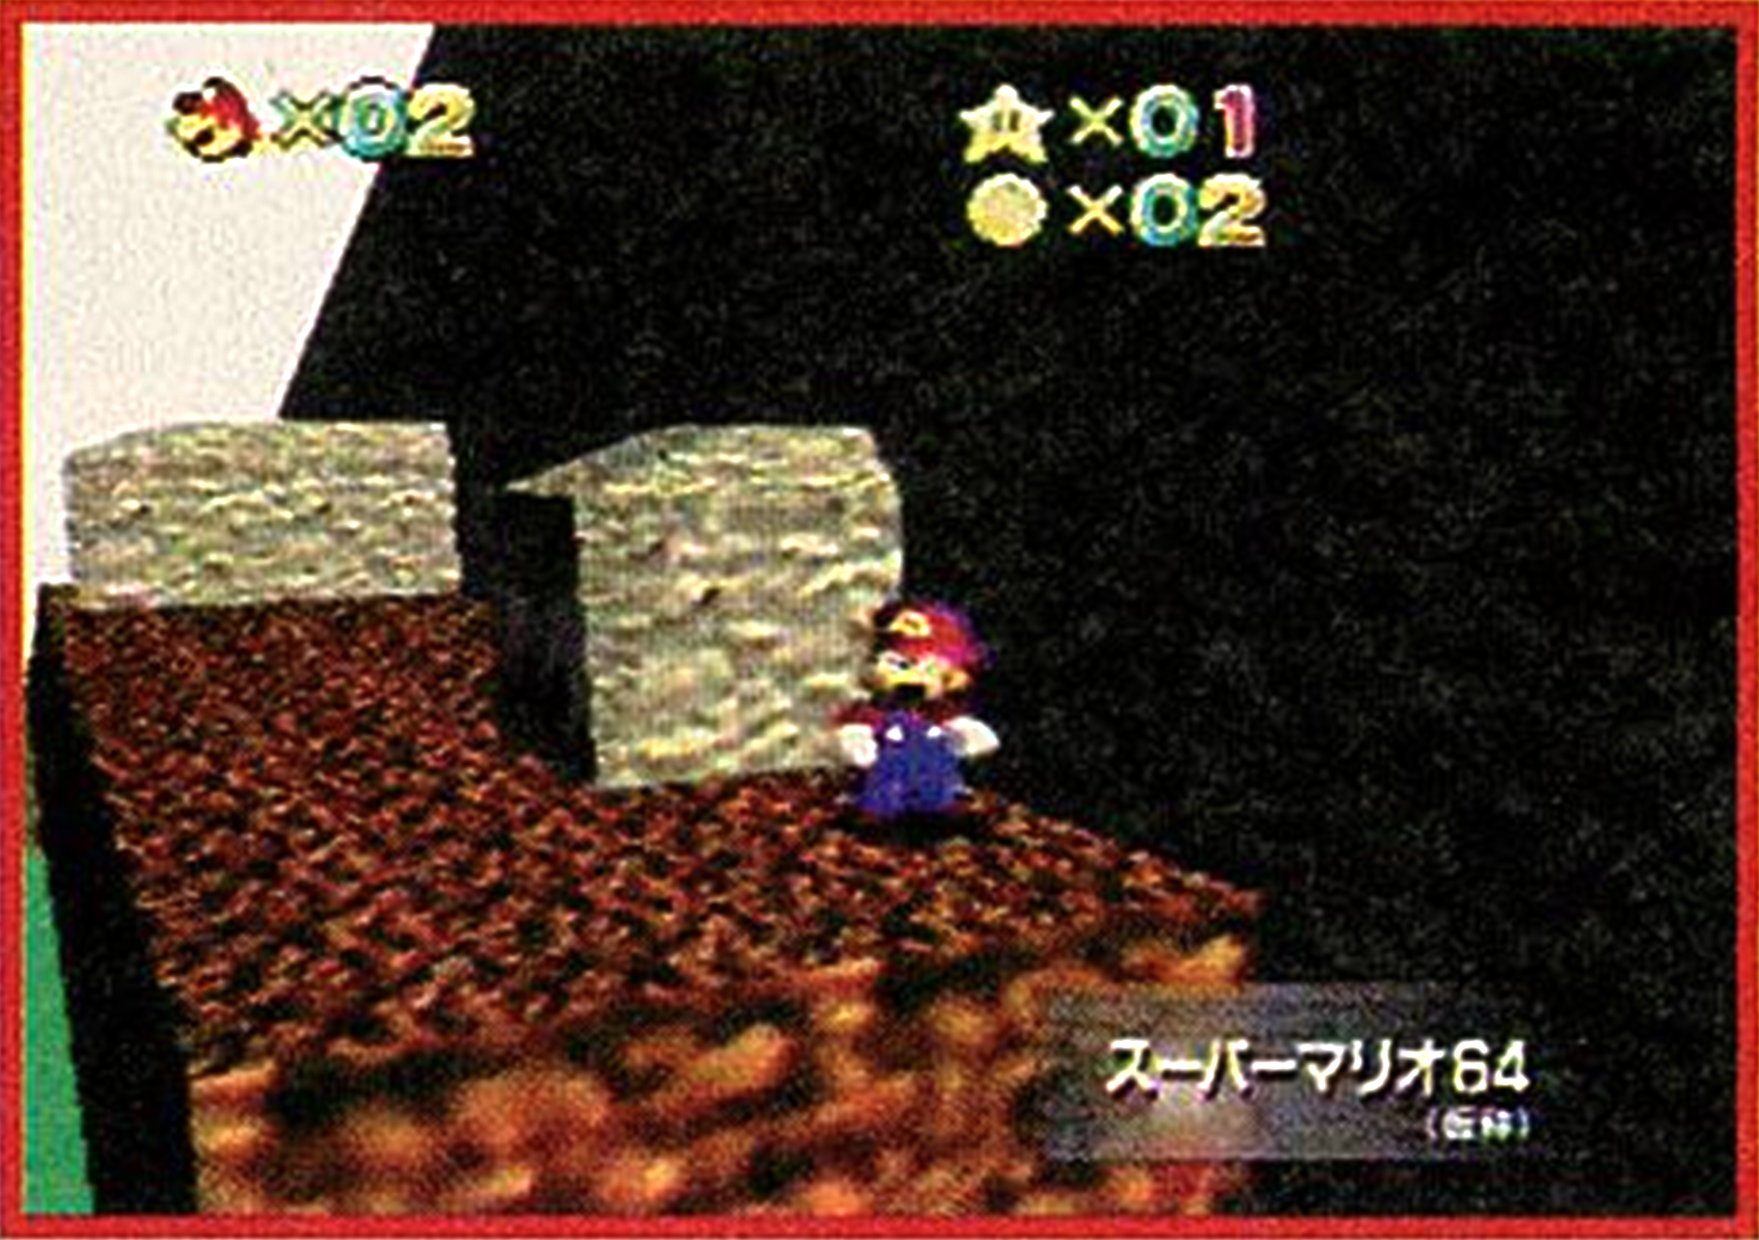
|
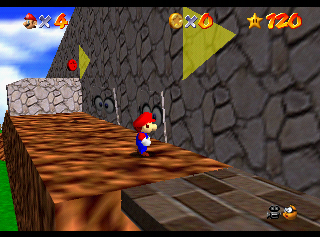
|
- This screenshot shows that the Bomps have been changed from the "POWER" build. Instead of 4 synced Bomps, this build has 2 unsynced Bomps. The Space World '95 demo build would add a wide Bomp in between the two normal Bomps, matching the final game.
"POW" Build |
Later "POW" Build iteration |
Final |
|---|---|---|
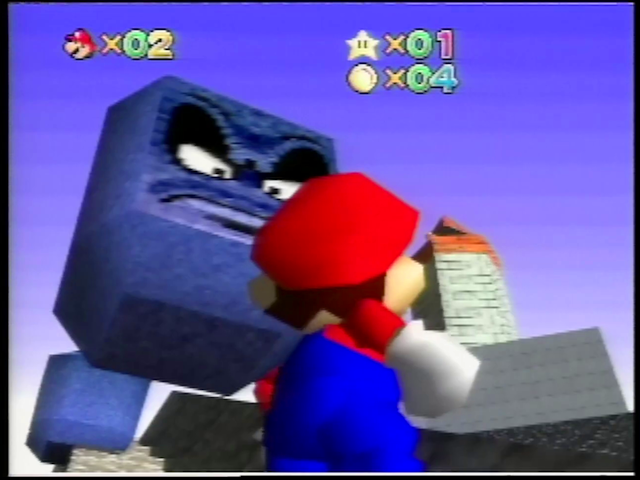 |
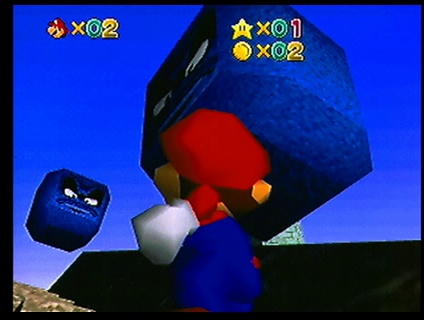 |
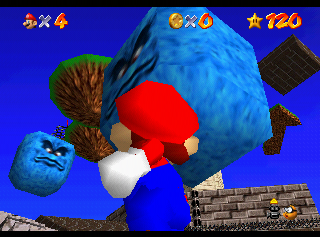 |
(Source: Promotional Video (Software) - Nintendo 64 B-Roll (1995) (3:36), MPEG Special Vol. 1 Video CD)
- Thwomps have a darker blue color and angrier faces. They also have circular shadows. This model can be found in the leaked source code.
- The Thwomps have different rotations and slightly different positions compared to the final game. A build in-between the "POW" build and Space World '95 demo shows the Thwomps in their final positions and rotations.
- The POW build screenshot has one of the Thwomps placed on the edge.
|
"POW" Build |
Final |
|---|---|
|
|
(Source: MPEG Special Vol. 1 Video CD)
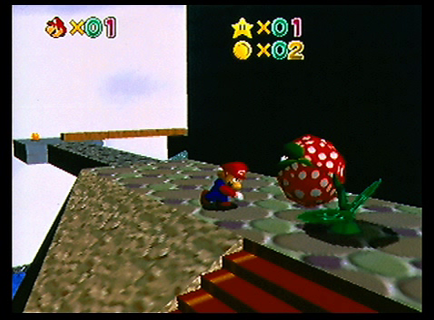
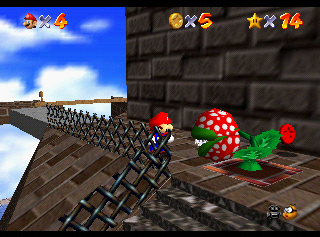
- The path before the Piranha Plant is a red carpet.
- Many of the floors have circular stone textures. These textures can be found in the July 25th, 2020 Gigaleak.
- The brick texture below the Piranha Plant and the fence near it are missing.
- The platform with the wooden plank is smaller.
- The sign on the left of the wooden plank is missing. On that same platform is a coin that was later removed.
|
"POW" Build |
Final |
|---|---|
|
|
(Source: MPEG Special Vol. 1 Video CD)
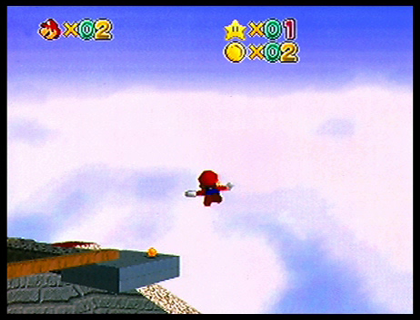
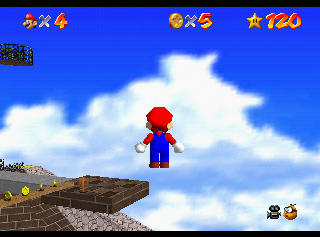
- Mario is flying without a Wing Cap. Footage from the Shoshinkai demo shows that he would fly after being shot out of a cannon.
- The coin line above the wooden plank is missing.
- The wooden plank is slightly thicker and placed closer to the middle of the platform.
- The owl cage also appears to be missing.
|
"POW" Build |
Final |
|---|---|

|
|
(Source: MPEG Special Vol. 1 Video CD)
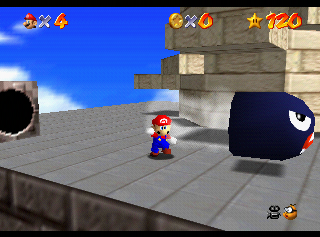
- The tower has triangular steps instead of the rectangular ones of the retail game. A later version of those steps used in the E3 1996 build can be found in the final game, unused. The tower's steps don't have shadows.
- Bullet Bills also lack a shadow. These early Bullet Bills were found in the Gigaleak under the name killer.sou.
- The Bullet Bill Launcher uses different textures with less detail and a grayer color.
- The elevator that leads to the tower isn't there, nor is the extra pole near it.
At 5:35 in this video, at the edge of the right television showing promotional video, Whomp's Fortress can be seen.
Fire Bubble (Lethal Lava Land)#
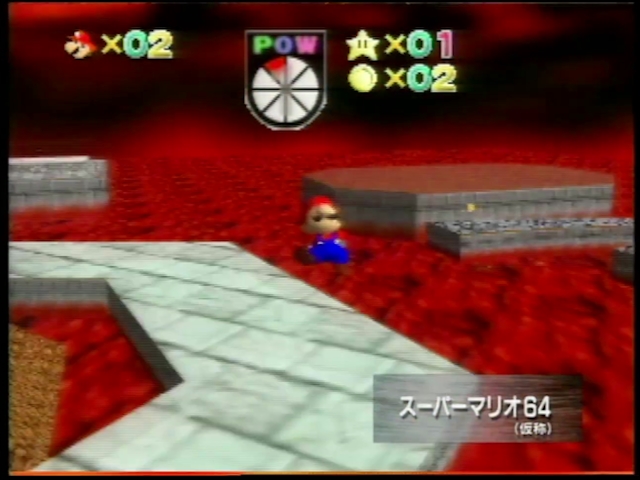
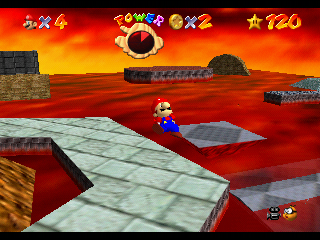
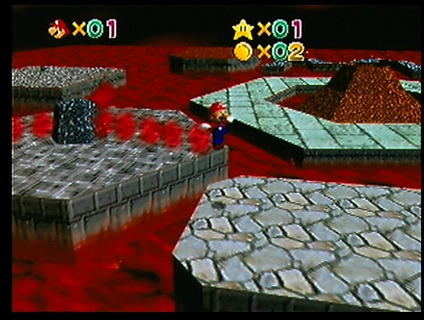
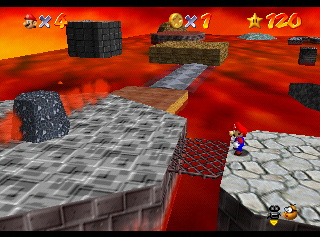
This stage is very similar to the final game in terms of appearance, but the layout is different, with the platforms much closer together and many of them missing.
|
"POW" Build |
Final |
|---|---|
|
|
- The flamethrower near the volcano is missing, as are the four platforms that sink and rise after the M-shaped structure.
- The lava isn't animated and has a different UV map.
- The spinning platform around the volcano has a slightly different UV map as well
- There's different textures used for the star platform, and the lava walls.
- The skybox is entirely different.
|
"POW" Build |
Final |
|---|---|
|
|
(Source: MPEG Special Vol. 1 Video CD)
- The Fire-Bars are different in this build: there are three sets of five fireballs, whereas the final game's have two sets of four fireballs. Note that the flames have a lower alpha value, and are a lot closer to red than the final game.
- The layout differences are clearly visible in this screenshot.
- There is no Big Bully on the uppermost platform; there's a small one instead.
- The volcano's texture is mapped differently compared to the final, looping a lot more.
- Mario is twirling, which can't happen in this level in the final game. In the Shoshinkai demo, the triple jump causes him to twirl, which seems to be what's happening here.
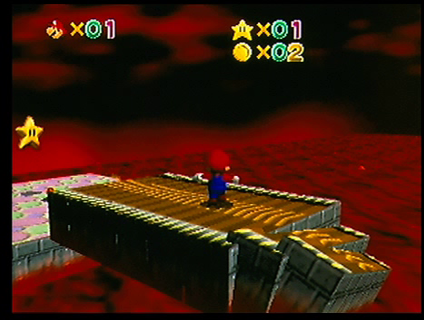
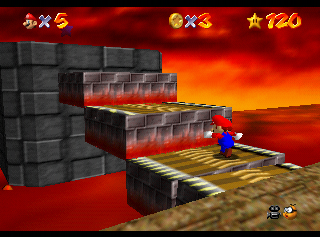
|
"POW" Build |
Final |
|---|---|
|
|
(Source: MPEG Special Vol. 1 Video CD)
- The falling bridge after the upmost platform has no vertical rise, making it a straight line to the star. The platform below this star is also much closer to the lava, and there's a coin on it.
- The star and bridge are spawned as soon as the player spawns.
Snow Slider (Cool, Cool Mountain)#
Cool, Cool Mountain has a completely different model and textures. The stage is modeled more crudely and has no enemies or coins.
Outside#
|
"POW" Build |
Final |
|---|---|
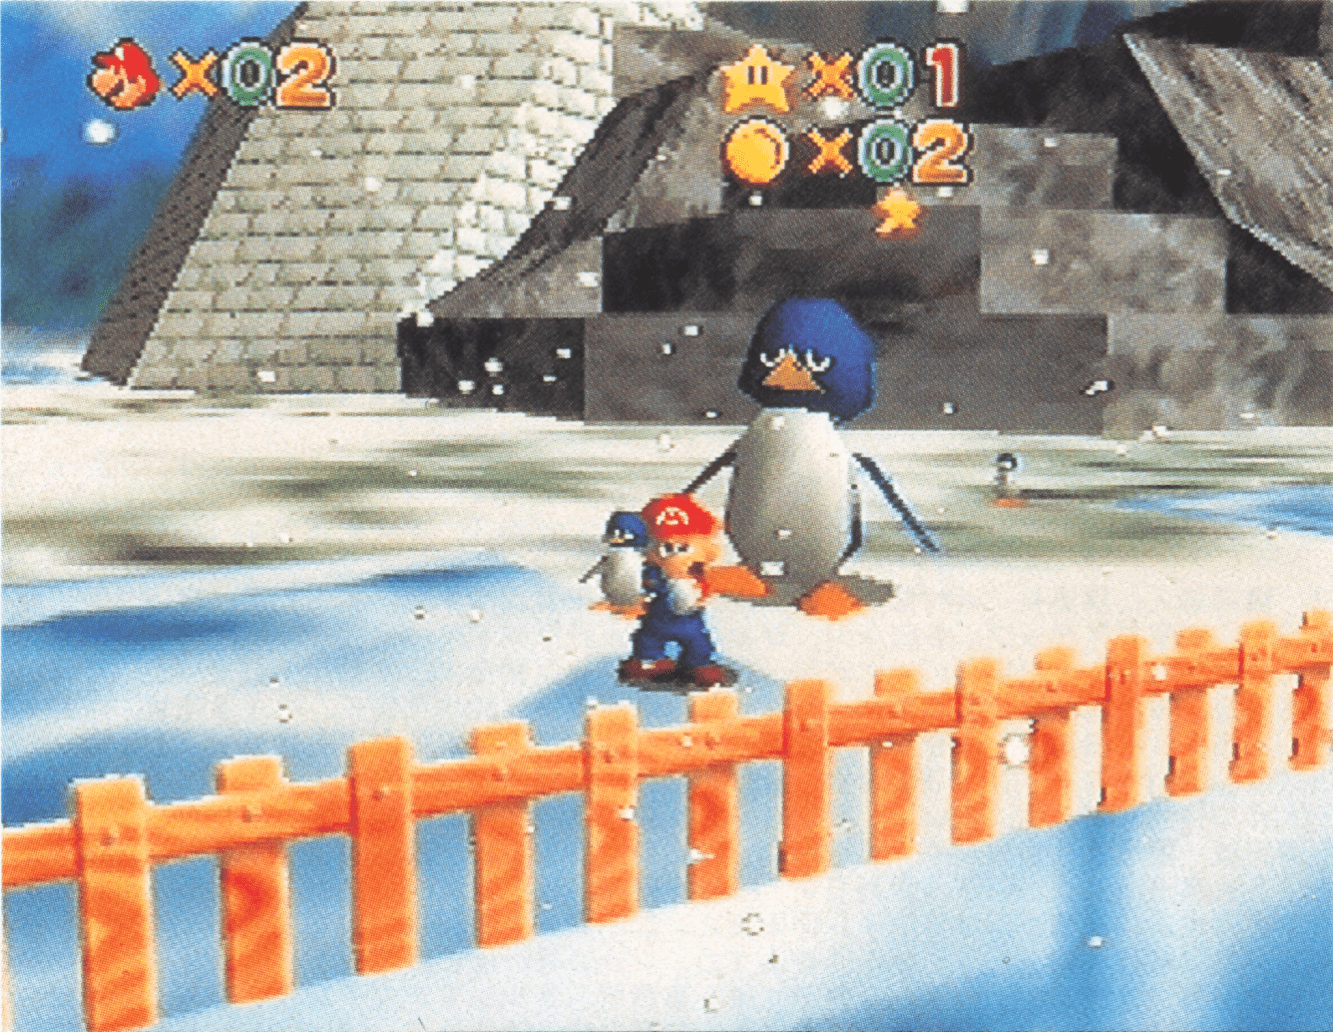
|
|
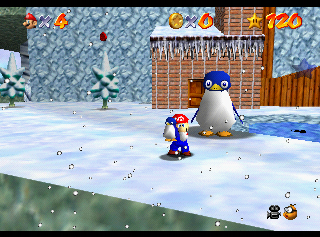
- The penguins have a different design, with more droopy eyes and a thinner torso. This early model can be found in the leaked source code.
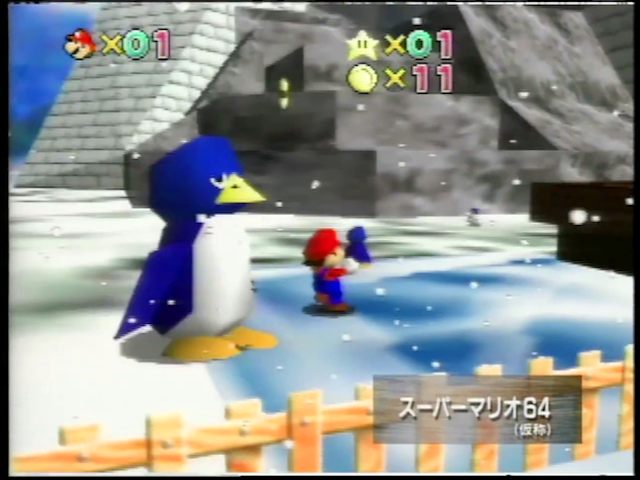
- The slide exit is a strange, dark model that somewhat resembles a chimney, probably a unique Warp Pipe design.
Slide#
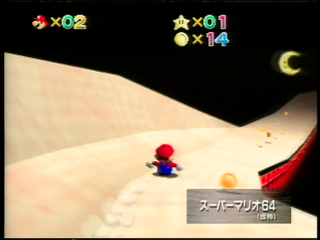
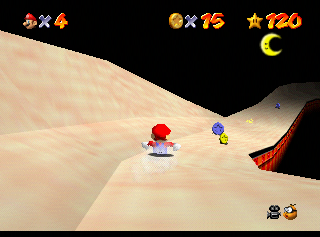
The slide has a completely different look. The final game uses this slide in Tall, Tall Mountain, giving Cool, Cool Mountain a different slide with a more icy aesthetic.
|
"POW" Build |
Final |
|---|---|
|
|
- The camera is positioned higher.
- The static coin is placed a little closer to the edge of the slide.
- The bouncing coins are regular coins, and there are more of them.
"POW" Build |
Final |
|---|---|
 |
 |
 |
 |
 |
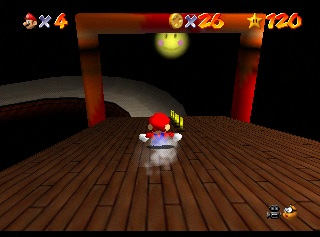 |
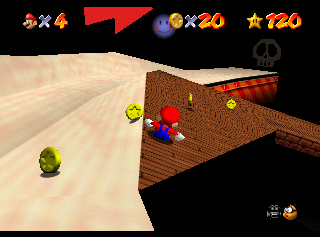
- There are no coins on the wooden platforms.
- The wooden platforms have different UV mapping, looping less than the final game.
- The first image shows a second route for the slide that was eventually removed, that second path can be seen in footage for the Shoshinkai demo.
- The yellow smiley in the third image is positioned lower.
|
"POW" Build |
Final |
|---|---|
|
|
(Source: MPEG Special Vol. 1 Video CD)
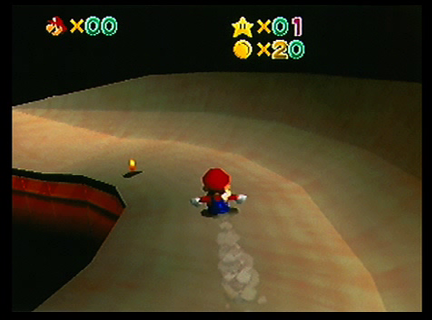
- The coins are placed differently, farther from the edge of the slide.
- The normals are different, with additional shading on the left side.
- The different dust particles can be seen again here.
Water Land (Dire, Dire Docks)#
|
"POW" Build |
Final |
|---|---|
|
|
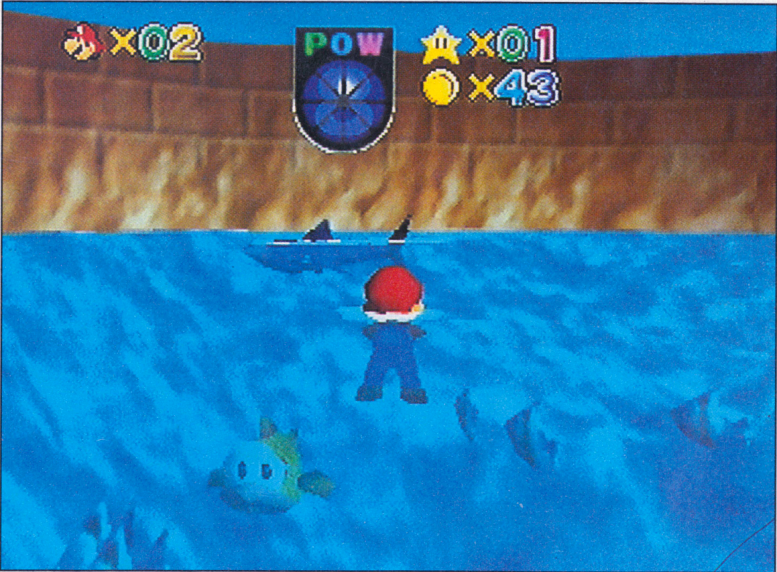
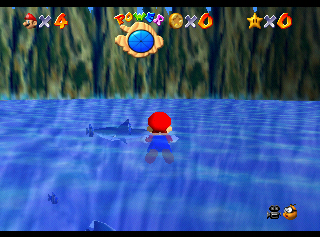
- The walls in the starting area use a completely different texture compared to the final game. That same wall is also a bit shorter than the final game.
- Sushi uses an early model with simpler textures. This model can be found in the leaked source code.
|
"POW" Build |
Final |
|---|---|
|
|
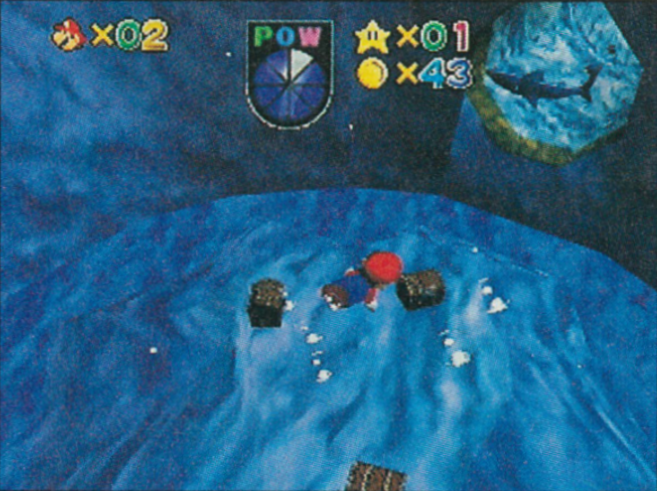
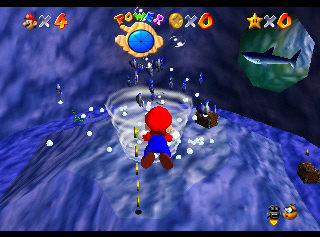
- Many objects are missing from this section: the whirlpool, the coins, and the water plant. The chests are also positioned differently; they are all on the elevated ground where the whirlpool is in the final game.
- The early Sushi design can be seen again here.
- The vertical line of coins isn't there.
- There is a smaller version of the Bowser bombs in the tunnel underwater, which are in the data of the final game, but aren't used.
- The tunnel starts of with a yellow edge, rather than a plant-based edge.
|
"POWER" Build |
Final |
|---|---|
|
|
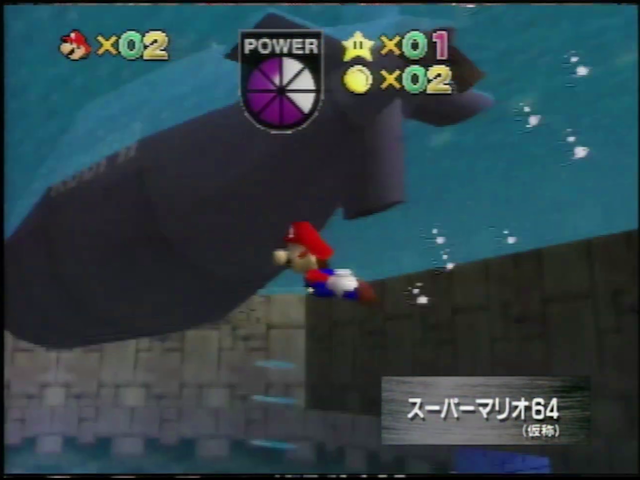
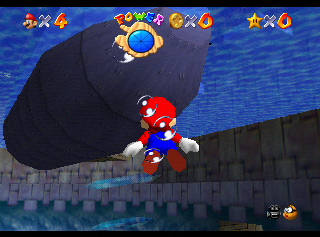
- The rings that come out of the Jet Stream are smaller compared to the final game.
- The tunnel's walls are blue.
- The water surface uses a different texture with a more cyan color, similar to Jolly Roger Bay's water texture.
|
"POW" Build |
Final |
|---|---|
|
|
(Source: MPEG Special Vol. 1 Video CD)
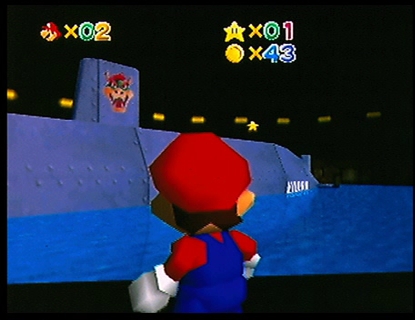
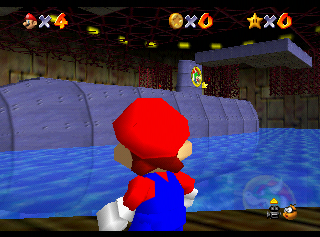
- The Bowser symbol on the ship is the head portion of Bowser's artwork from Super Mario Bros. 3, which was also reused in the Bowser painting and Lethal Lava Land sliding puzzle. That same submarine is rotated 180 degrees compared to the final version.
- Bowser's Submarine has "KOOPA" (Bowser's Japanese name) written on it.
- The gates and platforms above the submarine, which in the final game are used for the Red Coin star, are missing here.
- The submarine's conning tower is further away from the Power Star than in the final game.
- The submarine uses a different UV map.
- The ceiling is lower.
Sunken Ship (Jolly Roger Bay)#
"POWER" Build |
Final |
|---|---|
|
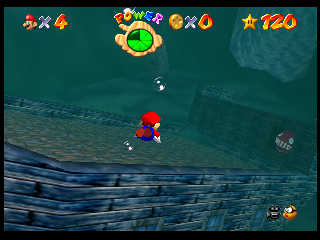 |
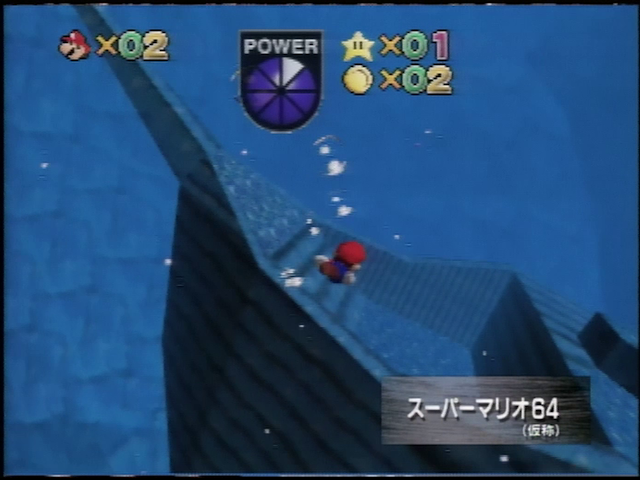
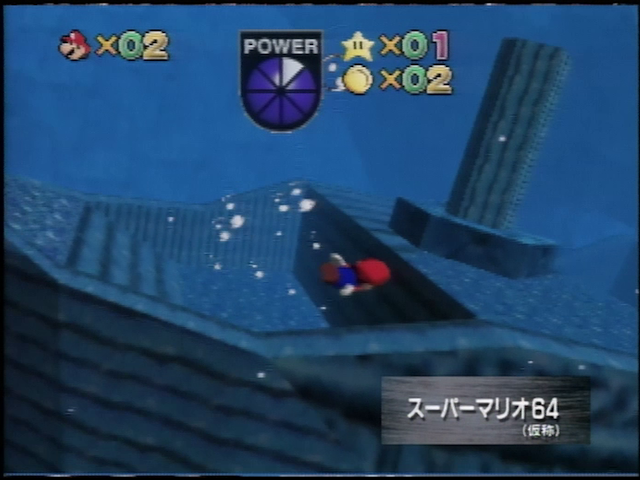
- An unknown object can be seen next to the ship. Judging by its shape, it could either be the ship's shadow or a removed part of the level.
- The entire level is extremely basic and crudely modeled.
- The water has a heavy amount of visual fog, and has a different fog color.
- The sunken ship is bigger, less detailed, whiter, and has a mast with a tall pillar on it.
Koopa 1 (Bowser in the Dark World)#
B-Roll Builds |
Final |
|---|---|
|
|
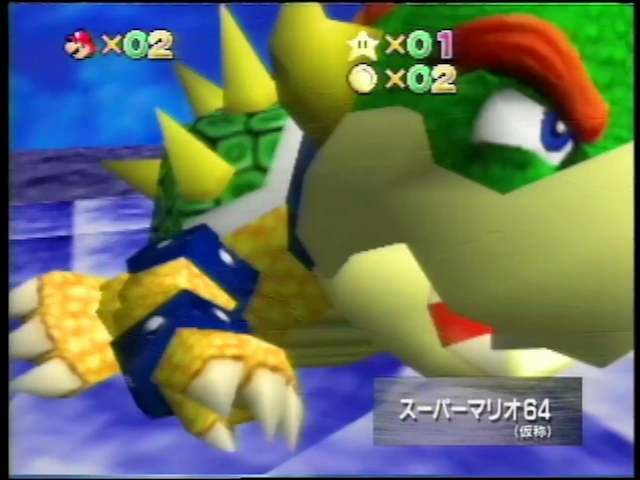
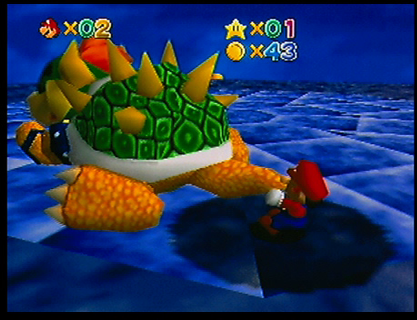
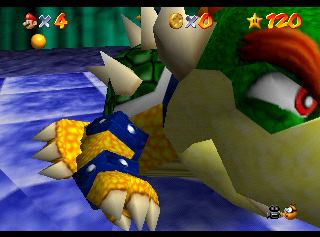
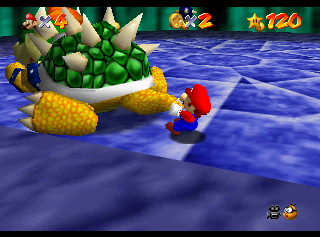
- Bowser's eyes are blue, as opposed to the final game's red; a texture with those blue eyes can still be found in the final game's files. Bowser also has a different shell texture, with a lighter green color, and there's a green spot on each pattern. Lastly, Bowser's snout is just a solid color with nostrils on it instead of having scales.
- The camera doesn't move, and only focuses on Mario throwing Bowser. Also, Bowser's shadow appears over Mario's position when throwing him.
- If Bowser's fire breath catches Mario while he is in first-person camera mode, the camera will not return to normal, staying in first-person mode.
- The shell's spikes and Bowser's horns are colored yellow instead of the same color as his nails and teeth.
- The skybox is completely different from the final game, showing a dark blue sky with lots of clouds.
- The camera is positioned higher when grabbing Bowser.
- The yellow spheres around the arena are positioned lower.
Unused Areas#
Early Mario Peace Sign Animation (Title Screen)#
- In the Nintendo 64 1995 Promotional Video, a brief video clip of Mario jumping towards the camera and throwing up a peace sign is played. He is seen standing on a simple checkerboard grid in front of a black background. The animation in this clip also appears to be visibly motion captured. In the Mario Kart 64 gigaleak, a leftover bit of unused SM64 lighting data can be found which looks almost identical to the lighting used on Mario in this clip. Furthermore, there is a reference to a deleted animation named "animeTitleDemo" in the SM64 gigaleak itself, which suggests that this is footage of the original title screen from before the Mario head was implemented.
- Mario's model is an earlier variant of Mario_old, with more detailed hands, vertex colored buttons and a higher up shirt.
Removed Stage, "Castle"#
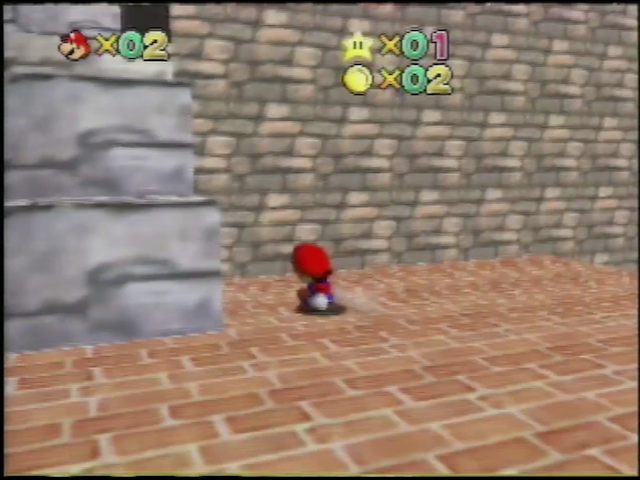
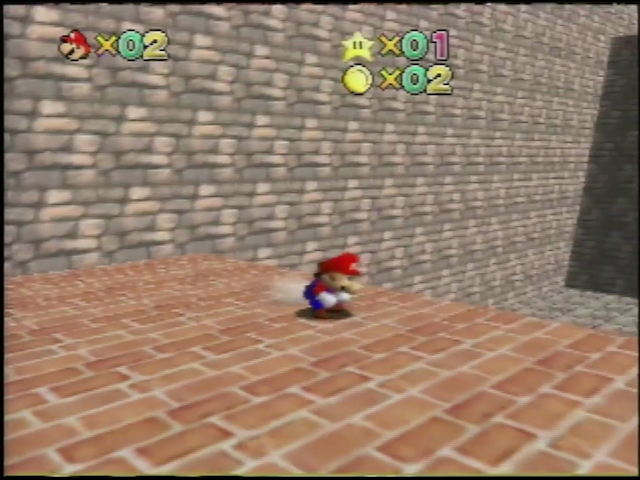

- Footage exists of a location that does not match anything in particular in the final game. The footage was bundled with other footage from this second demo. The full model can be found in the gigaleak, it appears to be an expansive stone castle with several levels and stairs leading up to the top.
- The skybox uses Whomp's Fortress painting.
Big Boo's Haunt (Ghost House)#
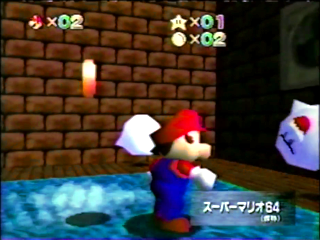
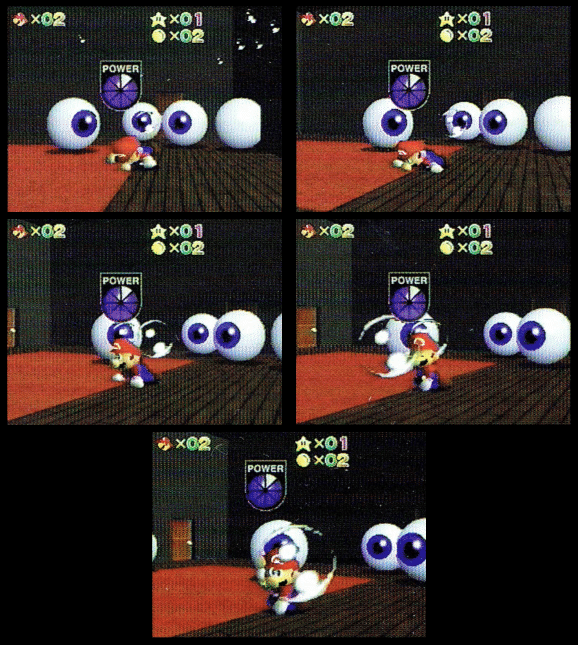

This stage is completely different with a basic level layout (possibly the underground area).
- A strange hallway-like room with a blue carpet can be seen here.
- There appears to be extra space surrounding the carpet on either side of the wall, with a small painting at the end.
- The wall in the hallway uses a brick wall texture from the slide (Snow Slider), which can be found in the gigaleak.
- There are two Boos in this room.
- There are two additional rooms in the stage:
- The first room has a red carpet and solid colored walls. The wall texture can be found in the gigaleak.
- There are five Mr. Is in this room, in the final game, there's two Mr. Is and a boss variant.
- Doors appear to have a unique texture, a similar texture is in the final game, but goes unused.
- The layout in this room is similar to the final game.
- The second room appears to be the same room with two Boos but no carpet, which is hard to see what's there.
Co-op Test Stage, "Dummy"#
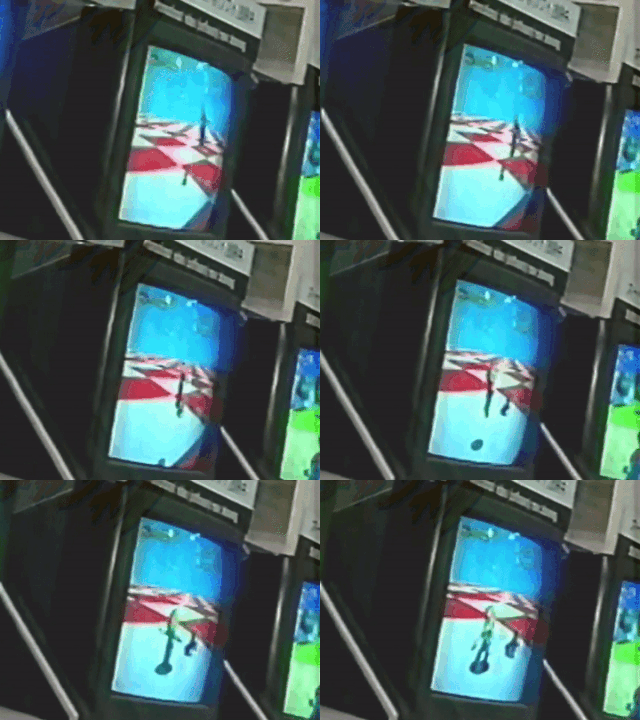
In November 2023, promotional footage from the Spaceworld 1995 showfloor surfaced a two player test level.
- The level design here is a plane with red checkerboard pattern, a green variant can be found in the leak.
- It is unknown what level ID specifically was used in this clip, as Dummy was used as a placeholder for empty level slots during development.
- Mario can be seen crawling while Luigi does triple jump.
- In the Iwata Asks interview for Super Mario 3D World, Yoshiaki Koizumi mentions an early prototype of Mario 64 that featured Mario and Luigi running around a simple, flat field, which matches what's seen in this brief clip.
Iwata
Regrets?

Koizumi
One goes all the way back to Super Mario 64. When we made the first prototype, Mario and Luigi were on a flat field.

Iwata
Both of them.

Koizumi
Yes. We ran it that way, but when we made the landforms, because of hardware limitations we had a choice between cutting Luigi or making more elaborate landforms. Then, in tears, we had to ask Luigi to leave.
(Source: Iwata Asks: Super Mario 3D World)