 This article has a talk page!
This is a sub-page of The Legend of Zelda: Ocarina of Time.
The developers overlooked a few interesting details in their rush to finish the game.
Inaccessible Navi Messages#
Certain Navi messages are inaccessible due to their triggers being unreachable for various reasons like being placed too far away, too high or inside of terrain. They are documented on the unused text page.
Kokiri Forest#
Hidden Pot in Twins' House#
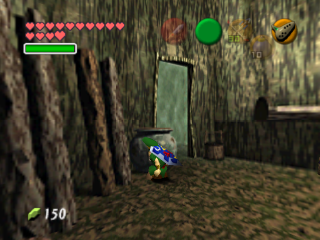
The collision model for the Twins' House in Kokiri Forest actually contains two pots, despite the pre-rendered background depicting only one. Because of the way the background image is mapped to the collision, attempting to roll between the two pots will result in parts of Link disappearing behind the background where the pot would be. This is illustrated in the lefthand image below.
|
Appearance In-Game |
Collision Model |
|---|---|
|

|
Inside the Deku Tree#
Navi Information Spots#
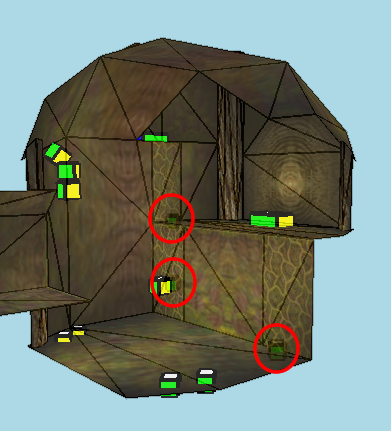
There should be three Navi information spots in the slingshot room of the Deku Tree. However, the actors for these information spots are loaded in the Deku Tree's main chamber, rather than the slingshot room where they're meant to appear. They would have used the same text as the information spot on the main chamber's second floor:
"Look at this wall! The vines growing on it give it a rough surface... Maybe you can climb it, Link!".
Hyrule Field#
Misplaced Bushes#
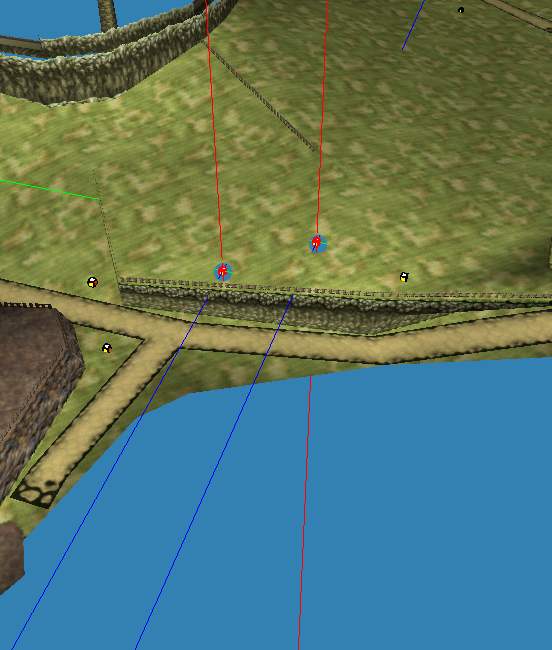
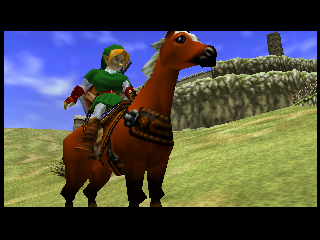
Several of Hyrule Field's scene setups contain two groups of small bushes whose coordinates put them underground near the entrance to Gerudo Valley. The bushes are spawned via actor 0x0151, variable 0x0201. Objects spawned by this actor attempt to attach to collision surfaces beneath them. However, because the two groups of bushes are not placed above any collision, they fail to spawn. When moved above ground, the actors will function properly.
It appears that the terrain for this area changed at some point in development, likely there was no higher cliff section with a fence. It seems that the developers forgot about the existence of these bushes after altering the map.
This oversight was fixed in Ocarina of Time 3D, with the bushes brought up to the surface.
Bazaar#
Invisible Lamp Model#
Restored model / no BG |
Original |
Restored / with BG |
|---|---|---|
 |
 |
 |
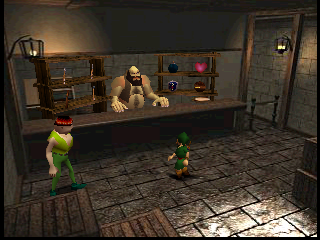
Removing the background and loading the lamp model. |
Originally the shelf is above the lamp. |
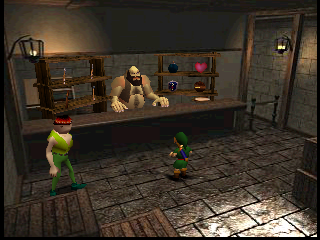
With the model loaded. |
A lamp model, which is in the upper-left part of the room, is not loaded normally in the map. The models are addressed correctly but end up not being executed. The lack of this model causes a small problem: the shelf on the left side crosses the lamp, but if the model had been loaded this would not happen. This detail is almost not noticed because the HUD is on top.
Back Alley#
Misplaced Bed in Back Alley House#

Examining the collision of the green-clad NPC's house in the Back Alley reveals that there is collision for a bed located outside the room's normal boundaries.
Hyrule Castle#
Missing Guard House Pots#
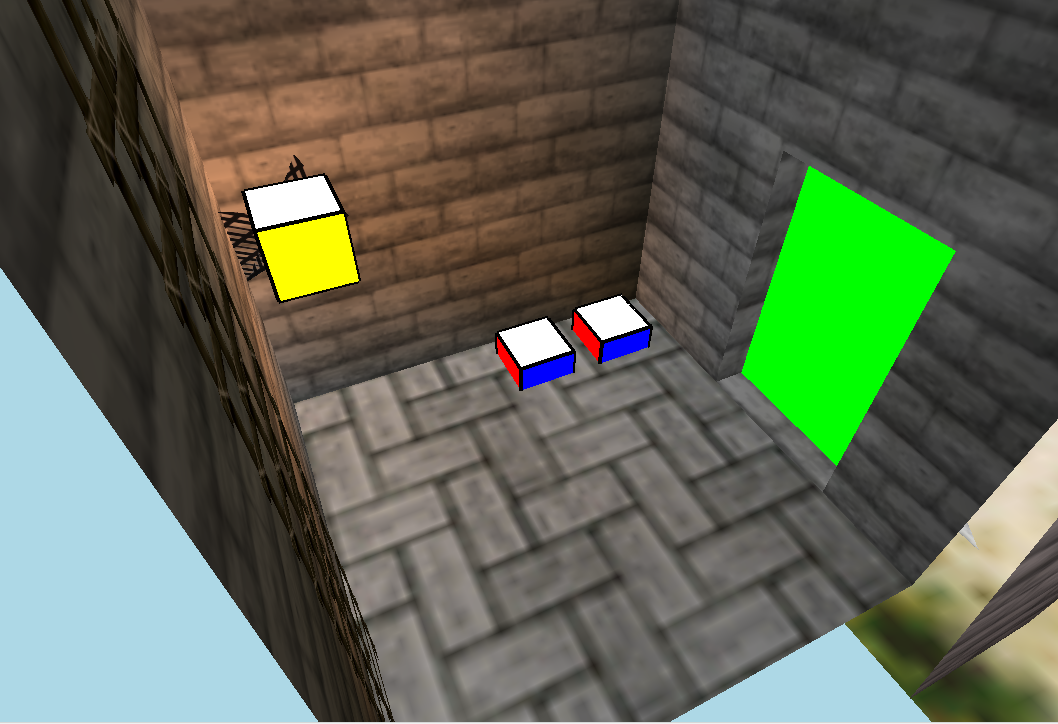
There are two missing pots that are supposed to appear inside the guard house.
Kakariko Village#
Mismatching Windmill Door#
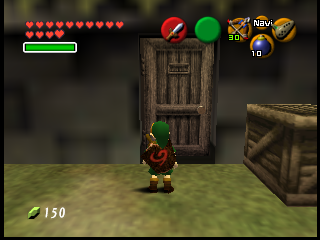

There is an oversight with the Kakariko Windmill door, making it use a different type of door indoors and outdoors. This is due to the interior using the wooden door in gameplay_keep while the overworld uses the wooden door from gameplay_field_keep. It can be seen in pre-release screenshots from July 1998 that the wooden door for both the exterior and interior would've been consistent at one point.
Kakariko Graveyard#
Fire Medallion on Pedestal#
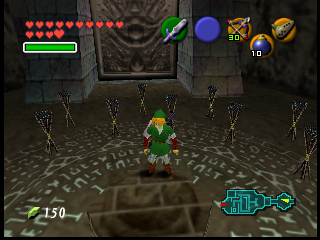
The pedestal at the Shadow Temple's entrance has the Fire Medallion symbol on it. While this could be construed as a hint to use Din's Fire, it should be noted that at one point in development that item didn't exist and fire magic was used directly through the Fire Medallion. It was removed altogether in Ocarina of Time 3D.
(Source: flyingomelette.com)
Missing Enemies#
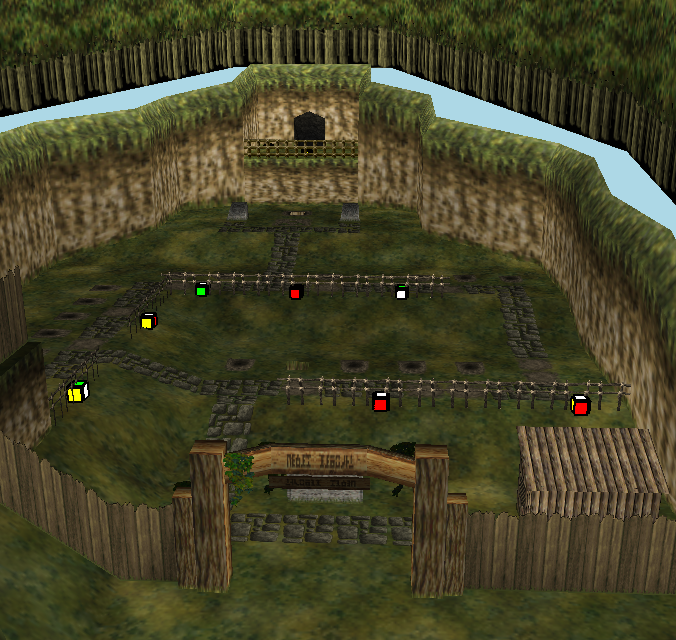
There are five roosting Keese and two Skulltulas who remain unloaded in Adult Link's Kakariko Graveyard, as they are not referenced. All creatures are hanging on the fences, with the first Skulltula located near the Spot Beam and the second Skulltula being at the top-right on the edge of the fence.
Dampé's Grave#
|
Broken |
Corrected |
|---|---|
|
|
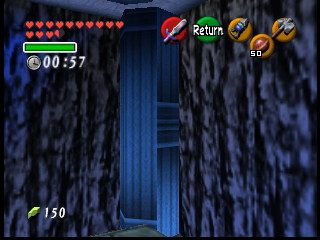
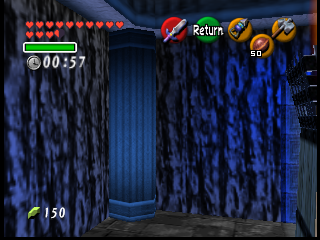
One of the columns in the room where the Dampé race ends has texture mapping errors, causing it to be misaligned compared to the others.
(Source: Seedy)
Dodongo's Cavern#
Unused Hookshot Targets#
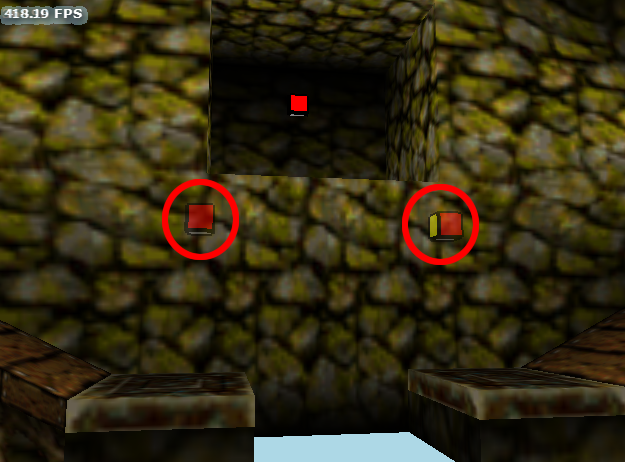
There are two disabled Hookshot targets in the first room of Dodongo's Cavern. They are placed outside of the map and fit with room #3, the room with the stone staircase puzzle.
Fire Temple#
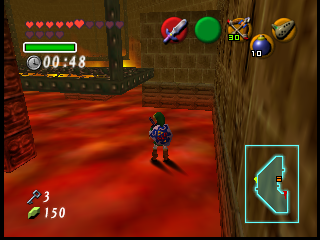
In the room with the firewall that chases you, there is one triangle on the lava floor next to the door that leads to the firewall maze that is not marked as lava, so you can stand on it without taking damage.
Lake Hylia#
Missing Pots#
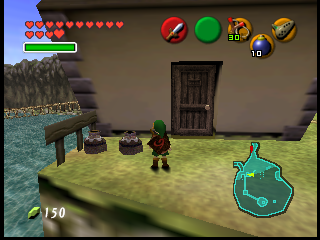
There are two pots that are in Lake Hylia's (Child setup) actor list but not in the object list. If the pot is added to the scene's object list, the pots appear next to the Lakeside Laboratory entrance.
Water Temple#
Missing Keese#
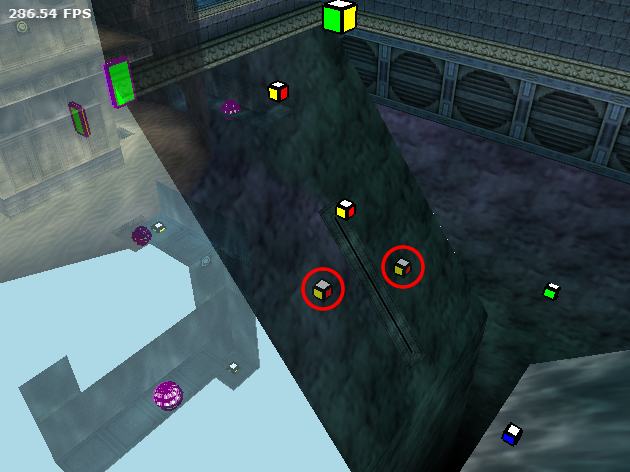
There are two disabled Keese roosting in the first room of the Water Temple. They are placed outside of the room boundaries and fit with room #6, the room with the waterfall.
Missing Pots#
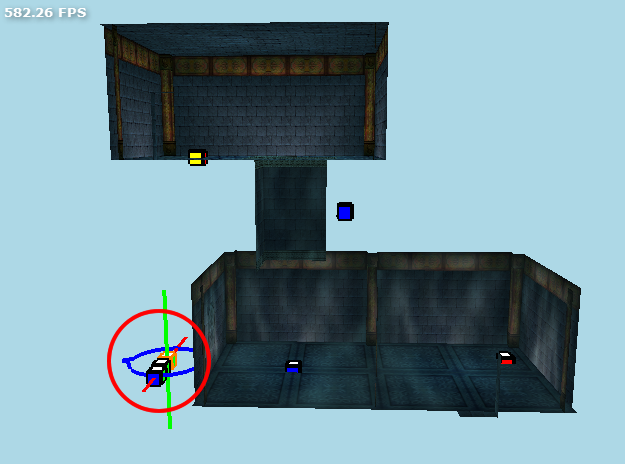
There are three pots located outside of room #11 in the Water Temple, the room with the timed water geyser. They are not loaded because they are outside the collision area. The pots line up with the wall on the floor above, hinting that the room was redesigned at some point and the pots were simply forgotten about.
Missing Spike Collision#
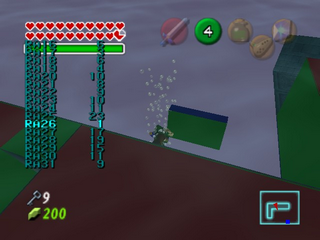
There is a corridor with spikes on the second floor to the right side of the map of the Water Temple. Outside this corridor is a forgotten piece of collision of a spike. If you touch this area, Link will take damage equal to the spikes of the corridor. The wall collision can be viewed using the Memory Editor in the Debug ROM or with a level editor. This oversight appears in all versions.
Removed Hookshot Target#
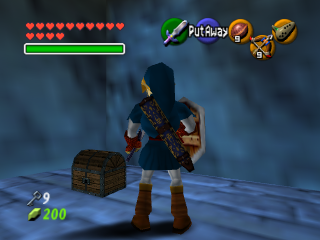
In the twisty cave room with the river and whirlpools, there is a section where the player must use the Longshot to reach a treasure chest before the gate closes. While the wall behind it looks like an ordinary solid stone wall, the structure of the room's model reveals that a square patch, the same size as the Hookshot targets seen elsewhere in the temple, is located directly behind the treasure chest. The patch of stone is even defined separately from the rest of the stone around it, further indicating that this was once a Hookshot target panel.
|
In-Game |
Edges |
|---|---|
|

|
It was probably removed due to being redundant, as the Longshot can simply hook onto the treasure chest itself.
There is a similar odd patch in the tunnel room connected to the main room, with the stone block, but it is at the top of the wall and not tall enough to fit a target. Two more patches can be found in the room with the rolling boulders, this time on the ceiling above the ledges at each end of the room. Having targets here would have made it easier to avoid the flowing currents and boulders when crossing the room.
Bottom of the Well#
Door Flag Issue#
In the Bottom of the Well, there is a permanently barred door that is normally only used as a one-way path back up from the basement in case you fall into one of the many trap holes. While the door is permanently barred, it is also programmed to open by defeating all enemies in the main room of the Bottom of the Well. However, if you try to do this without emerging through this door from the basement, a cutscene will play where the door opens and then closes right away again because the "permanently barred" flag takes priority over the "open by defeating all enemies" flag. This is very likely an oversight. Leaving and re-entering the main room will still permanently remove the bars. Defeating all the enemies after entering the main room through this door from the basement will make the same cutscene play, and the door will remain open instead of closing immediately. Either way, the door will remain open permanently.
Thieves' Hideout#
Misplaced Gerudo Guard#
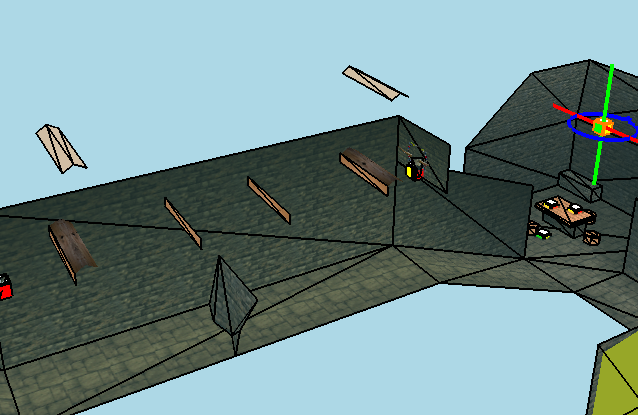
The actor for one of the patrolling Gerudo guards is placed too high, resulting in it floating down from the ceiling into its patrol after initially spawning. This, along with the fact that some of the log collision here is also out of place, suggests that these aspects may be remnants from an older layout that underwent a redesign.
Outside Ganon's Castle#
|
Hyrule Castle Stone Gate |
Ganon's Castle Stone Gate |
|---|---|
|
|
Ganon's Castle Stone Gate Texture In Hyrule Castle |
|---|
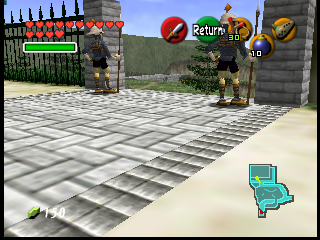 |
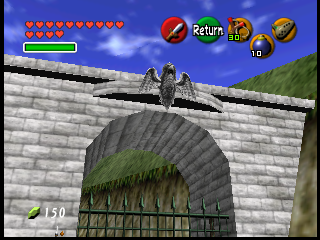
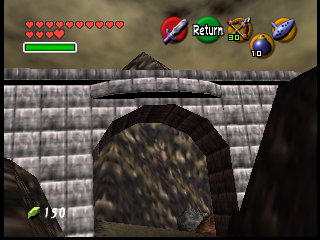
The texture used for the stone gate outside Ganon's Castle does not match the one used for the gate's Hyrule Castle counterpart. This texture can be found outside Hyrule Castle, close to the moat, albeit looking less dark.
Inside Ganon's Castle#
Forgotten Beam of Light Actor#
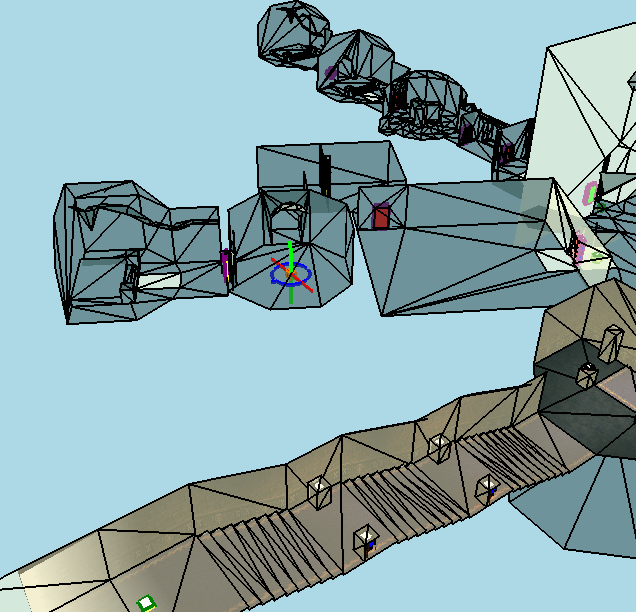
A spawn for an unused beam of light actor (00B7) exists in the spawn data for Inside Ganon's Castle room 0, the dungeon entrance. The actor itself will fail to load due to the necessary object file dependency not being set in the room data. The block's coordinates place it within room 18 (the second half of the Spirit Trial), directly underneath a web blocking a beam of light from above, suggesting that it was initially a placeholder before the puzzle was made a little more complex.
Texture Error#
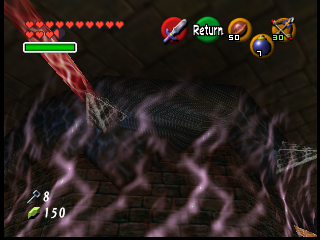
There's a nasty texture error on the blueish top part of wall between and inside the Fire and Light Barriers. The texture is massively stretched and distorted, giving it a zigzag-looking pattern.
Alternative Boss Door#


The last three doors of Ganon's Castle before the fight with Ganondorf are defined as ones that require a Boss Key to unlock. However, all three doors are set to the same value, so that when the first one is unlocked both subsequent ones are also unlocked. Curiously, there are two player spawns near those doors that are not used.
Forgotten Platform#

During the first fight against Ganondorf, you can see a platform in the center of the base outside the map.