 This article has a talk page!
This is a sub-page of The Legend of Zelda: Ocarina of Time.

|
This needs some investigation. |
Introduction#
Because Ocarina of Time's script and settings changed so frequently and drastically during development, cutscene director Takumi Kawagoe struggled with the question of how to keep his cutscenes up-to-date. Had the game used prerecorded FMVs, like Final Fantasy VII, a cutscene would need to be remade from scratch to reflect the current state of the game (such as the look of the characters and the design of the area) each time something that appeared in the scene was altered. Fortunately, Kawagoe was able to come up with a clever solution; the system used by the retail game.
The cutscenes in Ocarina of Time are not pre-rendered, which means that, rather than displaying a pre-recorded movie, the camera moves around in-game models on a predetermined path in real-time.
Some information is set in stone at the time of the cutscene's creation, such as the path of the camera, which actors and objects are loaded, which exits lead where, environmental settings such as the skybox, and the timing of the events and actions that take place in the scene. Other information, such as which outfit and accessories Link has equipped, and the current terrain, are not.
The data that is not predetermined is generated in real-time. Thanks to Kawagoe's system, even when the developers changed the appearance of an area following a scene's creation, there wasn't any need to rerecord it. In addition, Link's equipment in cutscenes always reflects what the player currently has equipped.
(Source: Kawagoe's Cutscene System - Iwata Asks: Finding the Right Location for the Opening Sequence)
Explaining the Alternate Scene Setups#
Because of the information preserved by the cutscene system, each cutscene environment acts as a time capsule that reflects some aspects of how the maps in which they take place appeared during the point in development that the cutscenes were created.
In the past, before gamers had access to the Debug ROM, some of these alternate setups could be explored using a series of GameShark codes. The process of adventuring through the cutscene environments, with their seemingly random exits, eerie out-of-place objects and NPCs, and frequent crashes, was dubbed the "Beta Quest".
Now that more is known about "how" and "why" behind the alternate scene setups, they can be explored and documented in a more systematic way.
This page attempts to catalogue the differences between the data preserved by the cutscenes and the data as it normally appears in the retail game.
Accessing the Alternate Scene Setups#
Alternate scene setups can be explored using the following steps:
- Open the Debug ROM and go to Map Select.
- Go to the scene's Map Select number (Map Select #).
- Set the stage to the scene's Stage number (Stage #).
- Enter the map. The cutscene will start to play.
- Press D-Pad Right to cancel the cutscene and walk around in the cutscene environment.
Because not all actors and objects present in the cutscene headers are loaded in-game, it may not be possible to view every object or actor listed below. Additionally, some actions may cause the game to crash, such as trying to leave the map via an exit with invalid or nonexistent exit data. Tread carefully!
Inside Jabu-Jabu's Belly#
Setup 04 - Finding Zora's Sapphire#
Map # |
Map Name |
Map Select # |
Stage # |
|---|---|---|---|
002 |
Inside Jabu-Jabu's Belly |
70 |
00 |
This is the cutscene environment in which Link finds Zora's Sapphire.
Environment Settings#
xxx
Layout Differences#
- The slimy things that are in the dungeon have corrupted textures in this version and look somewhat funky.
- In the next area where you would normally raise the water level using the switch, there is no switch and no water at first but if you decide to return to this room at some point, there's invisible water in the middle which extends all the way to the ceiling.
- In the main room with the elevator, there's a duplicate water surface at the very top. Since the water never goes that high normally, you may have needed to raise the water level at some point. There are also two Octoroks at the bottom (normally there's only one there), and the room where the Business Scrub can normally be found is empty.
- In the room before the boss room, there are two electric sponges submerged in the terrain. Also, there is no switch and the door to the boss room is moved way behind, preventing you from going up to it. This old pre-boss room can still be seen in the Debug ROM; it was probably changed because the developers didn't want to use the same puzzle twice in one dungeon.
- The rooms at the back of 1F are completely different. For one, there are no enemies present where the path forks, aside from the tentacles. All five rooms here are different from the final game:
- The leftmost door has a switch in front of it, but the door's already open and the switch has no obvious effect. If you go inside, you'll see the tentacle dying on its own. A chest will then appear with the Compass inside (final version has the Dungeon Map here). Also, even though the tentacle has died, none of the slimy things in the dungeon are gone.
- The middle-left room (blocked by a tentacle) just has a large chest with Deku Nuts inside. (This is where the Compass would be in the final version, protected by lots of Shaboms.)
- The middle room (blocked by a tentacle) again has a tentacle which dies on its own, as well as several Baris. Kill all enemies to make a treasure chest appear which contains the Boomerang. In the final version, the Boomerang is in the rightmost room instead. How you would have defeated the tentacle without the Boomerang in the first place remains a mystery.
- The middle-right room (blocked by a tentacle) has, yet again, a tentacle dying on its own. The treasure chest is already present...and contains a Piece of Heart, an item which doesn't appear anywhere within Jabu-Jabu's Belly in the final version!
- The rightmost room again has a switch which does nothing as the door is already open. The room is full of Stingers. Kill them and a treasure chest will appear, containing the Dungeon Map. (In the final version, the Boomerang is here instead.)

|
To do: |
Room xx
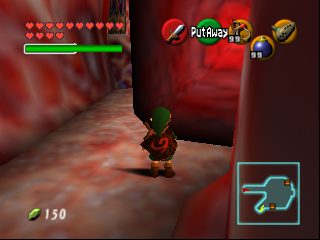
In Room xx, where you pick up Ruto, there is a misaligned door standing in the middle of the room. Trying to go through the door loads Room 15 (the duplicate version of Barinade's Lair) instead of Room 13, leaving Link in the darkness. This suggests that the area underwent a redesign.
In addition, the water level is lower than usual, and there are Stingers instead of Baris.
Room 15
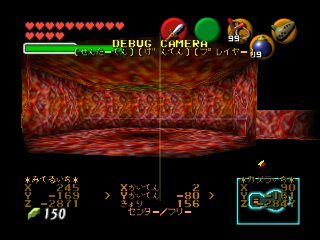
Room 15 is an incomplete duplicate of Barinade's lair. In the retail game, the boss rooms are contained in different maps than their respective dungeons. This may indicate that the boss rooms were once part of their dungeons as well.
Using the Debug ROM's camera function reveals the room's geometry far above.
Checking the map indicates that the room takes up the entirety of the outer region of the lower floor.
Unloaded Actors#
xxx
Unloaded Objects#
- The rightmost room of 1F has two Baris that are not loaded because they are outside the room, suggesting that the room was redesigned.
Exit Differences#
Does not contain any difference.
Spirit Temple#
Unreferenced Setup 01 (Unused)#
Map # |
Map Name |
Map Select # |
Stage # |
|---|---|---|---|
006 |
Spirit Temple |
81 |
N/A |
This is an unreferenced cutscene setup that cannot be accessed via Map Select. It appears to be an alternate version of Farore's portion of the Deku Tree's creation story cutscene.
In order to view the cutscene, the data for Unreferenced Setup 01, found at 0x02AF4860, was copied to the offset 0x2077950 (Kokiri Forest). It differs from Kokiri Forest's Setup 04 in a few ways. For example, the fog in the Spirit Temple version of the scene fades much more quickly, and the cutscene finishes a little faster.
These differences can be seen in the video on the right, which compares Unreferenced Setup 01 (left side) with Kokiri Forest Setup 04 (right side).
In addition, despite appearing in a scene file, Unreferenced Setup 01 references a list of actors to load for the setup. This is unusual because, normally, actor lists are only referred to in room files.
Environment Settings#
xxx
Layout Differences#
Many of the actors are located outside of the bounds of the map, indicating that the layout of the area was changed for the retail game. For example, on the third floor, in the adult side of the temple, the doors are west of where they are located in the final game. This suggests that the rooms were shifted east later on.
No doors are locked or otherwise barred. Perhaps Nintendo had not fully planned out how the player would complete the dungeon at this stage, or had simply not implemented barriers in order to make testing quicker.
There is also an extra door on the first floor of the adult side of the temple, with the transitional actor set up to load room 12. In the retail game, the first floor of the Spirit Temple is almost symmetrical. However, there is a circle of rooms on the child side of the temple that all link to each other, creating a loop. A similar configuration of rooms is present on the adult side of the temple, except that the room at the top of its loop is only linked on one side.
At the time this cutscene was created, the first floor of the temple was perfectly symmetrical. (This is also evidenced by the fact that there is a blank Spirit Temple minimap in the game's files that corresponds to the missing room at the top of the loop.) The extra door existed to close the adult side's loop.
This version of the Spirit Temple is very messy: no puzzles work correctly, there are no chests or items, and several objects are out of the map or in the wrong places. It’s not possible to be sure if the rooms were much different from the final version. This unused setup shows various mixed setups from different generations, and there's no way to be certain how the older versions of this temple looked.
Scene#
Interestingly, the scene header loads actors. There are 15 actors in total, loaded for all rooms.
Actor |
X |
Y |
Z |
Rot X |
Rot Y |
Rot Z |
Variable |
Observation |
|---|---|---|---|---|---|---|---|---|
0000 |
0005 |
FFBA |
02EC |
0000 |
8000 |
0000 |
0FFF |
Spawn Point |
0000 |
FFF6 |
FFBA |
02F9 |
0000 |
8000 |
0000 |
0FFF |
Spawn Point |
012A |
062C |
032D |
0075 |
0000 |
C000 |
0000 |
FF00 |
Dungeon Switch |
0150 |
FC68 |
01B8 |
FCB8 |
0000 |
0000 |
0000 |
FF10 |
Sun Switch |
0150 |
FB13 |
0409 |
FD3A |
4000 |
0000 |
0000 |
FF10 |
Sun Switch |
00FF |
035C |
0032 |
FC36 |
0000 |
8000 |
0000 |
FFC3 |
Push Block |
00FF |
FE98 |
032D |
FE52 |
0000 |
4000 |
0000 |
FFC3 |
Push Block |
006B |
01B6 |
0325 |
00CF |
0000 |
0000 |
0000 |
FFFF |
Flying Tiles |
006B |
0256 |
0325 |
00CF |
0000 |
0000 |
0000 |
FFFF |
Flying Tiles |
006B |
02F6 |
0325 |
00CF |
0000 |
0000 |
0000 |
FFFF |
Flying Tiles |
006B |
0206 |
0325 |
007F |
0000 |
0000 |
0000 |
FFFF |
Flying Tiles |
006B |
02A6 |
0325 |
007F |
0000 |
0000 |
0000 |
FFFF |
Flying Tiles |
006B |
0206 |
0325 |
011F |
0000 |
0000 |
0000 |
FFFF |
Flying Tiles |
006B |
02A6 |
0325 |
011F |
0000 |
0000 |
0000 |
FFFF |
Flying Tiles |
0008 |
02FC |
0032 |
FE2F |
0000 |
1555 |
0000 |
03F0 |
Flames |
0008 |
FD03 |
0032 |
FE2F |
0000 |
EAAB |
0000 |
03F0 |
Flames |
00F9 |
FB44 |
0715 |
FB46 |
0000 |
0000 |
0000 |
0000 |
Giant Rolling Boulder |
Room #1#
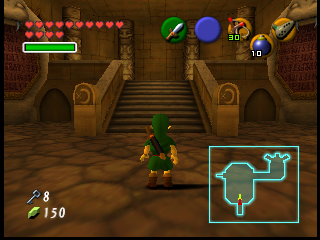
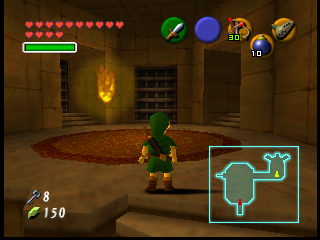
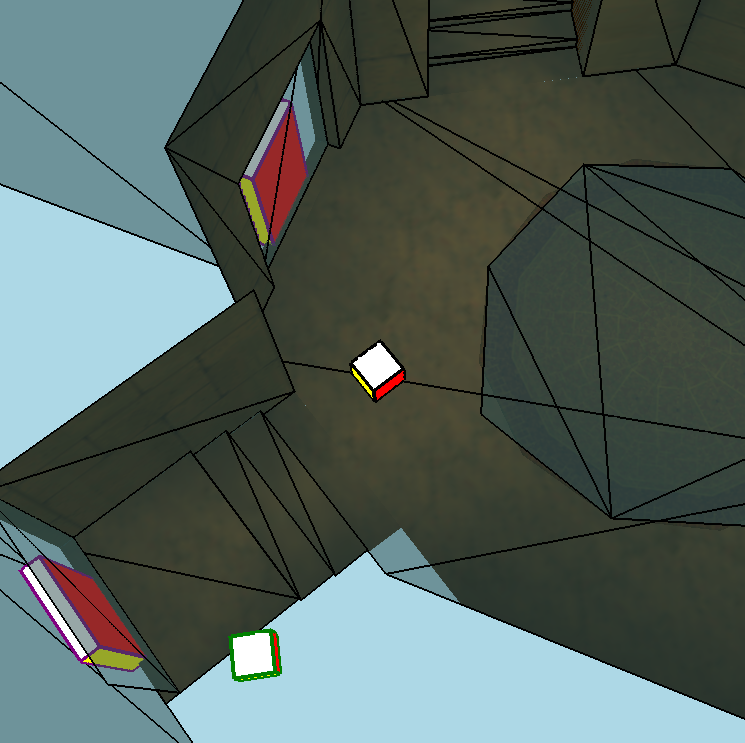
There are two spawn points at the entrance to the temple. For some reason, these points are positioned very high above the ground, perhaps suggesting that an earlier version of this temple had fewer stairs.
Additionally, in the Adult Link area, there is a flame actor in the exact same position but inverted compared to the one in the Child Link area.
Room #2#
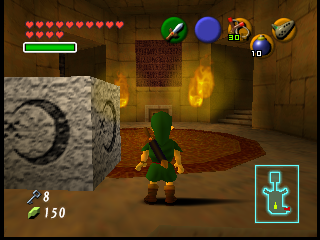

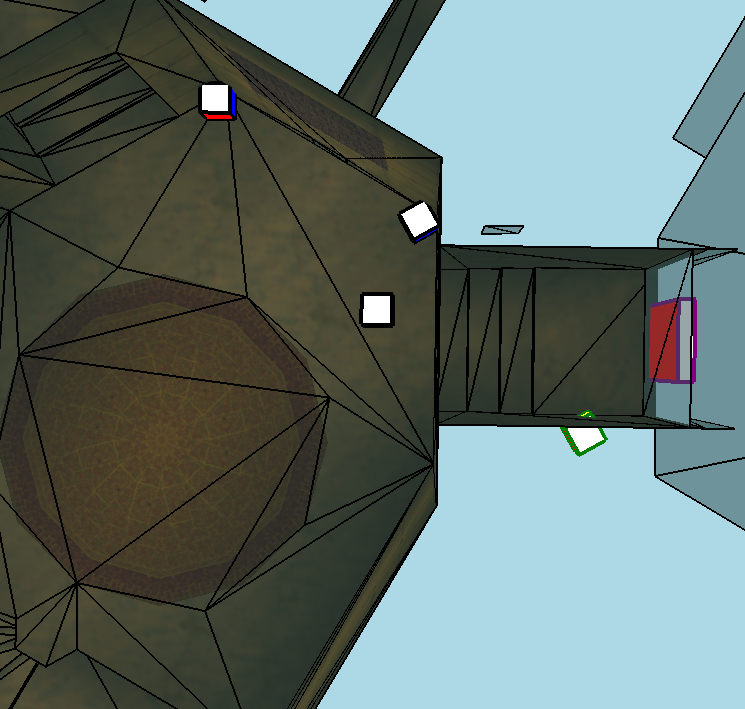
This is the first room that Child Link enters by crawling through a hole.
It has two more flames on the wall of the hole used to crawl through and get to the statue room. In addition, in the final version, there is a collision remnant near the door on the right that we will explore later.
There is also a pushable block that will fall as soon as you enter the room. For some reason, this block spawns very close to the room with the sun switch blocks. Perhaps this block was mistakenly placed in room 2 and perhaps the room with the blocks was a little lower than in this setup.
Room #3#
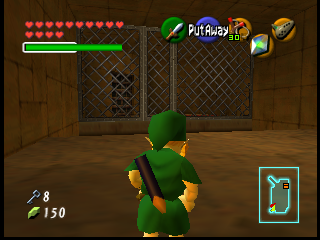


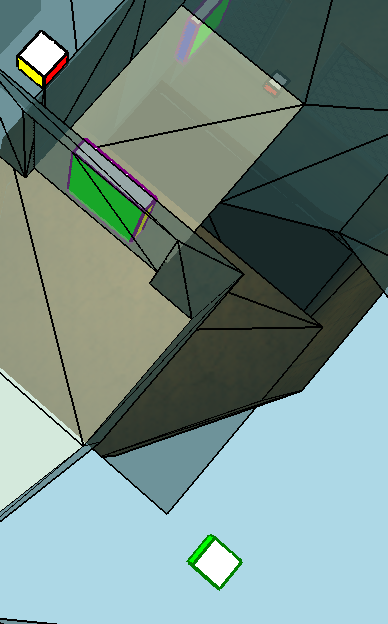
This room has a Hookshot target that is close to the room where the mirror puzzle occurs to activate the elevator that will take you to the statue's head. Interestingly, if we invert the coordinates of this actor, he will appear exactly above the room from Zelda's Lullaby song. It is possible that exactly the same room would be in this empty space.
Room #4#
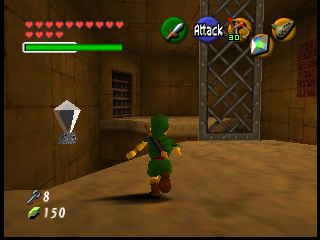
The floating switch seems to indicate that this room was edited and would've had floor to support the switch.
Room #5#
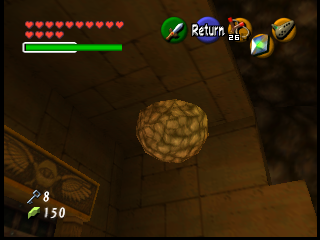
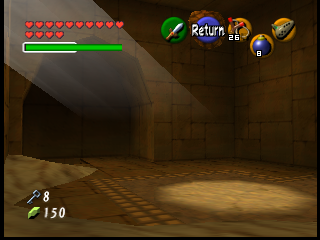
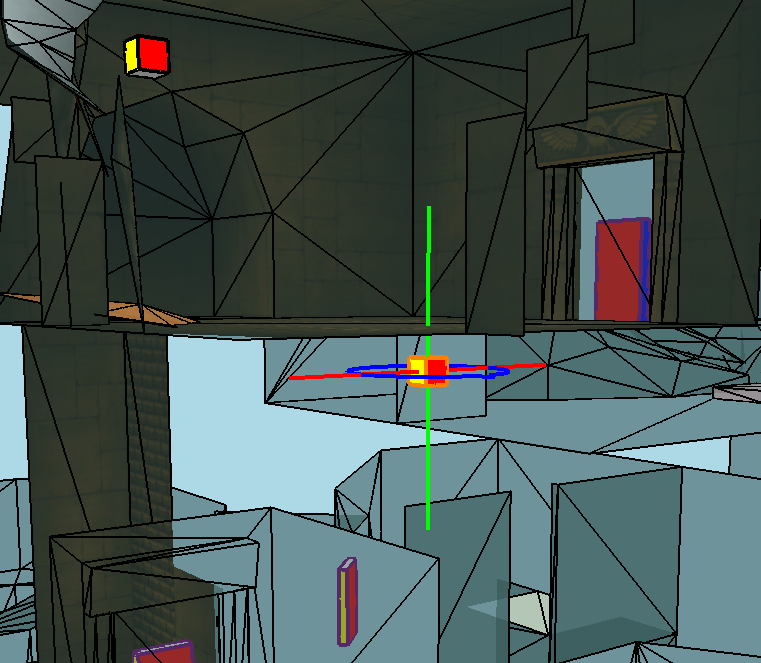
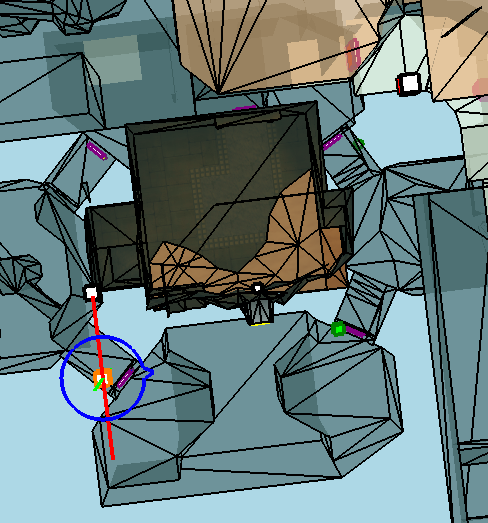
This room already has the boulder puzzle where you need to blow up the wall to let sunlight in. For some reason, there are two rolling boulders that are on top and fall into this room and look very misaligned with the room.
Room #6#
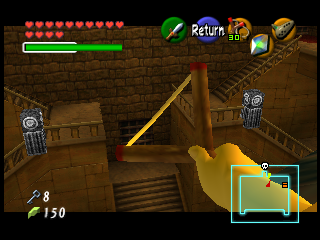
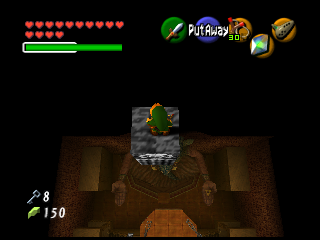
The main room of the statue, apparently the elevator structure and the statue's face are in the proper places as in the final version. The novelty here are the Hookshoot pillars that are added on each side of the stairs; however, there is another Hookshoot pillar much higher up, outside the map, so it is not possible to know if it is just there because it was forgotten or if the map had some difference.
Room #7#
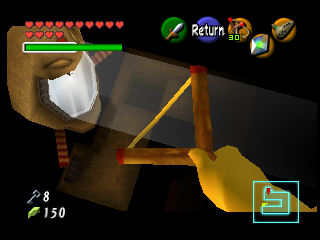
This is the room that connects to the first room in the temple. You push the blocks until you reach an elevator. The snake mirror that's used in the mirror room is placed outside the map boundaries. It's possible that the mirror room itself was located further down.
Room #8#
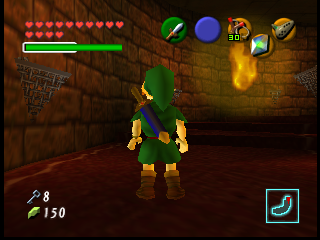

It's the staircase room that connects the statue room with the block room, it has a fire actor in the middle of this corridor, and for some reason we also have a snake mirror below the mirror puzzle room and it's at the same height as the actor in the previous room #7.
Room #9#
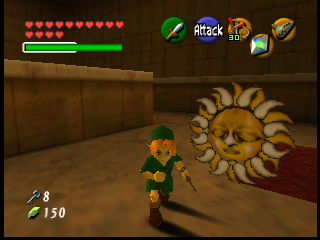
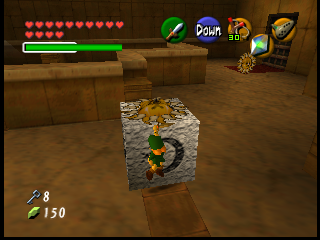
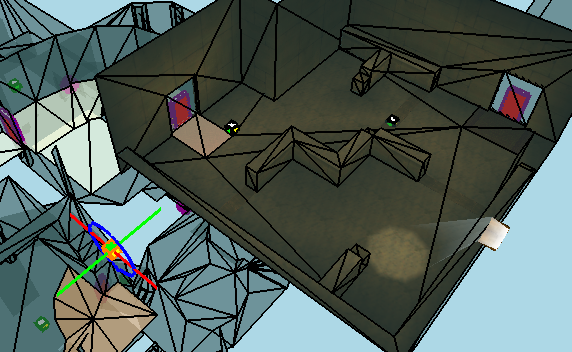
It's the room with the block and sun switch puzzles, nothing special here, except for one Sun Switch that is next to the door and facing the opposite way. Outside the room's boundaries, there is also another Sun Switch with its face down, perhaps indicating that this room has been moved.
Room #10#
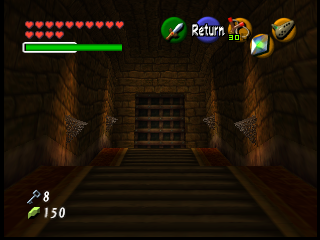
An empty corridor.
Room #11#
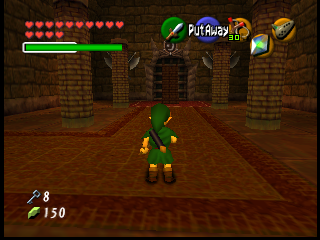
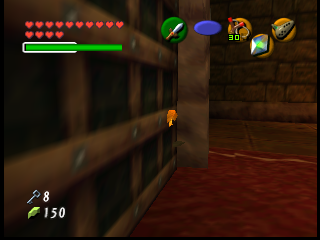
The sub-boss' room in the Child Link area, and it's empty. Apparently everything is the same as the final version's configuration, except for the gate. This gate that leads to the outside is a little further inside the room than in the final version.
Room #12#
These are the corridors for the two exits of the temple.
Room #13#

There is a second gate in the room next to where Zelda's Lullaby is played, and the main gate is a little away from the collision. This room was certainly larger and different from the final version, and apparently it is empty in this setup.
Room #14#
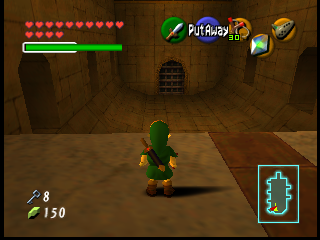
This is the room where the rolling boulders block you, and it's empty. The only difference is that the door takes you to another room that is further away from the collision, and Link can go through it.
Room #15#
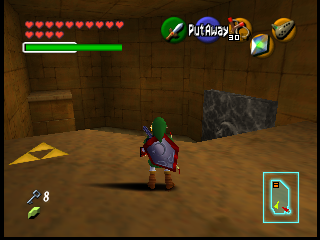
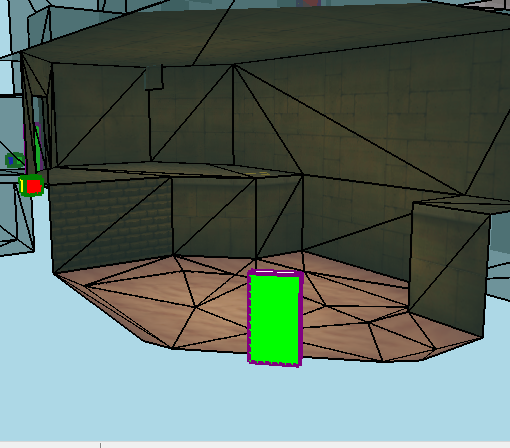
This room where Link plays Zelda's Lullaby is empty but contains scene actors that apparently fit here, a large Silver Gauntlet block fits in this room, furthermore next to this block there is an extra gate that does not exist in the final version; this gate takes Link to room 13.
Room #16#
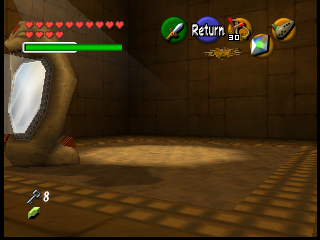
There's something wrong with the setup in this room: The snake mirror is misaligned, and we also have a floating sun switch. There's no way to tell if the room was different here.
Room #17#
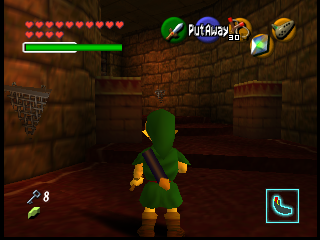
An empty corridor leading to the Anubis puzzle room.
Room #18#
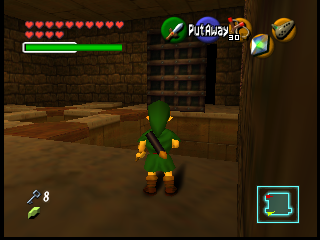
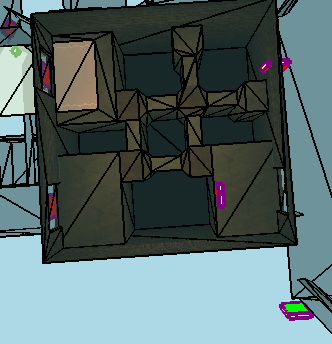
This Anubis room you reach as Adult Link would've been a bit smaller and might not have had chasms. The door is placed forward from the doorway, indicating this room was redesigned.
Room #19#
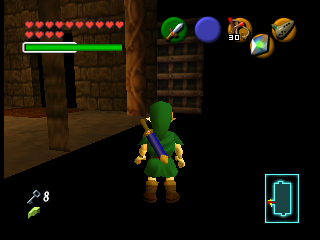
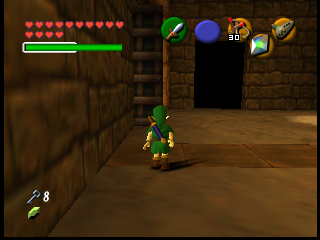
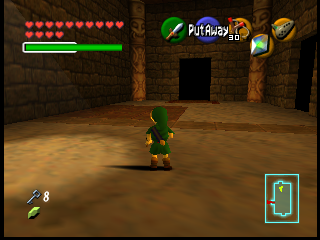
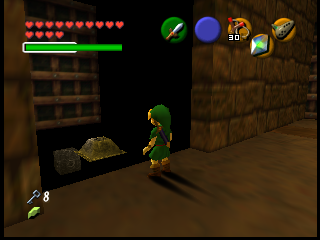
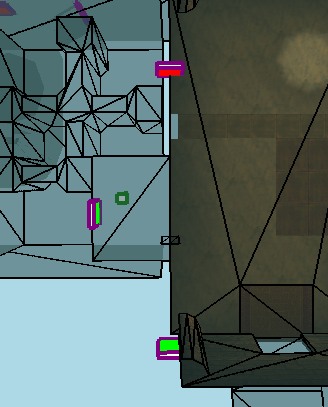
This room, based on the unused setup, should be a little different from the final version. It is a little dragged, and the gates do not fit in the collision correctly. This room looks empty, but for some reason the scene header has an actor for a switch near the gate of the Anubis room. In the final version, there is a switch for Armos to use, although it is not possible to understand what they wanted to do with this setup.
Room #20#
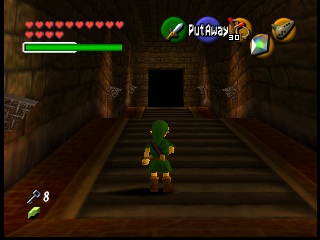
The corridor leading to the mid-boss area is empty and the gates are misaligned.
Room #21#
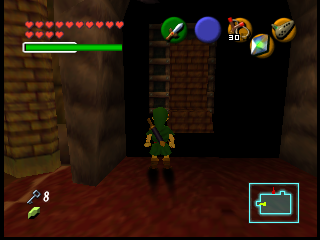
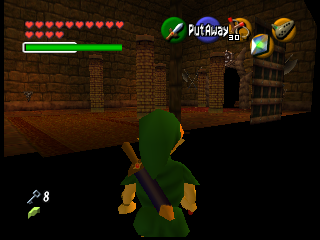
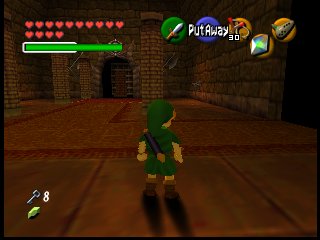
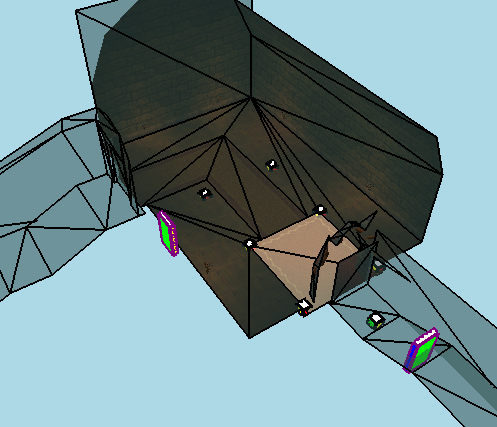
The battle room against the Iron Knuckle from the exit to the Mirror Shield. Clearly, this room was dragged and apparently the actors are out of position, but the room was exactly the same as in the final version.
Room #22#
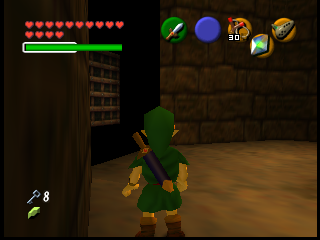
An empty room, except for the simple fact that the room's gate was displaced.
Room #23#
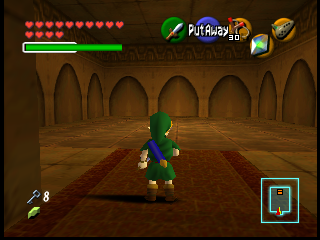
Simple empty room.
Room #24#
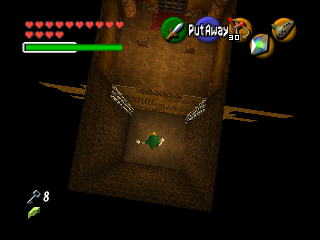
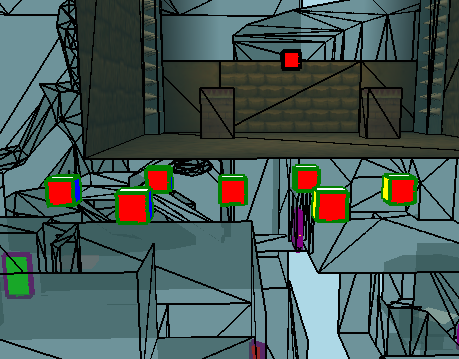
Climbable wall room with spikes. In this version the whole wall moves, while in the final version the middle of the wall is immobile. In this room below the floor, there are five flying tile actors generated by the scene header, but the format in which these actors are distributed is incompatible with the room.
Room #25#
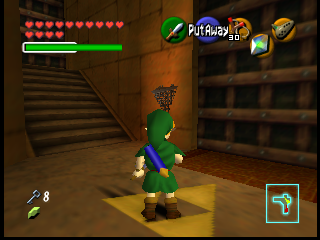
The corridor with a Triforce on the floor, but it's completely empty.
Room #26#
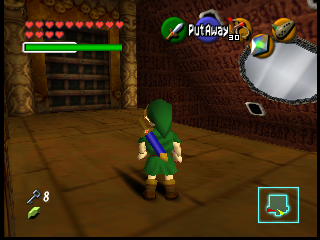
Statue elevator room, but it's completely empty.
Room #27#
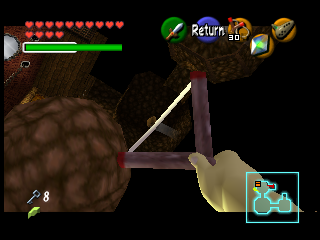
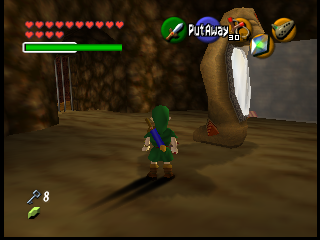
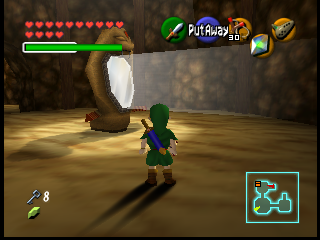

The snake mirror room. All the elements to activate the puzzle here seem ready, but there are no actors to activate the elevator. For some reason, there is a boulder outside the map, and it's misaligned.

A snake mirror from room 7 and 8 appears slightly below room 27, perhaps indicating that this room was raised slightly during development.

In room 5 there are two boulders that spawn near room 27, and an extra boulder as shown in the scene header. This indicates that there was another large room in the past which has since been removed, although this current setup does not feature a gate to reach this area.
Room #28#
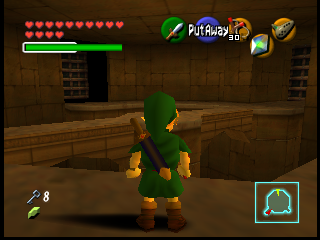
The Anubis Puzzle Room, but its completely empty. One of the doors is misaligned.
Room #29#
The boss' room, which is exactly the same as the final version.
Unloaded Actors#
xxx
Unloaded Objects#
Most of the actors loaded by the room files will fail to spawn, as the room headers lack references to an object list.
|
|
To do: |
Exit Differences#
The map has only two spawn points, instead of the usual four. Both spawn Link a short distance above the floor, in relatively the same spot. This indicates that the level of the ground was once different.
In addition, only three of the four exits are properly defined. The main exit to the Desert Colossus is the only one that is still the same as in normal gameplay.
Setup 00 |
|
|---|---|
No. |
Exit From |
01E1 |
Desert Colossus |
008D |
Spirit Temple Boss |
01E5 |
Desert Colossus |
01E9 |
Desert Colossus |
Unreferenced Setup 02 (Unused)#
Map # |
Map Name |
Map Select # |
Stage # |
|---|---|---|---|
006 |
Spirit Temple |
81 |
N/A |
Unused Cutscene B ✘
This is the cutscene environment in which xxx.
Environment Settings#
xxx
Layout Differences#
xxx
Unloaded Actors#
xxx
Unloaded Objects#
xxx
Exit Differences#
Setup 00 |
|
|---|---|
No. |
Exit From |
01E1 |
Desert Colossus |
008D |
Spirit Temple Boss |
01E5 |
Desert Colossus |
01E9 |
Desert Colossus |
Ice Cavern#
Setup 04 - Learning the Serenade of Water#
Map # |
Map Name |
Map Select # |
Stage # |
|---|---|---|---|
009 |
Ice Cavern |
86 |
00 |
This is the cutscene environment in which Link learns the Serenade of Water.
Environment Settings#
xxx
Layout Differences#
Many of the rooms in this setup are only half-textured. This is due to a lack of object transition maps. By adding them to the setup, it is possible to fully explore the dungeon.
All the doors in the dungeon are the wooden type that appears in the Forest Temple.
This version of the cavern contains no enemies, only Blue Fire and Red Ice.
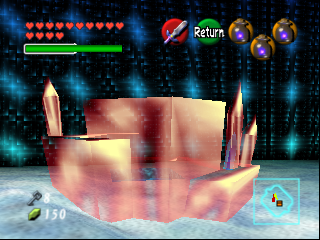
In the room with the Iron Boots, there is a large chunk of red ice that can be melted with Blue Fire. This red ice was possibly removed to prevent backtracking since the path that leads to this room has red ice that requires melting, and if the player didn't carry Blue Fire in more than one bottle, going back would've been necessary.
Unloaded Actors#
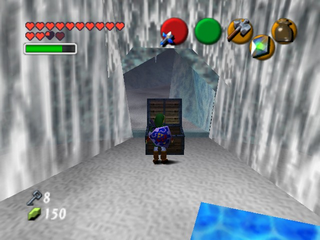
The ice helix room contains an actor for a chest with Bombchus inside.
Unloaded Objects#
xxx
Exit Differences#
Does not contain any difference.
Iron Knuckle's Lair#
Setup 04 - Koume & Kotake Order the Iron Knuckle to Fight#
Map # |
Map Name |
Map Select # |
Stage # |
|---|---|---|---|
023 |
Iron Knuckle's Lair |
83 |
00 |
Different The End cutscene?
This is the cutscene environment in which Koume and Kotake order the Iron Knuckle to fight.
Environment Settings#
xxx
Layout Differences#
xxx
Unloaded Actors#
xxx
Unloaded Objects#
xxx
Exit Differences#
Does not contain any difference.
Setup 05 - The Iron Knuckle Is Defeated#
Map # |
Map Name |
Map Select # |
Stage # |
|---|---|---|---|
023 |
Iron Knuckle's Lair |
83 |
01 |
This is the cutscene environment in which the Iron Knuckle is defeated.
Environment Settings#
xxx
Layout Differences#
xxx
Unloaded Actors#
xxx
Unloaded Objects#
xxx
Exit Differences#
Does not contain any difference.
Setup 06 - Nabooru Is Transformed#
Map # |
Map Name |
Map Select # |
Stage # |
|---|---|---|---|
023 |
Iron Knuckle's Lair |
83 |
02 |
This is the cutscene environment in which Nabooru is transformed into an Iron Knuckle by Koume and Kotake during the title demo.
Environment Settings#
xxx
Layout Differences#
xxx
Unloaded Actors#
xxx
Unloaded Objects#
xxx
Exit Differences#
Setup 00 |
|
|---|---|
No. |
Exit From |
02F5 |
Spirit Temple |
Link's House#
Setup 04 - Awoken by Navi#
Map # |
Map Name |
Map Select # |
Stage # |
|---|---|---|---|
052 |
Link's House |
44 |
00 |
This is the cutscene environment in which Navi wakes Link from his nightmare.
Environment Settings#
xxx
Layout Differences#
This version of Link's House lacks the green target spot where the player can check their high scores, as well as the breakable pot near his bed.
Unloaded Actors#
None.
Unloaded Objects#
Number |
Filename |
ID |
|---|---|---|
000E |
object_box |
Treasure Chest |
0029 |
object_o_anime |
Animation File |
0034 |
object_oE_anime |
Kokiri Animations |
004B |
object_oE3 |
Early Saria |
Exit Differences#
None.
Setup 05 - Opening#
Map # |
Map Name |
Map Select # |
Stage # |
|---|---|---|---|
052 |
Link's House |
44 |
01 |
This is the cutscene environment in which the Deku Tree introduces himself during the opening sequence.
Environment Settings#
xxx
Layout Differences#
This version of Link's House lacks the green target spot where the player can check their high scores, as well as the breakable pot near his bed.
Unloaded Actors#
xxx
Unloaded Objects#
Number |
Filename |
ID |
|---|---|---|
000E |
object_box |
Treasure Chest |
0029 |
object_o_anime |
Animation File |
0034 |
object_oE_anime |
Kokiri Animations |
004B |
object_oE3 |
Early Saria |
Exit Differences#
None.
Great Fairy's Fountain (Upgrades)#
Setup 04 - Receiving the Spin Attack#
Map # |
Map Name |
Map Select # |
Stage # |
|---|---|---|---|
059 |
Great Fairy's Fountain (Upgrades) |
27 |
00 |
This is the cutscene environment in which Link receives the Spin Attack from the Great Fairy.
Environment Settings#
xxx
Layout Differences#
xxx
Unloaded Actors#
xxx
Unloaded Objects#
xxx
Exit Differences#
xxx
Setup 05 - Receiving the Enhanced Magic Meter#
Map # |
Map Name |
Map Select # |
Stage # |
|---|---|---|---|
059 |
Great Fairy's Fountain (Upgrades) |
27 |
01 |
This is the cutscene environment in which Link receives the enhanced Magic Meter from the Great Fairy.
Environment Settings#
xxx
Layout Differences#
xxx
Unloaded Actors#
xxx
Unloaded Objects#
xxx
Exit Differences#
xxx
Setup 06 - Receiving Enhanced Defensive Power#
Map # |
Map Name |
Map Select # |
Stage # |
|---|---|---|---|
059 |
Great Fairy's Fountain (Upgrades) |
27 |
02 |
This is the cutscene environment in which Link receives enhanced defensive power from the Great Fairy.
Environment Settings#
xxx
Layout Differences#
xxx
Unloaded Actors#
xxx
Unloaded Objects#
xxx
Exit Differences#
xxx
Great Fairy's Fountain (Spells)#
Setup 04 - Receiving Farore's Wind#
Map # |
Map Name |
Map Select # |
Stage # |
|---|---|---|---|
061 |
Great Fairy's Fountain (Spells) |
29 |
00 |
This is the cutscene environment in which Link receives Farore's Wind from the Great Fairy.
Environment Settings#
xxx
Layout Differences#
xxx
Unloaded Actors#
xxx
Unloaded Objects#
xxx
Exit Differences#
xxx
Setup 05 - Receiving Din's Fire#
Map # |
Map Name |
Map Select # |
Stage # |
|---|---|---|---|
061 |
Great Fairy's Fountain (Spells) |
29 |
01 |
This is the cutscene environment in which Link receives Din's Fire from the Great Fairy.
Environment Settings#
xxx
Layout Differences#
xxx
Unloaded Actors#
xxx
Unloaded Objects#
xxx
Exit Differences#
xxx
Setup 06 - Receiving Nayru's Love#
Map # |
Map Name |
Map Select # |
Stage # |
|---|---|---|---|
061 |
Great Fairy's Fountain (Spells) |
29 |
02 |
This is the cutscene environment in which Link receives Nayru's Love from the Great Fairy.
Environment Settings#
xxx
Layout Differences#
xxx
Unloaded Actors#
xxx
Unloaded Objects#
xxx
Exit Differences#
xxx
Royal Family's Tomb#
Setup 04#
xxx
Environment Settings#
xxx
Layout Differences#
xxx
Unloaded Actors#
xxx
Unloaded Objects#
xxx
Exit Differences#
Does not contain any difference.
Setup 05#
Environment Settings#
xxx
Layout Differences#
xxx
Unloaded Actors#
xxx
Unloaded Objects#
xxx
Exit Differences#
Does not contain any difference.
Shooting Gallery#
Setup 05 - (Unused)#
Map # |
Map Name |
Map Select # |
Stage # |
|---|---|---|---|
066 |
Shooting Gallery |
22 |
01 |
Cutscene - xxx ✘
This is the cutscene environment in which xxx.
Environment Settings#
This setup plays the music for the indoor house theme rather than the traditional music used for the Shooting Gallery.
Layout Differences#
xxx
Unloaded Actors#
xxx
Unloaded Objects#
Number |
Filename |
ID |
|---|---|---|
00B6 |
object_gi_melody |
Music Note |
Exit Differences#
Number |
Exit From |
Exit To |
|---|---|---|
03BC |
Market (Child - Day) |
Bombchu Bowling Alley |
Setup 06 - (Unused)#
Map # |
Map Name |
Map Select # |
Stage # |
|---|---|---|---|
066 |
Shooting Gallery |
22 |
02 |
Cutscene - xxx ✘
This is the cutscene environment in which xxx.
Environment Settings#
xxx
Layout Differences#
xxx
Unloaded Actors#
xxx
Unloaded Objects#
xxx
Exit Differences#
Number |
Exit From |
Exit To |
|---|---|---|
03BC |
Market (Child - Day) |
Bombchu Bowling Alley |
Temple of Time#
Setup 04 - Returning From the Chamber of Sages#
Map # |
Map Name |
Map Select # |
Stage # |
|---|---|---|---|
067 |
Temple of Time |
20 |
00 |
This is the cutscene environment in which Link returns from the Chamber of Sages for the first time.
Environment Settings#
xxx
Layout Differences#
xxx
Unloaded Actors#
xxx
Unloaded Objects#
xxx
Exit Differences#
Does not contain any difference.
Setup 05 - Farewell to Navi#
Map # |
Map Name |
Map Select # |
Stage # |
|---|---|---|---|
067 |
Temple of Time |
20 |
01 |
This is the cutscene environment in which Link bids farewell to Navi at the end of the game.
Environment Settings#
xxx
Layout Differences#
xxx
Unloaded Actors#
xxx
Unloaded Objects#
xxx
Exit Differences#
Does not contain any difference.
Setup 06 - Learning the Prelude of Light#
Map # |
Map Name |
Map Select # |
Stage # |
|---|---|---|---|
067 |
Temple of Time |
20 |
02 |
This is the cutscene environment in which Link learns the Prelude of Light.
Environment Settings#
xxx
Layout Differences#
xxx
Unloaded Actors#
xxx
Unloaded Objects#
xxx
Exit Differences#
Does not contain any difference.
Setup 07 - Opening the Door of Time#
Map # |
Map Name |
Map Select # |
Stage # |
|---|---|---|---|
067 |
Temple of Time |
20 |
03 |
This is the cutscene environment in which Link opens the Door of Time.
Environment Settings#
xxx
Layout Differences#
xxx
Unloaded Actors#
xxx
Unloaded Objects#
xxx
Exit Differences#
Does not contain any difference.
Setup 08 - Visions of the Kokiri's Emerald (Unused)#
Map # |
Map Name |
Map Select # |
Stage # |
|---|---|---|---|
067 |
Temple of Time |
20 |
04 |
This is an unused cutscene environment in which the camera focuses on the Kokiri Emerald on the altar in the Temple of Time, before cutting to the entrance of the Sacred Forest Meadow.
Environment Settings#
xxx
Layout Differences#
xxx
Unloaded Actors#
xxx
Unloaded Objects#
xxx
Exit Differences#
Does not contain any difference.
Setup 09 - Visions of the Goron's Ruby (Unused)#
Map # |
Map Name |
Map Select # |
Stage # |
|---|---|---|---|
067 |
Temple of Time |
20 |
05 |
This is an unused cutscene environment in which the camera focuses on the Goron's Ruby on the altar in the Temple of Time, before cutting to the entrance of Death Mountain Crater.
Environment Settings#
xxx
Layout Differences#
xxx
Unloaded Actors#
xxx
Unloaded Objects#
xxx
Exit Differences#
Does not contain any difference.
Setup 10 - Visions of Zora's Sapphire (Unused)#
Map # |
Map Name |
Map Select # |
Stage # |
|---|---|---|---|
067 |
Temple of Time |
20 |
06 |
This is an unused cutscene environment in which the camera focuses on the Zora's Sapphire on the altar in the Temple of Time, before cutting to the entrance of Lake Hylia.
Environment Settings#
xxx
Layout Differences#
xxx
Unloaded Actors#
xxx
Unloaded Objects#
xxx
Exit Differences#
Does not contain any difference.
Setup 11 - Learning the Song of Time#
Map # |
Map Name |
Map Select # |
Stage # |
|---|---|---|---|
067 |
Temple of Time |
20 |
07 |
This is the cutscene environment in which Link learns the Song of Time.
Environment Settings#
xxx
Layout Differences#
xxx
Unloaded Actors#
xxx
Unloaded Objects#
xxx
Exit Differences#
Does not contain any difference.
Setup 12 - Sheik Tells of the Triforce#
Map # |
Map Name |
Map Select # |
Stage # |
|---|---|---|---|
067 |
Temple of Time |
20 |
08 |
This is the cutscene environment in which Sheik tells Link of the Triforce.
Environment Settings#
xxx
Layout Differences#
xxx
Unloaded Actors#
xxx
Unloaded Objects#
xxx
Exit Differences#
Does not contain any difference.
Setup 13 - Sheik's Identity Revealed#
Map # |
Map Name |
Map Select # |
Stage # |
|---|---|---|---|
067 |
Temple of Time |
20 |
09 |
This is the cutscene environment in which Sheik reveals herself to be Princess Zelda.
Environment Settings#
xxx
Layout Differences#
xxx
Unloaded Actors#
xxx
Unloaded Objects#
xxx
Exit Differences#
Does not contain any difference.
Setup 14 - Receiving the Light Arrows#
Map # |
Map Name |
Map Select # |
Stage # |
|---|---|---|---|
067 |
Temple of Time |
20 |
0A |
This is the cutscene environment in which Link receives the Light Arrows.
Environment Settings#
xxx
Layout Differences#
xxx
Unloaded Actors#
xxx
Unloaded Objects#
xxx
Exit Differences#
Does not contain any difference.
Chamber of the Sages#
Setup 04 - Awakening in the Sacred Realm#
Map # |
Map Name |
Map Select # |
Stage # |
|---|---|---|---|
068 |
Chamber of the Sages |
21 |
00 |
This is the cutscene environment in which Link awakens in the Sacred Realm for the first time.
Environment Settings#
xxx
Layout Differences#
xxx
Unloaded Actors#
xxx
Unloaded Objects#
xxx
Exit Differences#
Does not contain any difference.
Setup 05 - All the Sages Have Been Awakened#
Map # |
Map Name |
Map Select # |
Stage # |
|---|---|---|---|
068 |
Chamber of the Sages |
21 |
01 |
This is the cutscene environment in which all the Sages have been awakened.
Environment Settings#
xxx
Layout Differences#
xxx
Unloaded Actors#
Actor |
Filename |
ID |
Object |
Variable |
ID |
|---|---|---|---|---|---|
00D2 |
ovl_En_Ru2 |
Adult Ruto |
00CA |
0000 |
??? |
Unloaded Objects#
xxx
Exit Differences#
Does not contain any difference.
Setup 06 - Opening the Door to the Sacred Realm#
Map # |
Map Name |
Map Select # |
Stage # |
|---|---|---|---|
068 |
Chamber of the Sages |
21 |
02 |
This is the cutscene environment in which Link opens the door to the Sacred Realm.
Environment Settings#
xxx
Layout Differences#
xxx
Unloaded Actors#
xxx
Unloaded Objects#
xxx
Exit Differences#
Does not contain any difference.
Castle Hedge Maze (Day)#
Unreferenced Setup 01 (Unused)#
Map # |
Map Name |
Map Select # |
Stage # |
|---|---|---|---|
069 |
Castle Hedge Maze (Day) |
23 |
N/A |
This is an unreferenced setup that cannot be accessed via Map Select. It appears to be an unused version of Hyrule Castle Courtyard.
If one checks Link's location on the world map while in the scene, it suggests he is in Hyrule Field.
|
|
To do: |
Environment Settings#
xxx
Layout Differences#
xxx
Unloaded Actors#
xxx
Unloaded Objects#
xxx
Exit Differences#
Does not contain any difference.
Cutscene Map#
Setup 04 - The Goddesses Descend#
Map # |
Map Name |
Map Select # |
Stage # |
|---|---|---|---|
071 |
Cutscene Map |
115 |
00 |
This is the cutscene environment in which the Goddesses descend, during the Great Deku Tree's creation story.
Environment Settings#
xxx
Layout Differences#
xxx
Unloaded Actors#
xxx
Unloaded Objects#
xxx
Exit Differences#
Has no exits.
Setup 05 - Ganondorf Rides Through the Flames#
Map # |
Map Name |
Map Select # |
Stage # |
|---|---|---|---|
071 |
Cutscene Map |
115 |
01 |
This is the cutscene environment in which Ganondorf rides through the flames.
Environment Settings#
xxx
Layout Differences#
xxx
Unloaded Actors#
xxx
Unloaded Objects#
xxx
Exit Differences#
Has no exits.
Setup 06 - The Triforce Is Formed#
Map # |
Map Name |
Map Select # |
Stage # |
|---|---|---|---|
071 |
Cutscene Map |
115 |
02 |
This is the cutscene environment in which the Triforce is formed, during the Great Deku Tree's creation story.
Environment Settings#
xxx
Layout Differences#
xxx
Unloaded Actors#
xxx
Unloaded Objects#
xxx
Exit Differences#
Has no exits.
Setup 07 - Ganondorf Infiltrates the Sacred Realm#
Map # |
Map Name |
Map Select # |
Stage # |
|---|---|---|---|
071 |
Cutscene Map |
115 |
03 |
This is the cutscene environment in which Ganondorf infiltrates the Sacred Realm.
Environment Settings#
xxx
Layout Differences#
xxx
Unloaded Actors#
xxx
Unloaded Objects#
xxx
Exit Differences#
Has no exits.
Setup 08 - Sheik Tells of the Triforce#
Map # |
Map Name |
Map Select # |
Stage # |
|---|---|---|---|
071 |
Cutscene Map |
115 |
04 |
This is the cutscene environment in which Sheik tells Link about the Triforce.
Environment Settings#
xxx
Layout Differences#
xxx
Unloaded Actors#
xxx
Unloaded Objects#
xxx
Exit Differences#
Has no exits.
Setup 09 - The Deku Tree Sprout Reveals Link's Heritage#
Map # |
Map Name |
Map Select # |
Stage # |
|---|---|---|---|
071 |
Cutscene Map |
115 |
05 |
This is the cutscene environment in which the Deku Tree Sprout reveals Link's true heritage.
Environment Settings#
xxx
Layout Differences#
xxx
Unloaded Actors#
xxx
Unloaded Objects#
xxx
Exit Differences#
Has no exits.
Setup 10 - Ganondorf Rides Through the Flames (Unused)#
Map # |
Map Name |
Map Select # |
Stage # |
|---|---|---|---|
071 |
Cutscene Map |
115 |
06 |
Cutscene - ✘? Unused? Goes to title screen...
This is the cutscene environment in which xxx.
Environment Settings#
xxx
Layout Differences#
xxx
Unloaded Actors#
xxx
Unloaded Objects#
xxx
Exit Differences#
Has no exits.
Setup 11 - Child Zelda Tells of the Triforce & The Temple of Time#
Map # |
Map Name |
Map Select # |
Stage # |
|---|---|---|---|
071 |
Cutscene Map |
115 |
07 |
This is the cutscene environment in which Child Zelda tells Link about the Triforce and the Temple of Time.
Environment Settings#
xxx
Layout Differences#
xxx
Unloaded Actors#
xxx
Unloaded Objects#
xxx
Exit Differences#
Has no exits.
Setup 12 - A Thwarted Ganondorf Curses His Opposers#
Map # |
Map Name |
Map Select # |
Stage # |
|---|---|---|---|
071 |
Cutscene Map |
115 |
08 |
This is the cutscene environment in which Ganondorf curses Link and the Sages after being sealed in the Sacred Realm at the end of the game.
Environment Settings#
xxx
Layout Differences#
xxx
Unloaded Actors#
xxx
Unloaded Objects#
xxx
Exit Differences#
Has no exits.
Unreferenced Setup 01 (Unused)#
Map # |
Map Name |
Map Select # |
Stage # |
|---|---|---|---|
071 |
Cutscene Map |
115 |
N/A |
This is an unreferenced setup that cannot be accessed via Map Select. It appears, from the location and number of the setup, to be an unused child (day) version of the cutscene map.
|
|
To do: |
Environment Settings#
Unlike the cutscene setups, Link is set to spawn in a way that makes him both visible and controllable.
Layout Differences#
xxx
Unloaded Actors#
xxx
Unloaded Objects#
xxx
Exit Differences#
Has no exits.
Unreferenced Setup 02 (Unused)#
Map # |
Map Name |
Map Select # |
Stage # |
|---|---|---|---|
071 |
Cutscene Map |
115 |
N/A |
This is an unreferenced setup that cannot be accessed via Map Select. It appears, from the location and number of the setup, to be an unused child (night) version of the cutscene map.
|
|
To do: |
Environment Settings#
Unlike the cutscene setups, Link is set to spawn in a way that makes him both visible and controllable.
Layout Differences#
xxx
Unloaded Actors#
xxx
Unloaded Objects#
xxx
Exit Differences#
Has no exits.
Unreferenced Setup 03 (Unused)#
Map # |
Map Name |
Map Select # |
Stage # |
|---|---|---|---|
071 |
Cutscene Map |
115 |
N/A |
This is an unreferenced setup that cannot be accessed via Map Select. It appears, from the location and number of the setup, to be an unused adult (day) version of the cutscene map.
|
|
To do: |
Environment Settings#
Unlike the cutscene setups, Link is set to spawn in a way that makes him both visible and controllable.
Layout Differences#
xxx
Unloaded Actors#
xxx
Unloaded Objects#
xxx
Exit Differences#
Has no exits.
Unreferenced Setup 04 (Unused)#
Map # |
Map Name |
Map Select # |
Stage # |
|---|---|---|---|
071 |
Cutscene Map |
115 |
N/A |
This is an unreferenced setup that cannot be accessed via Map Select. It appears, from the location and number of the setup, to be an unused adult (night) version of the cutscene map.
|
|
To do: |
Environment Settings#
Unlike the cutscene setups, Link is set to spawn in a way that makes him both visible and controllable.
Layout Differences#
xxx
Unloaded Actors#
xxx
Unloaded Objects#
xxx
Exit Differences#
Has no exits.
Castle Courtyard#
Setup 04 - The End#
Map # |
Map Name |
Map Select # |
Stage # |
|---|---|---|---|
074 |
Castle Courtyard |
31 |
00 |
This is the cutscene environment in which Link approaches Zelda in her courtyard during the ending credits.
Environment Settings#
xxx
Layout Differences#
xxx
Unloaded Actors#
xxx
Unloaded Objects#
xxx
Exit Differences#
Does not contain any difference.
Setup 05 - Meeting Impa 1#
Map # |
Map Name |
Map Select # |
Stage # |
|---|---|---|---|
074 |
Castle Courtyard |
31 |
01 |
This is the cutscene environment in which Link meets Impa and learns Zelda's Lullaby before being escorted out of the castle.
Environment Settings#
xxx
Layout Differences#
xxx
Unloaded Actors#
Actor |
Filename |
ID |
Object |
Variable |
ID |
|---|---|---|---|---|---|
00B3 |
ovl_En_Heishi2 |
Hyrule Castle - Hylian Soldier |
0097 |
FF06 |
Princess Zelda's Guard |
00B3 |
ovl_En_Heishi2 |
Hyrule Castle - Hylian Soldier |
0097 |
FF06 |
Princess Zelda's Guard |
Unloaded Objects#
xxx
Exit Differences#
Does not contain any difference.
Setup 06 - Meeting Impa 2 (Unused)#
Map # |
Map Name |
Map Select # |
Stage # |
|---|---|---|---|
074 |
Castle Courtyard |
31 |
02 |
This is an unused cutscene environment in which Impa introduces herself, then escorts Link out of the castle without teaching him Zelda's Lullaby.
Environment Settings#
xxx
Layout Differences#
xxx
Unloaded Actors#
Actor |
Filename |
ID |
Object |
Variable |
ID |
|---|---|---|---|---|---|
00B3 |
ovl_En_Heishi2 |
Hyrule Castle - Hylian Soldier |
0097 |
FF06 |
Princess Zelda's Guard |
00B3 |
ovl_En_Heishi2 |
Hyrule Castle - Hylian Soldier |
0097 |
FF06 |
Princess Zelda's Guard |
Unloaded Objects#
xxx
Exit Differences#
Does not contain any difference.
Ganon's Tower Collapse Cutscene/Battle Arena#
Setup 04 - The Tower Collapses#
Map # |
Map Name |
Map Select # |
Stage # |
|---|---|---|---|
079 |
Ganon's Tower Collapse Cutscene/Battle Arena |
89 |
00 |
This is the cutscene environment in which Ganon's Tower collapses.
Environment Settings#
xxx
Layout Differences#
xxx
Unloaded Actors#
xxx
Unloaded Objects#
xxx
Exit Differences#
Number |
Exit From |
Exit To |
|---|---|---|
053C |
Inside Ganon's Castle |
Water Medallion Minidungeon |
Hyrule Field#
Setup 04 - Link's Nightmare#

Map # |
Map Name |
Map Select # |
Stage # |
|---|---|---|---|
081 |
Spot 00 - Hyrule Field |
1 |
00 |
This is the cutscene environment from the beginning of the game, where Child Link has a nightmare portending events to come.
Environment Settings#
xxx
Layout Differences#
Hyrule Field is devoid of objects, except at the entrance to Hyrule Castle.
Unloaded Actors#
xxx
Unloaded Objects#
xxx
Exit Differences#
There are potential, fossilized leftovers from when this scene was created. The exit to Zora's River leads to Zora's Domain, and the entrance to Hyrule Castle town leads directly into Hyrule Market. Instead of the Lost Woods, you are taken to Kokiri Forest, near Link's house. Lon Lon Ranch, as a separate area, may not have existed at this point in development.
Setup 00 |
|
|---|---|
No. |
Exit From |
0033 |
Market Entrance (Day) |
00DB |
Kakariko Village |
00EA |
Zora's River - Land Entrance |
04DE |
Lost Woods - Bridge Entrance |
0102 |
Lake Hylia |
0117 |
Gerudo Valley |
0157 |
Lon Lon Ranch |
0276 |
Market Entrance (Day) |
0102 |
Lake Hylia |
036D |
Fairy's Fountain |
003F |
Grotto - xxx |
02AE |
Lon Lon Ranch |
02E2 |
Lon Lon Ranch |
02E6 |
Lon Lon Ranch |
01D9 |
Zora's River - Water Entrance |
Setup 05 - Zelda & Impa Flee Hyrule Castle#
Map # |
Map Name |
Map Select # |
Stage # |
|---|---|---|---|
081 |
Spot 00 - Hyrule Field |
1 |
01 |
This is the cutscene environment in which Zelda and Impa flee from Hyrule Castle, and Link encounters Ganondorf for the first time.
Environment Settings#
xxx
Layout Differences#
xxx
Unloaded Actors#
xxx
Unloaded Objects#
xxx
Exit Differences#
Setup 00 |
|
|---|---|
No. |
Exit From |
0033 |
Market Entrance (Day) |
00DB |
Kakariko Village |
00EA |
Zora's River - Land Entrance |
04DE |
Lost Woods - Bridge Entrance |
0102 |
Lake Hylia |
0117 |
Gerudo Valley |
0157 |
Lon Lon Ranch |
0276 |
Market Entrance (Day) |
0102 |
Lake Hylia |
036D |
Fairy's Fountain |
003F |
Grotto - xxx |
02AE |
Lon Lon Ranch |
02E2 |
Lon Lon Ranch |
02E6 |
Lon Lon Ranch |
01D9 |
Zora's River - Water Entrance |
Setup 06 - Zelda Reminisces About Her Flight From Hyrule Castle#
Map # |
Map Name |
Map Select # |
Stage # |
|---|---|---|---|
081 |
Spot 00 - Hyrule Field |
1 |
02 |
Cutscene - ✔
This is the cutscene environment in which, after revealing herself, Adult Zelda reminisces to Link about her flight from Hyrule Castle.
Environment Settings#
xxx
Layout Differences#
xxx
Unloaded Actors#
xxx
Unloaded Objects#
xxx
Exit Differences#
Setup 00 |
|
|---|---|
No. |
Exit From |
0033 |
Market Entrance (Day) |
00DB |
Kakariko Village |
00EA |
Zora's River - Land Entrance |
04DE |
Lost Woods - Bridge Entrance |
0102 |
Lake Hylia |
0117 |
Gerudo Valley |
0157 |
Lon Lon Ranch |
0276 |
Market Entrance (Day) |
0102 |
Lake Hylia |
036D |
Fairy's Fountain |
003F |
Grotto - xxx |
02AE |
Lon Lon Ranch |
02E2 |
Lon Lon Ranch |
02E6 |
Lon Lon Ranch |
01D9 |
Zora's River - Water Entrance |
Setup 07 - Title Screen Demo#
Map # |
Map Name |
Map Select # |
Stage # |
|---|---|---|---|
081 |
Spot 00 - Hyrule Field |
1 |
03 |
This is the cutscene environment in which Link rides Epona through Hyrule Field during the title sequence.
Environment Settings#
xxx
Layout Differences#
xxx
Unloaded Actors#
xxx
Unloaded Objects#
xxx
Exit Differences#
Setup 00 |
|
|---|---|
No. |
Exit From |
0033 |
Market Entrance (Day) |
00DB |
Kakariko Village |
00EA |
Zora's River - Land Entrance |
04DE |
Lost Woods - Bridge Entrance |
0102 |
Lake Hylia |
0117 |
Gerudo Valley |
0157 |
Lon Lon Ranch |
0276 |
Market Entrance (Day) |
0102 |
Lake Hylia |
036D |
Fairy's Fountain |
003F |
Grotto - xxx |
02AE |
Lon Lon Ranch |
02E2 |
Lon Lon Ranch |
02E6 |
Lon Lon Ranch |
01D9 |
Zora's River - Water Entrance |
Setup 08 - Returning to Hyrule Field Upon Learning the Song of Time#
Map # |
Map Name |
Map Select # |
Stage # |
|---|---|---|---|
081 |
Spot 00 - Hyrule Field |
1 |
04 |
This is the cutscene environment in which the scene returns to Hyrule Field after Child Zelda teaches Link the Song of Time through a telepathic message.
Environment Settings#
xxx
Layout Differences#
xxx
Unloaded Actors#
Actor |
Filename |
ID |
Object |
Variable |
ID |
|---|---|---|---|---|---|
0108 |
ovl_Bg_Umajump |
Horse Jumping Fence |
0100 |
FFFF |
??? |
0108 |
ovl_Bg_Umajump |
Horse Jumping Fence |
0100 |
FFFF |
??? |
Unloaded Objects#
Number |
Filename |
ID |
|---|---|---|
001A |
object_horse |
Epona |
Exit Differences#
Setup 00 |
|
|---|---|
No. |
Exit From |
0033 |
Market Entrance (Day) |
00DB |
Kakariko Village |
00EA |
Zora's River - Land Entrance |
04DE |
Lost Woods - Bridge Entrance |
0102 |
Lake Hylia |
0117 |
Gerudo Valley |
0157 |
Lon Lon Ranch |
0276 |
Market Entrance (Day) |
0102 |
Lake Hylia |
036D |
Fairy's Fountain |
003F |
Grotto - xxx |
02AE |
Lon Lon Ranch |
02E2 |
Lon Lon Ranch |
02E6 |
Lon Lon Ranch |
01D9 |
Zora's River - Water Entrance |
Setup 09 - Credits in Hyrule Field#
Map # |
Map Name |
Map Select # |
Stage # |
|---|---|---|---|
081 |
Spot 00 - Hyrule Field |
1 |
05 |
This is the cutscene environment in which the credits play in Hyrule Field.
Environment Settings#
xxx
Layout Differences#
xxx
Unloaded Actors#
xxx
Unloaded Objects#
Number |
Filename |
ID |
|---|---|---|
002F |
object_spot00_objects |
Drawbridge |
007C |
object_wood02 |
Trees & Shrubbery |
Exit Differences#
Setup 00 |
|
|---|---|
No. |
Exit From |
0033 |
Market Entrance (Day) |
00DB |
Kakariko Village |
00EA |
Zora's River - Land Entrance |
04DE |
Lost Woods - Bridge Entrance |
0102 |
Lake Hylia |
0117 |
Gerudo Valley |
0157 |
Lon Lon Ranch |
0276 |
Market Entrance (Day) |
0102 |
Lake Hylia |
036D |
Fairy's Fountain |
003F |
Grotto - xxx |
02AE |
Lon Lon Ranch |
02E2 |
Lon Lon Ranch |
02E6 |
Lon Lon Ranch |
01D9 |
Zora's River - Water Entrance |
Setup 10 - Escaping Lon Lon Ranch#
Map # |
Map Name |
Map Select # |
Stage # |
|---|---|---|---|
081 |
Spot 00 - Hyrule Field |
1 |
06 |
This is the cutscene environment in which Adult Link escapes Lon Lon Ranch on Epona.
Setup 08, in which the scene returns to Hyrule Field after having cut to Zelda's telepathic message from the Temple of Time, uses the same setup.
Environment Settings#
xxx
Layout Differences#
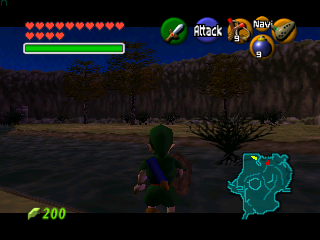
This version of Hyrule Field uses a different greenery setup than that of the final game. Some of the bushes are oddly placed, appearing underwater or even above the water's surface.
Unloaded Actors#
Actor |
Filename |
ID |
Object |
Variable |
ID |
|---|---|---|---|---|---|
0108 |
ovl_Bg_Umajump |
Horse Jumping Fence |
0100 |
FFFF |
??? |
0108 |
ovl_Bg_Umajump |
Horse Jumping Fence |
0100 |
FFFF |
??? |
Unloaded Objects#
There are three unloaded objects near the entrance to Gerudo Valley. Two horse jumping fences are present in the actor list, but they do not appear, as their object is missing. There is also a bush that is positioned off the map, which isn't loaded because it is outside the collision area.
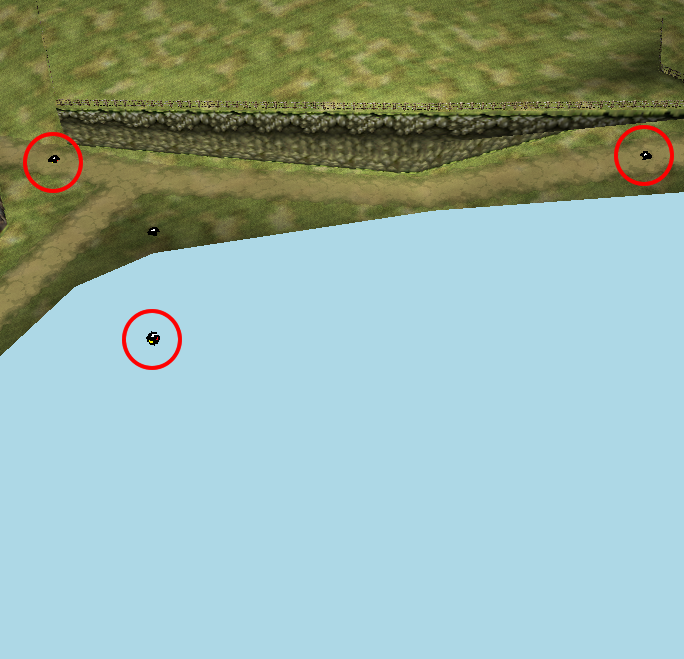
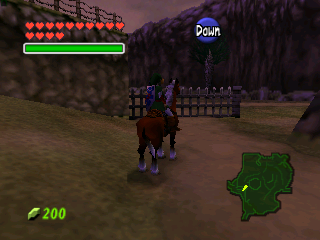

In addition, there are two cuttable bushes embedded in the side of Lon Lon Ranch.
Exit Differences#
Setup 00 |
|
|---|---|
No. |
Exit From |
0033 |
Market Entrance (Day) |
00DB |
Kakariko Village |
00EA |
Zora's River - Land Entrance |
04DE |
Lost Woods - Bridge Entrance |
0102 |
Lake Hylia |
0117 |
Gerudo Valley |
0157 |
Lon Lon Ranch |
0276 |
Market Entrance (Day) |
0102 |
Lake Hylia |
036D |
Fairy's Fountain |
003F |
Grotto - xxx |
02AE |
Lon Lon Ranch |
02E2 |
Lon Lon Ranch |
02E6 |
Lon Lon Ranch |
01D9 |
Zora's River - Water Entrance |
Setup 11 - Farewell to Zelda#
Map # |
Map Name |
Map Select # |
Stage # |
|---|---|---|---|
081 |
Spot 00 - Hyrule Field |
1 |
07 |
This is the cutscene environment in which Zelda bids farewell to Link in the skies above Hyrule Field, sending him back in time.
Environment Settings#
xxx
Layout Differences#
xxx
Unloaded Actors#
xxx
Unloaded Objects#
xxx
Exit Differences#
There are potential, fossilized leftovers from when this scene was created. The exit to Zora's River leads to Zora's Domain, and the entrance to Hyrule Castle town leads directly into Hyrule Market. Instead of the Lost Woods, you are taken to Kokiri Forest, near Link's house. Lon Lon Ranch, as a separate area, may not have existed at this point in development.
Setup 00 |
|
|---|---|
No. |
Exit From |
0033 |
Market Entrance (Day) |
00DB |
Kakariko Village |
00EA |
Zora's River - Land Entrance |
04DE |
Lost Woods - Bridge Entrance |
0102 |
Lake Hylia |
0117 |
Gerudo Valley |
0157 |
Lon Lon Ranch |
0276 |
Market Entrance (Day) |
0102 |
Lake Hylia |
036D |
Fairy's Fountain |
003F |
Grotto - xxx |
02AE |
Lon Lon Ranch |
02E2 |
Lon Lon Ranch |
02E6 |
Lon Lon Ranch |
01D9 |
Zora's River - Water Entrance |
Setup 12 - Escorted to Hyrule Field by Impa#
Map # |
Map Name |
Map Select # |
Stage # |
|---|---|---|---|
081 |
Spot 00 - Hyrule Field |
1 |
08 |
This is the cutscene environment in which Impa escorts Link to Hyrule Field, after teaching him Zelda's Lullaby.
Environment Settings#
xxx
Layout Differences#
xxx
Unloaded Actors#
xxx
Unloaded Objects#
Number |
Filename |
ID |
|---|---|---|
00DE |
object_gi_ocarina |
Ocarina of Time |
Exit Differences#
Setup 00 |
|
|---|---|
No. |
Exit From |
0033 |
Market Entrance (Day) |
00DB |
Kakariko Village |
00EA |
Zora's River - Land Entrance |
04DE |
Lost Woods - Bridge Entrance |
0102 |
Lake Hylia |
0117 |
Gerudo Valley |
0157 |
Lon Lon Ranch |
0276 |
Market Entrance (Day) |
0102 |
Lake Hylia |
036D |
Fairy's Fountain |
003F |
Grotto - xxx |
02AE |
Lon Lon Ranch |
02E2 |
Lon Lon Ranch |
02E6 |
Lon Lon Ranch |
01D9 |
Zora's River - Water Entrance |
Unreferenced Setup 01 (Unused)#
Map # |
Map Name |
Map Select # |
Stage # |
|---|---|---|---|
081 |
Spot 00 - Hyrule Field |
1 |
N/A |
UR ✘
This is the cutscene environment in which xxx.
Environment Settings#
xxx
Layout Differences#
xxx
Unloaded Actors#
Actor |
Filename |
ID |
Object |
Variable |
ID |
|---|---|---|---|---|---|
0108 |
ovl_Bg_Umajump |
Horse Jumping Fence |
0100 |
FFFF |
??? |
0108 |
ovl_Bg_Umajump |
Horse Jumping Fence |
0100 |
FFFF |
??? |
Unloaded Objects#
xxx
Exit Differences#
Setup 00 |
|
|---|---|
No. |
Exit From |
0033 |
Market Entrance (Day) |
00DB |
Kakariko Village |
00EA |
Zora's River - Land Entrance |
04DE |
Lost Woods - Bridge Entrance |
0102 |
Lake Hylia |
0117 |
Gerudo Valley |
0157 |
Lon Lon Ranch |
0276 |
Market Entrance (Day) |
0102 |
Lake Hylia |
036D |
Fairy's Fountain |
003F |
Grotto - xxx |
02AE |
Lon Lon Ranch |
02E2 |
Lon Lon Ranch |
02E6 |
Lon Lon Ranch |
01D9 |
Zora's River - Water Entrance |
Kakariko Village#
Setup 04 - Bongo Bongo Escapes the Well#
Map # |
Map Name |
Map Select # |
Stage # |
|---|---|---|---|
082 |
Spot 01 - Kakariko Village |
2 |
00 |
This is the cutscene environment in which Bongo Bongo escapes from the Bottom of the Well.
Environment Settings#
xxx
Layout Differences#
xxx
Unloaded Actors#
Actor |
Filename |
ID |
Object |
Variable |
ID |
|---|---|---|---|---|---|
00B3 |
ovl_En_Heishi2 |
Kakariko Village - Hylian Soldier |
0097 |
FF05 |
The road is closed beyond this point! Can't you read the sign over there? |
016E |
ovl_En_Hy |
0001 |
FF06 |
??? |
|
016E |
ovl_En_Hy |
0001 |
FF07 |
??? |
|
016E |
ovl_En_Hy |
0001 |
FF08 |
??? |
|
0100 |
ovl_Bg_Gate_Shutter |
Gate to Death Mountain |
0181 |
FFFF |
Gate to Death Mountain |
Unloaded Objects#
xxx
Exit Differences#
Setup 00 |
|
|---|---|
No. |
Exit From |
017D |
Hyrule Field |
013D |
Death Mountain Trail |
00E4 |
Kakariko Graveyard |
00B7 |
Bazaar |
0098 |
Bottom of the Well |
039C |
Impa's House |
02FD |
Kakariko Village House Boss's House |
0072 |
Granny's Potion Shop |
0453 |
Windmill "?" |
0384 |
Kakariko Potion Shop |
003B |
Shooting Gallery |
0550 |
House of Skulltula |
03EC |
Kakariko Potion Shop Back Door |
05C8 |
Impa's House Roof entrance |
Setup 05 - Learning the Nocturne of Shadow#
Map # |
Map Name |
Map Select # |
Stage # |
|---|---|---|---|
082 |
Spot 01 - Kakariko Village |
2 |
01 |
This is the cutscene environment in which Link learns the Nocturne of Shadow.
Environment Settings#
xxx
Layout Differences#
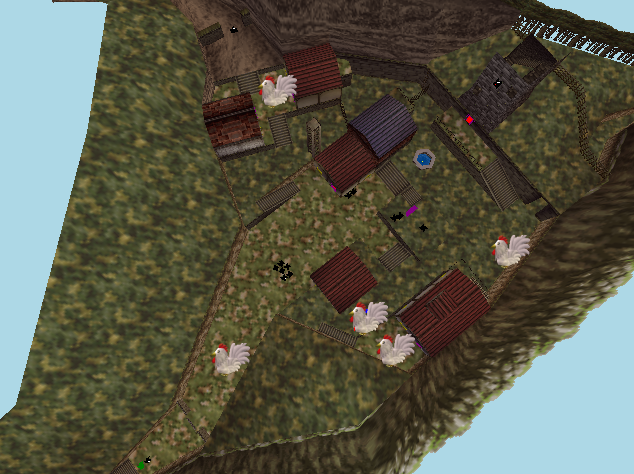
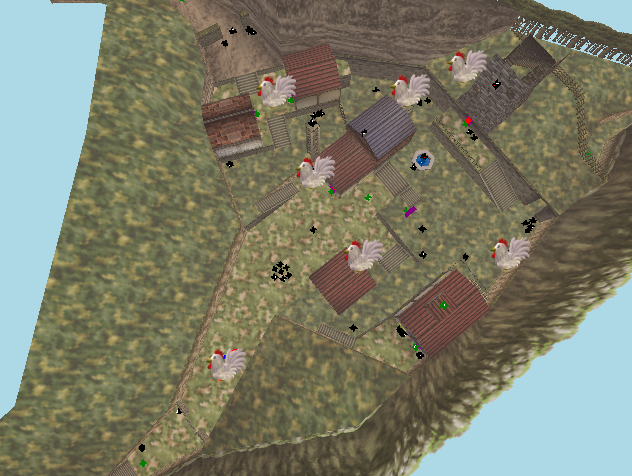
Cuccos
|
Setup 05 & 07 |
Final |
|---|---|
|
|
- 5 Cuccos instead of 7.
- This scene setup seems to be from April 1998, when you weren't able to climb behind the windmill and the well was placed elsewhere.
Unloaded Actors#
Actor |
Filename |
ID |
Object |
Variable |
ID |
|---|---|---|---|---|---|
016E |
ovl_En_Hy |
0001 |
FF06 |
??? |
|
016E |
ovl_En_Hy |
0001 |
FF07 |
??? |
|
016E |
ovl_En_Hy |
0001 |
FF08 |
??? |
|
0100 |
ovl_Bg_Gate_Shutter |
Gate to Death Mountain |
0181 |
FFFF |
Gate to Death Mountain |
Unloaded Objects#
xxx
Exit Differences#
Setup 00 |
|
|---|---|
No. |
Exit From |
017D |
Hyrule Field |
013D |
Death Mountain Trail |
00E4 |
Kakariko Graveyard |
00B7 |
Bazaar |
0098 |
Bottom of the Well |
039C |
Impa's House |
02FD |
Kakariko Village House Boss's House |
0072 |
Granny's Potion Shop |
0453 |
Windmill "?" |
0384 |
Kakariko Potion Shop |
003B |
Shooting Gallery |
0550 |
House of Skulltula |
03EC |
Kakariko Potion Shop Back Door |
05C8 |
Impa's House Roof entrance |
Setup 06 - The Well is Drained#
Map # |
Map Name |
Map Select # |
Stage # |
|---|---|---|---|
082 |
Spot 01 - Kakariko Village |
2 |
02 |
This is the cutscene environment in which the well is drained by Link playing the Song of Storms.
Environment Settings#
xxx
Layout Differences#
xxx
Unloaded Actors#
Actor |
Filename |
ID |
Object |
Variable |
ID |
|---|---|---|---|---|---|
0100 |
ovl_Bg_Gate_Shutter |
Gate to Death Mountain |
0181 |
FFFF |
Gate to Death Mountain |
00E5 |
ovl_Bg_Spot16_Doughnut |
Death Mountain Cloud Ring |
017A |
FFFF |
Death Mountain Cloud Ring |
Unloaded Objects#
xxx
Exit Differences#
Setup 00 |
|
|---|---|
No. |
Exit From |
017D |
Hyrule Field |
013D |
Death Mountain Trail |
00E4 |
Kakariko Graveyard |
00B7 |
Bazaar |
0098 |
Bottom of the Well |
039C |
Impa's House |
02FD |
Kakariko Village House Boss's House |
0072 |
Granny's Potion Shop |
0453 |
Windmill "?" |
0384 |
Kakariko Potion Shop |
003B |
Shooting Gallery |
0550 |
House of Skulltula |
03EC |
Kakariko Potion Shop Back Door |
05C8 |
Impa's House Roof entrance |
Setup 07 - Death Mountain Erupts#
Map # |
Map Name |
Map Select # |
Stage # |
|---|---|---|---|
082 |
Spot 01 - Kakariko Village |
2 |
03 |
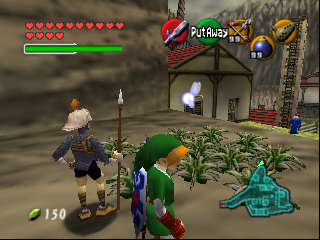
This is the cutscene environment in which Death Mountain erupts upon Link's defeat of Volvagia.
Environment Settings#
xxx
Layout Differences#
A circle of grass is positioned next to the guard at the main gate, which doesn't appear normally.
The gate guard and the Cuccos from Child Link's setup are also present in this map, despite the fact that the cutscene takes place during the Adult Era.
A lady in blue stands in front of Impa's House. She appears in the Market as Child Link, but is normally not present in Kakariko.
Cuccos
|
Setups 05 & 07 |
Final |
|---|---|
|
|
|
- 5 Cuccos instead of 7.
- This scene setup seems to be from April 1998, when you weren't able to climb behind the windmill and the well was placed elsewhere.
|
|
To do: |
Unloaded Actors#
Actor |
Filename |
ID |
Object |
Variable |
ID |
|---|---|---|---|---|---|
0100 |
ovl_Bg_Gate_Shutter |
Gate to Death Mountain |
0181 |
FFFF |
Gate to Death Mountain |
Unloaded Objects#
Number |
Filename |
ID |
|---|---|---|
00C5 |
object_os_anime |
Animation File |
0105 |
object_aob |
Mamamu Yan |
0107 |
object_ahg |
Hylian Man in Green |
Exit Differences#
Setup 00 |
|
|---|---|
No. |
Exit From |
017D |
Hyrule Field |
013D |
Death Mountain Trail |
00E4 |
Kakariko Graveyard |
00B7 |
Bazaar |
0098 |
Bottom of the Well |
039C |
Impa's House |
02FD |
Kakariko Village House Boss's House |
0072 |
Granny's Potion Shop |
0453 |
Windmill "?" |
0384 |
Kakariko Potion Shop |
003B |
Shooting Gallery |
0550 |
House of Skulltula |
03EC |
Kakariko Potion Shop Back Door |
05C8 |
Impa's House Roof entrance |
Setup 08 - Credits in Kakariko Village#
Map # |
Map Name |
Map Select # |
Stage # |
|---|---|---|---|
082 |
Spot 01 - Kakariko Village |
2 |
04 |
This is the cutscene environment in which the credits play in Kakariko Village.
Environment Settings#
xxx
Layout Differences#
xxx
Unloaded Actors#
xxx
Unloaded Objects#
Number |
Filename |
ID |
|---|---|---|
0097 |
object_sd |
Hylian Soldier |
00C5 |
object_os_anime |
Animation File |
0105 |
object_aob |
Mamamu Yan |
0107 |
object_ahg |
Hylian Man in Green |
0108 |
object_cne |
Thin Hylian Woman |
010D |
object_bba |
Old Hylian Woman |
010C |
object_bji |
Old Hylian Man |
0013 |
object_niw |
Cucco |
00EC |
object_ani |
Kakariko Village Rooftop Man |
Exit Differences#
Setup 00 |
|
|---|---|
No. |
Exit From |
017D |
Hyrule Field |
013D |
Death Mountain Trail |
00E4 |
Kakariko Graveyard |
00B7 |
Bazaar |
0098 |
Bottom of the Well |
039C |
Impa's House |
02FD |
Kakariko Village House Boss's House |
0072 |
Granny's Potion Shop |
0453 |
Windmill "?" |
0384 |
Kakariko Potion Shop |
003B |
Shooting Gallery |
0550 |
House of Skulltula |
03EC |
Kakariko Potion Shop Back Door |
05C8 |
Impa's House Roof entrance |
Graveyard#
Setup 04 - Learning the Sun's Song#
Map # |
Map Name |
Map Select # |
Stage # |
|---|---|---|---|
065 |
Royal Family's Tomb |
26 |
00 |
This is the cutscene environment in which Link learns the Sun's Song.
|
|
To do: |
Environment Settings#
xxx
Layout Differences#
Room 00
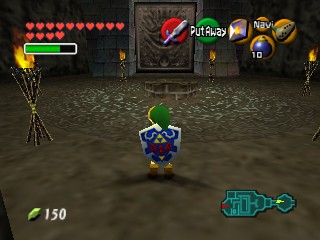
The entrance to the Shadow Temple is not accessible in this setup without some hacking. This is because ovl_En_Holl, an actor that allows Link to transition between two rooms via a tunnel, isn't activated. In order to fully activate it, one must edit the scene header at 0x02006C10, as well as the Front R / C actor for 01FF.
|
|
To do: |
The entrance to the Shadow Temple has fewer torches, and using Din's Fire doesn't open the temple gateway.
Room 01
This version of the map contains only one Poe. In the retail game, there are either none (as Child Link) or three (as Adult Link).
There is a gravestone at the wall to the left of Dampé's Grave, where one would normally find the Magic Bean spot.
The Piece of Heart that is normally concealed within a wooden box is instead contained in a treasure chest. The chest is very hard to see and can only be latched onto with the Longshot, which may be why the developers decided on the box.
Unloaded Actors#
xxx
Unloaded Objects#
Number |
Filename |
ID |
Used |
|---|---|---|---|
0061 |
object_mjin |
Blank Triforce Warp Pad |
✘ |
0063 |
object_mjin_dark |
Shadow Warp Pad |
✘ |
0090 |
object_efc_flash |
✘ |
|
0009 |
object_poh |
Poe/Disintigrating Body/Poe Soul |
✘ |
0089 |
object_tk |
Dampé/Shovel/Dampé's Ghost/Lantern |
✘ |
00A2 |
object_haka |
Gravestone & Dirt Patch |
✘ |
0013 |
object_niw |
Cucco |
✘ |
011E |
object_mamenoki |
Bean Planting Spot/Bean Sprout/Song of Storms Sprout/Flying Plant |
✘ |
000E |
object_box |
Treasure Chest/Boss Key Chest/Light When Opening Chest |
✘ |
Exit Differences#
xxx
Setup 05#
Map # |
Map Name |
Map Select # |
Stage # |
|---|---|---|---|
065 |
Royal Family's Tomb |
26 |
01 |
Cutscene - After Cutting to the Graveyard, the Scene Returns to the Tomb ✔ Double-Check
This is the cutscene environment in which xxx.
Environment Settings#
xxx
Layout Differences#
xxx
Unloaded Actors#
xxx
Unloaded Objects#
Number |
Filename |
ID |
Used |
|---|---|---|---|
0061 |
object_mjin |
Blank Triforce Warp Pad |
✘ |
0063 |
object_mjin_dark |
Shadow Warp Pad |
✘ |
0090 |
object_efc_flash |
✘ |
|
0009 |
object_poh |
Poe |
✘ |
0089 |
object_tk |
Dampé |
✘ |
00A2 |
object_haka |
Gravestone & Dirt Patch |
✘ |
0013 |
object_niw |
Cucco |
✘ |
011E |
object_mamenoki |
Bean Planting Spot |
✘ |
000E |
object_box |
Treasure Chest |
✘ |
00F9 |
object_spot01_objects |
Windmill Blades |
✘ |
Exit Differences#
xxx
Kokiri Forest#
Setup 04 - Farore Creates Life#
Map # |
Map Name |
Map Select # |
Stage # |
|---|---|---|---|
085 |
Spot 04 - Kokiri Forest |
5 |
00 |
This is the cutscene environment in which Farore creates life.
Environment Settings#
xxx
Layout Differences#
xxx
Unloaded Actors#
xxx
Unloaded Objects#
xxx
Exit Differences#
Setup 00 |
|
|---|---|
00EE |
Kokiri Forest |
0000 |
Deku Tree |
05E0 |
Lost Woods / Hyrule Exit |
0272 |
Link's House |
00C1 |
Kokiri Shop |
00C9 |
Know-it-all Brothers |
011E |
Lost Woods |
00EE |
Kokiri Forest |
009C |
House of Twins |
0433 |
Mido's House |
0437 |
Saria's House |
Setup 05 - The Deku Tree Tells of Ganondorf's Curse#
Map # |
Map Name |
Map Select # |
Stage # |
|---|---|---|---|
085 |
Spot 04 - Kokiri Forest |
5 |
01 |
This is the cutscene environment in which the Great Deku Tree tells Link of the curse placed upon him by Ganondorf.
Environment Settings#
xxx
Layout Differences#
xxx
Unloaded Actors#
xxx
Unloaded Objects#
Room 1 - ???
Number |
Filename |
ID |
|---|---|---|
0077 |
object_bird |
Brown Bird |
007C |
object_wood02 |
Trees & Shrubbery |
Exit Differences#
Setup 00 |
|
|---|---|
00EE |
Kokiri Forest |
0000 |
Deku Tree |
05E0 |
Lost Woods / Hyrule Exit |
0272 |
Link's House |
00C1 |
Kokiri Shop |
00C9 |
Know-it-all Brothers |
011E |
Lost Woods |
00EE |
Kokiri Forest |
009C |
House of Twins |
0433 |
Mido's House |
0437 |
Saria's House |
Setup 06 - Receiving the Kokiri Emerald#
Map # |
Map Name |
Map Select # |
Stage # |
|---|---|---|---|
085 |
Spot 04 - Kokiri Forest |
5 |
02 |
This is the cutscene environment in which Link receives the Kokiri Emerald from the Great Deku Tree.
Environment Settings#
xxx
Layout Differences#
xxx
Unloaded Actors#
xxx
Unloaded Objects#
xxx
Exit Differences#
Setup 00 |
|
|---|---|
00EE |
Kokiri Forest |
0000 |
Deku Tree |
05E0 |
Lost Woods / Hyrule Exit |
0272 |
Link's House |
00C1 |
Kokiri Shop |
00C9 |
Know-it-all Brothers |
011E |
Lost Woods |
00EE |
Kokiri Forest |
009C |
House of Twins |
0433 |
Mido's House |
0437 |
Saria's House |
Setup 07 - The Deku Tree Speaks With Navi#
Map # |
Map Name |
Map Select # |
Stage # |
|---|---|---|---|
085 |
Spot 04 - Kokiri Forest |
5 |
03 |
This is the cutscene environment in which the Great Deku Tree orders Navi to go to Link at the beginning of the game.
Environment Settings#
xxx
Layout Differences#
xxx
Unloaded Actors#
Room 0 - ???
Actor |
Filename |
ID |
Object |
Variable |
ID |
|---|---|---|---|---|---|
0126 |
ovl_Obj_Bean |
011E |
1F09 |
Magic Bean Spot |
|
00EE |
ovl_Item_Shield |
Collectable Deku Shield |
0015 |
0000 |
Collectable Deku Shield |
Unloaded Objects#
Room 0 - ???
Number |
Filename |
ID |
|---|---|---|
00BC |
object_sa |
Saria |
00C5 |
object_os_anime |
Animation File |
Room 1 - ???
Number |
Filename |
ID |
|---|---|---|
0061 |
object_mjin |
Blank Triforce Warp Pad |
0068 |
object_mjin_oka |
Ocarina Pad |
Exit Differences#
Setup 00 |
|
|---|---|
00EE |
Kokiri Forest |
0000 |
Deku Tree |
05E0 |
Lost Woods / Hyrule Exit |
0272 |
Link's House |
00C1 |
Kokiri Shop |
00C9 |
Know-it-all Brothers |
011E |
Lost Woods |
00EE |
Kokiri Forest |
009C |
House of Twins |
0433 |
Mido's House |
0437 |
Saria's House |
Setup 08 - Panning Through Kokiri Forest (Unused)#
Map # |
Map Name |
Map Select # |
Stage # |
|---|---|---|---|
085 |
Spot 04 - Kokiri Forest |
5 |
04 |
This is an unused cutscene environment in which the camera begins at the Deku Tree, then switches to various spots around the village, before returning to the Deku Tree's meadow.
Environment Settings#
xxx
Layout Differences#
In normal gameplay, the Deku Tree's meadow and the Kokiri Forest village area aren't loaded at the same time. There is an actor in the pathway between the village to the meadow named ovl_En_Holl that, when passed by, unloads one room and loads the next; the curve in the path ensures that the areas are not visible to the player as they blink in and out of existence. However, in this setup, both areas are loaded at the same time.
Upon exiting the Deku Tree's meadow via the path, a Piece of Heart will appear over Link's head.
There are no Kokiri present.
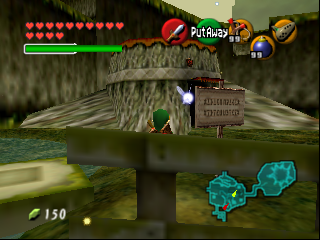
Several signs are placed in unusual positions. Some of these signs display text that is not related to Kokiri Forest, including a sign for Zora's Fountain and one for the Carpet Merchant's Shop in the Haunted Wasteland. Near the exit to Hyrule Field is a sign that reads "Forest Temple", which is never used in normal gameplay.
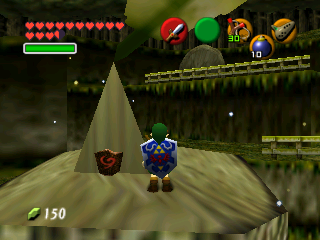
There are also a handful of Deku Shields scattered around. Their actor, ovl_Item_Shield, is not used elsewhere in the game. You can pick the shields up, but they have no effect.
Unloaded Actors#
Room 01 - ???
Actor |
Filename |
ID |
Object |
Variable |
ID |
|---|---|---|---|---|---|
0146 |
ovl_En_Sa |
Saria |
00BC |
0000 |
??? |
016D |
ovl_En_Md |
Mido |
00FB |
0000 |
??? |
0163 |
ovl_En_Ko |
Kokiri |
0001 |
D300 |
Rock Pulling Kokiri Boy |
There is an unloaded Piece of Heart that has been disabled by changing its variable from 0006 to FF06. When restored, it appears on top of the Kokiri Shop.
This Piece of Heart is mentioned in the Ocarina of Time guide published in Nintendo Power Issue 114, on Page 17. This indicates that the writers used a pre-release version of the game to compile their walkthrough.
Link can be seen collecting this Heart Piece in prerelease video footage.
|
Guidebook Screenshot |
Restored Actor |
|---|---|
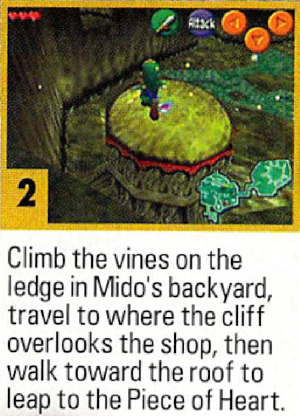
|
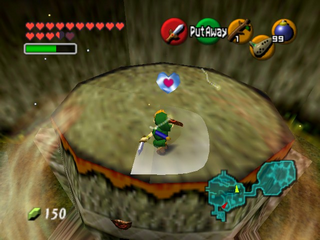
|
Unloaded Objects#
Room 0 - ????
Number |
Filename |
ID |
|---|---|---|
00AD |
object_gi_jewel |
Kokiri Emerald |
0061 |
object_mjin |
Blank Triforce Warp Pad |
0068 |
object_mjin_oka |
Ocarina Pad |
00BC |
object_sa |
Saria |
00FC |
object_km1 |
Strawberry-Haired Kokiri Boy |
00FD |
object_kw1 |
Strawberry-Haired Kokiri Girl |
00FB |
object_md |
Mido |
00C5 |
object_os_anime |
Animation File |
Room 1 - ????
Number |
Filename |
ID |
|---|---|---|
002A |
object_spot04_objects |
Deku Tree's Jaw |
00AD |
object_gi_jewel |
Kokiri Emerald |
0061 |
object_mjin |
Blank Triforce Warp Pad |
0068 |
object_mjin_oka |
Ocarina Pad |
Exit Differences#
Setup 00 |
|
|---|---|
00EE |
Kokiri Forest |
0000 |
Deku Tree |
05E0 |
Lost Woods / Hyrule Exit |
0272 |
Link's House |
00C1 |
Kokiri Shop |
00C9 |
Know-it-all Brothers |
011E |
Lost Woods |
00EE |
Kokiri Forest |
009C |
House of Twins |
0433 |
Mido's House |
0437 |
Saria's House |
Setup 09 - Panning Through Kokiri Forest 2#
Map # |
Map Name |
Map Select # |
Stage # |
|---|---|---|---|
085 |
Spot 04 - Kokiri Forest |
5 |
05 |
This is an unused cutscene environment very similar to Setup 08, however, only Room 01 (the Deku Tree's Meadow), is initially loaded. Once the cutscene ends, Link is left in the unloaded village portion of the map. If Link goes to the corridor leading to the Deku Tree, the village area will load, and replaying the cutscene will now allow it to be viewed properly: The camera begins looking at the Forest Training Center, then does a sideways pan through Kokiri Forest towards the Deku Tree, stopping at the House of Twins.
Environment Settings#
xxx
Layout Differences#
xxx
Unloaded Actors#
Room 01 - ???
Actor |
Filename |
ID |
Object |
Variable |
ID |
|---|---|---|---|---|---|
0146 |
ovl_En_Sa |
Saria |
00BC |
0000 |
??? |
016D |
ovl_En_Md |
Mido |
00FB |
0000 |
??? |
0163 |
ovl_En_Ko |
Kokiri |
0001 |
D300 |
Rock Pulling Kokiri Boy |
Unloaded Objects#
xxx
Environment#
This is the cutscene environment in which xxx.
Environment Settings#
xxx
Layout Differences#
xxx
Unloaded Actors#
xxx
Unloaded Objects#
Room 0 - ????
Number |
Filename |
ID |
|---|---|---|
00AD |
object_gi_jewel |
Kokiri Emerald |
0061 |
object_mjin |
Blank Triforce Warp Pad |
0068 |
object_mjin_oka |
Ocarina Pad |
00BC |
object_sa |
Saria |
00FC |
object_km1 |
Strawberry-Haired Kokiri Boy |
00FD |
object_kw1 |
Strawberry-Haired Kokiri Girl |
00FB |
object_md |
Mido |
00C5 |
object_os_anime |
Animation File |
Room 1 - ????
Number |
Filename |
ID |
|---|---|---|
002A |
object_spot04_objects |
Deku Tree's Jaw |
00AD |
object_gi_jewel |
Kokiri Emerald |
0061 |
object_mjin |
Blank Triforce Warp Pad |
0068 |
object_mjin_oka |
Ocarina Pad |
Exit Differences#
Setup 00 |
|
|---|---|
00EE |
Kokiri Forest |
0000 |
Deku Tree |
05E0 |
Lost Woods / Hyrule Exit |
0272 |
Link's House |
00C1 |
Kokiri Shop |
00C9 |
Know-it-all Brothers |
011E |
Lost Woods |
00EE |
Kokiri Forest |
009C |
House of Twins |
0433 |
Mido's House |
0437 |
Saria's House |
Setup 10 - Credits in the Deku Tree's Meadow#
Map # |
Map Name |
Map Select # |
Stage # |
|---|---|---|---|
085 |
Spot 04 - Kokiri Forest |
5 |
06 |
This is the cutscene environment in which the credits play in the Great Deku Tree's meadow.
Environment Settings#
xxx
Layout Differences#
xxx
Unloaded Actors#
xxx
Unloaded Objects#
Number |
Filename |
ID |
|---|---|---|
002A |
object_spot04_objects |
Deku Tree's Jaw |
Exit Differences#
Setup 00 |
|
|---|---|
00EE |
Kokiri Forest |
0000 |
Deku Tree |
05E0 |
Lost Woods / Hyrule Exit |
0272 |
Link's House |
00C1 |
Kokiri Shop |
00C9 |
Know-it-all Brothers |
011E |
Lost Woods |
00EE |
Kokiri Forest |
009C |
House of Twins |
0433 |
Mido's House |
0437 |
Saria's House |
Setup 11 - Credits in Kokiri Forest#
Map # |
Map Name |
Map Select # |
Stage # |
|---|---|---|---|
085 |
Spot 04 - Kokiri Forest |
5 |
07 |
This is the cutscene environment in which the credits play in Kokiri Forest.
Environment Settings#
xxx
Layout Differences#
xxx
Unloaded Actors#
xxx
Unloaded Objects#
Room 0 - ???
Number |
Filename |
ID |
|---|---|---|
002A |
object_spot04_objects |
Deku Tree's Jaw |
007C |
object_wood02 |
Trees & Shrubbery |
Room 1 - ???
Number |
Filename |
ID |
|---|---|---|
002A |
object_spot04_objects |
Deku Tree's Jaw |
007C |
object_wood02 |
Trees & Shrubbery |
012F |
object_kanban |
Square Sign |
Exit Differences#
Setup 00 |
|
|---|---|
00EE |
Kokiri Forest |
0000 |
Deku Tree |
05E0 |
Lost Woods / Hyrule Exit |
0272 |
Link's House |
00C1 |
Kokiri Shop |
00C9 |
Know-it-all Brothers |
011E |
Lost Woods |
00EE |
Kokiri Forest |
009C |
House of Twins |
0433 |
Mido's House |
0437 |
Saria's House |
Setup 12 - Meeting the Deku Tree Sprout#
Map # |
Map Name |
Map Select # |
Stage # |
|---|---|---|---|
085 |
Spot 04 - Kokiri Forest |
5 |
08 |
This is the cutscene environment in which Link meets the Deku Tree Sprout.
Environment Settings#
xxx
Layout Differences#
xxx
Unloaded Actors#
xxx
Unloaded Objects#
Room 0 - ???#
=
Number |
Filename |
ID |
|---|---|---|
002A |
object_spot04_objects |
Deku Tree's Jaw |
00C5 |
object_os_anime |
|
00FC |
object_km1 |
Strawberry-Haired Kokiri Boy |
00FD |
object_kw1 |
Strawberry-Haired Kokiri Girl |
012F |
object_kanban |
Square Sign |
Room 1 - ???#
=
Number |
Filename |
ID |
|---|---|---|
012F |
object_kanban |
Square Sign |
Exit Differences#
Setup 00 |
|
|---|---|
00EE |
Kokiri Forest |
0000 |
Deku Tree |
05E0 |
Lost Woods / Hyrule Exit |
0272 |
Link's House |
00C1 |
Kokiri Shop |
00C9 |
Know-it-all Brothers |
011E |
Lost Woods |
00EE |
Kokiri Forest |
009C |
House of Twins |
0433 |
Mido's House |
0437 |
Saria's House |
Setup 13 - The Deku Tree Sprout Reveals Link's Identity#
Map # |
Map Name |
Map Select # |
Stage # |
|---|---|---|---|
085 |
Spot 04 - Kokiri Forest |
5 |
09 |
This is the cutscene environment in which the Deku Tree Sprout reveals Link's Hylian heritage.
Environment Settings#
xxx
Layout Differences#
xxx
Unloaded Actors#
xxx
Unloaded Objects#
xxx
Exit Differences#
Setup 00 |
|
|---|---|
00EE |
Kokiri Forest |
0000 |
Deku Tree |
05E0 |
Lost Woods / Hyrule Exit |
0272 |
Link's House |
00C1 |
Kokiri Shop |
00C9 |
Know-it-all Brothers |
011E |
Lost Woods |
00EE |
Kokiri Forest |
009C |
House of Twins |
0433 |
Mido's House |
0437 |
Saria's House |
Sacred Forest Meadow#
Setup 04 - Learning the Minuet of Forest#
Map # |
Map Name |
Map Select # |
Stage # |
|---|---|---|---|
086 |
Spot 05 - Sacred Forest Meadow |
6 |
00 |
This is the cutscene environment in which Link learns the Minuet of Forest from Sheik.
Environment Settings#

This version of the Sacred Forest uses the same skybox that appears in the ending cutscene in which Link talks with Zelda in the sky of Hyrule Field. If one looks far enough, one can see the clouds flying through the ground.
Layout Differences#
xxx
Unloaded Actors#
xxx
Unloaded Objects#
Number |
Filename |
ID |
|---|---|---|
0068 |
object_mjin_oka |
Ocarina Pad |
0039 |
object_dekubaba |
Deku Baba |
004A |
object_dekunuts |
Mad Scrub |
0018 |
object_peehat |
Peahat |
00B6 |
object_gi_melody |
Music Note |
0090 |
object_efc_flash |
Exit Differences#
Setup 00 |
|
|---|---|
01A9 |
Lost Woods |
0169 |
Forest Temple |
Setup 05 - Learning Saria's Song#
Map # |
Map Name |
Map Select # |
Stage # |
|---|---|---|---|
086 |
Spot 05 - Sacred Forest Meadow |
6 |
01 |
This is the cutscene environment in which Saria teaches Link her very own song.
The scene plays twice. This may be because the cutscene is initiated by Saria's actor during normal gameplay. The first time the cutscene plays, a strange transition occurs.
Environment Settings#
xxx
Layout Differences#
Saria is positioned slightly incorrectly. She only performs one animation during the cutscene.
Unloaded Actors#
xxx
Unloaded Objects#
Number |
Filename |
ID |
|---|---|---|
0068 |
object_mjin_oka |
Ocarina Pad |
0039 |
object_dekubaba |
Deku Baba |
004A |
object_dekunuts |
Mad Scrub |
0018 |
object_peehat |
Peahat |
00B6 |
object_gi_melody |
Music Note |
0090 |
object_efc_flash |
Exit Differences#
Setup 00 |
|
|---|---|
01A9 |
Lost Woods |
0169 |
Forest Temple |
Lake Hylia#
Setup 04 - Sheik Commends Link on Finishing the Water Temple#
Map # |
Map Name |
Map Select # |
Stage # |
|---|---|---|---|
087 |
Spot 06 - Lake Hylia |
7 |
00 |
This is the cutscene environment in which Sheik congratulates Link on having finished the Water Temple.
Environment Settings#
xxx
Layout Differences#
xxx
Unloaded Actors#
xxx
Unloaded Objects#
xxx
Exit Differences#
Setup 00 |
|
|---|---|
0189 |
Hyrule Field |
01A5 |
Gerudo Valley |
0010 |
Water Temple |
027A |
Hyrule Field |
0043 |
Lakeside Laboratory |
045F |
Fishing Pond |
0328 |
Zora's Domain |
Setup 05 - Credits in Lake Hylia#
Map # |
Map Name |
Map Select # |
Stage # |
|---|---|---|---|
087 |
Spot 06 - Lake Hylia |
7 |
01 |
This is the cutscene environment in which the credits play in Lake Hylia.
Environment Settings#
xxx
Layout Differences#
xxx
Unloaded Actors#
xxx
Unloaded Objects#
xxx
Exit Differences#
Setup 00 |
|
|---|---|
0189 |
Hyrule Field |
01A5 |
Gerudo Valley |
0010 |
Water Temple |
027A |
Hyrule Field |
0043 |
Lakeside Laboratory |
045F |
Fishing Pond |
0328 |
Zora's Domain |
Zora's Domain#
Setup 04 - Credits in Zora's Domain#
Map # |
Map Name |
Map Select # |
Stage # |
|---|---|---|---|
088 |
Spot 07 - Zora's Domain |
8 |
00 |
This is the cutscene environment in which the credits play in Zora's Domain.
Environment Settings#
xxx
Layout Differences#
Two torches were moved out of the water to be closer to the staircase, and the sign for the diving mini-game was moved, and its type was changed to a directional sign that can't be cut. These layout changes were made late since even screenshots from early October show these differences.
|
Sep. '98 |
Oct. '98 |
|---|---|
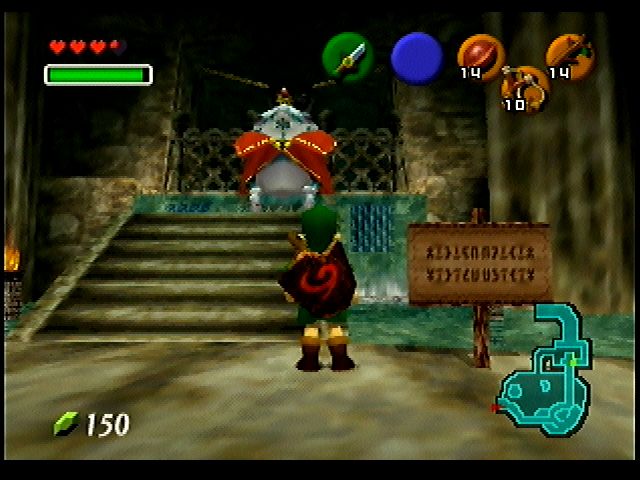
|
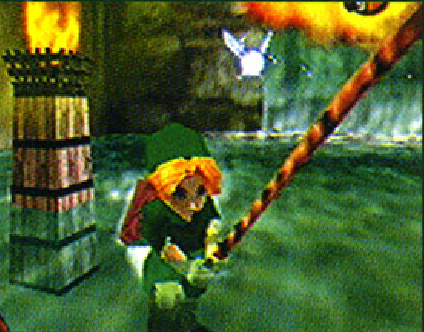
|
|
Regular Setup |
Stage 00 |
|---|---|
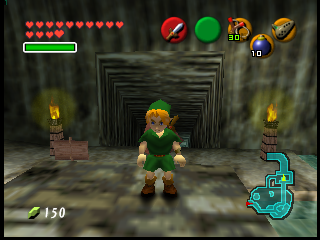
|
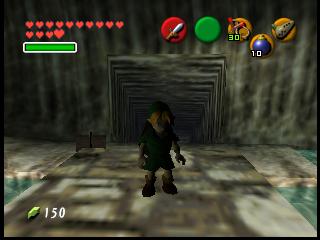
|
|
Regular Setup |
Stage 00 |
|---|---|
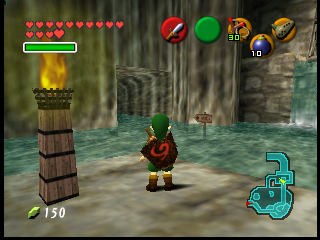
|
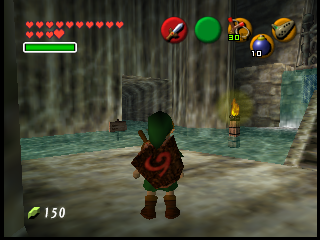
|
Unloaded Actors#
xxx
Unloaded Objects#
Room 1 - ???
Number |
Filename |
ID |
|---|---|---|
00A4 |
object_syokudai |
Torch |
012F |
object_kanban |
Square Sign |
Exit Differences#
Setup 00 |
|
|---|---|
019D |
Zora River |
0225 |
Zora's Domain |
0380 |
Zora Shop |
0560 |
Lake Hylia |
Zora's Fountain#
Setup 04 - Receiving Zora's Sapphire#
Map # |
Map Name |
Map Select # |
Stage # |
|---|---|---|---|
089 |
Spot 08 - Zora's Fountain |
9 |
00 |
This is the cutscene environment in which Link receives Zora's Sapphire from Ruto.
Environment Settings#
xxx
Layout Differences#
xxx
Unloaded Actors#
Actor |
Filename |
ID |
Object |
Variable |
ID |
|---|---|---|---|---|---|
01A8 |
ovl_Bg_Spot08_Bakudankabe |
Bombable Fairy Fountain Wall - Zora's Fountain |
0074 |
00FF |
Bombable Fairy Fountain Wall - Zora's Fountain |
Unloaded Objects#
Number |
Filename |
ID |
|---|---|---|
0012 |
object_bubble |
Shabom |
0016 |
object_tite |
Tektite |
0061 |
object_mjin |
Blank Triforce Warp Pad |
0068 |
object_mjin_oka |
Ocarina Pad |
0007 |
object_okuta |
Octorok |
0090 |
object_efc_flash |
Exit Differences#
Setup 00 |
|
|---|---|
0199 |
Zora River |
0028 |
Inside Jabu Jabu's Belly |
01A1 |
Zora's Domain |
0088 |
Ice Cavern |
0371 |
Great Fairy's Fountain |
Setup 05 - Jabu-Jabu Inhales (Unused)#
Map # |
Map Name |
Map Select # |
Stage # |
|---|---|---|---|
089 |
Spot 08 - Zora's Fountain |
9 |
01 |
This is an unused cutscene environment in which Link and Jabu-Jabu stare each other down. Jabu-Jabu then opens his mouth to inhale Link, but nothing happens, as he is too far from the platform to have any effect on our hapless hero.
In addition to using Map Select, Setup 05 can also be reached by using a glitch known as "Farore's Wind Wrong Warp". To reach the cutscene environment, Farore's Wind must be cast after exiting the Carpenter's Tent in Gerudo Valley.
Generally, the scene will crash when accessed due to Jabu-Jabu's actor being loaded twice. If it is loaded successfully, which may be possible on some emulators and on the Virtual Console version of the game, it will crash if Link steps on the Ocarina pedestal, approaches the entrances to Zora's Domain or the Great Fairy's Fountain, or looks in certain directions. Using a GameShark code called "Specific Things Lean" (80025614 0001 for US 1.0) will make the scene less likely to crash, but does not fix the problem entirely. The patched Debug ROM fixes the area fully.
|
|
To do: |
Environment Settings#
xxx
Layout Differences#
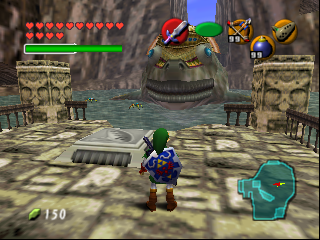
In this setup, Jabu-Jabu is further back than normal. He is surrounded by Tektites and Octoroks, which normally only appear when you're Adult Link (by which time Jabu-Jabu is gone), and never appear in these positions.

There is a grey pedestal that has an image of an Ocarina on it positioned on the center of the platform. This Ocarina image doesn't look exactly like the Fairy Ocarina nor the Ocarina of Time; it uses an early design from a point in l development when the three Spiritual Stones were inserted into the Ocarina. This pedestal is present in several cutscene setups; however, it is only loaded and visible during gameplay in setups 05 and 06 of Zora's Fountain.
A contemporary fan account of playing the 1998 CBS Toy Test demo suggests that these pedestals were once used as song triggers, forcing Link to take out his Ocarina and displaying a musical staff when stepped on.
As mentioned above, two instances of Jabu-Jabu are loaded in the setup, causing it to crash frequently due to the large amount of polygons. Using an editor or GameShark code to remove or replace one of these models will cause the crashes to cease.
(Source: ZHQ.com (Toy Test playthrough account), Cendamos (reason for crash))
Unloaded Actors#
xxx
Unloaded Objects#
Number |
Filename |
ID |
|---|---|---|
0012 |
object_bubble |
Shabom |
Exit Differences#
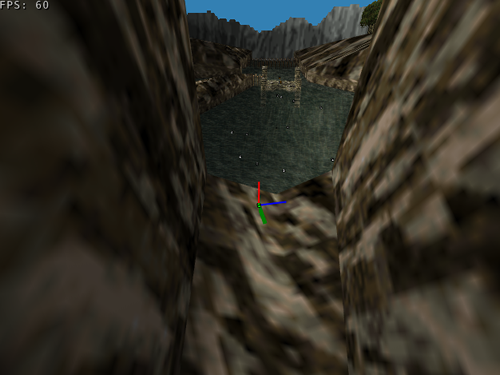
There is an unused player spawn in the gap between the two mountains behind Jabu-Jabu. This was the old location for the Ice Cavern, as it shares the same exit ID as the Ice Cavern in the regular scene setups, which is 4. It's also visible on the early minimap.
|
Early Overworld Minimap |
Final Overworld Minimap |
|---|---|

|

|
Setup 00 |
|
|---|---|
0199 |
Zora River |
0028 |
Inside Jabu Jabu's Belly |
01A1 |
Zora's Domain |
0088 |
Ice Cavern |
0371 |
Great Fairy's Fountain |
Setup 06 - Credits in Zora's Fountain (Unused)#
Map # |
Map Name |
Map Select # |
Stage # |
|---|---|---|---|
089 |
Spot 08 - Zora's Fountain |
9 |
02 |
This is an unused cutscene environment in which the camera pans to Jabu-Jabu from the mouth of the Ice Cavern, and a portion of the credits is displayed. It seems that Zora's Fountain was originally intended to appear during the ending sequence, though it doesn't in the retail game.
Like Setup 05, this scene will generally crash when accessed due to Jabu-Jabu's actor being loaded twice. If it is loaded successfully, which may be possible on some emulators and on the Virtual Console version of the game, it will crash if Link steps on the Ocarina pedestal, approaches the entrances to Zora's Domain or the Great Fairy's Fountain, or looks in certain directions. Using a GameShark code called "Specific Things Lean" (80025614 0001 for US 1.0) will make the scene less likely to crash, but does not fix the problem entirely. The patched Debug ROM fixes the area fully.
Environment Settings#
xxx
Layout Differences#
As mentioned above, two instances of Jabu-Jabu are loaded in the setup, causing it to crash frequently due to the large amount of polygons. To stop the crashes, one must use an editor or GameShark code to remove or replace one of these models, and also reenable the actor Bg_Spot08_Iceblock by adding its object, object_spot08_obj (0074), to the map.
Unloaded Actors#
Actor |
Filename |
ID |
Object |
Variable |
ID |
|---|---|---|---|---|---|
00D1 |
ovl_Bg_Spot08_Iceblock |
??? |
0074 |
0214 |
??? |
Unloaded Objects#
Number |
Filename |
ID |
|---|---|---|
0012 |
object_bubble |
Shabom |
0061 |
object_mjin |
Blank Triforce Warp Pad |
0068 |
object_mjin_oka |
Ocarina Pad |
Exit Differences#
As in the previous setup, there is an unused player spawn in the gap between the two mountains behind Jabu-Jabu. This was the old location for the Ice Cavern.
Setup 00 |
|
|---|---|
0199 |
Zora River |
0028 |
Inside Jabu Jabu's Belly |
01A1 |
Zora's Domain |
0088 |
Ice Cavern |
0371 |
Great Fairy's Fountain |
Gerudo Valley#
Setup 04 - Din Creates the Earth#
Map # |
Map Name |
Map Select # |
Stage # |
|---|---|---|---|
090 |
Spot 09 - Gerudo Valley |
10 |
00 |
This is the cutscene environment in which Din molds the earth during the Great Deku Tree's creation story.
Environment Settings#
xxx
Layout Differences#
xxx
Unloaded Actors#
xxx
Unloaded Objects#
xxx
Exit Differences#
Setup 00 |
|
|---|---|
018D |
Hyrule Field |
0219 |
Lake Hylia |
0130 |
Haunted Wasteland |
0129 |
Gerudo Fortress |
03A0 |
Carpenter's Tent |
Waypoint Differences#
Waypoints define the paths along which certain things in the game, such as NPCs and water currents, travel.
During normal gameplay, the waypoints that determine the direction of the river current in Gerudo Valley are set to the series of waterfalls that spill down the canyon. In Setups 04 and 05, the waypoints follow a straight line, with only a slight decline.
|
Normal Gameplay |
Setup 04 and 05 |
|---|---|
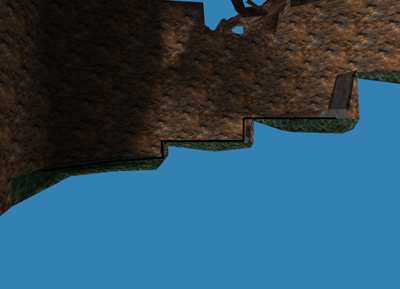
|
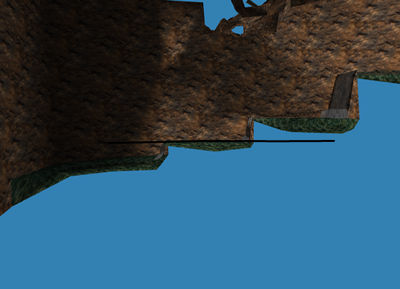
|
Setup 05 - Lightning Crashes As Din Creates the Earth#
Map # |
Map Name |
Map Select # |
Stage # |
|---|---|---|---|
090 |
Spot 09 - Gerudo Valley |
10 |
01 |
This is the cutscene environment in which a violent thunderstorm precedes Din molding the earth during the Great Deku Tree's creation story.
Environment Settings#
xxx
Layout Differences#
xxx
Unloaded Actors#
xxx
Unloaded Objects#
xxx
Exit Differences#
Setup 00 |
|
|---|---|
0219 |
Lake Hylia |
0130 |
Haunted Wasteland |
0129 |
Gerudo Fortress |
03A0 |
Carpenter's Tent |
Waypoint Differences#
Waypoints define the paths along which certain things in the game, such as NPCs and water currents, travel.
During normal gameplay, the waypoints that determine the direction of the river current in Gerudo Valley are set to the series of waterfalls that spills down the canyon. In Setups 04 and 05, the waypoints follow a straight line, with only a slight decline.
|
Normal Gameplay |
Setups 04 and 05 |
|---|---|
|
|
|
Setup 06 - Credits in Gerudo Valley#
Map # |
Map Name |
Map Select # |
Stage # |
|---|---|---|---|
090 |
Spot 09 - Gerudo Valley |
10 |
02 |
Cutscene - xxx ✔
This is the cutscene environment in which the credits play in Gerudo Valley.
Environment Settings#
xxx
Layout Differences#
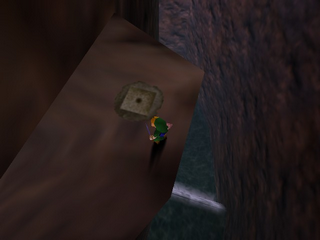
There is a Magic Bean spot on a section of cliff that is normally occupied by a grotto.
Unloaded Actors#
xxx
Unloaded Objects#
The fence that prevents Link from crossing the river is present, but not loaded.
Exit Differences#
Setup 00 |
|
|---|---|
018D |
Hyrule Field |
0219 |
Lake Hylia |
0130 |
Haunted Wasteland |
0129 |
Gerudo Fortress |
03A0 |
Carpenter's Tent |
Lost Woods#
Setup 04 - Saria Confronts Link#
Map # |
Map Name |
Map Select # |
Stage # |
|---|---|---|---|
091 |
Spot 10 - Lost Woods |
11 |
00 |
This is the cutscene environment in which Saria confronts Link on the bridge as he leaves Kokiri Forest.
Environment Settings#
xxx
Layout Differences#
The Magic Bean spot is positioned near the bridge on the ground.
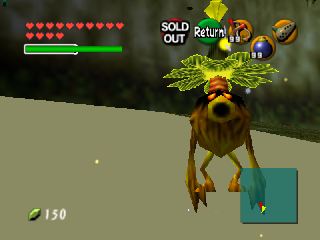
The Business Scrub, while loaded, is submerged in the ground. This indicates that the layout of the area was changed for the retail game. While the Scrub normally sells a Deku Stick upgrade, he instead offers Link a Piece of Heart for 10 Rupees, like the Business Scrub in Lake Hylia during normal gameplay.
Unloaded Actors#
xxx
Unloaded Objects#
xxx
Exit Differences#
Does not contain any difference.
Desert Colossus#
Setup 04 - Learning the Requiem of Spirit#
Map # |
Map Name |
Map Select # |
Stage # |
|---|---|---|---|
092 |
Spot 11 - Desert Colossus |
12 |
00 |
This is the cutscene environment in which Link learns the Requiem of Spirit.
Environment Settings#
xxx
Layout Differences#
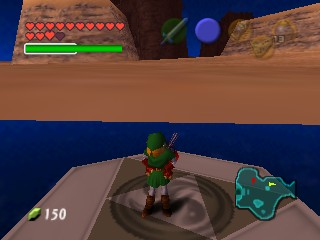
There are two actors buried in the ground, including the Spirit Temple's warp pad. This suggests that the level design was flatter at one point in development.
Unloaded Actors#
Actor |
Filename |
ID |
Object |
Variable |
ID |
|---|---|---|---|---|---|
019F |
ovl_Bg_Spot11_Bakudankabe |
Desert Colossus - Bombable Fairy Fountain Wall |
016F |
00FF |
??? |
01C2 |
ovl_Bg_Spot11_Oasis |
Desert Colossus - Oasis Water |
016F |
0000 |
Desert Colossus - Oasis Water |
Unloaded Objects#
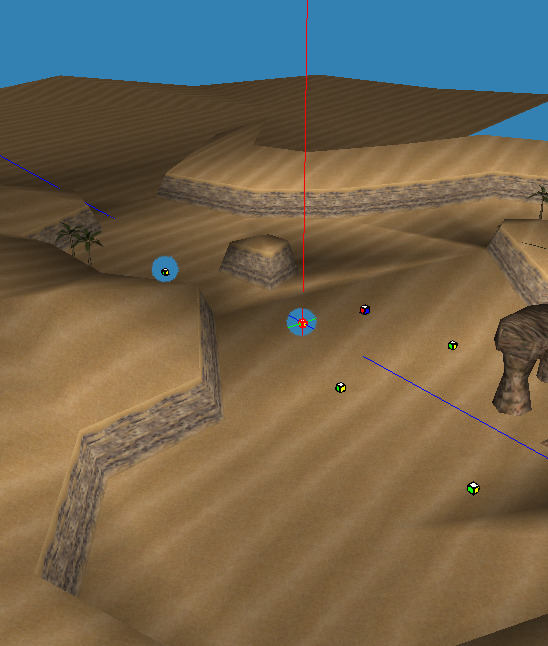
The second actor buried in the ground is not loaded because it is outside the collision area. It is part of a group of objects that contains the small rock circles found around Hyrule.
Number |
Filename |
ID |
|---|---|---|
0068 |
object_mjin_oka |
Ocarina Pad |
00B6 |
object_gi_melody |
Music Note |
0090 |
object_efc_flash |
Exit Differences#
Setup 00 |
|
|---|---|
0365 |
Haunted Wasteland |
0082 |
Spirit Temple |
03F0 |
Spirit Temple Silver Gauntlets Chest |
03F4 |
Spirit Temple Mirror Shield Chest |
0588 |
Great Fairy's Fountain |
Setup 05 - Nabooru Is Kidnapped#
Map # |
Map Name |
Map Select # |
Stage # |
|---|---|---|---|
092 |
Spot 11 - Desert Colossus |
12 |
01 |
This is the cutscene environment in which Nabooru is kidnapped by Koume and Kotake.
Environment Settings#
xxx
Layout Differences#
xxx
Unloaded Actors#
Actor |
Filename |
ID |
Object |
Variable |
ID |
|---|---|---|---|---|---|
019F |
ovl_Bg_Spot11_Bakudankabe |
Desert Colossus - Bombable Fairy Fountain Wall |
016F |
00FF |
??? |
019F |
ovl_Bg_Spot11_Bakudankabe |
Desert Colossus - Bombable Fairy Fountain Wall |
016F |
00FF |
??? |
01C2 |
ovl_Bg_Spot11_Oasis |
Desert Colossus - Oasis Water |
016F |
0000 |
Desert Colossus - Oasis Water |
Unloaded Objects#
Number |
Filename |
ID |
|---|---|---|
0061 |
object_mjin |
Blank Triforce Warp Pad |
0066 |
object_mjin_soul |
Spirit Warp Pad |
Exit Differences#
Setup 00 |
|
|---|---|
0365 |
Haunted Wasteland |
0082 |
Spirit Temple |
03F0 |
Spirit Temple Silver Gauntlets Chest |
03F4 |
Spirit Temple Mirror Shield Chest |
0588 |
Great Fairy's Fountain |
Gerudo's Fortress#
Setup 00 - Child (Day)#
Map # |
Map Name |
Map Select # |
Stage # |
|---|---|---|---|
093 |
Spot 12 - Gerudo's Fortress |
13 |
おひる ジャラ (Age: 5) |
This is the Child (Day) environment of Gerudo's Fortress. Child Link is normally prevented from entering the fortress by a fence across the Gerudo Valley bridge. However, it is possible to visit as Child Link via illegitimate means, such as using the valley's lone Cucco to get over the fence, or by warping to the Desert Colossus and then backtracking through the Haunted Wasteland.
The two guards patrolling behind the fence in Gerudo Valley will normally never be able to catch you. However, if you get behind the fence and confront them, they will throw you into the river unless you have the Gerudo's Card. There are also three boxes stacked together behind the fence, something seen nowhere else in the game; if the two lower boxes are broken, the third box will be left floating in the air.
Environment Settings#
xxx
Layout Differences#
There are no Gerudo outside the fortress, save for one in front of the gate.
There is a Piece of Heart on top of the jail. Collecting the other Heart Pieces in the game will allow you to obtain 20 hearts, making this one extraneous.
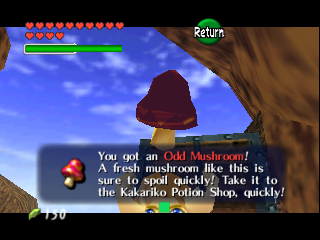
The chest at the top of the fortress is present, but it contains the Odd Mushroom instead of a Piece of Heart. The timer that normally counts down when the player acquires this Adult Link trade item does not start.
Unloaded Actors#
xxx
Unloaded Objects#
There are no cuttable signs loaded, as their objects are missing from the object list. Loading them manually reveals that the sign for the Horseback Archery Range is in a different position.
Exit Differences#
Does not contain any difference.
Setup 04 - Credits in Gerudo's Fortress#
Map # |
Map Name |
Map Select # |
Stage # |
|---|---|---|---|
093 |
Spot 12 - Gerudo's Fortress |
13 |
00 |
Cutscene - Horseback Archery Introduction ✔ ???
This is the cutscene environment in which xxx.
|
|
To do: |
Environment Settings#
xxx
Layout Differences#
xxx
Unloaded Actors#
Room 1 - ???
Actor |
Filename |
ID |
Object |
Variable |
ID |
|---|---|---|---|---|---|
0141 |
ovl_En_Kanban |
Square Sign |
012F |
031A |
Horseback Archery Range / Skilled players are welcome! Current record: X Points |
Unloaded Objects#
xxx
Exit Differences#
Setup 00 |
|
|---|---|
022D |
Gerudo Valley |
0486 |
Thieves' Hideout |
048A |
Thieves' Hideout |
048E |
Thieves' Hideout |
0492 |
Thieves' Hideout |
0496 |
Thieves' Hideout |
049A |
Thieves' Hideout |
049E |
Thieves' Hideout |
04A2 |
Thieves' Hideout |
04A6 |
Thieves' Hideout |
04AA |
Thieves' Hideout |
04AE |
Thieves' Hideout |
04B2 |
Thieves' Hideout |
0570 |
Thieves' Hideout |
0008 |
Gerudo Training Grounds |
0130 |
Haunted Wasteland |
Setup 05 - Credits in Gerudo's Fortress#
Map # |
Map Name |
Map Select # |
Stage # |
|---|---|---|---|
093 |
Spot 12 - Gerudo's Fortress |
13 |
01 |
This is the cutscene environment in which the credits play in Gerudo's Fortress. Only the lower part of Gerudo's Fortress is shown.
Environment Settings#
xxx
Layout Differences#
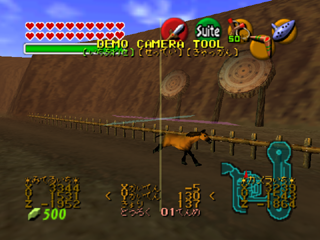
The Horseback Archery Range contains one of the brown horses that normally appear in Lon Lon Ranch.
Unloaded Actors#
Room 0 - ???
Actor |
Filename |
ID |
Object |
Variable |
ID |
|---|---|---|---|---|---|
0191 |
ovl_Bg_Spot12_Saku |
Gerudo's Fortress - Mesh Gate to Training Ground |
0162 |
00FF |
??? |
Unloaded Objects#
xxx
Exit Differences#
Setup 00 |
|
|---|---|
022D |
Gerudo Valley |
0486 |
Thieves' Hideout |
048A |
Thieves' Hideout |
048E |
Thieves' Hideout |
0492 |
Thieves' Hideout |
0496 |
Thieves' Hideout |
049A |
Thieves' Hideout |
049E |
Thieves' Hideout |
04A2 |
Thieves' Hideout |
04A6 |
Thieves' Hideout |
04AA |
Thieves' Hideout |
04AE |
Thieves' Hideout |
04B2 |
Thieves' Hideout |
0570 |
Thieves' Hideout |
0008 |
Gerudo Training Grounds |
0130 |
Haunted Wasteland |
Setup 06 - Thrown in Jail#
Map # |
Map Name |
Map Select # |
Stage # |
|---|---|---|---|
093 |
Spot 12 - Gerudo's Fortress |
13 |
02 |
This is the cutscene environment in which Link is jailed for trespassing by the Gerudo guards.
Environment Settings#
xxx
Layout Differences#
xxx
Unloaded Actors#
Room 0 - ???
Actor |
Filename |
ID |
Object |
Variable |
ID |
|---|---|---|---|---|---|
0191 |
ovl_Bg_Spot12_Saku |
Gerudo's Fortress - Mesh Gate to Training Ground |
0162 |
00FF |
??? |
Room 1 - ???
Actor |
Filename |
ID |
Object |
Variable |
ID |
|---|---|---|---|---|---|
01A0 |
ovl_Obj_Kibako2 |
Wooden Crate |
0170 |
FFFF |
??? |
01A0 |
ovl_Obj_Kibako2 |
Wooden Crate |
0170 |
FFFF |
??? |
01A0 |
ovl_Obj_Kibako2 |
Wooden Crate |
0170 |
FFFF |
??? |
01A0 |
ovl_Obj_Kibako2 |
Wooden Crate |
0170 |
FFFF |
??? |
01A0 |
ovl_Obj_Kibako2 |
Wooden Crate |
0170 |
FFFF |
??? |
01A0 |
ovl_Obj_Kibako2 |
Wooden Crate |
0170 |
FFFF |
??? |
Unloaded Objects#
xxx
Exit Differences#
Does not contain any difference.
Hyrule Castle#
Unreferenced Setup 01 (Unused)#
Map # |
Map Name |
Map Select # |
Stage # |
|---|---|---|---|
095 |
Spot 15 - Hyrule Castle |
15 |
N/A |
This is an unreferenced setup that cannot be accessed via Map Select. It appears to be an unused version of Hyrule Castle.
Its data is located at offset 0x021f9d20 in version 1.0.
Environment Settings#
xxx
Layout Differences#
xxx
Unloaded Actors#
xxx
Unloaded Objects#
xxx
Exit Differences#
The player spawn at the entrance tothe Great Fairy's Fountain is different.
When Link is captured by the castle guards, he respawns facing away from the main gate rather than towards it. There is also no animation of Link being thrown forward like in the used version.
Instead of taking Link to the Great Fairy's Fountain where he receives Din's Fire, the fountain exit leads to the Great Fairy's Fountain where Link receives a magic meter and the Spin Attack. The latter is normally located on Death Mountain.
Setup 00 |
|
|---|---|
025A |
Market - Child Day |
007A |
Castle Courtyard |
0578 |
Great Fairy's Fountain |
Death Mountain Trail#
Setup 04#
Map # |
Map Name |
Map Select # |
Stage # |
|---|---|---|---|
096 |
Spot 16 - Death Mountain Trail |
16 |
00 |
Cutscene - Nayru Gives Law to the World ✔
This is the cutscene environment in which xxx.
Environment Settings#
xxx
Layout Differences#
xxx
Unloaded Actors#
Actor |
Filename |
ID |
Object |
Variable |
ID |
|---|---|---|---|---|---|
00E5 |
ovl_Bg_Spot16_Doughnut |
Death Mountain Cloud Ring |
017A |
FFFF |
Death Mountain Cloud Ring |
Unloaded Objects#
xxx
Exit Differences#
Setup 00 |
|
|---|---|
0191 |
Kakariko Village |
014D |
Goron City |
0147 |
Death Mountain Crater |
0004 |
Dondogo's Cavern |
0315 |
Great Fairy's Fountain |
Setup 05#
Map # |
Map Name |
Map Select # |
Stage # |
|---|---|---|---|
096 |
Spot 16 - Death Mountain Trail |
16 |
01 |
Cutscene - Receiving Goron's Ruby ✔
This is the cutscene environment in which xxx.
Environment Settings#
xxx
Layout Differences#
xxx
Unloaded Actors#
Actor |
Filename |
ID |
Object |
Variable |
ID |
|---|---|---|---|---|---|
00CD |
ovl_Bg_Spot16_Bombstone |
Boulder Blocking Dodongo's Cavern |
00C2 |
FFFF |
Boulder Blocking Dodongo's Cavern |
Unloaded Objects#
xxx
Exit Differences#
Setup 00 |
|
|---|---|
0191 |
Kakariko Village |
014D |
Goron City |
0147 |
Death Mountain Crater |
0004 |
Dondogo's Cavern |
0315 |
Great Fairy's Fountain |
Setup 06 - (Unused)#
Map # |
Map Name |
Map Select # |
Stage # |
|---|---|---|---|
096 |
Spot 16 - Death Mountain Trail |
16 |
02 |
Cutscene - xxx ✘? ?
This is an unused cutscene environment in which the camera pans down the valley to the distant sight of Kakariko Village, then shows the section of the trail down which a Goron normally rolls. The sound of something dropping is heard, and Link gives his surprised grunt from Setup 05, in which he receives the Goron's Ruby.
After waiting for around 45 seconds, the player will gain control of Link and see the Ruby stuck in the ground in front of him. Moving further away from the area causes the sound of the Ruby to increase in pitch.
Environment Settings#
xxx
Layout Differences#
xxx
Unloaded Actors#
Actor |
Filename |
ID |
Object |
Variable |
ID |
|---|---|---|---|---|---|
00CD |
ovl_Bg_Spot16_Bombstone |
Boulder Blocking Dodongo's Cavern |
00C2 |
FFFF |
Boulder Blocking Dodongo's Cavern |
Unloaded Objects#
xxx
Exit Differences#
Setup 00 |
|
|---|---|
0191 |
Kakariko Village |
014D |
Goron City |
0147 |
Death Mountain Crater |
0004 |
Dondogo's Cavern |
0315 |
Great Fairy's Fountain |
Setup 07#
Map # |
Map Name |
Map Select # |
Stage # |
|---|---|---|---|
096 |
Spot 16 - Death Mountain Trail |
16 |
03 |
Cutscene - Credits at Death Mountain Trail ✔
This is the cutscene environment in which xxx.
Environment Settings#
xxx
Layout Differences#
xxx
Unloaded Actors#
xxx
Unloaded Objects#
xxx
Exit Differences#
Setup 00 |
|
|---|---|
0191 |
Kakariko Village |
014D |
Goron City |
0147 |
Death Mountain Crater |
0004 |
Dondogo's Cavern |
0315 |
Great Fairy's Fountain |
Setup 08#
Map # |
Map Name |
Map Select # |
Stage # |
|---|---|---|---|
096 |
Spot 16 - Death Mountain Trail |
16 |
04 |
Cutscene - Sages Stand on Death Mountain During Ending ✔
This is the cutscene environment in which xxx.
Environment Settings#
xxx
Layout Differences#
xxx
Unloaded Actors#
Actor |
Filename |
ID |
Object |
Variable |
ID |
|---|---|---|---|---|---|
00E5 |
ovl_Bg_Spot16_Doughnut |
Death Mountain Cloud Ring |
017A |
FFFF |
Death Mountain Cloud Ring |
Unloaded Objects#
xxx
Exit Differences#
Setup 00 |
|
|---|---|
0191 |
Kakariko Village |
014D |
Goron City |
0147 |
Death Mountain Crater |
0004 |
Dondogo's Cavern |
0315 |
Great Fairy's Fountain |
Unreferenced Setup 01 (Unused)#
Map # |
Map Name |
Map Select # |
Stage # |
|---|---|---|---|
096 |
Spot 16 - Death Mountain Trail |
16 |
N/A |
This is an unreferenced setup that cannot be accessed via Map Select. It appears to be an unused night version of Death Mountain Trail, perhaps from a period of development when, like Kakariko Village, the area had separate night and day setups and time did not pass.
In order to explore the setup, use a hex editor to navigate to scene header 78a0, room header 07c0 in the ROM. Then, replace 0200 A075 with 0200 A078, and 0300 03F0 with 0300 07C0, and head to Death Mountain Trail as an adult.
Environment Settings#
xxx
Layout Differences#
There is no circle of smoke ringing Death Mountain.
A Bomb Flower is positioned in a spot that can be seen in pre-release images from November 1997.
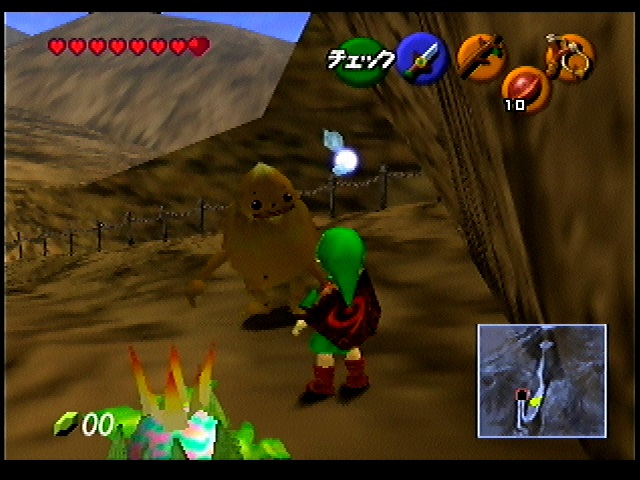
Unloaded Actors#
Actor |
Filename |
ID |
Object |
Variable |
ID |
|---|---|---|---|---|---|
0026 |
ovl_En_Hata |
Flagpole |
0076 |
FFFF |
??? |
0026 |
ovl_En_Hata |
Flagpole |
0076 |
FFFF |
??? |
00CD |
ovl_Bg_Spot16_Bombstone |
Boulder Blocking Dodongo's Cavern |
00C2 |
FFFF |
Boulder Blocking Dodongo's Cavern |
Unloaded Objects#
There are Armos present in the object list, but they are not loaded, as they have no corresponding actors.
Exit Differences#
The player spawns are located in different places. For example, the location at which the player appears upon entering the map from Goron City seems to be located near the stone circle.
The Great Fairy's Fountain exit freezes, indicating that it was not present in the map at this time.
Setup 00 |
|
|---|---|
0191 |
Kakariko Village |
014D |
Goron City |
0147 |
Death Mountain Crater |
0004 |
Dondogo's Cavern |
0315 |
Great Fairy's Fountain |
Death Mountain Crater#
Setup 04 - Learning the Bolero of Fire#
Map # |
Map Name |
Map Select # |
Stage # |
|---|---|---|---|
097 |
Spot 17 - Death Mountain Crater |
17 |
00 |
This is the cutscene environment in which Link learns the Bolero of Fire.
Environment Settings#
xxx
Layout Differences#
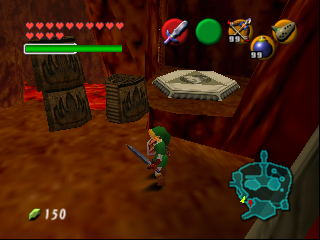
The warp pad is positioned on a small platform.
In addition, several Megaton Blocks sit idle.
Unloaded Actors#
xxx
Unloaded Objects#
xxx
Exit Differences#
Setup 00 |
|
|---|---|
01BD |
Death Mountain Trail |
01C1 |
Goron City |
0165 |
Fire Temple |
04BE |
Great Fairy's Fountain |
Setup 05#
Map # |
Map Name |
Map Select # |
Stage # |
|---|---|---|---|
097 |
Spot 17 - Death Mountain Crater |
17 |
01 |
Cutscene - Learning the Bolero of Fire in Opening Demo ✔ Not used anywhere else?
This is the cutscene environment in which xxx.
Environment Settings#
xxx
Layout Differences#
xxx
Unloaded Actors#
xxx
Unloaded Objects#
xxx
Exit Differences#
Setup 00 |
|
|---|---|
01BD |
Death Mountain Trail |
01C1 |
Goron City |
0165 |
Fire Temple |
04BE |
Great Fairy's Fountain |
Goron City#
Setup 04 - Darunia Dances to Saria's Song#
Map # |
Map Name |
Map Select # |
Stage # |
|---|---|---|---|
098 |
Spot 18 - Goron City |
18 |
00 |
This is the cutscene environment in which Darunia dances to Saria's Song.
Environment Settings#
The lighting is much darker than it is during normal gameplay.
Layout Differences#
The Gorons are positioned differently than usual throughout the area. Some are very close to the fence and clip through it when they stand, which may suggest that there was not originally a fence in this location.
The treasure room on the highest floor has large chests containing Bombs. In normal gameplay, they contain Rupees. The large assortment of boulders in the room is also missing.
The lava room has no time blocks. Instead of a grotto entrance leading to a Business Scrub cave, there is another treasure chest with Bombs. Only one side of the lava has a Hookshot platform, so Link cannot return to the opposite side of the room without getting hurt.
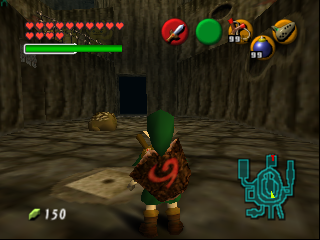
There is a Magic Bean spot on the bottom floor. In the retail game, there are no places in Goron City unreachable by normal means, so its purpose is unclear. Perhaps the middle platform originally had no ropes upon which Link was able to walk?
Unloaded Actors#
Room 0 - ???
Actor |
Filename |
ID |
Object |
Variable |
ID |
Quantity |
|---|---|---|---|---|---|---|
0127 |
ovl_Obj_Bombiwa |
Bombable Boulder |
0163 |
00FF |
??? |
87 |
Room 1 - ???
Actor |
Filename |
ID |
Object |
Variable |
ID |
|---|---|---|---|---|---|
005E |
ovl_Obj_Syokudai |
Torch |
00A4 |
2400 |
??? |
005E |
ovl_Obj_Syokudai |
Torch |
00A4 |
2400 |
??? |
Room 2 - ???
Actor |
Filename |
ID |
Object |
Variable |
ID |
|---|---|---|---|---|---|
0059 |
ovl_Bg_Breakwall |
??? |
0001 |
2002 |
??? |
0059 |
ovl_Bg_Breakwall |
??? |
0001 |
2004 |
??? |
0059 |
ovl_Bg_Breakwall |
??? |
0001 |
2005 |
??? |
0059 |
ovl_Bg_Breakwall |
??? |
0001 |
2006 |
??? |
0127 |
ovl_Obj_Bombiwa |
Bombable Boulder |
0163 |
00FF |
??? |
0127 |
ovl_Obj_Bombiwa |
Bombable Boulder |
0163 |
00FF |
??? |
Room 3 - ???
Actor |
Filename |
ID |
Object |
Variable |
ID |
Quantity |
|---|---|---|---|---|---|---|
0127 |
ovl_Obj_Bombiwa |
Bombable Boulder |
0163 |
0003 |
??? |
6 |
0059 |
ovl_Bg_Breakwall |
0001 |
2002 |
??? |
||
0059 |
ovl_Bg_Breakwall |
0001 |
2004 |
??? |
Unloaded Objects#
Two types of actors are not loaded because their objects are missing from the object list.
The first is several bombable boulders that are missing from the entrance to the Lost Woods, the path to the boulder-filled room, the boulder-filled room itself, and the boulders in Medigoron's room.
The second is the bombable wall in Medigoron's room. When loaded, it is revealed to be in a different position than usual.
The only ones left are the bombable boulder and bombable wall.
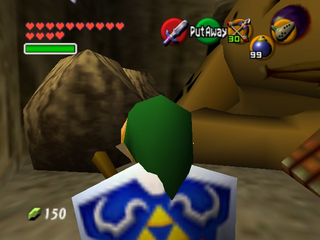
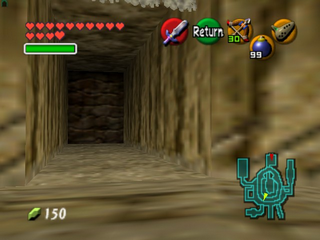
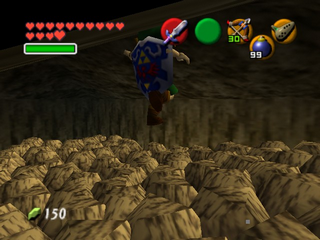
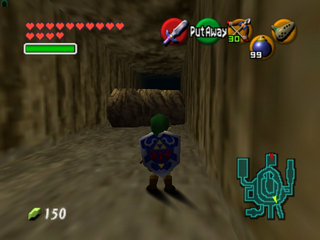
Exit Differences#
Setup 00 |
|
|---|---|
01B9 |
Death Mountain Trail |
0246 |
Death Mountain Crater |
037C |
Goron Shop |
04D6 |
Lost Woods |
Setup 05#
Map # |
Map Name |
Map Select # |
Stage # |
|---|---|---|---|
098 |
Spot 18 - Goron City |
18 |
01 |
Cutscene - Credits in Goron City ✔
This is the cutscene environment in which xxx.
Environment Settings#
xxx
Layout Differences#
xxx
Unloaded Actors#
xxx
Unloaded Objects#
xxx
Exit Differences#
Setup 00 |
|
|---|---|
01B9 |
Death Mountain Trail |
0246 |
Death Mountain Crater |
037C |
Goron Shop |
04D6 |
Lost Woods |
Lon Lon Ranch#
Setup 04#
Map # |
Map Name |
Map Select # |
Stage # |
|---|---|---|---|
099 |
Spot 20 - Lon Lon Ranch |
19 |
00 |
Cutscene - Introduction to Ingo's Race ✔
This is the cutscene environment in which xxx.
Environment Settings#
xxx
Layout Differences#
xxx
Unloaded Actors#
xxx
Unloaded Objects#
xxx
Exit Differences#
Does not contain any difference.
Setup 05#
Map # |
Map Name |
Map Select # |
Stage # |
|---|---|---|---|
099 |
Spot 20 - Lon Lon Ranch |
19 |
01 |
Cutscene - Learning Epona's Song ✔
This is the cutscene environment in which xxx.
Environment Settings#
xxx
Layout Differences#
xxx
Unloaded Actors#
xxx
Unloaded Objects#
xxx
Exit Differences#
Setup 00 |
|
|---|---|
01F9 |
Hyrule Field |
028A |
Hyrule Field Southern Fence Jump |
028E |
Hyrule Field Western Fence Jump |
0292 |
Hyrule Field Eastern Fence Jump |
004F |
Talon's House |
02F9 |
Stables |
05D0 |
Tower |
Setup 06 - Credits in Lon Lon Ranch (Circle of Flames)#
Map # |
Map Name |
Map Select # |
Stage # |
|---|---|---|---|
099 |
Spot 20 - Lon Lon Ranch |
19 |
02 |
This is the cutscene environment in which the Artwork Unit is credited as the camera pans down to a circle of rainbow-colored flames.
Environment Settings#
xxx
Layout Differences#
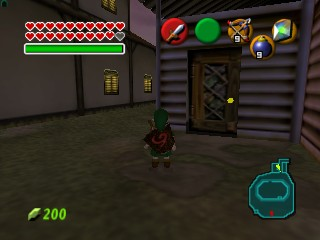
The doors to the ranch buildings are the same ones used in the Forest Temple.
Unloaded Actors#
xxx
Unloaded Objects#
xxx
Exit Differences#
Do not have exits.
Setup 07#
Map # |
Map Name |
Map Select # |
Stage # |
|---|---|---|---|
099 |
Spot 20 - Lon Lon Ranch |
19 |
03 |
Cutscene - Credits 2 - Support Unit ✔ Talon & Ingo
This is the cutscene environment in which xxx.
Environment Settings#
xxx
Layout Differences#
xxx
Unloaded Actors#
xxx
Unloaded Objects#
xxx
Exit Differences#
Do not have exits.
Setup 08#
Map # |
Map Name |
Map Select # |
Stage # |
|---|---|---|---|
099 |
Spot 20 - Lon Lon Ranch |
19 |
04 |
Cutscene - Credits 3 - Script Support ✔ Hyrule Market Hagglers
This is the cutscene environment in which xxx.
Environment Settings#
xxx
Layout Differences#
xxx
Unloaded Actors#
xxx
Unloaded Objects#
xxx
Exit Differences#
Do not have exits.
Setup 09#
Map # |
Map Name |
Map Select # |
Stage # |
|---|---|---|---|
099 |
Spot 20 - Lon Lon Ranch |
19 |
05 |
Cutscene - Credits 4 - French Text Writer ✔ Adult Malon Singing
This is the cutscene environment in which xxx.
Environment Settings#
xxx
Layout Differences#
xxx
Unloaded Actors#
xxx
Unloaded Objects#
xxx
Exit Differences#
Do not have exits.
Setup 10#
Map # |
Map Name |
Map Select # |
Stage # |
|---|---|---|---|
099 |
Spot 20 - Lon Lon Ranch |
19 |
06 |
Cutscene - Credits 5 - Motion Editors ✔ Mido & King Zora Sitting
This is the cutscene environment in which xxx.
Environment Settings#
xxx
Layout Differences#
xxx
Unloaded Actors#
xxx
Unloaded Objects#
xxx
Exit Differences#
Do not have exits.
Setup 11#
Map # |
Map Name |
Map Select # |
Stage # |
|---|---|---|---|
099 |
Spot 20 - Lon Lon Ranch |
19 |
07 |
Cutscene - Credits 6 - Technical Support ✔ Fishing Pond Owner & Shop NPCs
This is the cutscene environment in which xxx.
Environment Settings#
xxx
Layout Differences#
xxx
Unloaded Actors#
xxx
Unloaded Objects#
xxx
Exit Differences#
Do not have exits.
Ganon's Castle Exterior#
Setup 04 - The Sages Construct the Rainbow Bridge#
Map # |
Map Name |
Map Select # |
Stage # |
|---|---|---|---|
100 |
Ganon's Castle Exterior |
15 |
00 |
This is the cutscene environment in which the Sages construct the rainbow bridge that allows Link to cross over to Ganon's Castle.
Environment Settings#
xxx
Layout Differences#
xxx
Unloaded Actors#
xxx
Unloaded Objects#
Number |
Filename |
ID |
|---|---|---|
0061 |
object_mjin |
Blank Triforce Warp Pad |
0068 |
object_mjin_oka |
Ocarina Pad |
001A |
object_horse |
Epona |
0090 |
object_efc_flash |
Exit Differences#
xxx
Unreferenced Setup 01 (Unused)#
Map # |
Map Name |
Map Select # |
Stage # |
|---|---|---|---|
100 |
Ganon's Castle Exterior |
15 |
N/A |
This is an unreferenced setup that cannot be accessed via Map Select. It appears to be an unused night version of Ganon's Castle (Exterior), perhaps from a period of development when, like the Market, the area had separate night and day setups and time did not pass.
If one checks Link's location on the world map while in the scene, it suggests he is in Hyrule Field.
Environment Settings#
The sky lacks clouds.
Layout Differences#
xxx
Unloaded Actors#
xxx
Unloaded Objects#
xxx
Exit Differences#
Some player spawns are coordinated differently.
Entering the castle will take Link to Ganon's Tower, rather than Inside Ganon's Castle.