 This article has a talk page!
This is a sub-page of The Hundred Line: Last Defense Academy.
Unused Sprites#
Takumi Sumino#
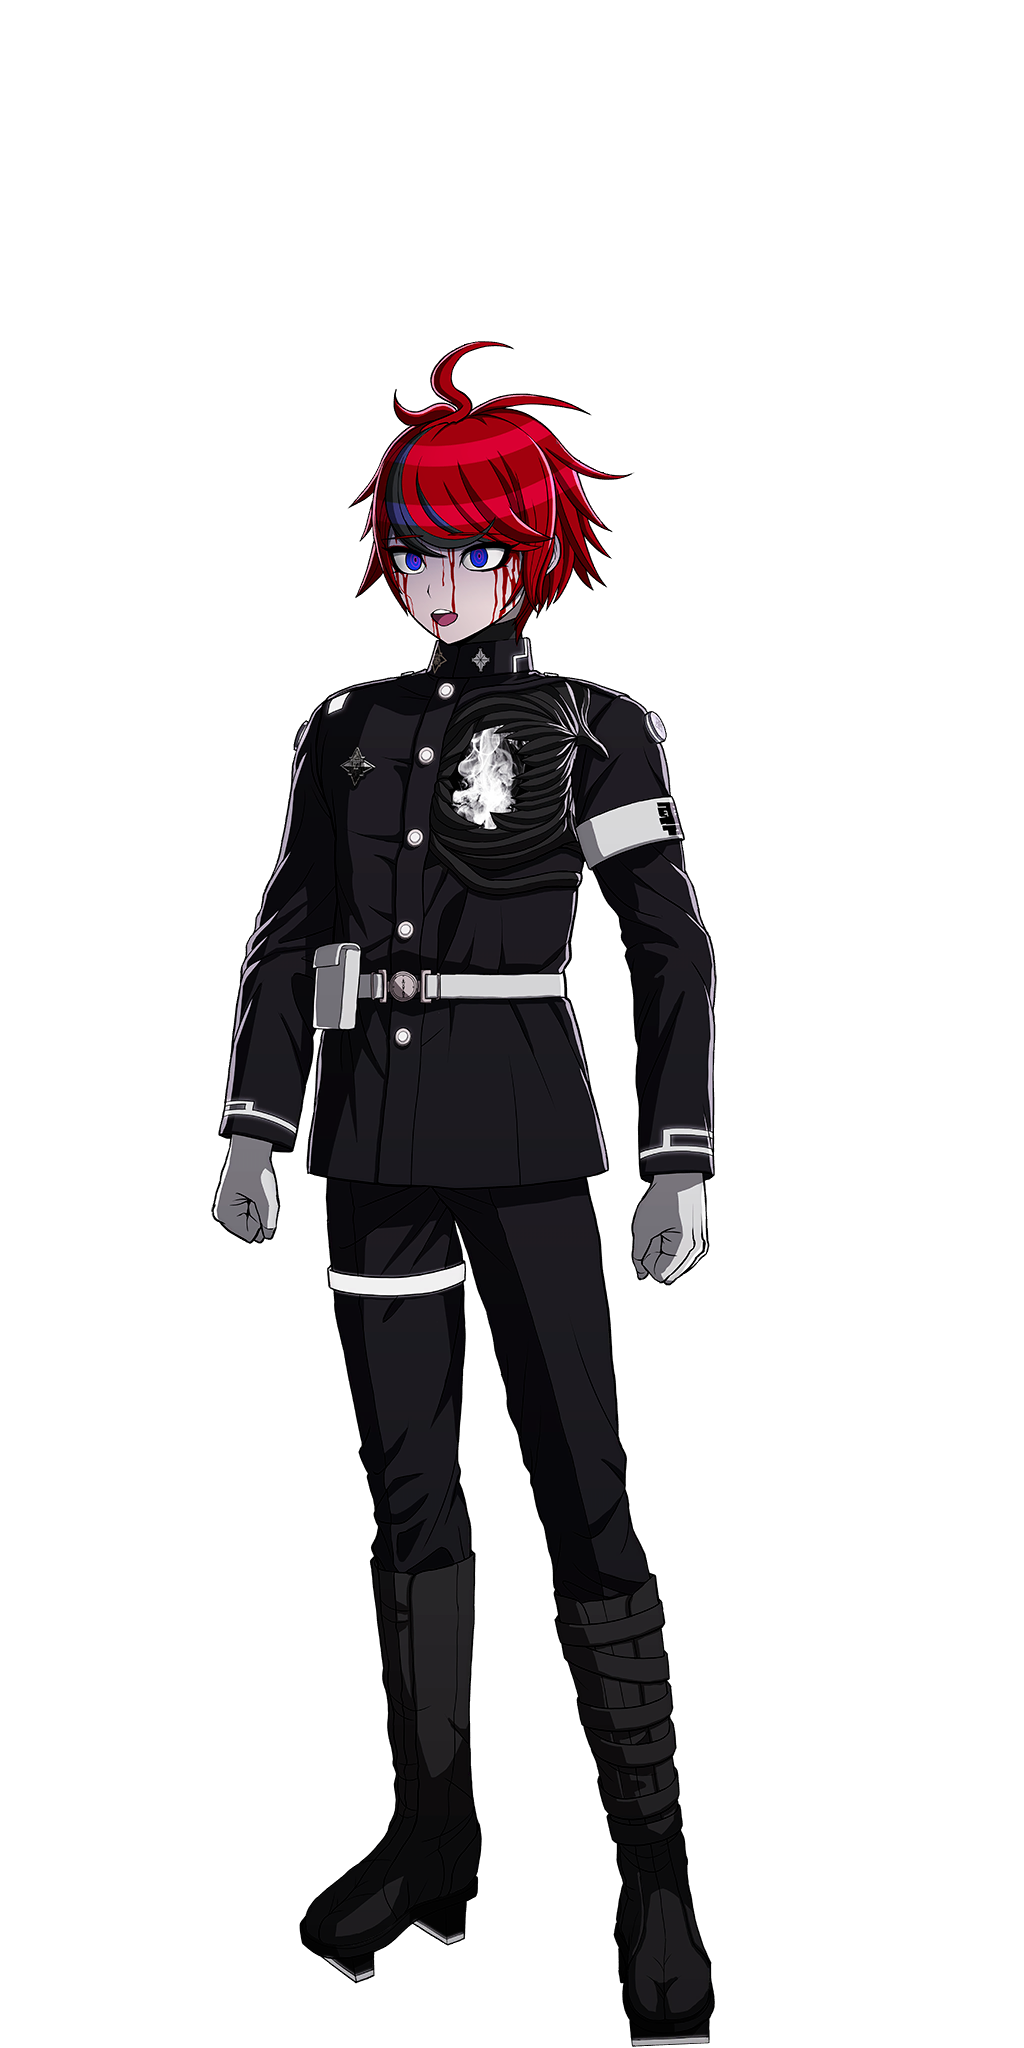
An unused sprite of a bloodied Takumi in his Class Armor.
Takemaru Yakushiji#
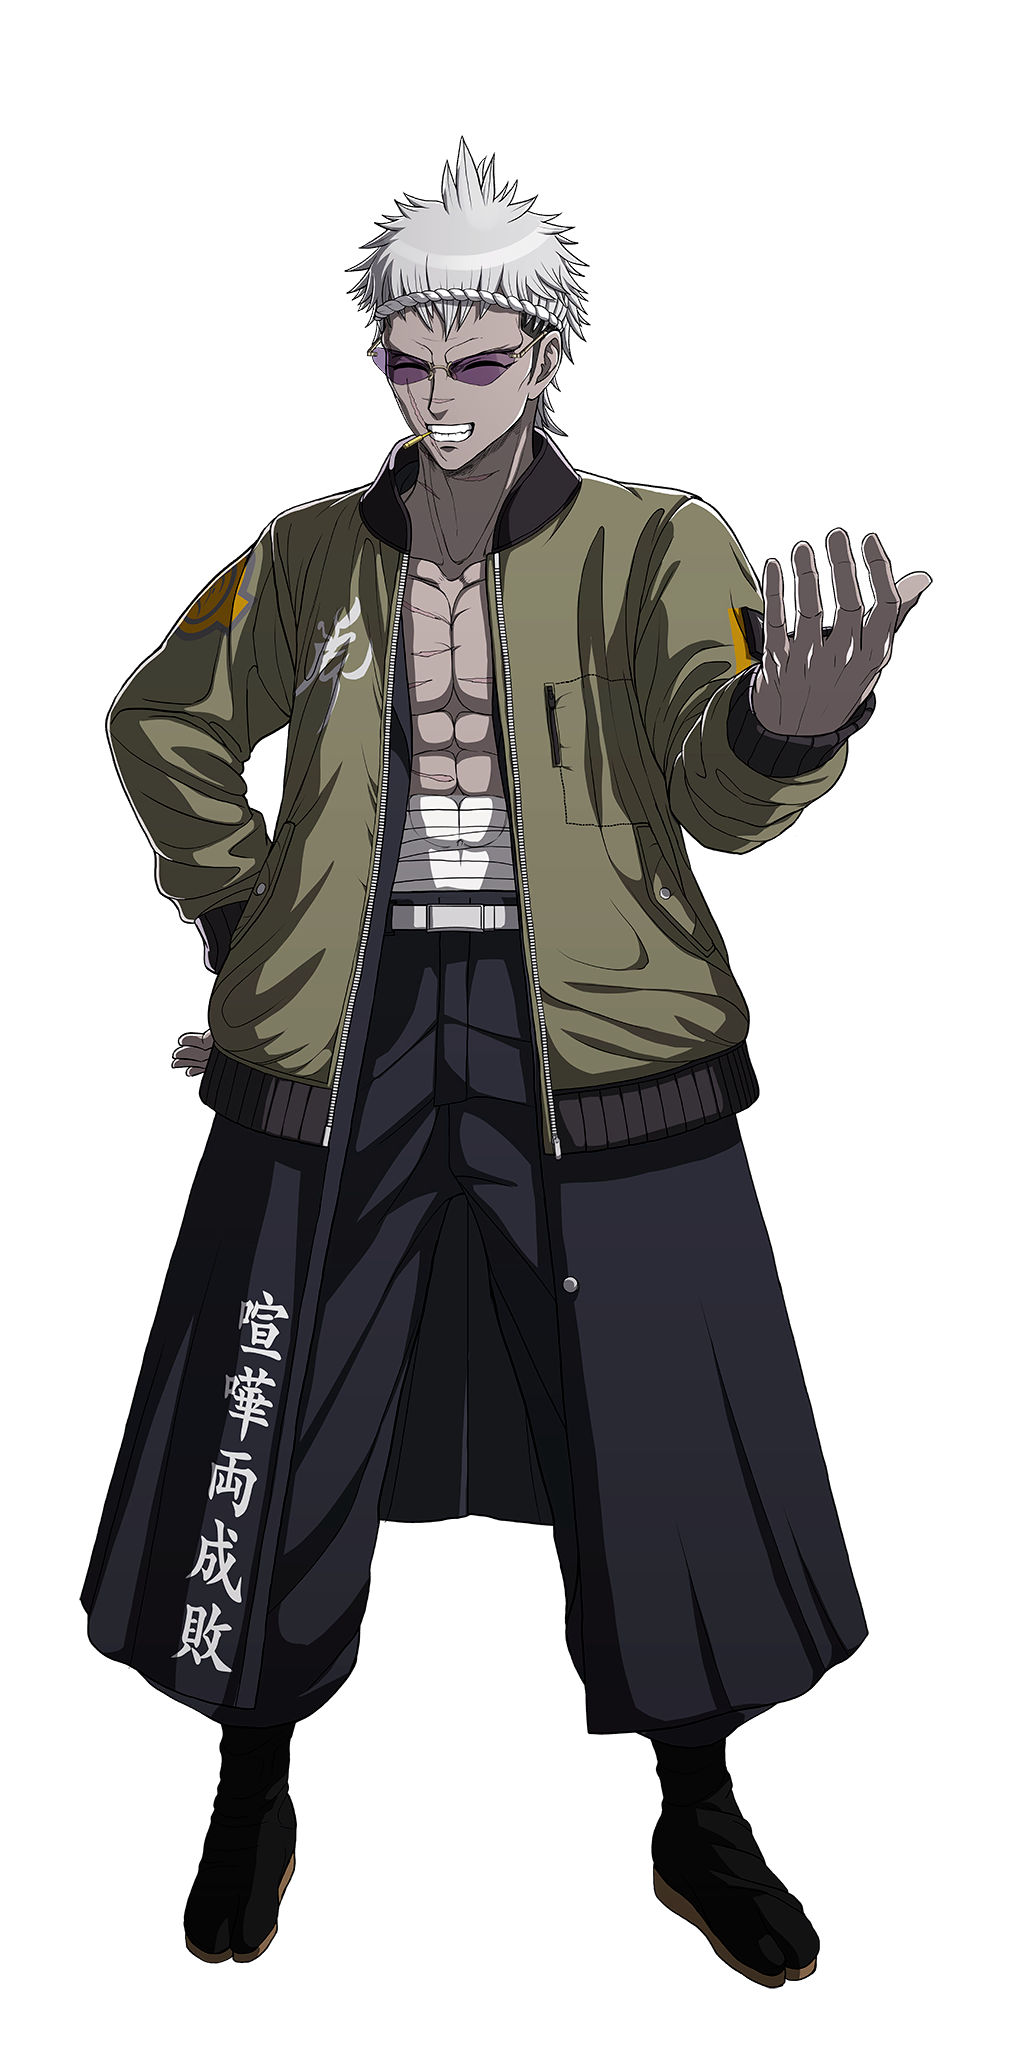
This unused sprite of Takemaru is technically used in exactly one place: one of his portraits visible while he is selected on the Bonding Events section of the Gallery. However, only a portion of this sprite is visible, and even then most of it is blocked by the large Takemaru neutral sprite standing in front of the other portraits (including this one) in the background.
Hiruko Shizuhara#
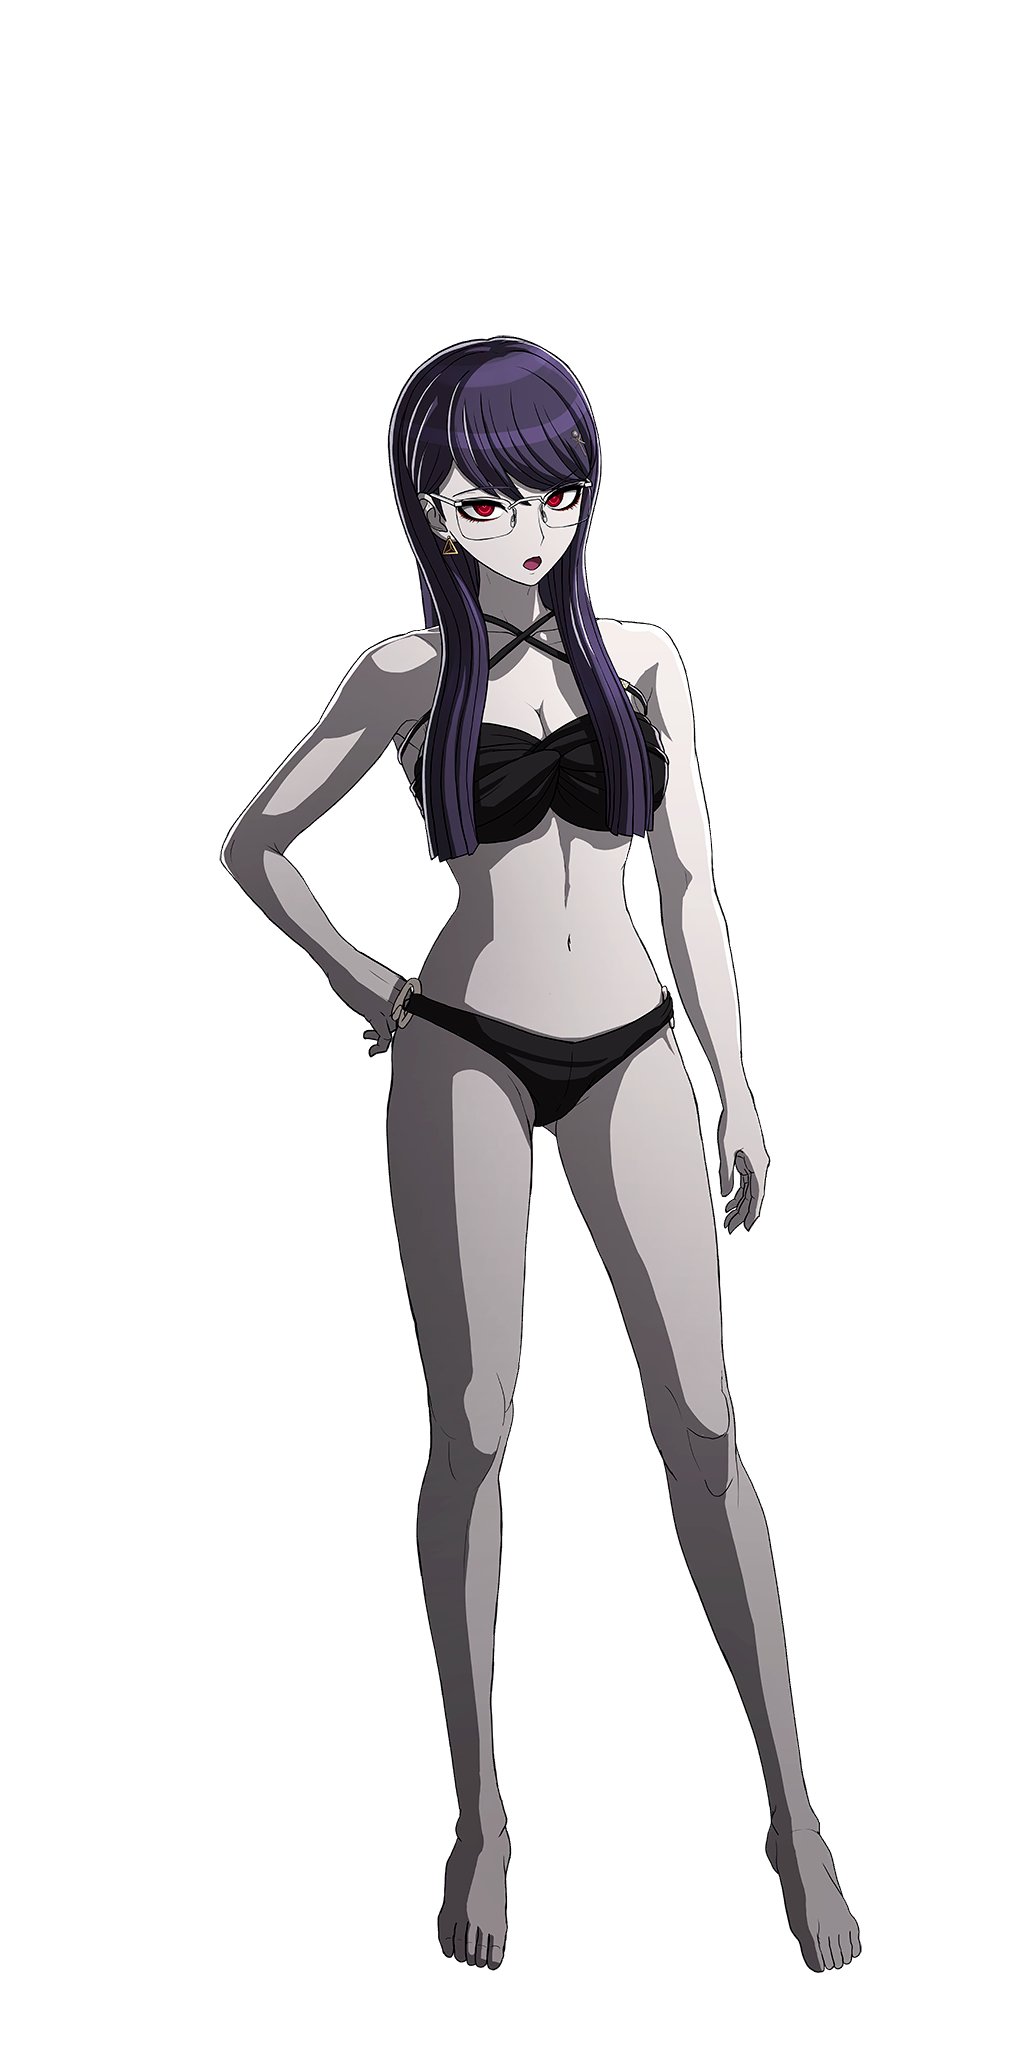
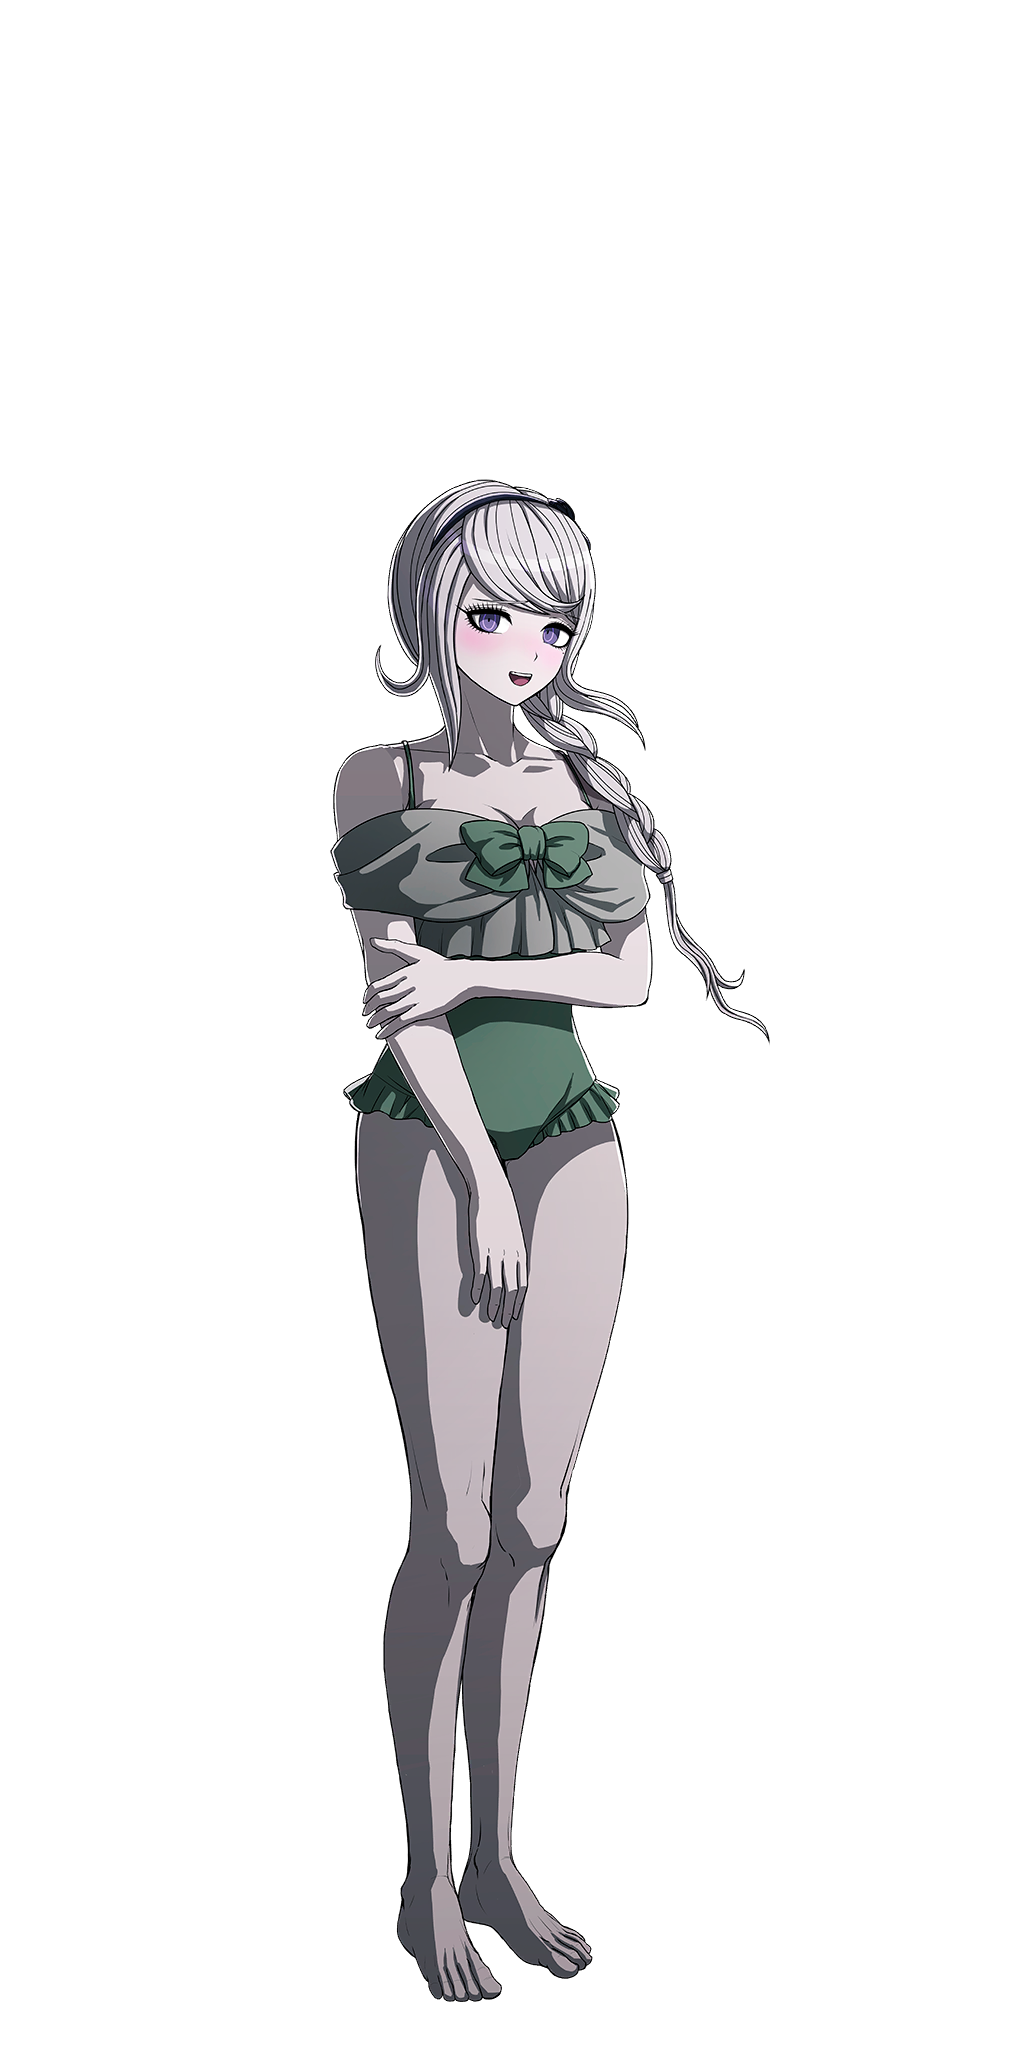
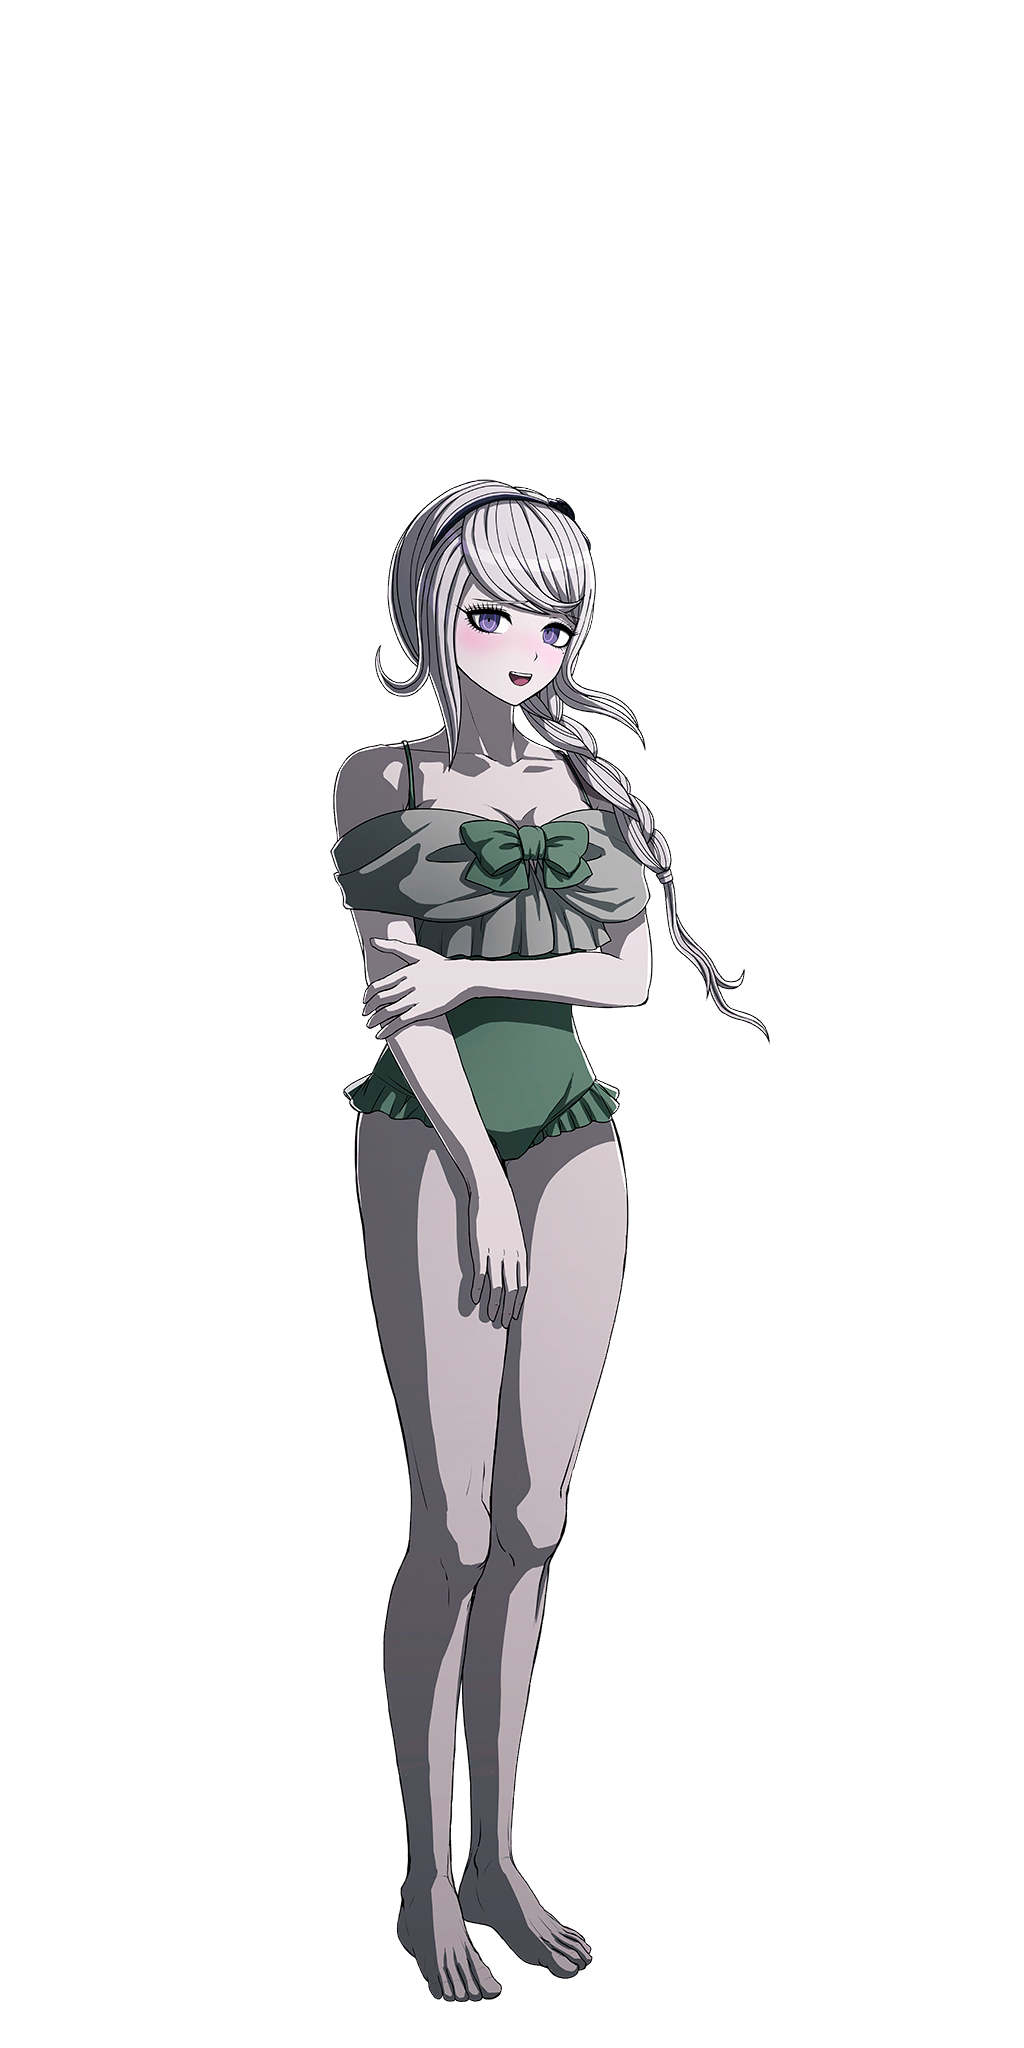
An unused sprite of Hiruko in her swimsuit. This is extremely similar to one of her other swimsuit sprites, but with a different expression.
Darumi Amemiya#
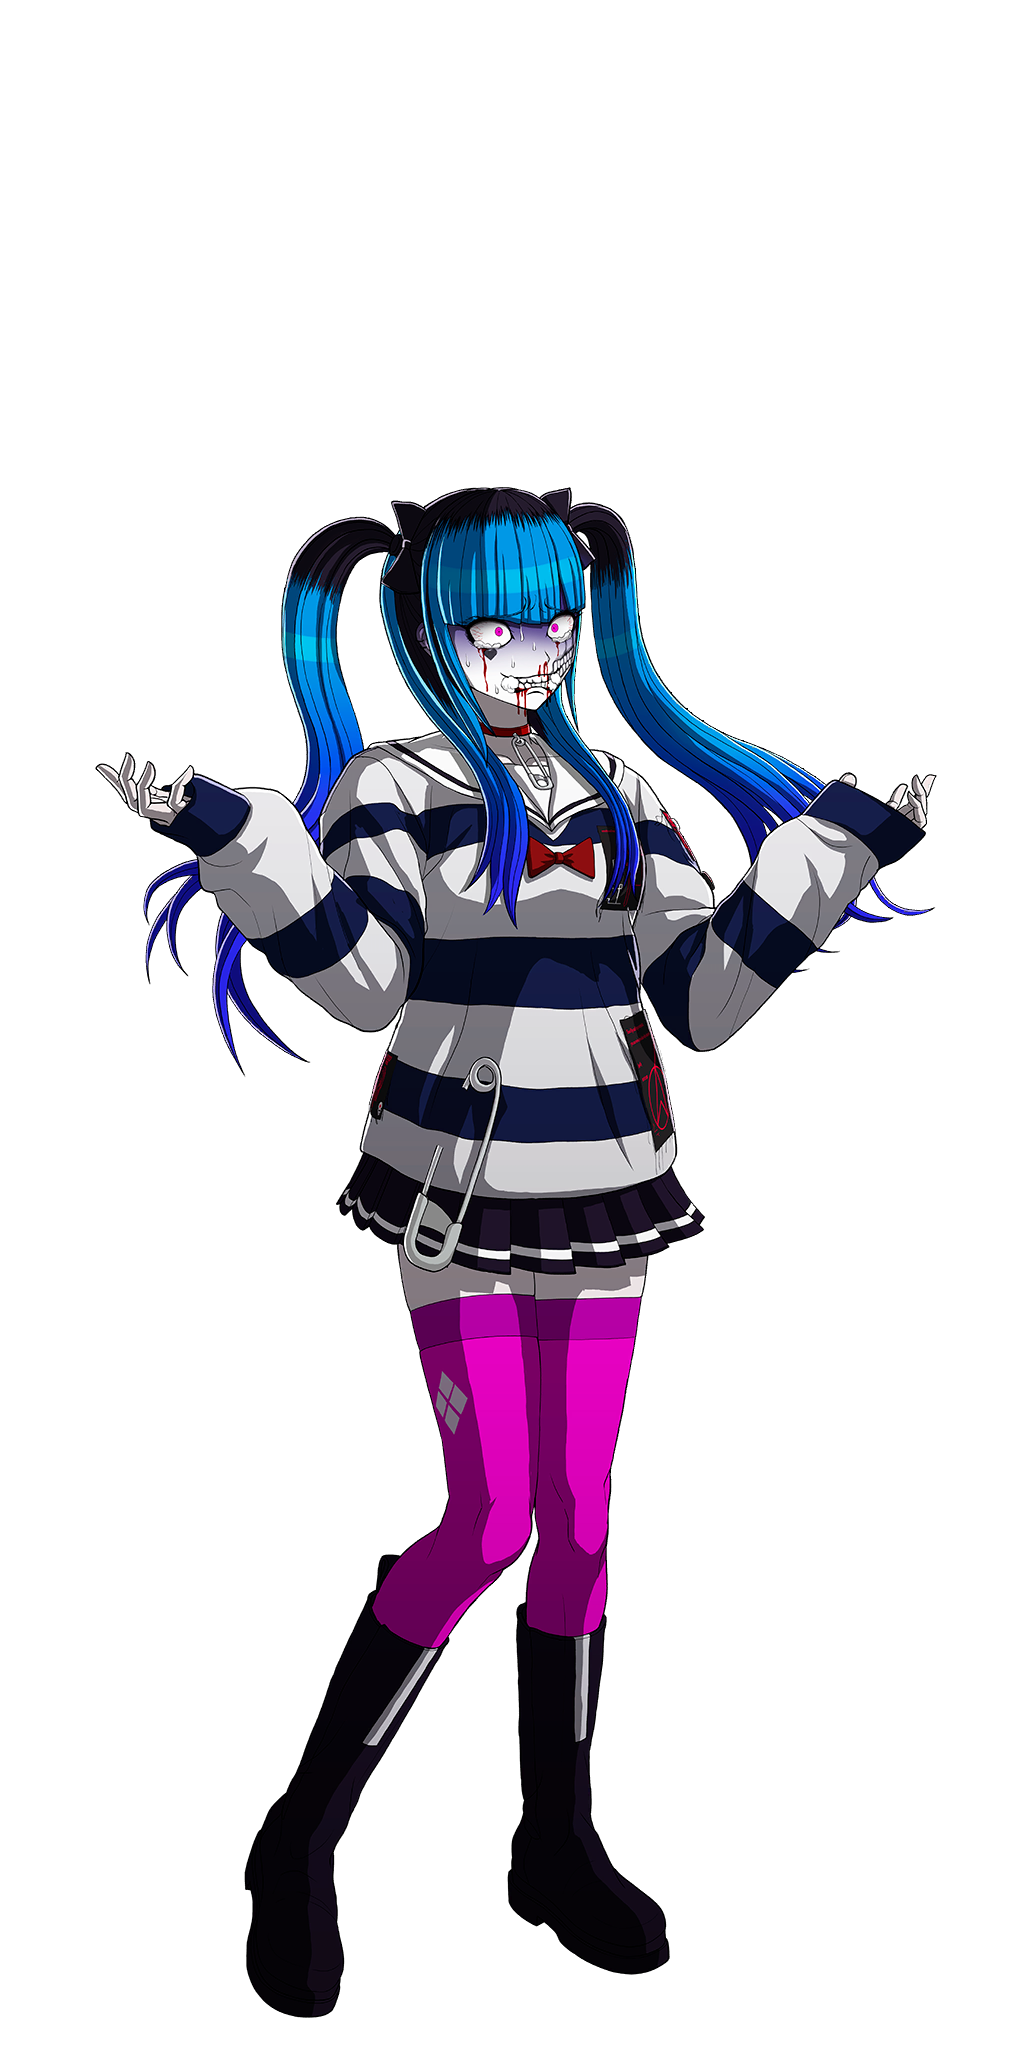
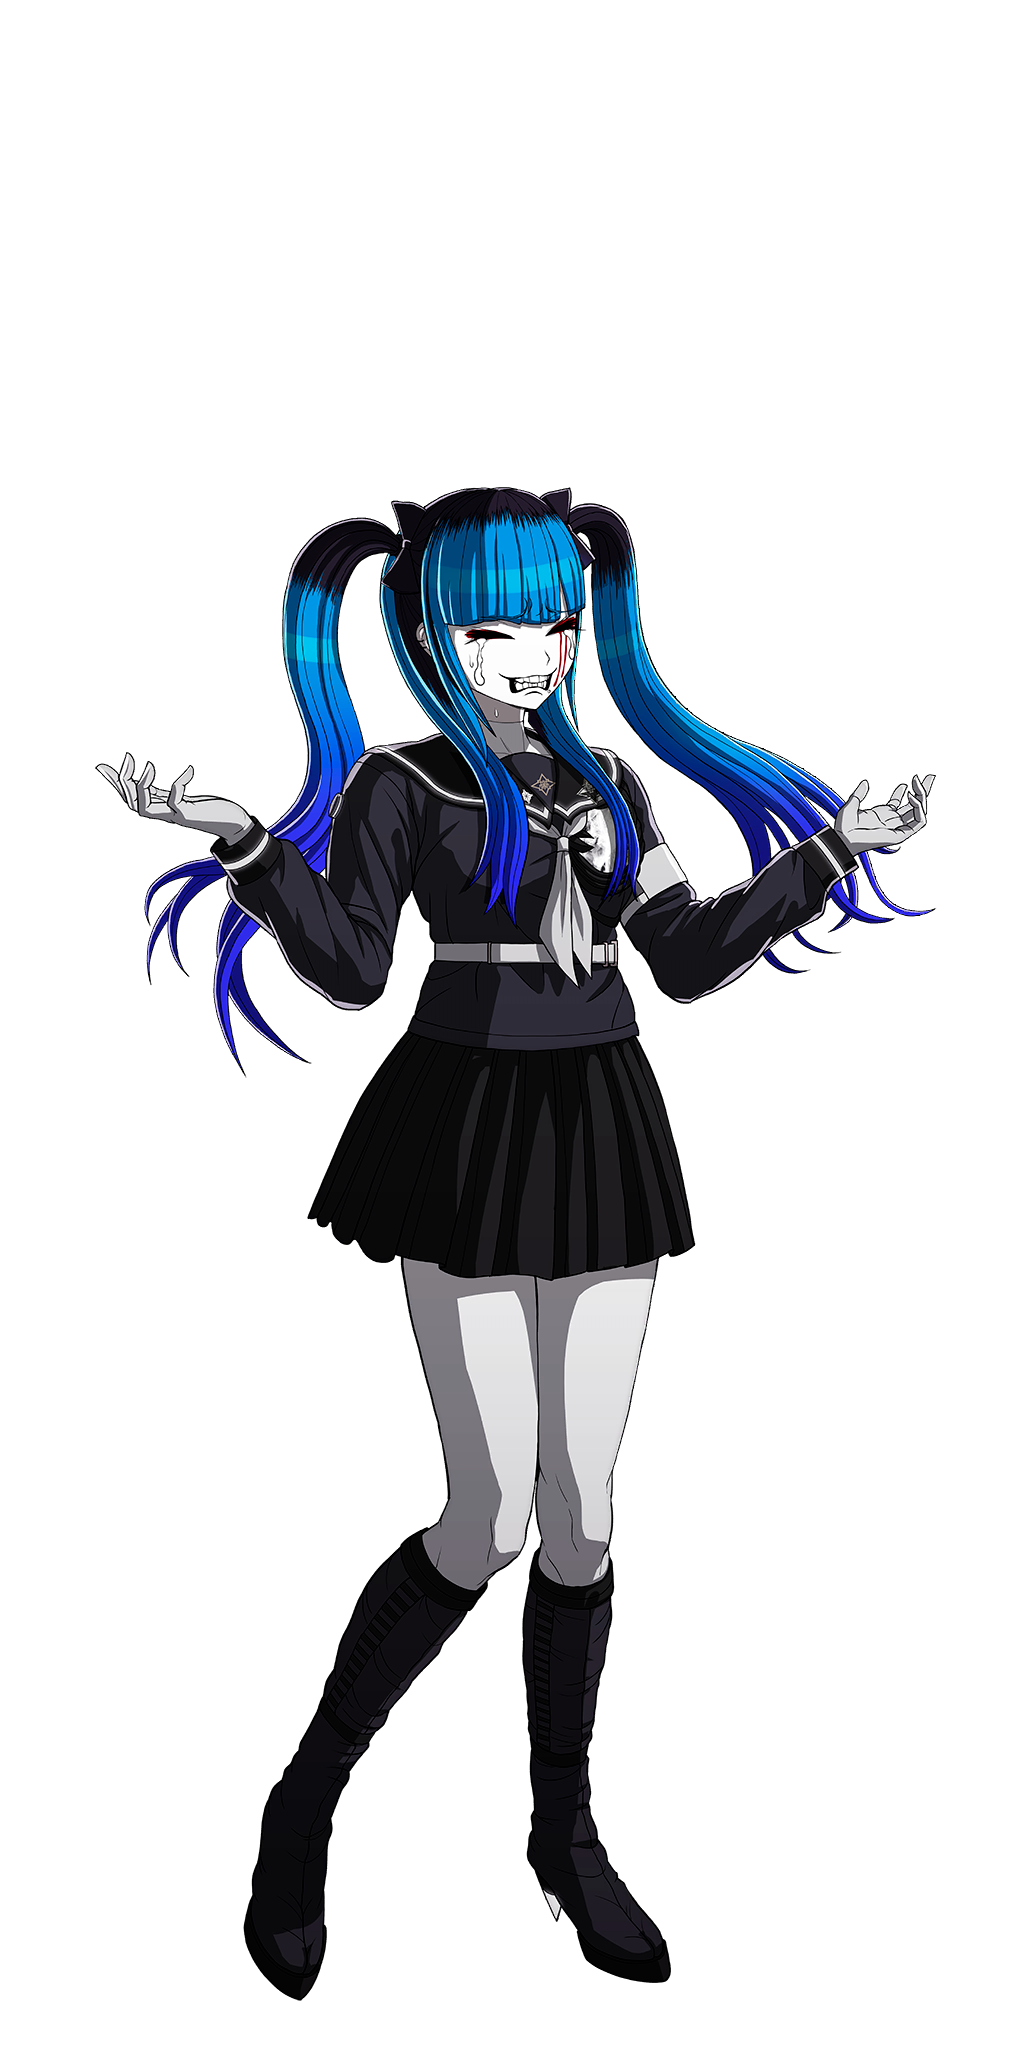
The first unused sprite of Darumi is a regular outfit variation of one of her sprites, the used one having her in her Class Armor. The second is vice-versa with a different expression.
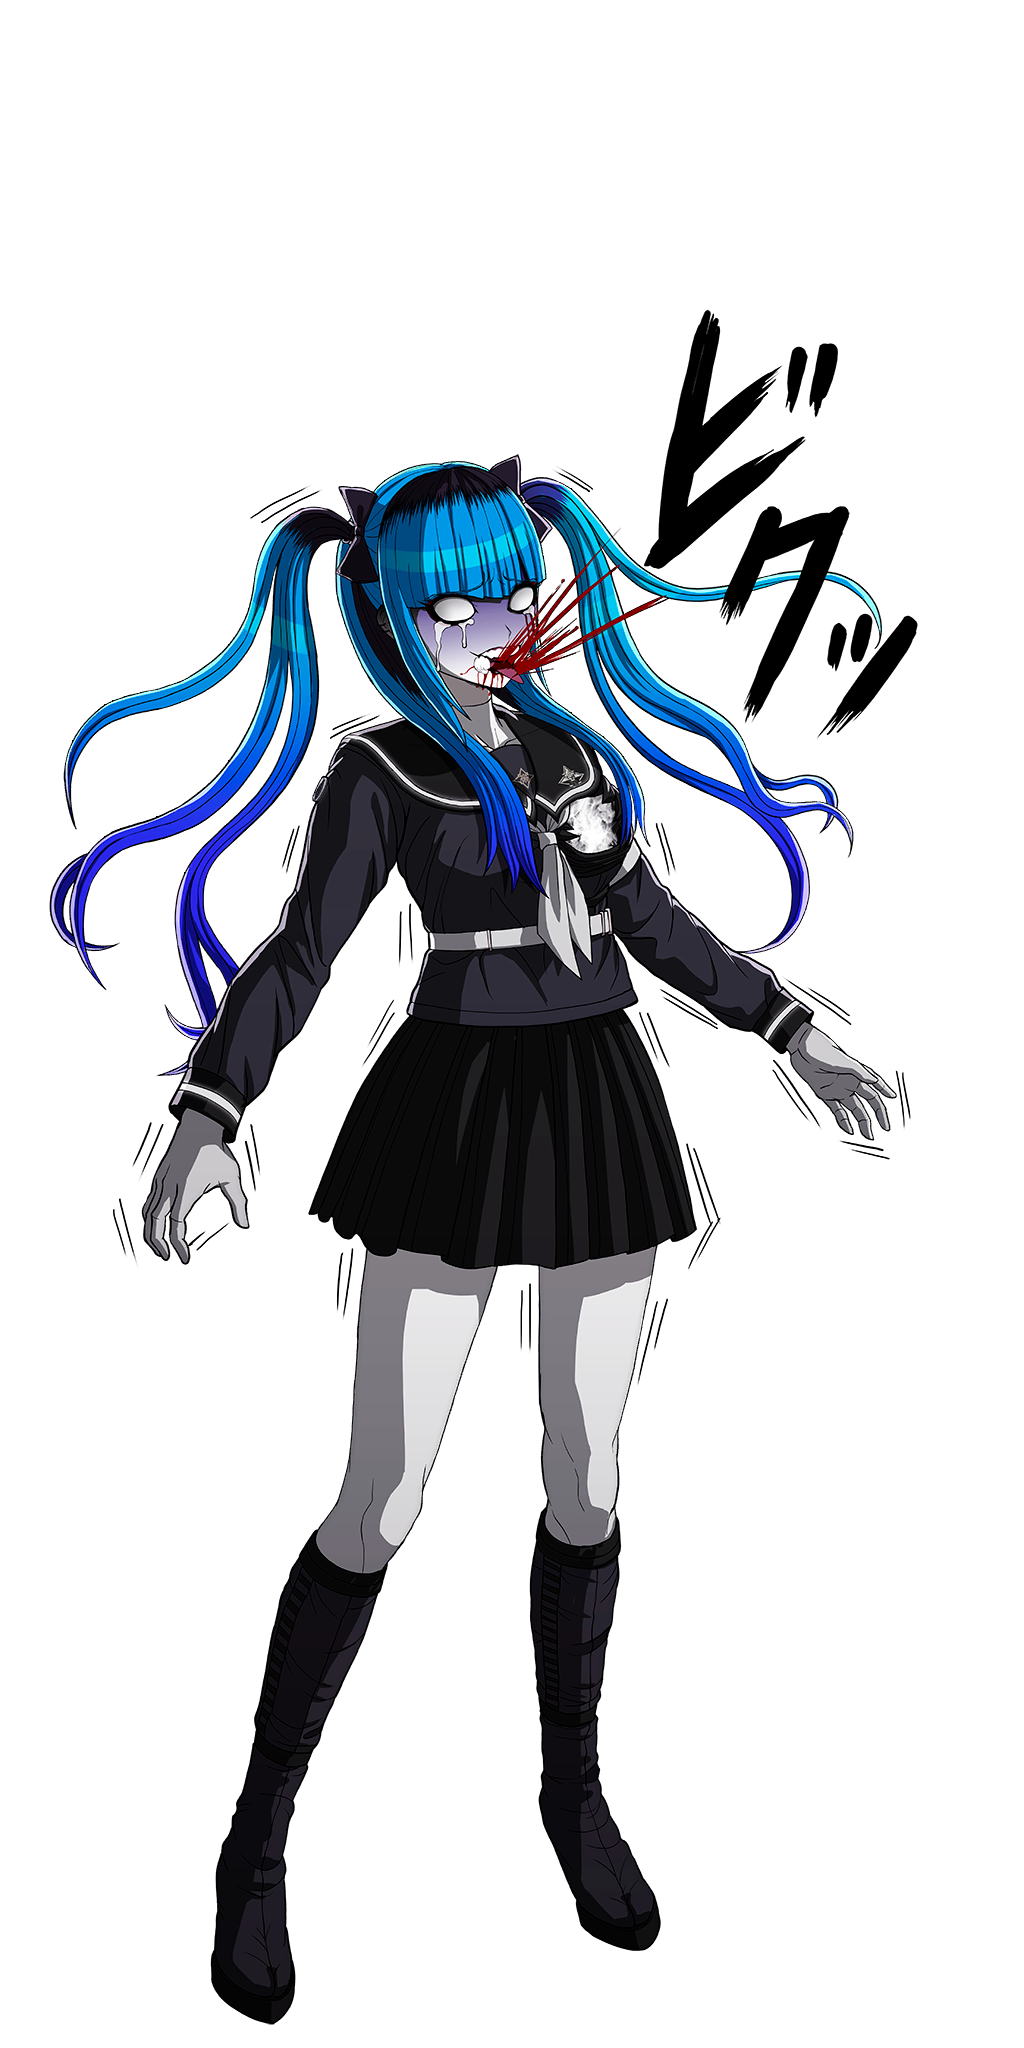
The context of this one is unknown.
Eito Aotsuki#
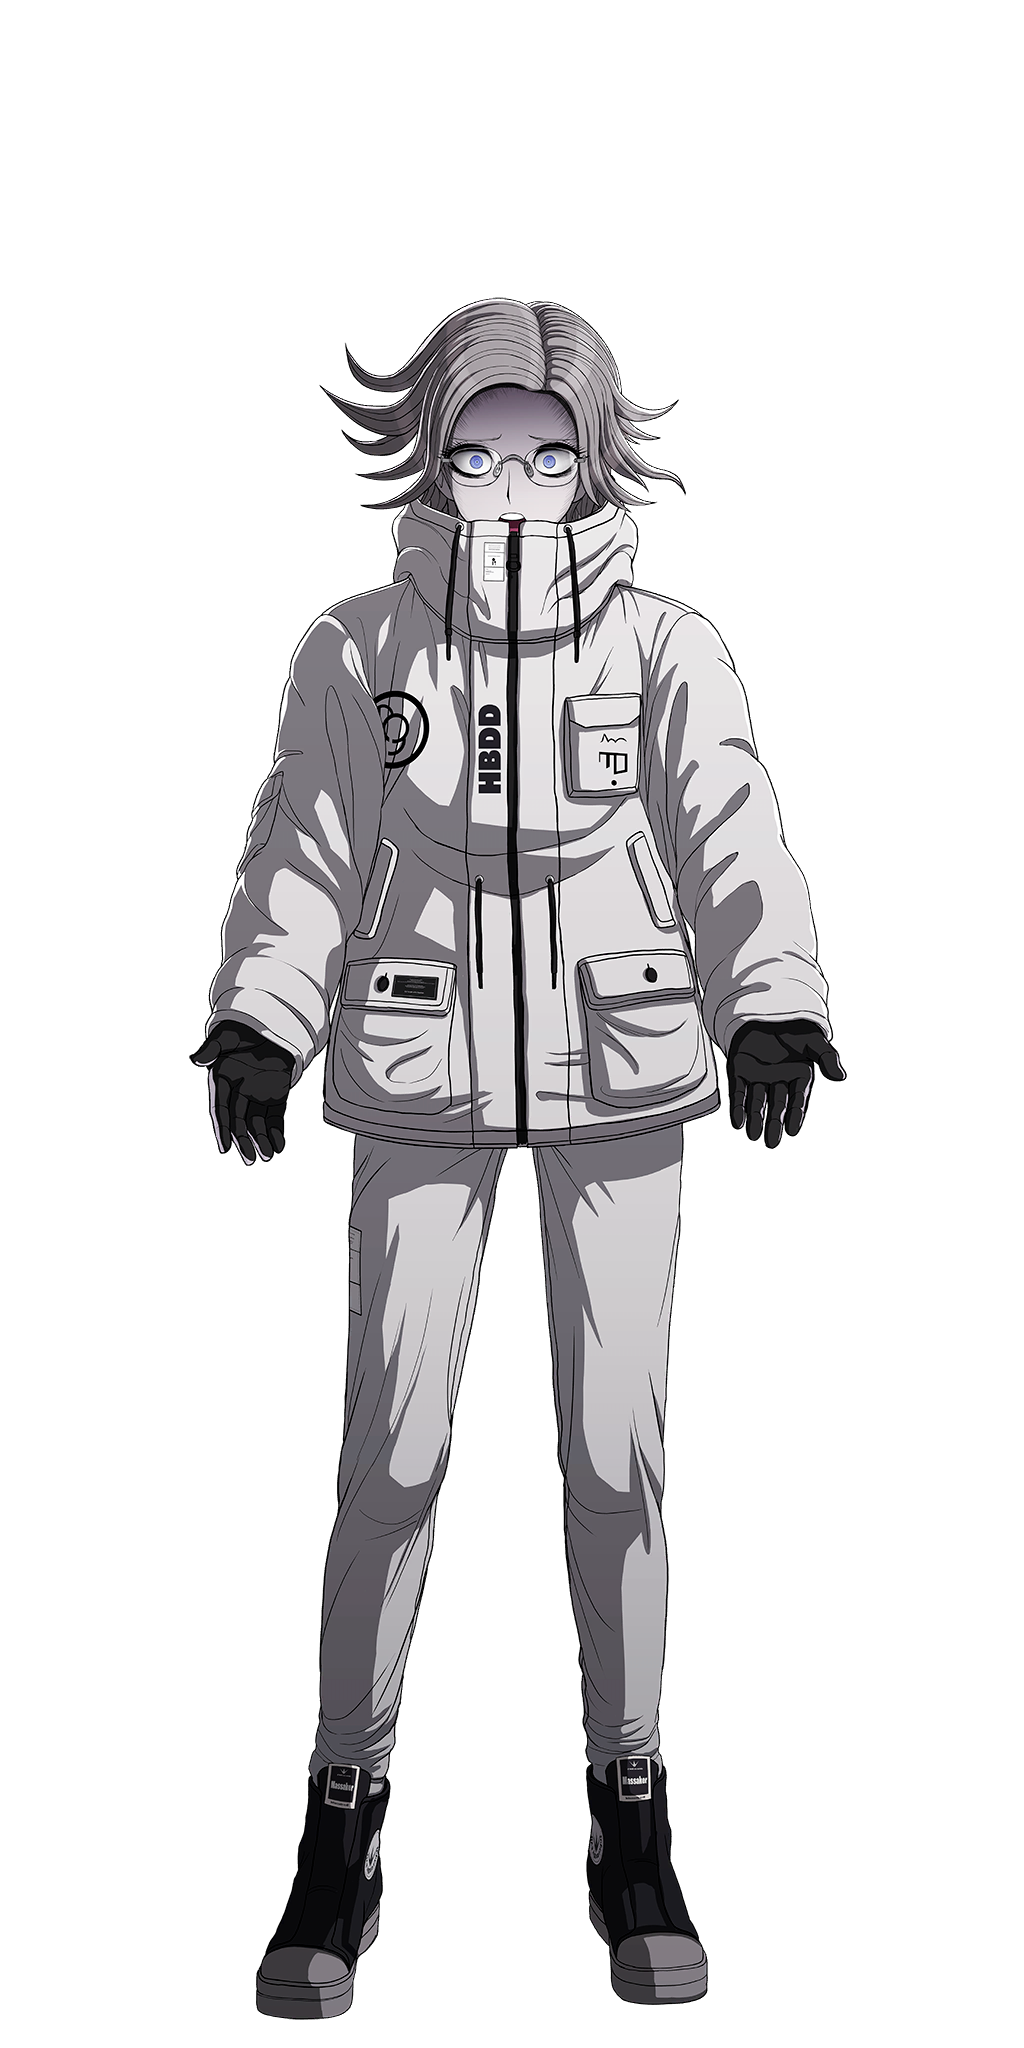
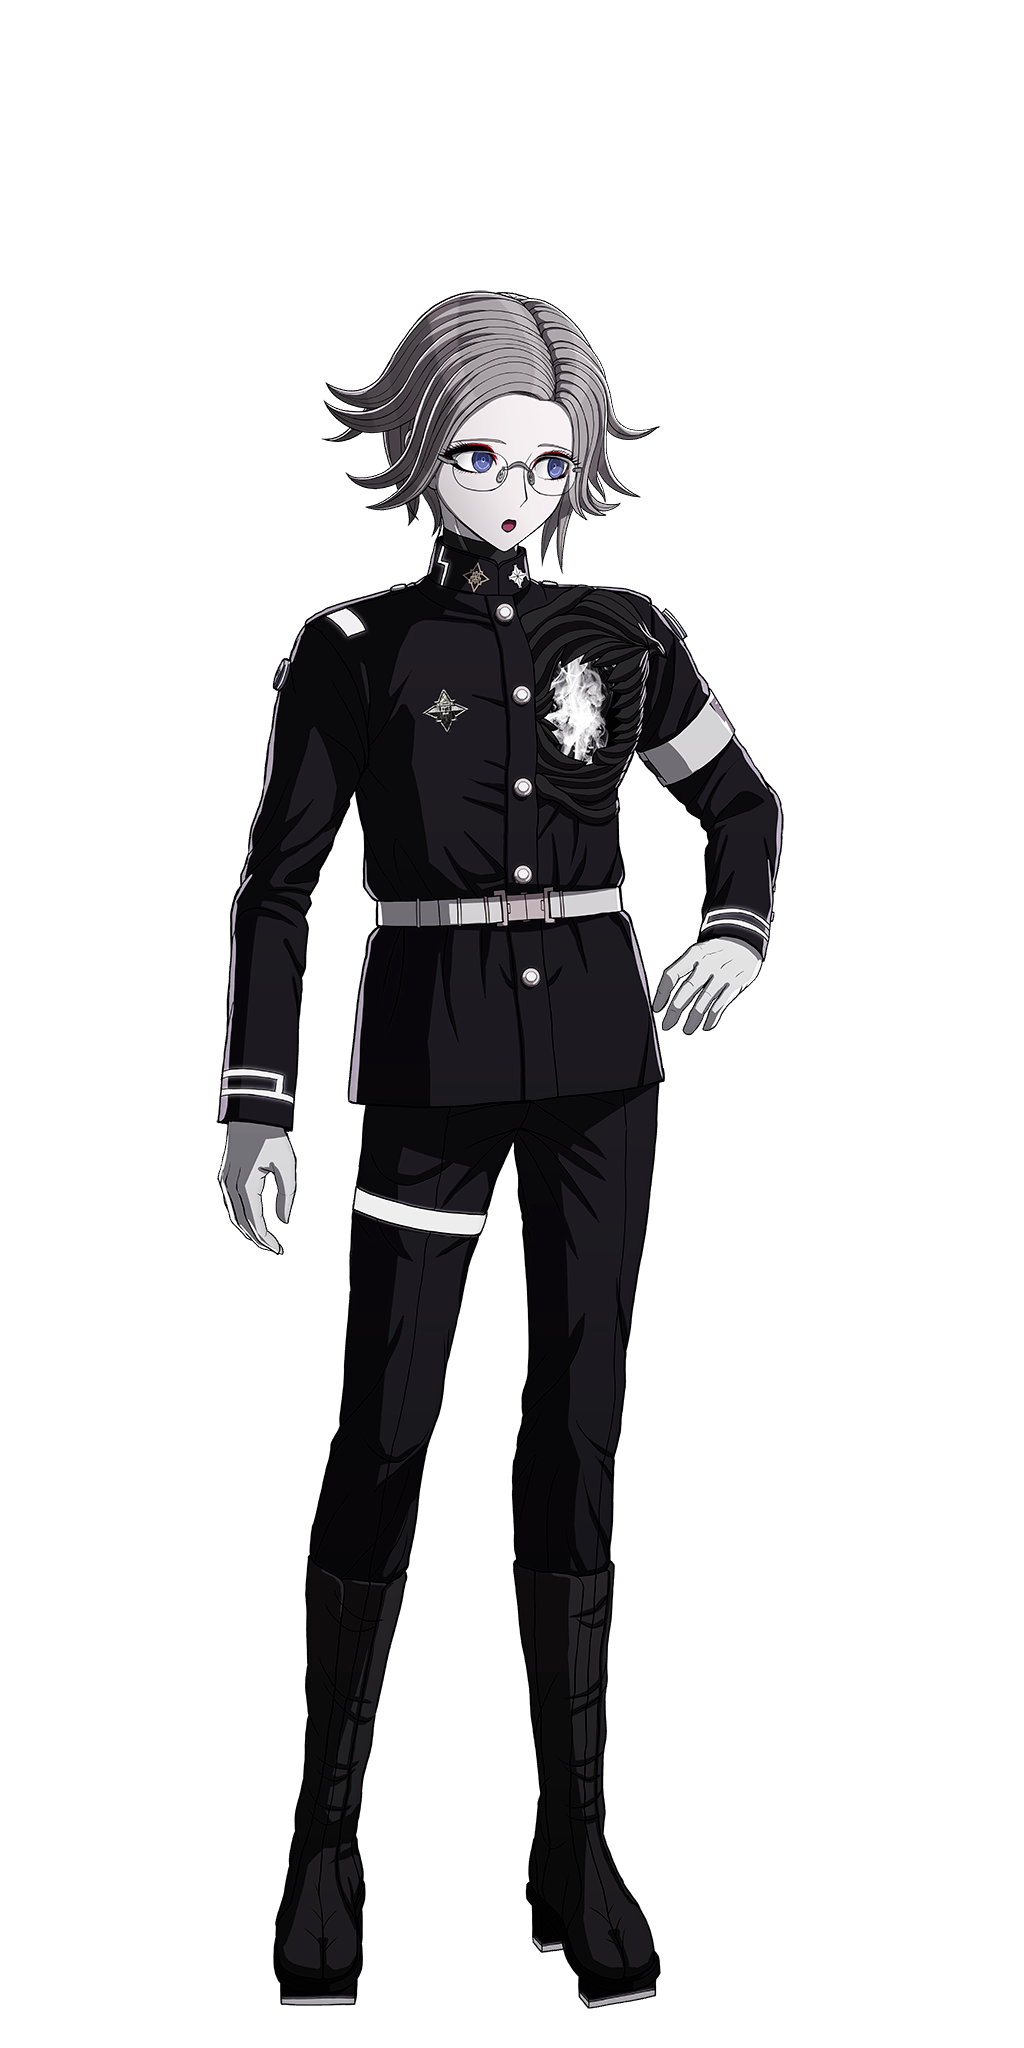
The first sprite of Eito is a regular outfit variation of one of his traitorous shocked sprites, the used one having him in his Class Armor. The second is vice-versa with a different pose, though a variation of this where he is blinded and wearing shades is also used.
Gaku Maruko#
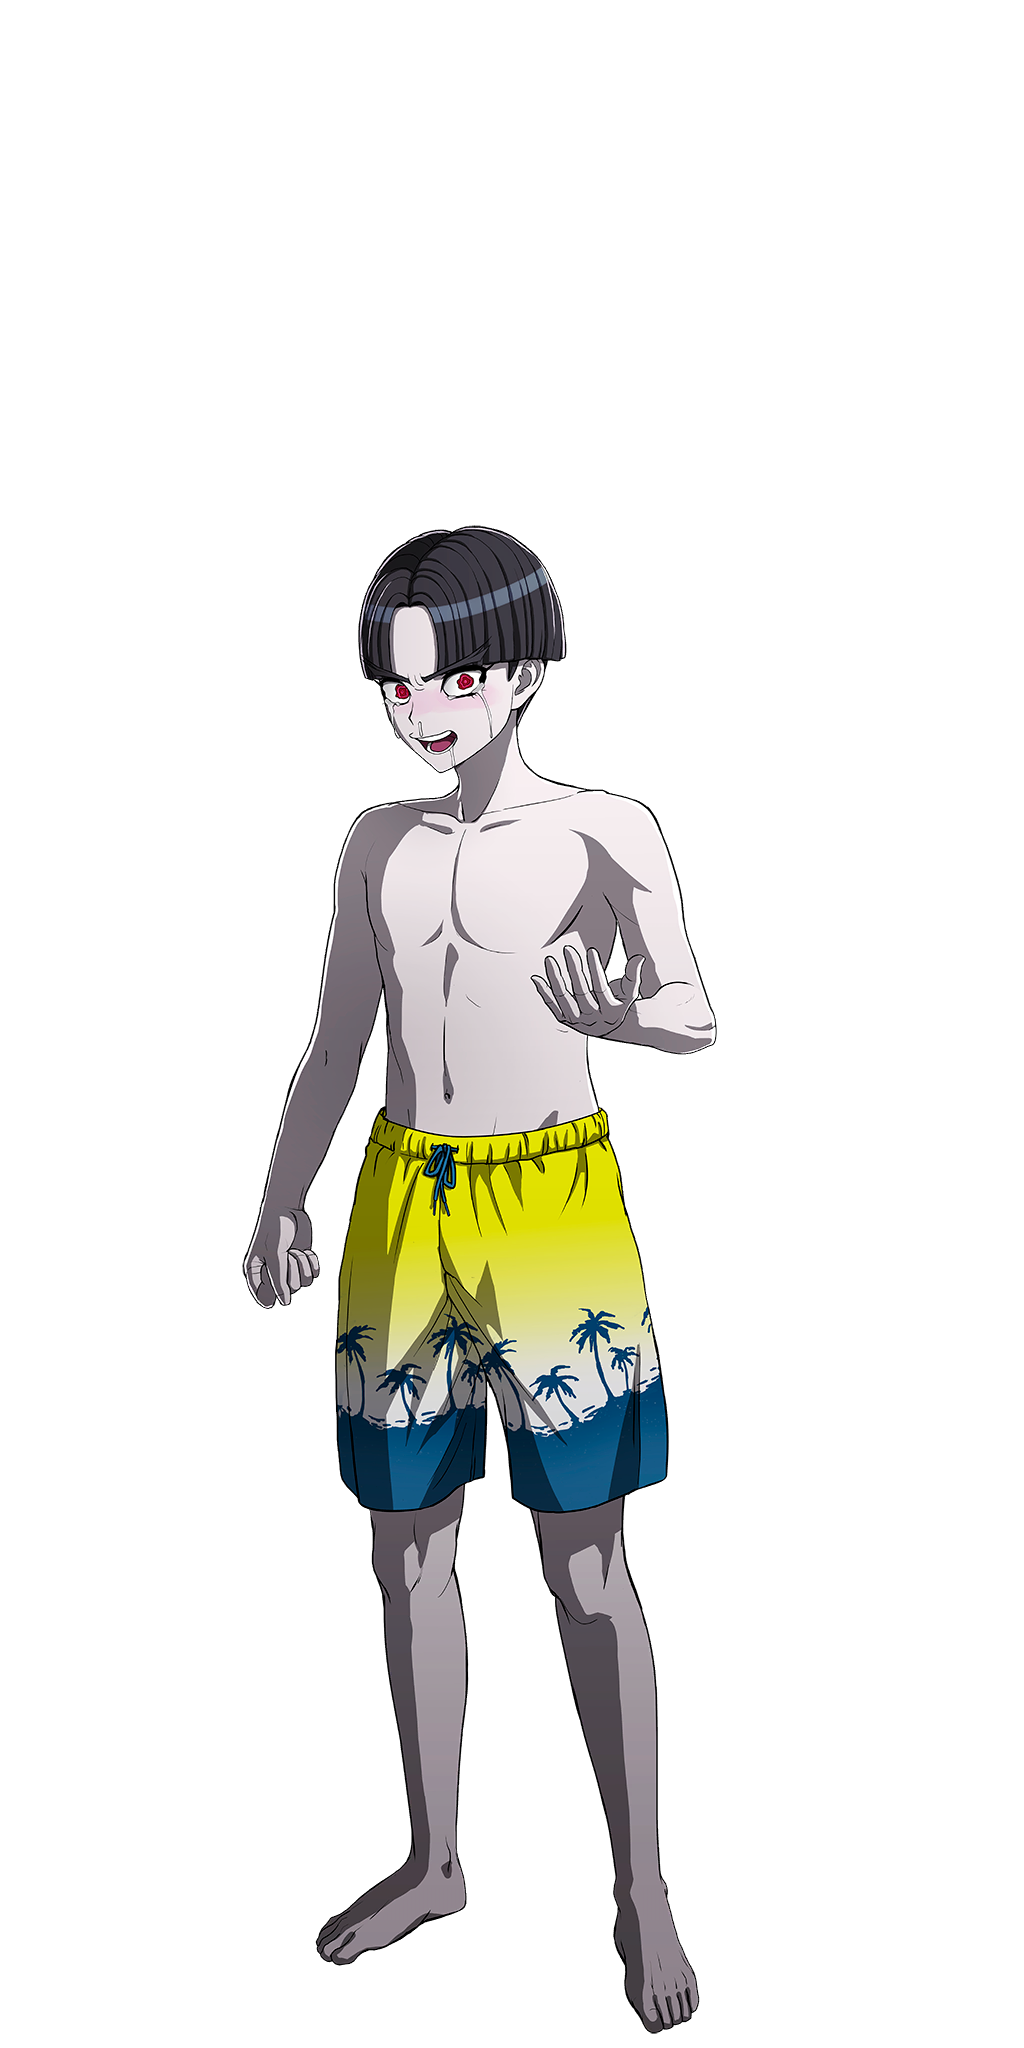
An unused swimsuit variation of one of Gaku's crying sprites.
Ima Tsukumo#
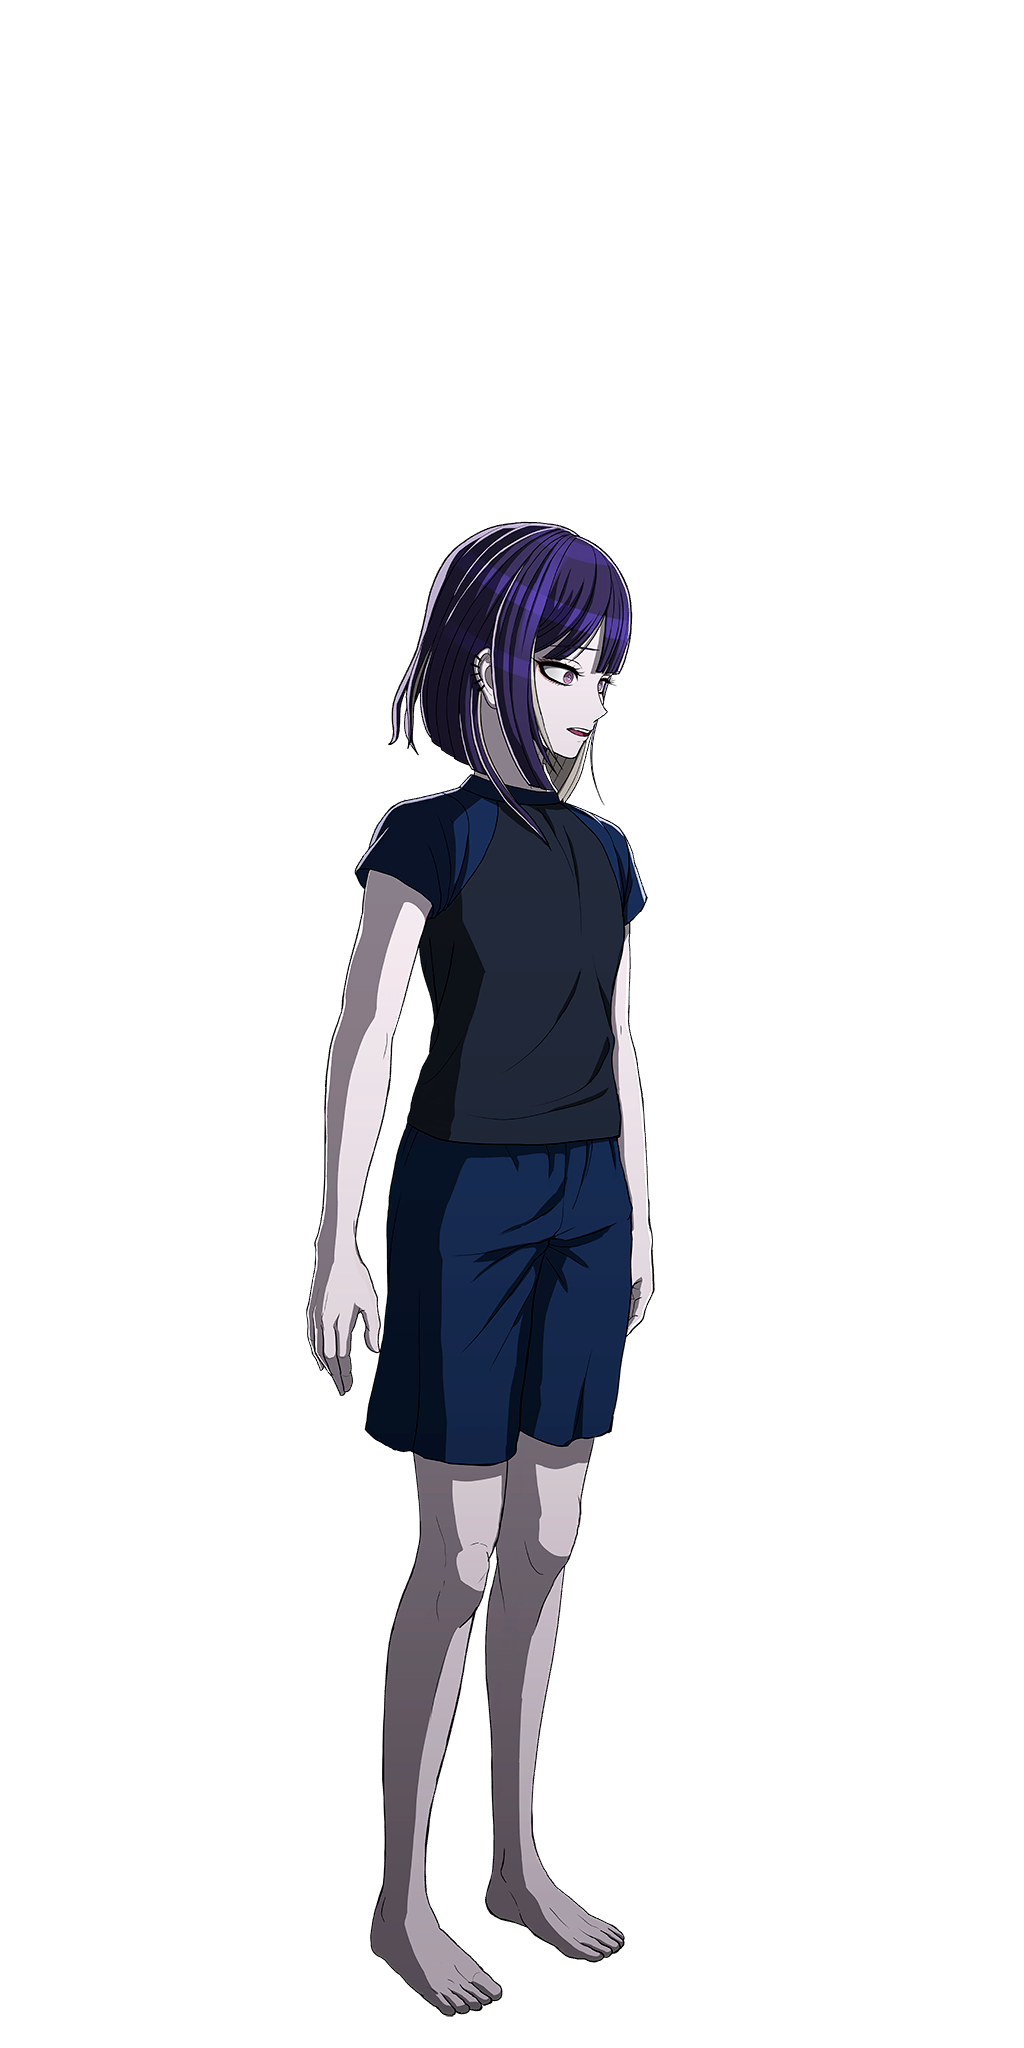
An unused sprite of Ima in his swimming outfit. He is not seen in this outfit outside of the pool party CGs.
Kako Tsukumo#
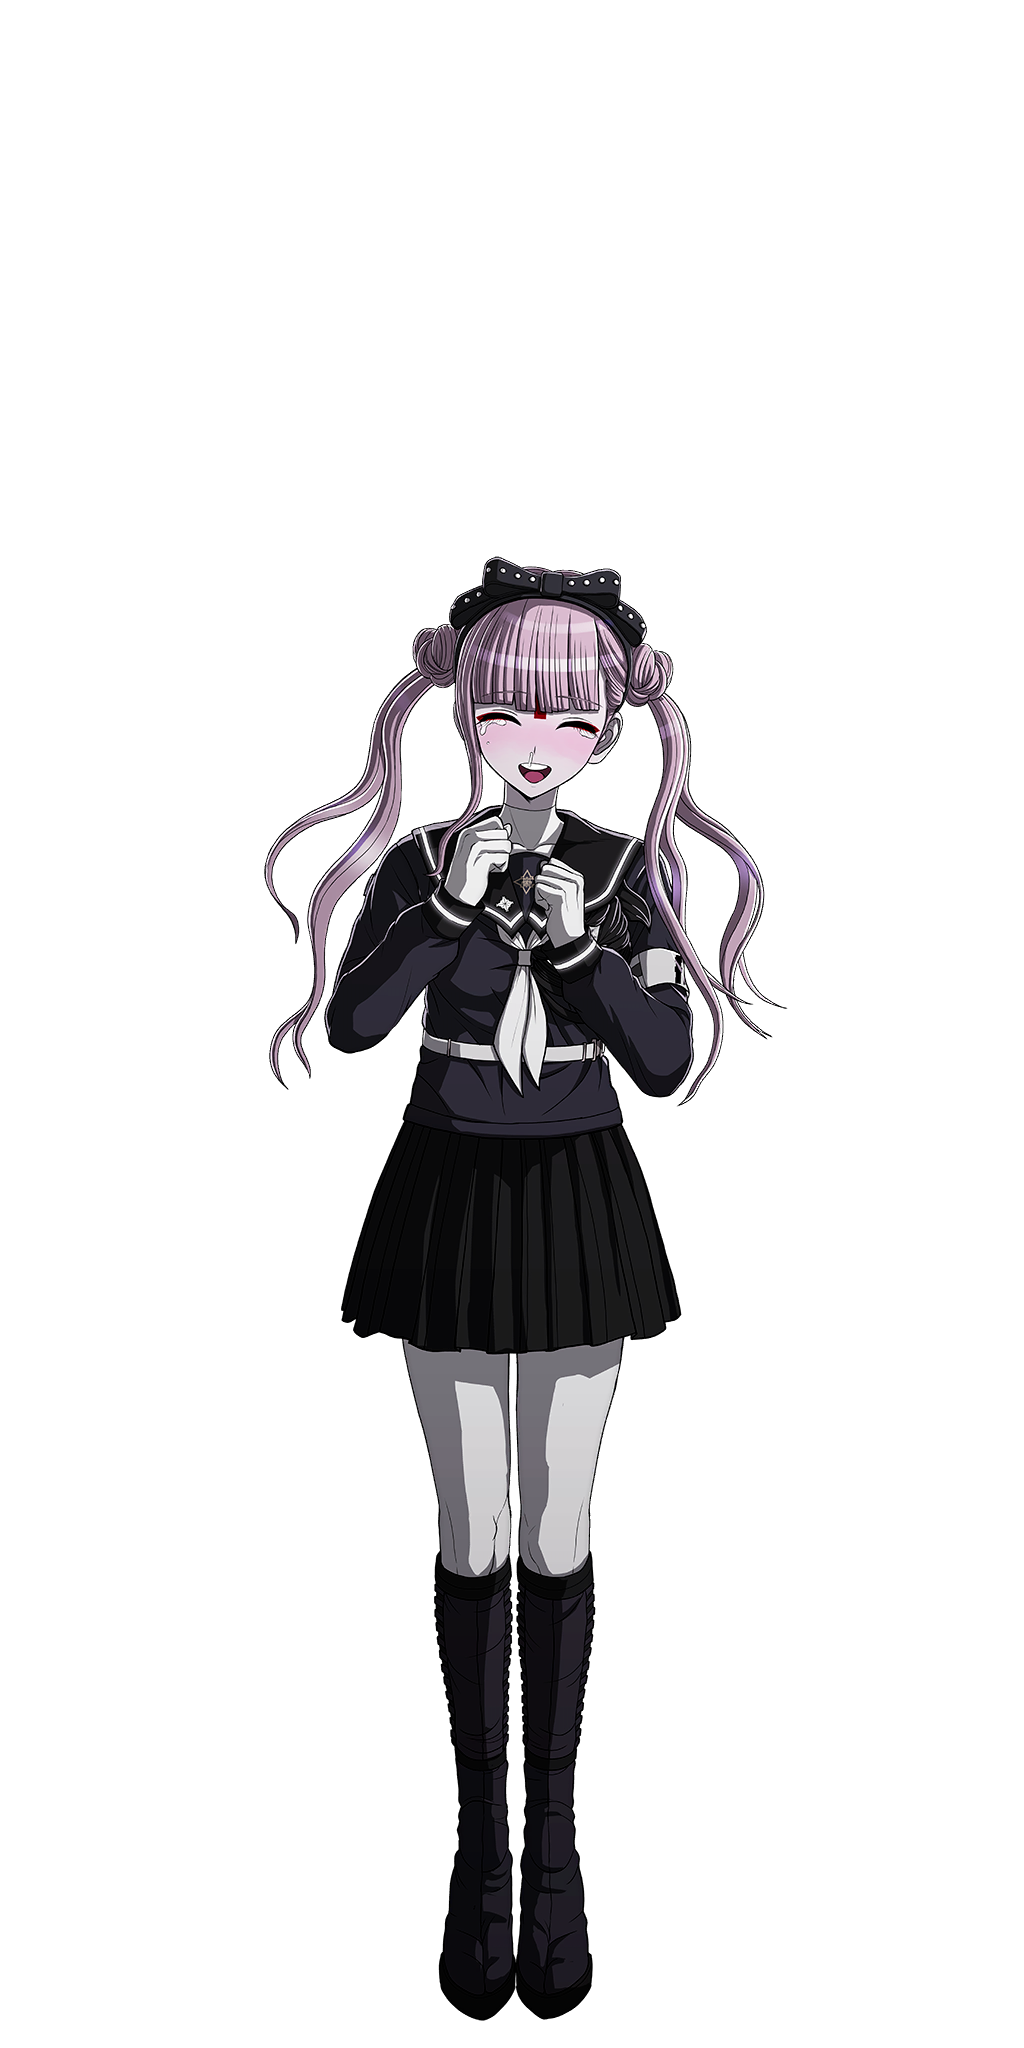
An unused sprite of Kako crying for joy in her Class Armor.
Shouma Ginzaki#
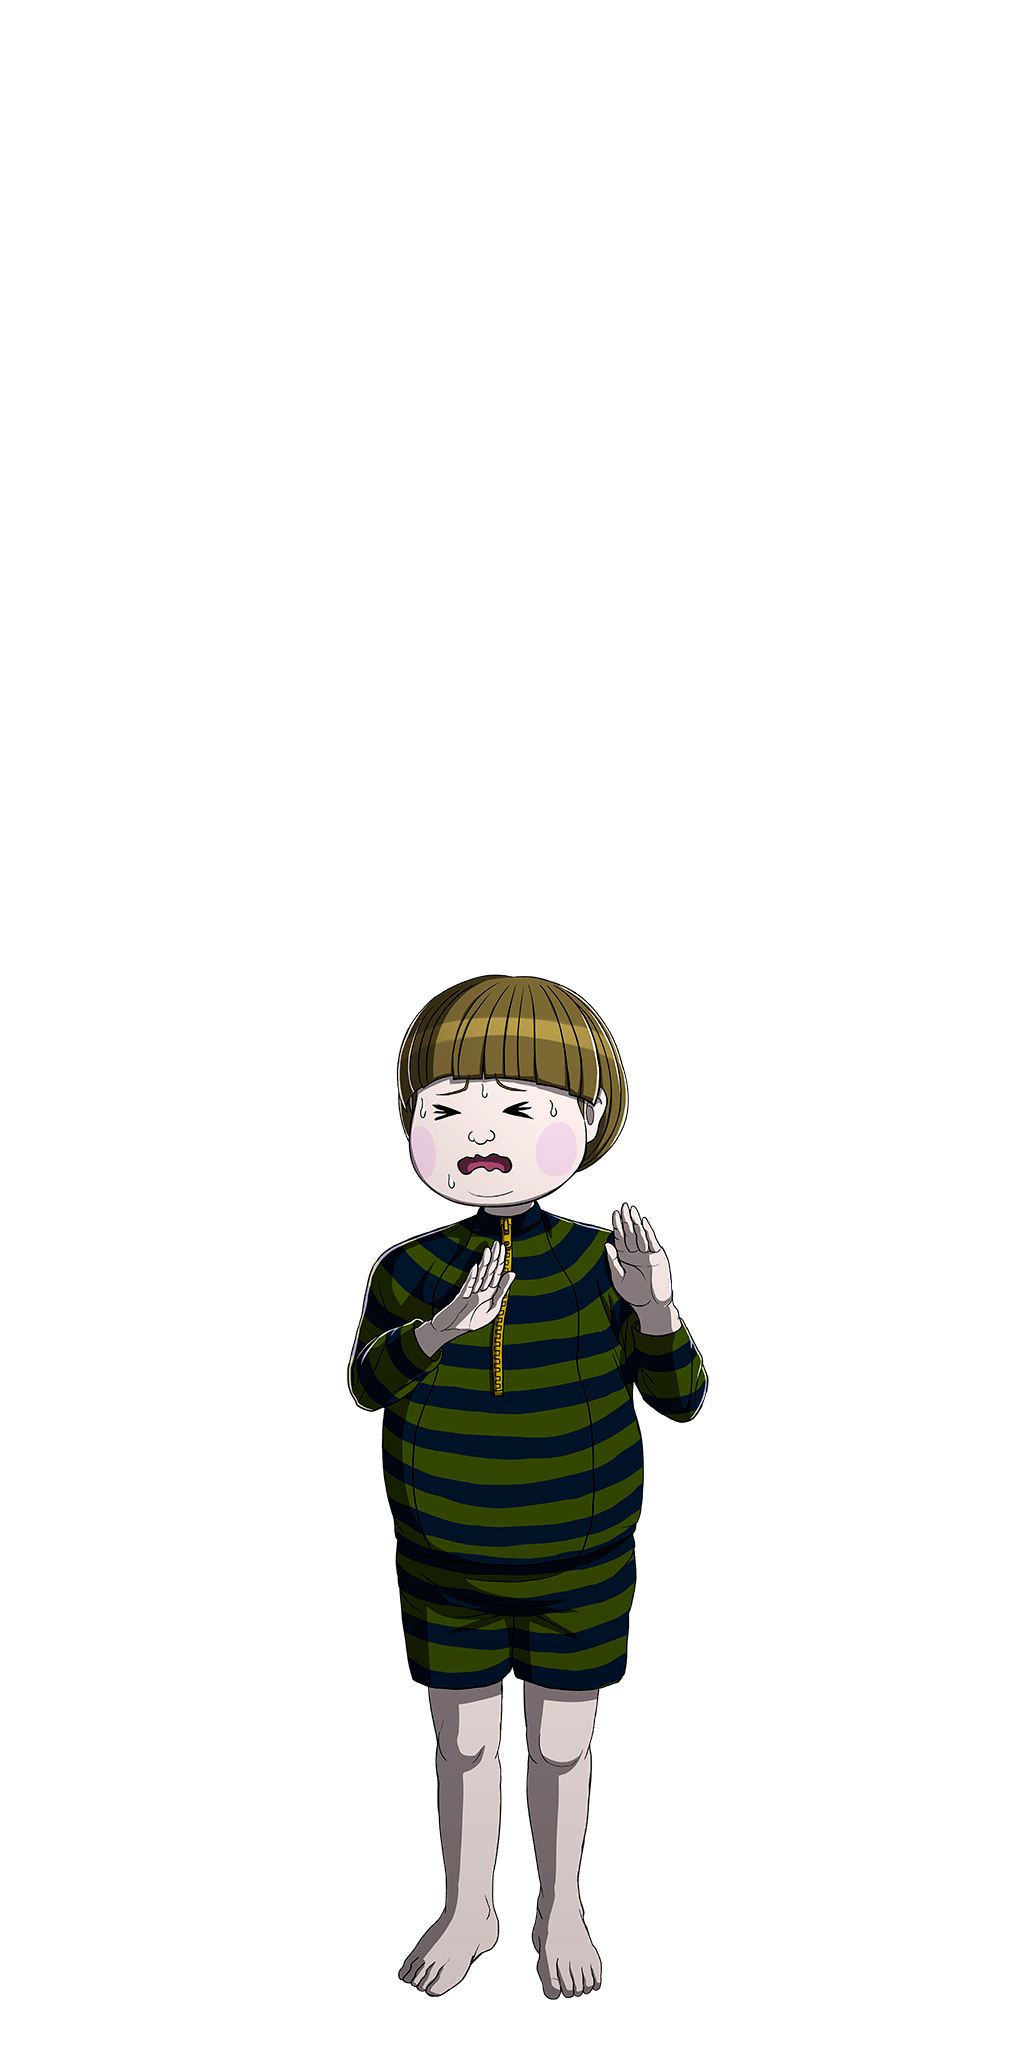
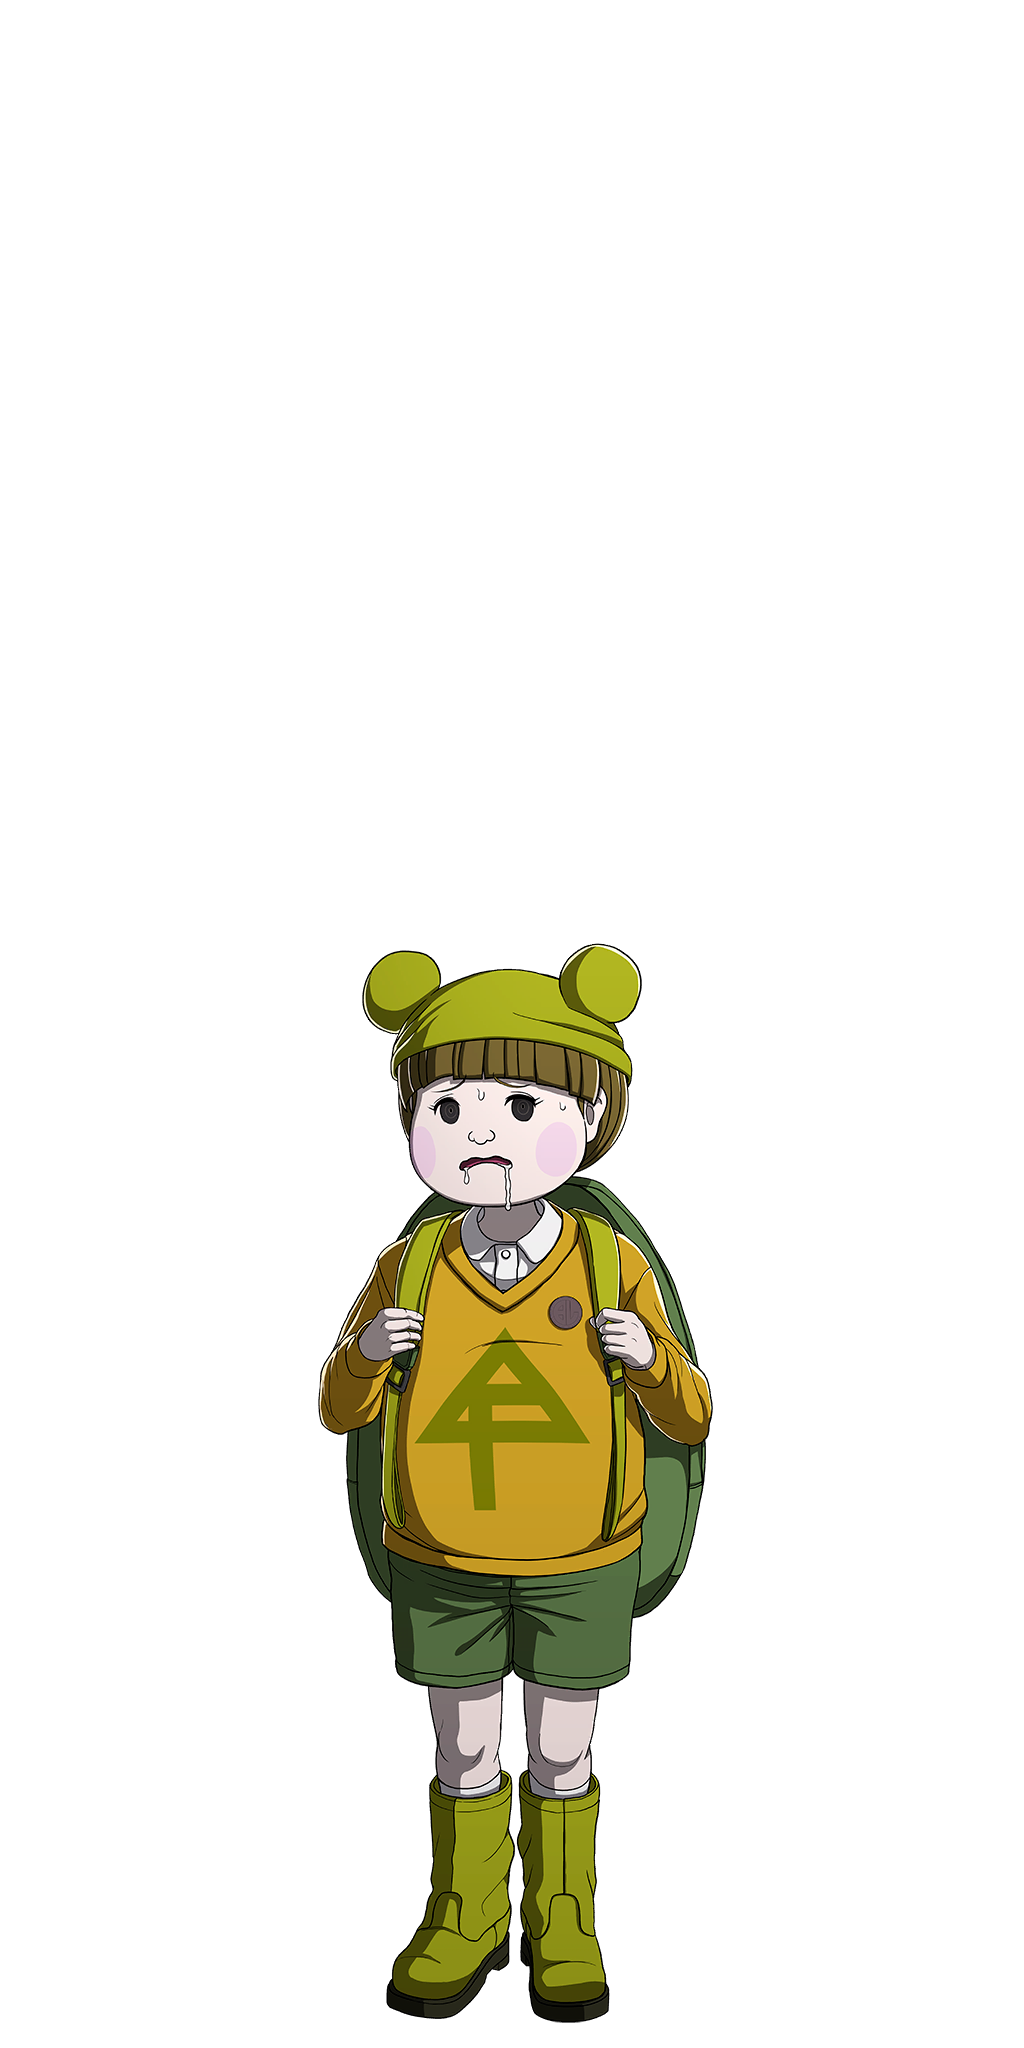
The first unused sprite of Shouma is him in his swimming outfit. He is not seen in this outfit outside of the pool party CGs. The other is some sort of worried sprite in his regular outfit.
Moko Mojiro#
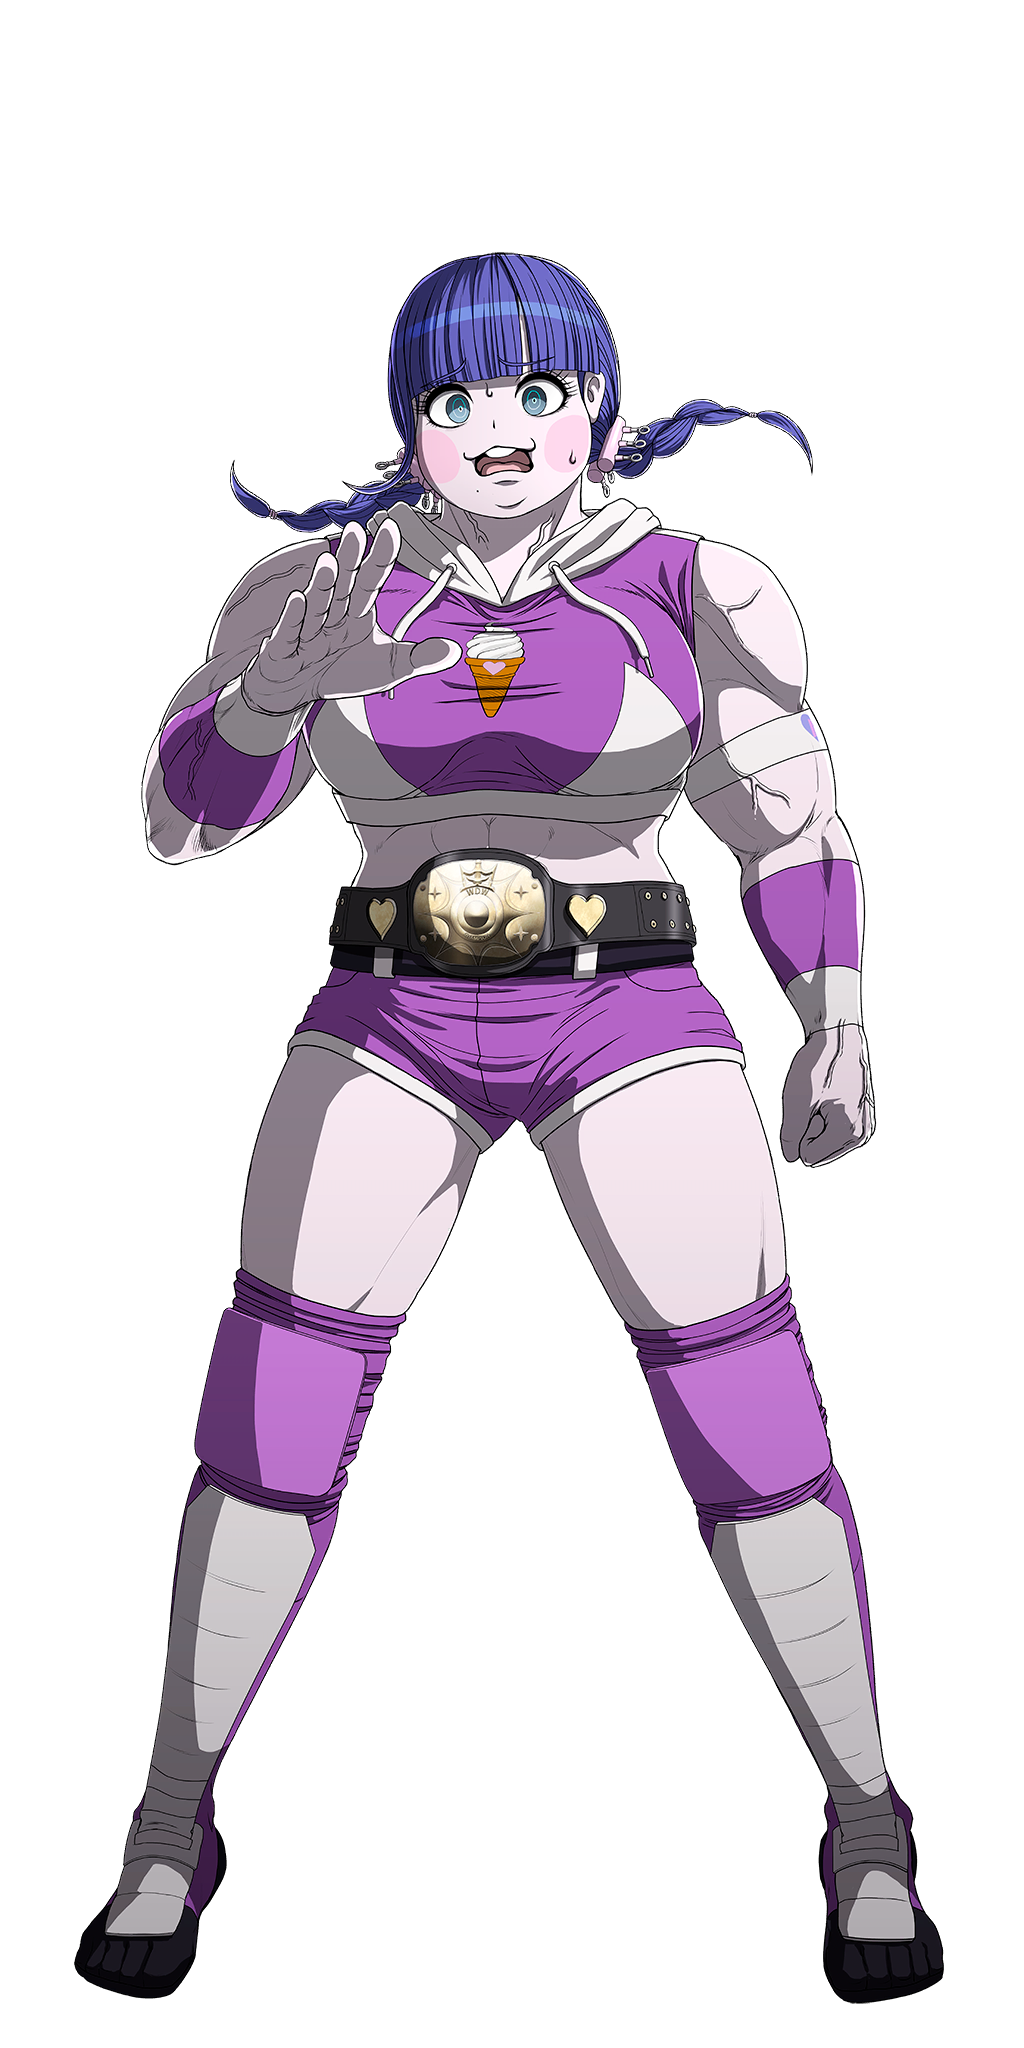
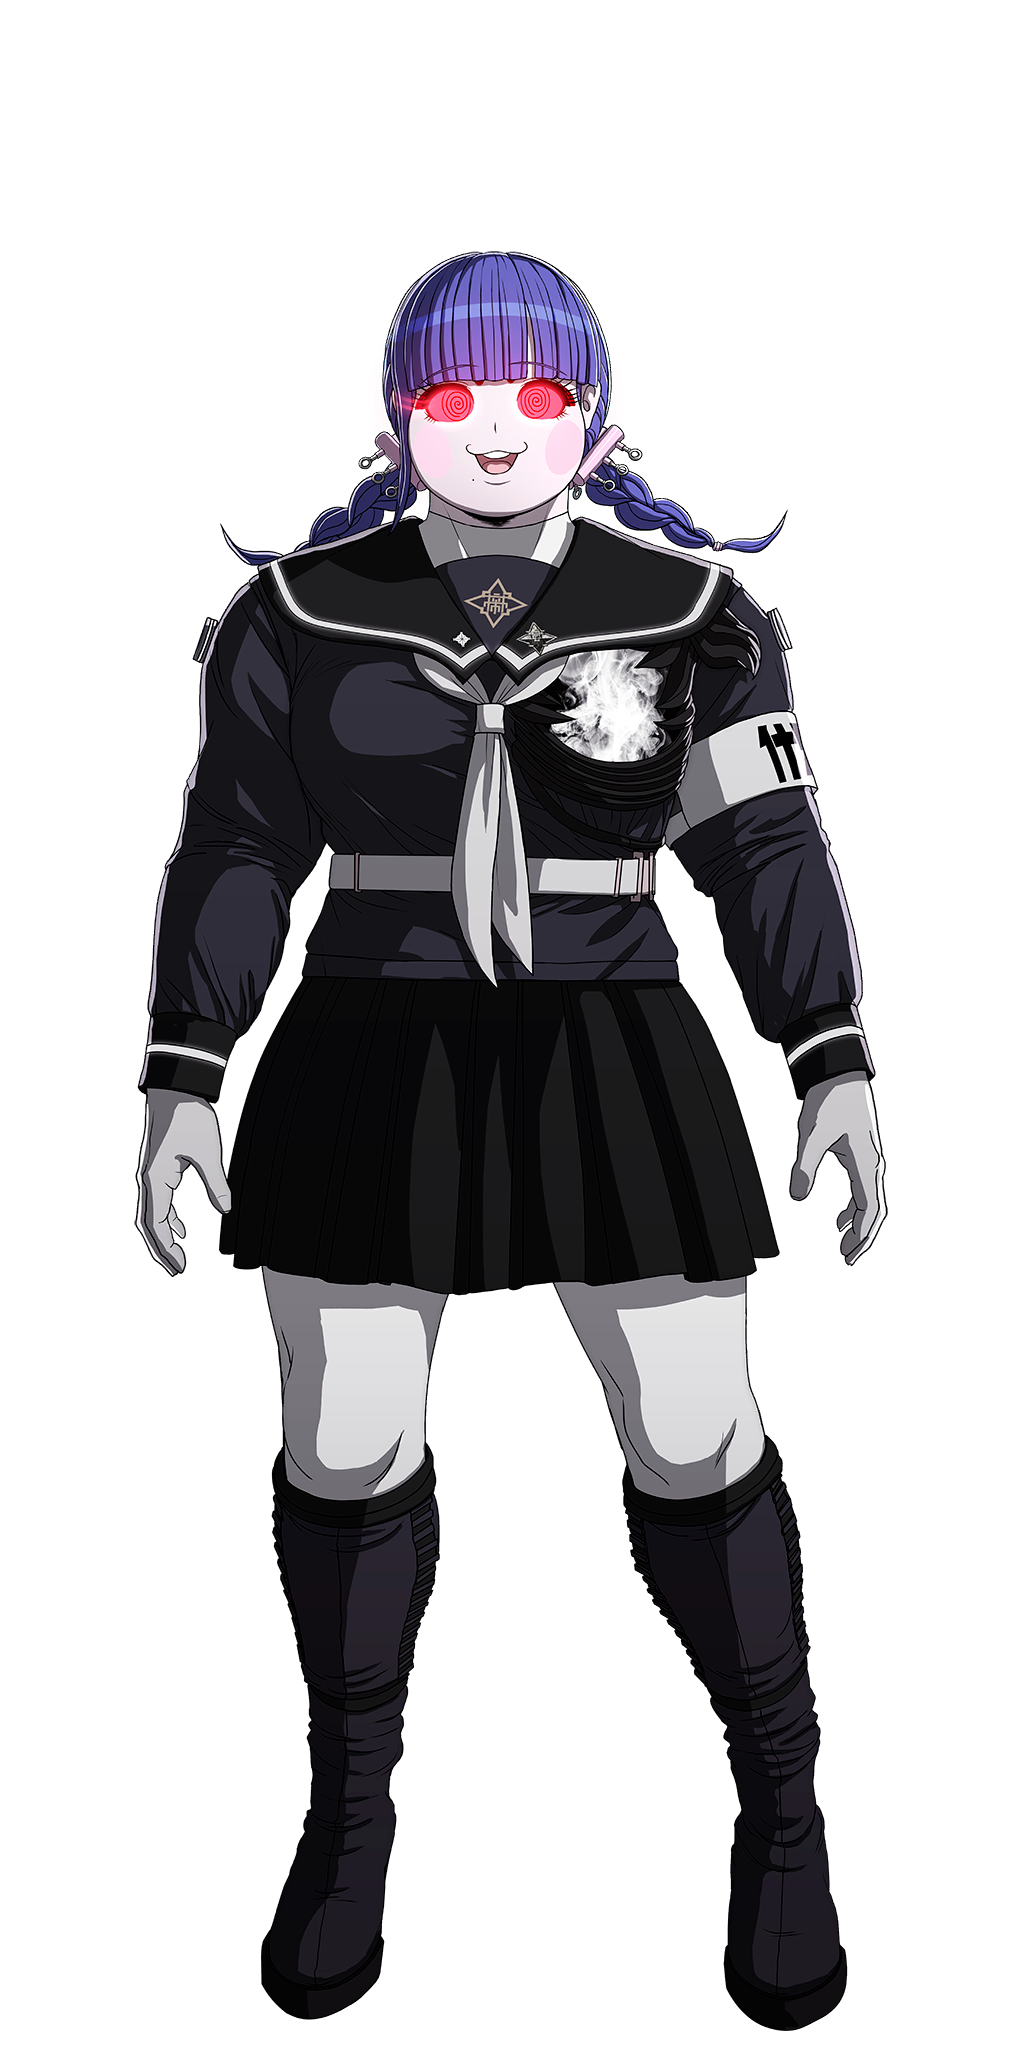
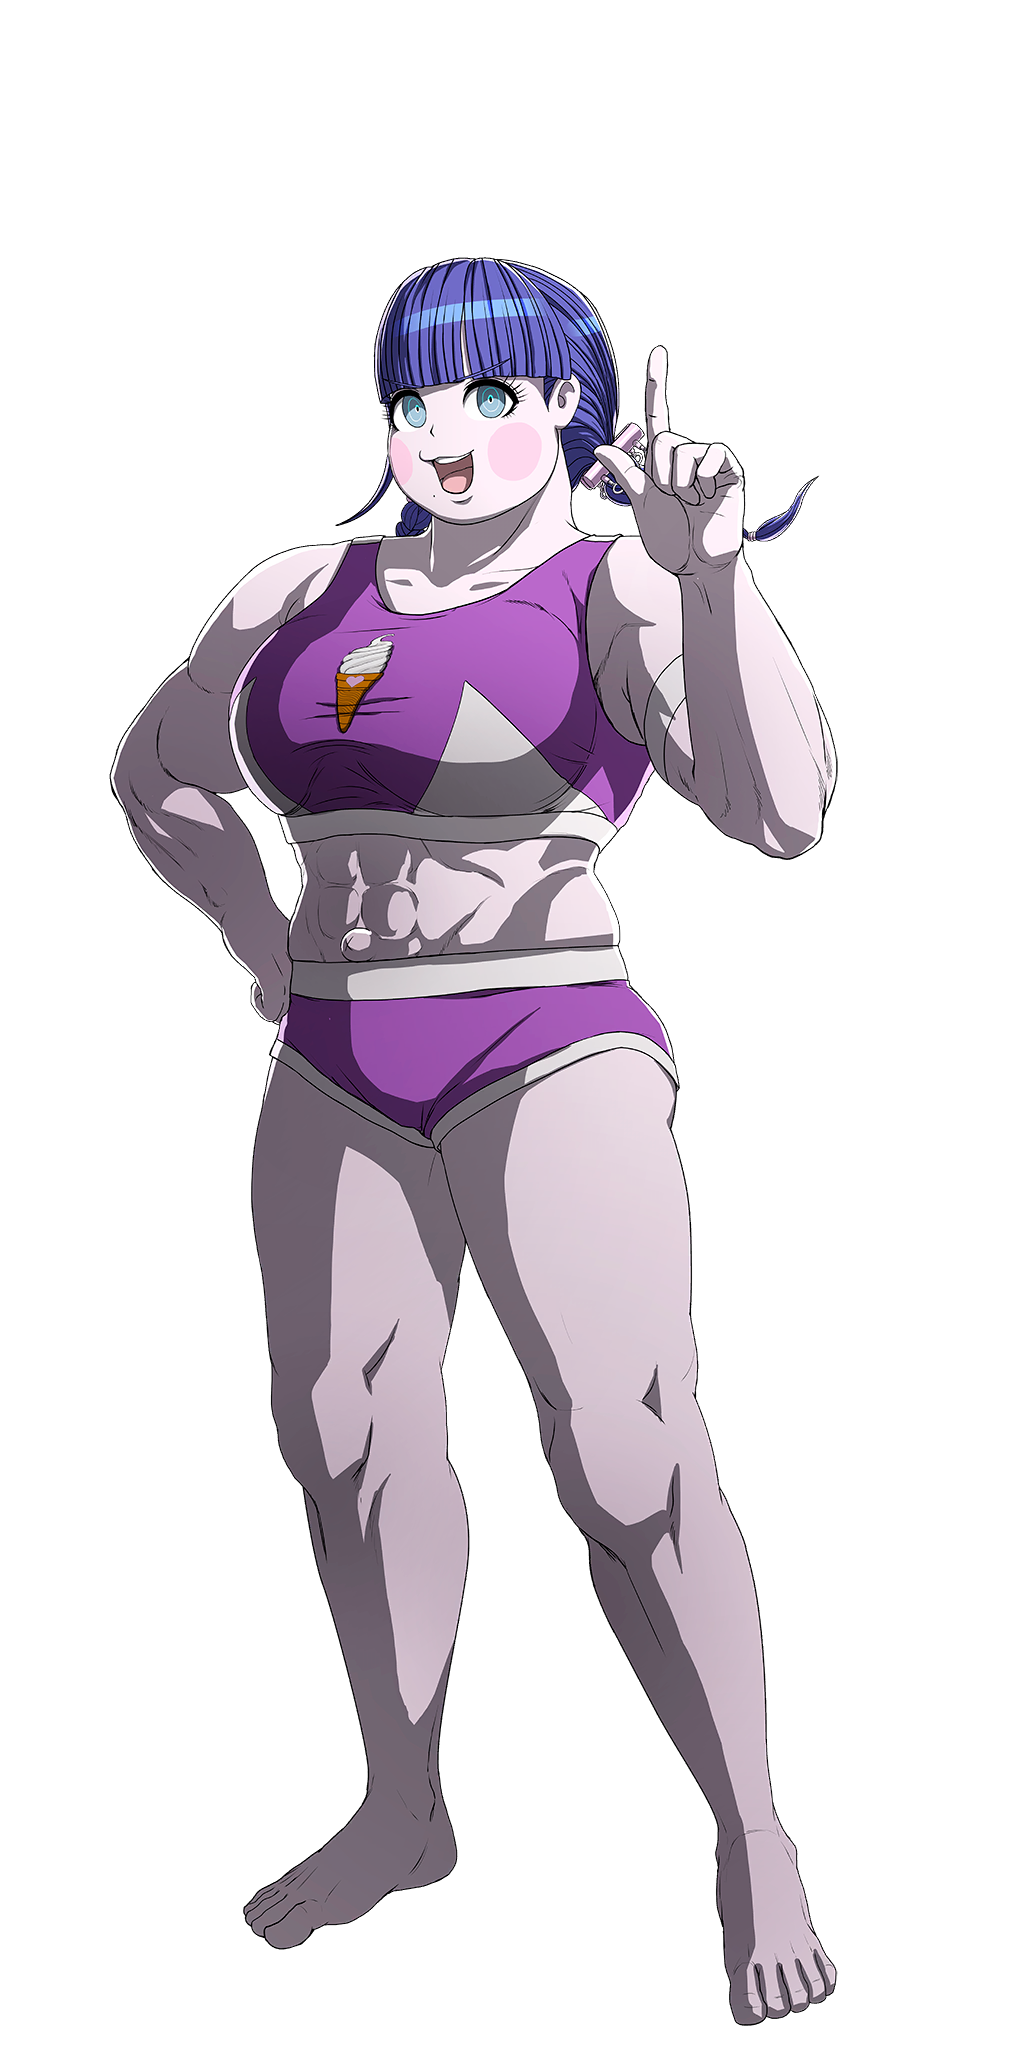
Some unused sprites of Moko, including one in her regular outfit, one in her Class Armor likely intended for when she gets brainwashed by Parmith, and one in her swimsuit.
Kako-G#
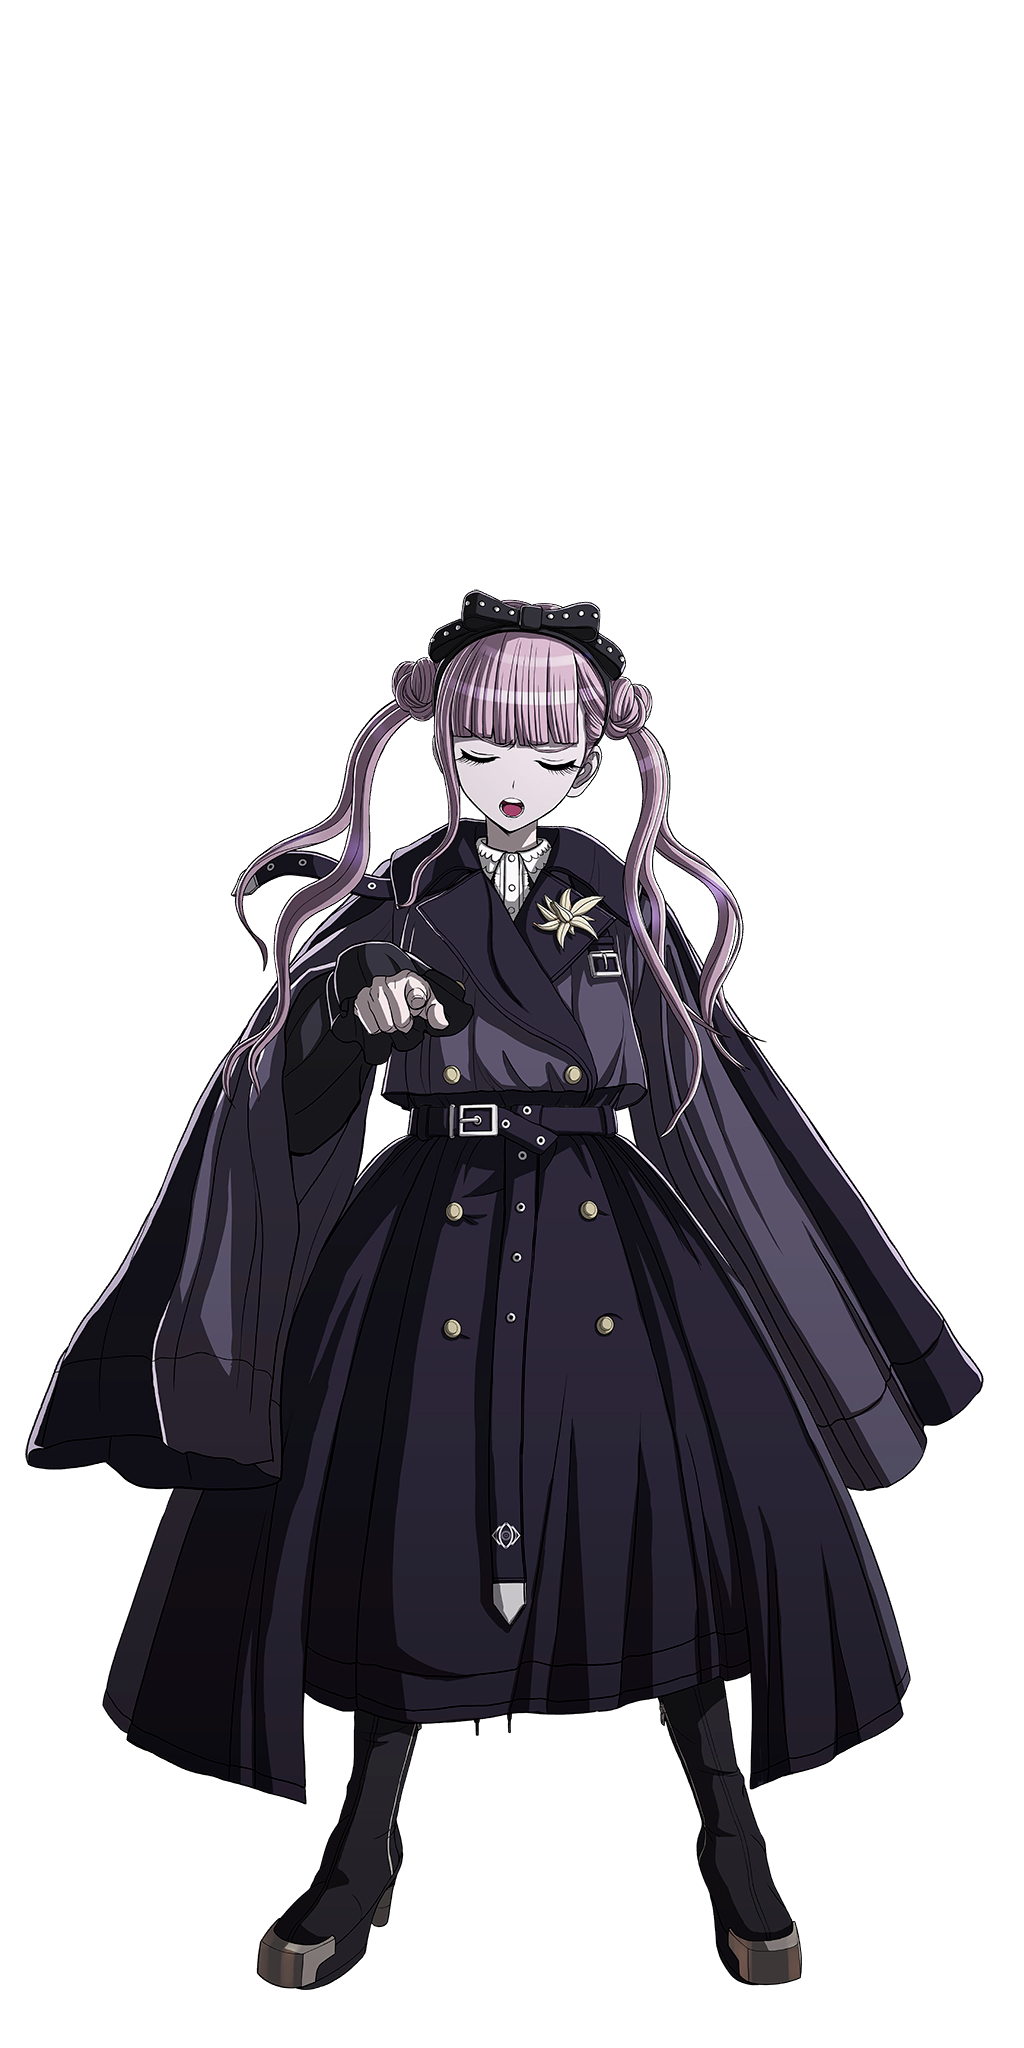
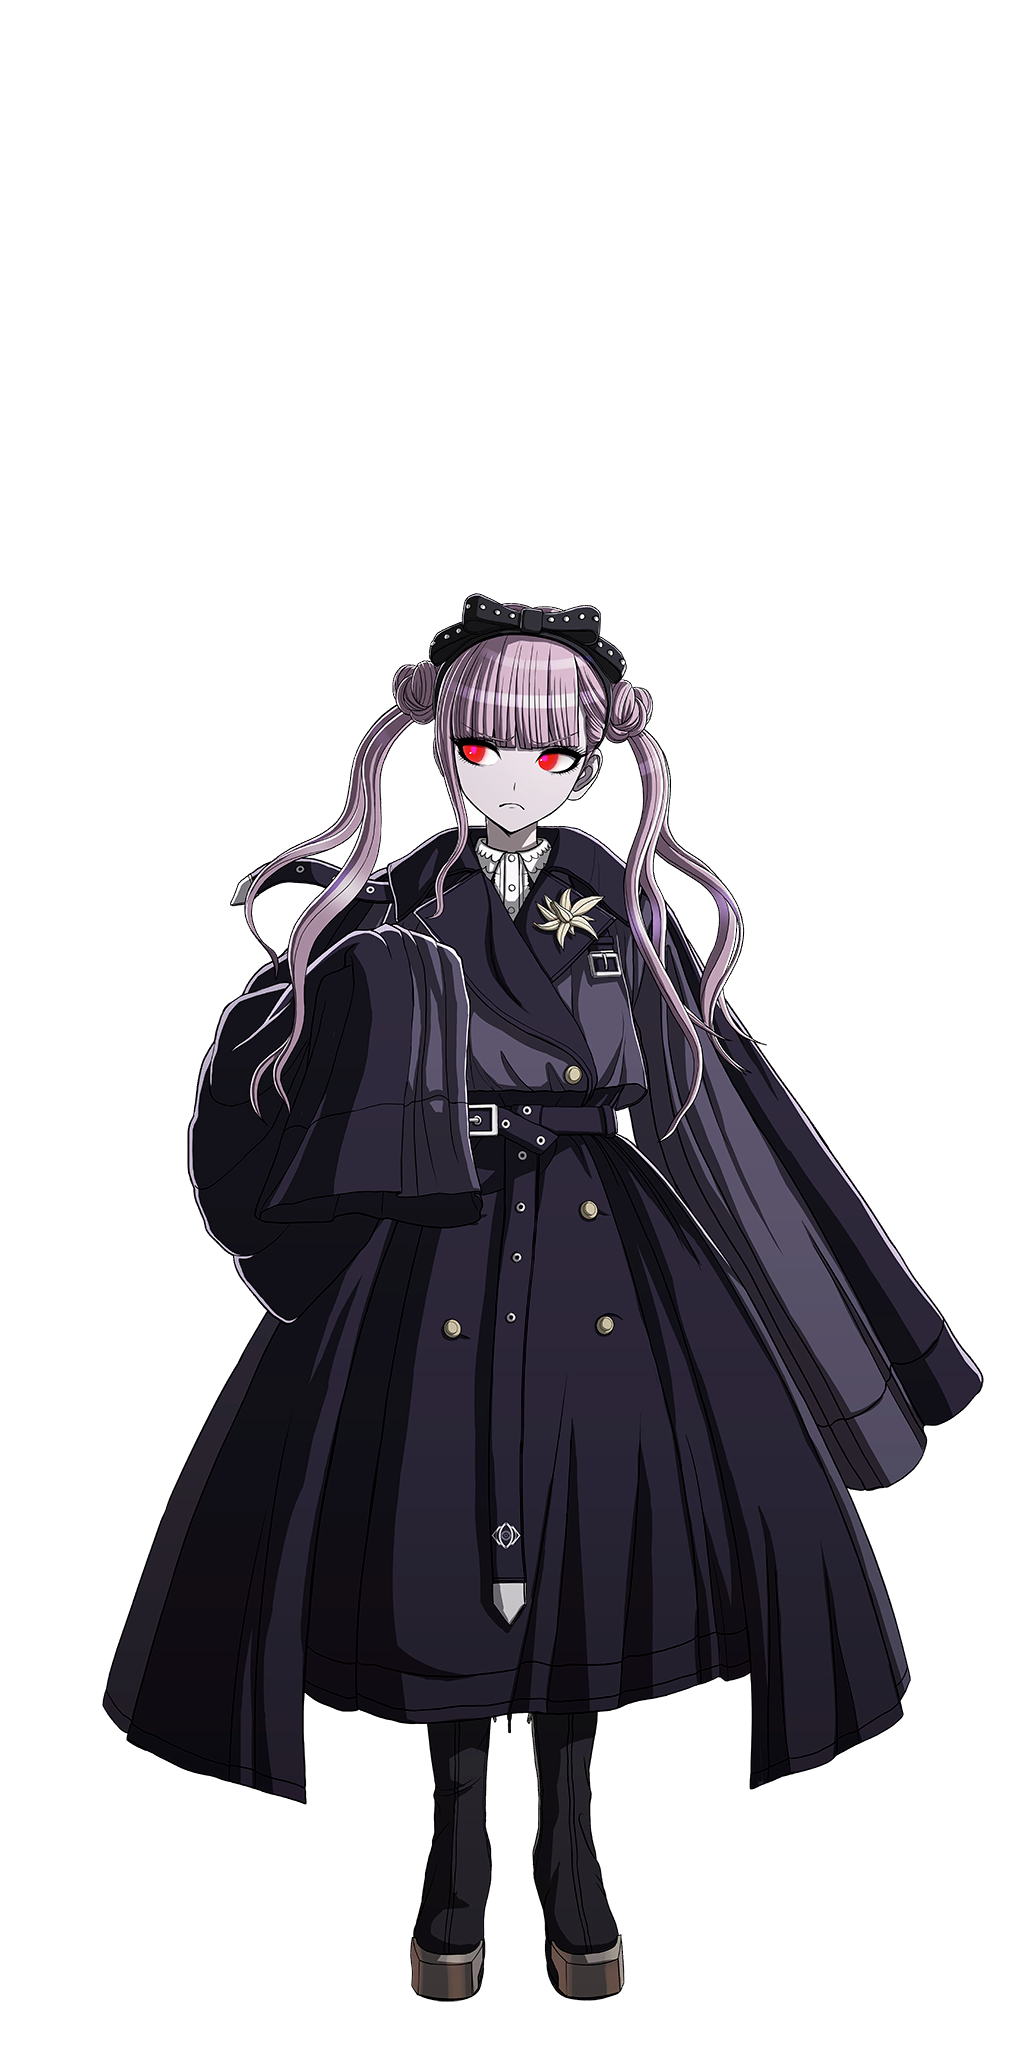
Two unused sprites of Kako-G.
Early Sprites#
Early |
Final |
|---|---|
 |
 |
 |
 |
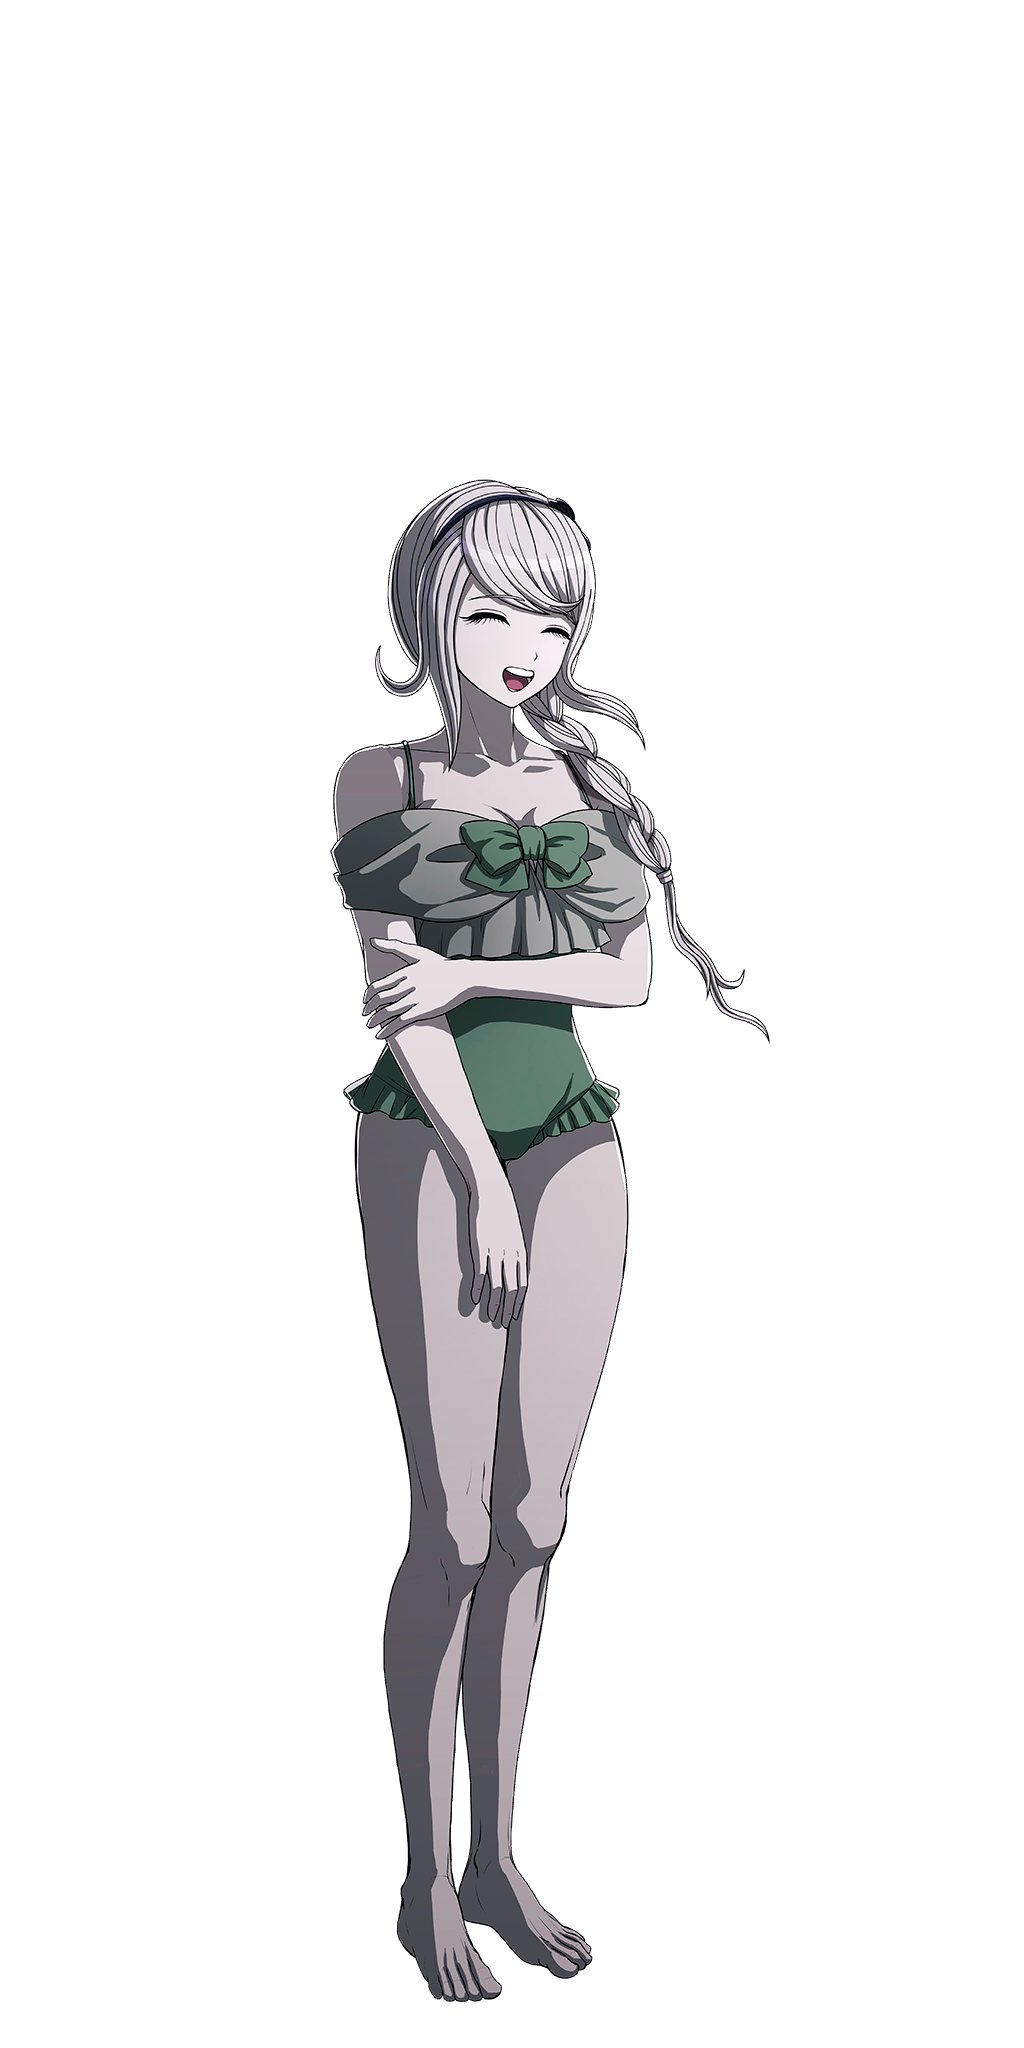
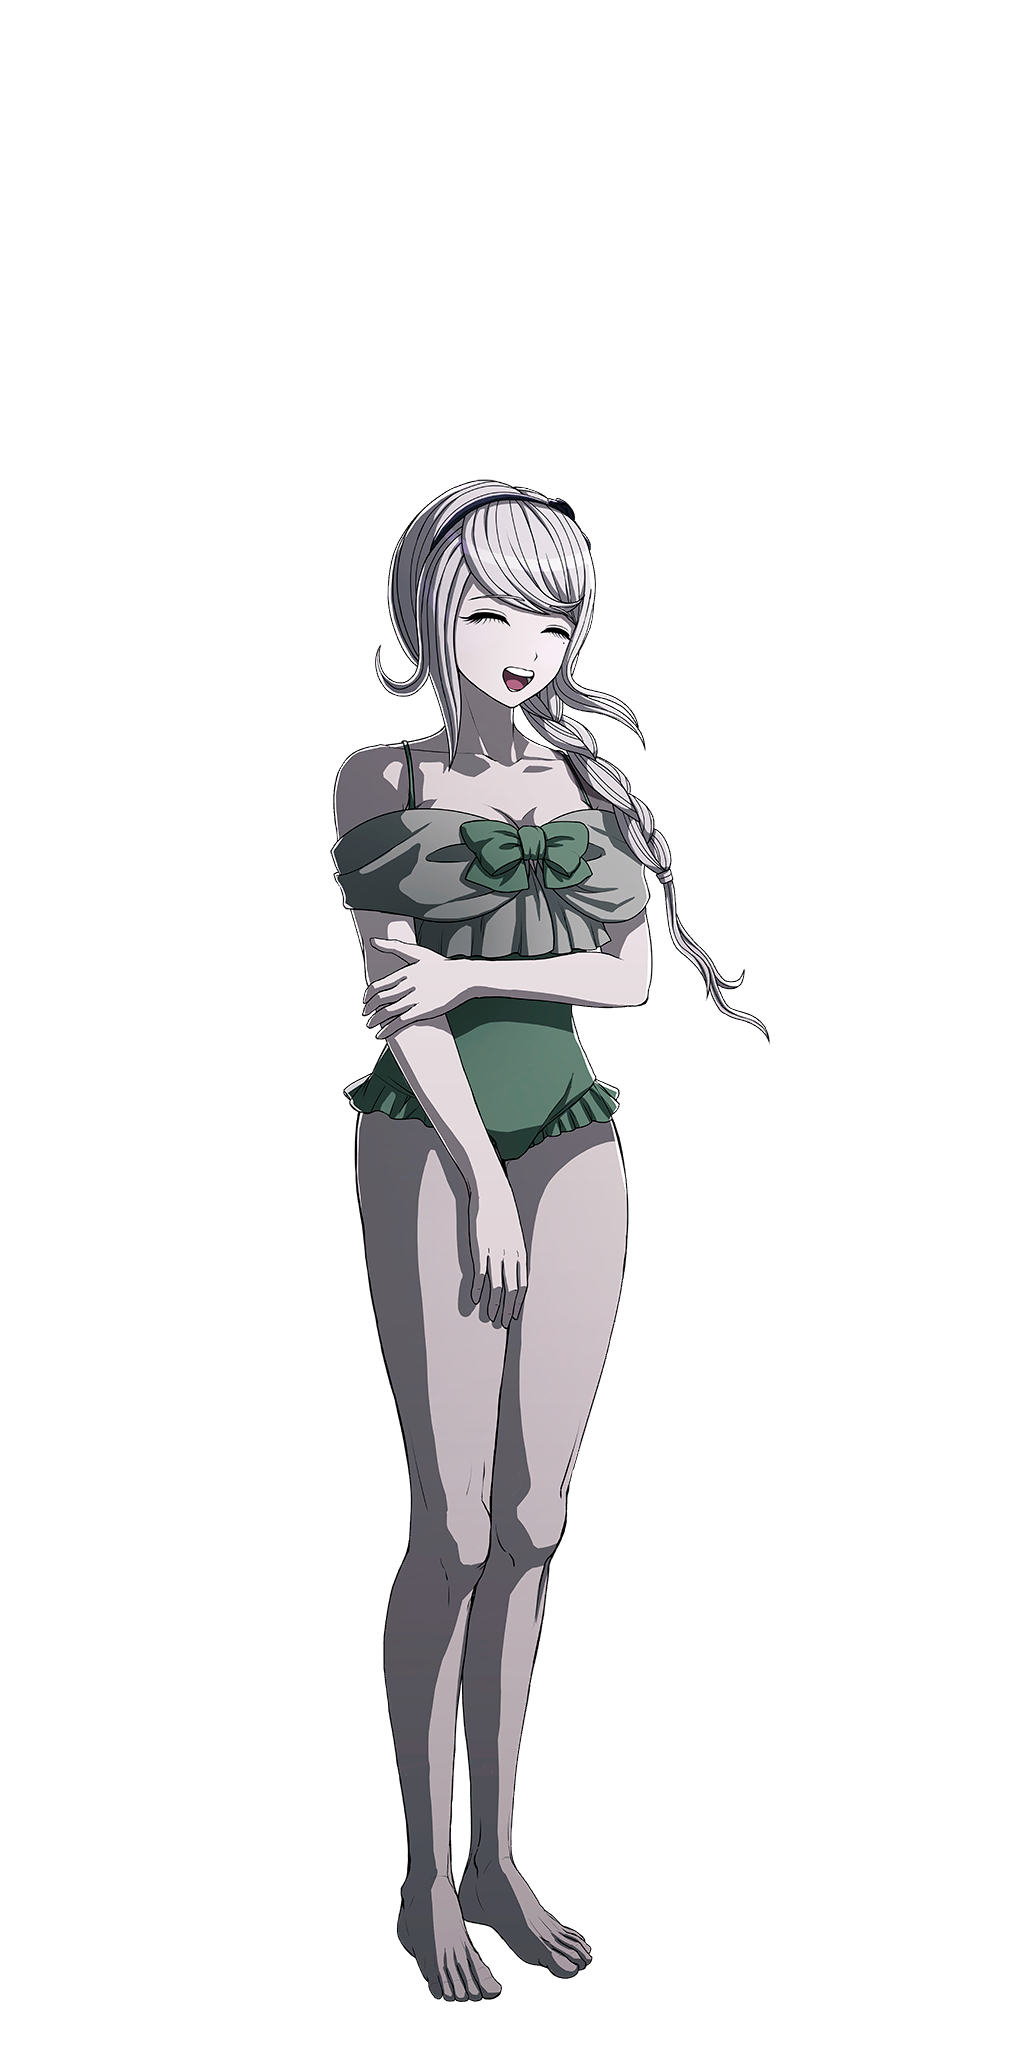
Two of Nozomi's swimsuit sprites were edited to correct the shading on her arm.
Unused Backgrounds#
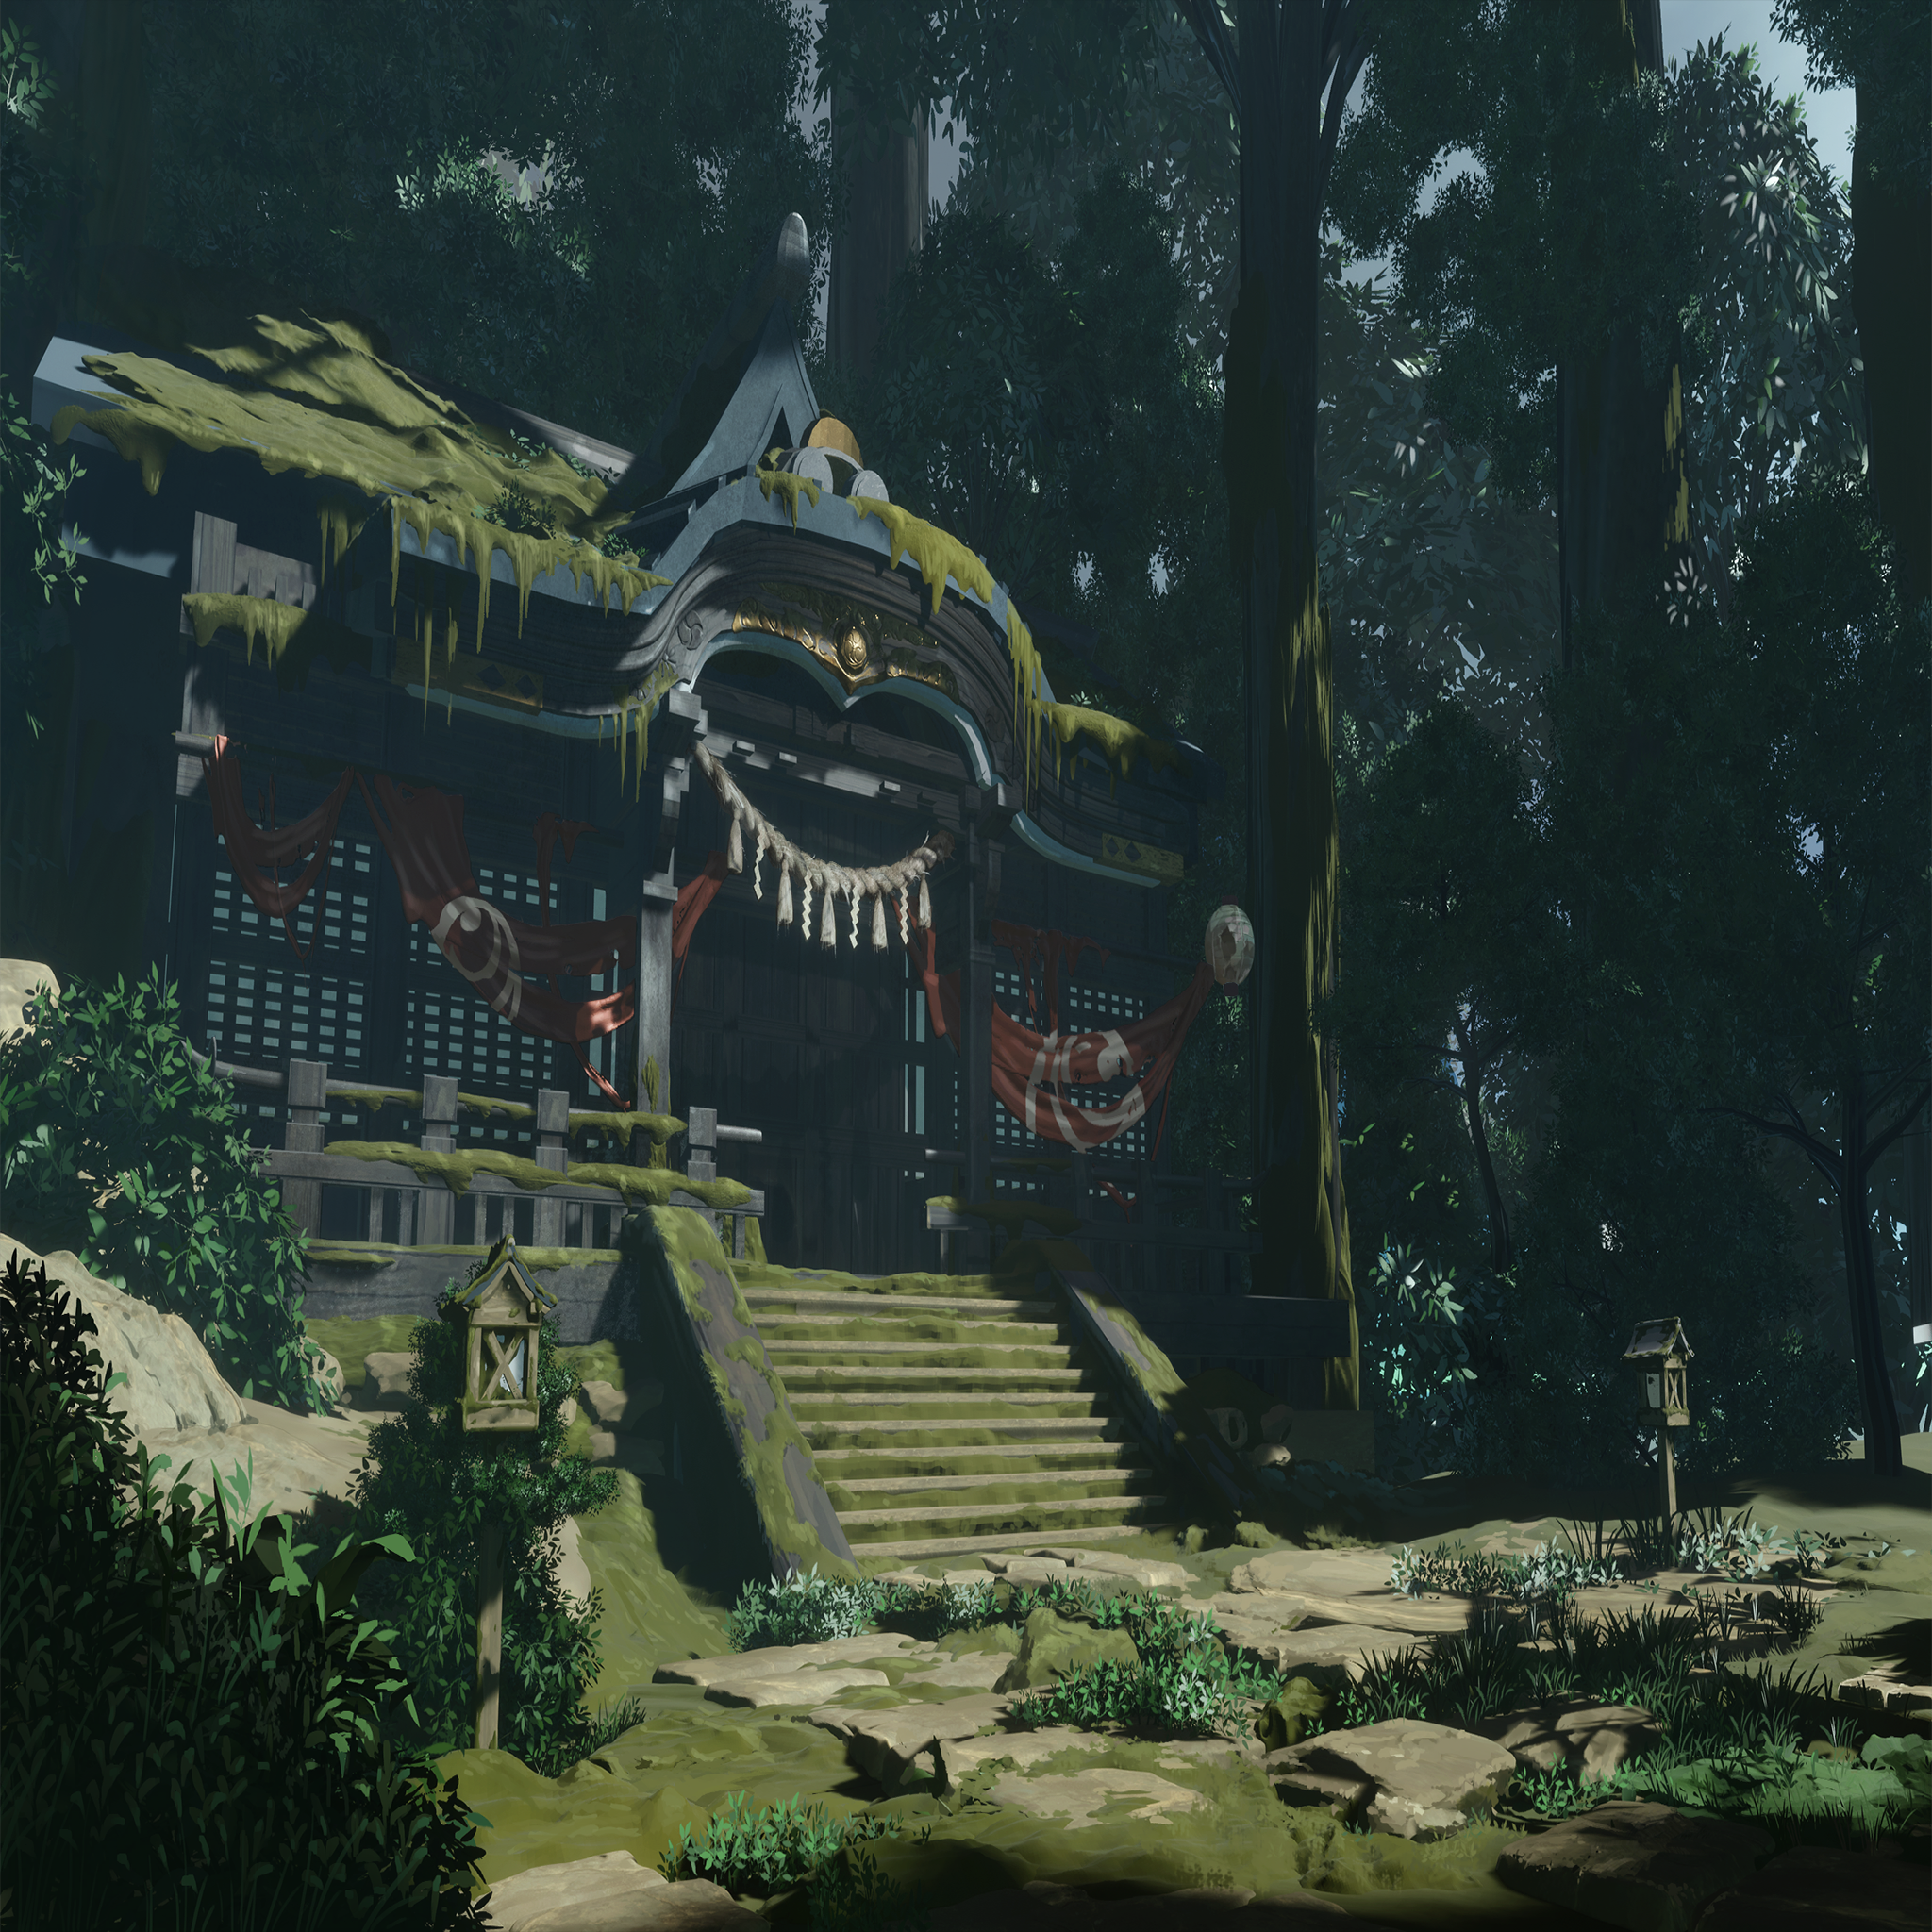
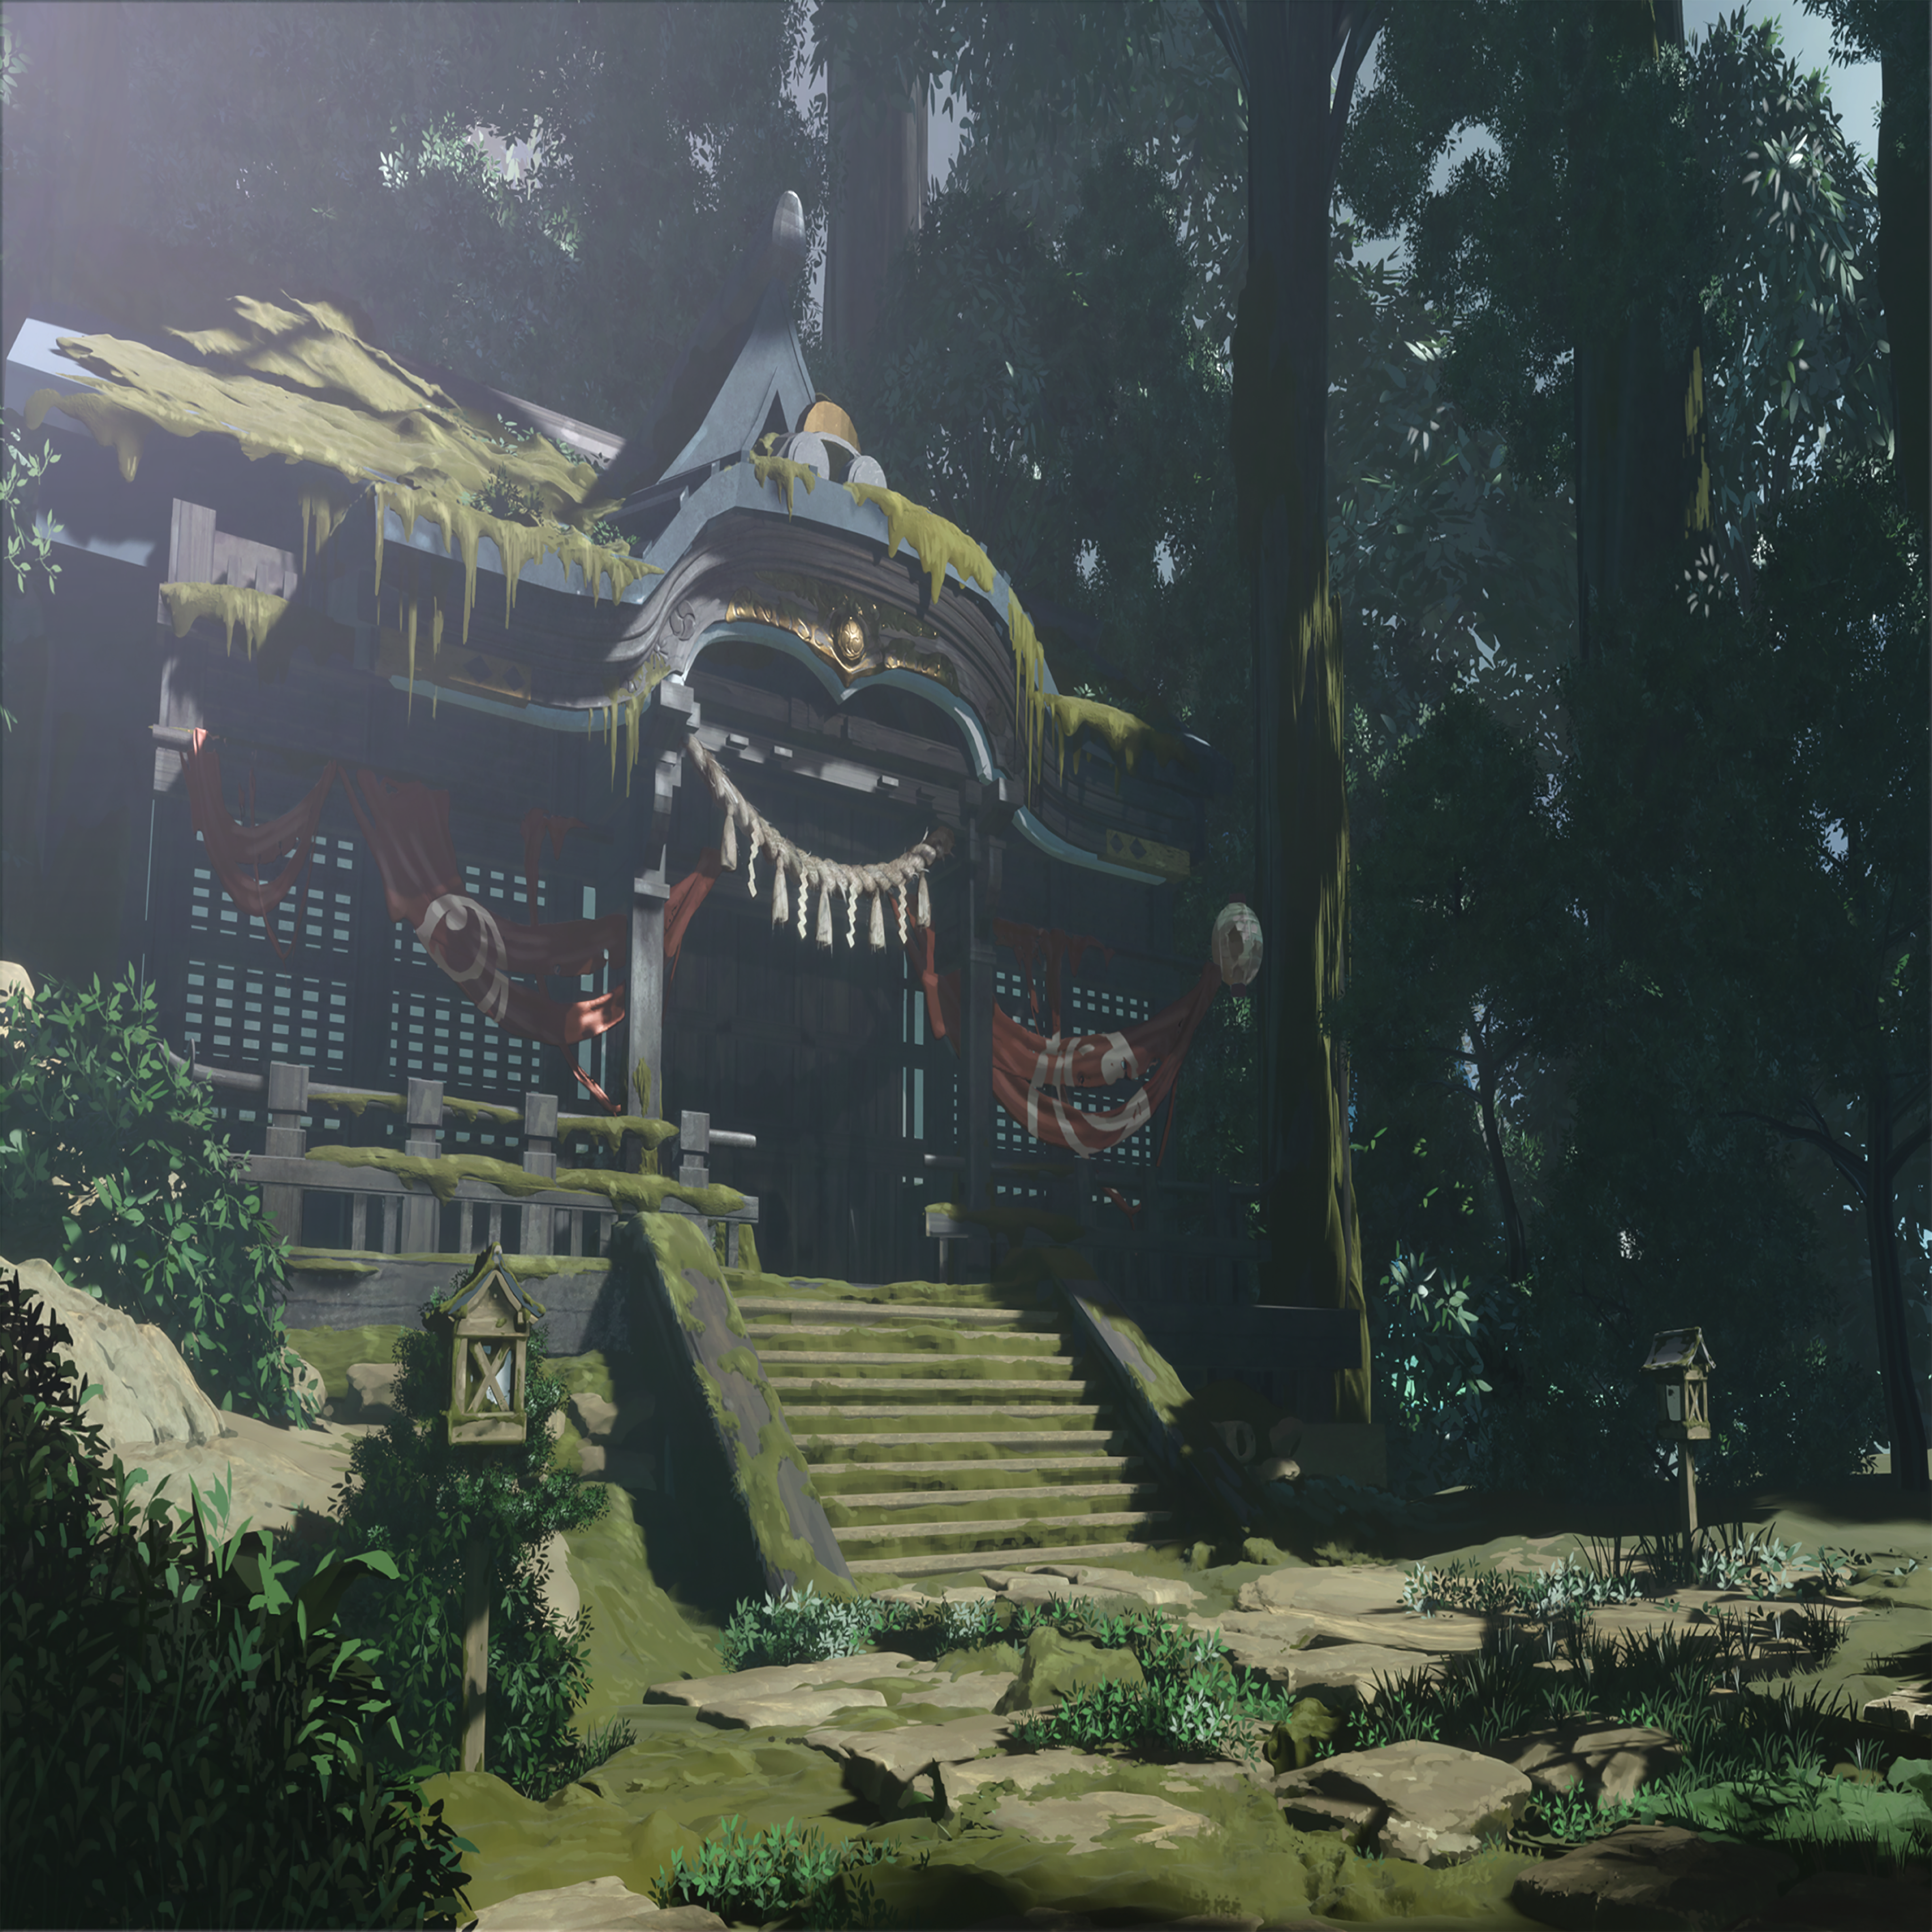
An unused background depicting some sort of shrine. It's meant for the background of room e0214 ("e" signifying "event rooms", or rooms that are simply a background as opposed to a full 3D model), but this shrine is never visited. It was possibly intended for as a potential Box of Blessings location in the Route of the same name. The first image is the texture for the room backdrop. The second image is the texture used when characters are simply talking at each other without showing the portraits standing in the room, usually used during battle sequences or when standing in the room would look weird, such as when inside the school bus.
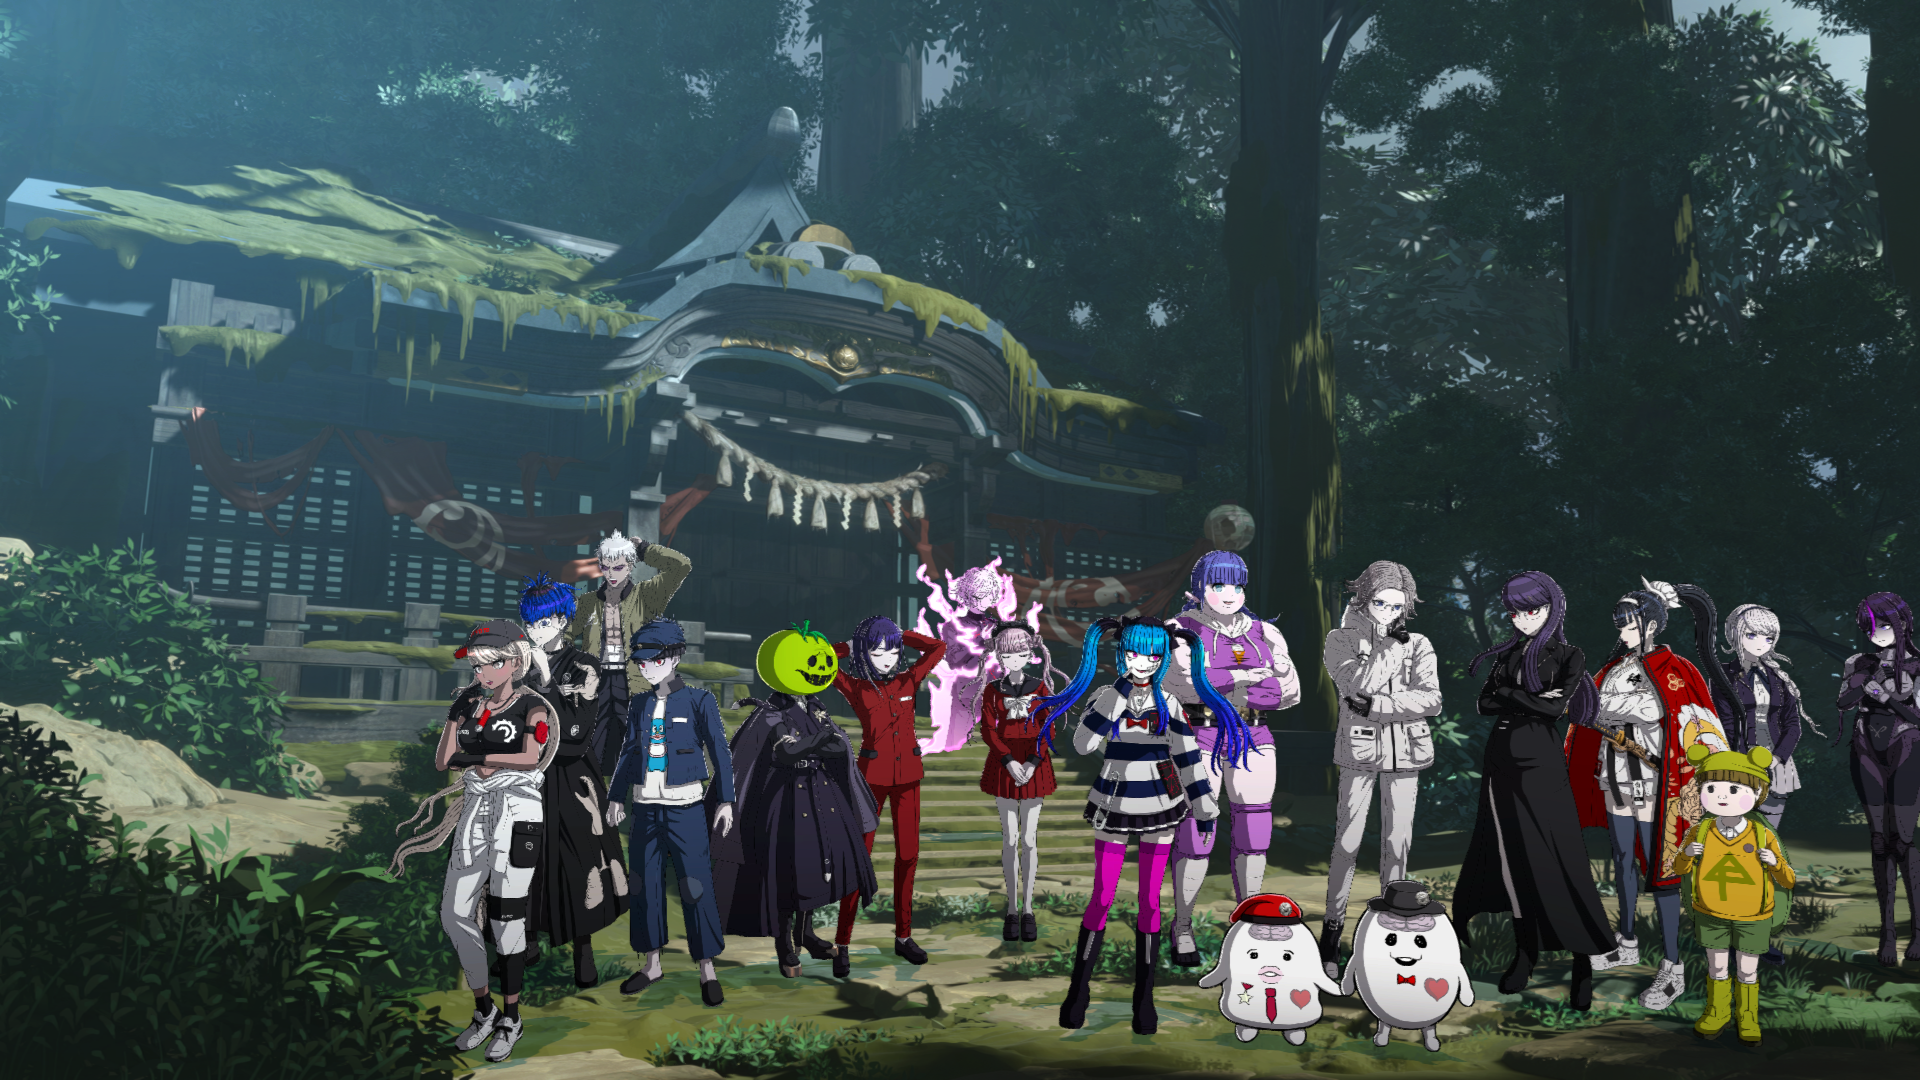
The shrine room as it looks in-game, showing the unused position data for the main characters.
Adjusted Textures#
Initial |
Version 1.2.0 |
|---|---|
 |
 |
 |
 |
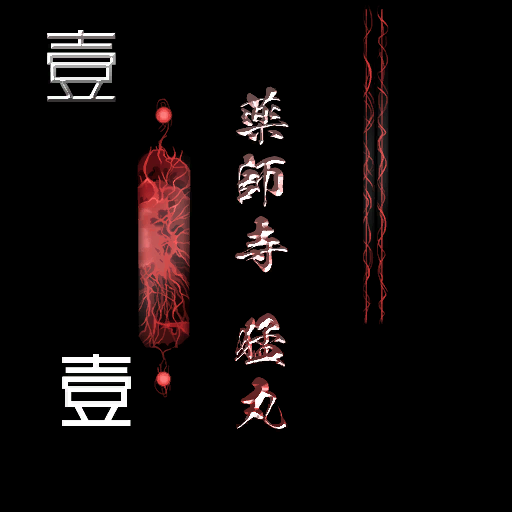
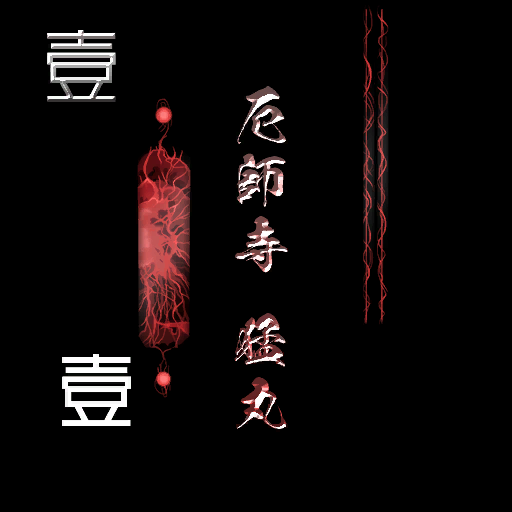
The kanji on Takemaru's Infuser was originally incorrect. It was fixed in Version 1.2.0. Note that this is basically only visible for a very brief moment during executions.
Unused CGs#
Variant 1 |
Variant 2 |
Unused |
|---|---|---|
 |
 |
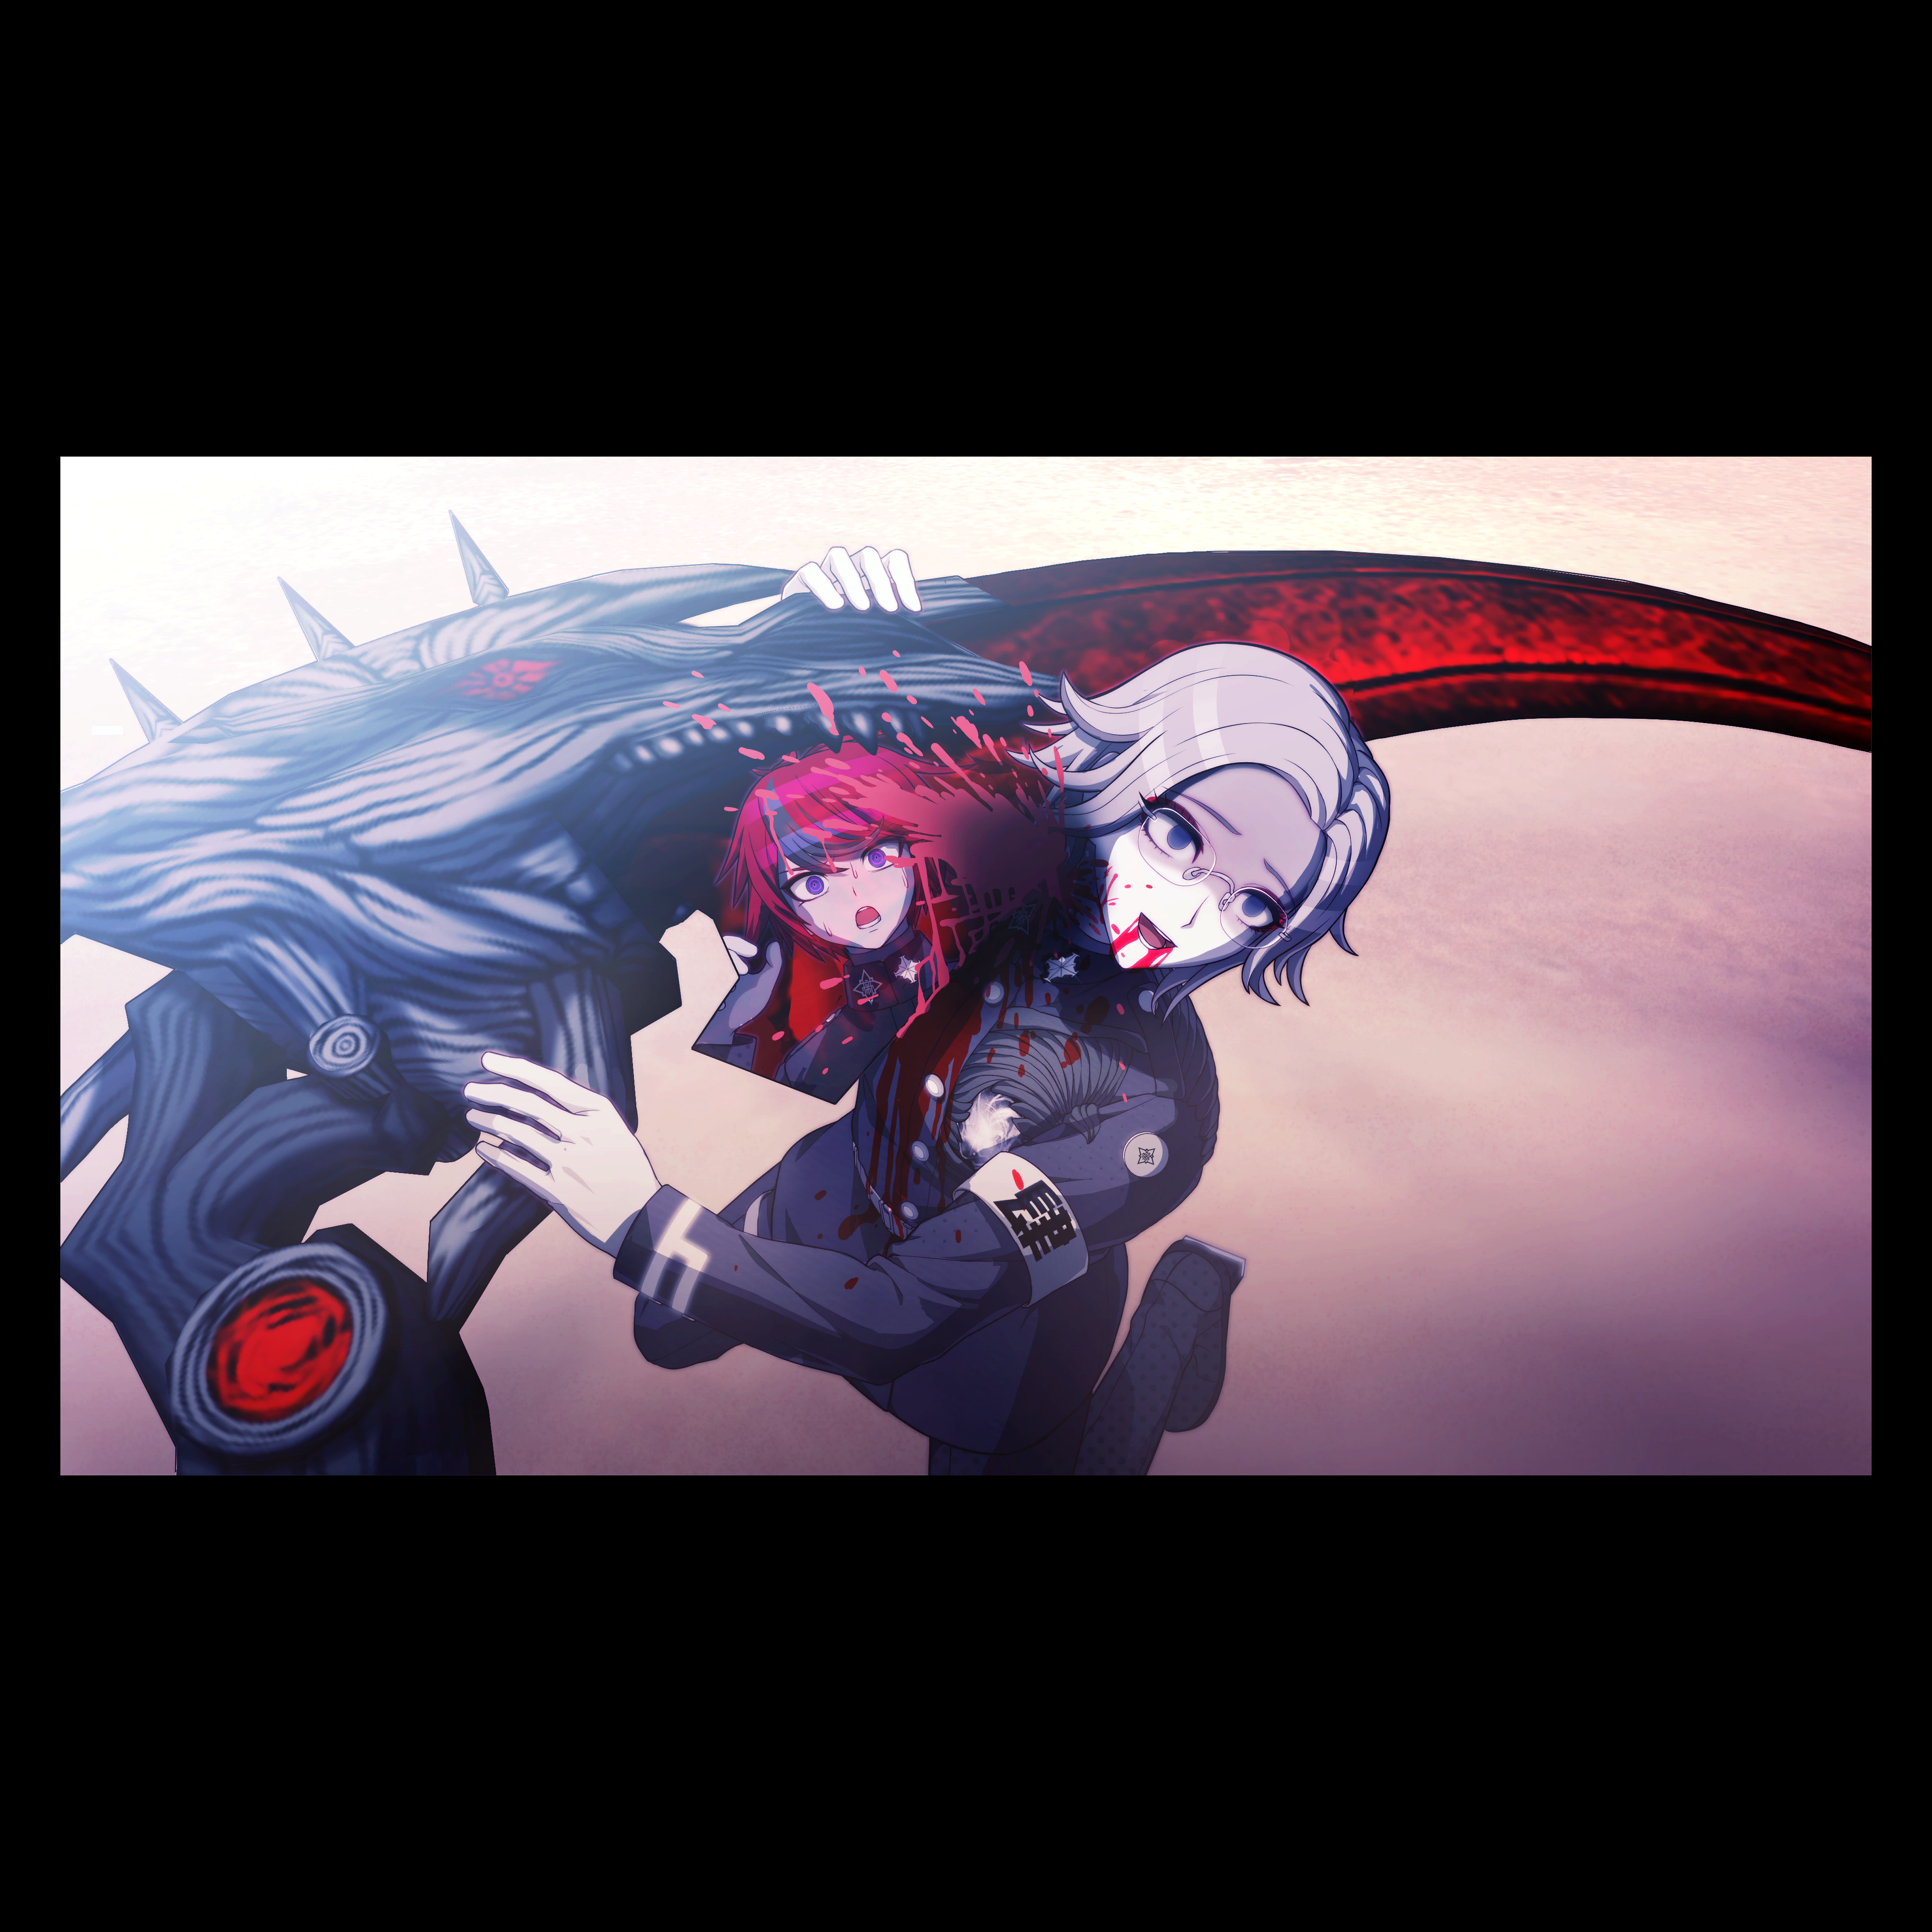 |
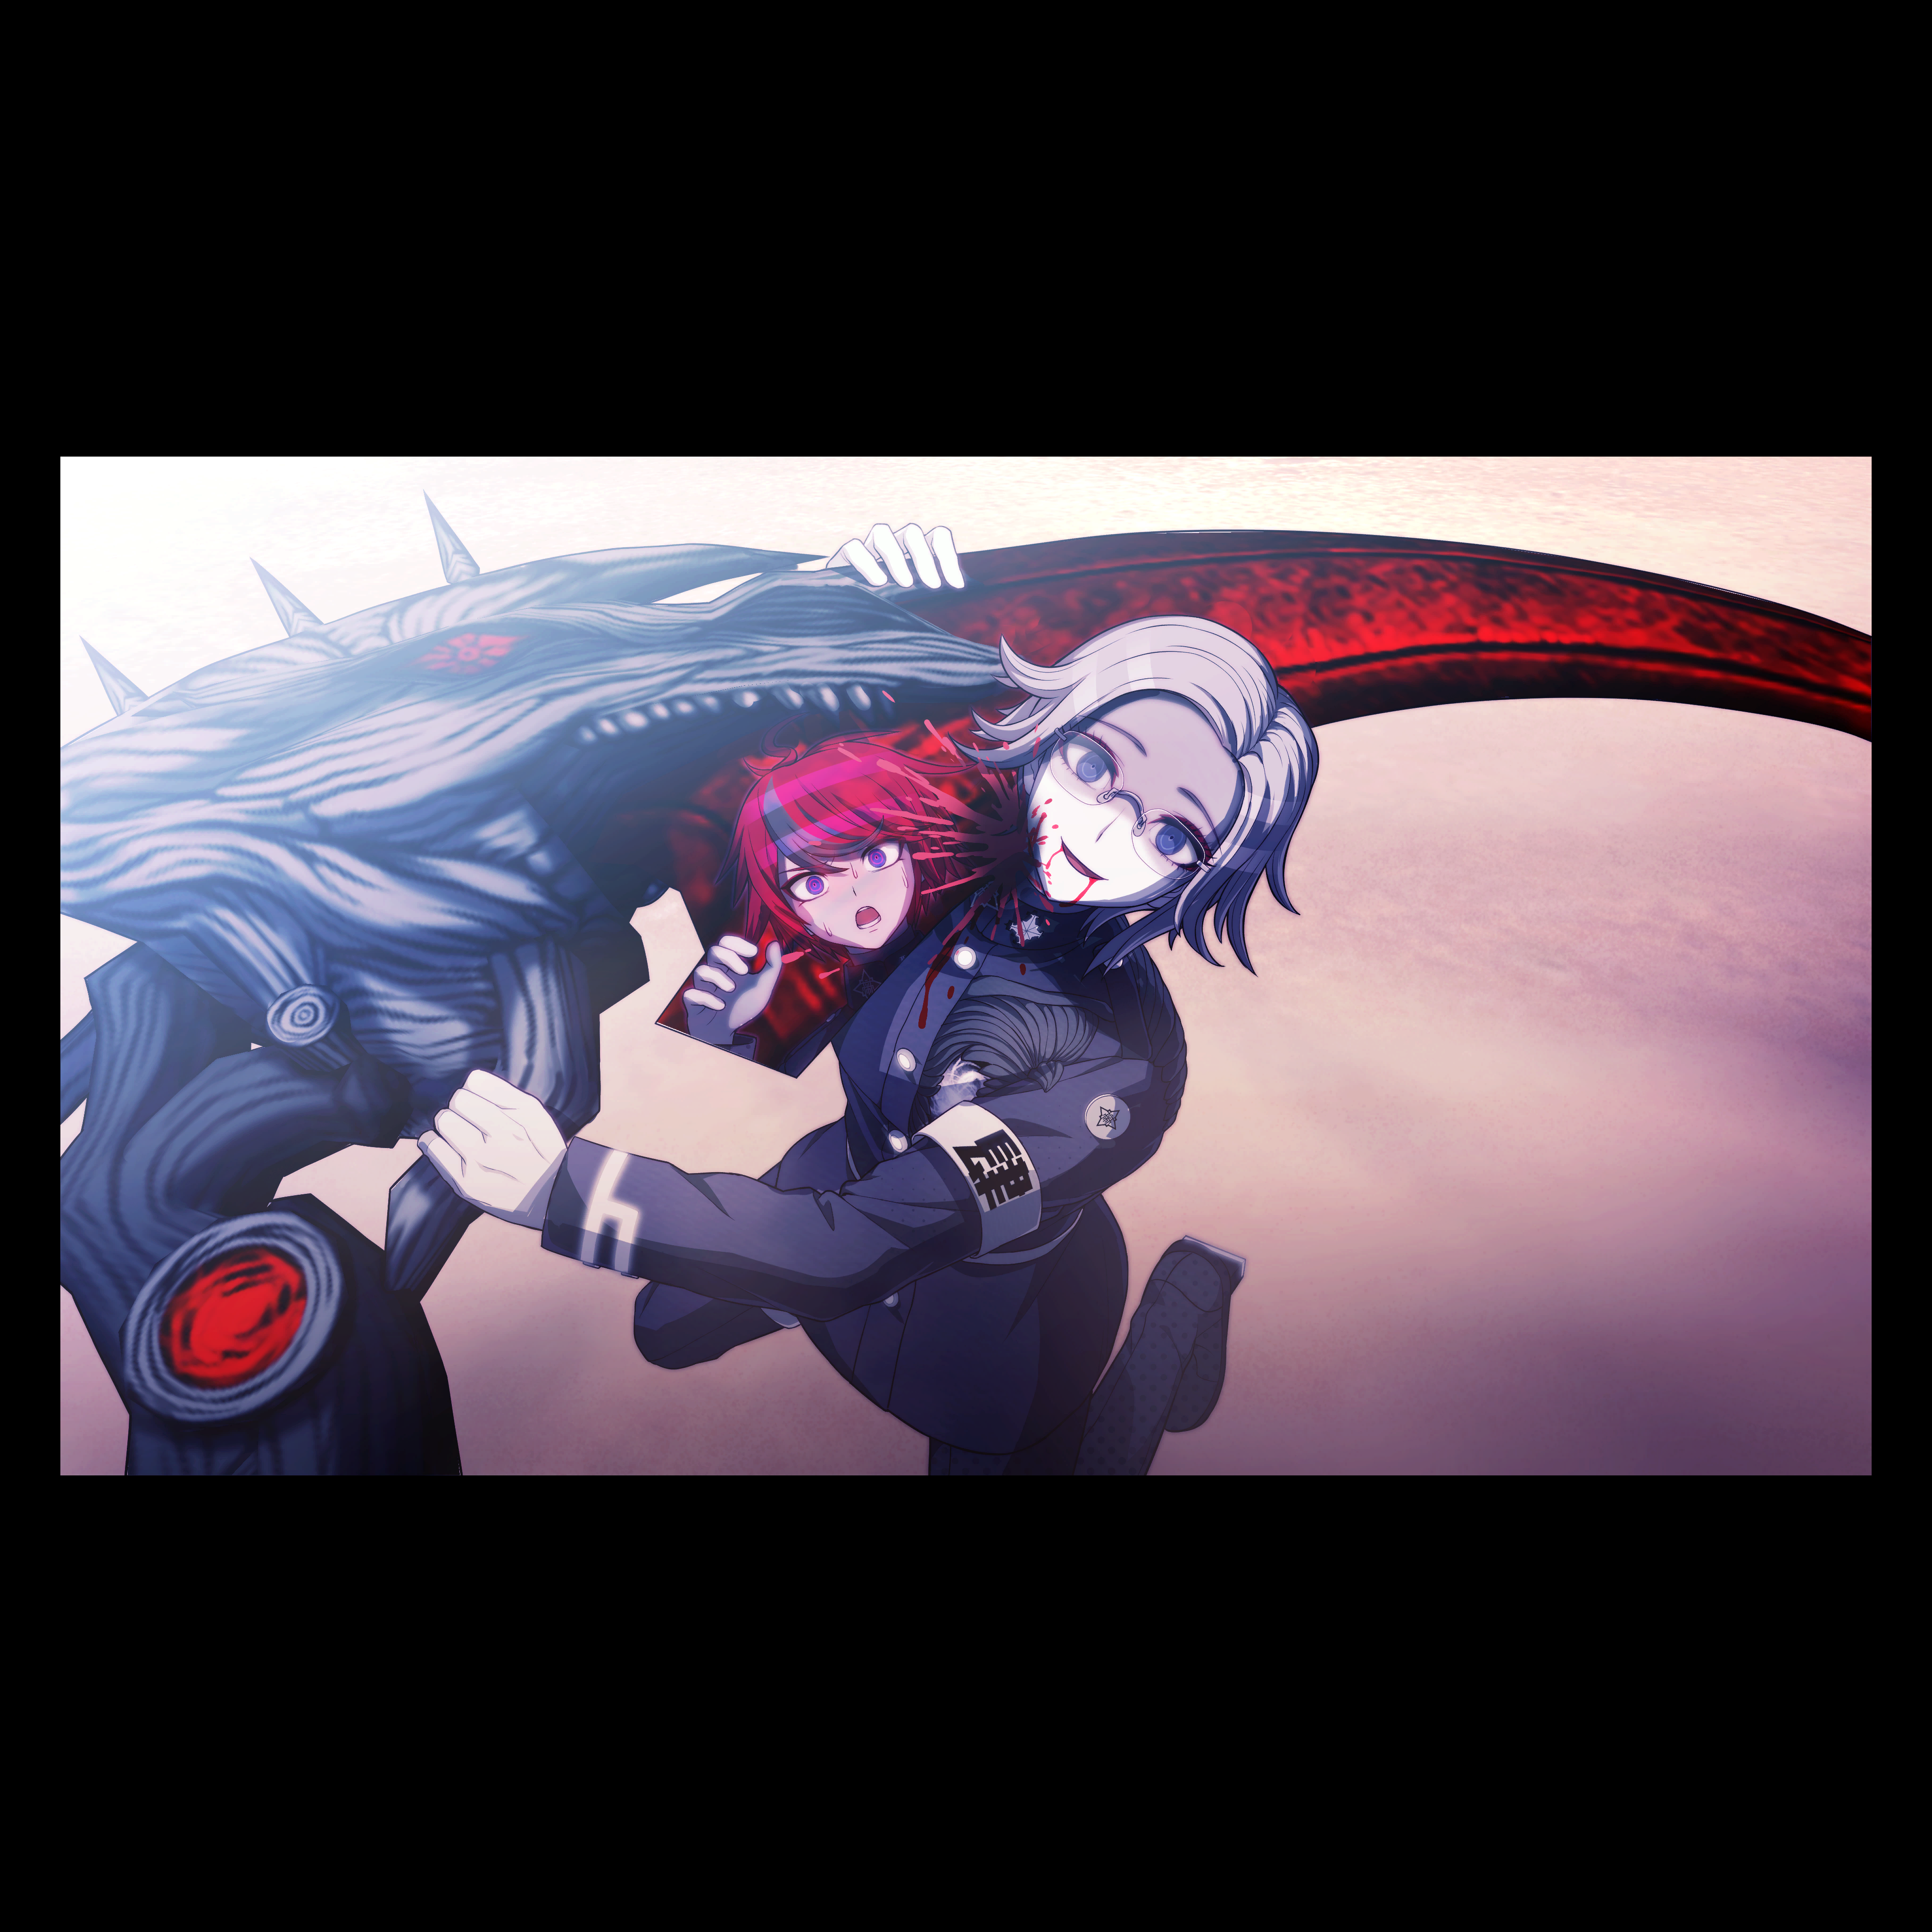
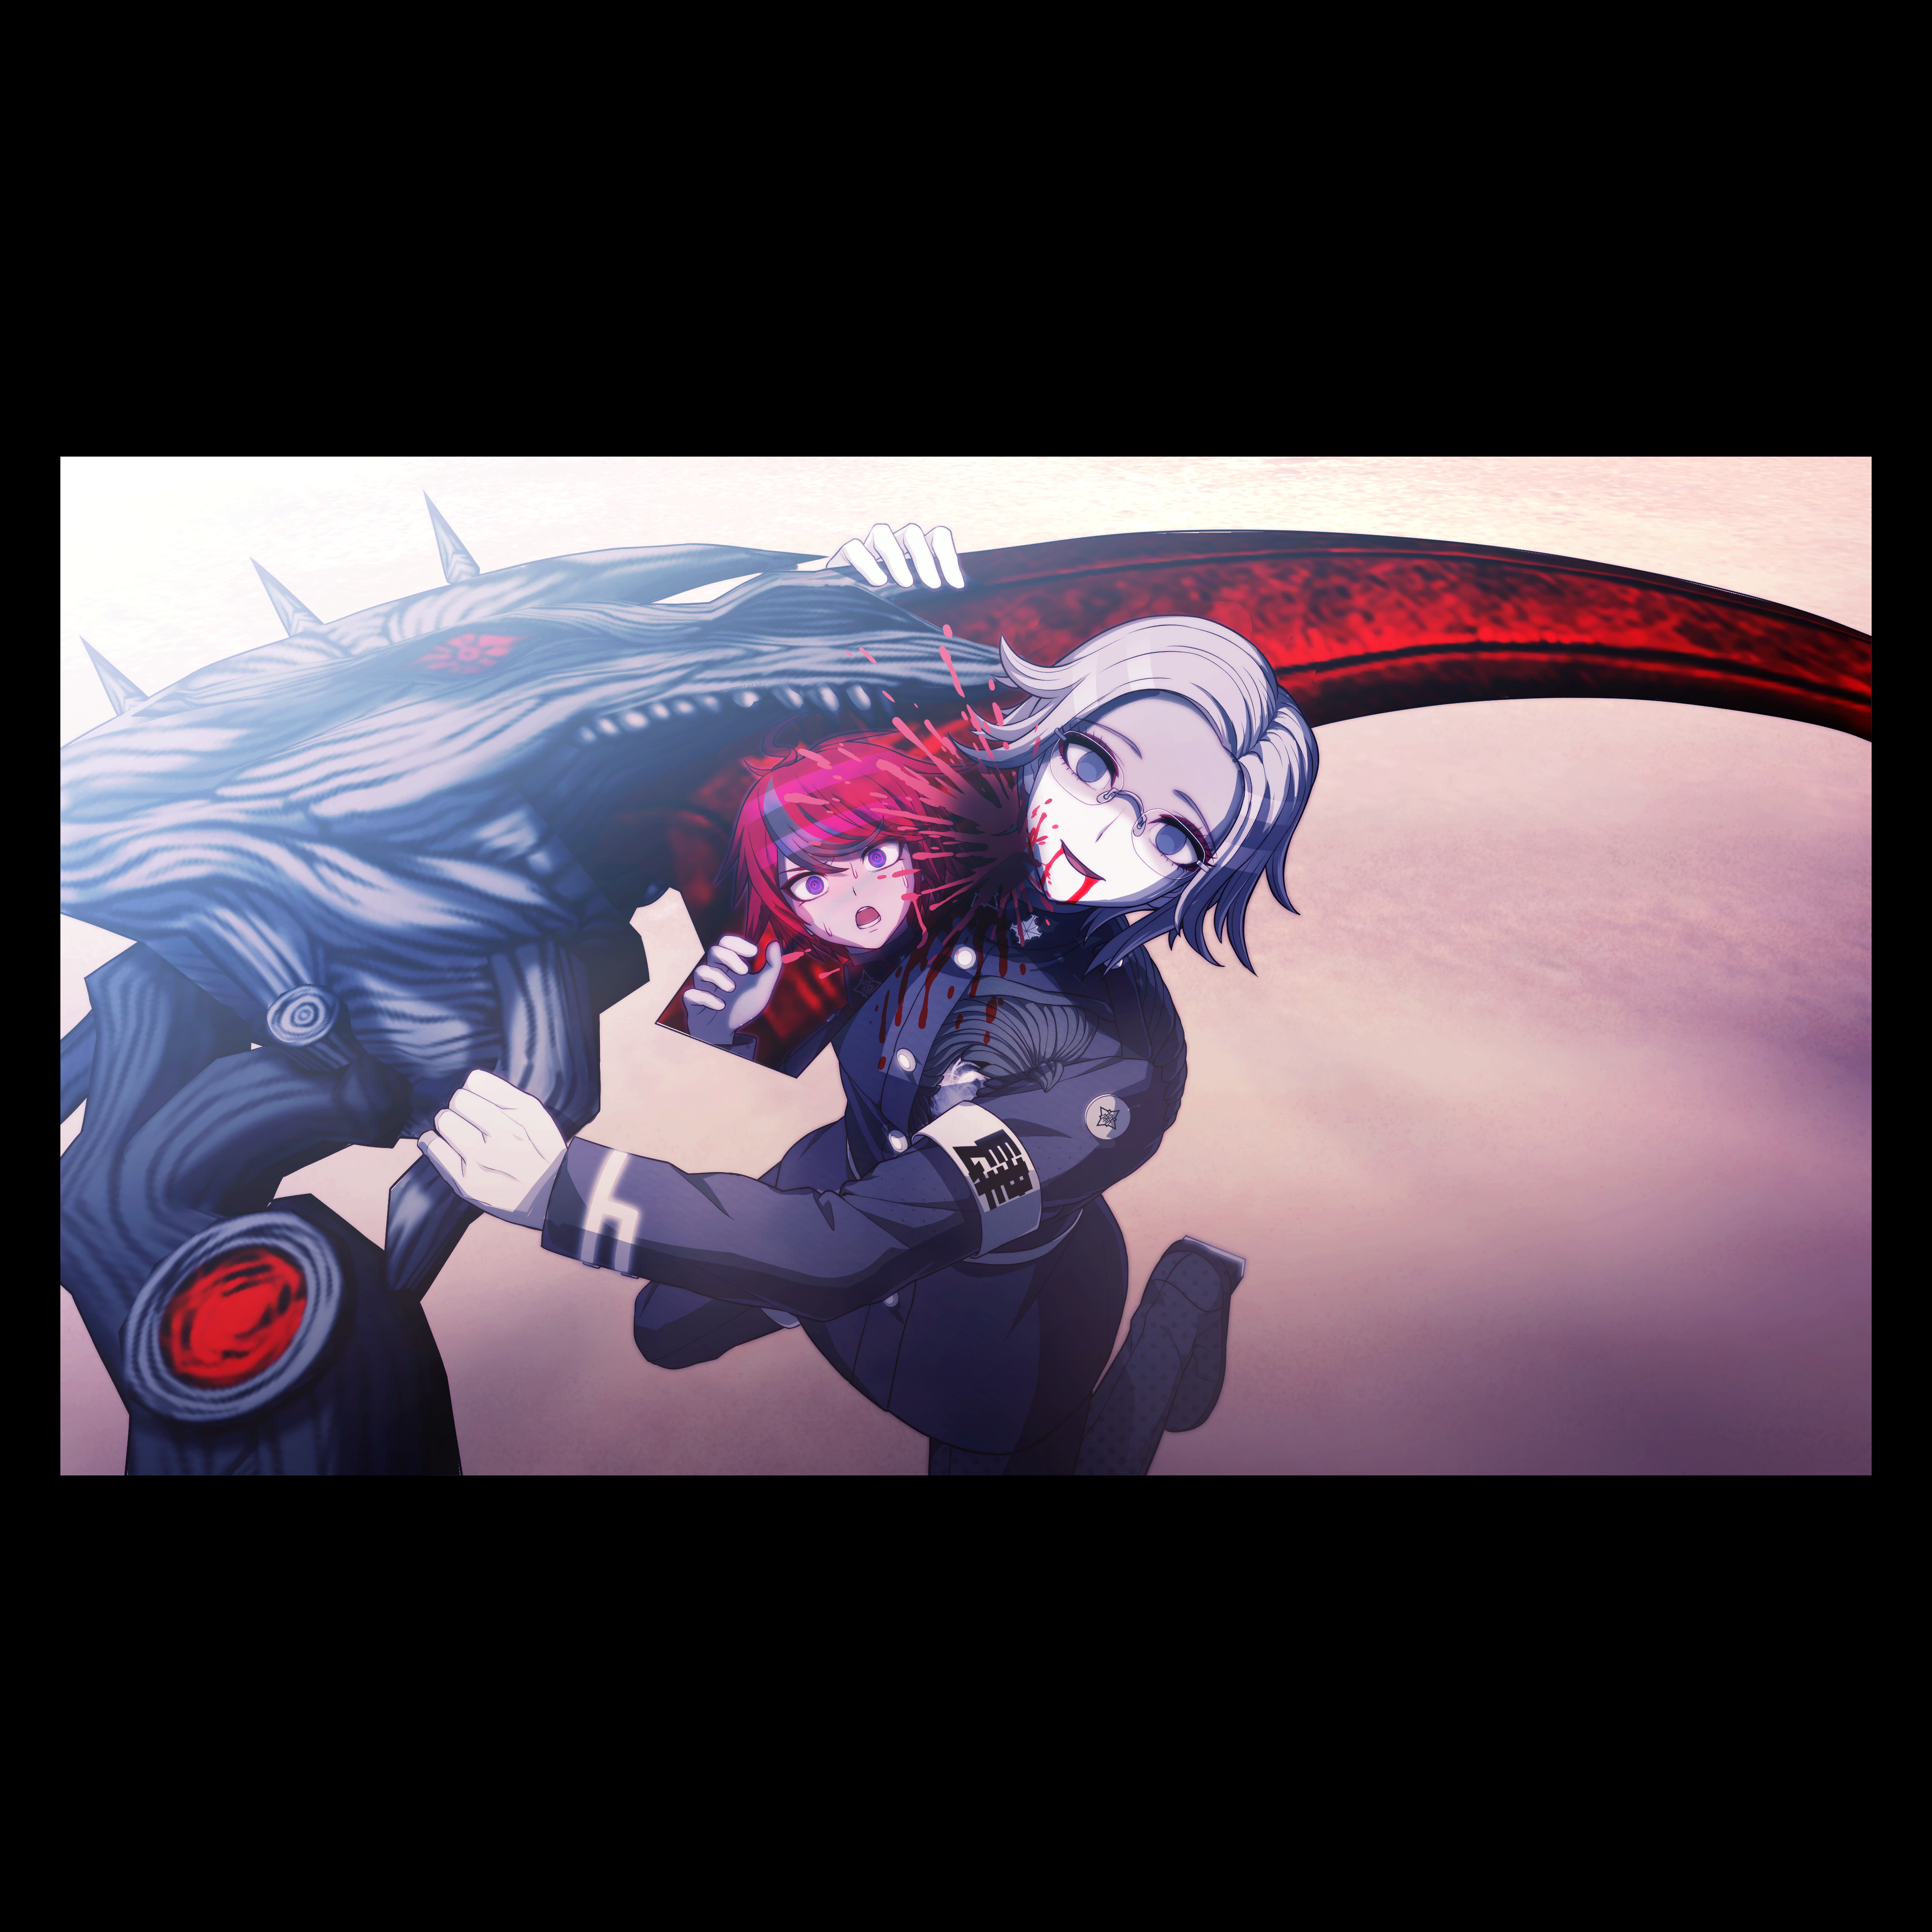
Two different CGs are used in the final game to show Eito Aotsuki's death on the Coming-of-Age Route in motion, but there's a third variant left in the files.
|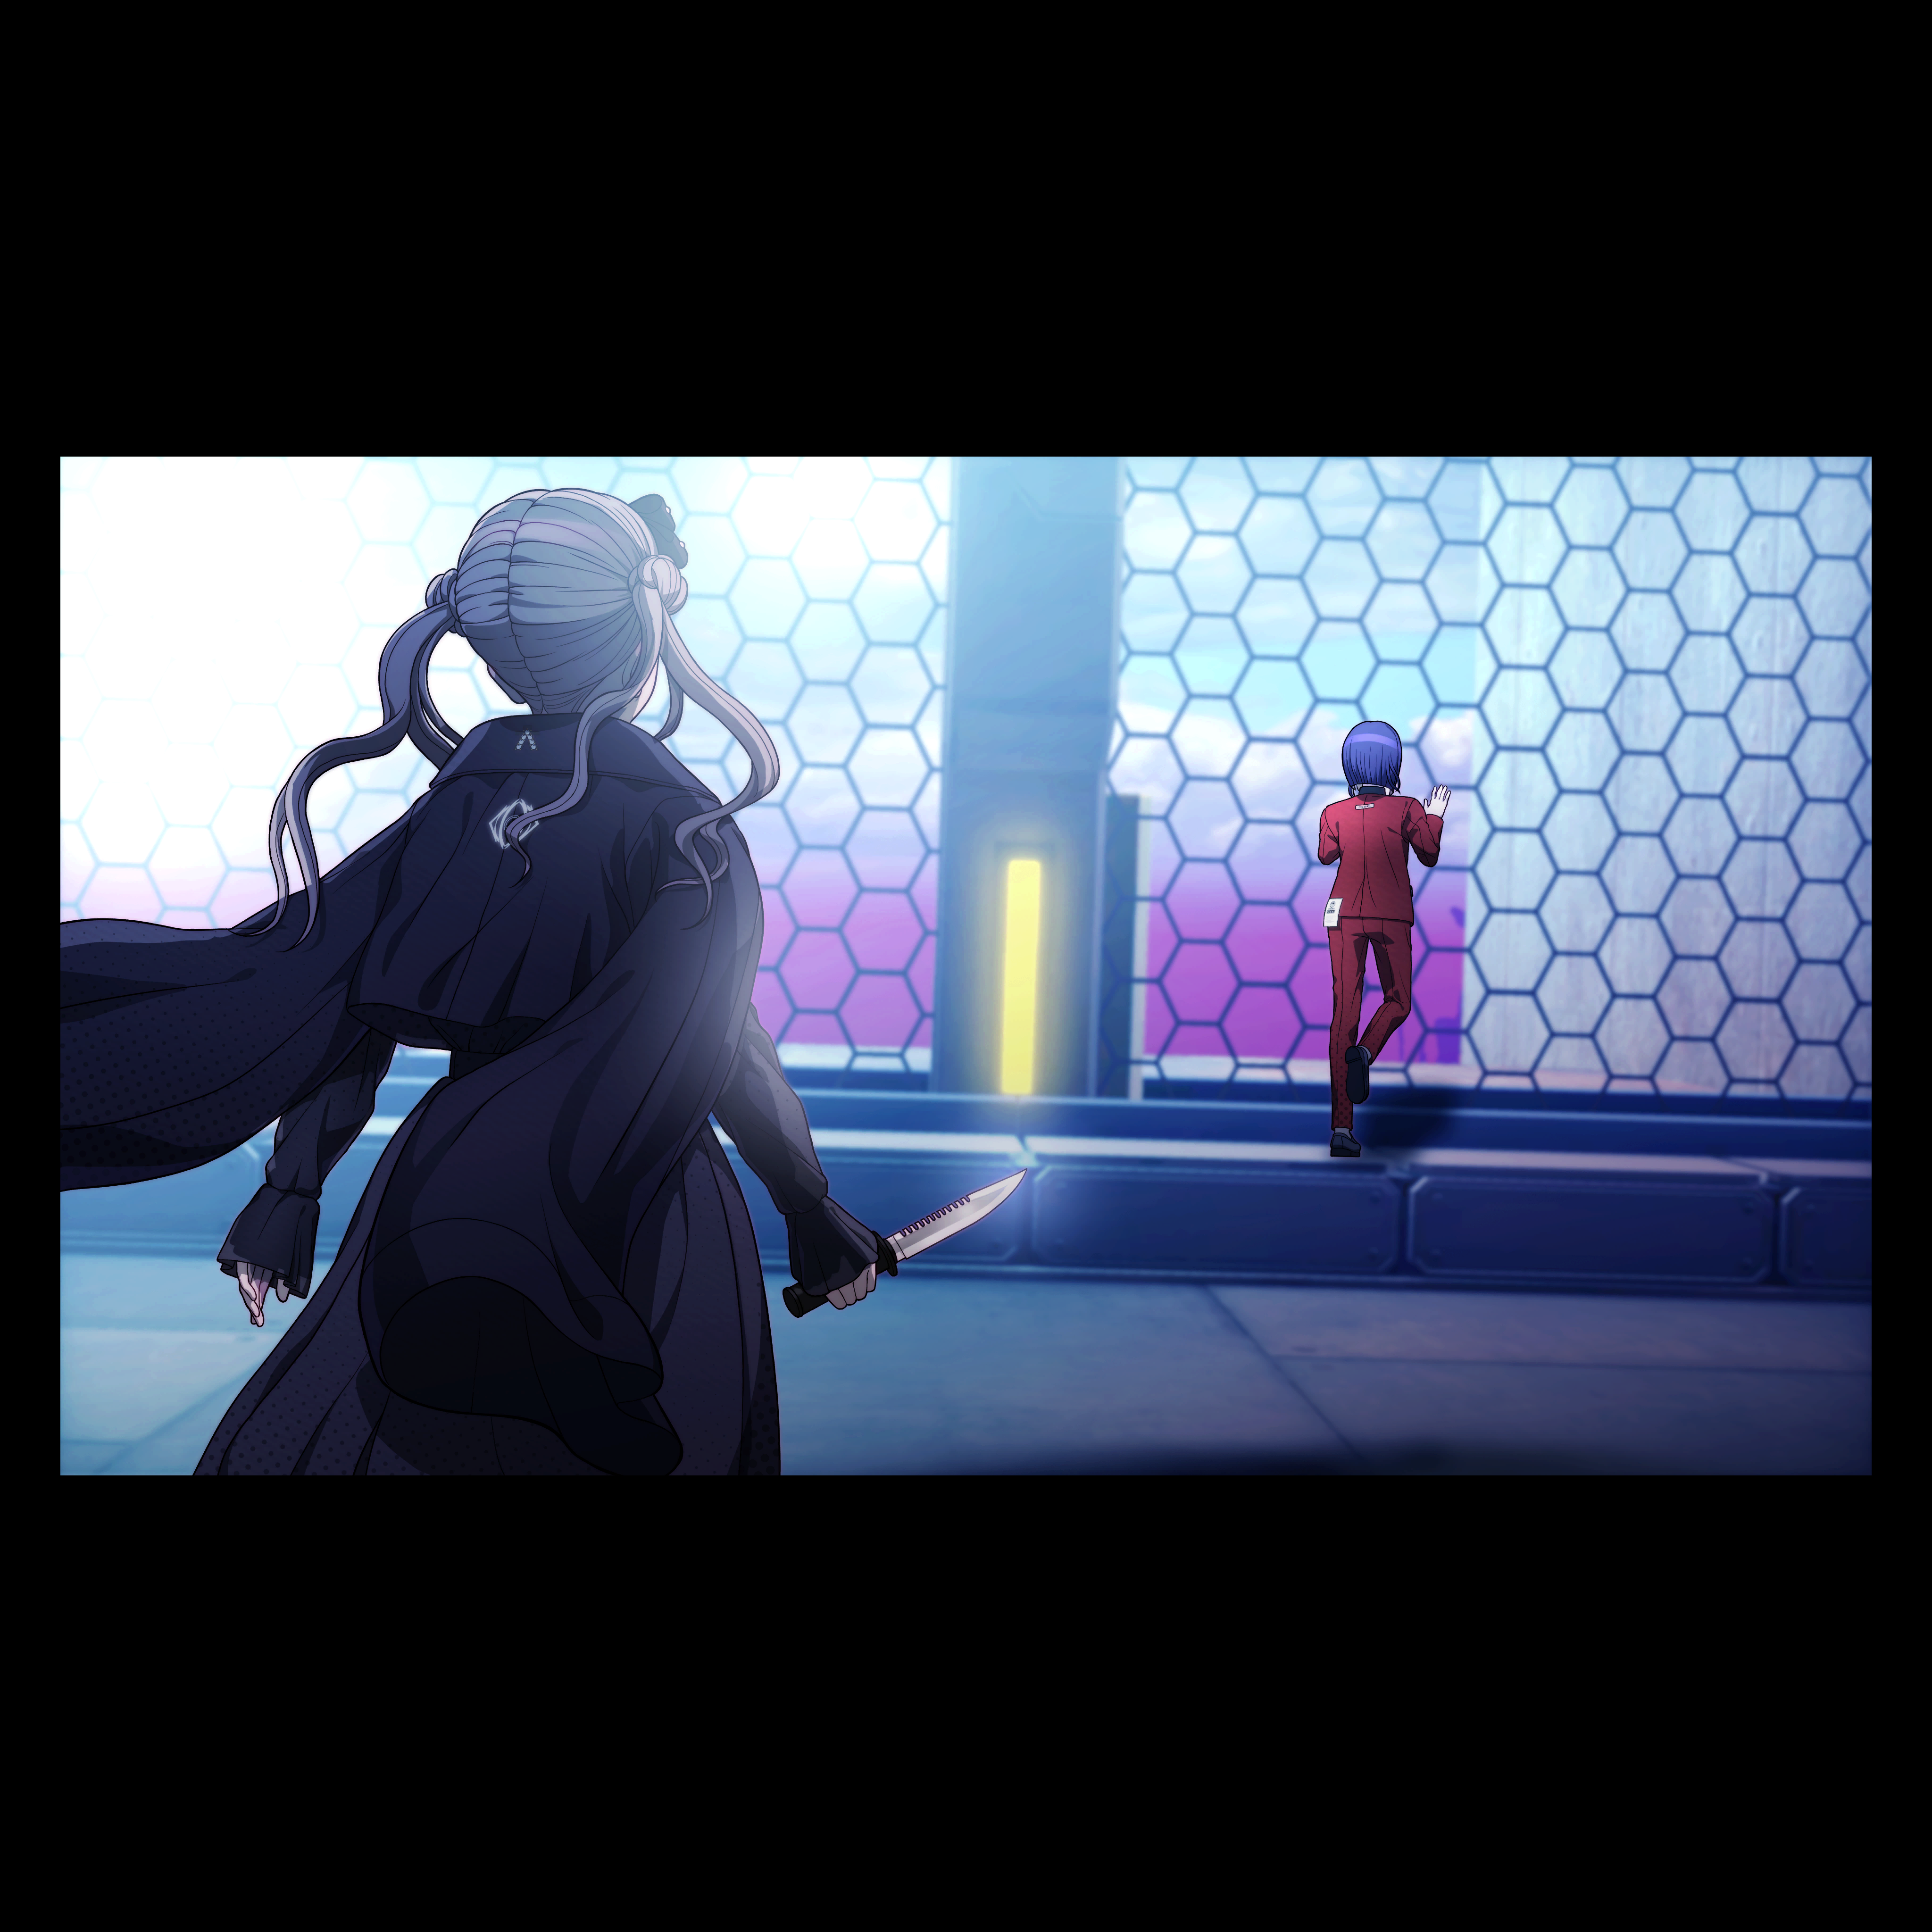
An unused CG depicts Kako-G (the G'ie infected Kako wearing Kurara's clothes) approaching Ima on the rooftop while holding a knife. Based on the file numbering (471) this could have been designed for use right before or after she kidnaps a glowing Nozomi in the S.F. Route.
Used |
Unused |
|---|---|
 |
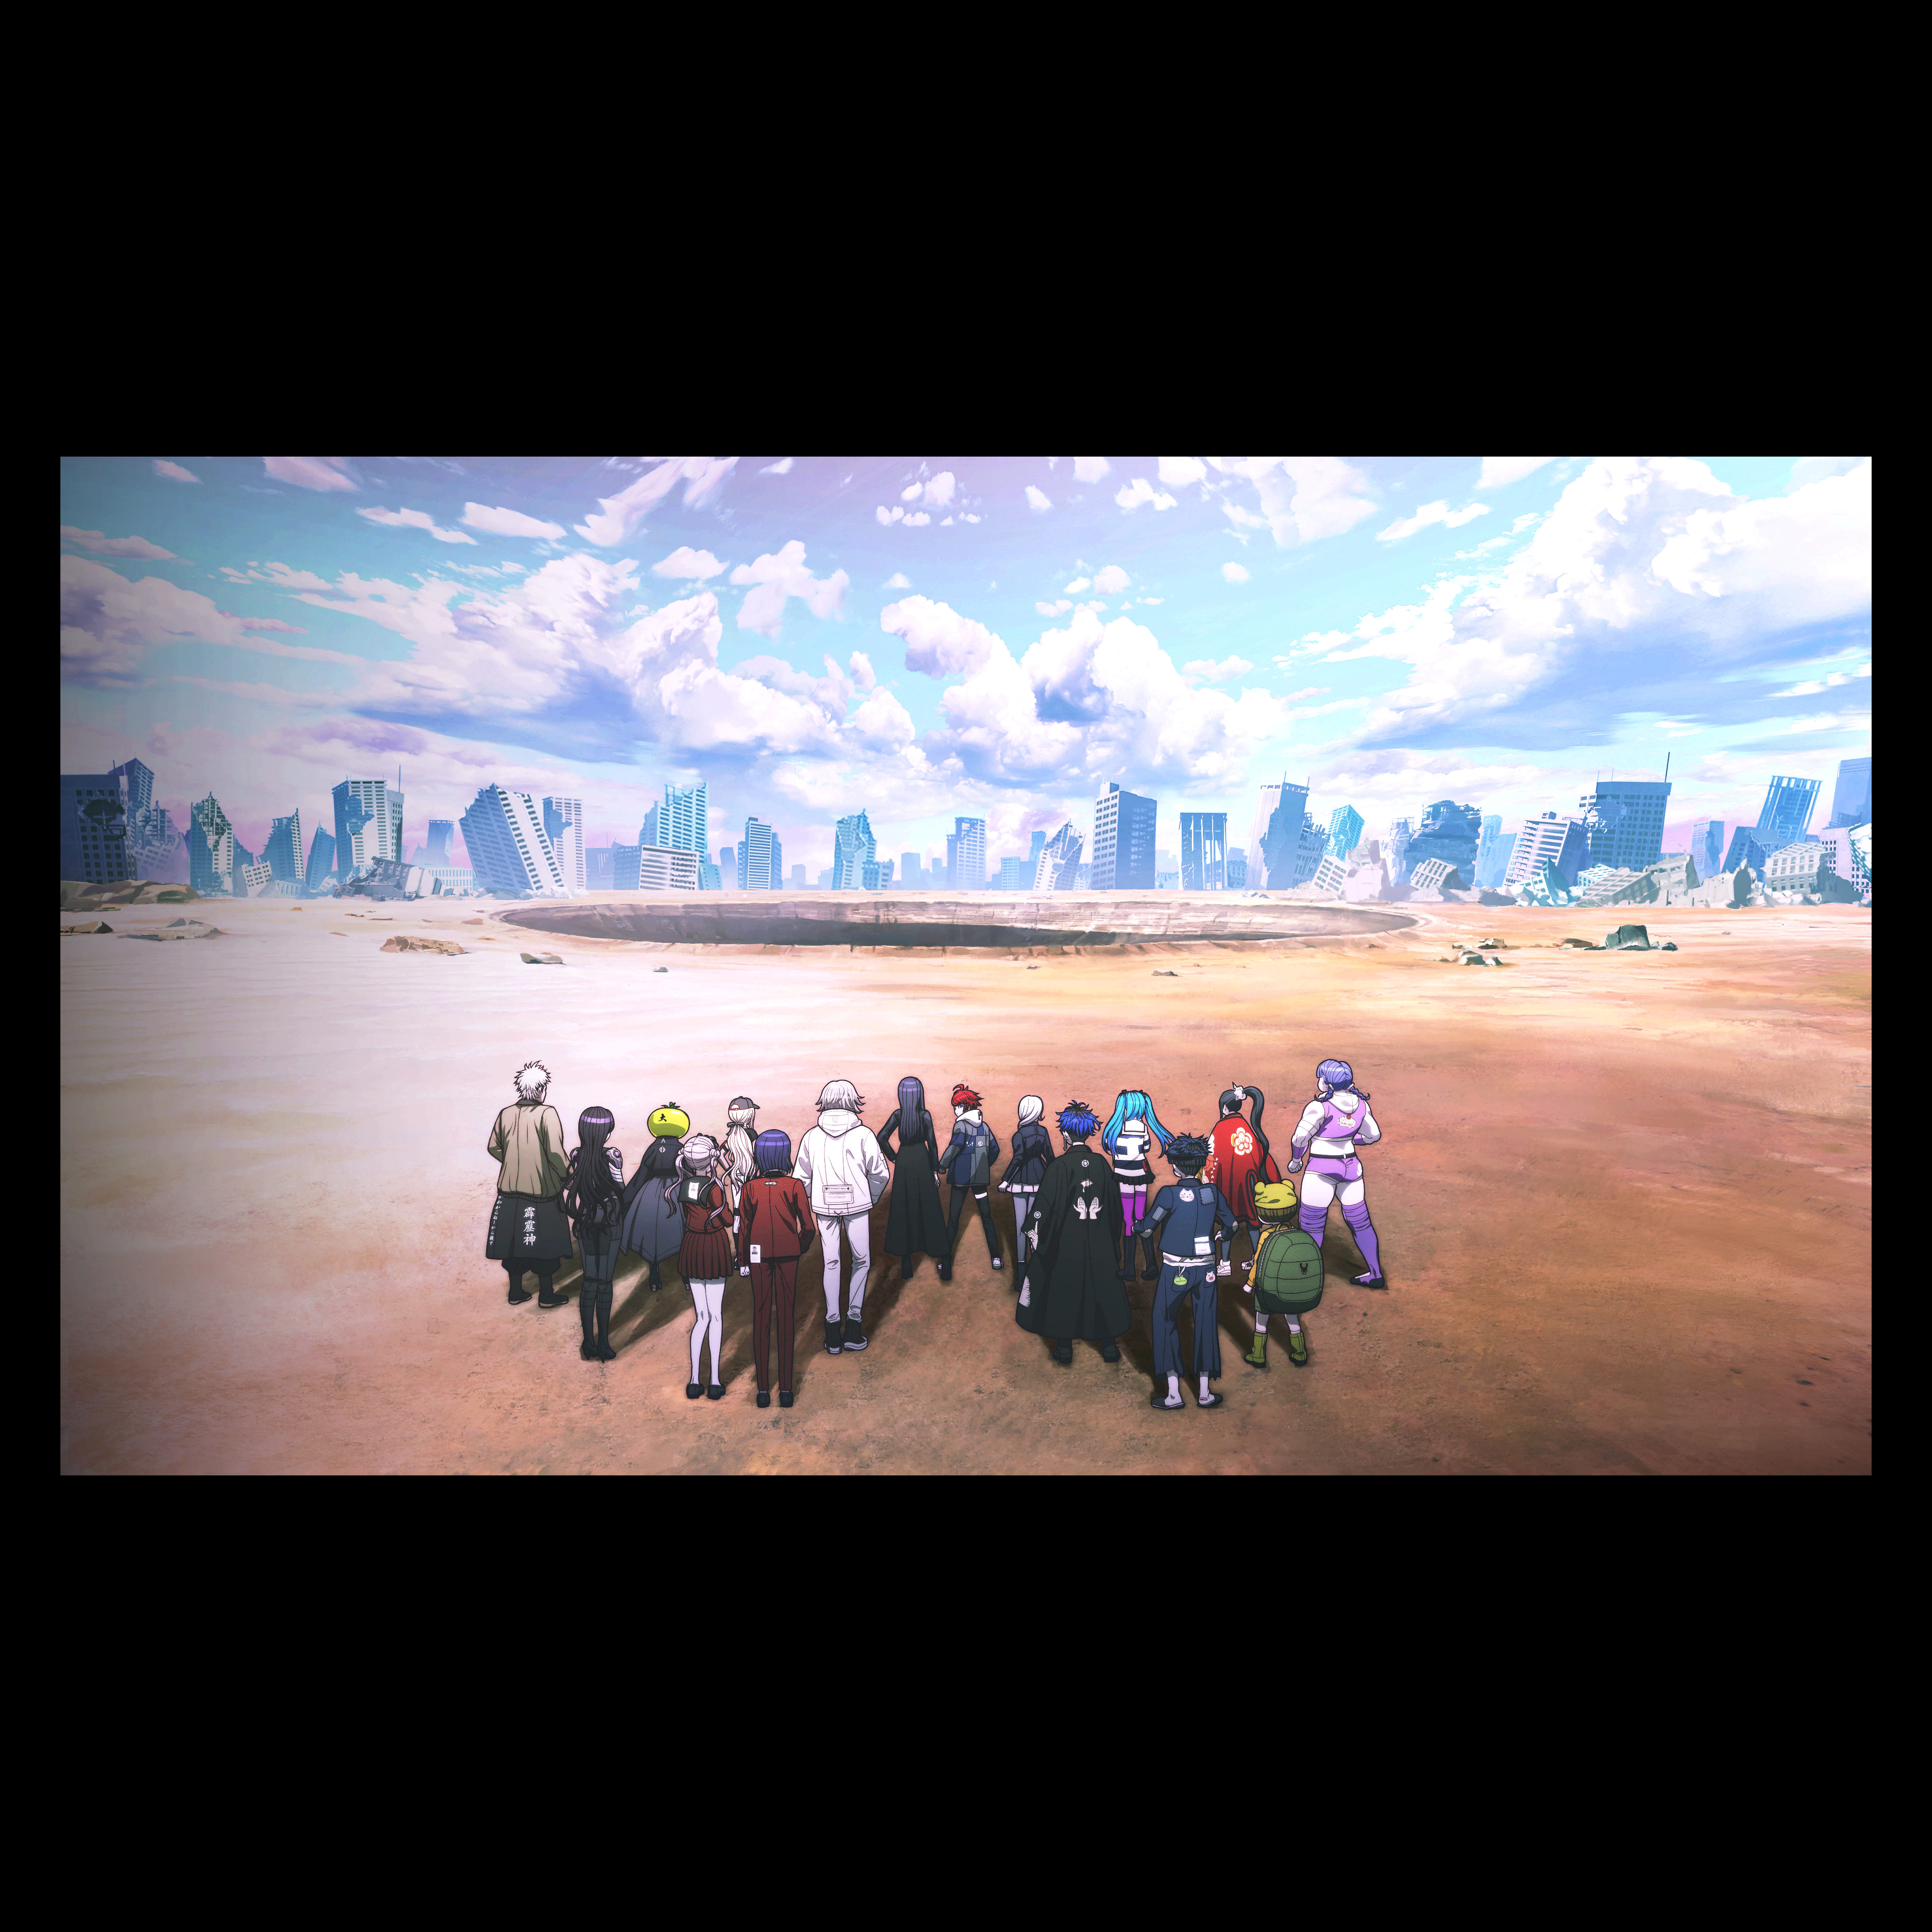 |
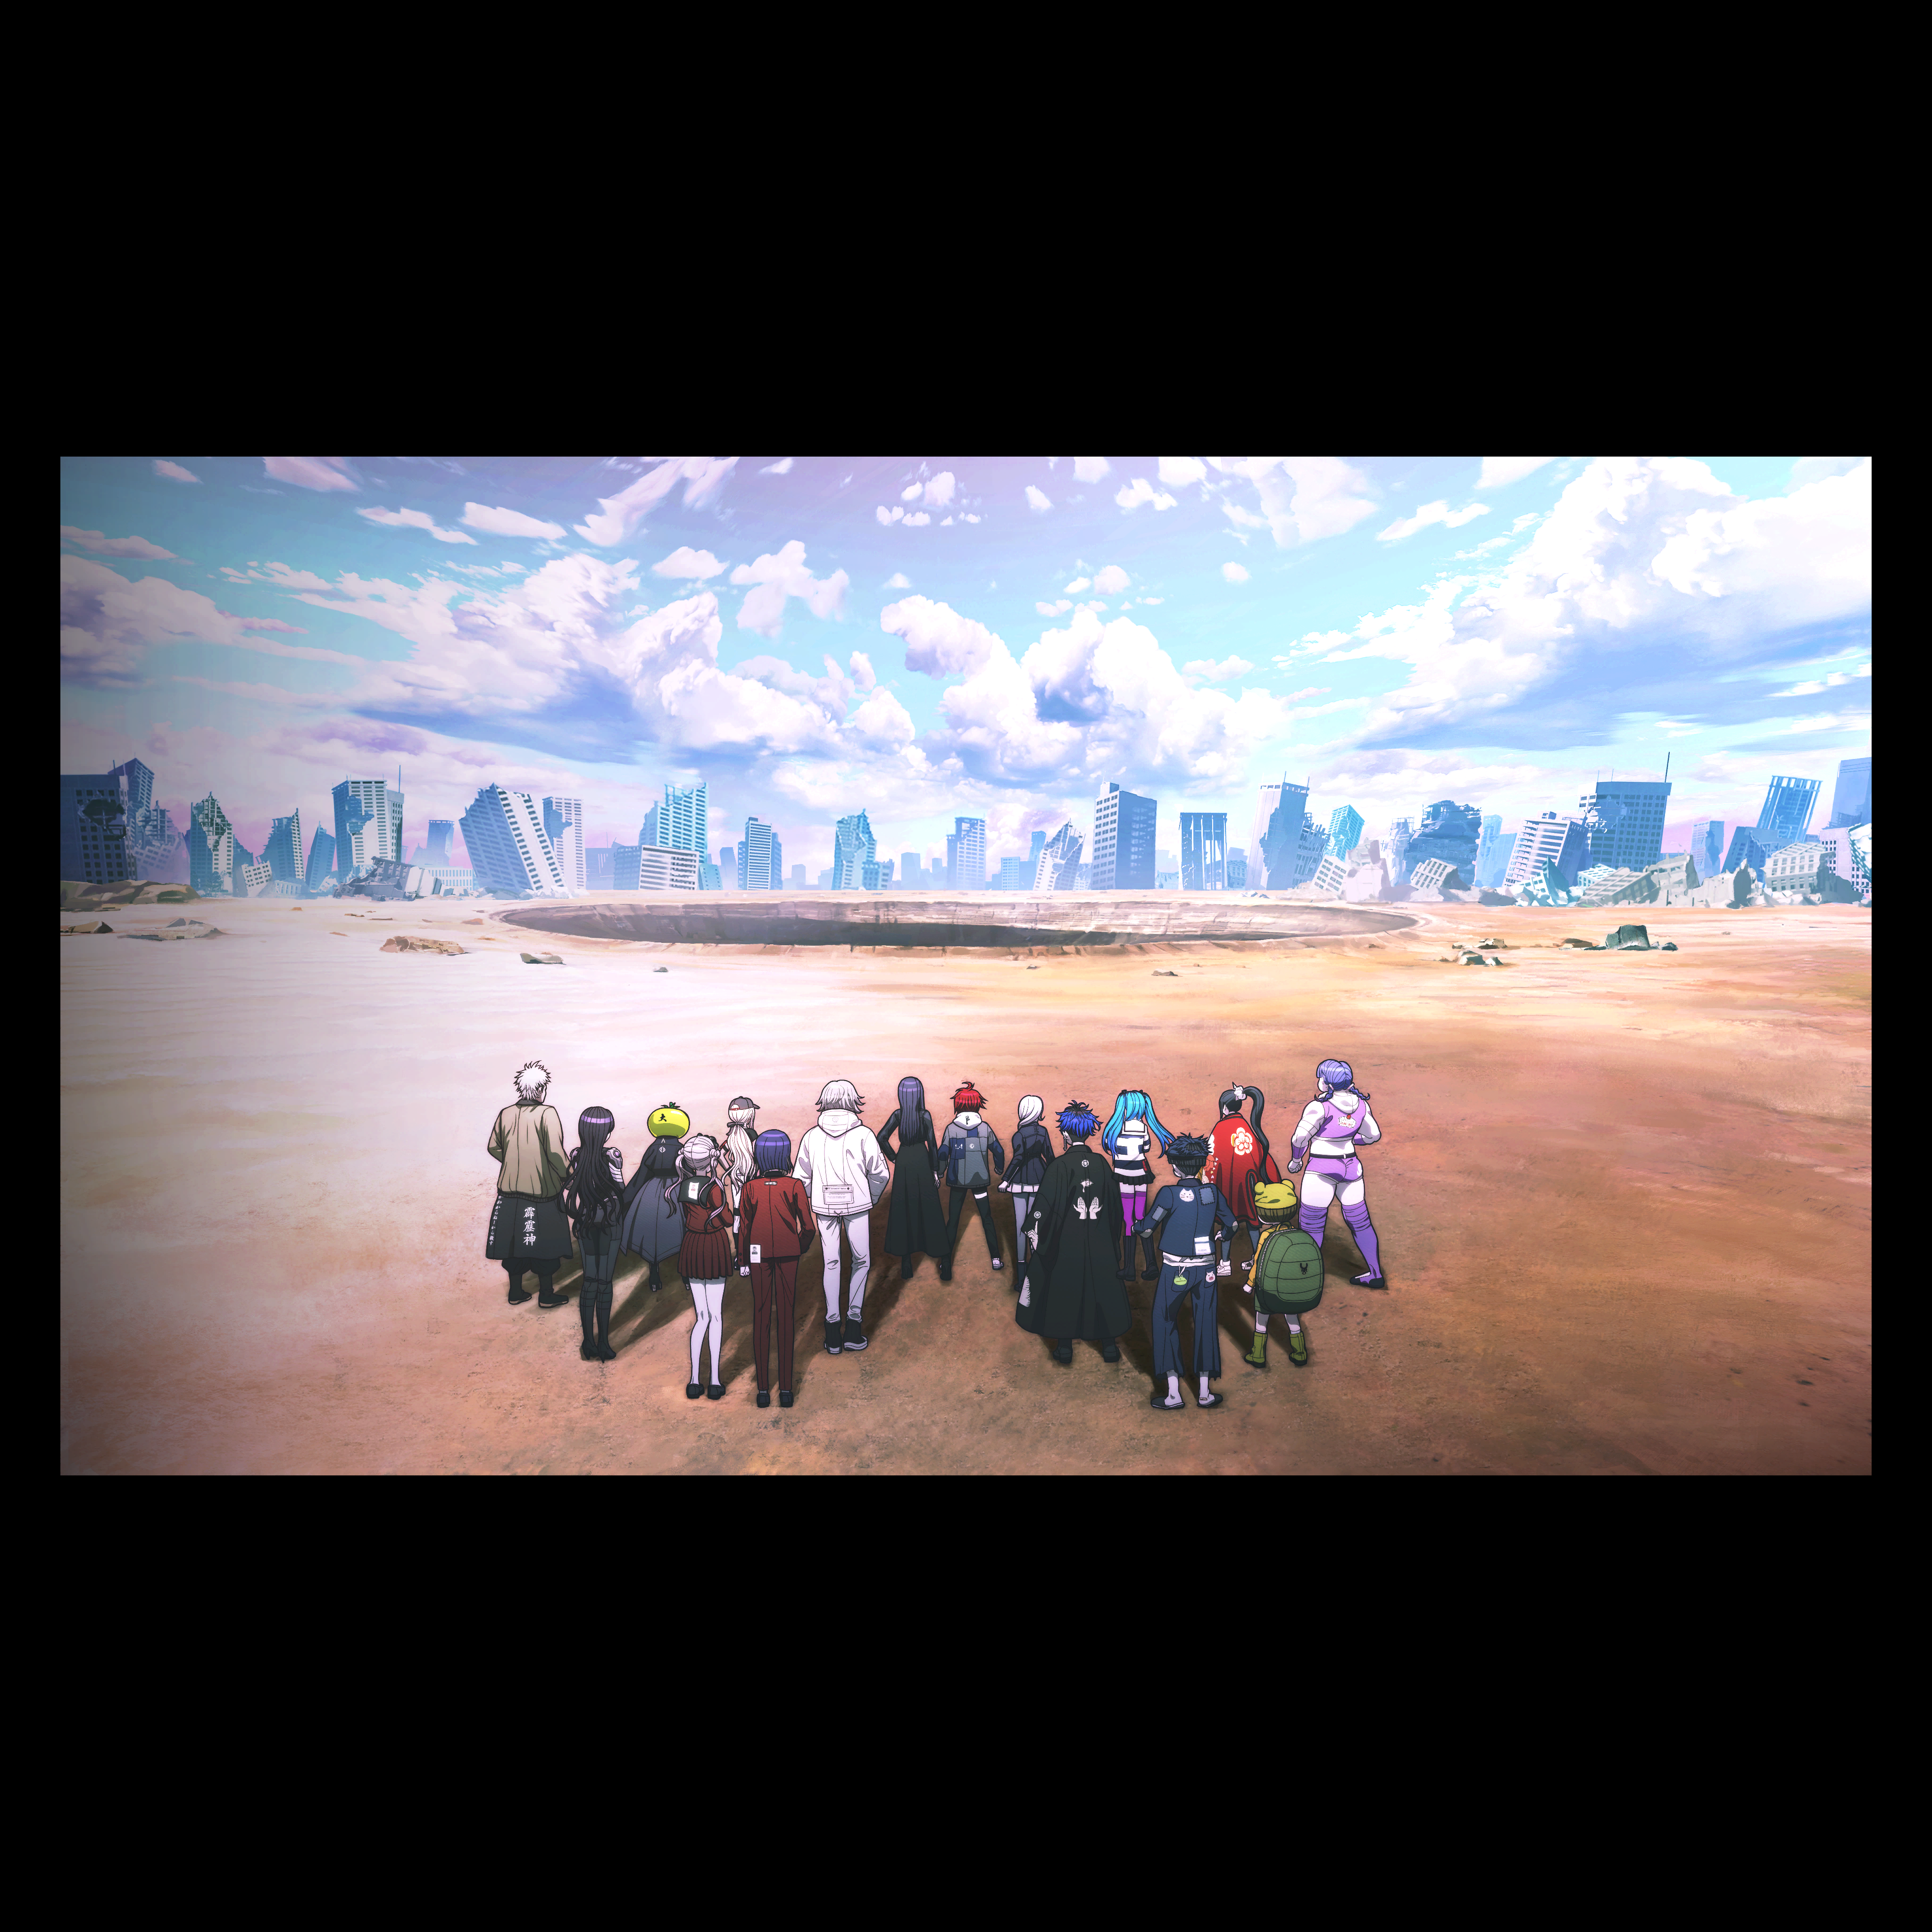
An unused variant of the CG from the S.F. Route used to show the SDU standing in front of a crater can be found in the game files. The only difference is that Takumi's head is turned towards Hiruko and/or the player.
Early CGs#
|
Early |
Final |
|---|---|
|
|
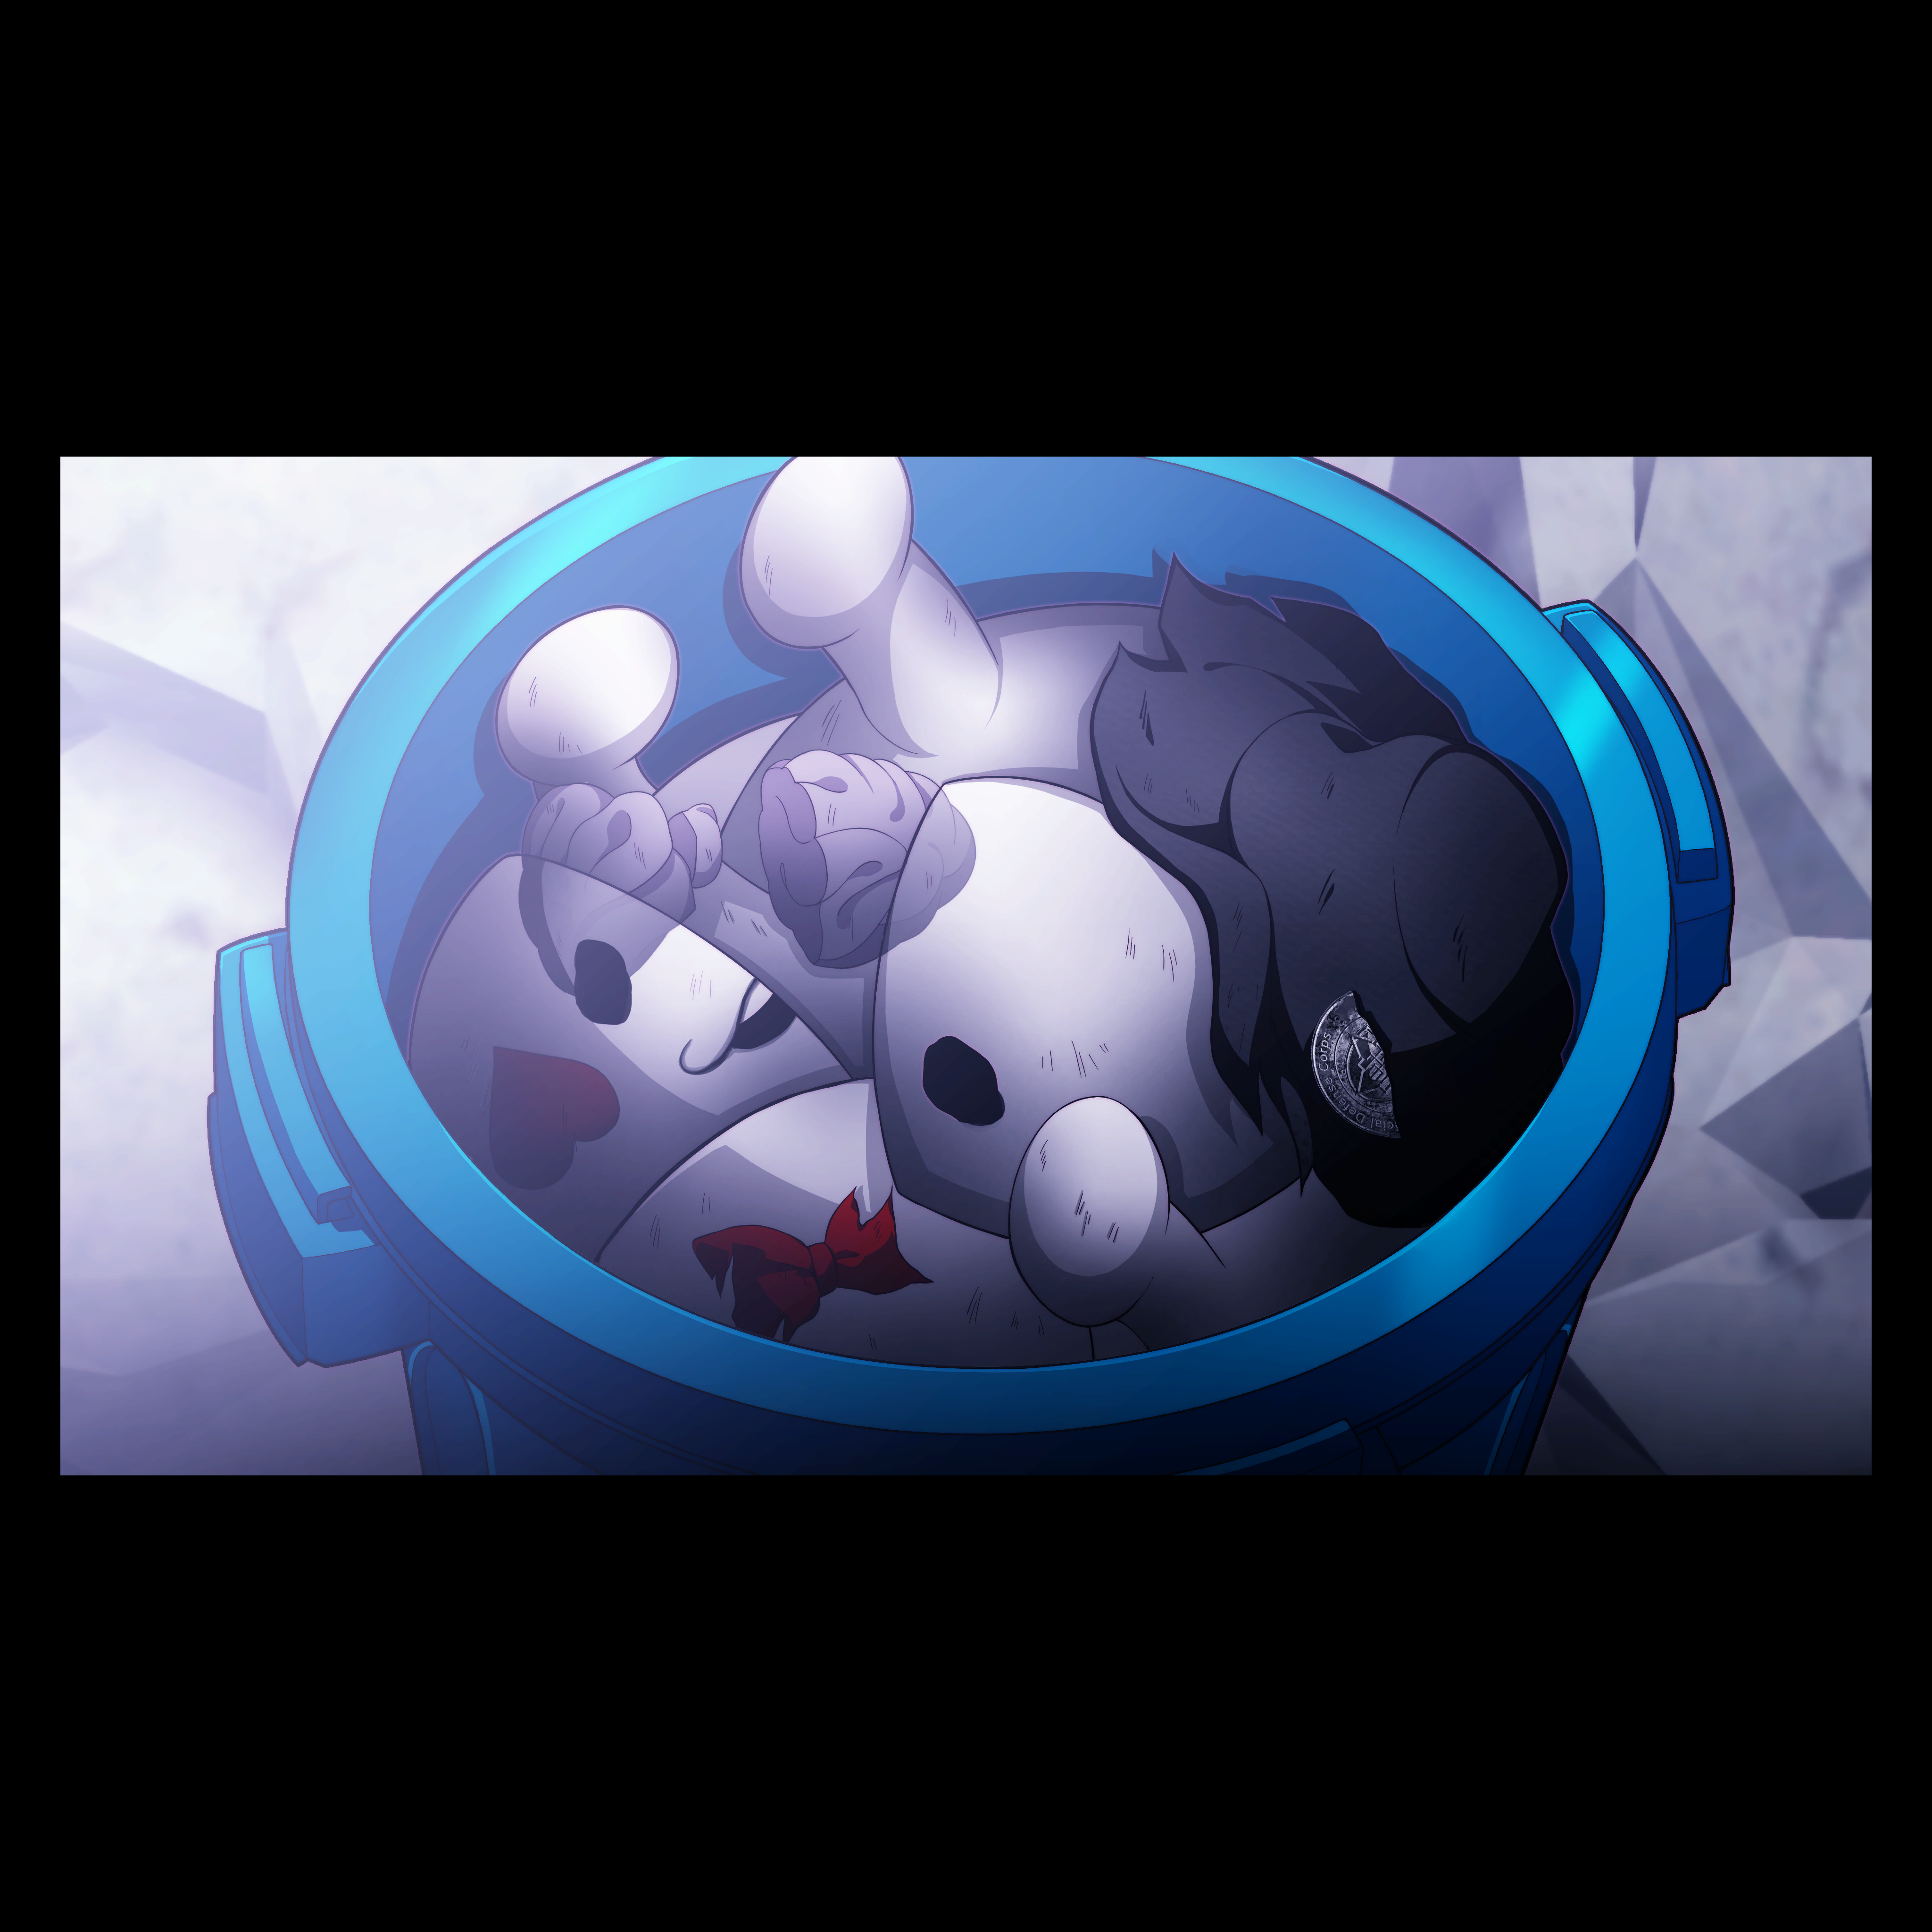
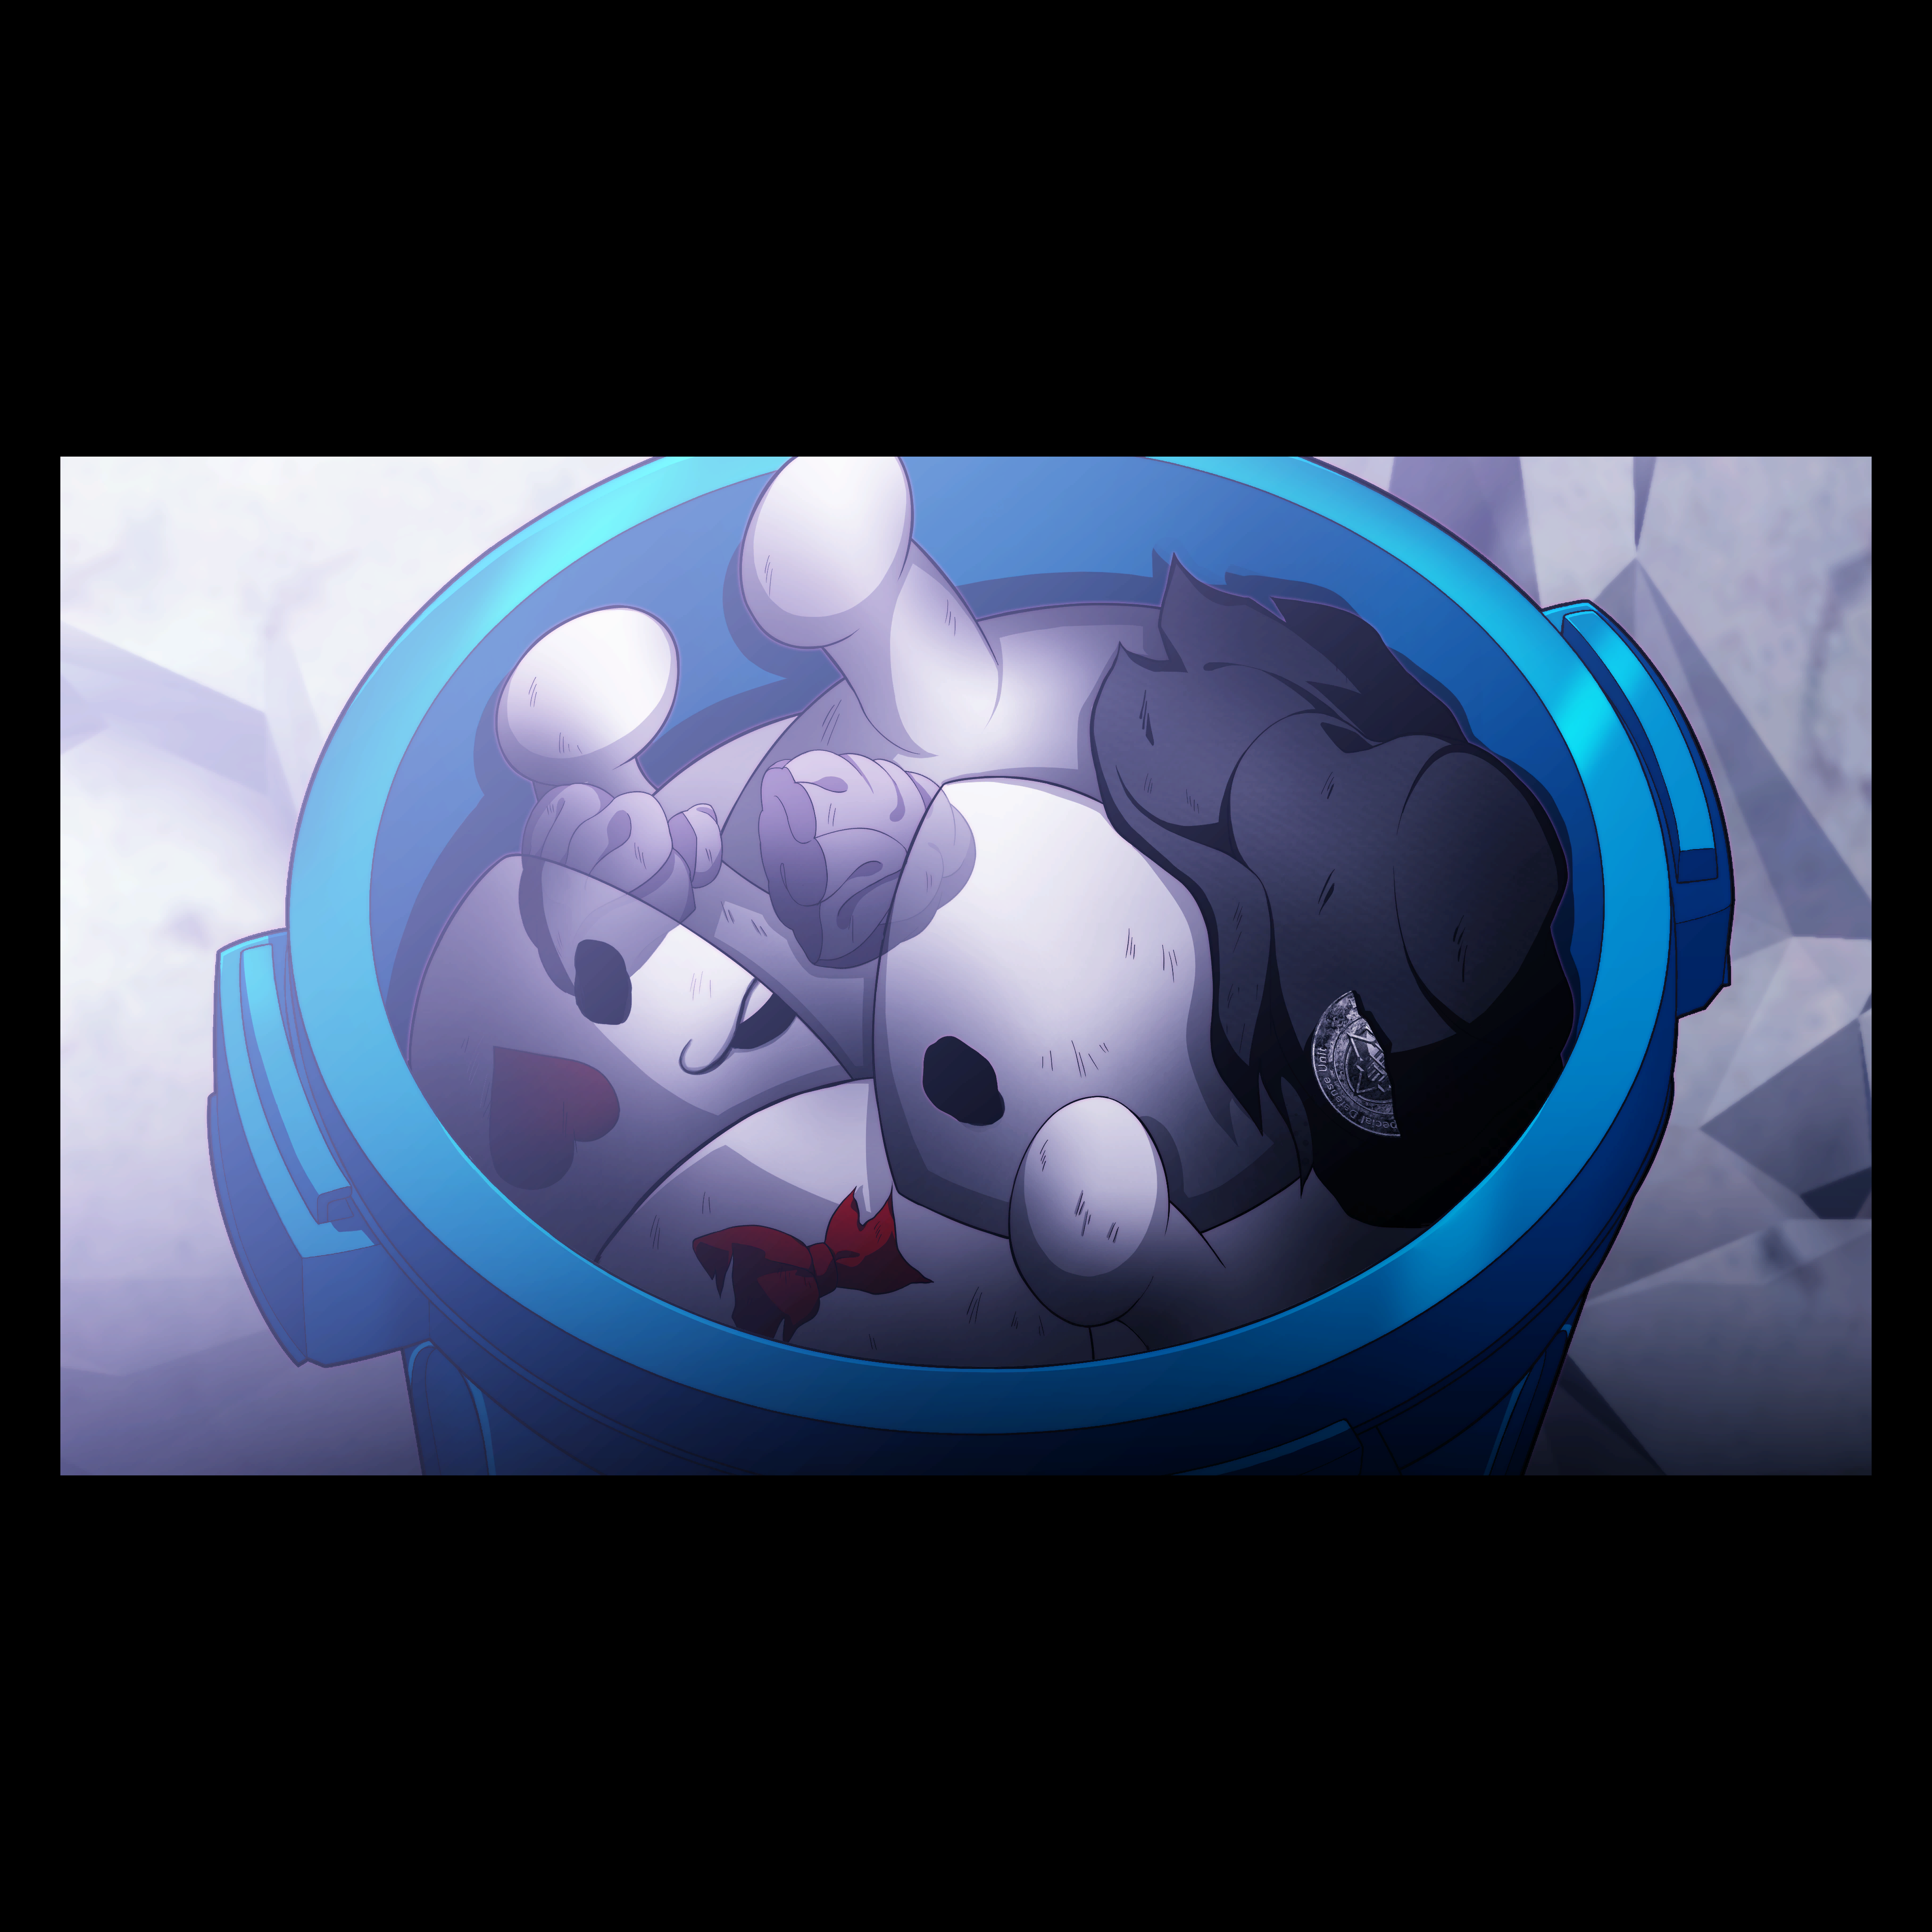
It appears that at some point in development the Special Defense Unit was known as the "Special Defense Corps". This CG from the 1st Scenario route was to be updated to reflect the name change.
Unseen Graphics#
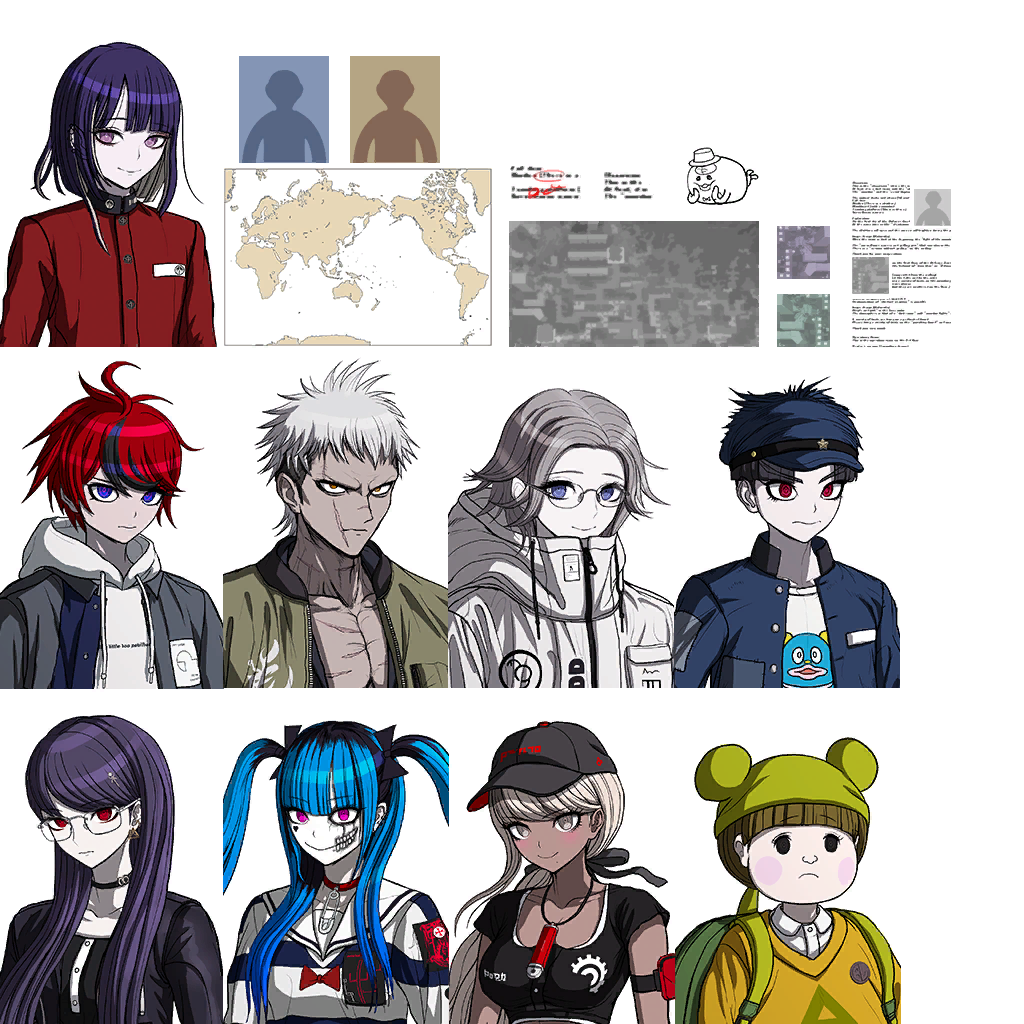
Kako's room is never visited during the game, and can only be seen by replaying her Bond Events from the Gallery menu. Hanging on the right wall is a bulletin board with pictures of the other nine Last Defense Academy students, but only the left side of it is just barely visible at the beginning of the event before the camera immediately zooms in on Kako. A closer examination of the texture for the pictures used in her room shows that the portraits are different from any used in the game, most likely coming from earlier in development. Note Takemaru's lack of shades; he only forgoes the shades while in his Class Armor. A doodle of one of Sirei's portraits can also be seen, though its location in the room, if any, is unknown (possibly on a paper on Kako's desk).
Unused UI#
Gift Icons#
Two unused icons for gifts exist, corresponding to the Animal Fossil and Sanshokupan given to Takumi while looking for a present for Hiruko on the S.F. Route. While they are necessary for unlocking the Calico Cat Figure, they are not gifts themselves, though the Sturdy Rubber Balloons from the same scenario are, possibly creating some confusion during development that led to the creation of these assets.


Navigation#
When standing outside doors in the hallways, UI elements appear above the them to show where they lead. These elements do not appear for every room, thus these UI images go unused. Note that the Girls Bathrooms are never accessible at any point.
Room |
Japanese |
English |
Traditional Chinese |
Simplified Chinese |
|---|---|---|---|---|
Girls Bathroom (North) |
 |
 |
 |
 |
Girls Bathroom (South) |
 |
 |
 |
 |
1F Hallway |
 |
 |
 |
 |
2F Hallway |
 |
 |
 |
 |
3F Hallway |
 |
 |
 |
 |
Connecting Hallway |
 |
 |
 |
 |
Roof (South) |
 |
 |
 |
 |
Roof (North) |
 |
 |
 |
 |
Roof |
 |
 |
 |
 |
Boss Subtitles#

|
To do: |
Boss subtitle graphics were created for every boss, including every commander in their name-unknown 1st Scenario appearance, but not all get used for one reason or another.
Boss |
Notes |
English Title |
|---|---|---|
Squad Seven Commander (Zen'ta, 1st Scenario) |
Zen'ta is fought in her fake Moko Mojiro form in 1st Scenario and does not get a proper boss introduction. |
 |
Paragon of Indomitability, Valla-Garzo |
Valla-Garzo and Szanshin do not get their own boss introductions after 1st Scenario. Outside of the initial route, they are never fought alone, only in the Valla-Garshin form. |
 |
Paragon of Salvation, Szanshin |
 |
|
Eito Aotsuki |
Eito and Shion do not get boss introduction scenes. |
 |
Shion |
 |
|
Nyewgank and Turamtammi |
Despite constantly appearing together outside of 1st Scenario, Nyewgank and Turamtammi never share a boss intro; each one happens separately. |
 |
The graphics for Supreme Commander V'ehxness's boss intro was corrected in Version 1.0.5 to have two characters in the Futuran language (which is basically Japanese kana but with a different script) swapped. The intended translation is "ヴェシネス" but the subtitles originally translated it as "ヴェネシス". The old graphics are still in the files.
Version |
No Title |
English Title |
|---|---|---|
Release Version |
 |
 |
Version 1.0.5 |
 |
 |
Early Tutorial Screenshots#
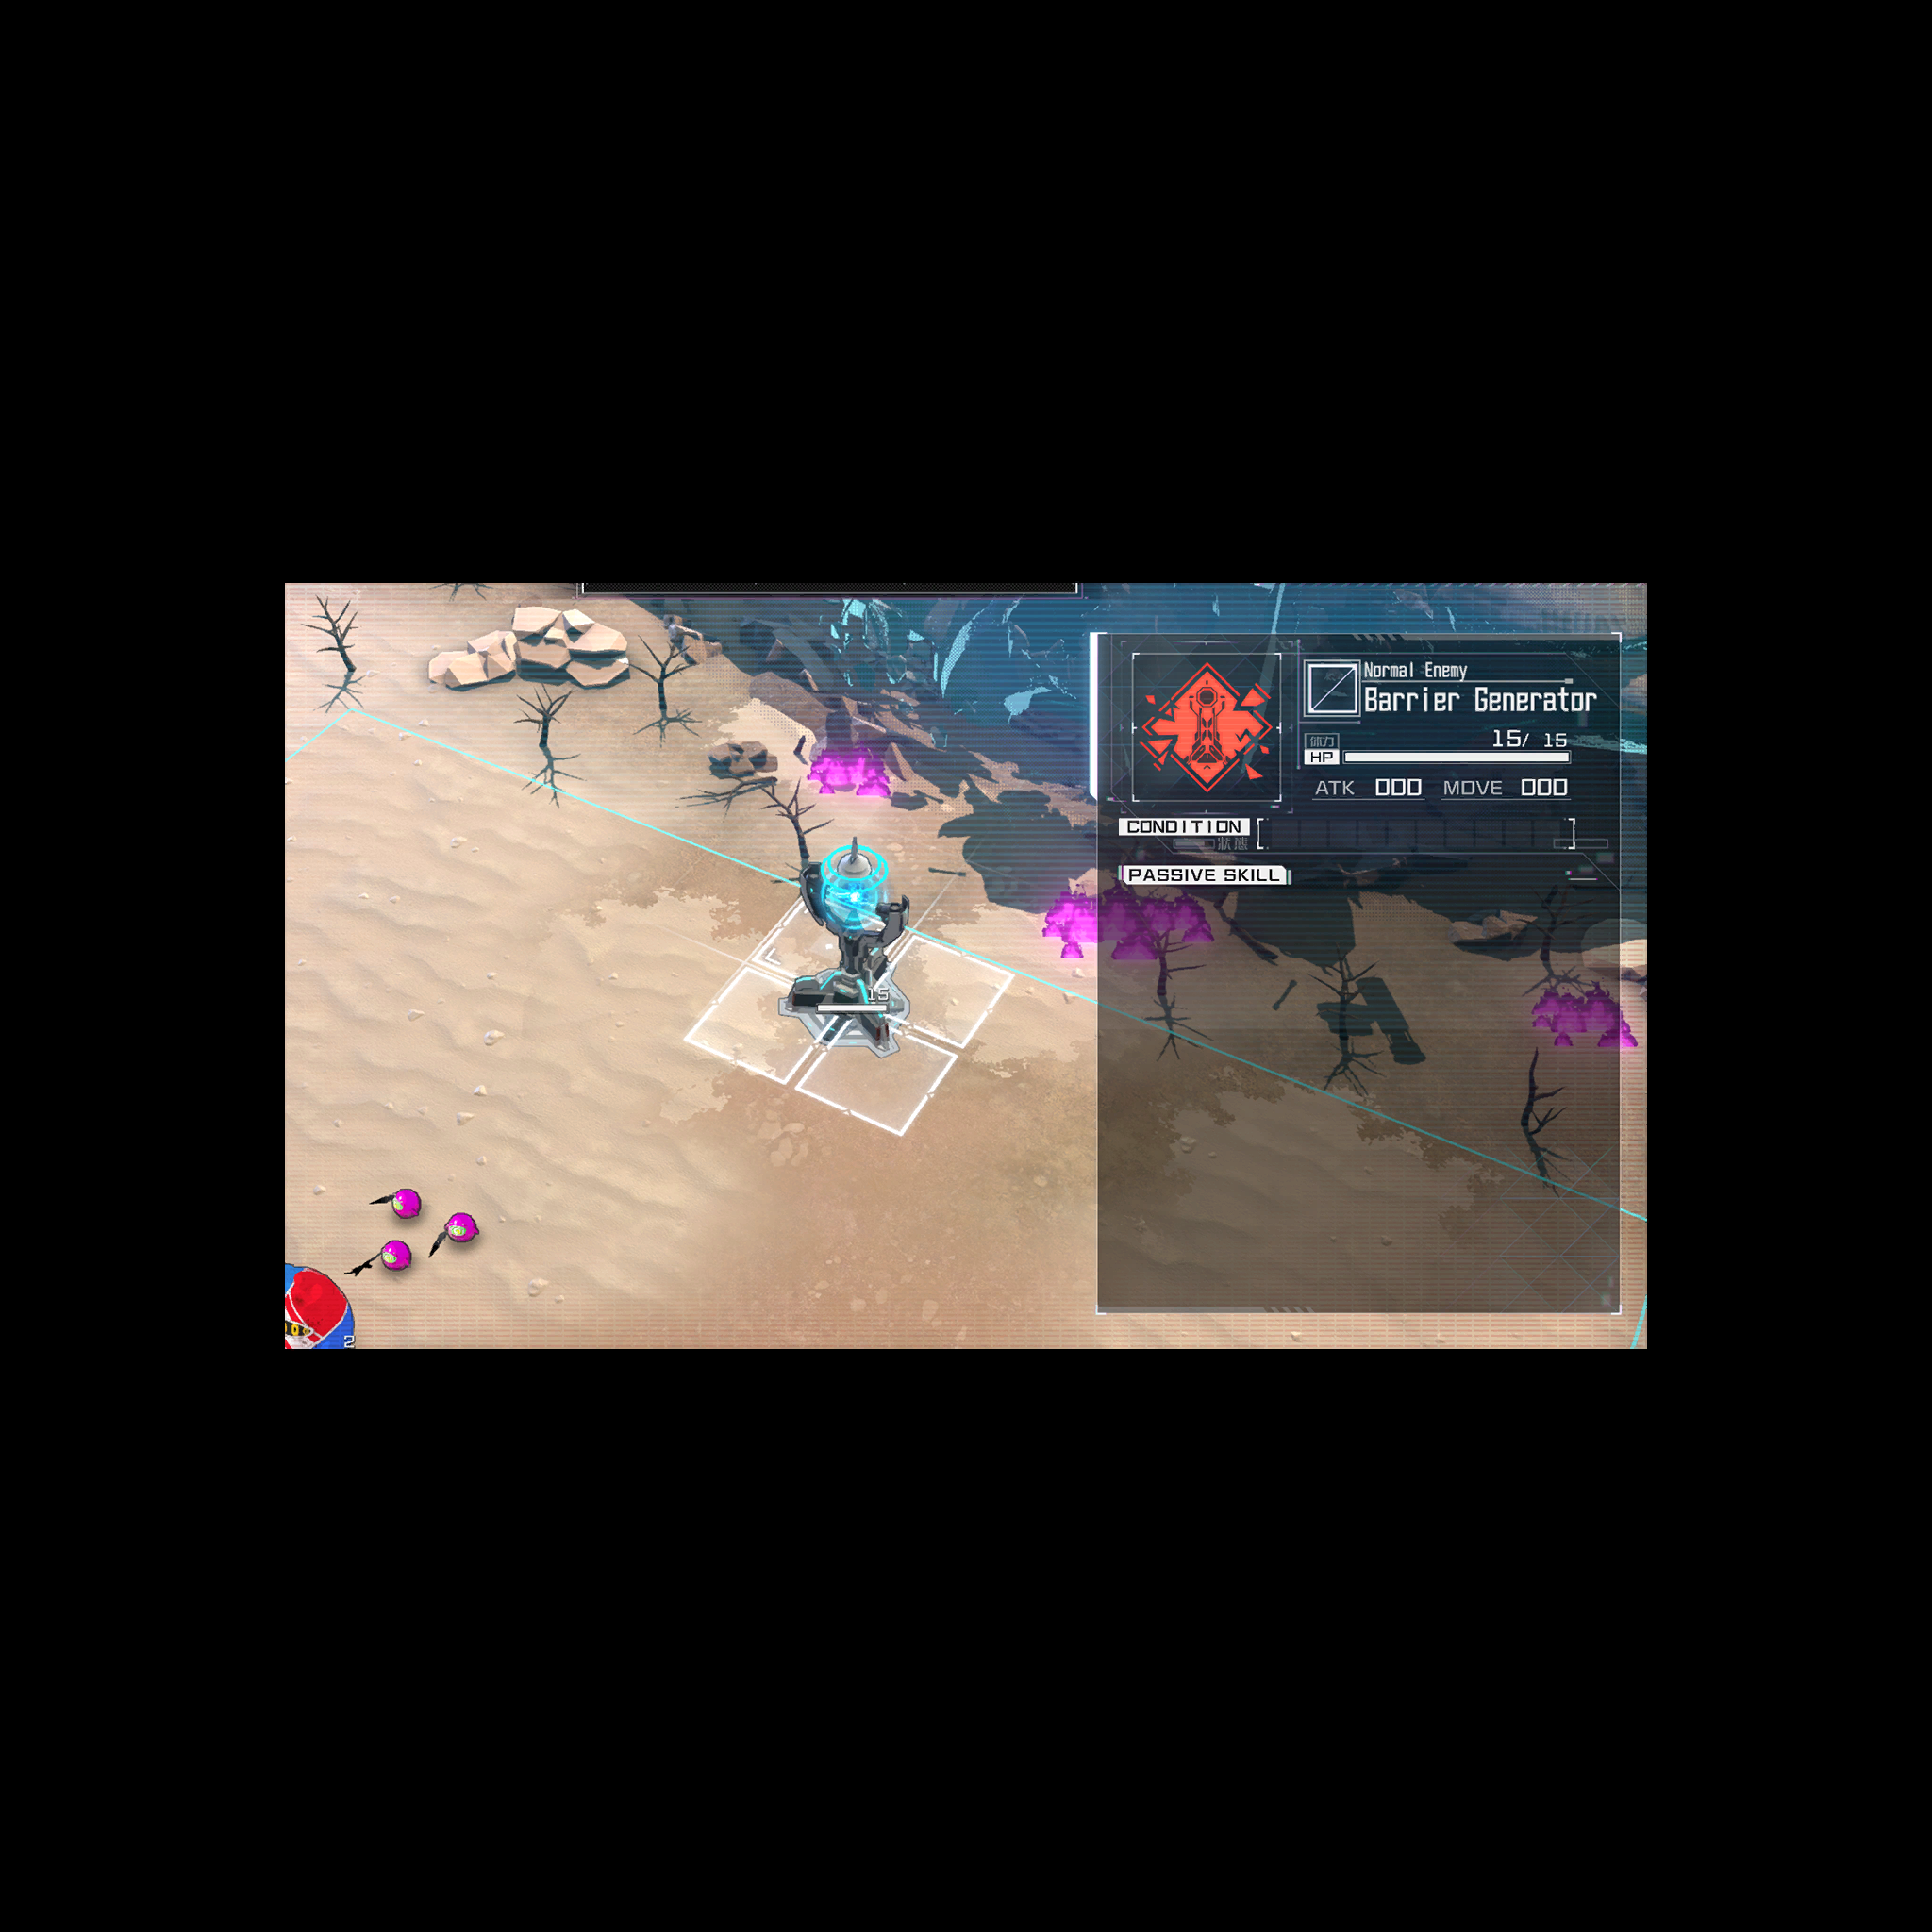
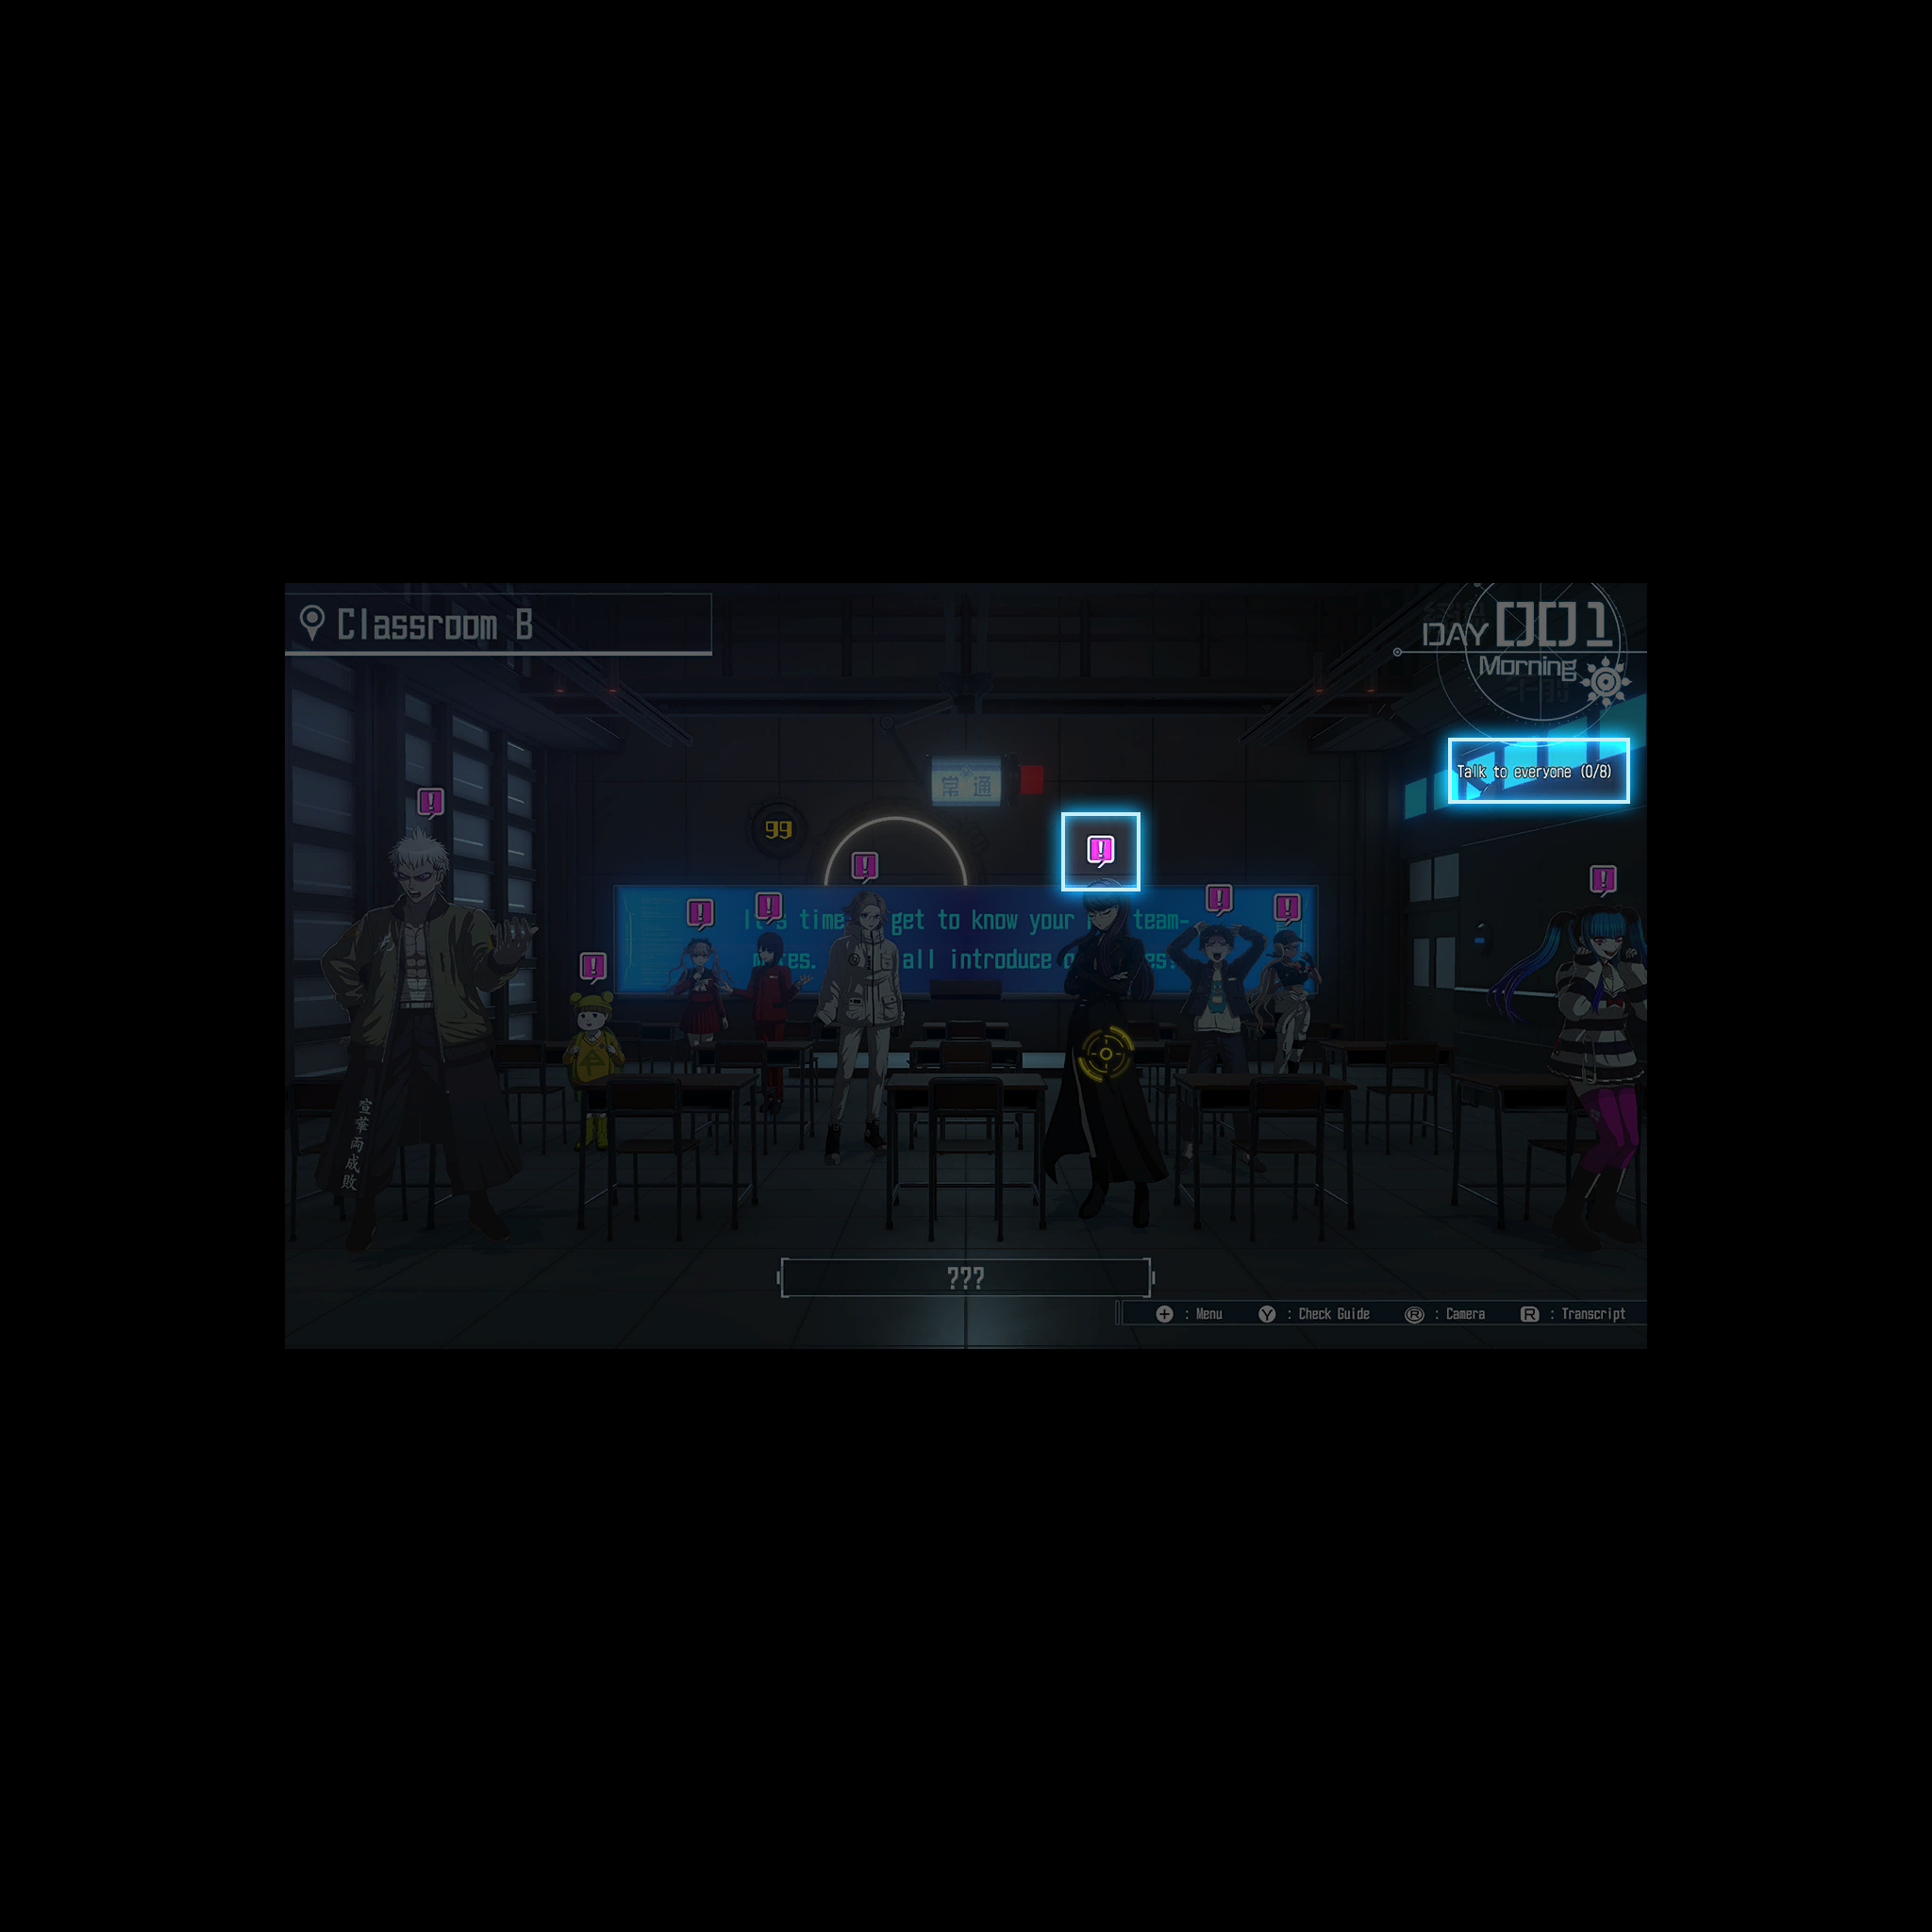
Two screenshots from the Help tutorial boxes were changed at some point in development, with the earlier versions still existing in the files.
Early Screenshot |
Final Screenshot |
|---|---|
 |
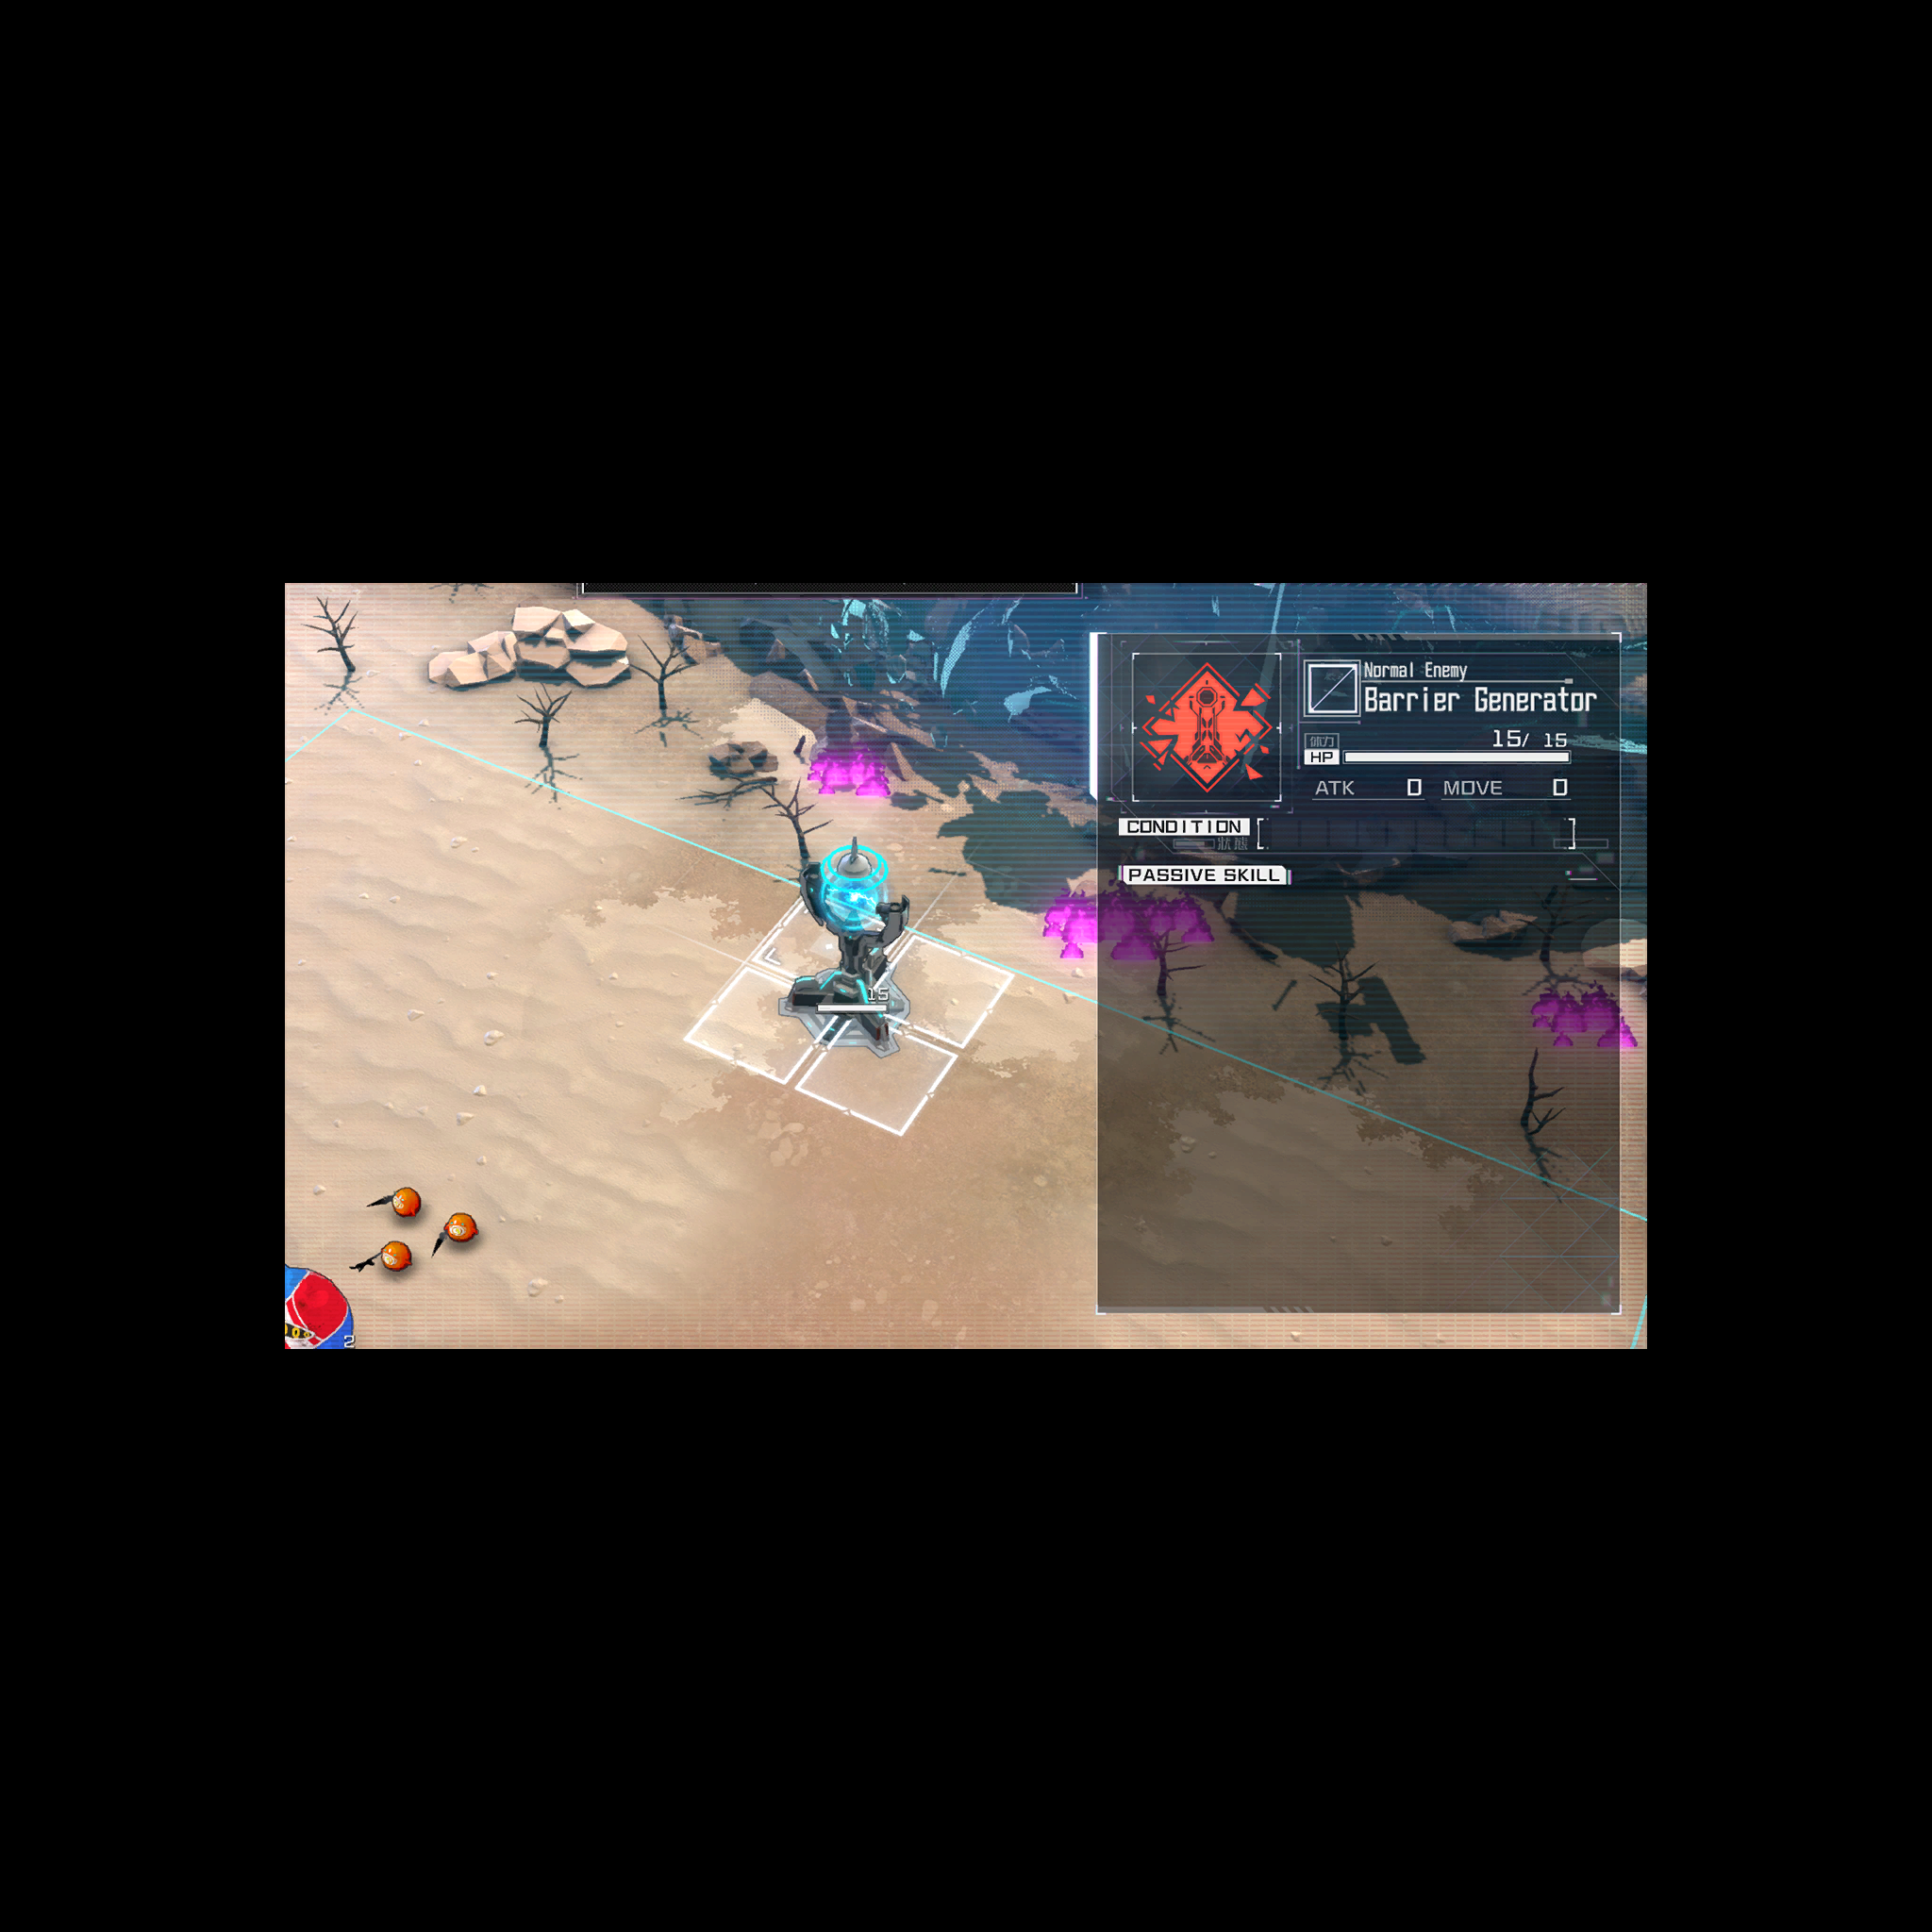 |
This screenshot from the "Offensive Battles" section originally had three-digit formatted numbers for ATK and MOVE instead of its current format of no leading zeroes.
Early Screenshot |
Final Screenshot |
|---|---|
 |
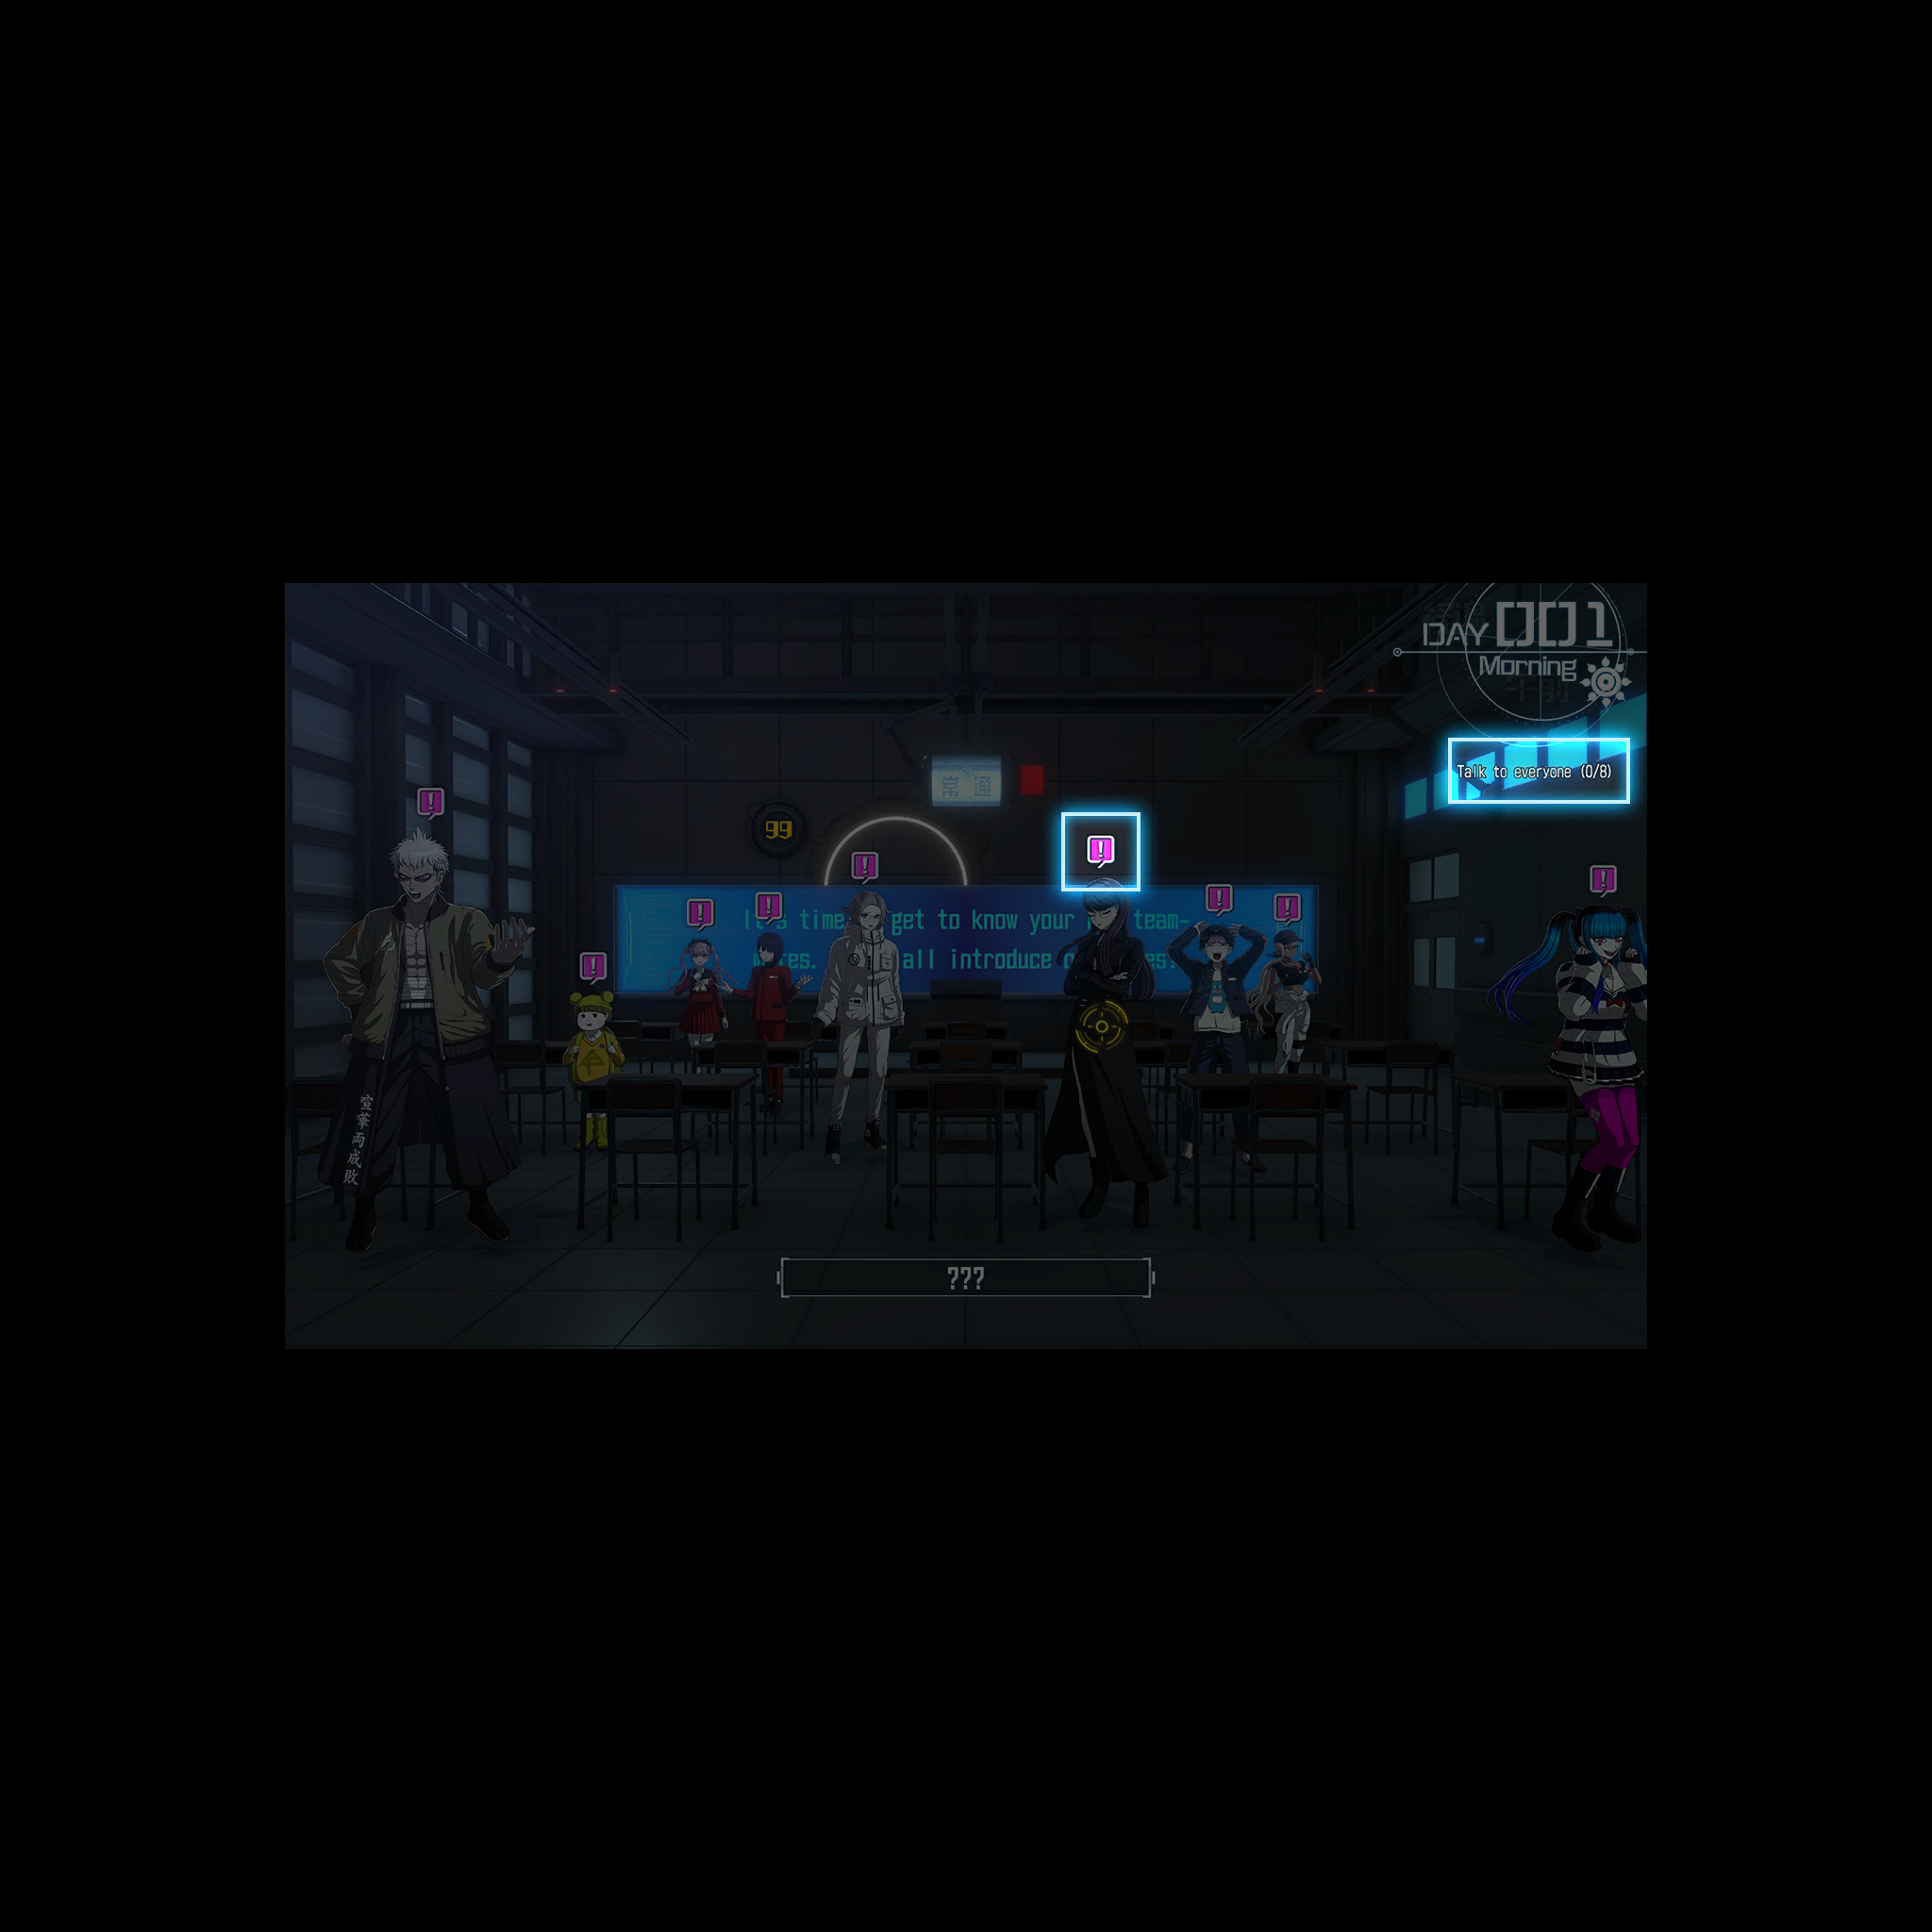 |
This screenshot from "Basic Info: Classrooms" originally had the room name visible in the top-right corner, but was removed, mostly likely because the room itself is actually not called "Classroom B"; it is called "2F Classroom" instead. (Despite this, at least one other help image still refers to the classroom by its old name and is displayed in the final game.) The control guide at the bottom is also removed, despite both these features being present during the normal gameplay the screenshot is intended to depict.
Early Warning Screen#
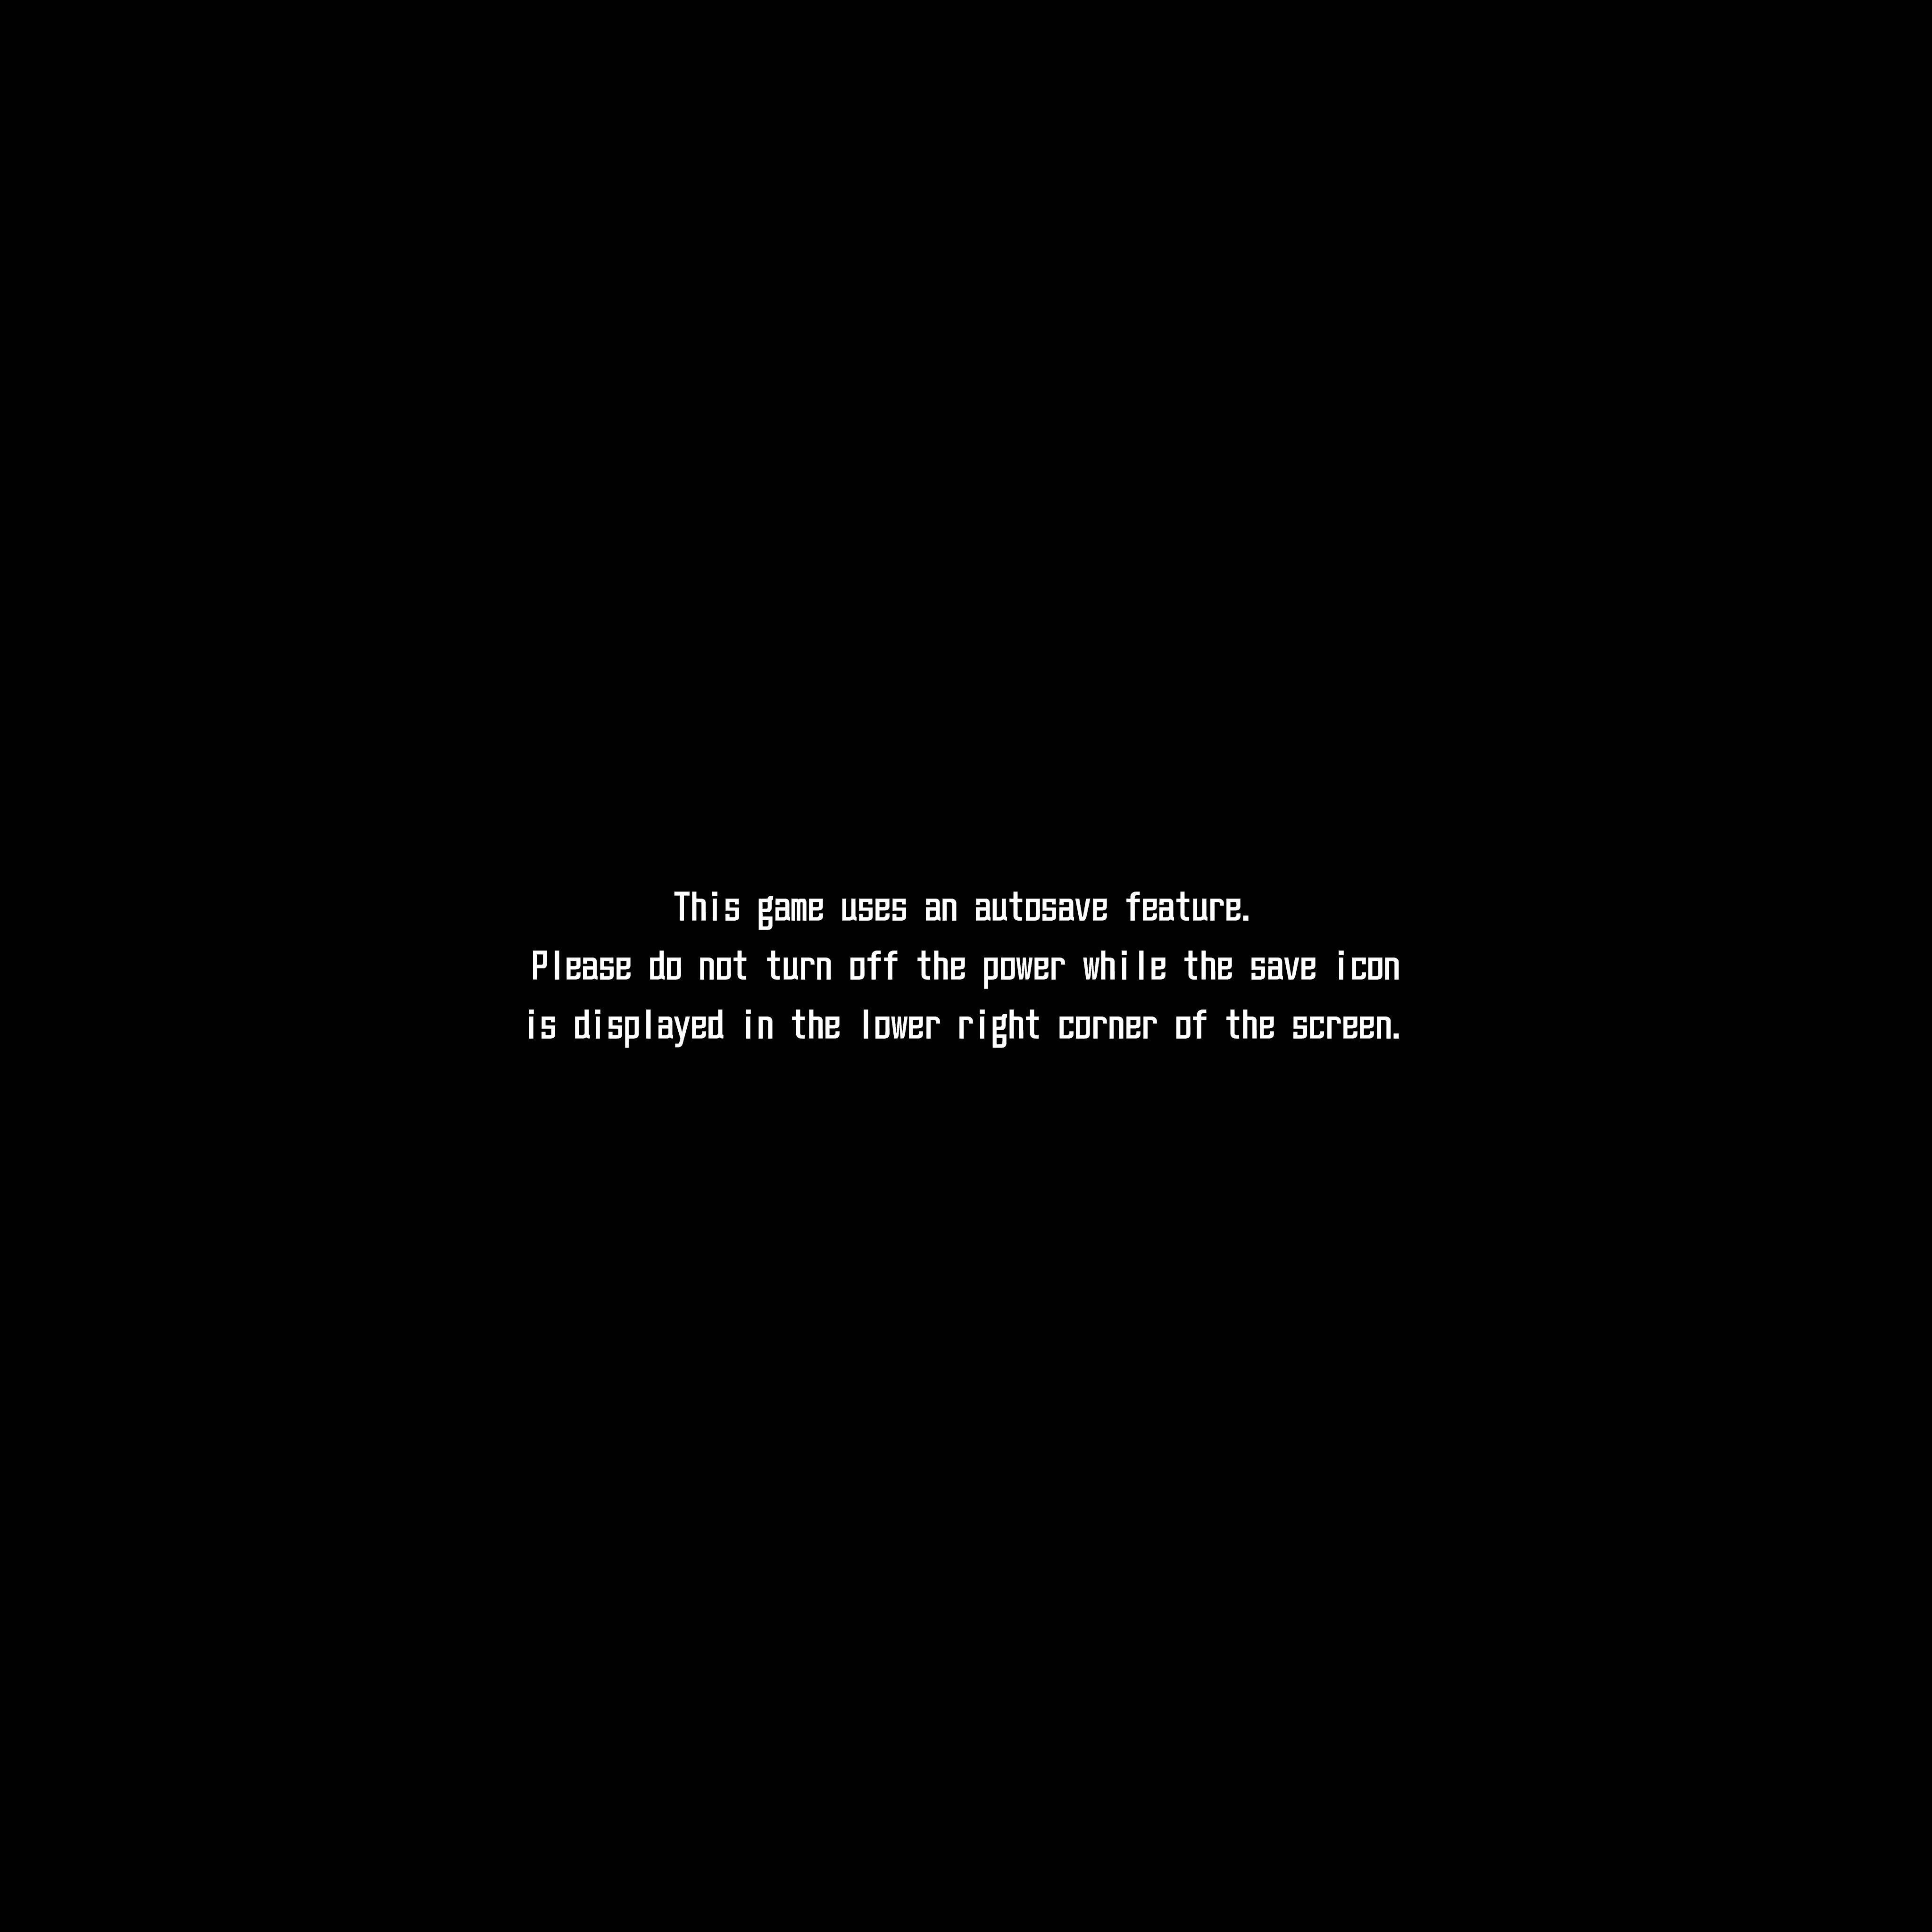
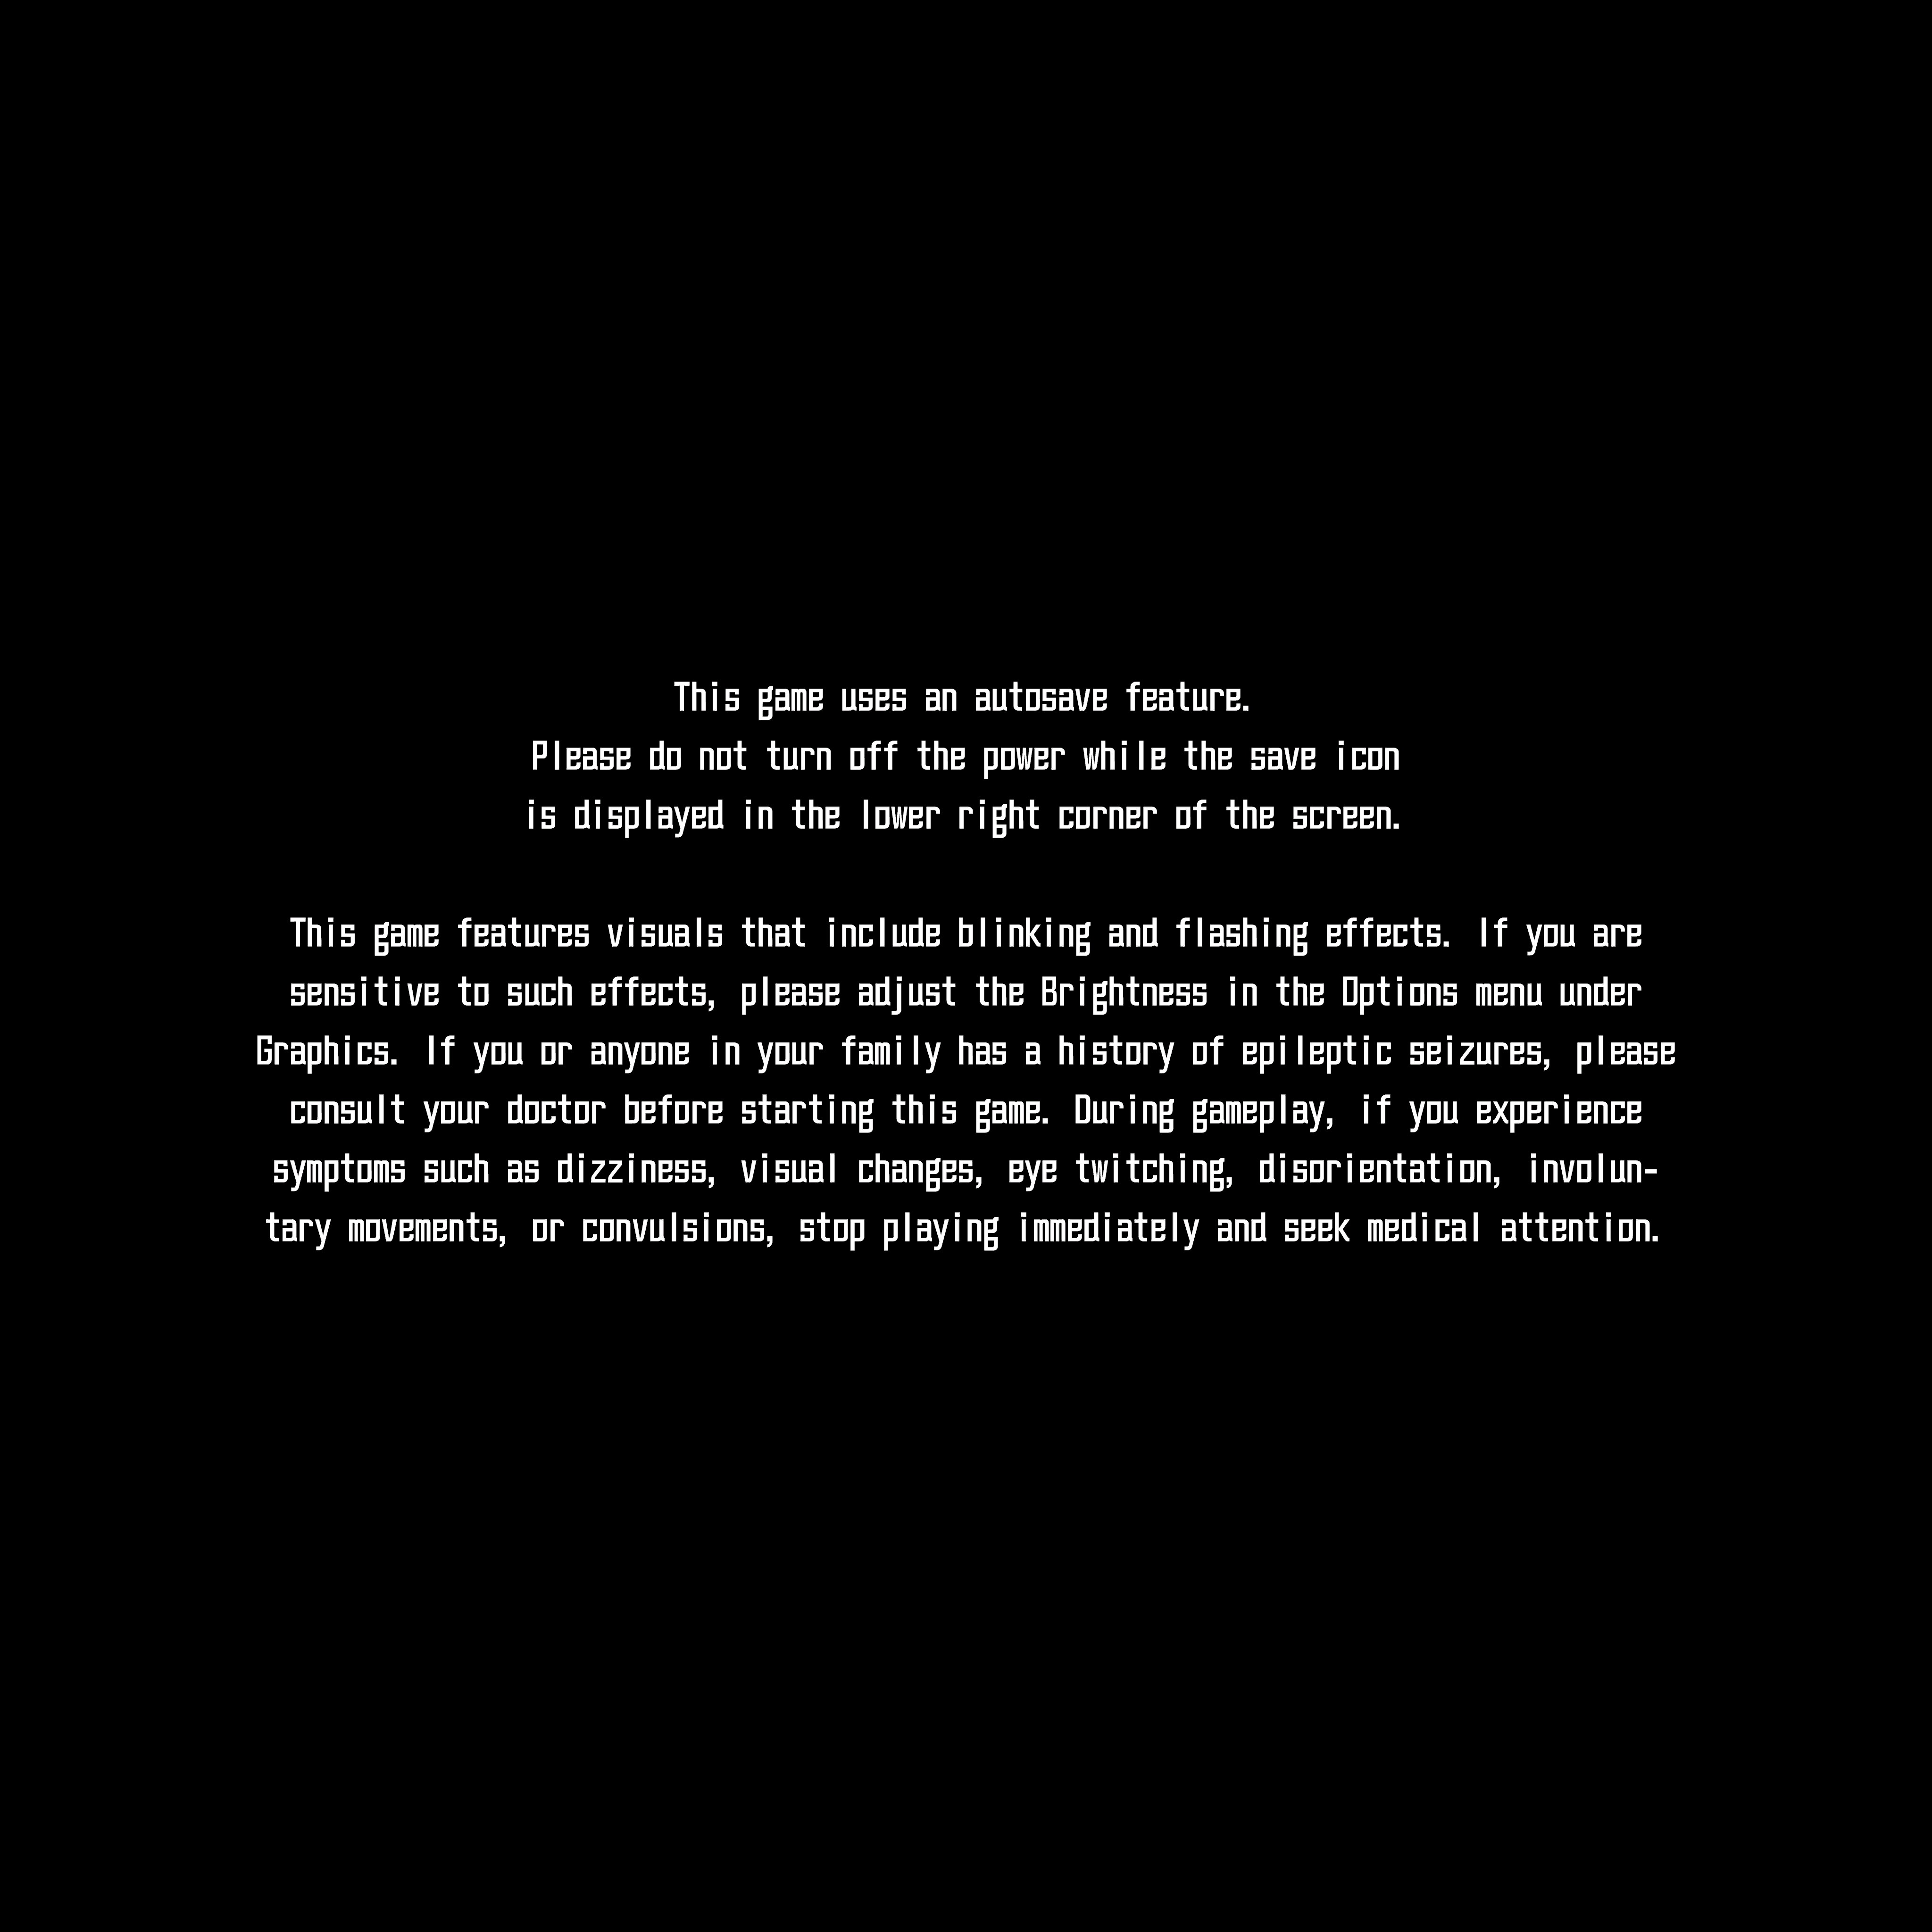
The pre-title screen message about autosaving and photosensitive warnings originally only had the former, and said screen still exists in the files. It can also currently be seen in the demo.
Early Message |
Final Message |
|---|---|
 |
 |
Misc. Unused Graphics#

A pretty normal dummy graphic that goes from black to white. It has three duplicates in the files, known as "ui_event_cutin_dummy", "event_backscreen_battle_dummy", and "event_backscreen_freeeve_dummy", giving us insight on what this graphic was used for during development.