 This article has a talk page!
This is a sub-page of Development:The Legend of Zelda: Ocarina of Time.

|
To do:
|
Unused and earlier versions of scene and room files in the Ocarina of Time iQue leak.
Spot04_OLD
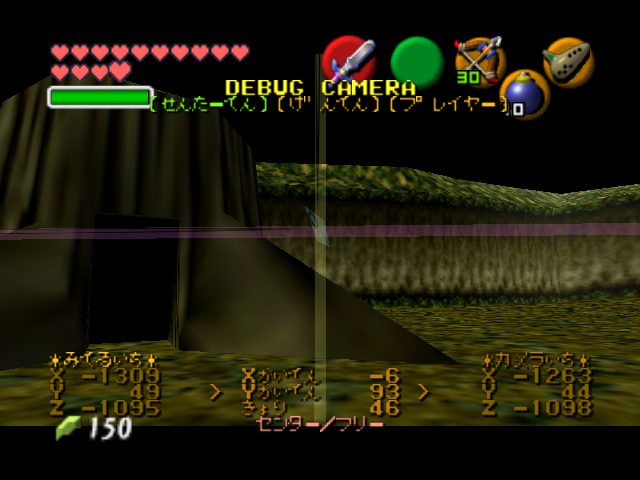
This foggy forest is a precursor to the Kokiri Forest that was shown at Spaceworld 1997, and is much more spacious than the cozy village used for release. It uses the same type of room header as the Stalfos Miniboss Room map from the Master Quest debug ROM, and thus must be edited to work with the final version of the game. The scene lacks collision, or at least working collision, causing Link to instantly fall through the ground when the map is loaded. However, it can be viewed with the Camera Editor debug function once it is loaded in-game.
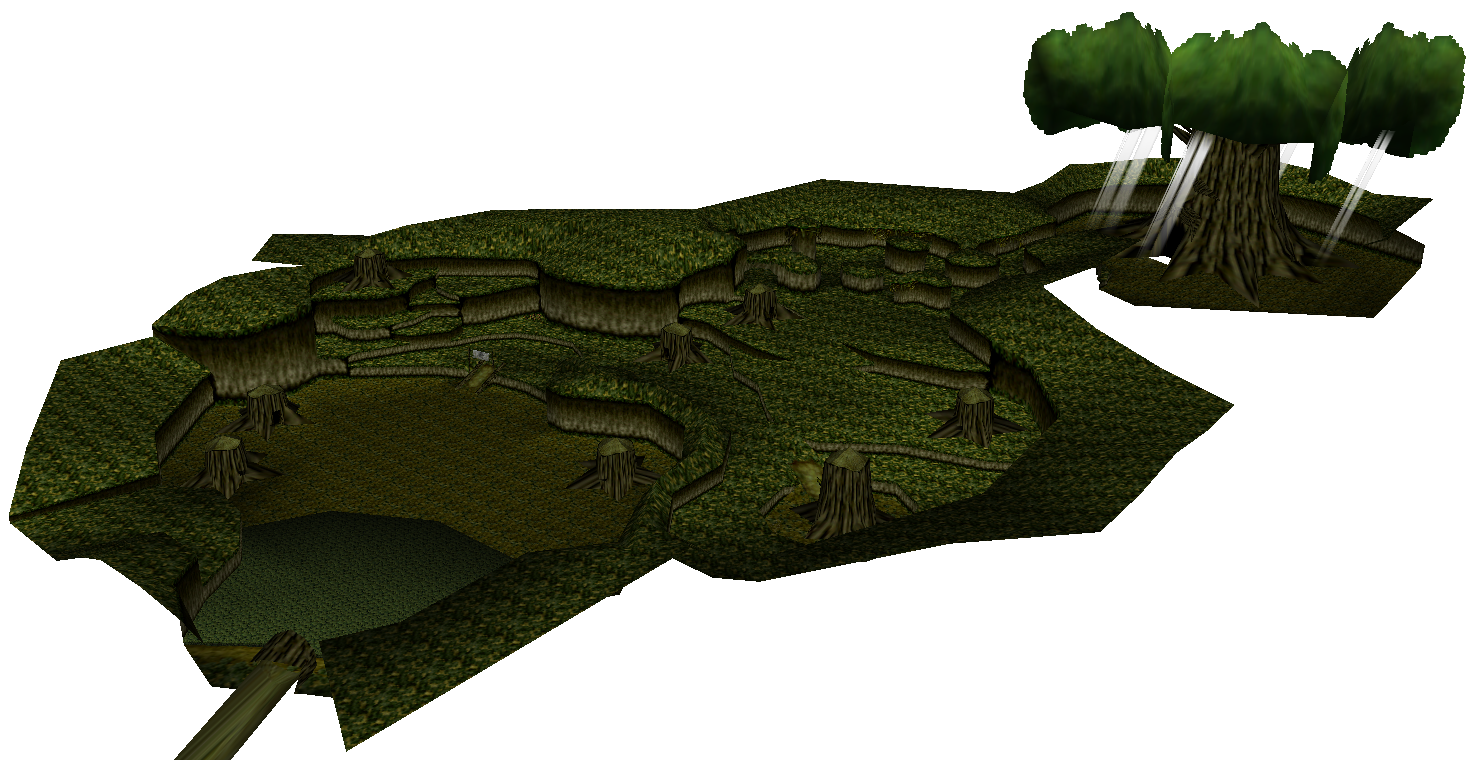
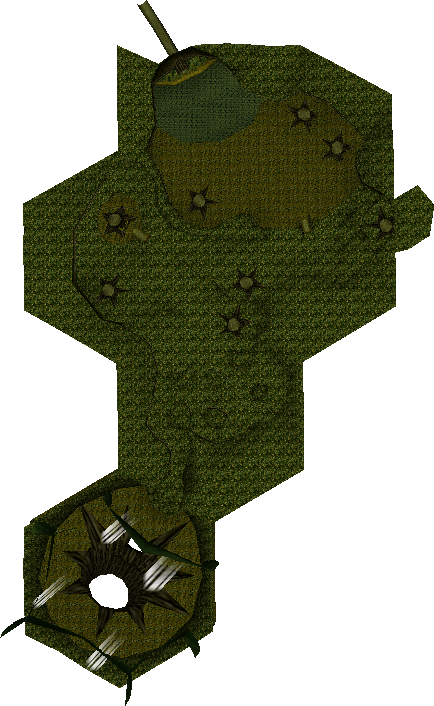
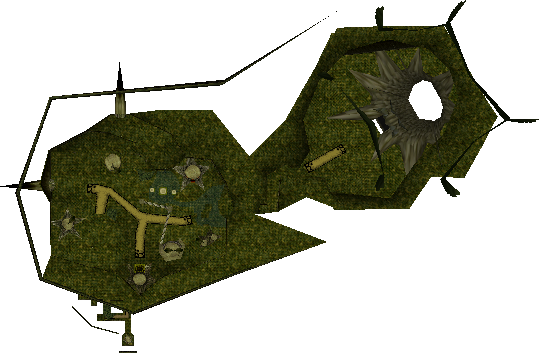
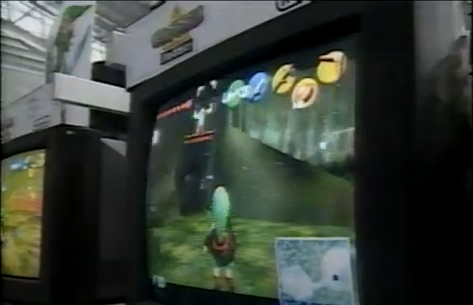
Provided below is a top-down comparison, facing north. Many elements, such as the cliffs and the Kokiri homes, are similar to the ones shown at Spaceworld '97, although a lot of the topography is different.
|
Pre-release |
Final |
|---|---|
|
|
|
Kokiri Homes (SW97) |
Spot04_OLD Homes |
|---|---|
|
|
Spot04_Old |
Late 1997 Overdump |
Final |
|---|---|---|
|
|
|
Spot04_Old |
Late 1997 Overdump |
Final |
|---|---|---|
|
|
|
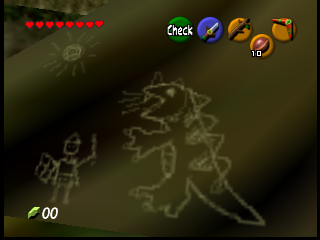
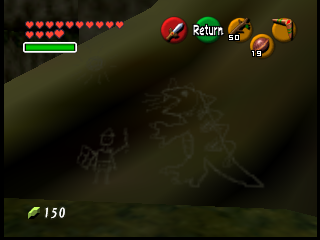
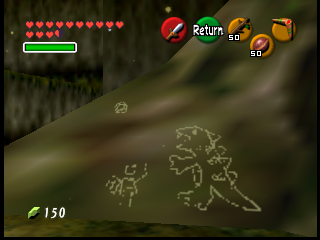
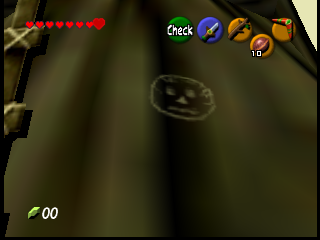
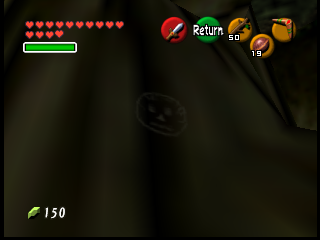
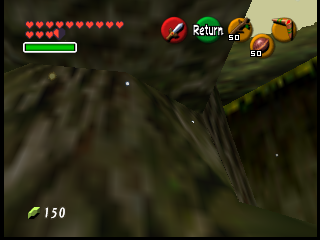
The drawings engraved on Link's House lost detail between Kokiri Forest's revisions. Could this have been because the texture format changed?
Spawn Points#
00 - Entrance Tunnel#
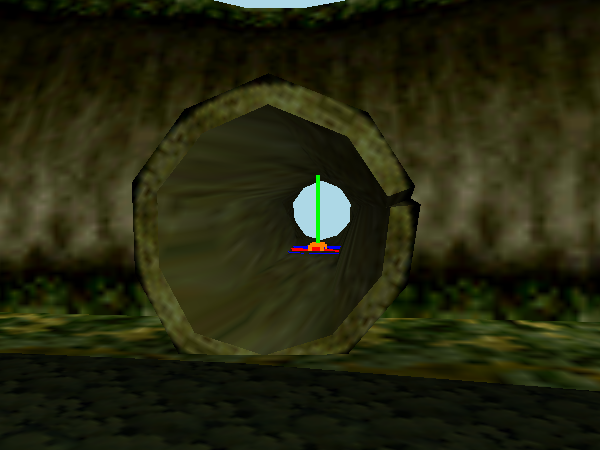
This spawn point is connected to exit 0185, which corresponds to Hyrule Field.
01 - Deku Tree#
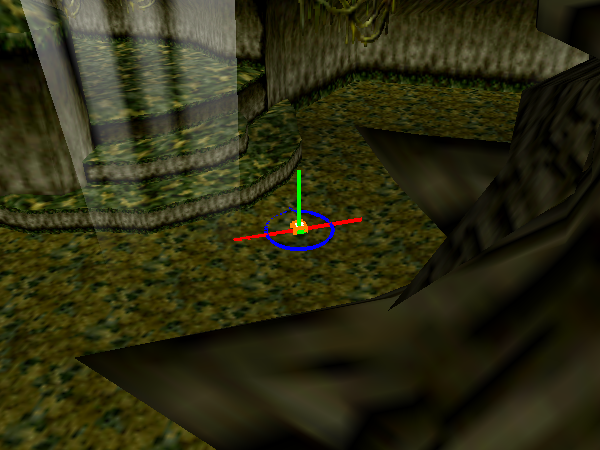
This spawn point is connected to exit 0000, which corresponds to Inside the Deku Tree.
02 - Kokiri Hills#
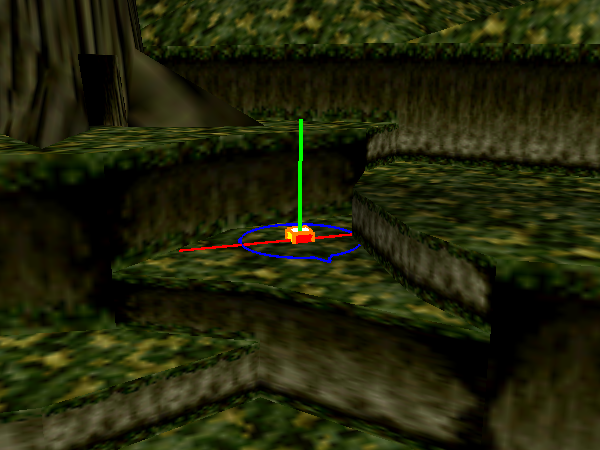
Below the house on the hill is spawn point 00FC, which corresponds to the Sacred Forest Meadow. At one point during development, there was likely an entrance there from this hill.
(Source: Zel)
03 - Link's Home#
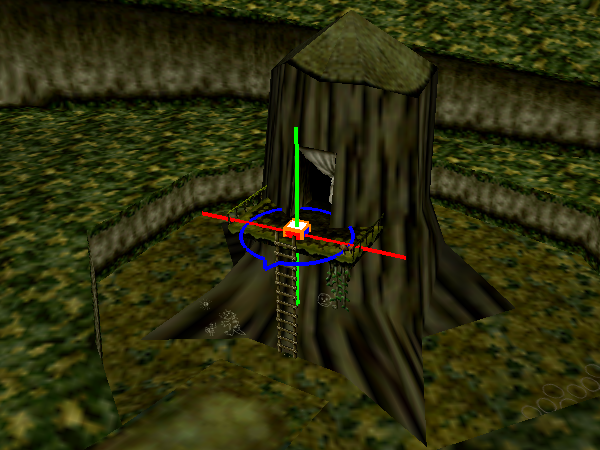
This spawn point is connected to exit 00BB, which corresponds to Link's Home from Savewarp, so Link will appear in front of his bed.
04 - Kokiri Shop#
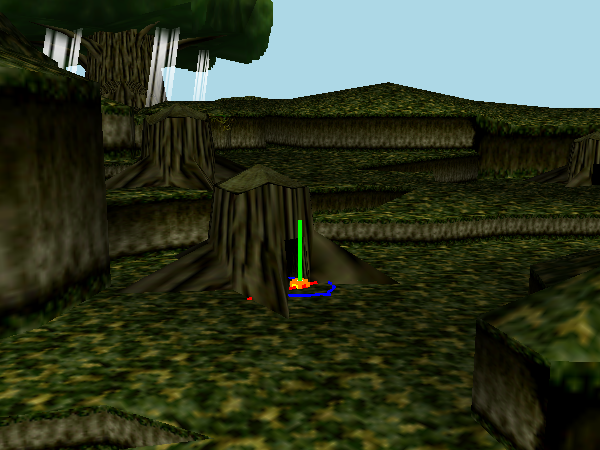
This spawn point is connected to exit 00C1, which corresponds to the Kokiri Shop.
Exits#
Index |
Appear At |
From |
|---|---|---|
0185 |
Hyrule Field |
Lost Woods |
0000 |
Deku Tree |
Kokiri Forest |
00FC |
Sacred Forest Meadow |
Lost Woods |
00BB |
Links House Bed |
Save Warp |
00C1 |
Kokiri Shop |
Kokiri Forest |
Fstdan
This early dungeon was prominently featured in pre-release materials from April-July 1997.
The filename may translate to "first dungeon". While it's unknown when it was added to the game, it was ultimately removed on 1998/09/01.
Many elements of its overall structure and design, including whole textures, found their way into the final release version of Inside Ganon's Castle. Some of the assets used in this map are borrowed from Mario 64.
Unlike Spot04_OLD, it can be loaded without amending its room header, but it also lacks the collision data and cannot be explored without modifications.
It uses the music sequence NA_BGM_DUNGEON of Dodongo's Cavern / Death Mountain Crater by default.
Layout#
The dungeon consists of 10 rooms spread over multiple floors, with several corridors and stairs connecting the central rooms to a towering structure.
While the inside of the dungeon is only sparingly lit by several torches at the walls, there are also two bright outside areas which utilize the skybox.
Most of the rooms are completely devoid of any actors: The most notable omissions are the flame actors and the Iron Knuckle, which were both featured in early screenshots.
The room files are not numbered in a particular order, so we will follow the layout beginning with Link's starting point.
Room 8#
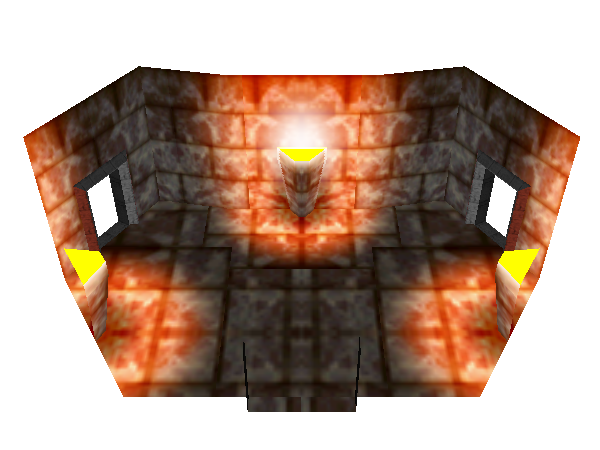
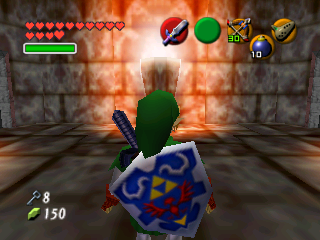
Upon entering the dungeon, Link appears inside the reddish-hued entrance chamber, which features three torches and two doors to each side.
The left door leads to Room 7, the right door leads to Room 6.
Overview |
Entrance Room |
|---|---|
 |
 |
Strangely, the transition door actors for the entrance of the dungeon itself are missing. 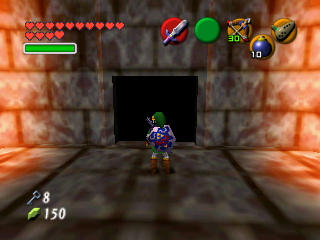
Room 7#
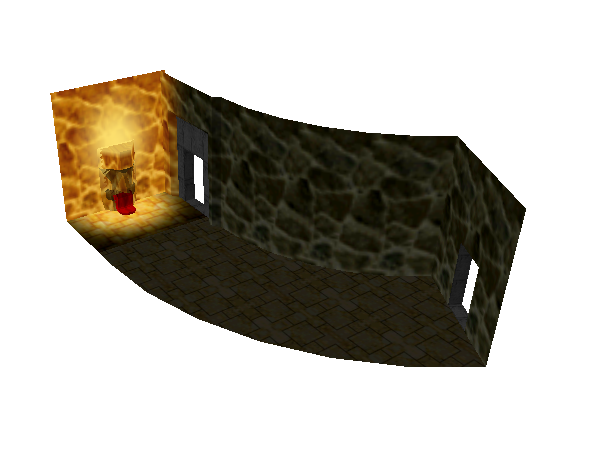
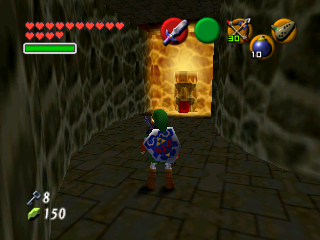
Link enters a dark and slightly bent hallway, which is only lit by a torch with facial features and a tongue.
The door to the right of the torch leads to Room 1.
Overview |
Hall |
|---|---|
 |
 |
Room 6#
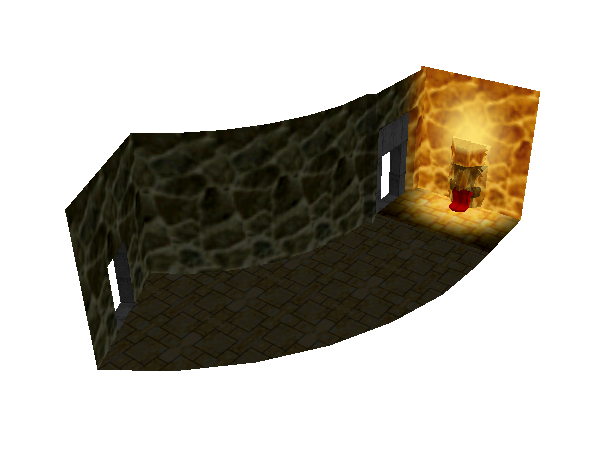
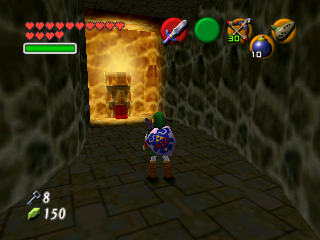
This hallway is an exact mirror of Room 7.
The door to the left of the torch leads to Room 1.
Overview |
Hall |
|---|---|
 |
 |
Room 1#
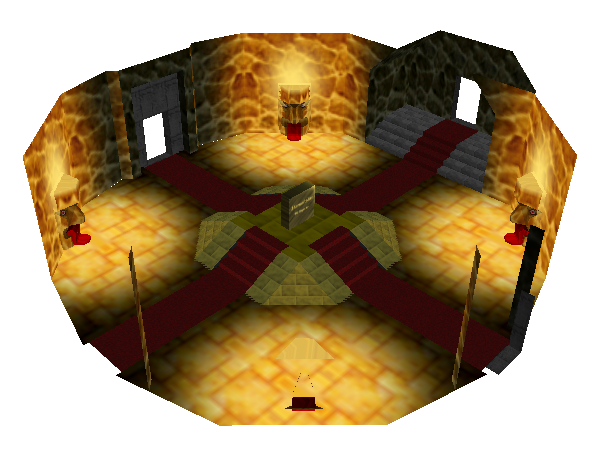
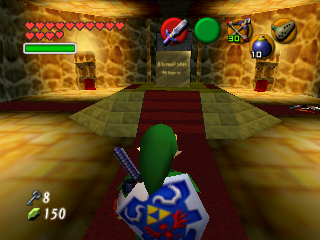
Link enters the orange-hued central chamber, where a lonely Stalfos is already waiting to fight him.
The red carpets on the floor lead to the central raised area that holds a famous plaque.
There are the previously seen torch idols in every corner of the chamber, but this time they also feature eyes.
The door preceded by the stairs leads to Room 4.
Overview |
Main Room |
|---|---|
 |
 |
This room was featured in an early screenshot released in April 1997. 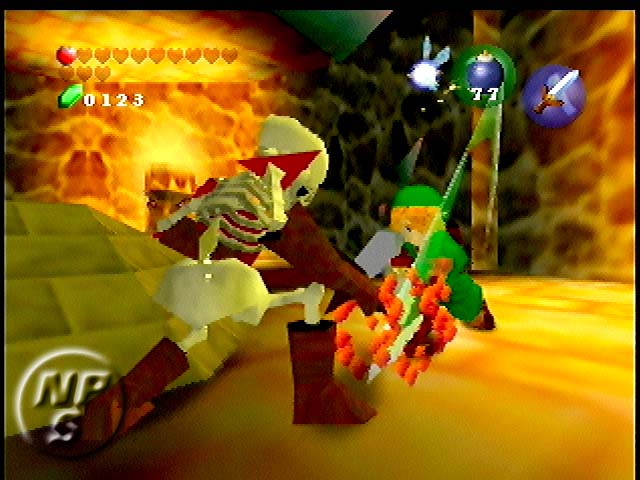
Actor |
Filename |
ID |
Object |
Variable |
ID |
Used |
|---|---|---|---|---|---|---|
0002 |
En_Test |
Stalfos |
0032 |
FFFF |
Rises from Ground, Mini-Boss Theme |
✔ |
Room 4#
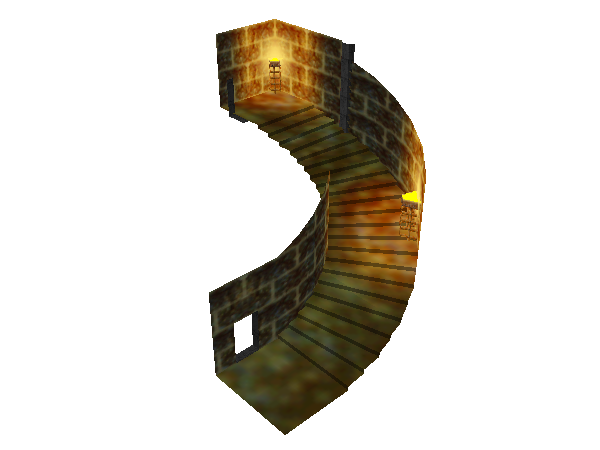
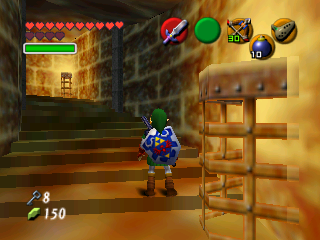
A torchlit hallway with a curved staircase.
The door at the end leads to Room 2.
Overview |
Staircase |
|---|---|
 |
 |
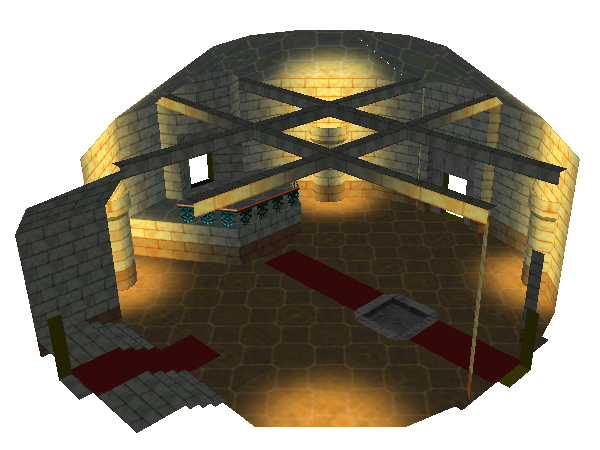
Room 2#
Link enters another central chamber, where a single depression is placed amidst a red carpet. The carpet leads to a balcony, where a treasure chest rests.
The door to the right leads to Room 5, while the door preceded by the stairs leads to Room 0.
Overview |
Main Room |
|---|---|
 |
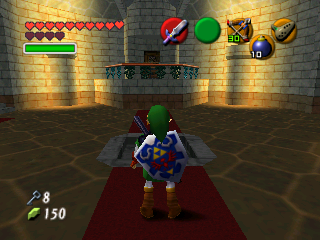 |
This room was featured in an early screenshot released in April 1997. 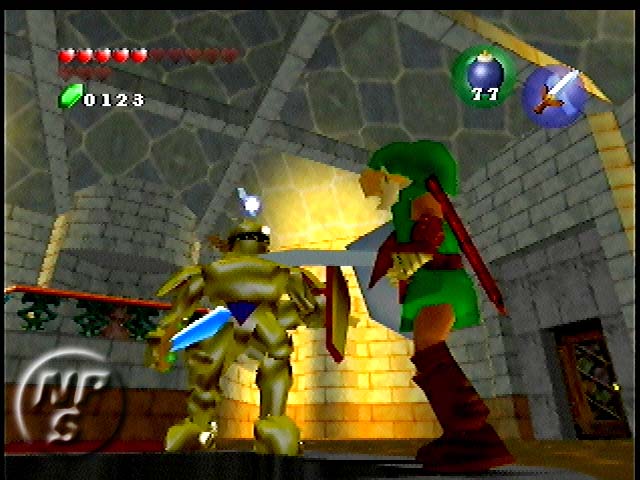
Actor |
Filename |
ID |
Object |
Variable |
ID |
Used |
|---|---|---|---|---|---|---|
000A |
En_Box |
Treasure Chest |
000E |
007F |
Invalid |
✔ |
The treasure chest is set up with an invalid initiation variable, and opening it will softlock the game.
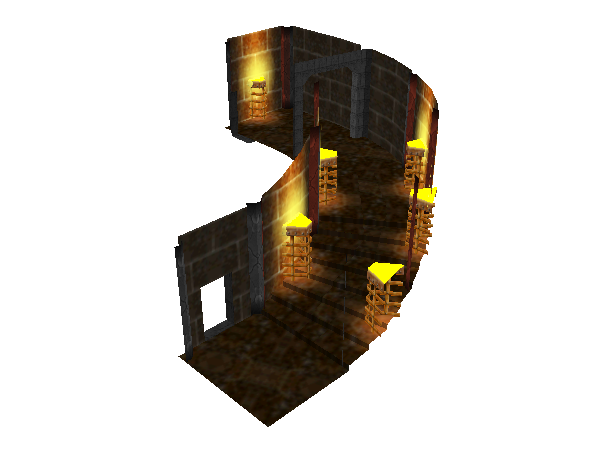
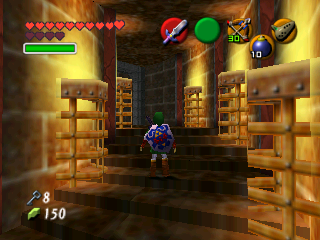
Room 5#
Another torchlit hallway with a curved staircase.
The door at the end leads back to the treasure chest balcony in Room 2.
Overview |
Staircase |
|---|---|
 |
 |
This room was featured in an early screenshot released in April 1997. 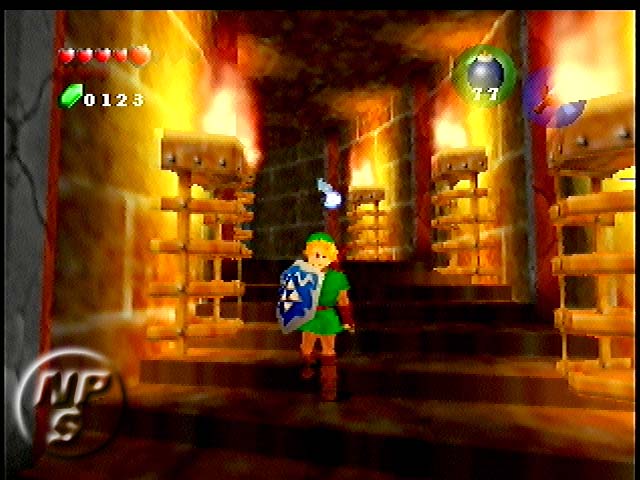
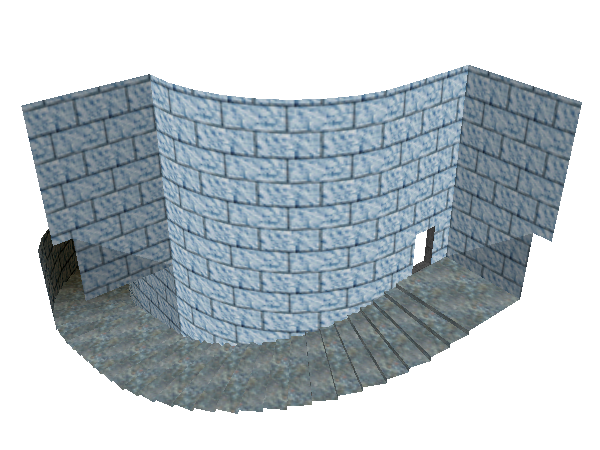
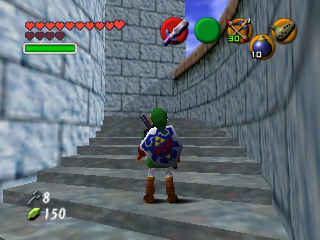
Room 0#
Link enters the first outside area featuring the skybox.
The door at the end of the curved staircase leads to Room 3.
Overview |
Outside Area |
|---|---|
 |
 |
Room 3#
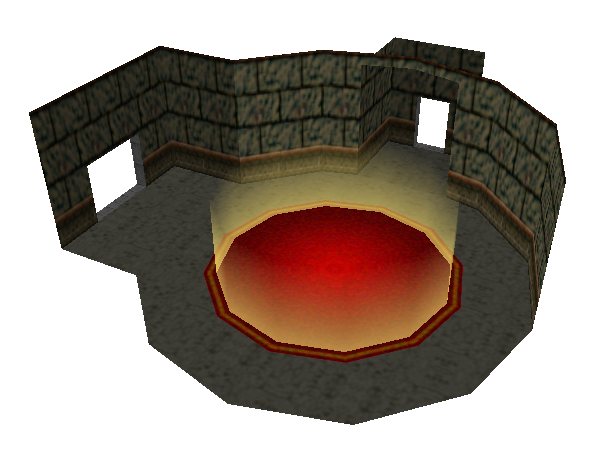
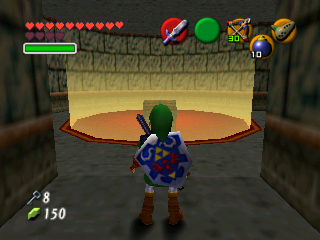
A circular room with a red-carpeted area in the center, which emits a strange glow and holds a treasure chest inside of it.
The doors to the right leads to Room 9.
Overview |
Shiny Room |
|---|---|
 |
 |
There are two transition door actors set up side by side to load Room 9. While the final version still includes an unused double-door setup for en_door, it doesn't seem to have been implemented at this point in development. 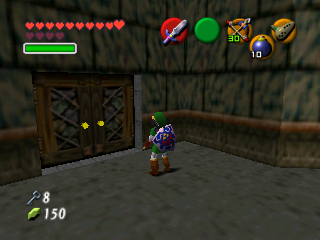
Actor |
Filename |
ID |
Object |
Variable |
ID |
Used |
|---|---|---|---|---|---|---|
000A |
En_Box |
Treasure Chest |
000E |
0FFF |
Invalid |
✔ |
The treasure chest is set up with an invalid initiation variable, so opening it will softlock the game.
Room 9#
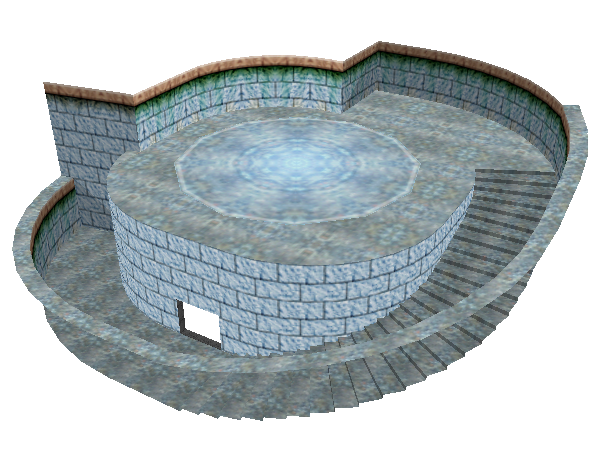
The final area is located outside on top of the tower.
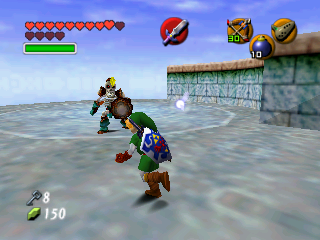
After following the staircase to the rooftop area, Link has to battle another Stalfos.
Overview |
Outside Area |
|---|---|
 |
 |
Actor |
Filename |
ID |
Object |
Variable |
ID |
Used |
|---|---|---|---|---|---|---|
0002 |
En_Test |
Stalfos |
0032 |
FFFF |
Rises from Ground, Mini-Boss Theme |
✔ |
Object |
Filename |
ID |
Used |
|---|---|---|---|
0029 |
object_o_anime |
Animation File |
✘ |
0034 |
object_oE_anime |
Animation File |
✘ |
000E |
object_box |
Treasure Chest |
✘ |
0038 |
object_am |
Armos Statue |
✘ |
0032 |
object_sk2 |
Stalfos |
✔ |
000B |
object_wallmaster |
Wallmaster/Floormaster |
✘ |
003B |
object_oA3 |
Impa's Masked Head [Early] |
✘ |
Environment Settings#
|
|
To do: |
Objects#
With the exception of Room 9, each room loads the following objects:
Object |
Filename |
ID |
Used |
|---|---|---|---|
0029 |
object_o_anime |
Animation File |
✘ |
0034 |
object_oE_anime |
Animation File |
✘ |
000E |
object_box |
Treasure Chest |
✔ |
0038 |
object_am |
Armos Statue |
✘ |
0032 |
object_sk2 |
Stalfos |
✔ |
000B |
object_wallmaster |
Wallmaster/Floormaster |
✘ |
Spawn Points#

There are two spawn points in Room 8, one connects to exit 0209, which corresponds to Kokiri Forest from the Deku Tree, while the other one connects to exit 0000, which corresponds to Inside the Deku Tree from Kokiri Forest. It's unusual to have two spawn points sitting right next to each other, with both of them pointing to different exits.
Exits#
Index |
Appear At |
From |
|---|---|---|
0209 |
Kokiri Forest |
Inside the Deku Tree |
0000 |
Inside the Deku Tree |
Kokiri Forest |
zelda_tool_rom.o
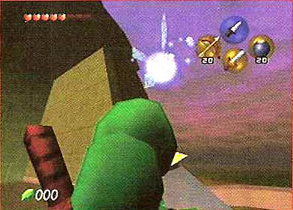
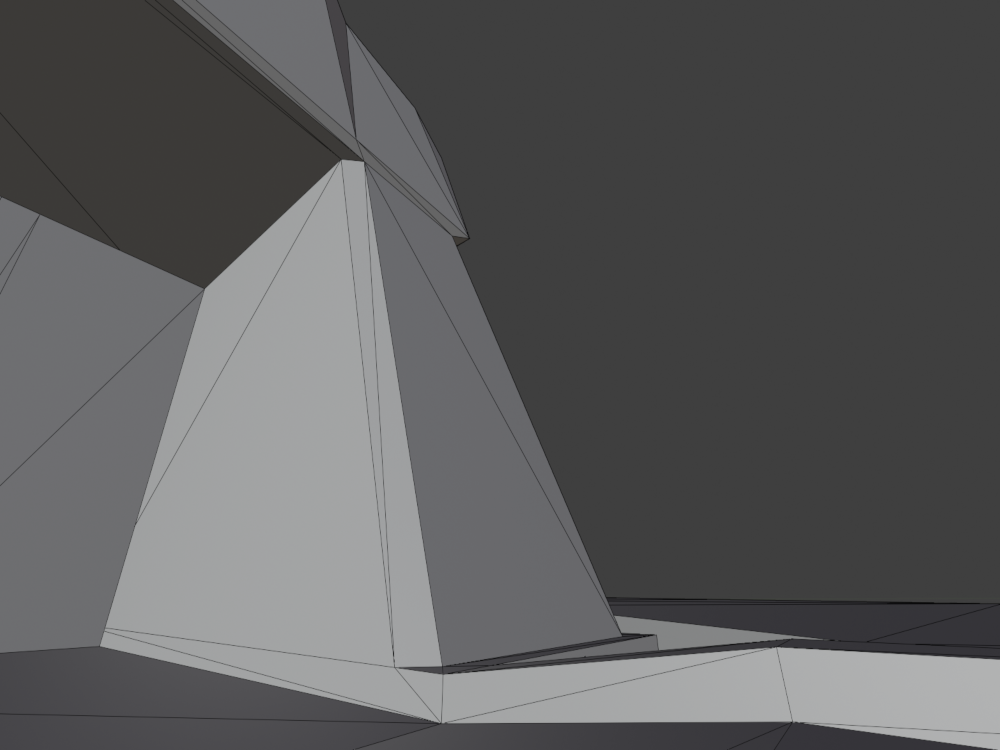
The file zelda_tool_rom.o contains leftover scene data, along with collision to a map that is inaccessible, while other parts of the file seem to be dummied out. If the collision is converted into an object and into a map, it can be injected and viewed in-game. Shown below is the collision-to-map converted and injected without textures applied.
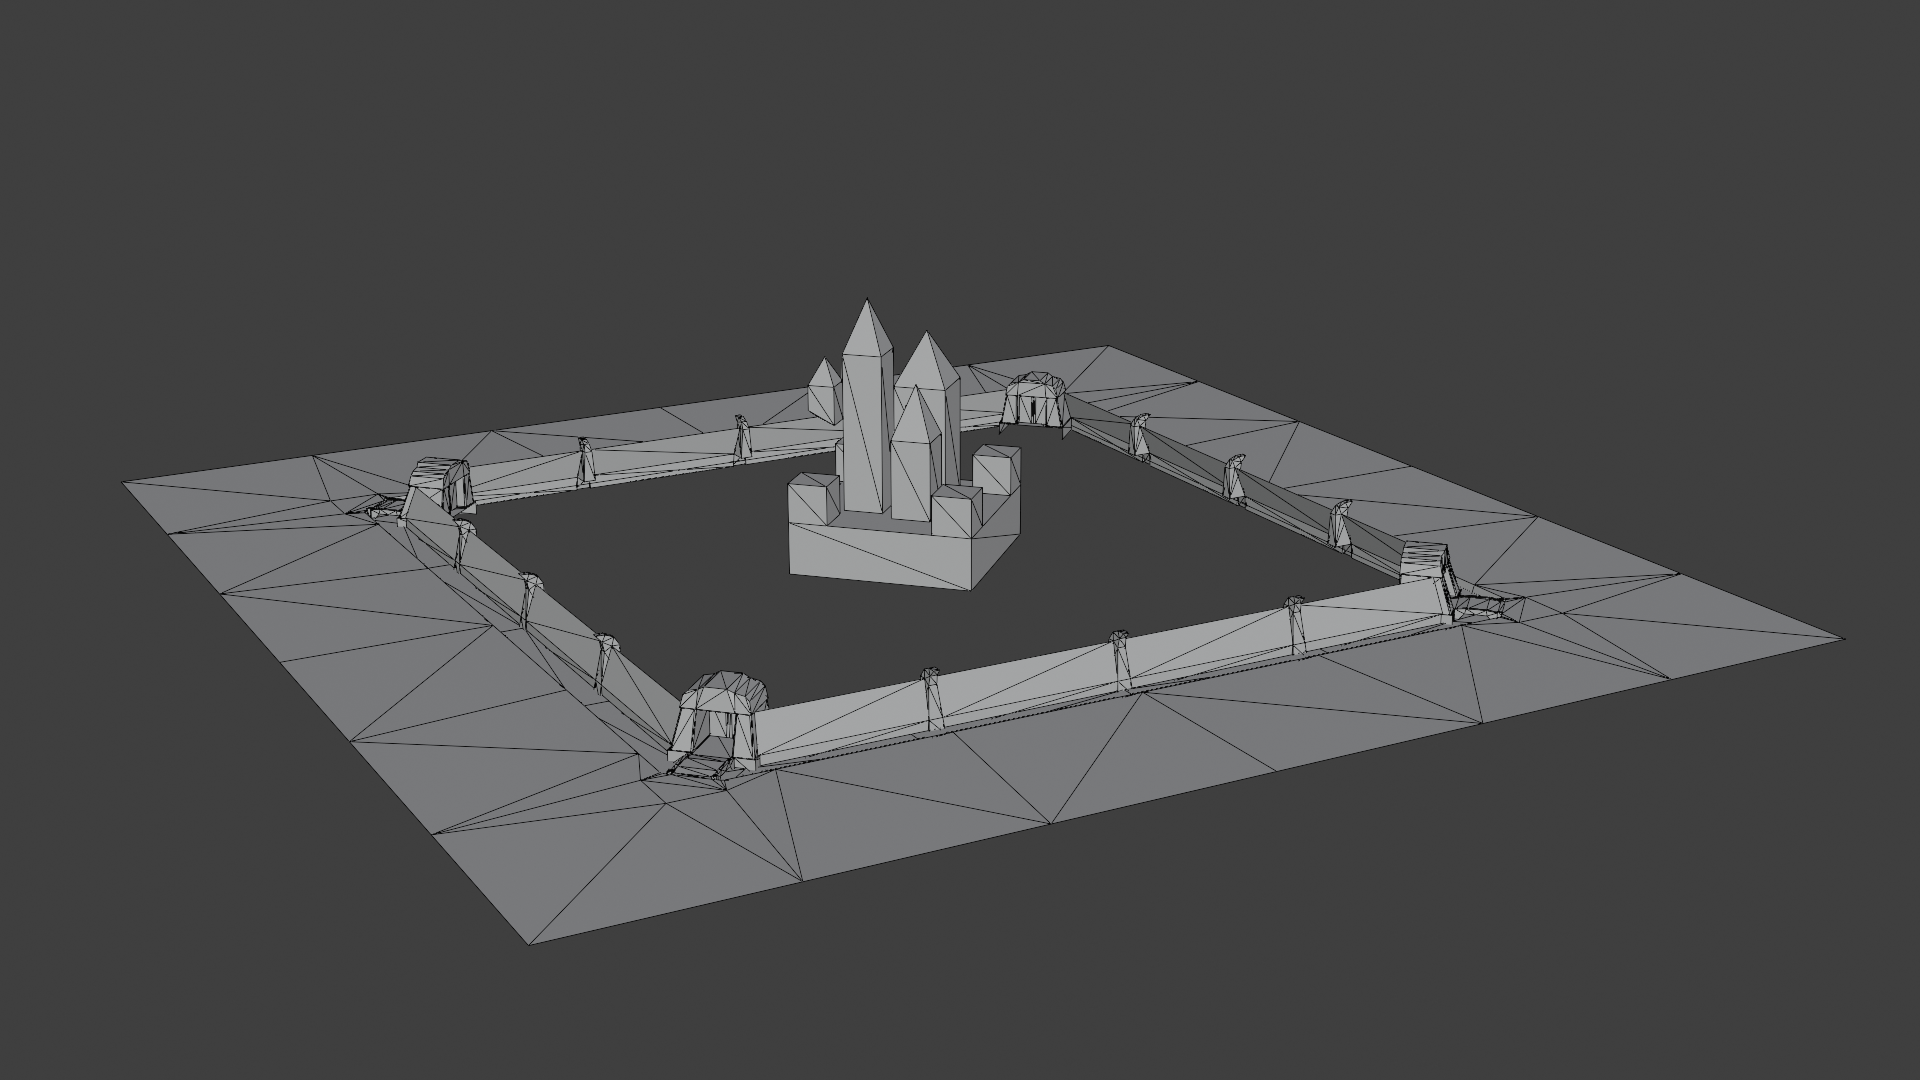
It reveals a huge walled area surrounded by a moat with bridges leading over it to four gates and a castle which is located at the center.
Inside the moat is also an additional layer, which presumably was once used as a water surface.
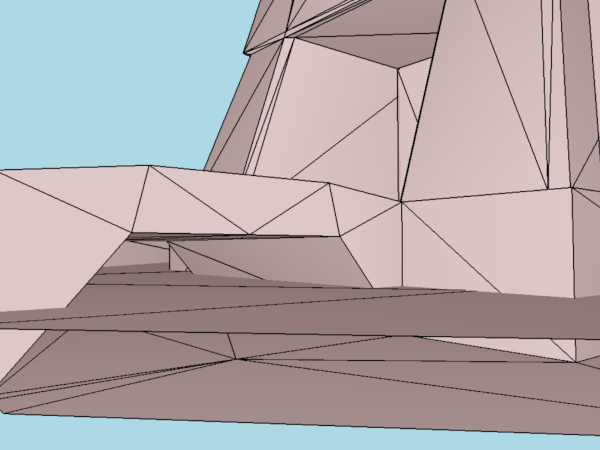
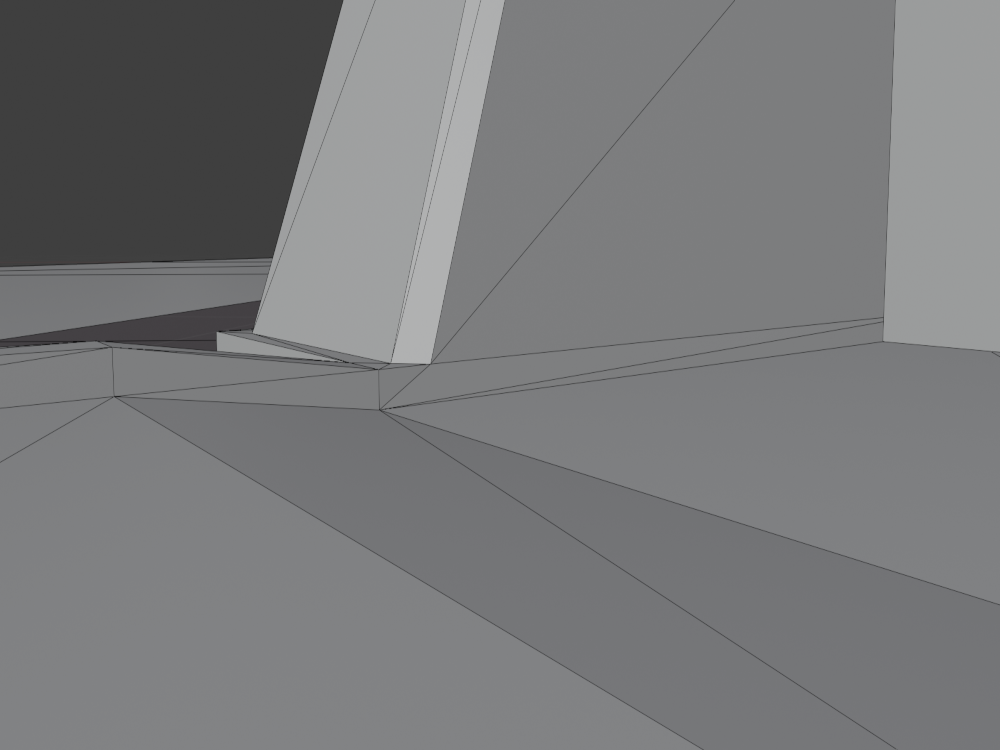
This area can also be seen in pre-release screenshots:
|
May 1997 |
Collision |
|---|---|

|
|
|
May 1997 |
Collision |
|---|---|
|
|
File Structure#
|
|
To do: |
The first few bytes seem to contain two pointers, with an address start and address end.
00 55 B5 90 00 56 60 00 Scene Header#
|
|
To do: |
The scene header is located at offset 0xB590, which either seems to use an older format or for some reason is broken.
All offsets now use segment 0x04, which actually is used for gameplay keep, whereas scenes in the final version would use segment 0x02.
04 01 18 14 04 00 B5 D8 03 00 00 08 04 01 3F D4
06 01 4A B8 04 00 B5 E0 08 00 E3 D0 00 00 00 02
00 01 E3 D0 04 00 B5 C8 12 00 00 08 01 00 00 00
15 00 18 14 00 00 00 00
Command |
Description |
Variables |
Notes |
|---|---|---|---|
0x04 |
Room List |
04011814 0400B5D8 |
Offset points to valid entry format at 0xB5D8. |
0x03 |
Collision Header |
03000008 04013FD4 |
Offset points to collision header at 0x13FD4. |
0x06 |
Entrance List |
06014AB8 0400B5E0 |
Offset points to entrance list entry at 0xB5E0. |
0x08 |
(Room Behavior) |
0800E3D0 00000002 |
Only used in room headers. |
0x00 |
Spawn Point List |
0001E3D0 0400B5C8 |
Wrong order, offset points to spawn point entry at 0xB5C8. |
0x12 |
(Skybox Settings) |
12000008 01000000 |
Only used in room headers. |
0x15 |
Sound Settings |
15001814 00000000 |
Wrong order. |
0x07 |
"Special Objects" |
Missing, required. |
|
0x11 |
Skybox Settings |
Missing, required. |
|
0x0F |
Lighting Settings |
Missing, required. |
|
0x14 |
End marker |
Missing, required. |
|
Collision#
The collision data starts at offset 0xB5F0, which includes the collision header at offset 0x13FD4.
Unfortunately, there are no individual polygon types specified, although the collision header points to them at 0xB5F8, nor are any polygon types adressed inside the polygon array, so all surfaces just behave like dirt when the collision is loaded in-game.
The collision header also includes the offset for camera data at 0xB5F0, but it doesn't contain any entries.
Textures#
The texture data starts at offset 0x14000 and includes three textures, see Unused Textures for more information.
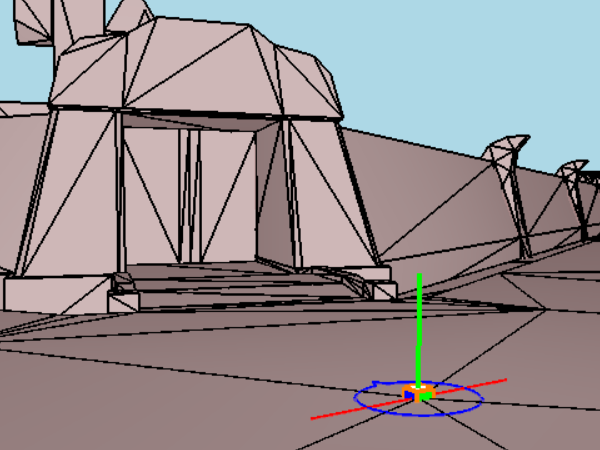
Spawn Point#
|
Spawn Point |
In-game |
|---|---|
|

|
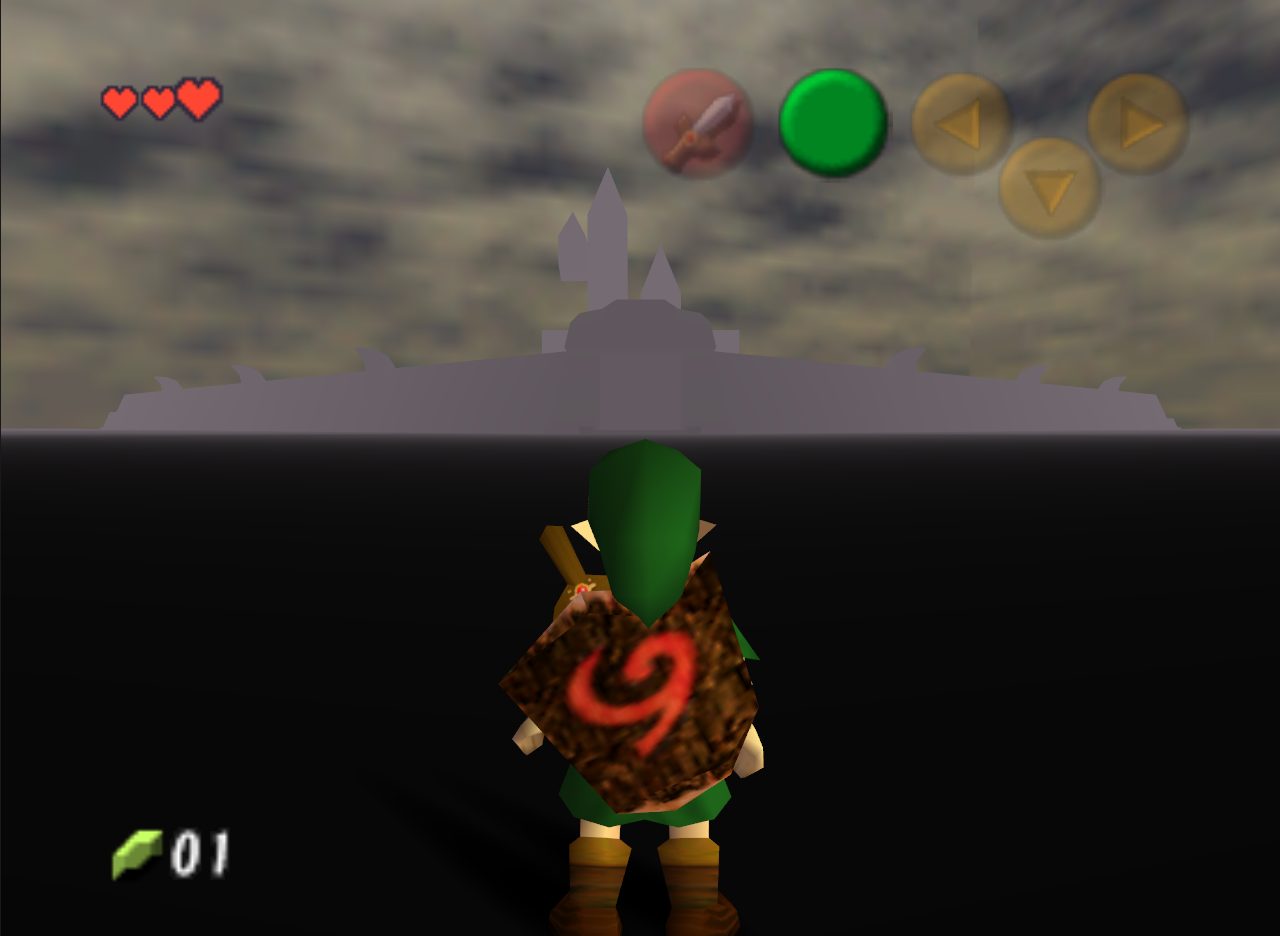
Various In-Game Images#
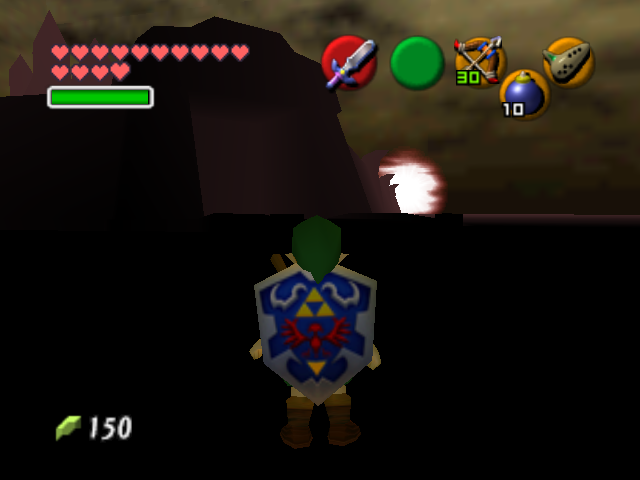

Know-It-All Brothers' House
K_Home.bak#
|
|
To do: |
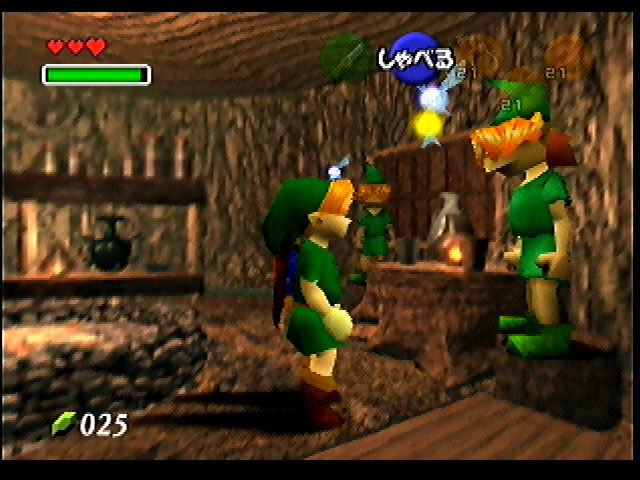
An earlier version of the Know-It-All Brothers' House can be found in data\shape2\zelda_scene\K_Home.bak.
The room_info file with the header information is missing, so the final room_info was used to compile and load the room file, which reveals several differences. The most obvious one is that the whole layout, including the background render, is mirrored. This can be also seen in an earlier screenshot released in September 1998.
Another peculiarity is the missing 0x07 command for "Special Objects" in the scene header.
The image of the earlier background render for the overhead view is also featured in Prerenders.
|
Pre-release |
Final |
|---|---|
|
|
|


Kokiri Shop
Kokiri.bak#
|
|
To do: |
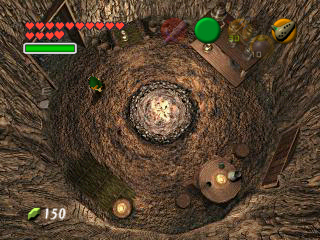
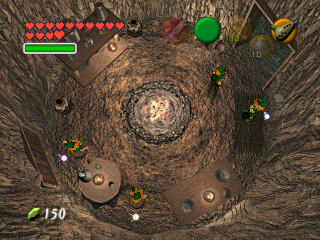
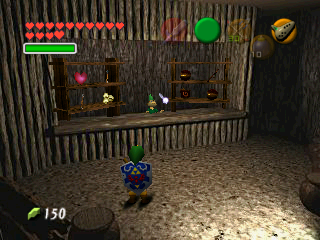
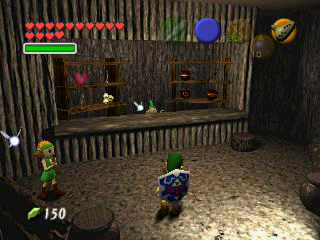
This is an earlier version of the Kokiri Shop and features some small differences, like the missing stool, the second wall on the left that hides the shelves behind the wall, an extended counter, and some subtle changes in the lighting.
It uses the music sequence NA_BGM_LINK_HOUSE, instead of NA_BGM_SHOP, which implies that the latter one was not finished during that time in development.
The image of the earlier background render is also featured in Prerenders.
Kokiri.bak |
Ocarina of Time |
|---|---|
 |
 |
Kokiri.bak |
Ocarina of Time |
|---|---|
 |
 |
Room 0#
Actors#
Actor |
Filename |
ID |
Object |
Variable |
ID |
Used |
|---|---|---|---|---|---|---|
003D |
En_Ossan |
Shop Owner |
0001 |
0000 |
Kokiri Shop Owner |
✔ |
00C2 |
En_Tana |
Shop Shelves |
00B2 |
0000 |
✔ |
Objects#
The compiled room file causes a crash, because the final actor setup for the shop shelves features the Deku Seeds and the object list in the earlier version doesn't include them, instead we can find the object for the potions in it.
Object |
Filename |
ID |
|---|---|---|
00CB |
object_gi_shield_1 |
Item Model - Deku Shield |
00BB |
object_gi_nuts |
Item Model - Deku Nut |
00C7 |
object_gi_stick |
Item Model - Deku Stick |
00B2 |
object_shop_dungen |
Shop Shelves |
00EB |
object_gi_liquid |
Item Model - Potions |
0101 |
object_masterkokiri |
Kokiri Shop Proprietor Animation |
0102 |
object_masterkokirihead |
Kokiri Shop Proprietor's Head |
Saria's House
K_House5#
|
|
To do: |
(Source: Dark Linkaël)
Skulltula House
Kinsuta2#
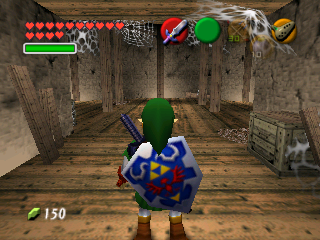
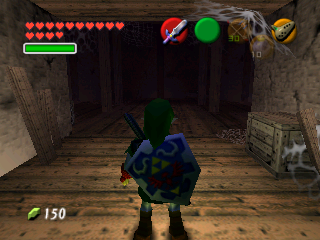
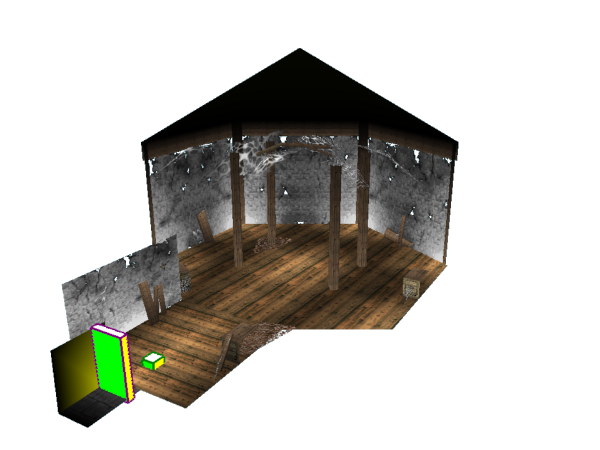
An earlier version of the Skulltula House, located in zelda_scene/Kinsuta2. All related actors and objects are missing in the earlier setup, which also utilizes different lighting settings and completely lacks the haunting atmosphere of the final version.
Kinsuta2 |
Final |
|---|---|
 |
 |
Kinsuta2 |
Final |
|---|---|
 |
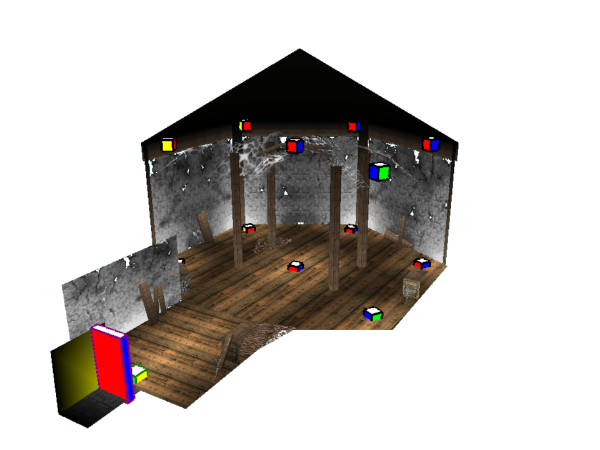 |
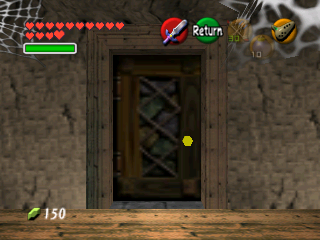
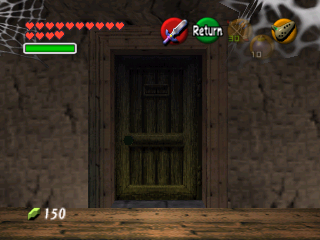
The scene header is missing the 0x07 command for "Special Objects". Therefore, the transition door actor uses the gameplay_keep object. The door is also rotated to the other side, while the spawn point is a little bit further away and connects to exit 0242, which corresponds to Death Mountain Trail from Dodongo's Cavern.
Kinsuta2 |
Final |
|---|---|
 |
 |
Exits#
Index |
Appear At |
From |
|---|---|---|
0242 |
Death Mountain Trail |
Dodongo's Cavern |
Bazaar
Shop#
zelda_tool_scene/Shop contains display lists for an earlier version of the Bazaar, located in the file shop1_d.o.
The room mesh is missing the upper section above the counter and contains only one crate to the right.
Shop1_d |
Final |
|---|---|
 |
 |
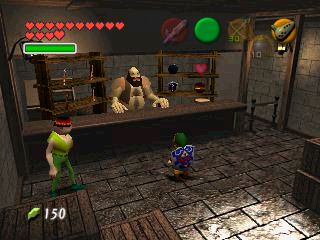
The developers later included the upper portion in the mesh, after they added an additional board on top of the shop shelves, which can be seen missing in an earlier screenshot.
Shop1_d |
Pre-release Shelves |
|---|---|
 |
 |
Malon's Stable
Stable#
zelda_tool_scene/Stable contains display lists for an earlier version of Malon's Stable. The only difference is the darker shading of the vertical poles, everything else seems to be the same.
Stable |
Final |
|---|---|
 |
 |
Dodongo's Cavern
|
|
To do: |
The iQue files include two different versions of Dodongo's Cavern: Ddanh_noanime and Ddanh. Both are work in progress versions of the dungeon, and are different stages of completion, especially regarding the animated textures.
They are also missing actors in nearly every room and only include one spawn point in the entrance room, whereas the other one in Room 7 is missing.
Ddanh_noanime#
Ddanh_noanime is a slightly earlier version of the other Ddanh and features a few differences.
The map files are located in data/shape2/zelda_scene/.GOMI/ddanh_noanime.
"Gomi" translates to "garbage" and implies that these files were meant to be deleted - "noanime" likely refers to the lack of animation features.
Room 0#
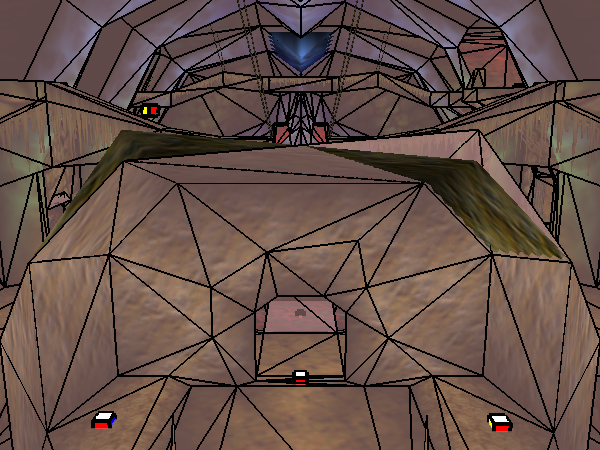
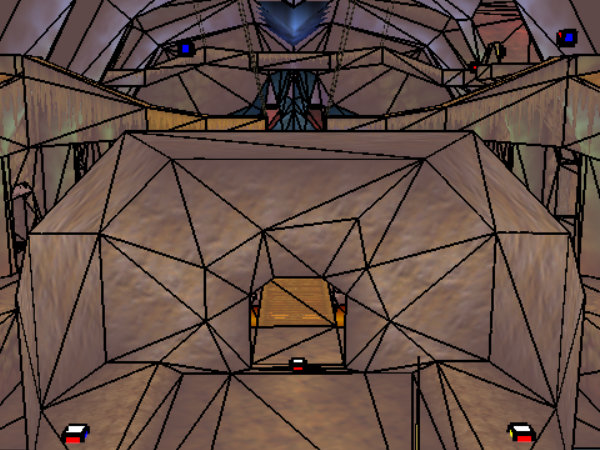
The ceiling is misaligned between the mesh and collision model
|
Ddanh_noanime |
Dodongo's Cavern (OoT v1.0) |
|---|---|
|
|
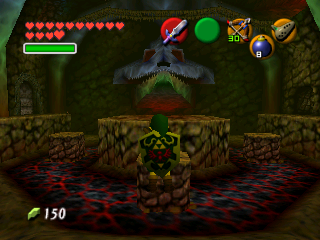
After Link blows up the bombable wall blocking the entrance, a cutscene starts but ends promptly, often causing the game to crash.
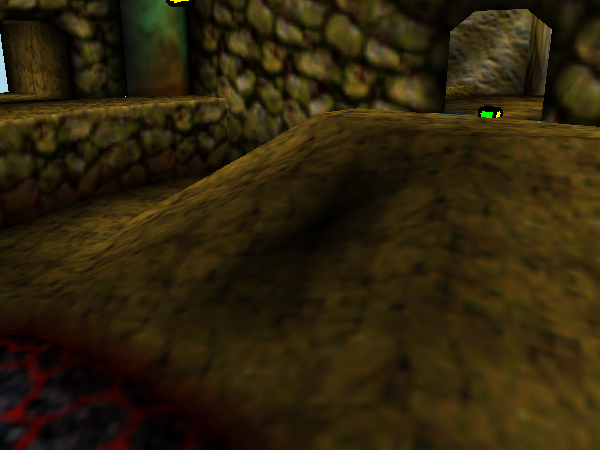
The textures for the platform leading to the lava pit are missing, though the collision is present.
|
Ddanh_noanime |
Main Area |
|---|---|
|
|
Anime Files#
All versions of Dodongo's Cavern reference the following model and texture files, which are located in their own subdirectories in data/shape2.
These model and texture files are used to address various animation features in the display lists.
Filename |
Ddanh_noanime |
Ddan OoT v1.0 |
Notes |
|---|---|---|---|
anime_1_txt |
✘ |
✔ |
entrance tunnel |
anime_4_model |
✘ |
✔ |
left Dodongo eye |
anime_5_model |
✘ |
✔ |
right Dodongo eye |
anime_2_txt |
✘ |
✔ |
lava ground |
Ddanh_noanime doesn't reference the anime files in Room 0 at all, and several animation features are missing in this version. For instance, it's missing the day to night transition used in the entrance tunnel, defaulting to the daytime version.
The ground surrounding the lava in the central area isn't animated, only using a static texture.
The eyes of the Dodongo skull always glow red, even before Link treats them with some bombs. 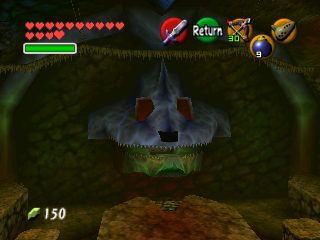
Actors#
Room 0 only features a few actors, mostly those relevant to gameplay mechanics. The only enemies are two Fire Keeses.
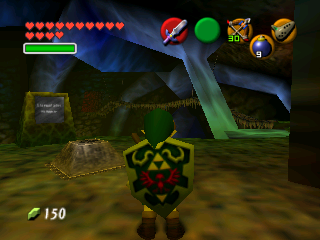
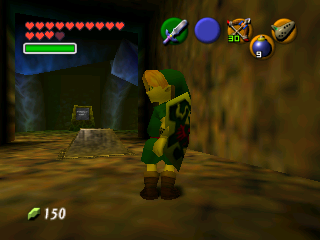
Some of the actors are placed at different locations, like the Dungeon Switch and the Fire Keese. Other actors are at the exact same location, like the elevators and the Dodongo jawbone.
|
Dungeon Switch |
Dodongo's Cavern (OoT v1.0) |
|---|---|
|
|
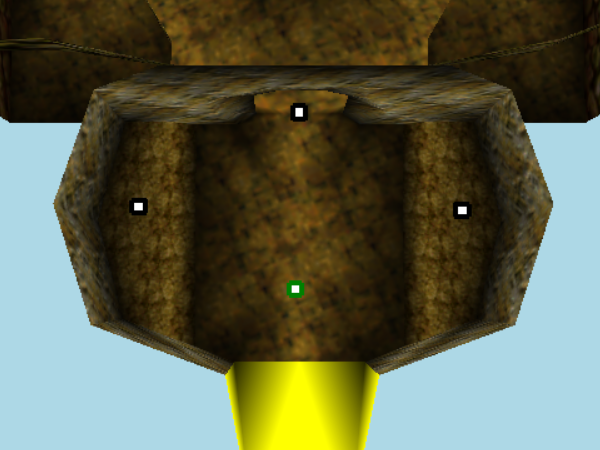
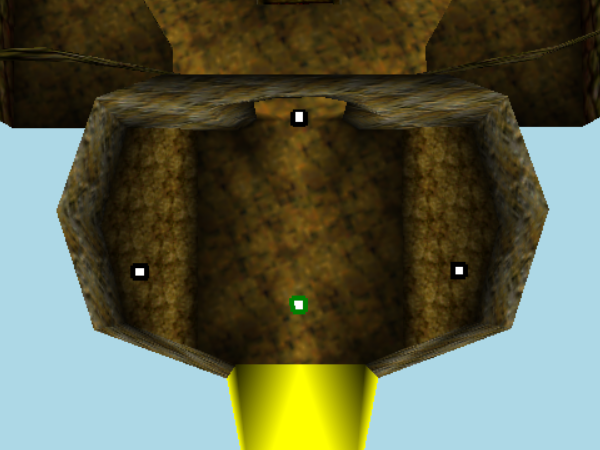
Both Bomb Flowers and the spawn point in the entrance room are moved closer to the inner wall:
|
Bomb Flowers & Spawn Point |
Dodongo's Cavern (OoT v1.0) |
|---|---|
|
|
Actor |
Filename |
ID |
Object |
Variable |
ID |
Used |
|---|---|---|---|---|---|---|
003F |
Bg_Dodoago |
Dodongo Skull Jawbone |
002B |
001A |
✔ |
|
0058 |
Bg_Ddan_Jd |
Rising stone platform (Dodongo's Cavern) |
002B |
00FF |
✔ |
|
0058 |
Bg_Ddan_Jd |
Rising stone platform (Dodongo's Cavern) |
002B |
000A |
✔ |
|
0058 |
Bg_Ddan_Jd |
Rising stone platform (Dodongo's Cavern) |
002B |
00FF |
✔ |
|
012A |
Obj_Switch |
Dungeon Switch |
0003 |
0A00 |
✔ |
|
0013 |
En_Firefly |
Keese |
000D |
0000 |
✔ |
|
0013 |
En_Firefly |
Keese |
000D |
0000 |
✔ |
|
0059 |
Bg_Breakwall |
Bombable Wall |
0001 |
0007 |
✔ |
|
004C |
En_Bombf |
Bomb Flower |
0031 |
FFFF |
✔ |
|
004C |
En_Bombf |
Bomb Flower |
0031 |
FFFF |
✔ |
Objects#
Object |
Filename |
ID |
Used |
|---|---|---|---|
002B |
object_ddan_objects |
Dodongo's Cavern Objects |
✔ |
018A |
object_bwall |
Bombable Wall |
✔ |
000D |
object_firefly |
Keese |
✔ |
0031 |
object_bombf |
Bomb Flower |
✔ |
000E |
object_box |
Treasure Chest |
✘ |
Room 1#
Actors#
There are no actors in this room.
Objects#
Object |
Filename |
ID |
Used |
|---|---|---|---|
002B |
object_ddan_objects |
Dodongo's Cavern Objects |
✔ |
018A |
object_bwall |
Bombable Wall |
✘ |
000D |
object_firefly |
Keese |
✘ |
0031 |
object_bombf |
Bomb Flower |
✘ |
000E |
object_box |
Treasure Chest |
✘ |
Room 2#
Actors#
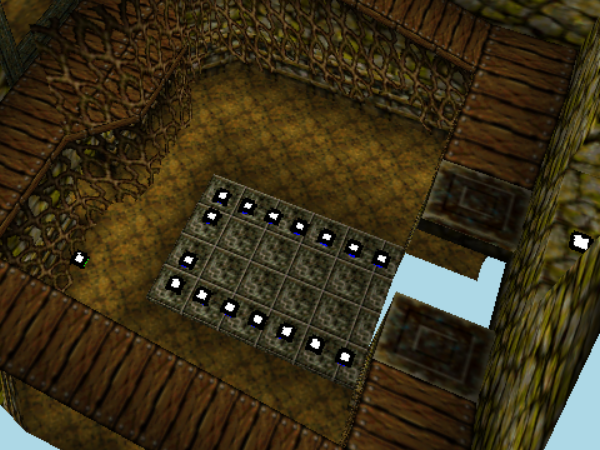
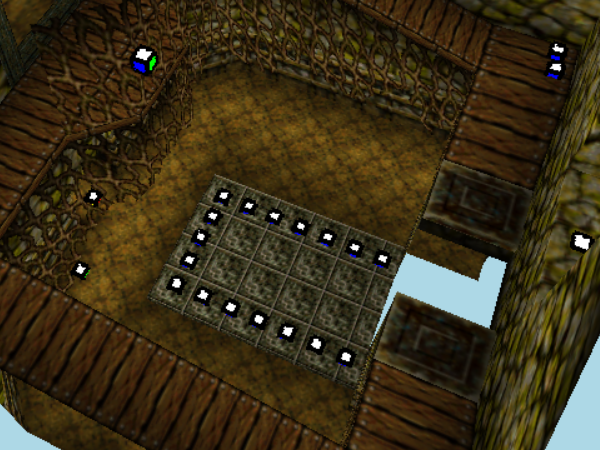
The Bomb Flowers are at the exact same location, except for a single one in the front and center of the stairs, which was added for the final version.
All the other actors are missing.
|
Bomb Flowers |
Dodongo's Cavern (OoT v1.0) |
|---|---|
|
|
Actor |
Filename |
ID |
Object |
Variable |
ID |
Used |
|---|---|---|---|---|---|---|
005C |
Bg_Ddan_Kd |
Stone Stairs |
002B |
0023 |
Falls down when all Bomb Flowers are exploded |
✔ |
004C |
En_Bombf |
Bomb Flower |
0031 |
FFFF |
✔ |
|
004C |
En_Bombf |
Bomb Flower |
0031 |
FFFF |
✔ |
|
004C |
En_Bombf |
Bomb Flower |
0031 |
FFFF |
✔ |
|
004C |
En_Bombf |
Bomb Flower |
0031 |
FFFF |
✔ |
|
004C |
En_Bombf |
Bomb Flower |
0031 |
FFFF |
✔ |
|
004C |
En_Bombf |
Bomb Flower |
0031 |
FFFF |
✔ |
|
004C |
En_Bombf |
Bomb Flower |
0031 |
FFFF |
✔ |
|
004C |
En_Bombf |
Bomb Flower |
0031 |
FFFF |
✔ |
|
004C |
En_Bombf |
Bomb Flower |
0031 |
FFFF |
✔ |
|
004C |
En_Bombf |
Bomb Flower |
0031 |
FFFF |
✔ |
|
004C |
En_Bombf |
Bomb Flower |
0031 |
FFFF |
✔ |
|
004C |
En_Bombf |
Bomb Flower |
0031 |
FFFF |
✔ |
|
004C |
En_Bombf |
Bomb Flower |
0031 |
FFFF |
✔ |
|
004C |
En_Bombf |
Bomb Flower |
0031 |
FFFF |
✔ |
|
004C |
En_Bombf |
Bomb Flower |
0031 |
FFFF |
✔ |
|
004C |
En_Bombf |
Bomb Flower |
0031 |
FFFF |
✔ |
|
004C |
En_Bombf |
Bomb Flower |
0031 |
FFFF |
✔ |
Objects#
Object |
Filename |
ID |
Used |
|---|---|---|---|
002B |
object_ddan_objects |
Dodongo's Cavern Objects |
✔ |
018A |
object_bwall |
Bombable Wall |
✘ |
000D |
object_firefly |
Keese |
✘ |
0031 |
object_bombf |
Bomb Flower |
✔ |
000E |
object_box |
Treasure Chest |
✘ |
Room 3#
Anime Files#
Filename |
Ddanh_noanime |
Ddan OoT v1.0 |
Notes |
|---|---|---|---|
anime_2_txt |
✘ |
✔ |
lava ground |
anime_3_model |
✔ |
✔ |
? |
anime_2_model |
✔ |
✔ |
? |
The Lizalfos room already references the model files, but does not reference the texture file.
The lava ground only uses a static texture, instead of an animated one.
Actors#
This room contains no actors, whereas the other Ddanh already includes both Lizalfos.
Room 9#
Actors#
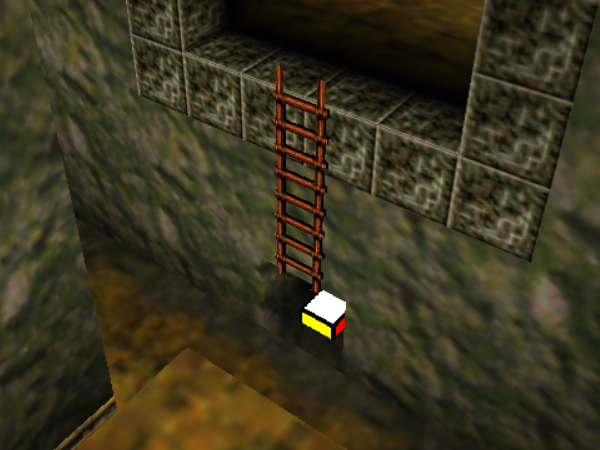
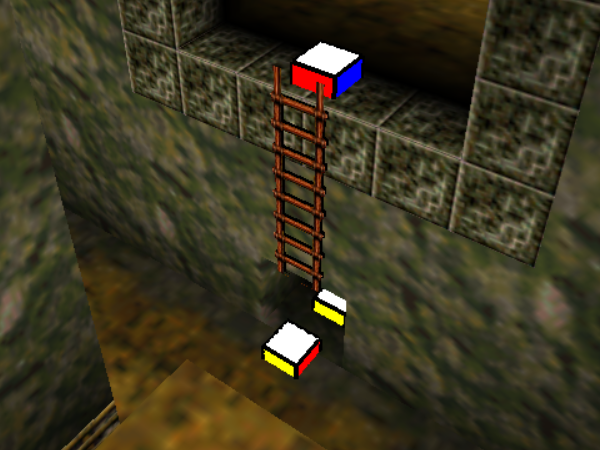
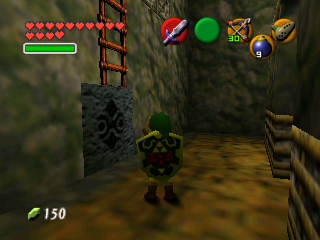
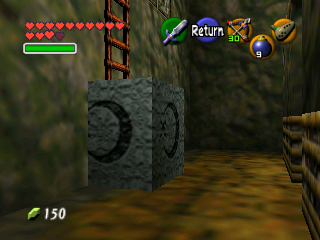
The only actor in this room is the pushblock, which is fully enclosed by the grotto, instead of jutting slightly out:
|
Pushblock |
Dodongo's Cavern (OoT v1.0) |
|---|---|
|
|
|
Pushblock |
Dodongo's Cavern (OoT v1.0) |
|---|---|
|
|
Actor |
Filename |
ID |
Object |
Variable |
ID |
Used |
|---|---|---|---|---|---|---|
00FF |
Obj_Oshihiki |
Movable Block |
0003 |
FF00 |
Nullable Switch Flag |
✔ |
Objects#
Object |
Filename |
ID |
Used |
|---|---|---|---|
002B |
object_ddan_objects |
Dodongo's Cavern Objects |
✔ |
All the other rooms contain no actors and just load the object 002B - object_ddan_objects.
Ddanh#
Ddanh is a later version, including preliminary work on the animated features. The map files are located in zelda_scene/ddanh.
It uses the same actor & object setup as Ddanh_noanime, with Room 3 being the exception.
Room 0#
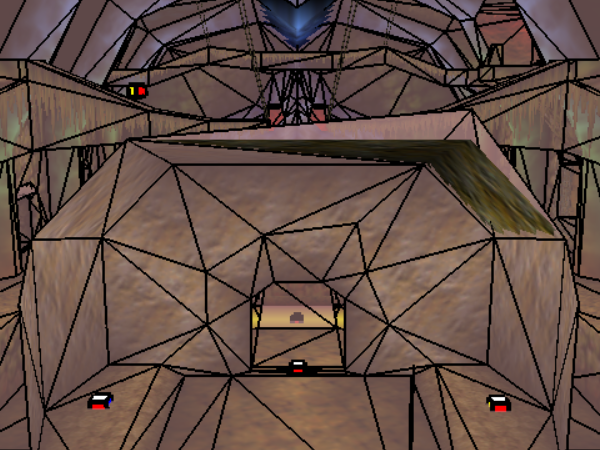
The entrance has matched the left side of the collision mesh with the ceiling, but hasn't fixed the right.
|
Ddanh |
Dodongo's Cavern (OoT v1.0) |
|---|---|
|
|
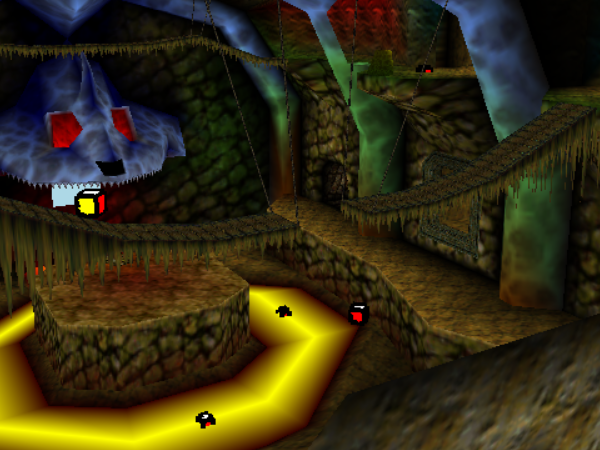
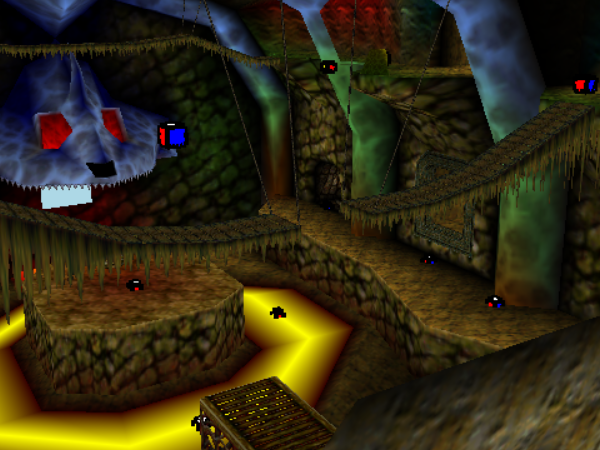
After bombing the wall, the intro cutscene starts to play, but just keeps hanging and locking up. The game doesn't hard crash anymore.
The textures for the platform are still missing.
|
Overview |
Dodongo's Cavern (OoT v1.0) |
|---|---|
|
|
Anime Files#
Filename |
Ddanh |
Ddan OoT v1.0 |
Notes |
|---|---|---|---|
anime_1_txt |
✔ |
✔ |
entrance tunnel |
anime_4_model |
✘ |
✔ |
left Dodongo eye |
anime_5_model |
✘ |
✔ |
right Dodongo eye |
anime_2_txt |
✔ |
✔ |
lava ground |
Ddanh already includes more references, only missing the anime models in Room 0.
The entrance tunnel features a day to night time transition in this version, but it's glitchy and doesn't seem to be properly implemented.
The lava ground around the central area now features an animated texture, although it also doesn't seem to be properly implemented yet.
The eyes of the Dodongo are still glowing, even before bombing.
Room 3#
Anime Files#
Filename |
Ddanh_noanime |
Ddan OoT v1.0 |
Notes |
|---|---|---|---|
anime_2_txt |
✔ |
✔ |
lava ground |
anime_3_model |
✔ |
✔ |
? |
anime_2_model |
✔ |
✔ |
? |
The lava in this room also features an animated texture now, but displays the same visual glitches as Room 0.
Actors#
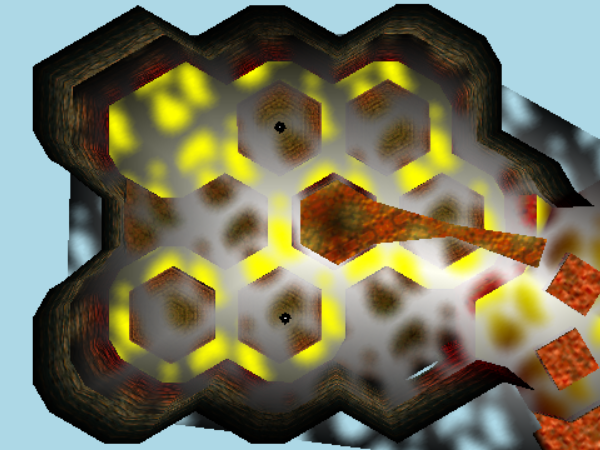
This version includes the two Lizalfos in the lower floor section, and they spawn on different platforms compared to the final:
|
Lizalfos |
Dodongo's Cavern (OoT v1.0) |
|---|---|
|
|
Actor |
Filename |
ID |
Object |
Variable |
ID |
Used |
|---|---|---|---|---|---|---|
0025 |
En_Zf |
Lizalfos & Dinolfos |
001B |
0500 |
✔ |
|
0025 |
En_Zf |
Lizalfos & Dinolfos |
001B |
0501 |
✔ |
Objects#
Object |
Filename |
ID |
Used |
|---|---|---|---|
002B |
object_ddan_objects |
Dodongo's Cavern Objects |
✔ |
001B |
object_zf |
Lizalfos & Dinolfos |
✔ |
TEST01_BAK
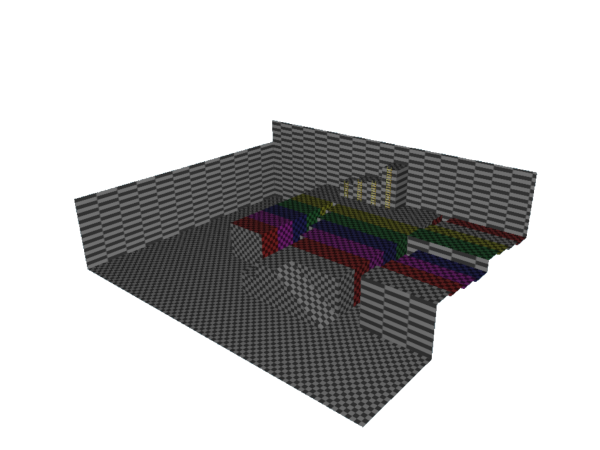
This is an earlier version of the TEST01 map. It's a smaller version of the test map that is found in the Master Quest Debug build and in the Japanese version of Majora's Mask. Like syotes and Spot04_OLD, Test01_BAK is missing the room_info file that contains the room header. Another peculiarity is that the scene header is missing the 0x15 command for "Sound Settings".
This map is also mentioned in the commit logs of z_ocarina2/src/spec. It was added to the game on 1997/05/28 by Makoto Sasaki.
Test01_BAK |
Test01 |
|---|---|
 |
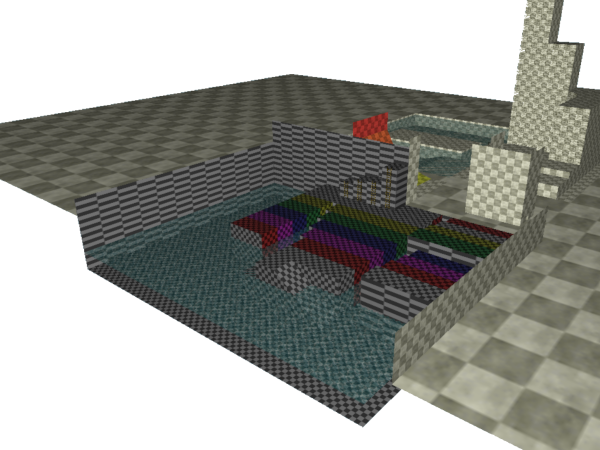 |
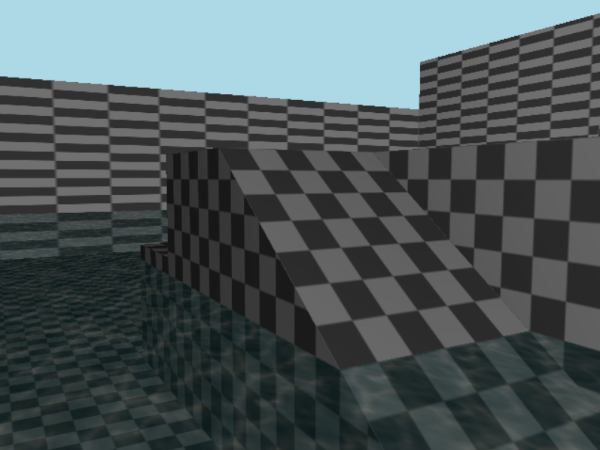
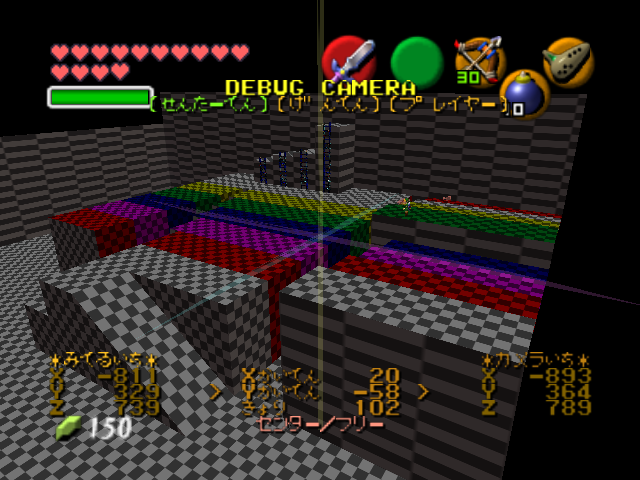
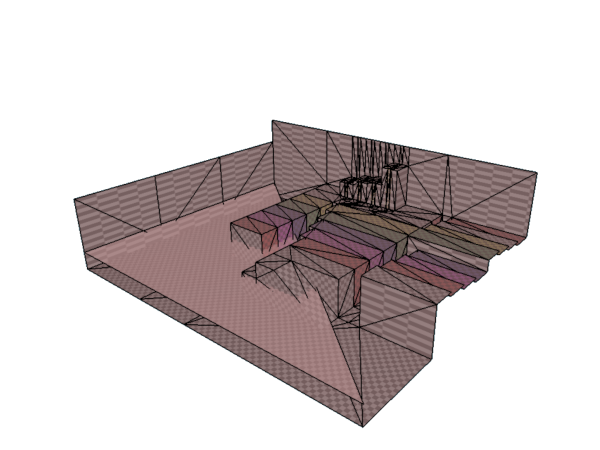
The ladders in this earlier version are completely modeled and functional, whereas Link cannot climb them in the other Test01 map versions.

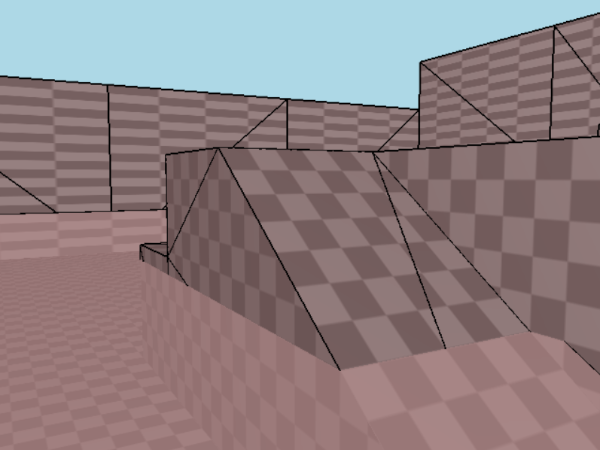
The collision header doesn't point to any water box entries, but instead features a mesh plane that is placed where the water box would be in the later version. The collision detection flag of this polygon is set up to let Link and the camera pass through it, but not projectiles like arrows. This also seems to point to an earlier method of how water surfaces were set up, similar to the collision layer inside the moat that can be seen in zelda_tool_rom.
Test01_BAK |
Test01 |
|---|---|
 |
 |
Various Images#
Test01
|
|
To do: |
(Source: Dark Linkaël)
64DD Test Dungeons
The leaked iQue files include small versions for almost all dungeons in the game. These files are not included in the n64dd_rom.spec file required for building the disk.
While their internal filenames use the suffix "_dd" or "_ddtes"(DD Test), these maps were small test maps created before shipping to retail to ensure all the DD hooks worked properly.
These rooms are miniature versions of their respective, larger dungeons, and hold all dungeons items required for those dungeons, including the Map, Compass, Navi hints, dungeon items, and enemies. Their exits lead to the boss rooms for their respective dungeon.
The leaked files also include all dungeon Minimaps for these versions, see Minimaps for more information.
Ydan_ddtes#
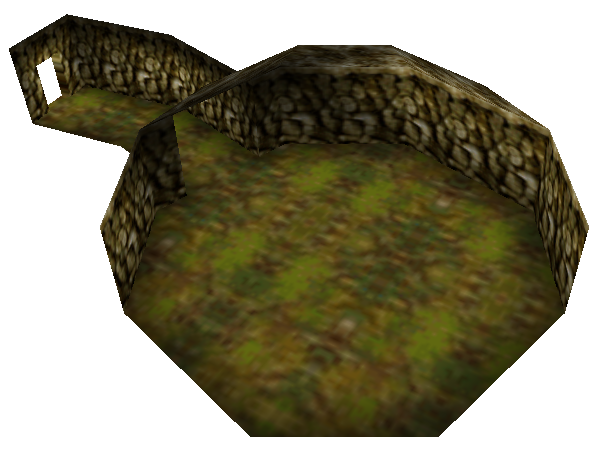
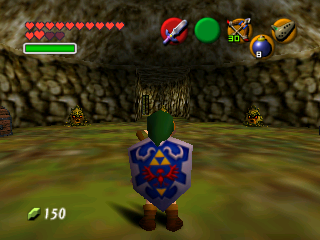
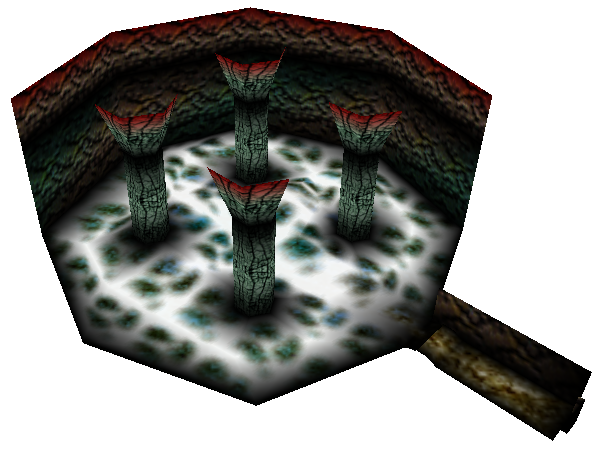
A small mini-dungeon of Inside the Deku Tree, consisting of two rooms. The entrance contains the three Hintnuts and chests with a Dungeon Map and Compass. The door leads to the boss battle against Queen Gohma.
Room 0#
Link's starting point in this map.
Overview |
Entrance |
|---|---|
 |
 |
Actor |
Filename |
ID |
Object |
Variable |
ID |
Used |
|---|---|---|---|---|---|---|
000A |
En_Box |
Treasure Chest |
000E |
0801 |
Compass |
✔ |
000A |
En_Box |
Treasure Chest |
000E |
0822 |
Dungeon Map |
✔ |
0192 |
En_Hintnuts |
Deku Scrubs |
0164 |
0001 |
First scrub to hit |
✔ |
0192 |
En_Hintnuts |
Deku Scrubs |
0164 |
0002 |
Second scrub to hit |
✔ |
0192 |
En_Hintnuts |
Deku Scrubs |
0164 |
9C03 |
Third scrub to hit, talks when caught |
✔ |
000A |
En_Box |
Treasure Chest |
000E |
10A3 |
Fairy Slingshot, Clear Flag |
✔ |
011B |
Elf_Msg |
Navi Message |
0001 |
8401 |
✔ |
|
011B |
Elf_Msg |
Navi Message |
0001 |
0502 |
✔ |
|
011B |
Elf_Msg |
Navi Message |
0001 |
0603 |
✔ |
|
0173 |
Elf_Msg2 |
Navi Information Spot (Targetable, Green) |
0001 |
3F04 |
✔ |
|
0173 |
Elf_Msg2 |
Navi Information Spot (Targetable, Green) |
0001 |
3F06 |
✔ |
Object |
Filename |
ID |
Used |
|---|---|---|---|
0063 |
object_ydan_objects |
Inside the Deku Tree Objects |
✔ |
000E |
object_box |
Treasure Chest |
✔ |
00B0 |
object_bdoor |
Boss Door |
✘ |
001E |
object_gol |
Gohma Larva |
✔ |
0164 |
object_hintnuts |
Deku Scrubs |
✔ |
Room 1#
Overview |
|---|
 |
Object |
Filename |
ID |
Used |
|---|---|---|---|
0063 |
object_ydan_objects |
Inside the Deku Tree Objects |
✔ |
000E |
object_box |
Treasure Chest |
✘ |
00B0 |
object_bdoor |
Boss Door |
✘ |
001E |
object_gol |
Gohma Larva |
✘ |
0164 |
object_hintnuts |
Deku Scrubs |
✘ |
Environment Settings#
|
|
To do: |
Exits#
Index |
Appear At |
From |
|---|---|---|
0209 |
Kokiri Forest |
Inside the Deku Tree |
040F |
Deku Tree Boss |
Inside the Deku Tree |
Ddanh_ddtes#
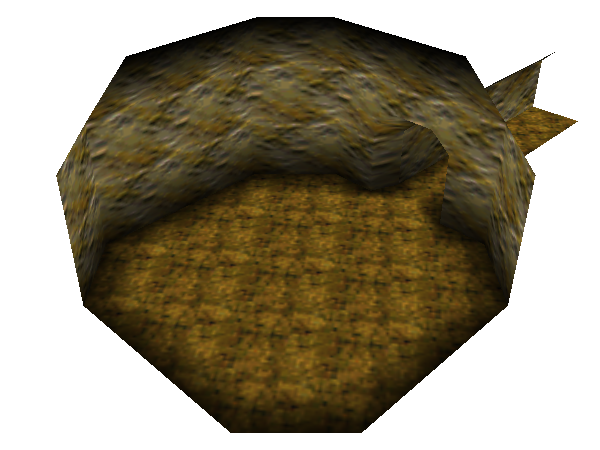
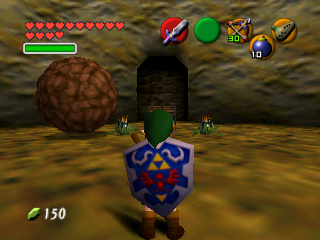
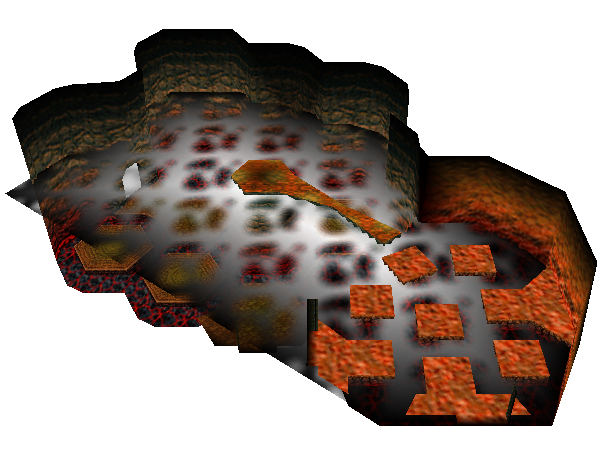
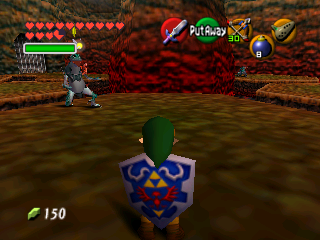
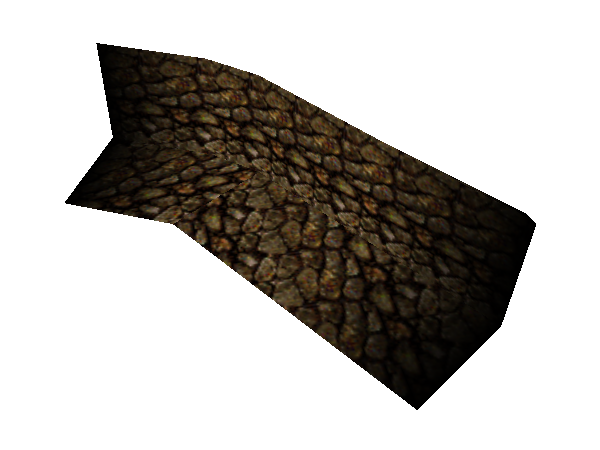
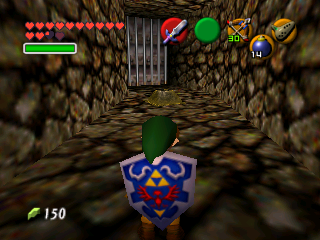
A small mini-dungeon of Dodongo's Cavern, consisting of four rooms.
Room 0#
Link's starting point in this map.
Overview |
Entrance |
|---|---|
 |
 |
Actor |
Filename |
ID |
Object |
Variable |
ID |
Used |
|---|---|---|---|---|---|---|
0130 |
En_Goroiwa |
Rolling Boulder |
011F |
0C00 |
Rolling Boulder |
✔ |
000A |
En_Box |
Treasure Chest |
000E |
0802 |
Compass |
✔ |
000A |
En_Box |
Treasure Chest |
000E |
0823 |
Dungeon Map |
✔ |
0059 |
Bg_Breakwall |
Bombable Wall |
018A |
000F |
Dodongo's Cavern Bombable Wall |
✔ |
004C |
En_Bombf |
Bomb Flower |
0031 |
FFFF |
Bomb Flower |
✔ |
004C |
En_Bombf |
Bomb Flower |
0031 |
FFFF |
Bomb Flower |
✔ |
Object |
Filename |
ID |
Used |
|---|---|---|---|
002B |
object_ddan_objects |
Dodongo's Cavern Objects |
✔ |
001B |
object_zf |
Lizalfos & Dinolfos |
✘ |
011F |
object_goroiwa |
Rolling Boulder |
✔ |
000E |
object_box |
Treasure Chest |
✔ |
018A |
object_bwall |
Dodongo’s Cavern Bombable Wall |
✔ |
0031 |
object_bombf |
Bomb Flower |
✔ |
Room 1#
Overview |
Lizalfos Battle |
|---|---|
 |
 |
Actor |
Filename |
ID |
Object |
Variable |
ID |
Used |
|---|---|---|---|---|---|---|
0025 |
En_Zf |
Lizalfos & Dinolfos |
001B |
FF00 |
Lizalfos |
✔ |
0025 |
En_Zf |
Lizalfos & Dinolfos |
001B |
FF01 |
Lizalfos |
✔ |
000A |
En_Box |
Treasure Chest |
000E |
1641 |
Bomb Bag, Clear Flag |
✔ |
Object |
Filename |
ID |
Used |
|---|---|---|---|
002B |
object_ddan_objects |
Dodongo's Cavern Objects |
✔ |
001B |
object_zf |
Lizalfos & Dinolfos |
✔ |
011F |
object_goroiwa |
Rolling Boulder |
✘ |
000E |
object_box |
Treasure Chest |
✔ |
018A |
object_bwall |
Dodongo’s Cavern Bombable Wall |
✘ |
0031 |
object_bombf |
Bomb Flower |
✘ |
Room 2#
Overview |
Room |
|---|---|
 |
 |
Actor |
Filename |
ID |
Object |
Variable |
ID |
Used |
|---|---|---|---|---|---|---|
012A |
Obj_Switch |
Dungeon Switch |
0003 |
0A00 |
Floor Switch |
✔ |
Object |
Filename |
ID |
Used |
|---|---|---|---|
002B |
object_ddan_objects |
Dodongo's Cavern Objects |
✔ |
001B |
object_zf |
Lizalfos & Dinolfos |
✘ |
011F |
object_goroiwa |
Rolling Boulder |
✘ |
000E |
object_box |
Treasure Chest |
✘ |
018A |
object_bwall |
Dodongo’s Cavern Bombable Wall |
✘ |
0031 |
object_bombf |
Bomb Flower |
✘ |
Room 3#
Overview |
|---|
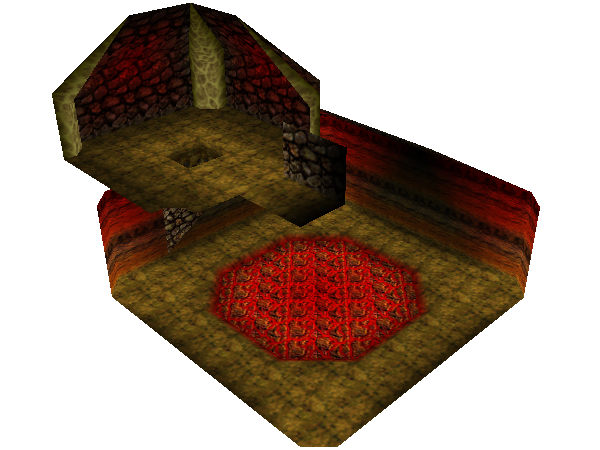 |
Object |
Filename |
ID |
Used |
|---|---|---|---|
002B |
object_ddan_objects |
Dodongo's Cavern Objects |
✔ |
Environment Settings#
|
|
To do: |
Exits#
Index |
Appear At |
From |
|---|---|---|
0242 |
Death Mountain Trail |
Dodongo's Cavern |
040B |
Dodongo's Cavern Boss |
Dodongo's Cavern |
Bdan_dd#
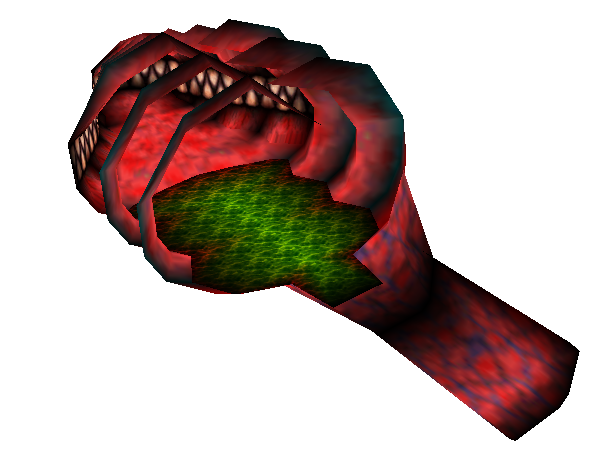
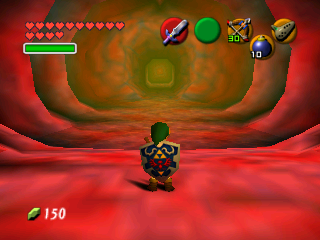
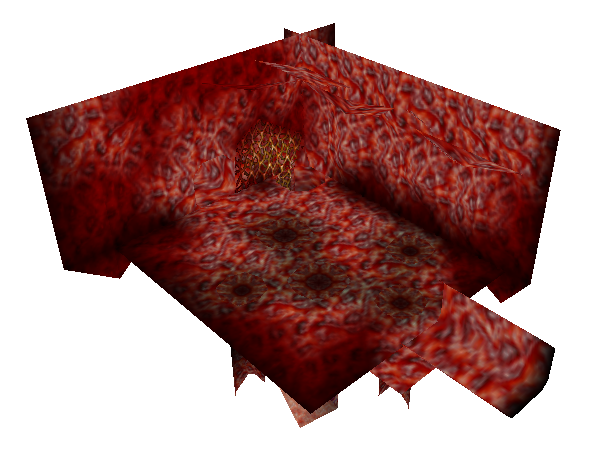
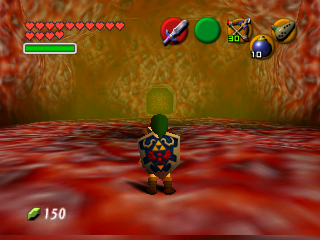
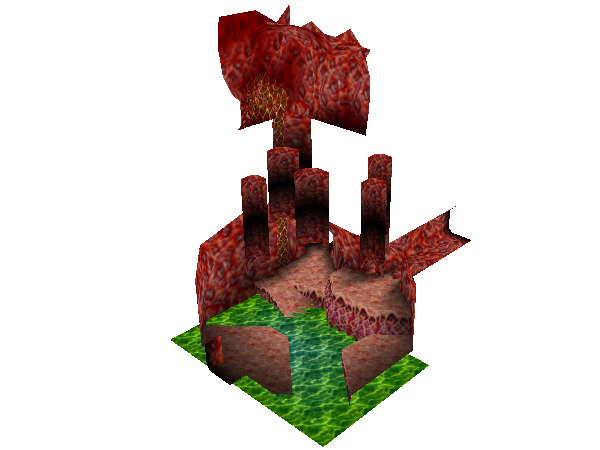
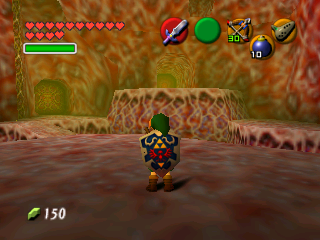
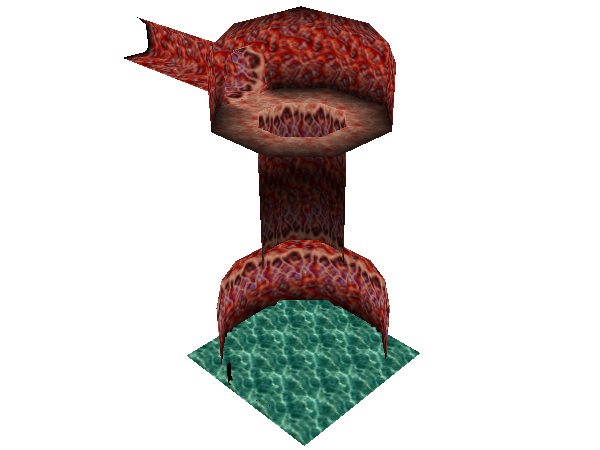
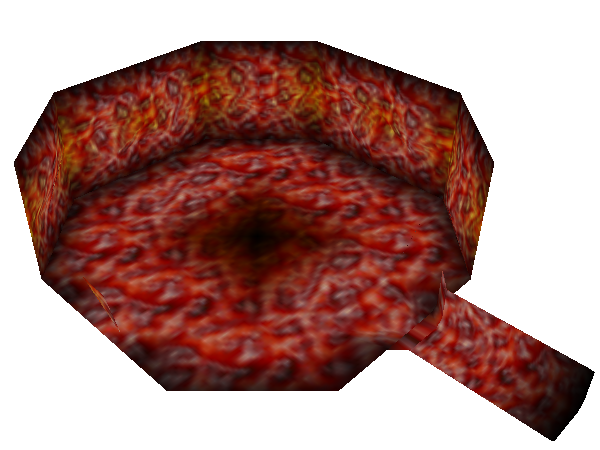
A small mini-dungeon of Jabu-Jabu's Belly, but most of its files are nulled. Only the individual files for the display lists remain, located in data/shape2/zelda_tool_scene/Bdan_dd.
The following images show a restoration of the whole scene, so everything is custom made, except for the display lists of the room mesh.
Room 0#
Overview |
Entrance |
|---|---|
 |
 |
Room 1#
Overview |
Room |
|---|---|
 |
 |
Room 2#
Overview |
Room |
|---|---|
 |
 |
Room 3#
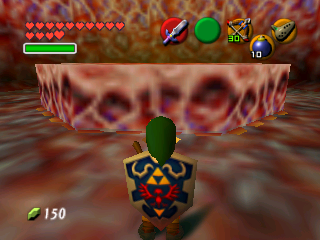
Overview |
Big Octo Battle |
|---|---|
 |
 |
Room 4#
Overview |
|---|
 |
Mori_dd#
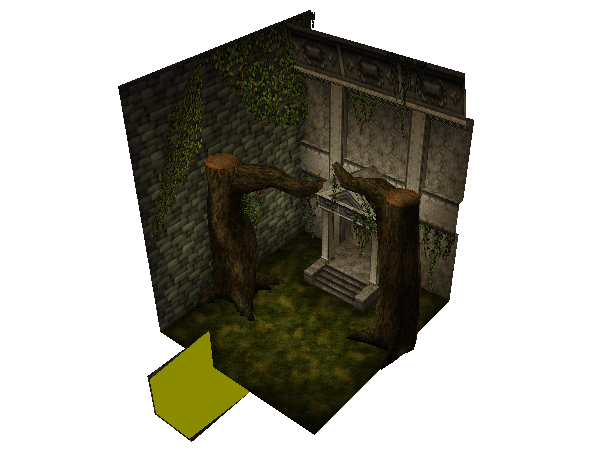
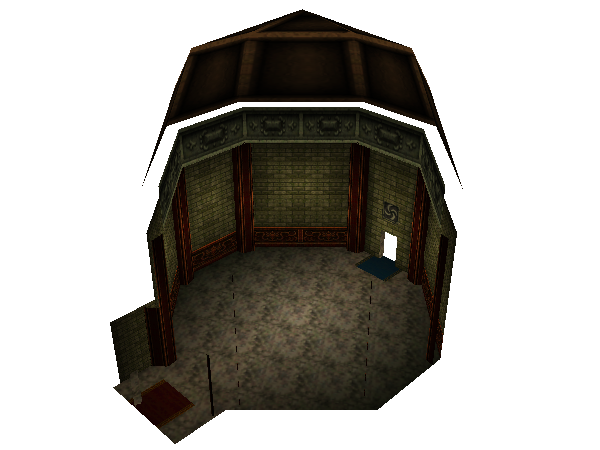
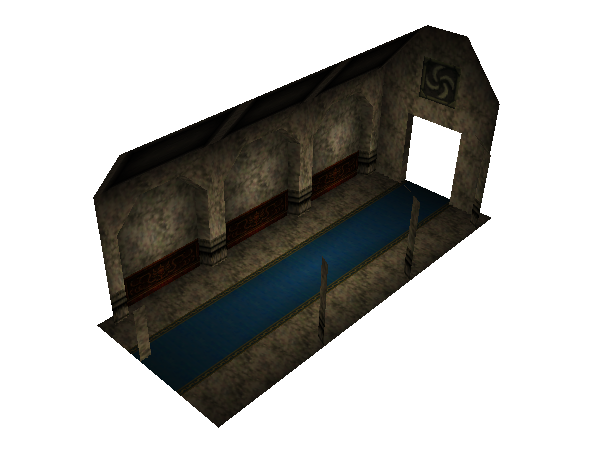
A small mini-dungeon of the Forest Temple, consisting of four rooms. It features a fight with Stalfos, and ends with fighting Phantom Ganon.
Room 0#
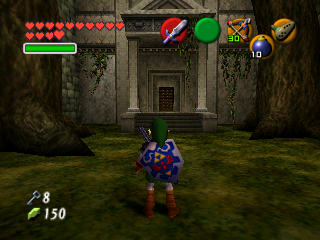
Link's starting point in this map.
Overview |
Entrance |
|---|---|
 |
 |
Actor |
Filename |
ID |
Object |
Variable |
ID |
Used |
|---|---|---|---|---|---|---|
000A |
En_Box |
Treasure Chest |
000E |
0804 |
Compass |
✔ |
000A |
En_Box |
Treasure Chest |
000E |
0823 |
Dungeon Map |
✔ |
Object |
Filename |
ID |
Used |
|---|---|---|---|
0073 |
object_mori_tex |
Forest Temple Textures |
✔ |
0072 |
object_mori_objects |
Forest Temple Objects |
✔ |
000E |
object_box |
Treasure Chest |
✔ |
Room 1#
Overview |
Stalfos Battle |
|---|---|
 |
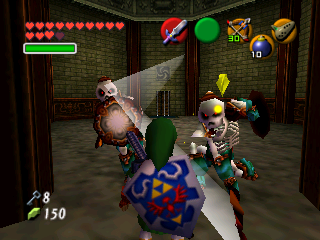 |
Actor |
Filename |
ID |
Object |
Variable |
ID |
Used |
|---|---|---|---|---|---|---|
0002 |
En_Test |
Stalfos |
0032 |
FFFF |
Rises from Ground, Mini-Boss Theme |
✔ |
0002 |
En_Test |
Stalfos |
0032 |
FFFF |
Rises from Ground, Mini-Boss Theme |
✔ |
000A |
En_Box |
Treasure Chest |
000E |
1082 |
Fairy Bow, Clear Flag |
✔ |
Object |
Filename |
ID |
Used |
|---|---|---|---|
0073 |
object_mori_tex |
Forest Temple Textures |
✔ |
0072 |
object_mori_objects |
Forest Temple Objects |
✔ |
000E |
object_box |
Treasure Chest |
✔ |
0090 |
object_efc_flash |
✘ |
|
0032 |
object_sk2 |
Stalfos |
✔ |
Room 2#
Overview |
Boss-Key Room |
|---|---|
 |
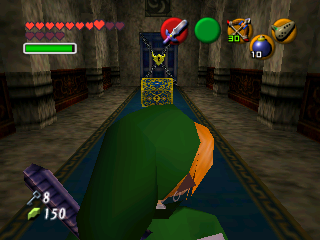 |
Actor |
Filename |
ID |
Object |
Variable |
ID |
Used |
|---|---|---|---|---|---|---|
000A |
En_Box |
Boss Key Treasure Chest |
000E |
27E1 |
Boss Key |
✔ |
Object |
Filename |
ID |
Used |
|---|---|---|---|
0073 |
object_mori_tex |
Forest Temple Textures |
✔ |
0072 |
object_mori_objects |
Forest Temple Objects |
✔ |
000E |
object_box |
Treasure Chest |
✔ |
00B0 |
object_bdoor |
Boss Door |
✔ |
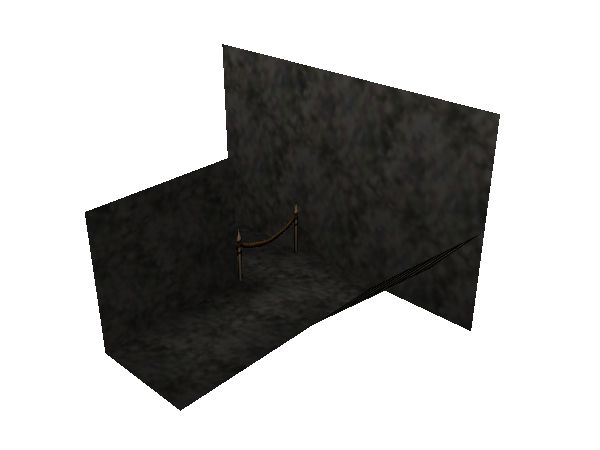
Room 3#
Overview |
|---|
 |
Object |
Filename |
ID |
Used |
|---|---|---|---|
0073 |
object_mori_tex |
Forest Temple Textures |
✔ |
0072 |
object_mori_objects |
Forest Temple Objects |
✔ |
000E |
object_box |
Treasure Chest |
✔ |
00B0 |
object_bdoor |
Boss Door |
✔ |
Environment Settings#
|
|
To do: |
Exits#
Index |
Appear At |
From |
|---|---|---|
0215 |
Sacred Forest Meadow |
Forest Temple |
000C |
Forest Temple Boss |
Forest Temple |
Hidan_dd#
|
|
To do: |
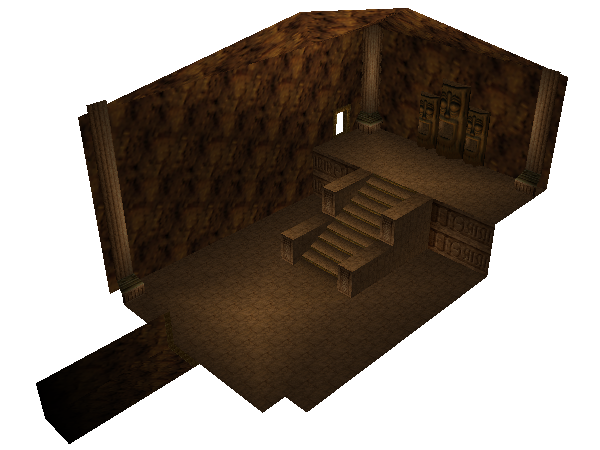
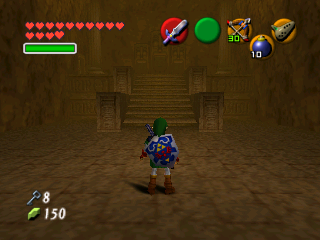
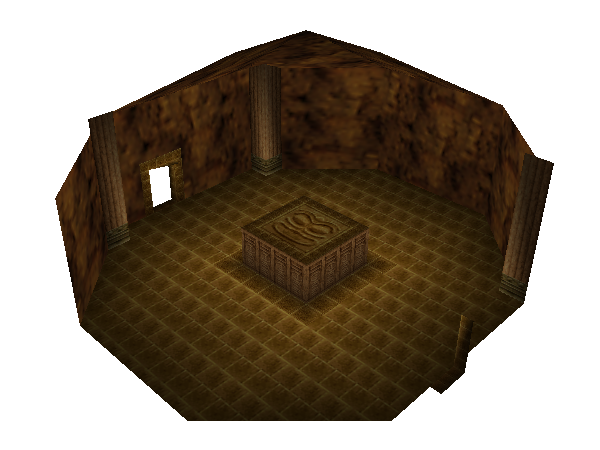
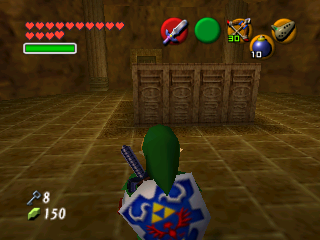
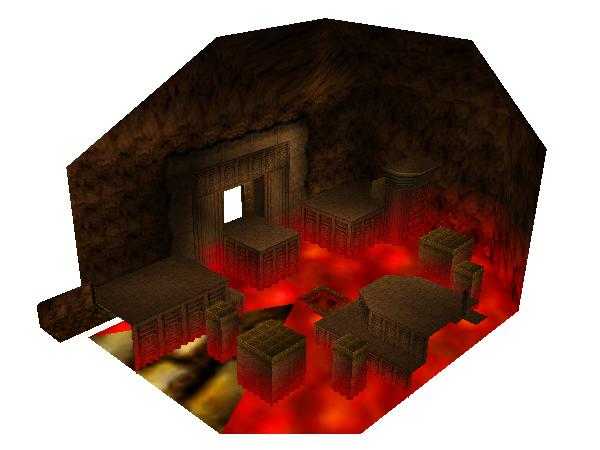
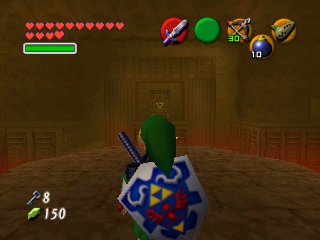
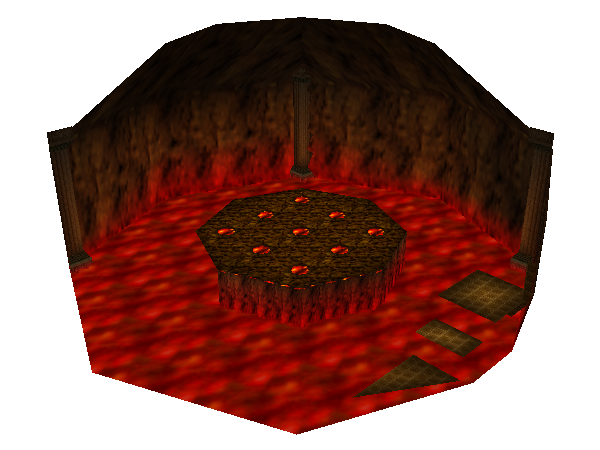
A small mini-dungeon of the Fire Temple, but most of its files are nulled. Only the individual files for the display lists remain, located in data/shape2/zelda_tool_scene/Hidan_dd.
The following images show a restoration of the whole scene, so everything is custom made, except for the display lists of the room mesh.
Room 0#
Link's starting point in this map.
Overview |
Entrance |
|---|---|
 |
 |
Room 2#
Overview |
Flame Dancer Battle |
|---|---|
 |
 |
Room 1#
Overview |
Boss-Key Room |
|---|---|
 |
 |
Room 3#
Overview |
|---|
 |
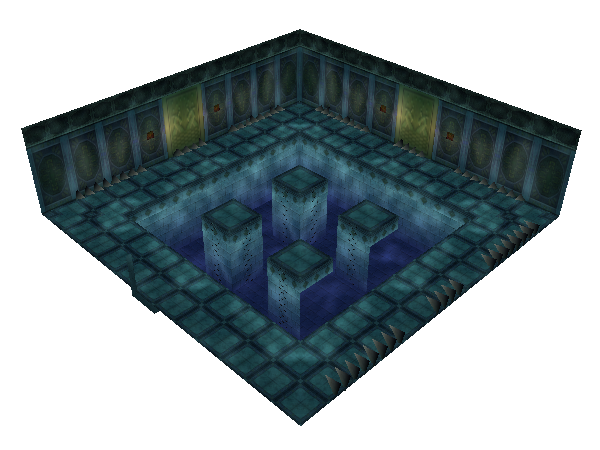
Mizusin_dd#
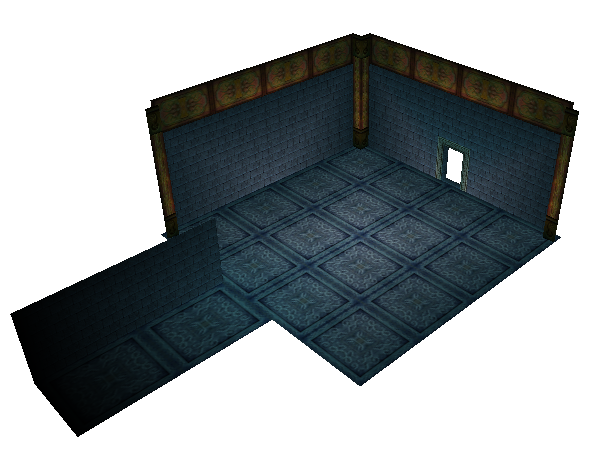
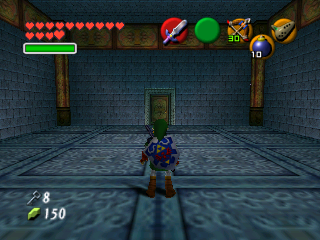
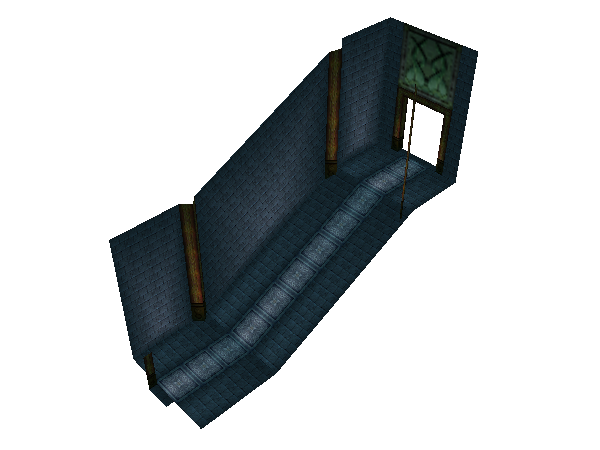
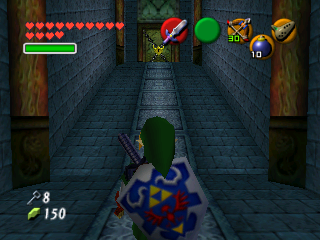
A small mini-dungeon of the Water Temple, but most of its files are nulled. Only the individual files for the display lists remain, located in data/shape2/zelda_tool_scene/Mizusin_dd.
The following images show a restoration of the whole scene, so everything is custom made, except for the display lists of the room mesh.
Room 2#
Link's starting point in this map.
Overview |
Entrance |
|---|---|
 |
 |
Room 1#
Dark Link Battle |
|---|
 |
Room 0#
Overview |
Boss-Key Room |
|---|---|
 |
 |
Room 3#
Overview |
|---|
 |
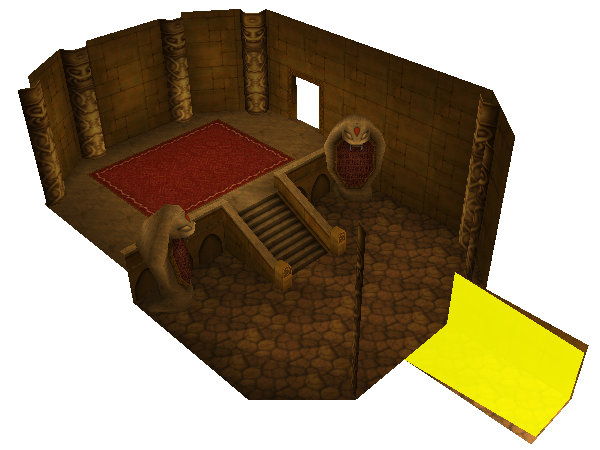
Jyasinzou_dd#
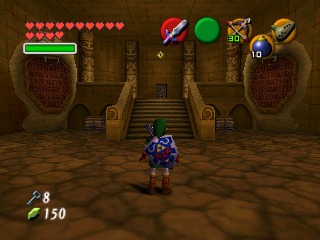
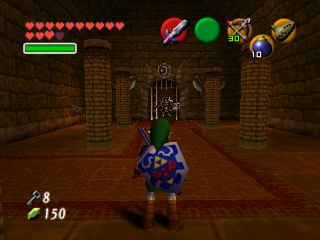
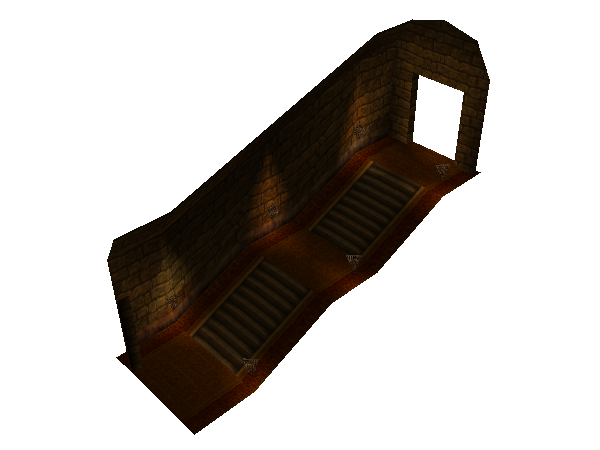
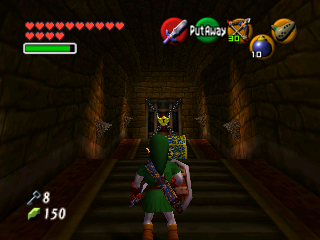
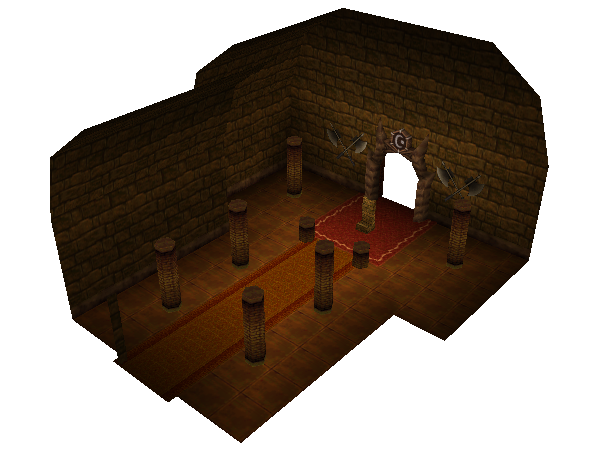
A small mini-dungeon of the Spirit Temple, consisting of four rooms. The entrance contains chests with a Dungeon Map and Compass, and there are three fake doors that attack Link at the top of the entrance. The rightmost door leads to the mini-boss from the final game's Spirit Temple.
Room 0#
Link's starting point in this map.
Overview |
Entrance |
|---|---|
 |
 |
Actor |
Filename |
ID |
Object |
Variable |
ID |
Used |
|---|---|---|---|---|---|---|
008A |
En_Vm |
Beamos |
008B |
0501 |
Beamos |
✔ |
008A |
En_Vm |
Beamos |
008B |
0501 |
Beamos |
✔ |
01C1 |
Door_Killer |
Door Mimic |
018E |
FF00 |
Door Mimic |
✔ |
01C1 |
Door_Killer |
Door Mimic |
018E |
FF00 |
Door Mimic |
✔ |
0002 |
En_Test |
Stalfos |
0032 |
0003 |
Stalfos, Drops From Sky on Approach |
✔ |
011D |
En_Tubo_Trap |
Flying Pot |
0003 |
00E3 |
Flying Pot |
✔ |
011D |
En_Tubo_Trap |
Flying Pot |
0003 |
00E4 |
Flying Pot |
✔ |
011D |
En_Tubo_Trap |
Flying Pot |
0003 |
00E5 |
Flying Pot |
✔ |
011D |
En_Tubo_Trap |
Flying Pot |
0003 |
00E6 |
Flying Pot |
✔ |
000A |
En_Box |
Treasure Chest |
000E |
36A1 |
Silver Gauntlets, Switch Flag |
✔ |
012A |
Obj_Switch |
Dungeon Switch |
0003 |
0102 |
Yellow Eye Switch |
✔ |
000A |
En_Box |
Treasure Chest |
000E |
0803 |
Compass |
✔ |
000A |
En_Box |
Treasure Chest |
000E |
0824 |
Dungeon Map |
✔ |
Object |
Filename |
ID |
Used |
|---|---|---|---|
00F1 |
object_jya_obj |
Spirit Temple Objects |
✔ |
016C |
object_jya_iron |
Destructable Iron Knuckle Objects |
✘ |
00B0 |
object_bdoor |
Boss Door |
✘ |
016D |
object_jya_door |
Spirit Temple Door & Shutter |
✔ |
018E |
object_door_killer |
Door Mimic |
✔ |
008B |
object_vm |
Beamos |
✔ |
0032 |
object_sk2 |
Stalfos |
✔ |
000E |
object_box |
Treasure Chest |
✔ |
0090 |
object_efc_flash |
Effect - Flash |
✘ |
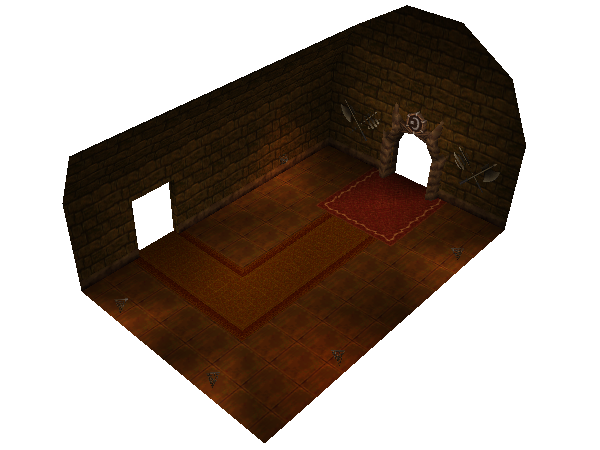
Room 2#
Overview |
Room |
|---|---|
 |
 |
Actor |
Filename |
ID |
Object |
Variable |
ID |
Used |
|---|---|---|---|---|---|---|
0169 |
Bg_Jya_Ironobj |
Iron Knuckle Throne & Columns |
016C |
0000 |
Iron Knuckle Column |
✔ |
0169 |
Bg_Jya_Ironobj |
Iron Knuckle Throne & Columns |
016C |
0000 |
Iron Knuckle Column |
✔ |
0169 |
Bg_Jya_Ironobj |
Iron Knuckle Throne & Columns |
016C |
0000 |
Iron Knuckle Column |
✔ |
0169 |
Bg_Jya_Ironobj |
Iron Knuckle Throne & Columns |
016C |
0000 |
Iron Knuckle Column |
✔ |
0169 |
Bg_Jya_Ironobj |
Iron Knuckle Throne & Columns |
016C |
0000 |
Iron Knuckle Column |
✔ |
0169 |
Bg_Jya_Ironobj |
Iron Knuckle Throne & Columns |
016C |
0000 |
Iron Knuckle Column |
✔ |
0169 |
Bg_Jya_Ironobj |
Iron Knuckle Throne & Columns |
016C |
0001 |
Iron Knuckle Throne |
✔ |
0113 |
En_Ik |
Iron Knuckle |
0106 |
FF01 |
Iron Knuckle ( Field Enemy ) |
✔ |
000A |
En_Box |
Treasure Chest |
000E |
1562 |
Mirror Shield, Clear Flag |
✔ |
Object |
Filename |
ID |
Used |
|---|---|---|---|
00F1 |
object_jya_obj |
Spirit Temple Objects |
✔ |
016C |
object_jya_iron |
Destructable Iron Knuckle Objects |
✘ |
00B0 |
object_bdoor |
Boss Door |
✘ |
016D |
object_jya_door |
Spirit Temple Door & Shutter |
✔ |
0106 |
object_ik |
Iron Knuckle |
✔ |
000E |
object_box |
Treasure Chest |
✔ |
Room 1#
Overview |
Room |
|---|---|
 |
 |
Actor |
Filename |
ID |
Object |
Variable |
ID |
Used |
|---|---|---|---|---|---|---|
000A |
En_Box |
Treasure Chest |
000E |
27F4 |
Boss Key |
✔ |
Object |
Filename |
ID |
Used |
|---|---|---|---|
00F1 |
object_jya_obj |
Spirit Temple Objects |
✔ |
016C |
object_jya_iron |
Destructable Iron Knuckle Objects |
✘ |
00B0 |
object_bdoor |
Boss Door |
✔ |
016D |
object_jya_door |
Spirit Temple Door & Shutter |
✔ |
000E |
object_box |
Treasure Chest |
✔ |
0090 |
object_efc_flash |
Effect - Flash |
✘ |
Room 3#
Overview |
|---|
 |
Object |
Filename |
ID |
Used |
|---|---|---|---|
00F1 |
object_jya_obj |
Spirit Temple Objects |
✔ |
016C |
object_jya_iron |
Destructable Iron Knuckle Objects |
✘ |
00B0 |
object_bdoor |
Boss Door |
✔ |
016D |
object_jya_door |
Spirit Temple Door & Shutter |
✔ |
Environment Settings#
|
|
To do: |
Exits#
Index |
Appear At |
From |
|---|---|---|
01E1 |
Desert Colossus |
Spirit Temple |
008D |
Spirit Temple Boss |
Spirit Temple |
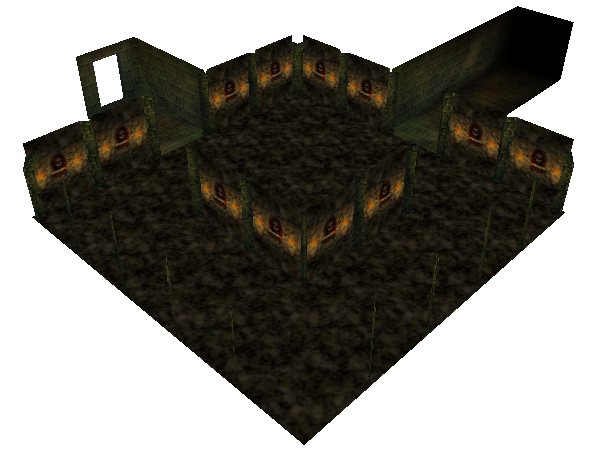
Hakadan_dd#
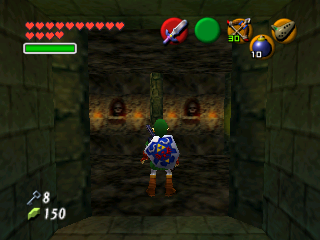
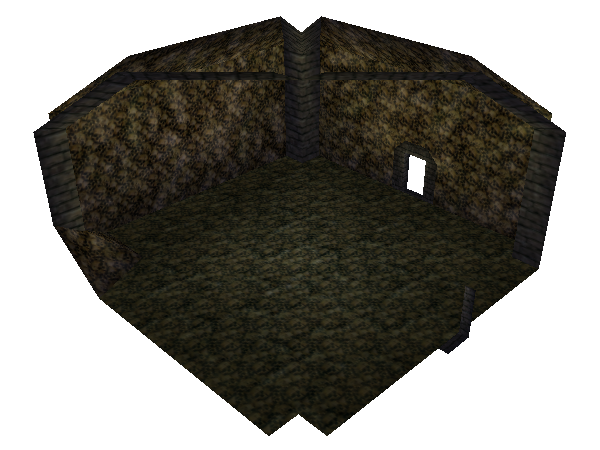
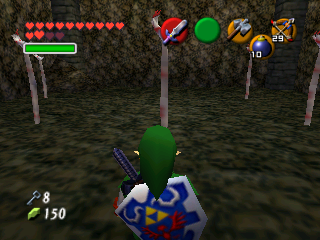
A small mini-dungeon of the Shadow Temple, consisting of four rooms.
Room 0#
Link's starting point in this map.
Overview |
Entrance |
|---|---|
 |
 |
Actor |
Filename |
ID |
Object |
Variable |
ID |
Used |
|---|---|---|---|---|---|---|
01C1 |
Door_Killer |
Treasure Chest |
018E |
FF00 |
Door Mimic |
✔ |
01C1 |
Door_Killer |
Treasure Chest |
018E |
FF00 |
Door Mimic |
✔ |
0090 |
En_Rd |
Redead & Gibdo |
0098 |
7F02 |
Redead |
✔ |
0090 |
En_Rd |
Redead & Gibdo |
0098 |
7F02 |
Redead |
✔ |
005E |
Obj_Syokudai |
Torchstand |
00A4 |
2400 |
Torchstand |
✔ |
012A |
Obj_Switch |
Dungeon Switch |
0003 |
0102 |
Eye Switch |
✔ |
012A |
Obj_Switch |
Dungeon Switch |
0003 |
0202 |
Eye Switch |
✔ |
012A |
Obj_Switch |
Dungeon Switch |
0003 |
0382 |
Frozen Eye Switch |
✔ |
000A |
En_Box |
Treasure Chest |
000E |
3802 |
Compass |
✔ |
000A |
En_Box |
Treasure Chest |
000E |
3823 |
Dungeon Map |
✔ |
Object |
Filename |
ID |
Used |
|---|---|---|---|
0069 |
object_haka_objects |
Shadow Temple Objects |
✔ |
00B0 |
object_bdoor |
Boss Door |
✘ |
0187 |
object_haka_door |
Shadow Temple Door & Shutter |
✔ |
000E |
object_box |
Treasure Chest |
✔ |
0090 |
object_efc_flash |
Effect - Flash |
✘ |
0098 |
object_rd |
Redead |
✔ |
018E |
object_door_killer |
Door Mimic |
✔ |
00A4 |
object_syokudai |
Torchstand |
✔ |
Room 2#
Overview |
Dead Hand Battle |
|---|---|
 |
 |
Actor |
Filename |
ID |
Object |
Variable |
ID |
Used |
|---|---|---|---|---|---|---|
00A5 |
En_Dha |
Dead Hand's Hands |
00A6 |
FFFF |
Dead Hand's Hand |
✔ |
00A5 |
En_Dha |
Dead Hand's Hands |
00A6 |
FFFF |
Dead Hand's Hand |
✔ |
00A5 |
En_Dha |
Dead Hand's Hands |
00A6 |
FFFF |
Dead Hand's Hand |
✔ |
00A5 |
En_Dha |
Dead Hand's Hands |
00A6 |
FFFF |
Dead Hand's Hand |
✔ |
00A5 |
En_Dha |
Dead Hand's Hands |
00A6 |
FFFF |
Dead Hand's Hand |
✔ |
00A4 |
En_Dh |
Dead Hand |
00A6 |
FFFF |
Dead Hand |
✔ |
000A |
En_Box |
Treasure Chest |
000E |
15E1 |
Hover Boots, Clear Flag |
✔ |
Object |
Filename |
ID |
Used |
|---|---|---|---|
0069 |
object_haka_objects |
Shadow Temple Objects |
✔ |
00B0 |
object_bdoor |
Boss Door |
✘ |
0187 |
object_haka_door |
Shadow Temple Door & Shutter |
✔ |
000E |
object_box |
Treasure Chest |
✔ |
0090 |
object_efc_flash |
Effect - Flash |
✘ |
00A6 |
object_dh |
Dead Hand & Hands |
✔ |
Room 1#
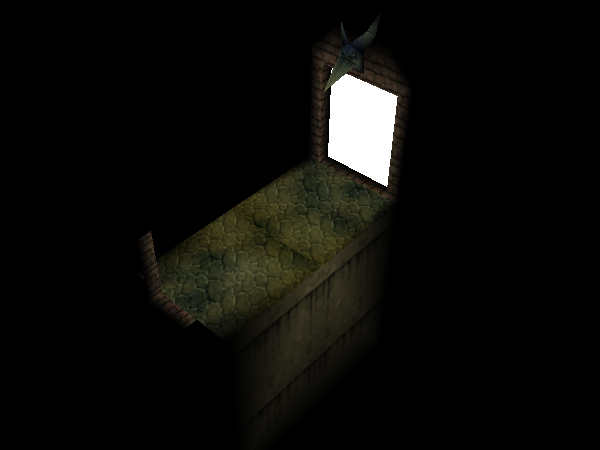
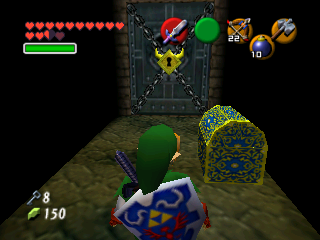
Overview |
Boss-Key Room |
|---|---|
 |
 |
Actor |
Filename |
ID |
Object |
Variable |
ID |
Used |
|---|---|---|---|---|---|---|
01B4 |
Bg_Gnd_Darkmeiro |
Ganondorf Shadow Trial Invisible Path |
0179 |
FF01 |
✔ |
|
01D1 |
Obj_Timeblock |
Time Block |
0190 |
38FF |
✔ |
|
01D1 |
Obj_Timeblock |
Time Block |
0190 |
38FF |
✔ |
|
000A |
En_Box |
Treasure Chest |
000E |
27E4 |
Boss Key |
✔ |
Object |
Filename |
ID |
Used |
|---|---|---|---|
0069 |
object_haka_objects |
Shadow Temple Objects |
✔ |
00B0 |
object_bdoor |
Boss Door |
✔ |
0187 |
object_haka_door |
Shadow Temple Door & Shutter |
✔ |
000E |
object_box |
Treasure Chest |
✔ |
0090 |
object_efc_flash |
Effect - Flash |
✘ |
0190 |
object_timeblock |
Time Block |
✔ |
00A8 |
object_efc_tw |
Time Block Disappearance Effect |
✔ |
0179 |
object_demo_kekkai |
Inside Ganon's Castle Objects |
✔ |
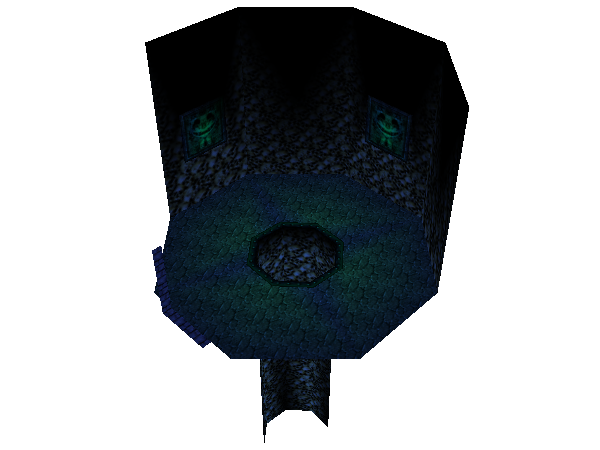
Room 3#
Overview |
|---|
 |
Object |
Filename |
ID |
Used |
|---|---|---|---|
0069 |
object_haka_objects |
Shadow Temple Objects |
✔ |
00B0 |
object_bdoor |
Boss Door |
✔ |
0187 |
object_haka_door |
Shadow Temple Door & Shutter |
✘ |
Environment Settings#
|
|
To do: |
Exits#
Index |
Appear At |
From |
|---|---|---|
0205 |
Kakariko Graveyard |
Shadow Temple |
0413 |
Shadow Temple Boss |
Shadow Temple |
Hakadan_ch_dd#
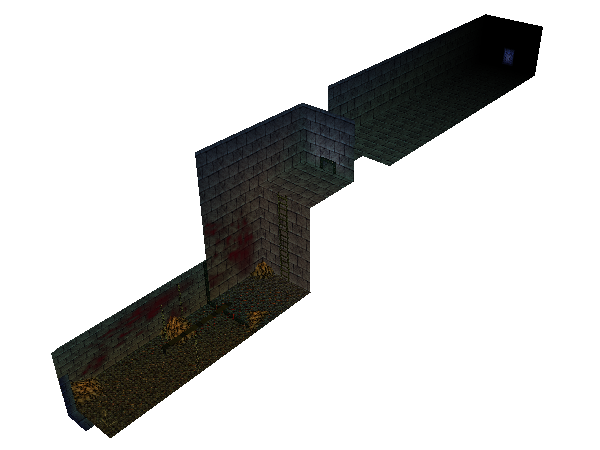
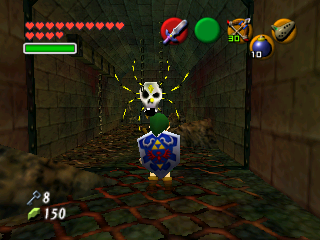
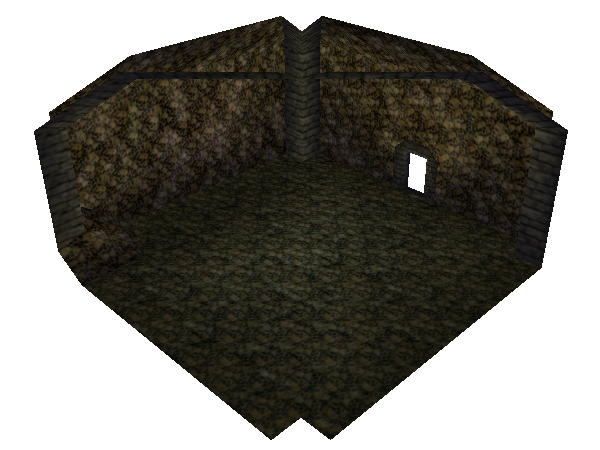
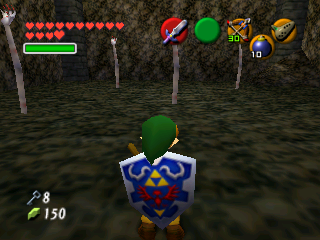
A small mini-dungeon of the Bottom of the Well, consisting of two rooms.
Room 0#
Link's starting point in this map.
Overview |
Entrance |
|---|---|
 |
 |
Actor |
Filename |
ID |
Object |
Variable |
ID |
Used |
|---|---|---|---|---|---|---|
0037 |
En_St |
Skulltula |
0024 |
0001 |
Skulltula |
✔ |
Object |
Filename |
ID |
Used |
|---|---|---|---|
008D |
object_hakach_objects |
Bottom of the Well Objects |
✔ |
0187 |
object_haka_door |
Shadow Temple Door & Shutter |
✔ |
0024 |
object_st |
Skulltula |
✔ |
Room 1#
Overview |
Room |
|---|---|
 |
 |
Actor |
Filename |
ID |
Object |
Variable |
ID |
Used |
|---|---|---|---|---|---|---|
000A |
En_Box |
Treasure Chest |
000E |
1141 |
Lens of Truth, Clear Flag |
✔ |
00A4 |
En_Dh |
Dead Hand |
00A6 |
FFFF |
Dead Hand |
✔ |
00A5 |
En_Dha |
Dead Hand's Hands |
00A6 |
FFFF |
Dead Hand's Hand |
✔ |
00A5 |
En_Dha |
Dead Hand's Hands |
00A6 |
FFFF |
Dead Hand's Hand |
✔ |
00A5 |
En_Dha |
Dead Hand's Hands |
00A6 |
FFFF |
Dead Hand's Hand |
✔ |
00A5 |
En_Dha |
Dead Hand's Hands |
00A6 |
FFFF |
Dead Hand's Hand |
✔ |
00A5 |
En_Dha |
Dead Hand's Hands |
00A6 |
FFFF |
Dead Hand's Hand |
✔ |
Object |
Filename |
ID |
Used |
|---|---|---|---|
008D |
object_hakach_objects |
Bottom of the Well Objects |
✔ |
0187 |
object_haka_door |
Shadow Temple Door & Shutter |
✔ |
0098 |
object_rd |
Redead |
✘ |
00A6 |
object_dh |
Dead Hand & Hands |
✔ |
000E |
object_box |
Treasure Chest |
✔ |
0090 |
object_efc_flash |
Effect - Flash |
✘ |
Environment Settings#
|
|
To do: |
Exits#
Index |
Appear At |
From |
|---|---|---|
02A6 |
Kakariko Village |
Bottom of the Well |
Other 64DD Maps
|
|
To do: |
Z2_DD_IKE#
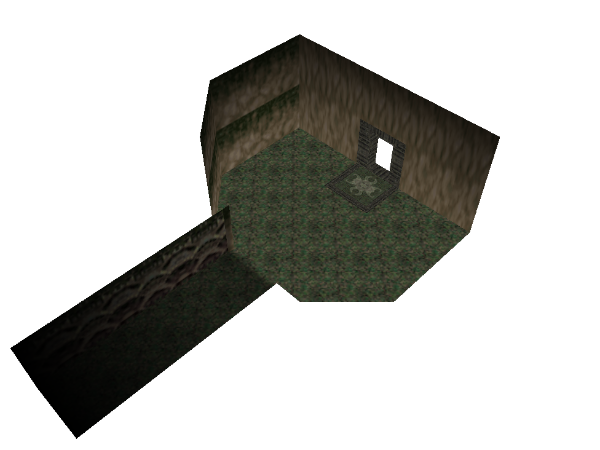
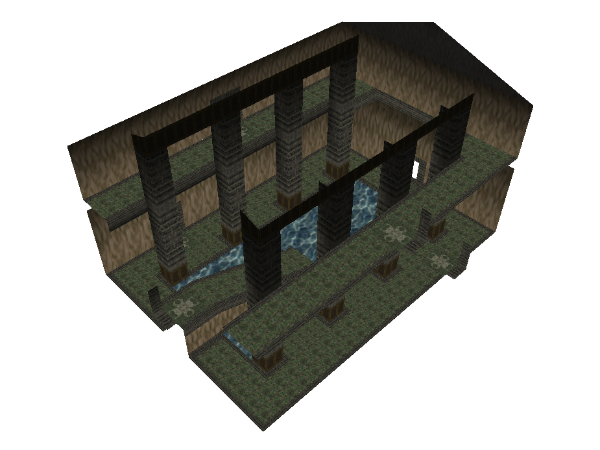
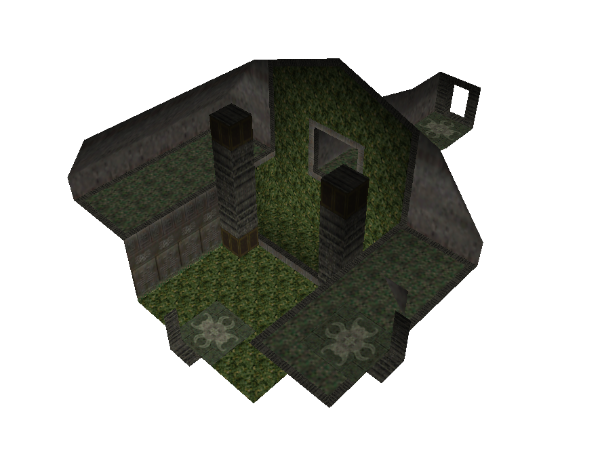
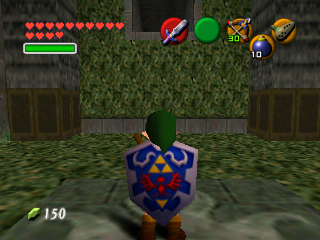
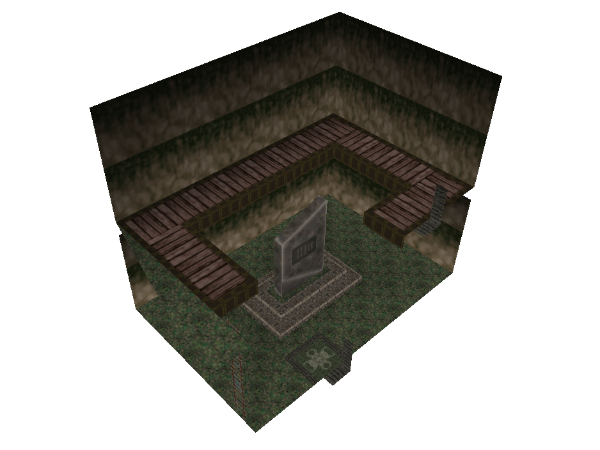
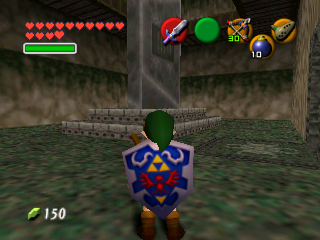
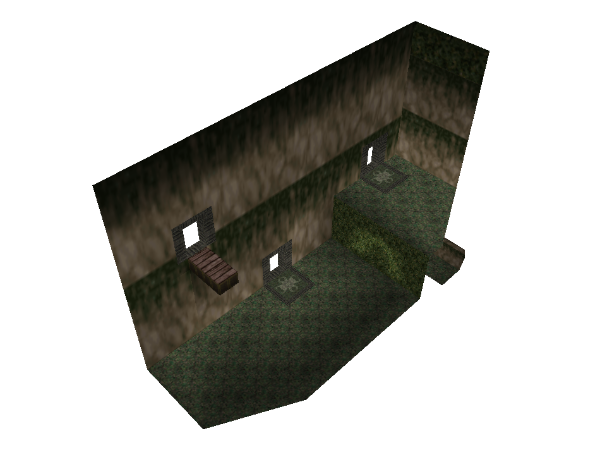
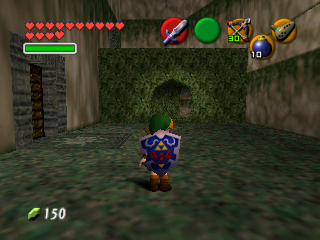
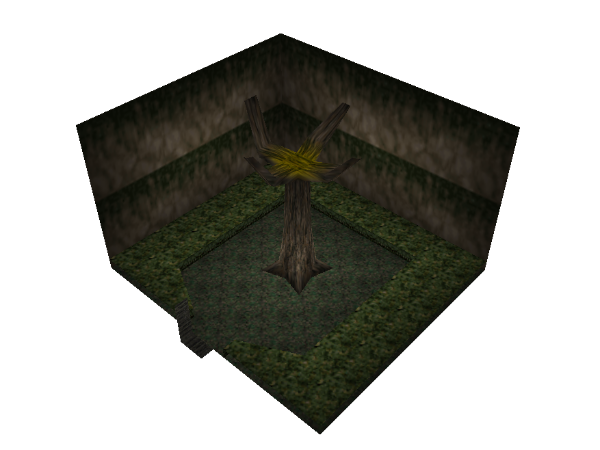
This is an early version of the Swamp Spiderhouse from Majora's Mask, consisting of 6 rooms. "IKE" may translate to "pond".
According to commit logs in z_ocarina2/src/n64dd_rom.spec, this map was added to the game on May 22nd, 2000.
It's unknown why it is included as an Ocarina of Time map intended to be loaded with the DD. One thing to note, however, is that it includes "ydan_show.o." Ydan is the name of the Deku Tree. It also uses the Deku Tree's music, the entrance of the map exits out of the Deku Tree into Kokiri Forest, and the very end of the map exits out into Gohma's Lair, implying that it was meant to replace the Deku Tree's dungeon somehow.
In Majora's Mask this map was renamed to Z2_KINSTA1, meaning Gold Skulltula 1.
(Source: Restoration: Zel)
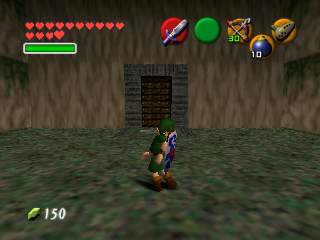
Layout#
Room 0#
Link's starting point in this map.
Overview |
Entrance |
|---|---|
 |
 |
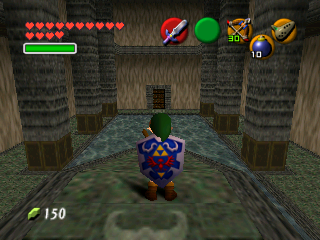
Room 1#
Overview |
Room |
|---|---|
 |
 |
Room 2#
Overview |
Room |
|---|---|
 |
 |
Room 3#
Overview |
Room |
|---|---|
 |
 |
Room 4#
Overview |
Room |
|---|---|
 |
 |
Room 5#
Overview |
|---|
 |
Environment Settings#
|
|
To do: |
Exits#
|
|
To do: |
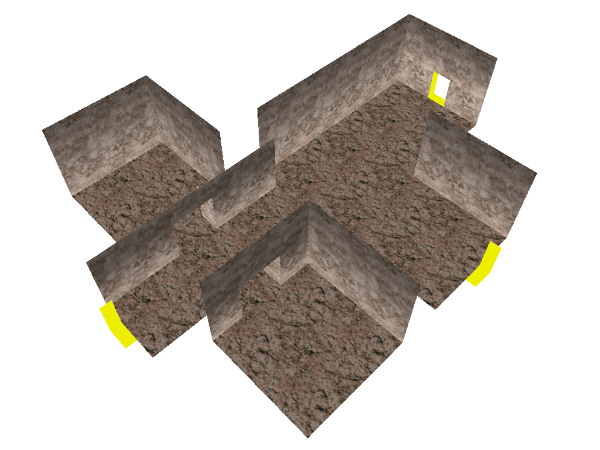
Z2_ReDead#
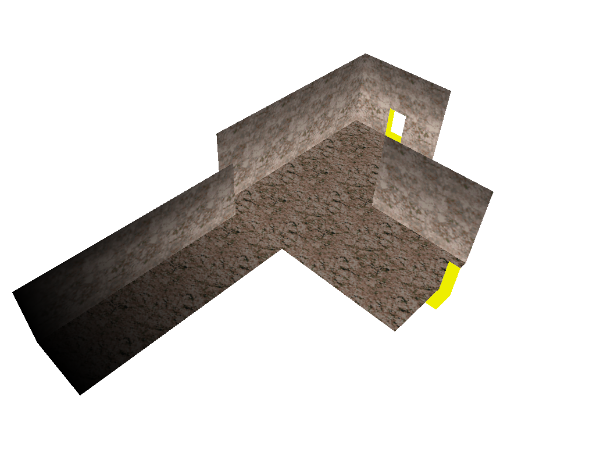
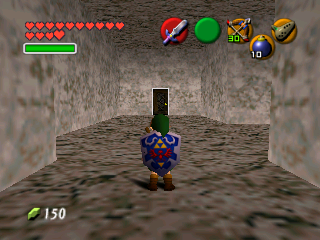
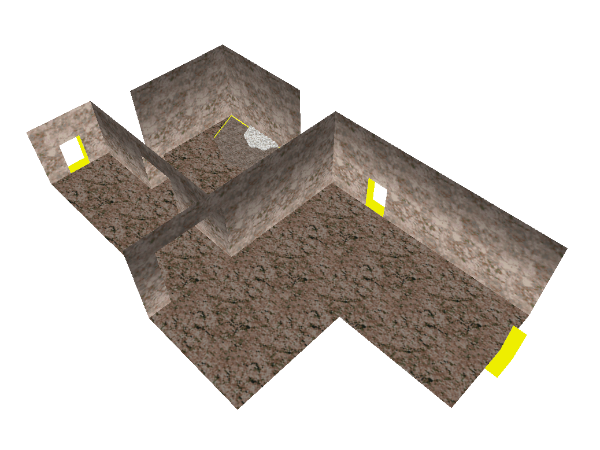
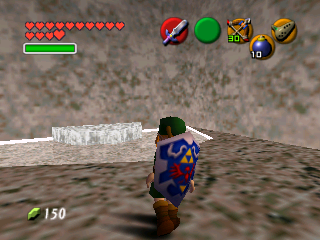
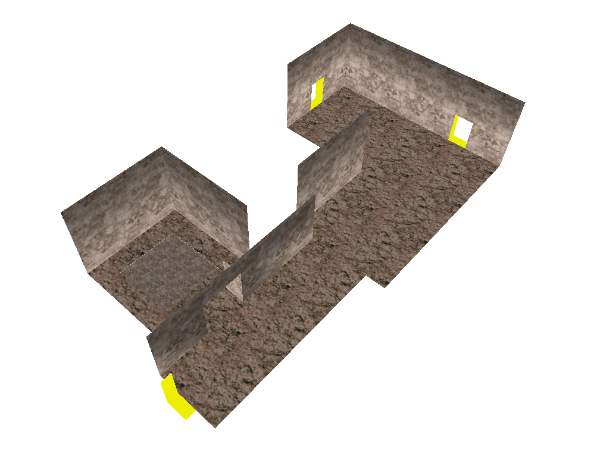
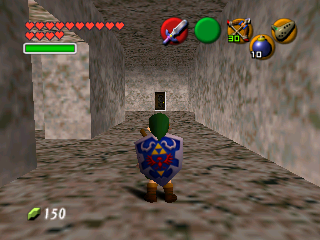
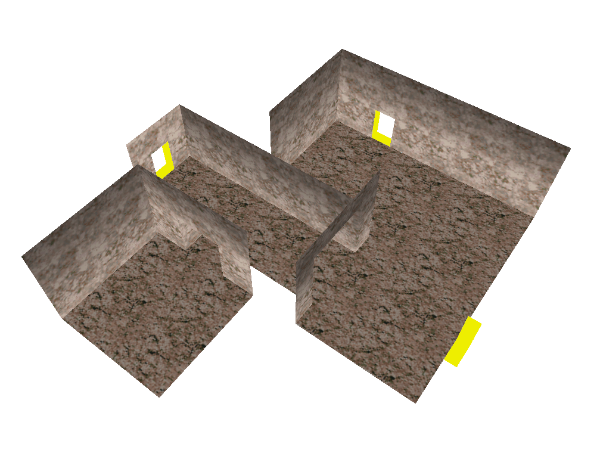
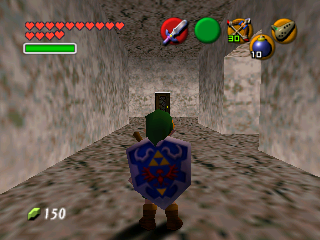
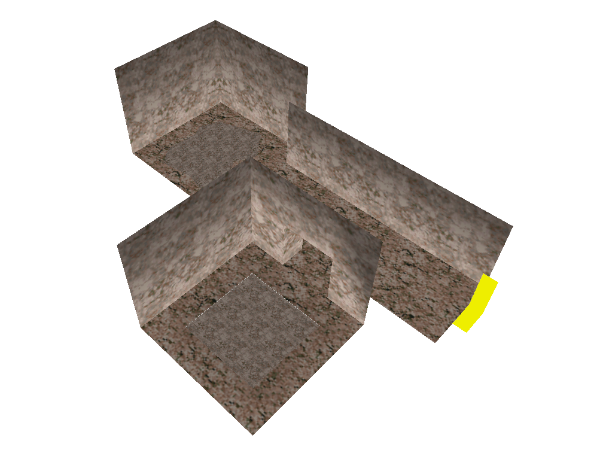
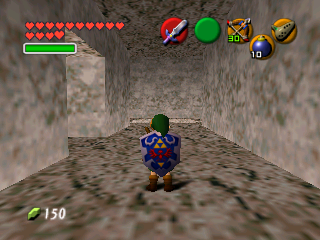
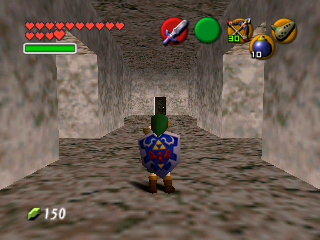
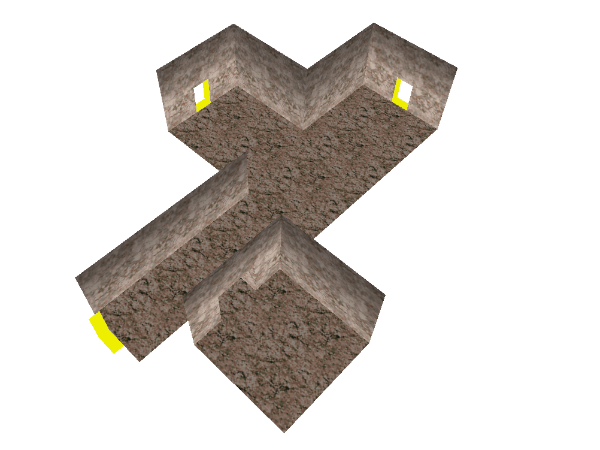
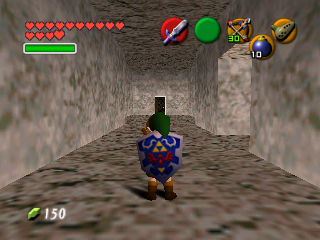
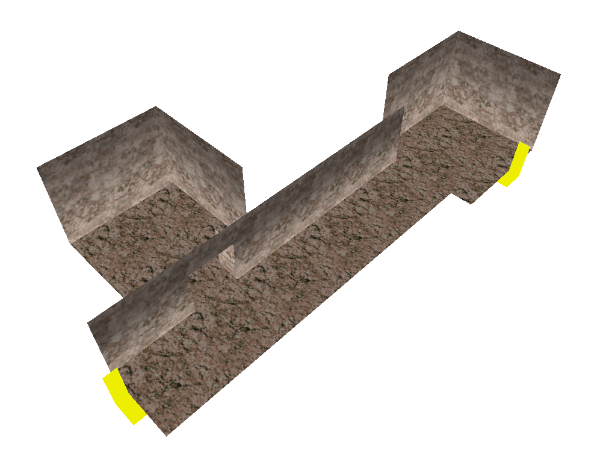
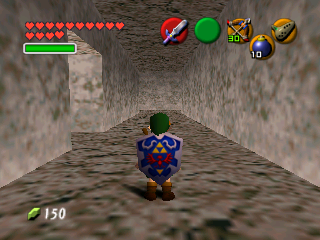
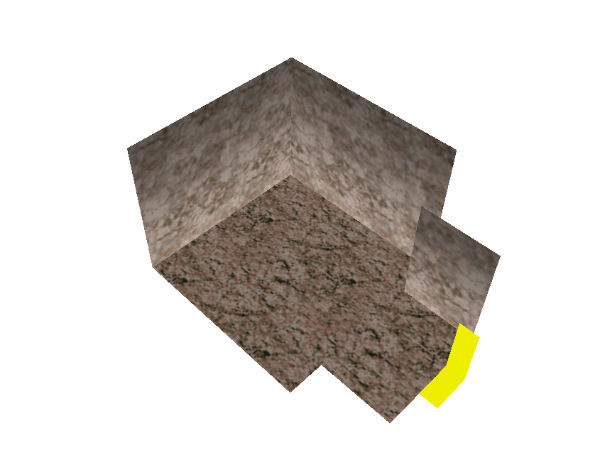
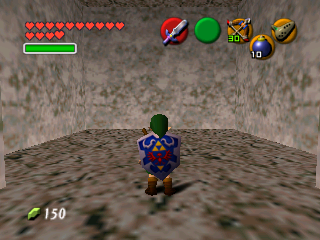
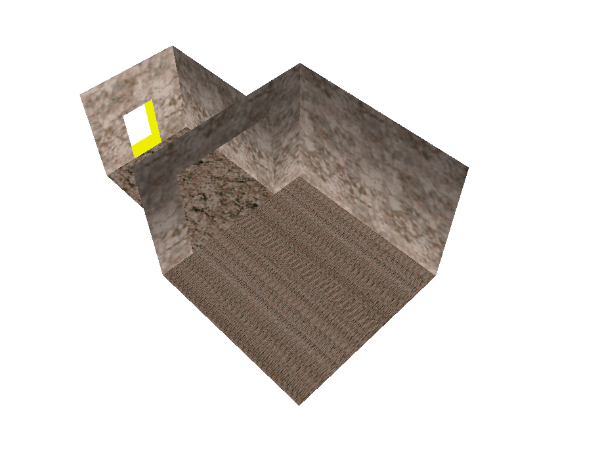
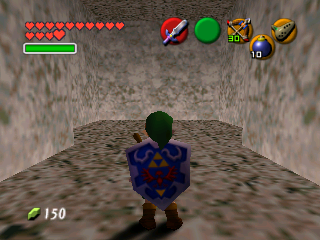
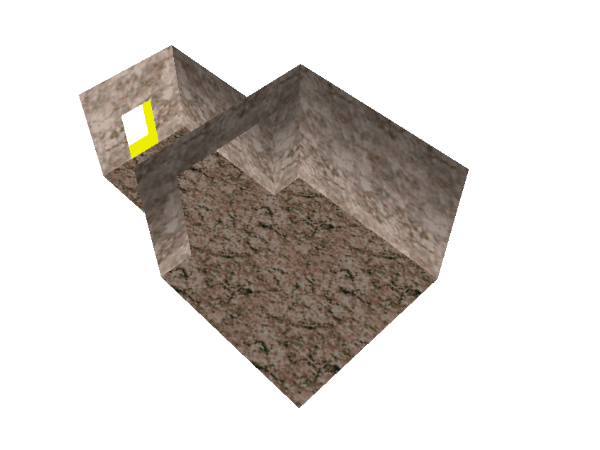
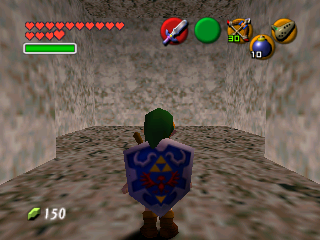
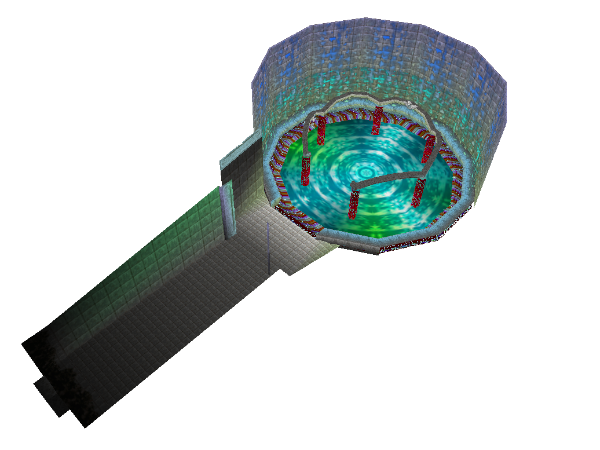
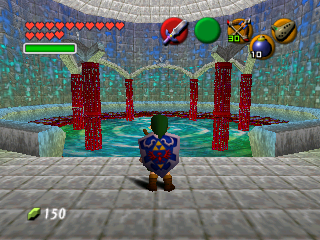
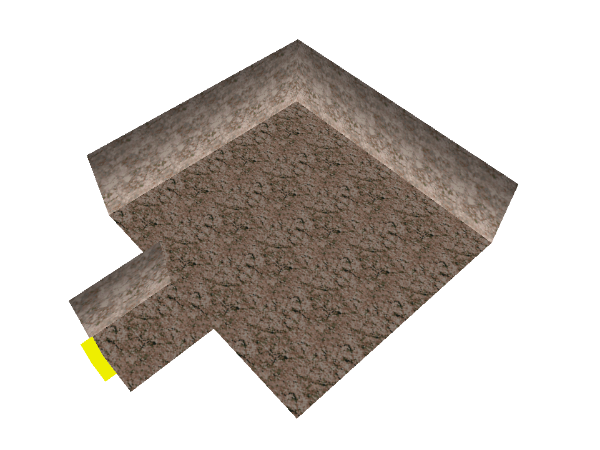
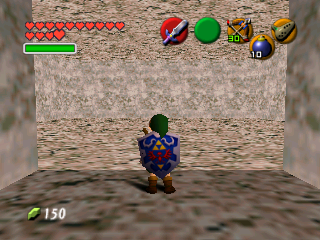
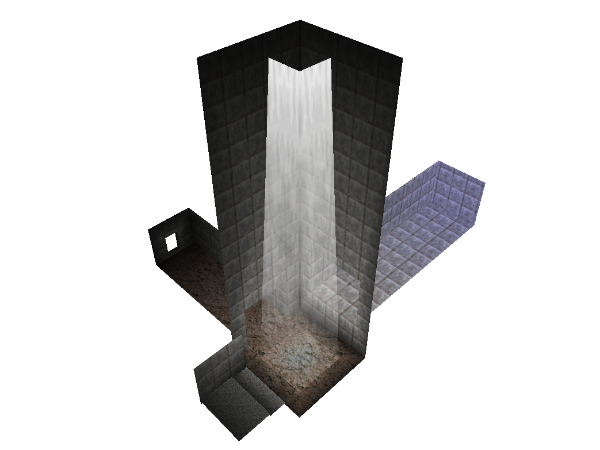
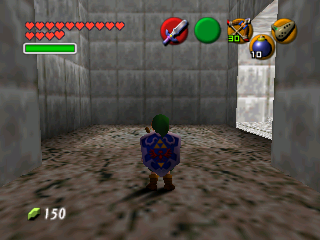
This is an early version of Beneath the Well in Ikana from Majora's Mask, consisting of 14 rooms.
According to commit logs in z_ocarina2/src/n64dd_rom.spec, this map was added to the game on May 22nd, 2000.
It's unknown why it is included as an Ocarina of Time map intended to be loaded with the DD. One thing to note, however, is that it includes "bdan_show.o." Bdan is the name of Inside Jabu Jabu's Belly. It also uses Jabu Jabu's music, the entrance of the map exits out of Jabu Jabu into Zora's Fountain, and the very end of the map exits into Barinade's Lair, implying that it was meant to replace Inside Jabu Jabu's Belly somehow. Also, some textures are corrupted, and the lighting is unfinished in this preliminary version of the map.
Majora's Mask retains the same file name as this early version.
(Source: Restoration: Zel)
Layout#
Room 0#
Link's starting point in this map.
Overview |
Entrance |
|---|---|
 |
 |
Room 1#
Overview |
Room |
|---|---|
 |
 |
Room 2#
Overview |
Room |
|---|---|
 |
 |
Room 3#
Overview |
Room |
|---|---|
 |
 |
Room 4#
Overview |
Room |
|---|---|
 |
 |
Room 5#
Overview |
Room |
|---|---|
 |
 |
Room 6#
Overview |
Room |
|---|---|
 |
 |
Room 7#
Overview |
Room |
|---|---|
 |
 |
Room 8#
Overview |
Room |
|---|---|
 |
 |
Room 9#
Overview |
Room |
|---|---|
 |
 |
Room 10#
Overview |
Room |
|---|---|
 |
 |
Room 11#
Overview |
Room |
|---|---|
|
|
Room 12#
Overview |
Room |
|---|---|
 |
 |
Room 13#
Overview |
Room |
|---|---|
 |
 |
Environment Settings#
|
|
To do: |
Exits#
|
|
To do: |