 This article has a talk page!
This is a sub-page of Proto:Mario & Luigi: Superstar Saga.
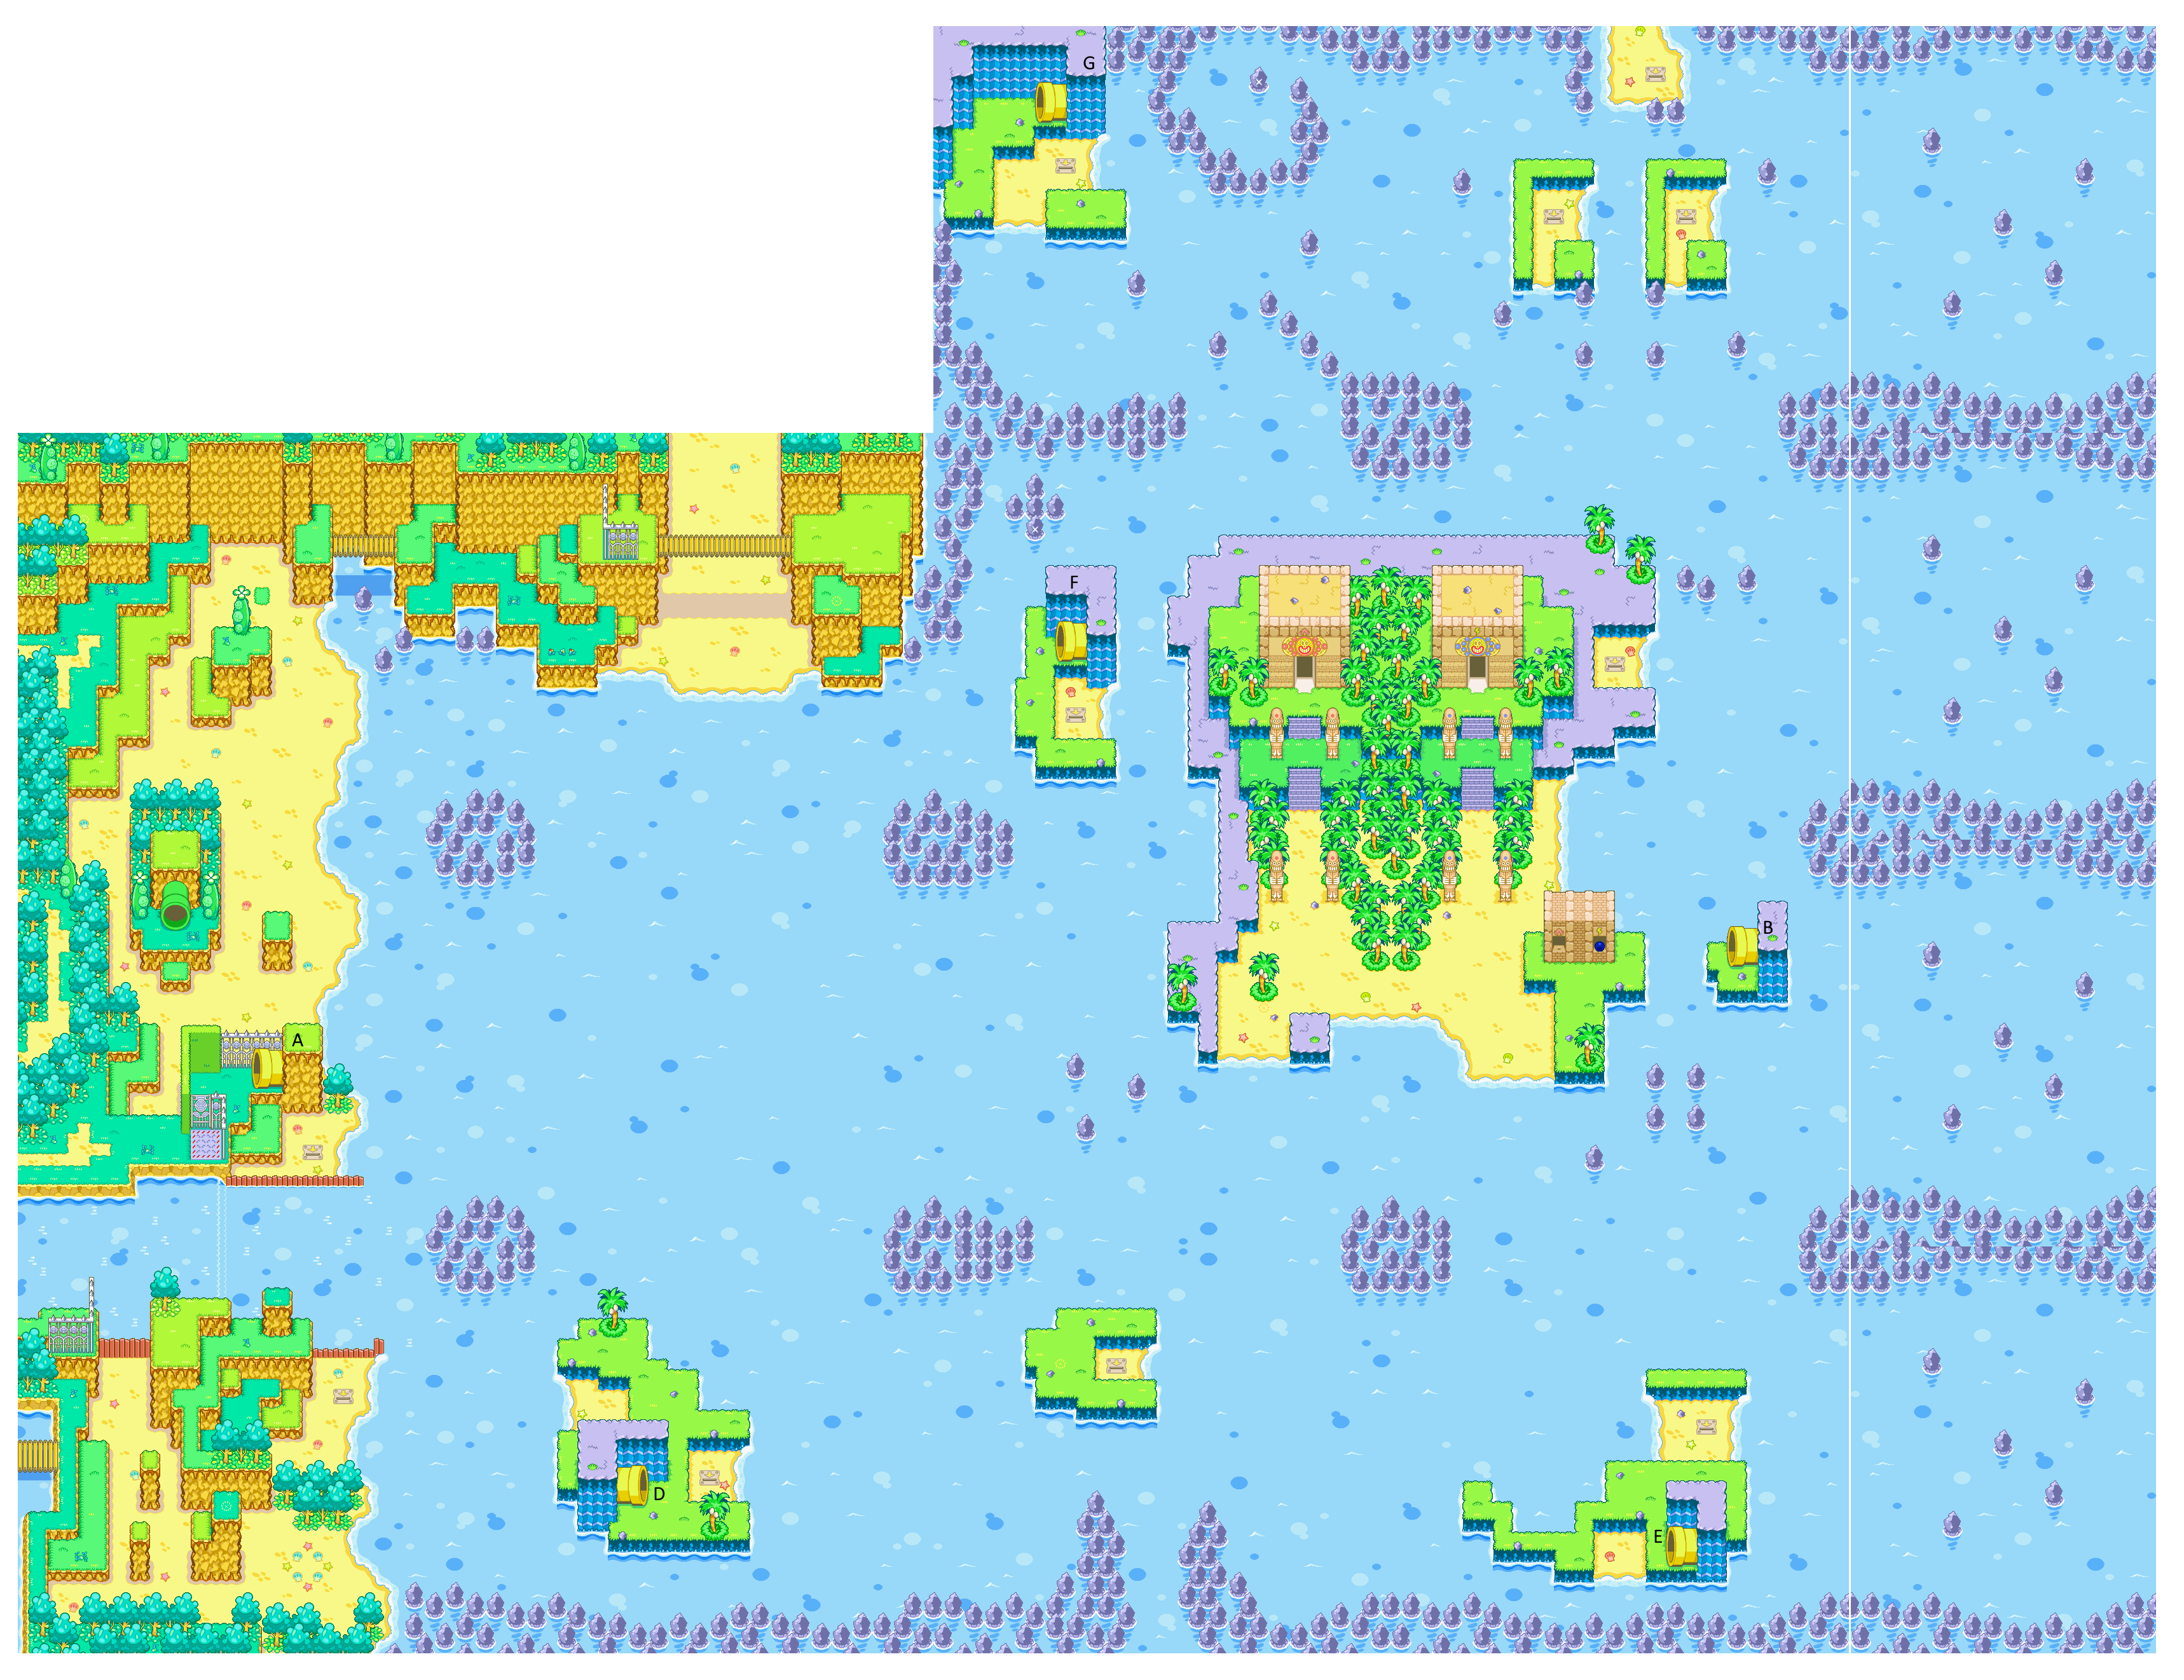
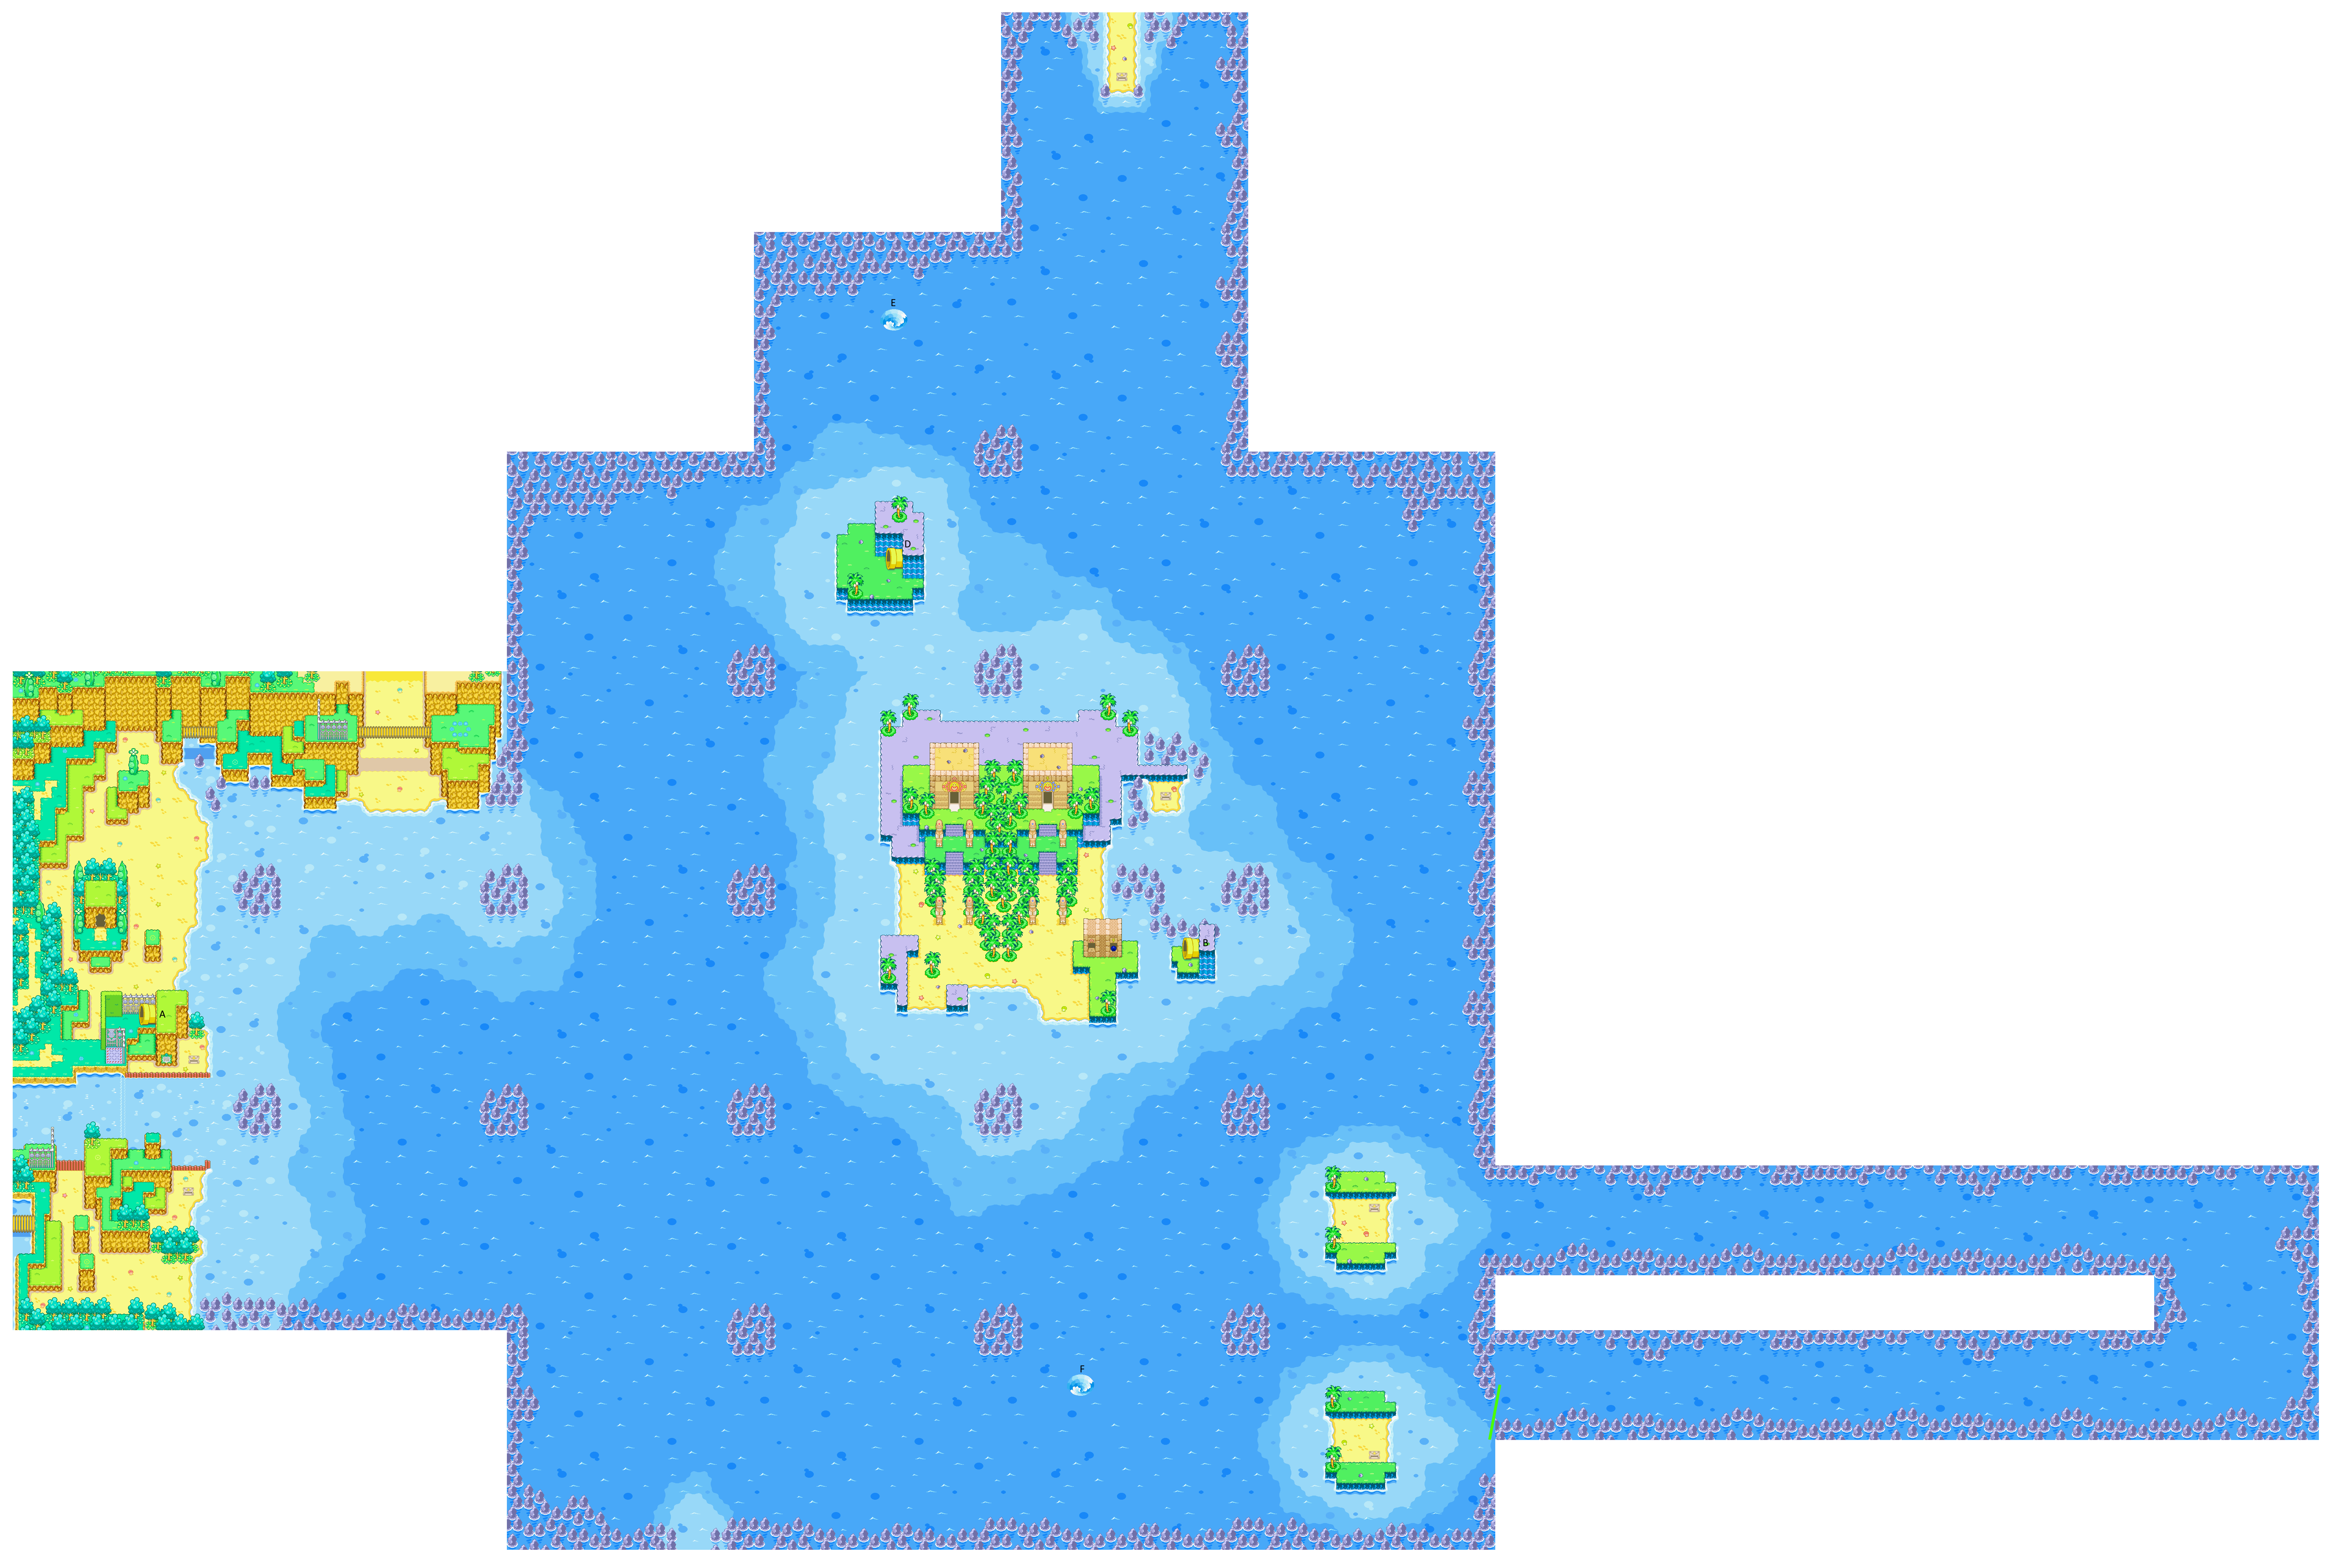
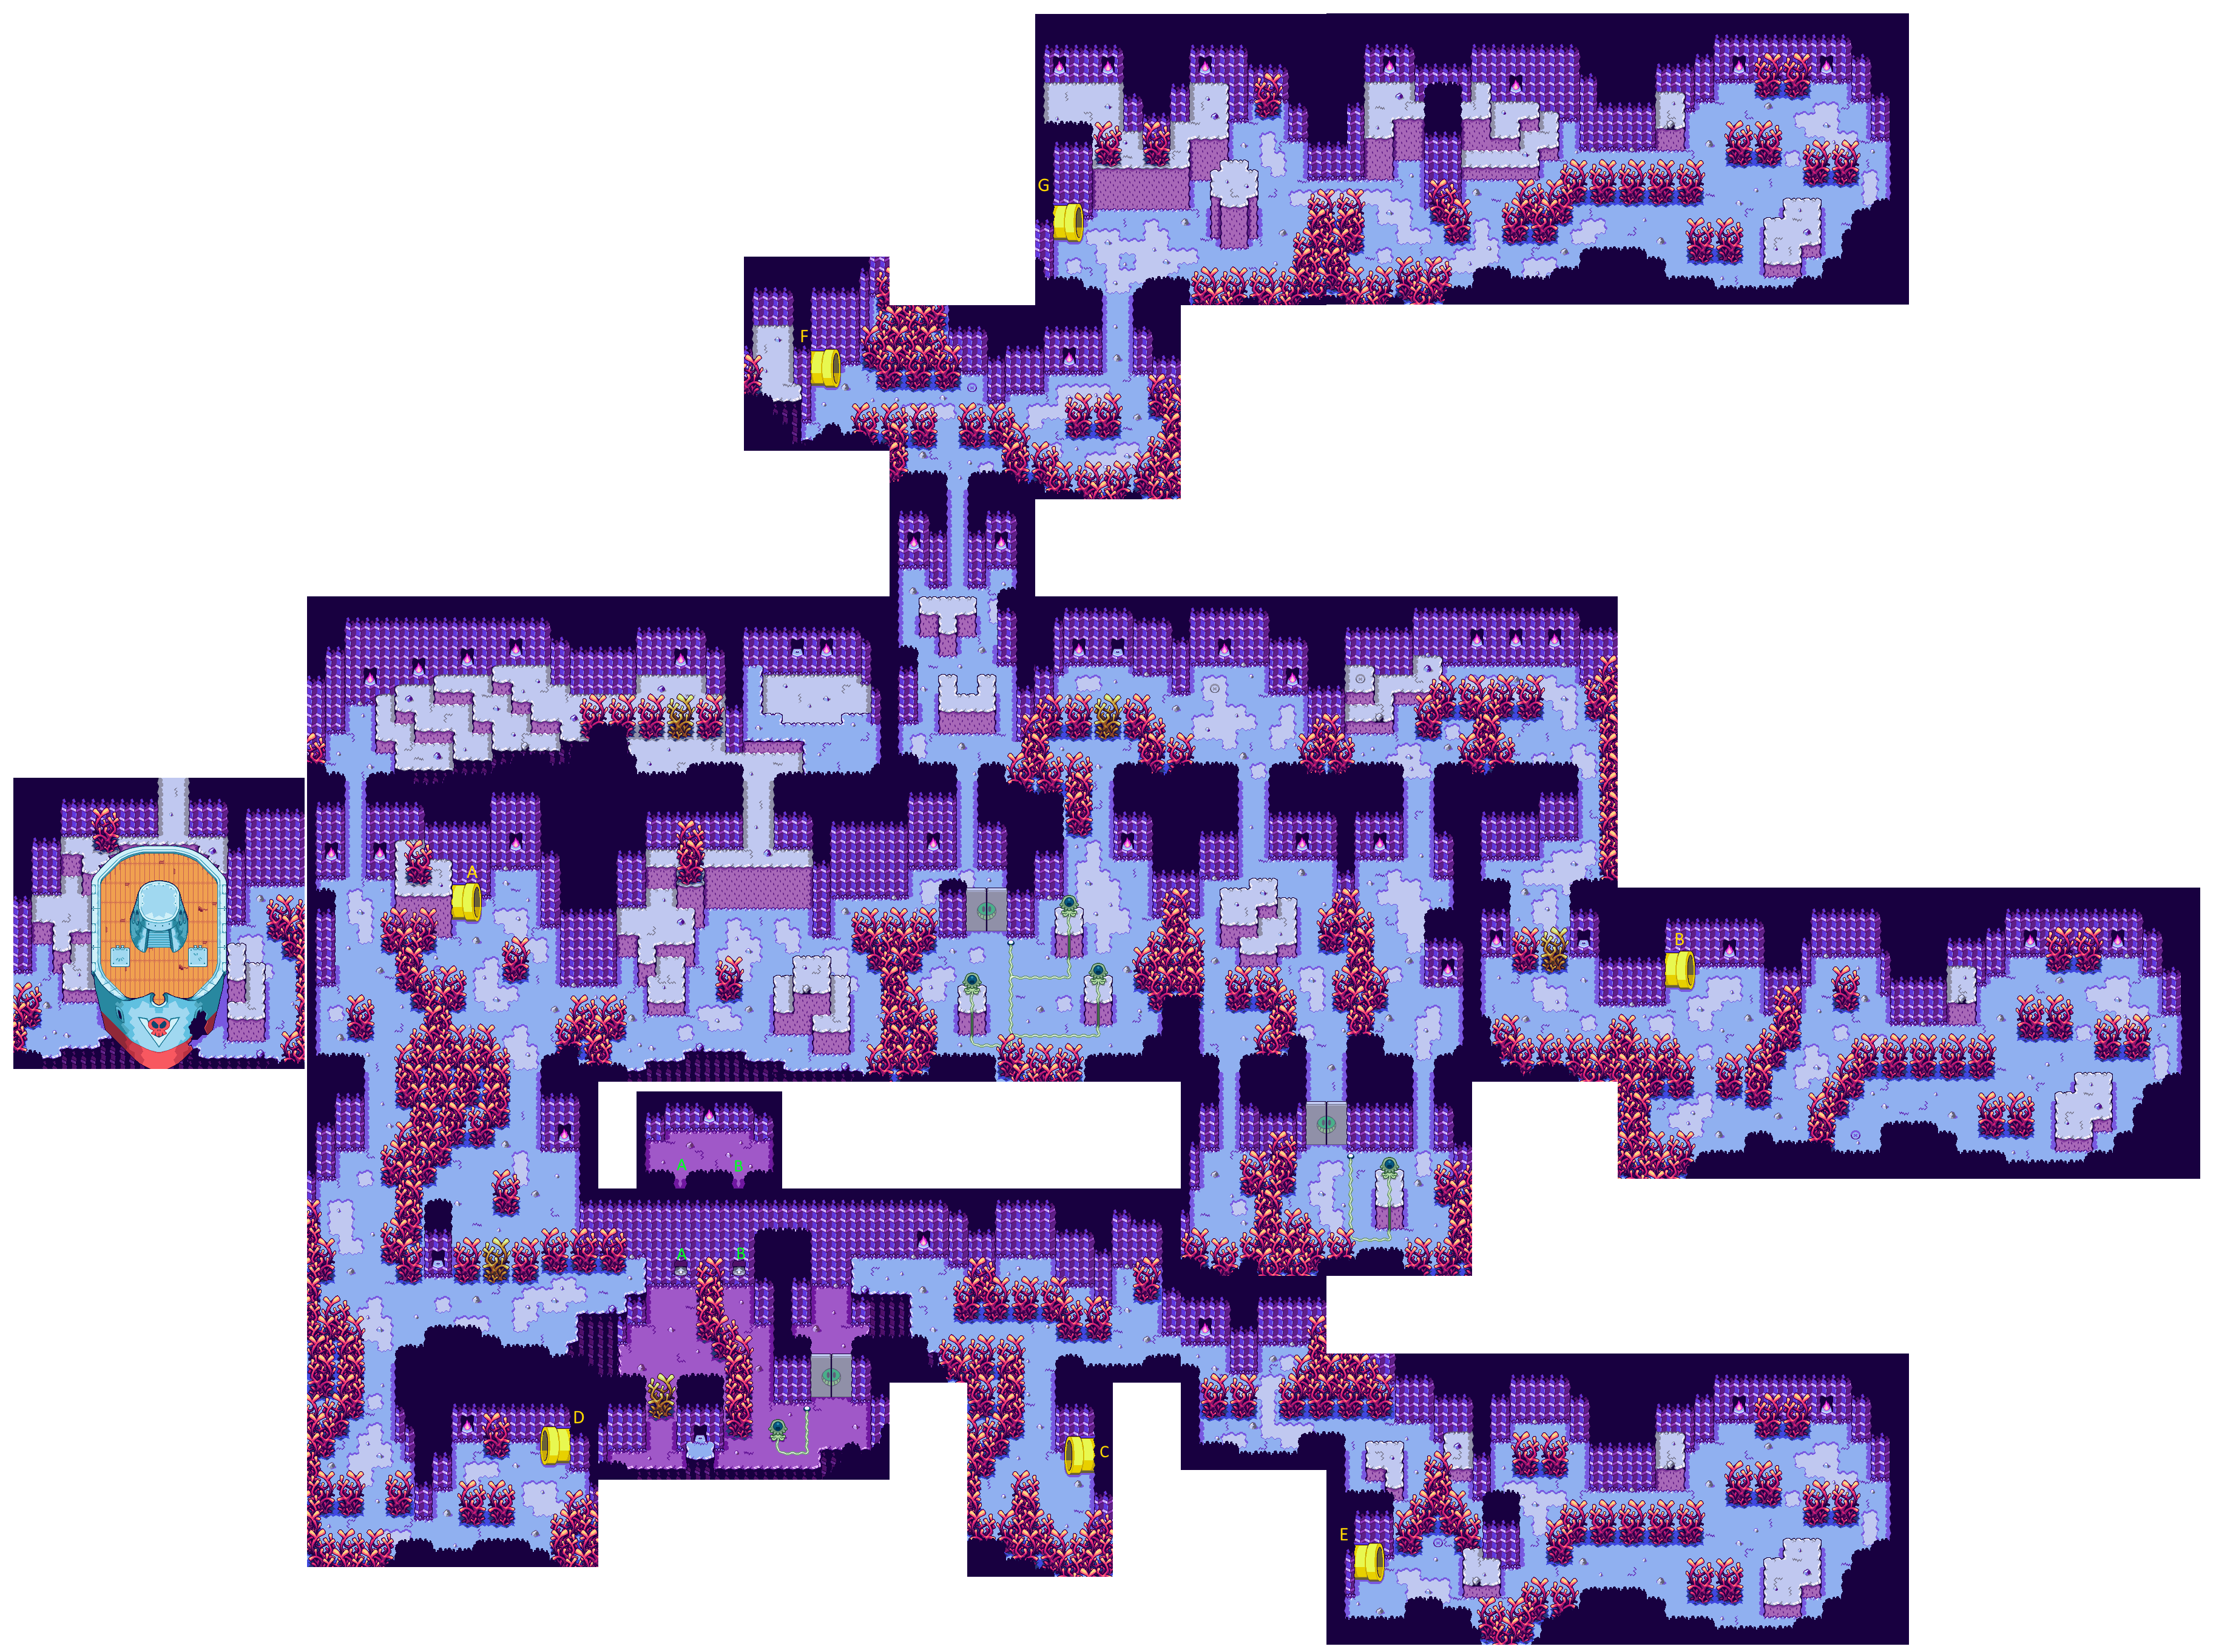
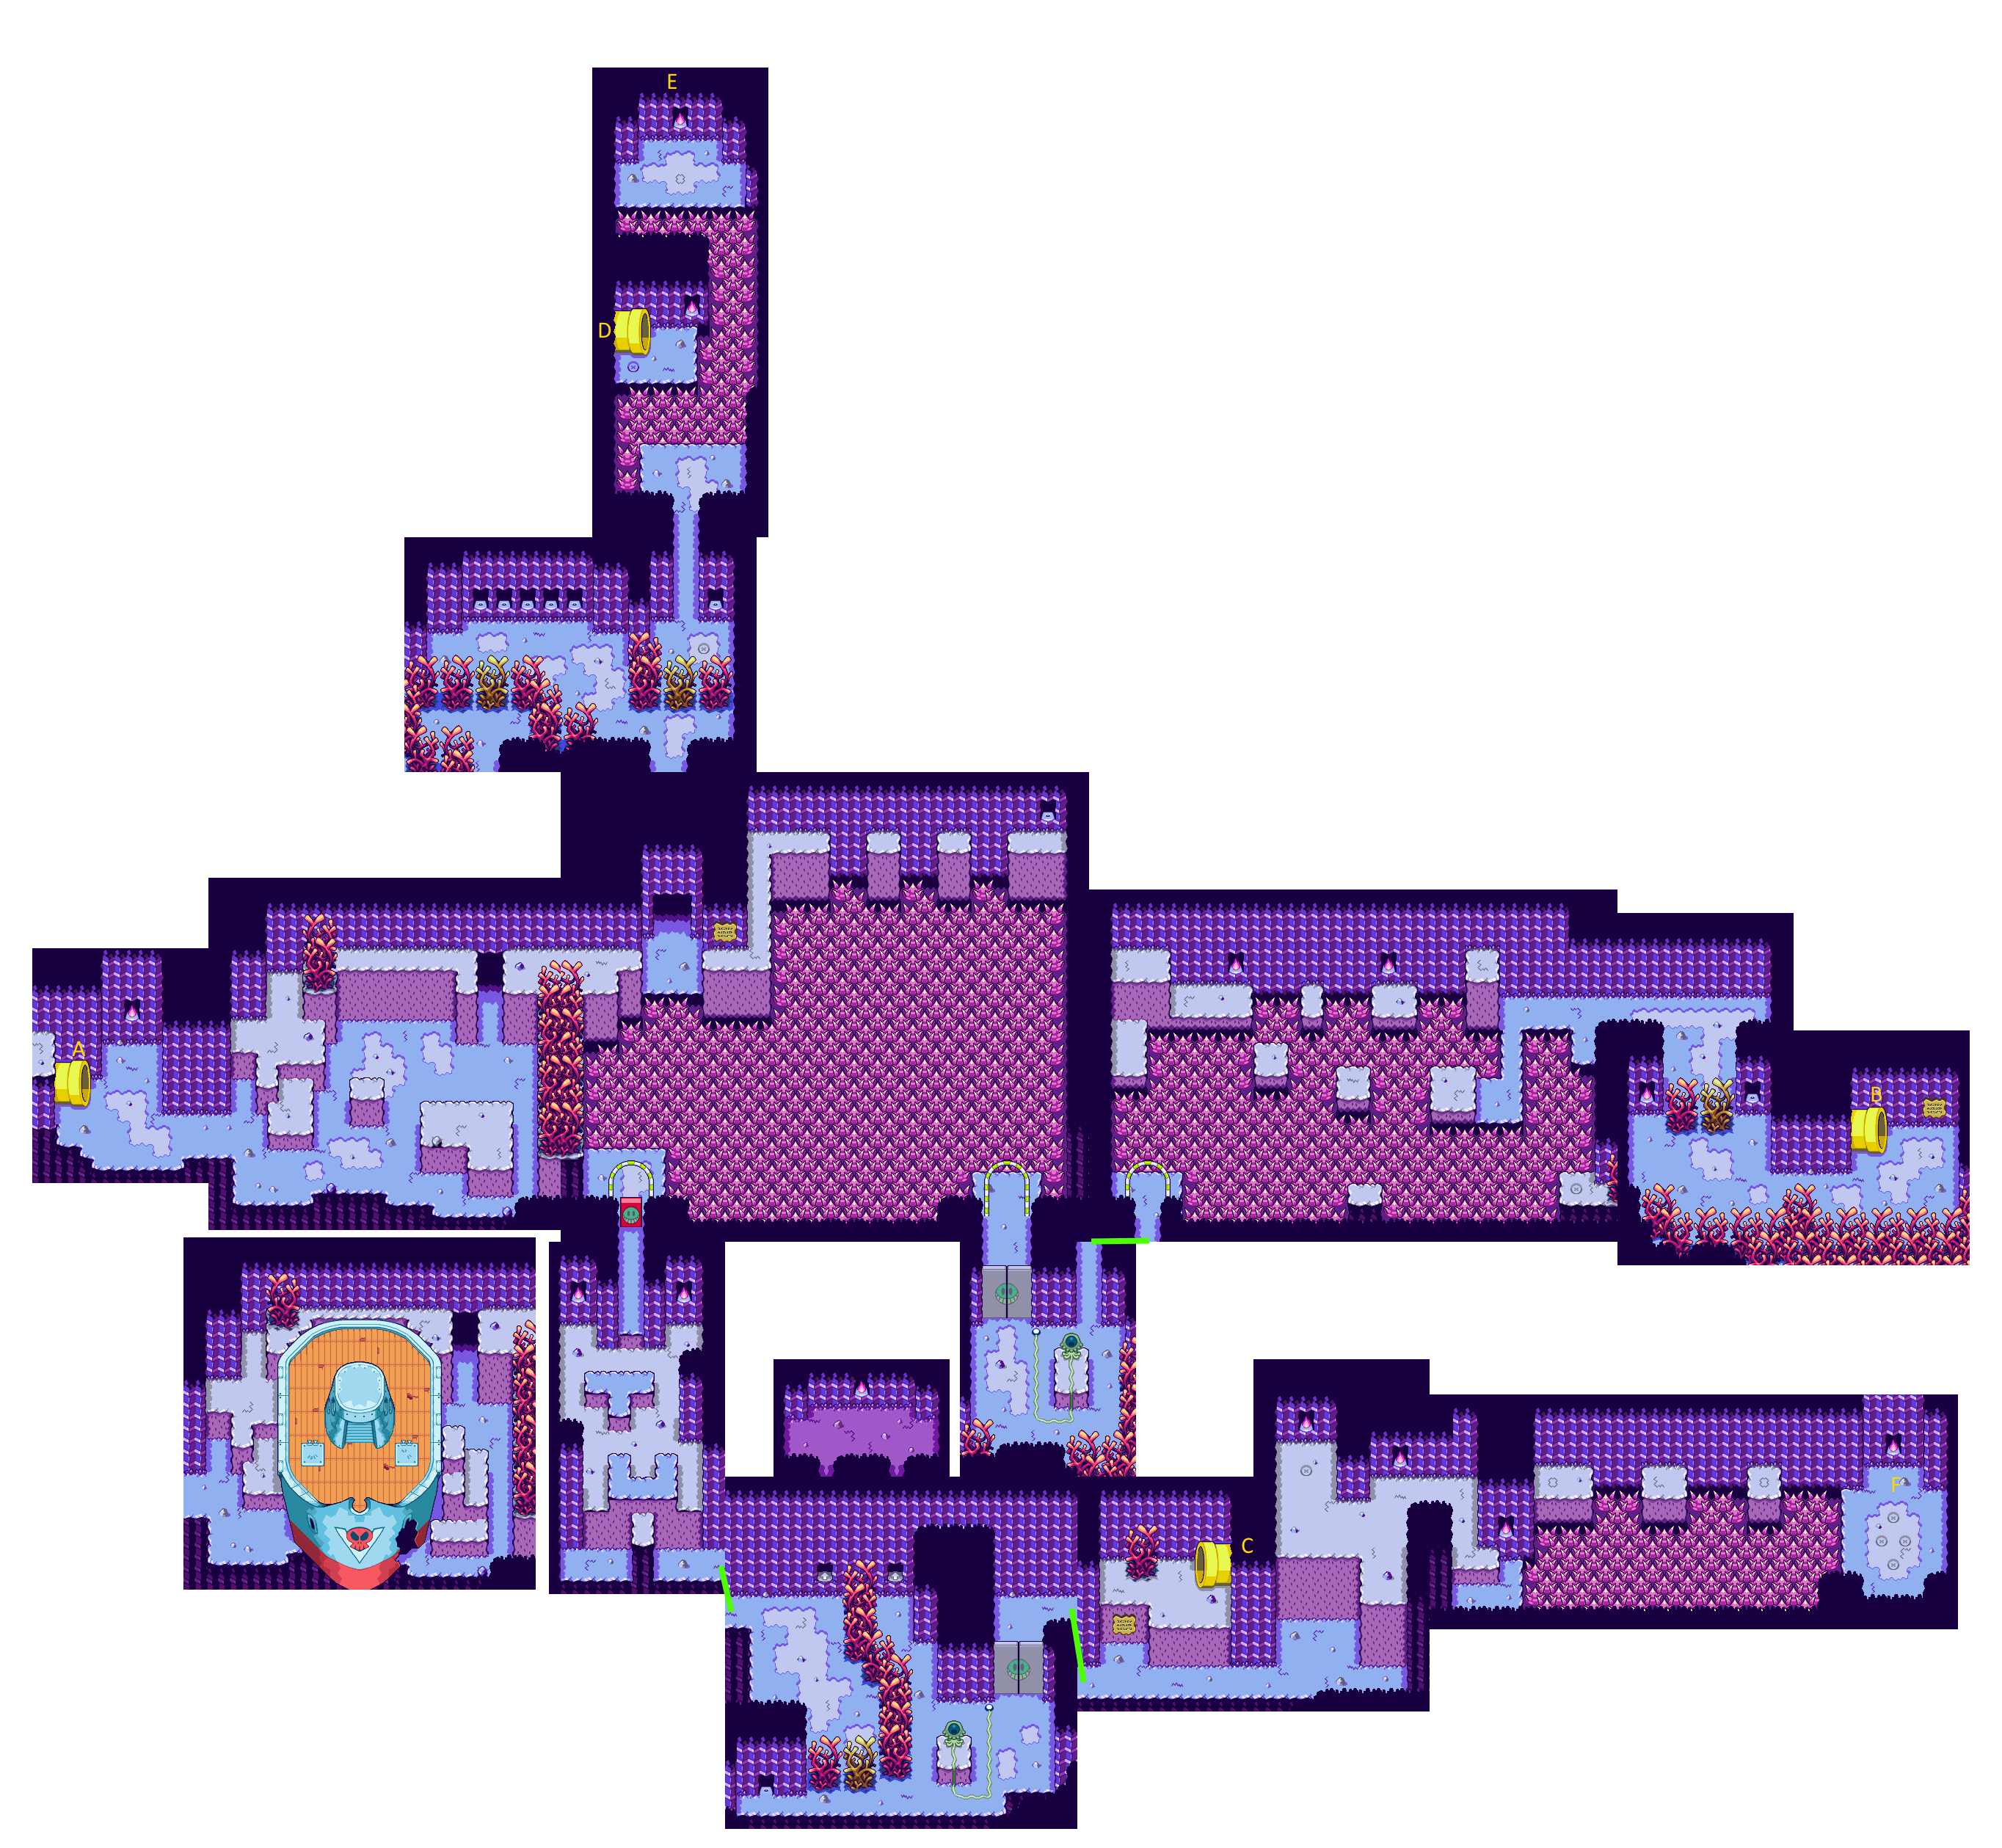
Oho Ocean and the seabed are arguably the most-changed areas in the entire build. Every single map of the ocean and seabed are different in some way, and the size of the area changed drastically. In the E3 Demo, the ocean surface was relatively small and basic, but the seabed was massive and sprawling. In the final, the inverse is true: the ocean surface got much bigger and the seabed was completely overhauled and made much simpler. Two comparisons of the complete maps are provided below, and each room is analyzed individually, as well.
|
E3 |
Final |
|---|---|
|
|
|
E3 |
Final |
|---|---|
|
|
Used
Oho Oasis#
Instead of Oho Jees inhabiting the island, there are unique Beanish that can be found. They speak completely differently than the Oho Jee, and give the impression that, originally, the island wasn't deserted.
Map 168#
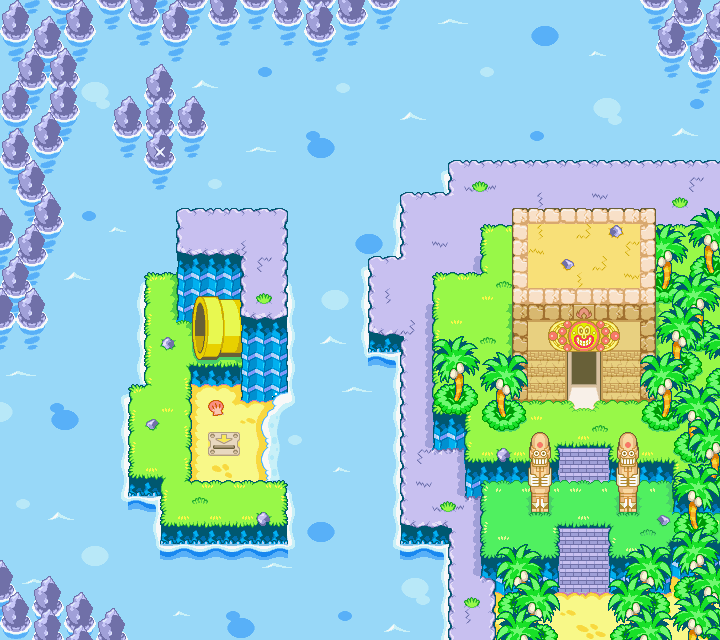
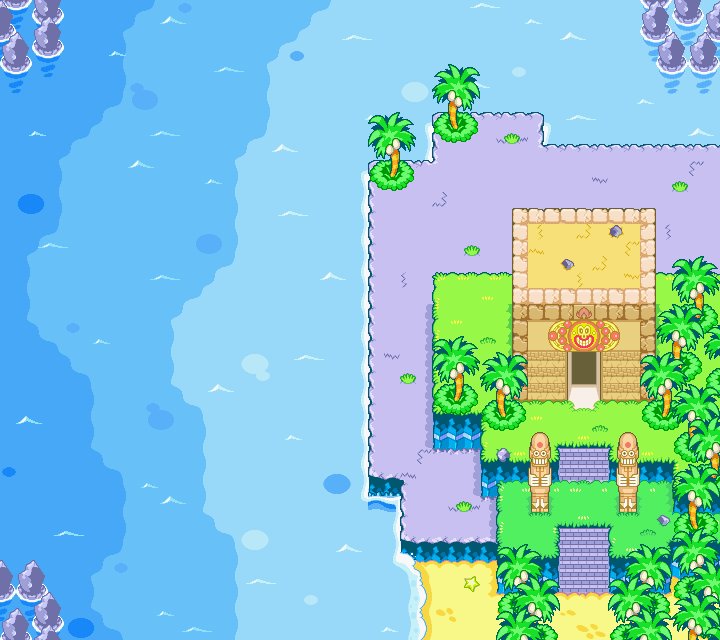
The NW side of the oasis. A small island off to the left was removed, which had a yellow pipe leading down to the seabed. Many rocks in the water were removed, as well. On the main island, the purple rock landmass was extended north a little bit, with two palm trees being added to the edges of it, and a chunk of it on the left was cut out. The grass cliff on top of it behind the Fire Palace was removed, and the very bottom right of the island in the map was changed from purple rock to a sandy beach. Finally, and this will be a common change with the ocean, multiple water colors were introduced to convey how close the player is to land. Deep blue means there's no land nearby, while the light blue is used along the shores. In the prototype, only the light blue color is used.
|
E3 |
Final |
|---|---|
|
|
Map 169#
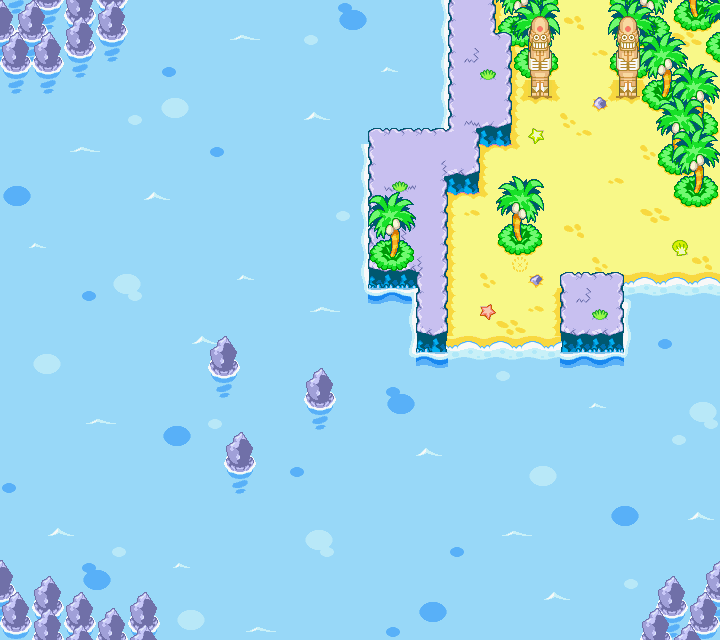
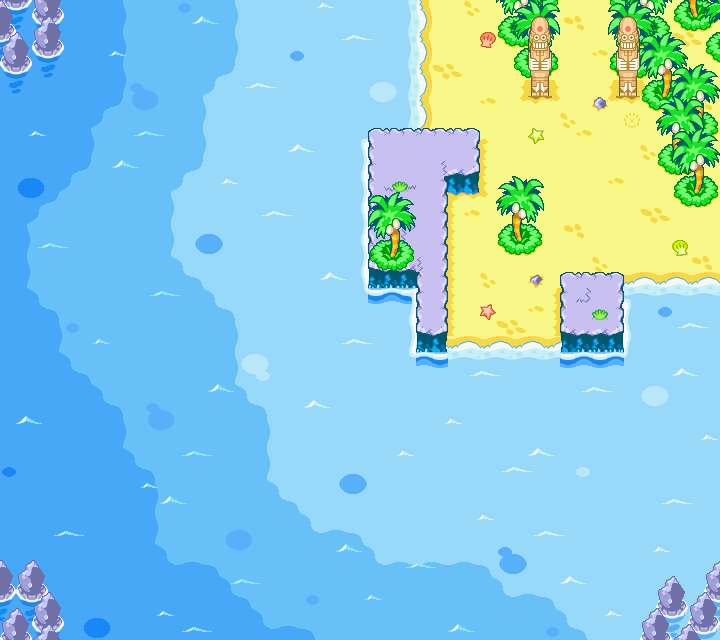
The SW side of the oasis. The purple rock land that was removed in the previous map was also removed here, becoming all beach along the top left side of the map. Aside from that, some rocks were removed from the water, some water detail was changed, and the bean spot was moved.
|
E3 |
Final |
|---|---|
|
|
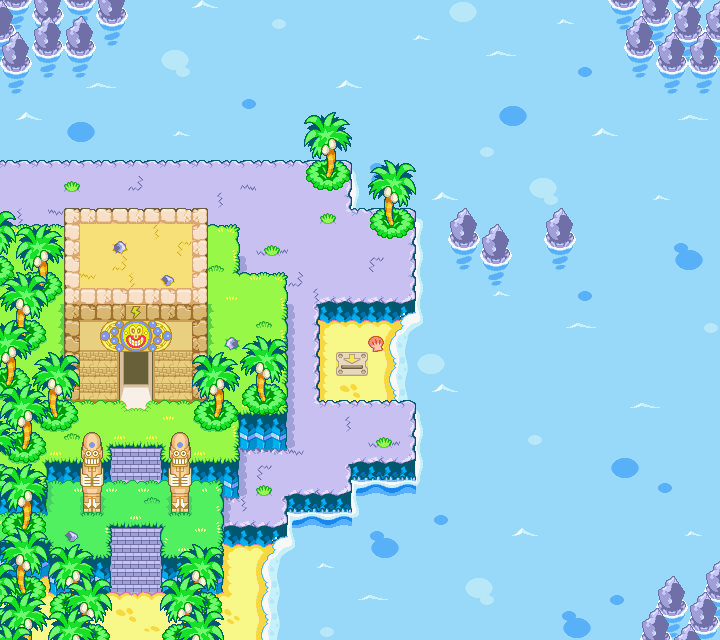
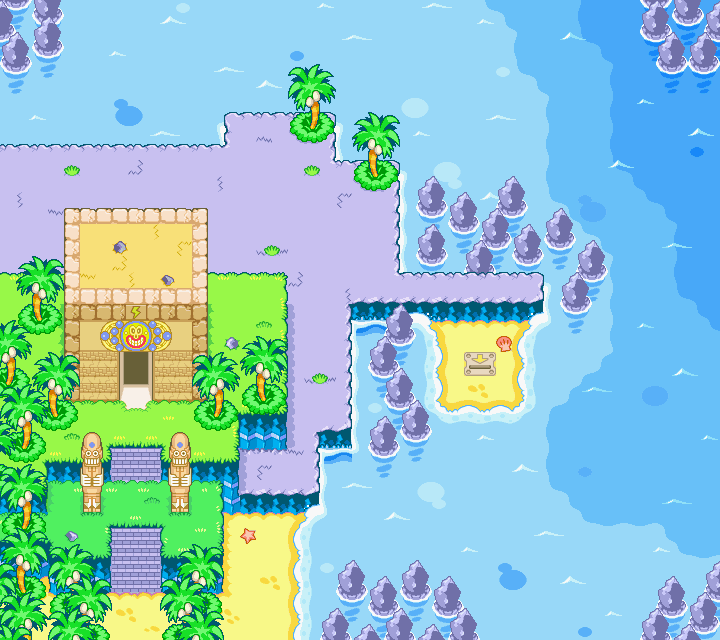
Map 172#
The NE side of the island. The purple rock land was extended north a bit, and the surfing spot was moved out a bit from the island so it could be blocked off by an Ultra Hammer block. Some rocks were removed at the top left, while many were added at the bottom right. The beach on the right side was also extended out a bit.
|
E3 |
Final |
|---|---|
|
|
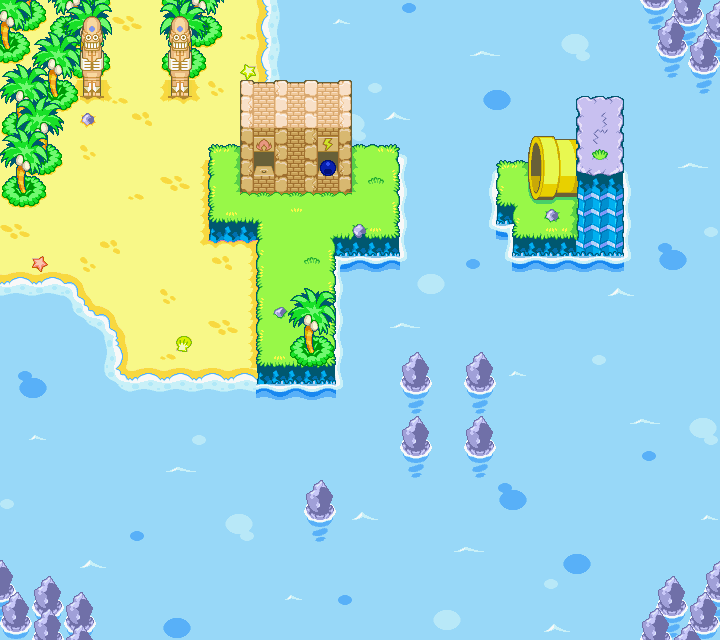
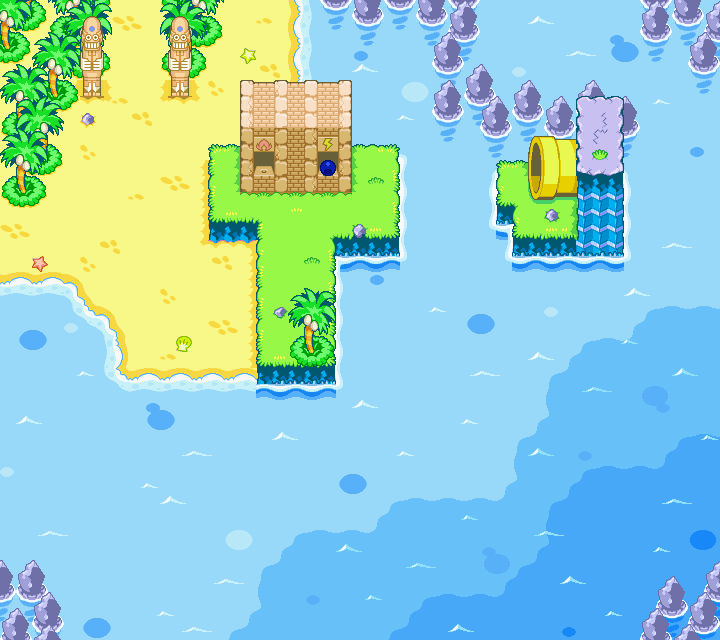
Map 173#
The SE side of the island. Some rocks were removed from the bottom half of the map while many were added at the top. Some water details changed, as well.
|
E3 |
Final |
|---|---|
|
|
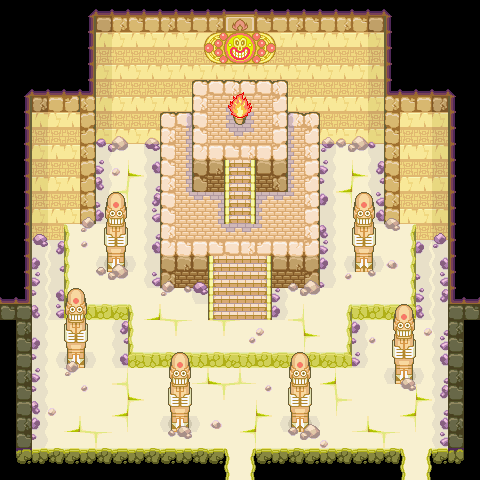
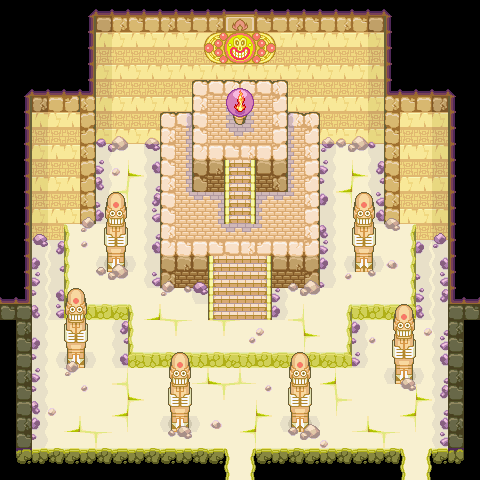
Map 179#
The only differences inside the Fire and Thunder Palaces is that the elements are not contained within an orb, which plays into the different cutscene that appears in this prototype compared to the final game.
|
E3 |
Final |
|---|---|
|
|
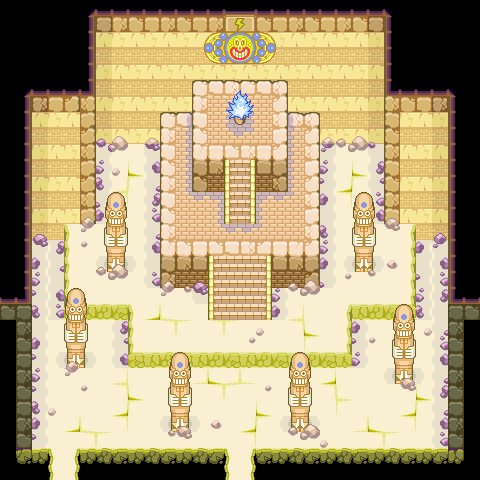
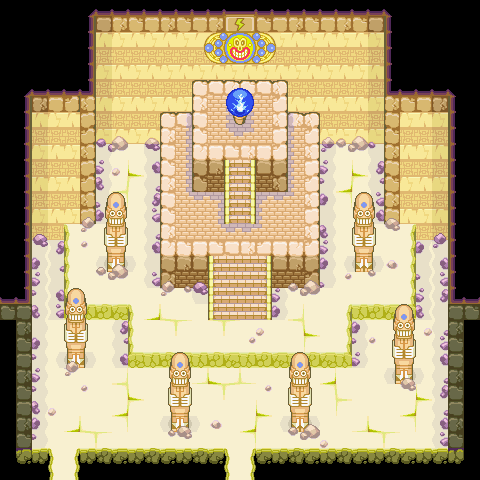
Map 183#
As mentioned, the element isn't contained in an orb. All other aspects and rooms of the palaces are identical to the final.
|
E3 |
Final |
|---|---|
|
|
Oho Ocean#
Map 165#
Some rocks were removed at the top left and bottom. Water detail is different.
|
E3 |
Final |
|---|---|

|

|
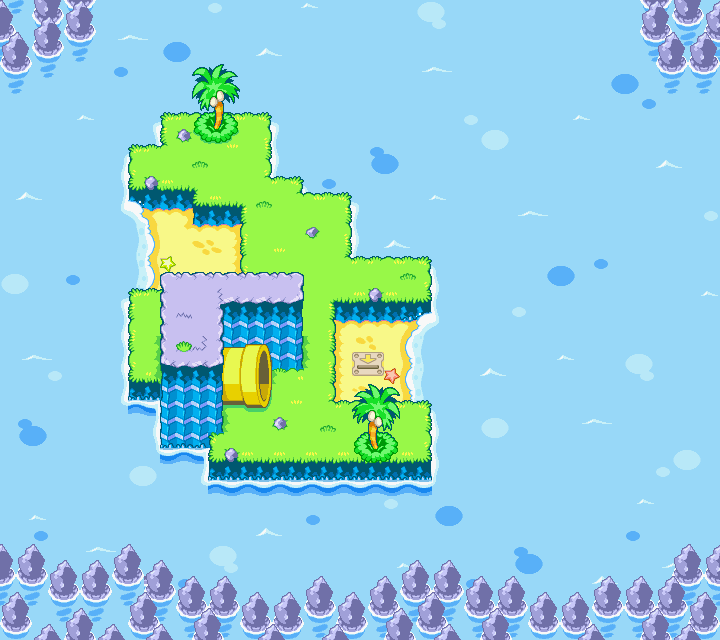
Map 166#
The island with the warp pipe leading to the seabed was removed. A couple rocks at the top left also got yeeted. Water detail is different.
|
E3 |
Final |
|---|---|
|

|
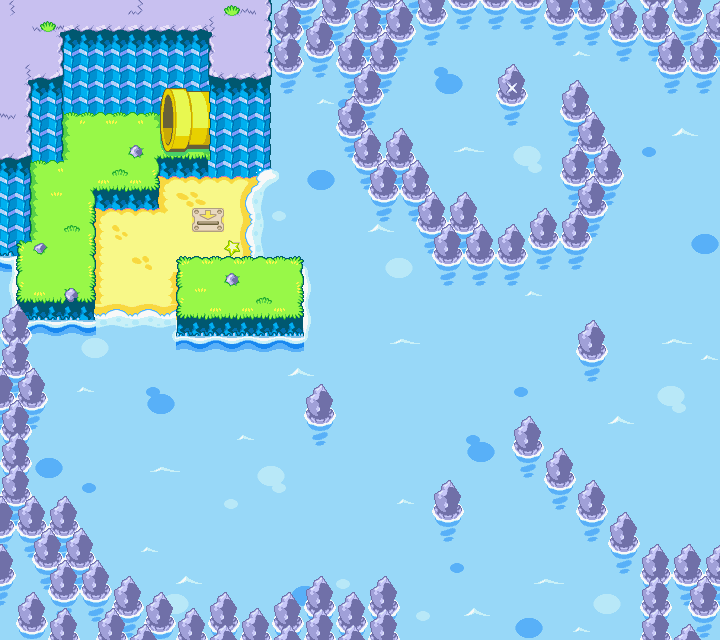
Map 167#
Another warp pipe island thrown in the trash. Rocks took its place for the most part. Interestingly, there is a unique rock at the top with an "X" mark on it that was removed as well. Approaching or trying to interact with it does nothing, however. Water detail is different.
|
E3 |
Final |
|---|---|
|

|
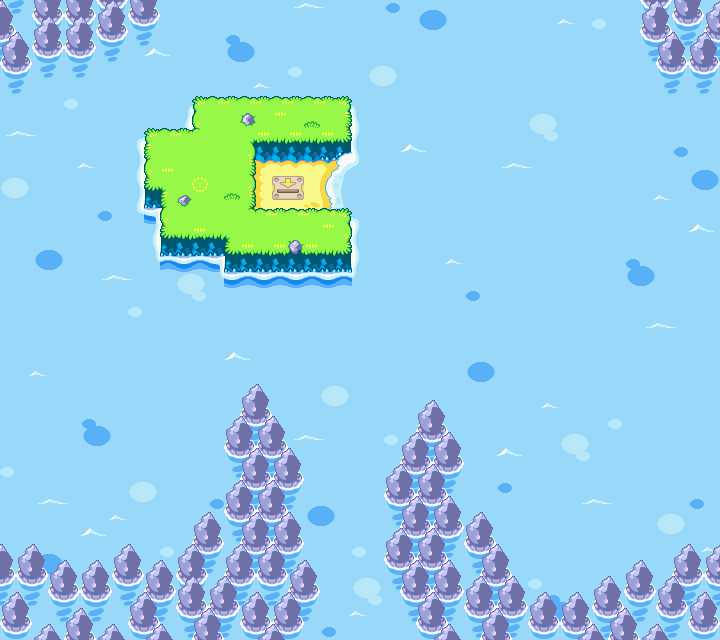
Map 170#
This map was the original entrance to Gwarhar Lagoon. The surfing island that...really didn't seem to serve much of a purpose was wiped. Many more rocks were added along the left side. Water detail is different.
|
E3 |
Final |
|---|---|
|

|
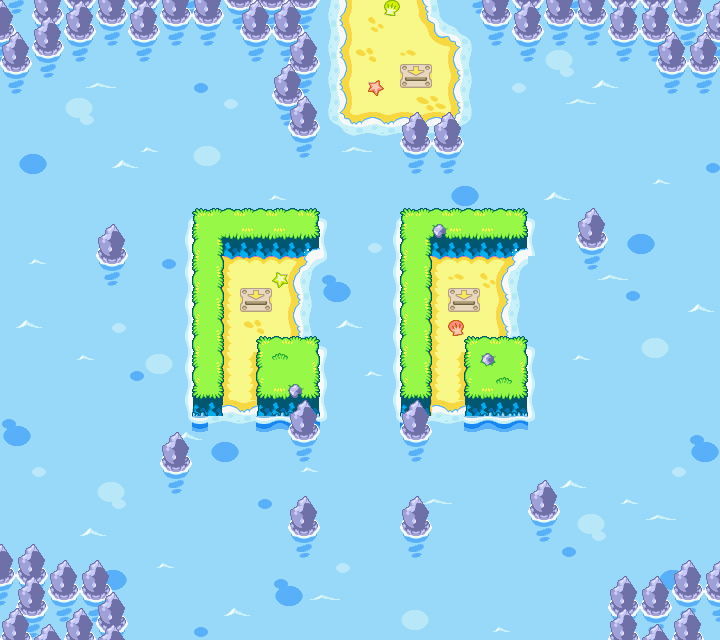
Map 171#
This map was the original entrance to Joke's End. In the final, the surfing spot for Joke's End's beach got its own dedicated map. The odd double surfing islands were removed, as were all the rocks around them. The amount of rocks at the bottom corners was reduced. Water detail is different, did you know?
|
E3 |
Final |
|---|---|
|

|
Map 174#
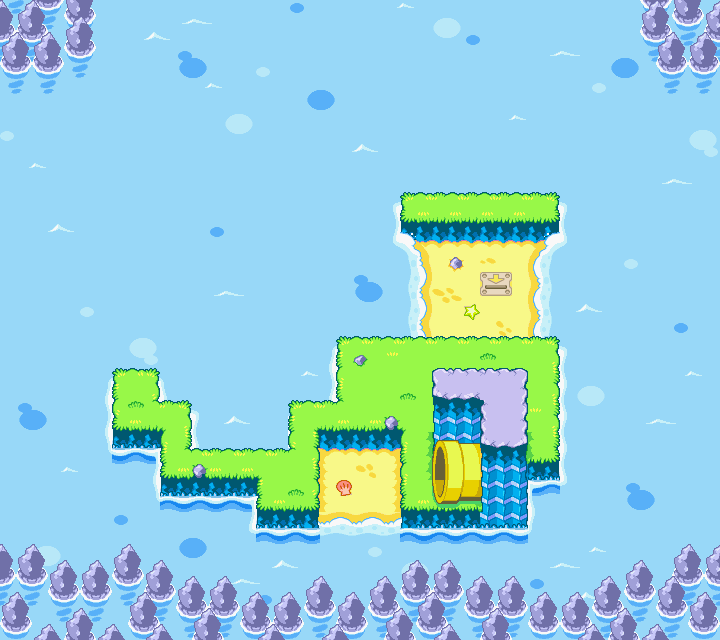
Yet another warp pipe island that was wiped off the map. It received a more modular appearance in the final, with all four sides being opened up to travel. Say it with me: water detail is different.
|
E3 |
Final |
|---|---|
|

|
Map 175#
Now, this map is a little interesting. The prototype version of Oho Ocean isn't as constrained as the final's, despite being smaller. On the east side of the ocean, there's a gimmick that was completely scrapped from the final game. There are no rocks to prevent you from surfing out east forever and ever, however, upon going too far east, you'll reach this map, no matter where you entered from in the ocean. Attempting to surf further east will result in you looping back around to the left side of this map, essentially creating a feeling of an endless ocean until you realize that the scenery isn't changing. Turning around and surfing back to the west will result in you returning to the previous map on the ocean that you initially entered from. This might've been removed in the final for possibly creating disorientation for the player, as well as not being entirely clear as to what's going on at first. In the final, this 'endless ocean' map was changed into Gwarhar Lagoon's new entrance.
|
E3 |
Final |
|---|---|

|

|
Seabead#
As mentioned at the top of the page, the prototype seabed is much larger and more complex than the final's. All rooms for it are different, and some got shuffled around. The spiky floor gimmick seen in the final in some rooms is not present in the prototype at all. You also cannot swim yet in this prototype, the inclusion of which in the final may have constituted the overhaul of the area.
Map 192#
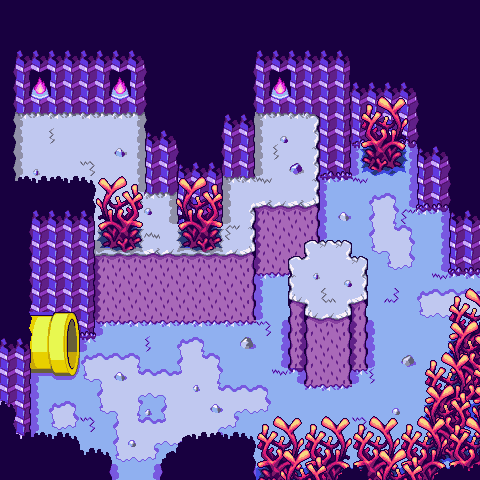
This is an exit from the top-left most island warp pipe in the prototype, and the exit from Oho Oasis in the final.
|
E3 |
Final |
|---|---|
|

|
Map 193#
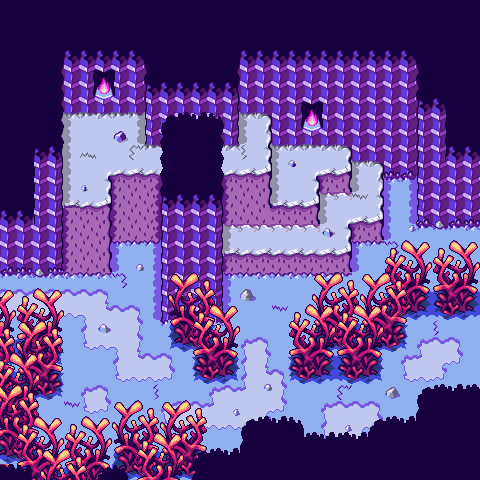
Completely different. The equivalent map for this in the prototype is under a different map ID.
|
E3 |
Final |
|---|---|
|

|
Map 194#
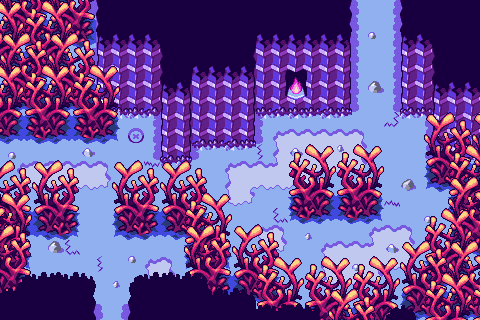
Completely different. An Ankoopa blocks the way to the bottom path in-between the coral. The equivalent map to this in the prototype is under a different map ID.
|
E3 |
Final |
|---|---|
|

|
Map 195#
A puzzle room in the final, and a scrapped warp pipe island exit in the prototype.
|
E3 |
Final |
|---|---|

|

|
Map 196#
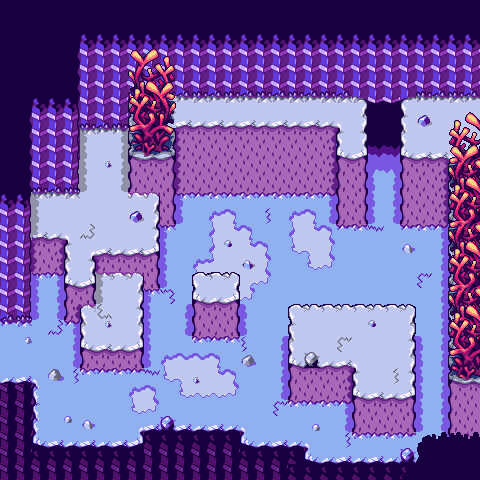
An early version of a room on the way to Gwarhar Lagoon in the final. The final's equivalent exists under a different map ID. In the final, this map ID is used for the room that the S.S. Chuckola sinks into before it has sunk.
|
E3 |
Final |
|---|---|

|
|
Map 197#
Completely different. This room in the final is the entrance to the seabed from the mainland side.
|
E3 |
Final |
|---|---|

|

|
Map 198#
The room north of the S.S. Chuckola sunk room in the prototype. This room contains an underwater barrel puzzle in which the bros. must position themselves so that Mario can light the empty alcove with fire. However, in this build (and maybe the final game, given there are no underwater barrels in the final), Mario's fire hand has issues triggering when standing on top of a barrel underwater. Thus, this puzzle cannot actually be solved in the prototype.
|
E3 |
Final |
|---|---|

|

|
Map 199#
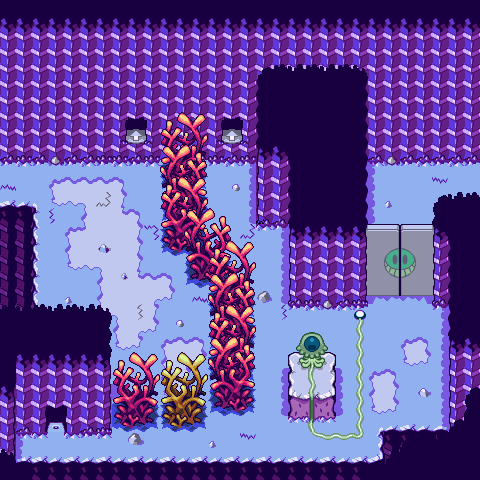
Completely different. A similar map exists in the final. The equivalent map for this in the prototype exists under a different map ID.
|
E3 |
Final |
|---|---|

|
|
Map 200#
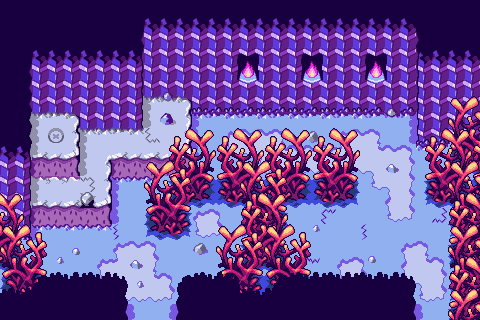
Completely different. The equivalent map for this in the prototype is under a different map ID.
|
E3 |
Final |
|---|---|
|

|
Map 201#
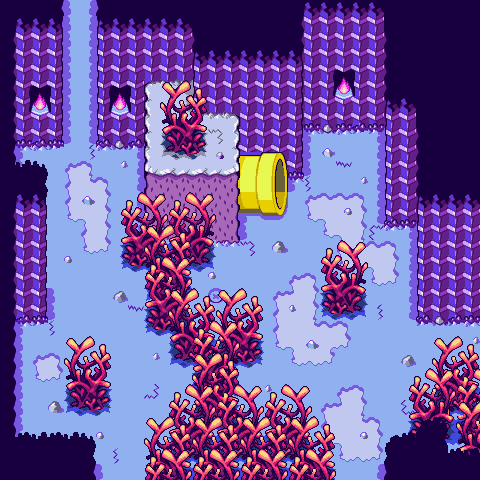
Both maps contain a warp pipe exit, and that's about all they have in common. The prototype's pipe takes the player to the mainland, while the final's leads to Gwarhar Lagoon.
|
E3 |
Final |
|---|---|
|

|
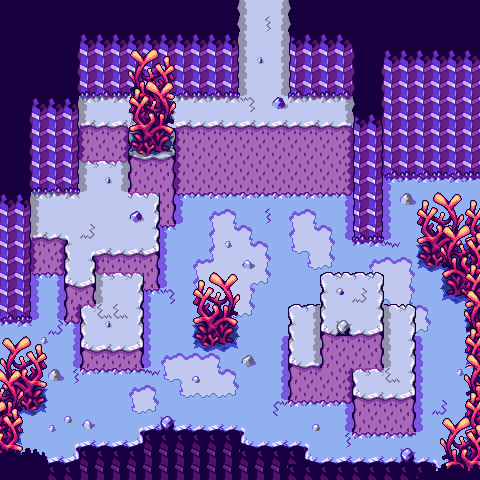
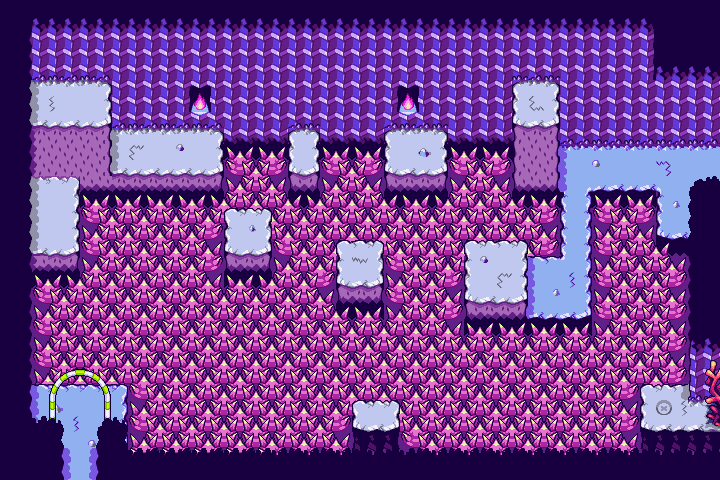
Map 202#
Completely different. This room in the prototype is the room reserved for the S.S. Chuckola when it sinks.
|
E3 |
Final |
|---|---|
|
|
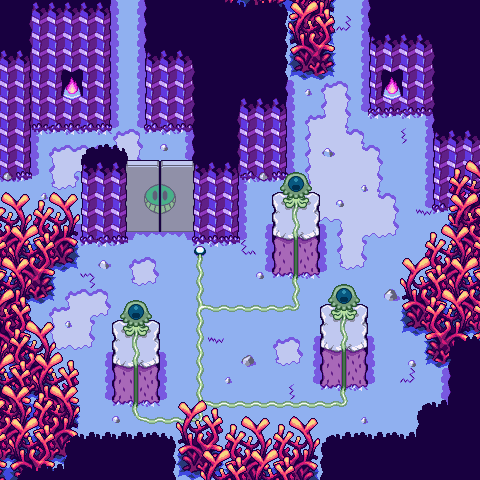
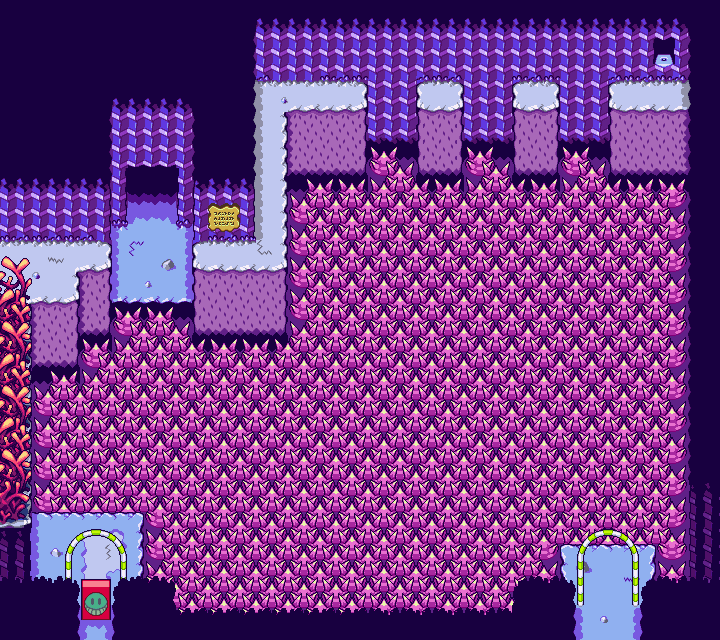
Map 203#
Completely different. The prototype contains a unique three-way Thunderhand receptacle puzzle; the final game never has more than one per puzzle. Following the path the player has to take in the prototype to return to the mainland from Oho Oasis, this would be the second jellyfish puzzle they'd need to solve.
|
E3 |
Final |
|---|---|
|
|
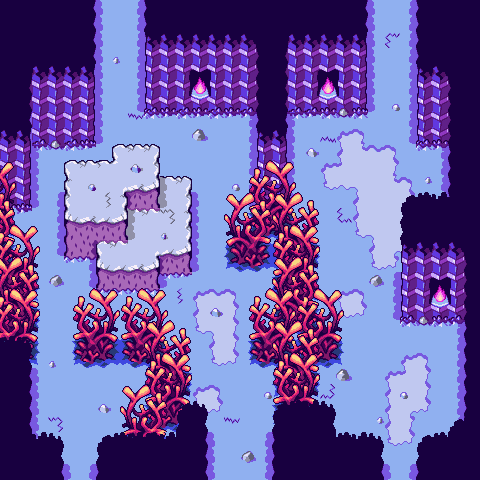
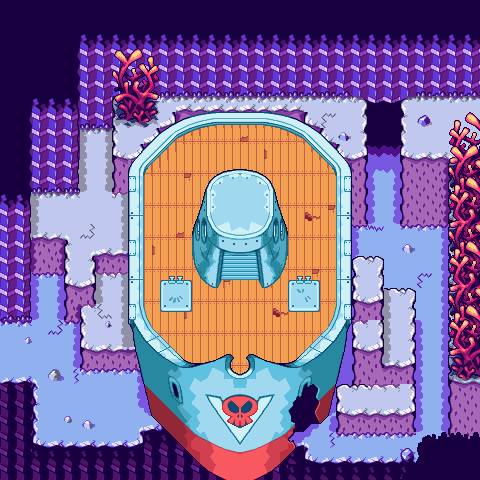
Map 204#
Completely different. This map is used in the final for the sunken S.S. Chuckola. The equivalent to this map in the prototype, is, you guessed it, under a different map ID.
|
E3 |
Final |
|---|---|
|
|
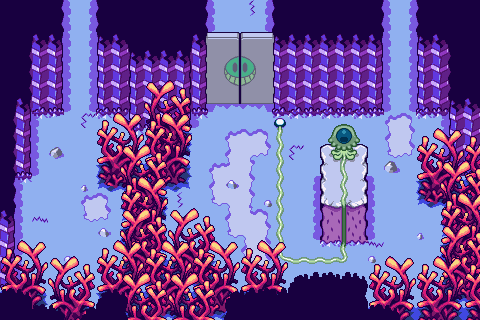
Map 205#
This area in the final doesn't exist in the prototype at all. This map in the prototype is for the single jellyfish receptacle puzzle seen in the final game. Compared to the final version, an extra area on the left was removed.
|
E3 |
Final |
|---|---|
|

|
Map 206#
This area in the final is accessed by whirlpool. Whirpools don't exist in the prototype, but the brothers have their graphics in the data for falling into one. The prototype map is the equivalent of the second map from the Oasis side of the seabed. The map exits north instead of west.
|
E3 |
Final |
|---|---|

|

|
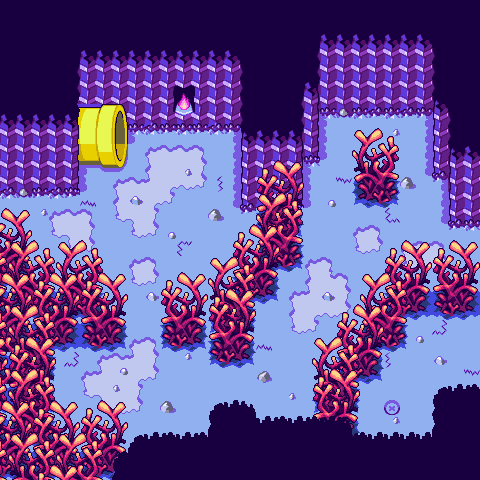
Map 207#
Completely different. This map in the prototype is the exit to Oho Oasis.
|
E3 |
Final |
|---|---|
|

|
Map 208#
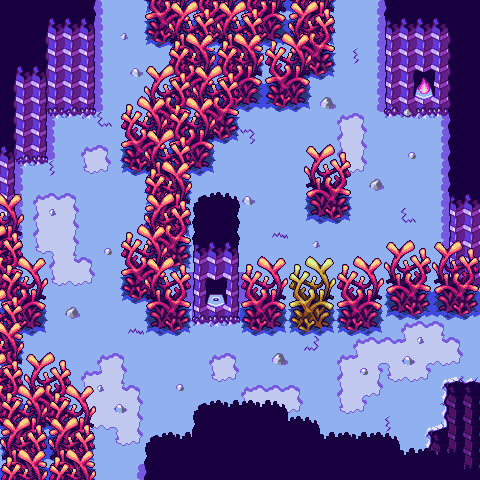
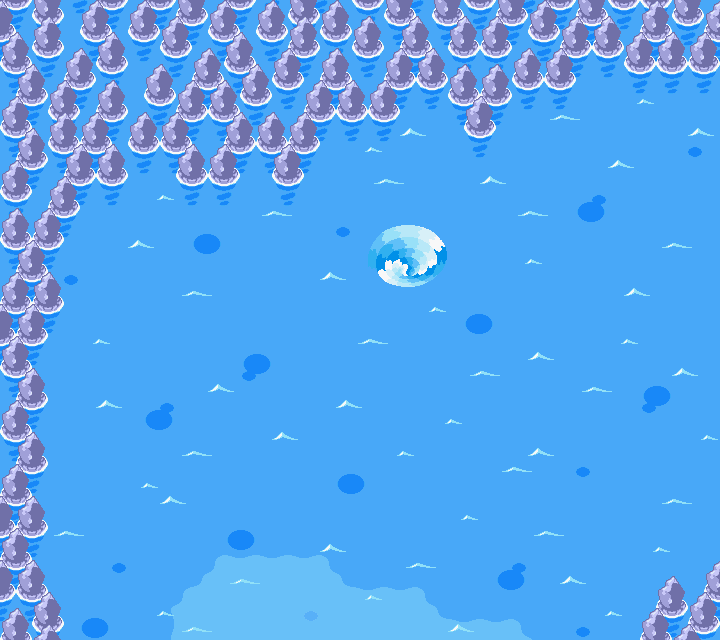
And here's where the excess prototype seabed maps start to show themselves. There's no more seabed at this point in the final, yet it continues in the prototype. This is a completely scrapped room on the way to Gwarhar Lagoon in the prototype. The Firebrand alcove is used to make a shortcut back to the pipe to the mainland. The final uses this map for the NW corner of Oho Ocean, and contains a whirlpool to a bonus area.
|
E3 |
Final |
|---|---|
|
|
Map 209#
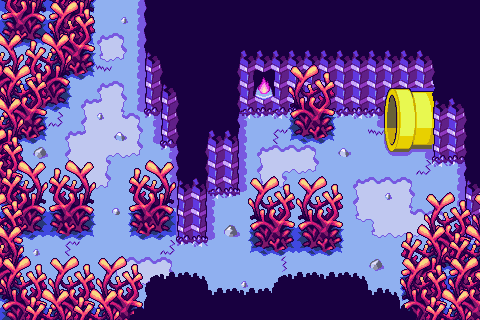
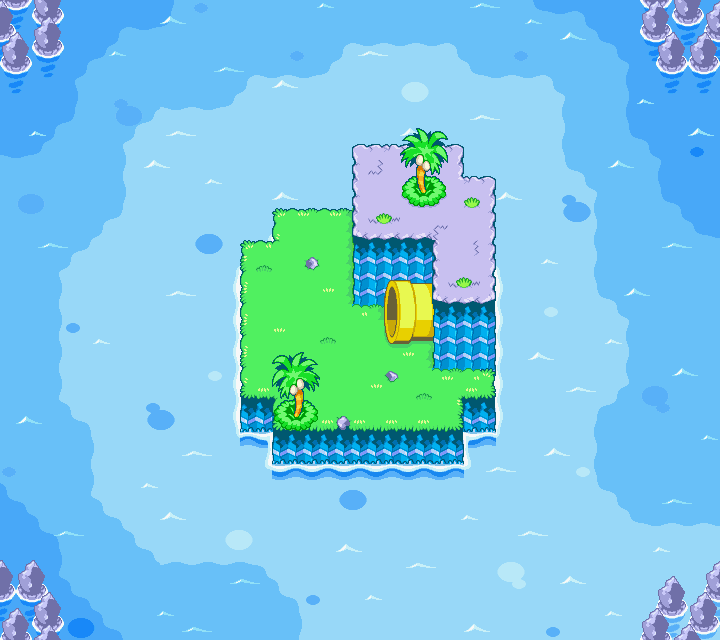
The prototype's map has a warp pipe leading up to the pipe at the bottom-left corner of Oho Ocean, while the final's is an island that can only be accessed by warp pipe in an area that can only be reached by whirlpool.
|
E3 |
Final |
|---|---|
|
|
Map 210#
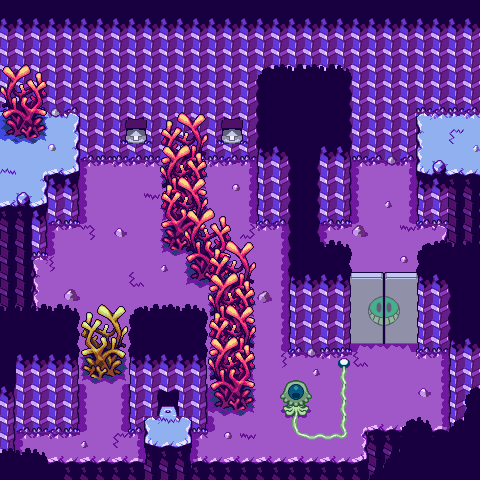
An early version of the Mini Mario puzzle room that leads to Gwarhar Lagoon. The final's version of this map is under a different map ID. There are many layout differences in the room compared to the final version, especially with the Firebrand alcove and the High Jump required to exit the room. The floor of most of the room is also a different color.
|
E3 |
Final |
|---|---|
|

|
Map 211#
The Mini Mario transition room. It didn't change too much compared to the final...in that it actually didn't change at all! Huzzah! ...Except that the final's is under a different map ID.
|
E3 |
Final |
|---|---|

|

|
Map 212#
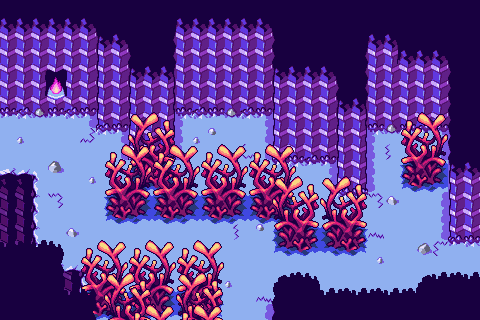
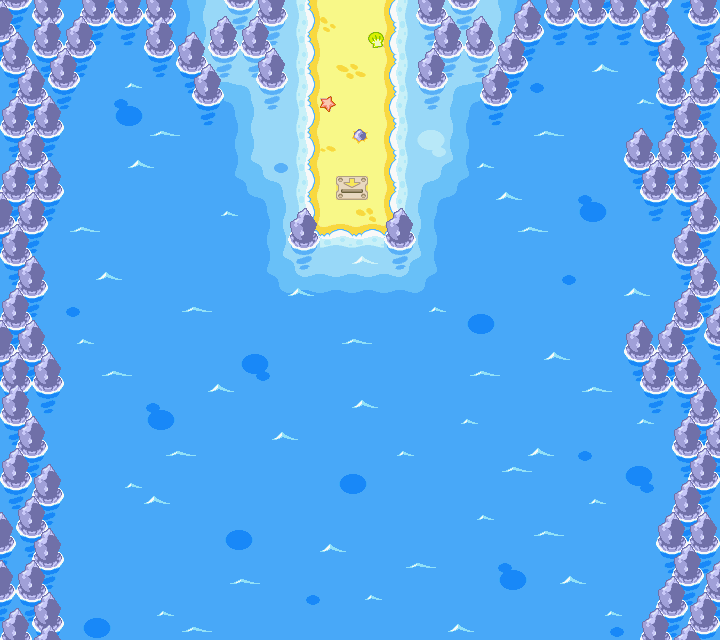
The dedicated room for Joke's End's surfing spot was once a completely scrapped seabed room that branches off in two directions. South leads to the pipe that leads to Gwarhar Lagoon, while east leads to an extended path that leads to another warp pipe back up to the surface at the bottom-right corner of the ocean.
|
E3 |
Final |
|---|---|
|
|
Map 213#
This warp pipe leads to Gwarhar Lagoon. The design of the room is completely different to the final's.
|
E3 |
Final |
|---|---|

|

|
Map 214#
A tiny scrapped seabed room. It wasn't really replaced by anything more interesting, to be honest...
|
E3 |
Final |
|---|---|

|

|
Map 215#
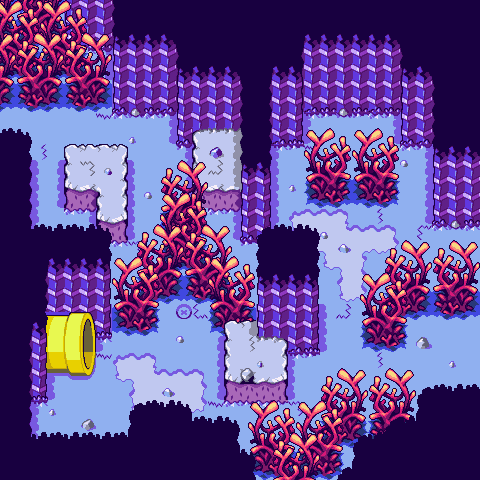
A scrapped larger seabed room with a pipe leading up to the bottom right corner of the ocean, as well as a bean spot next to it.
|
E3 |
Final |
|---|---|
|

|
Map 216#
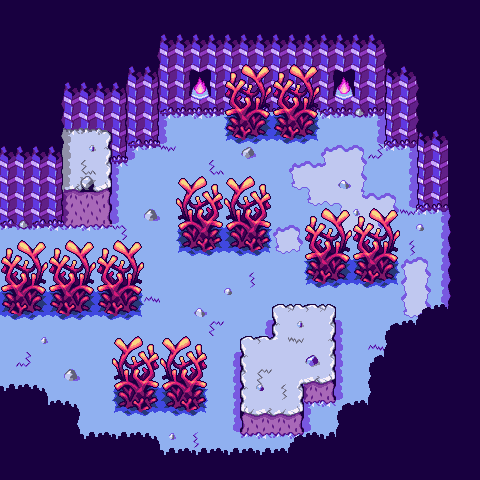
Now, this is another interesting map. This map is actually used three times in the prototype's seabed. It has a unique gimmick in that its left exit is dynamic; it'll return you to whatever room you were in previously when you entered it. If you hack the build to spawn you in here from the file select and try to exit it, it'll take you to a debug room. It's basically a "dead-end" room, as that's what it's used for in this build. The final has nothing like this, and replaced it with an ocean map with another whirlpool.
|
E3 |
Final |
|---|---|
|

|
Map 217#
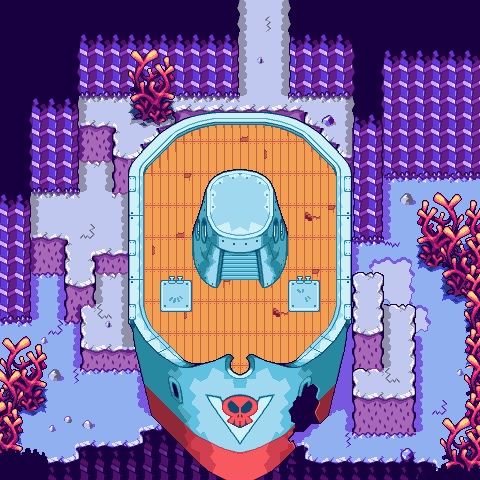
The prototype's equivalent to the sunken SS Chuckola map. Aside from that, not much else to say. Final's exists under a different map ID. You know.
|
E3 |
Final |
|---|---|
|

|
Unused
Map 4#
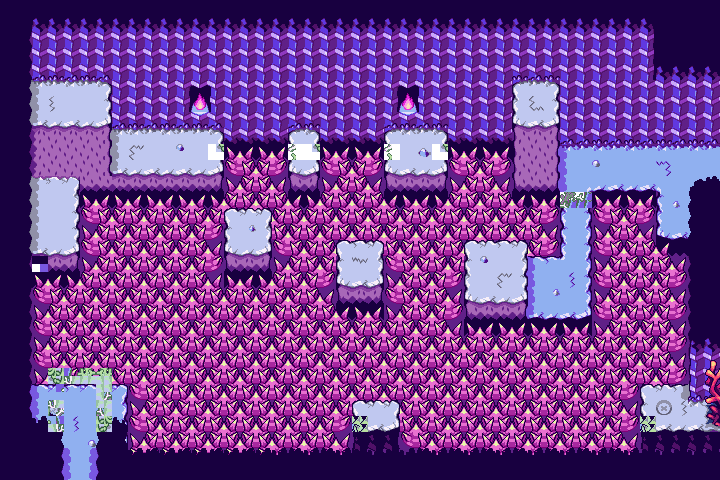
An unused map in this build and the final game, which for some reason was completely changed between the prototype and final. It's a copy of map 165 in the prototype, and 202 in the final game but with some glitched graphics. Unknown purpose.
|
E3 |
Final |
|---|---|
|
|
|