 This article has a talk page!
This is a sub-page of Proto:Mario & Luigi: Superstar Saga.
Alongside Oho Ocean, Teehee Valley is another area in the game that saw the most drastic changes, although nothing like the total layout overhaul the ocean got. Several touch ups to the general tileset of the area were made, like small rocks being bleached with sand, the cacti having harsher shading on their bases, and the giant fishbones and starfish poking a bit less out of the sand. There's also no bean spots to be seen in the desert in the prototype, something that was more than remedied in the final.
Used
Teehee Valley#
Map 286#
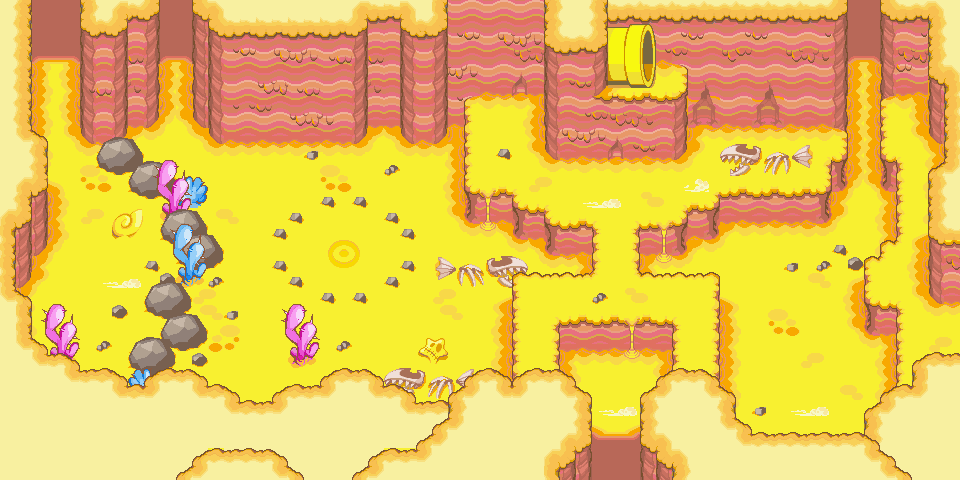
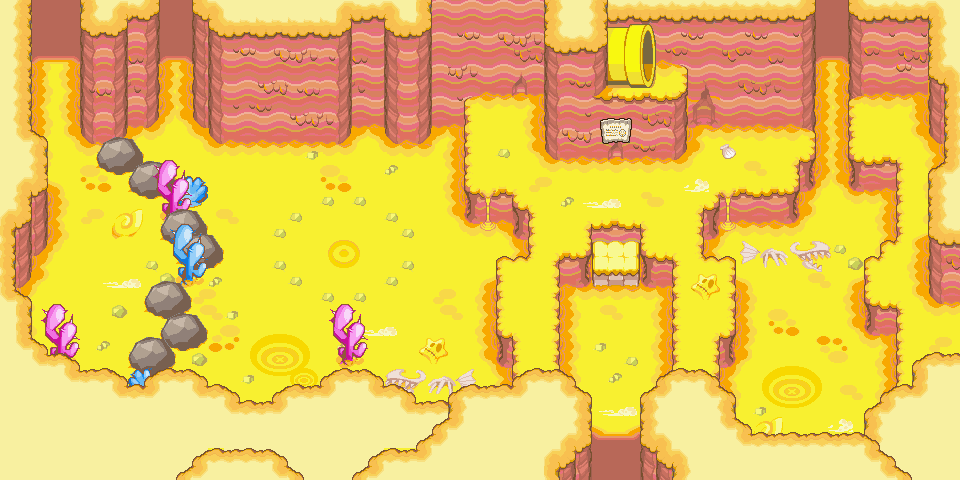
The entrance area. Stairs were added so that a High Jump isn't mandatory for entry, along with the general terrain being tweaked a fair bit. A giant fishbone was removed on the left, and the other was moved down off the ledge. A sign was slapped onto the wall beneath the pipe. Some bean spots were added, too.
|
E3 |
Final |
|---|---|
|
|
Map 287#
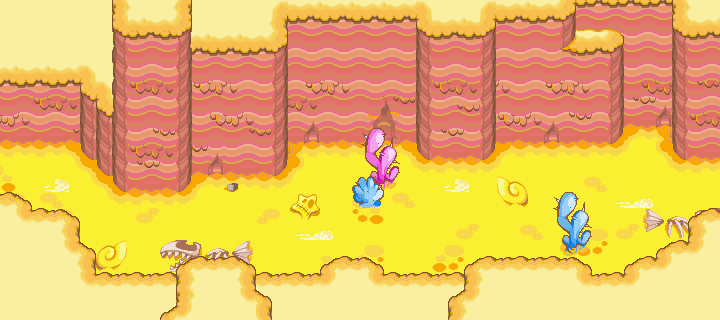
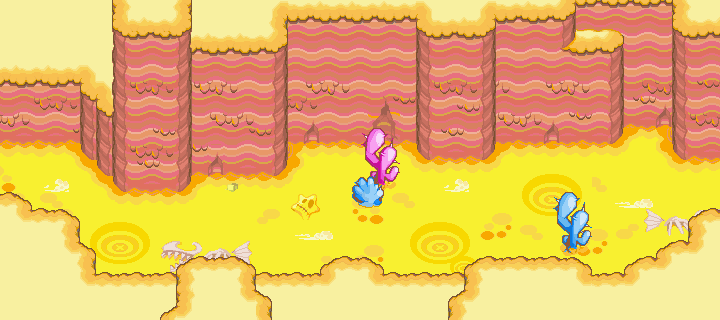
Several bean spots were added.
|
E3 |
Final |
|---|---|
|
|
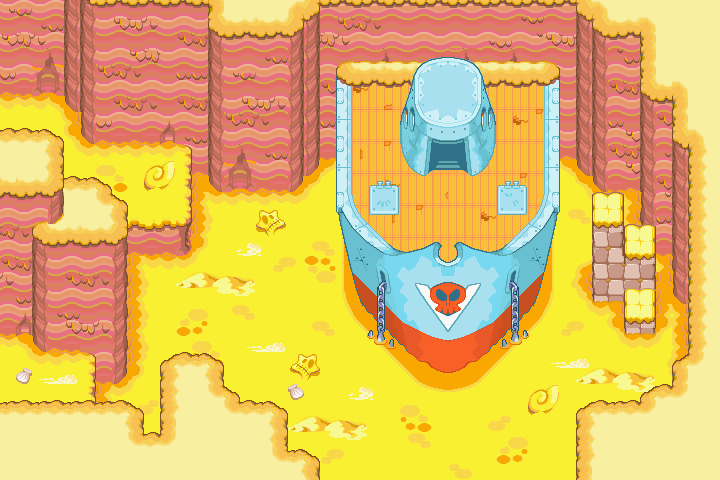
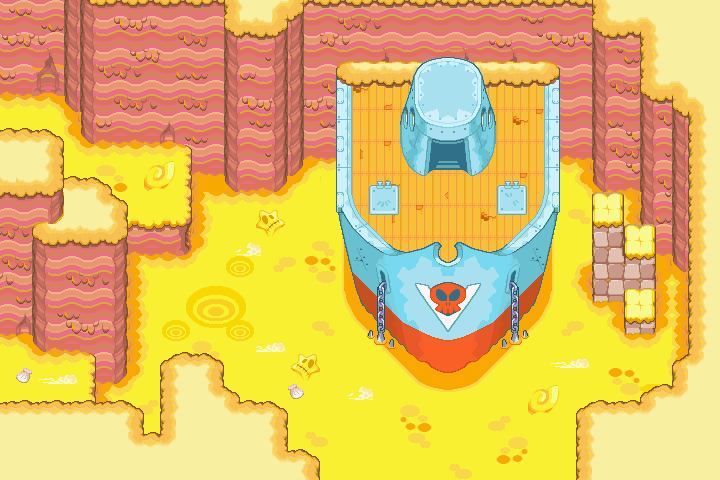
Map 288#
Some hills of sand were removed and replaced with different detail, and parts of the back wall were modified a bit.
|
E3 |
Final |
|---|---|
|
|
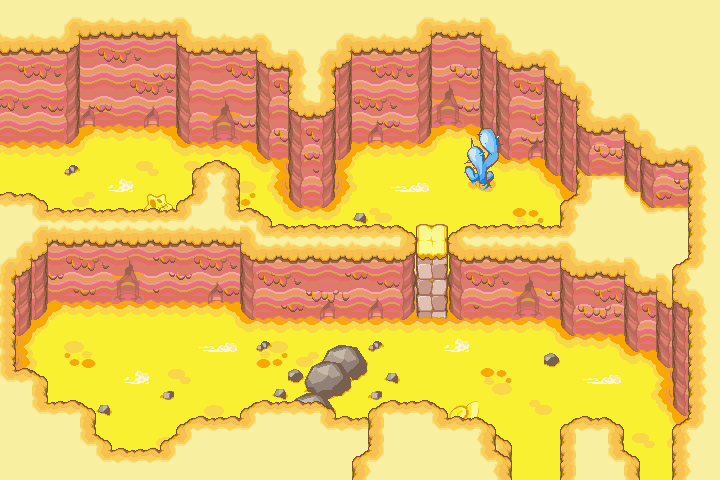
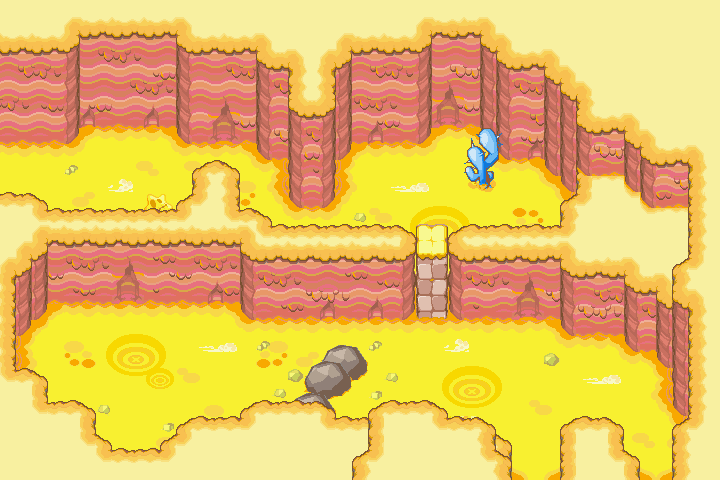
Map 290#
Some bean spots were added, and some shading on the sand was added to the exits at the bottom.
|
E3 |
Final |
|---|---|
|
|
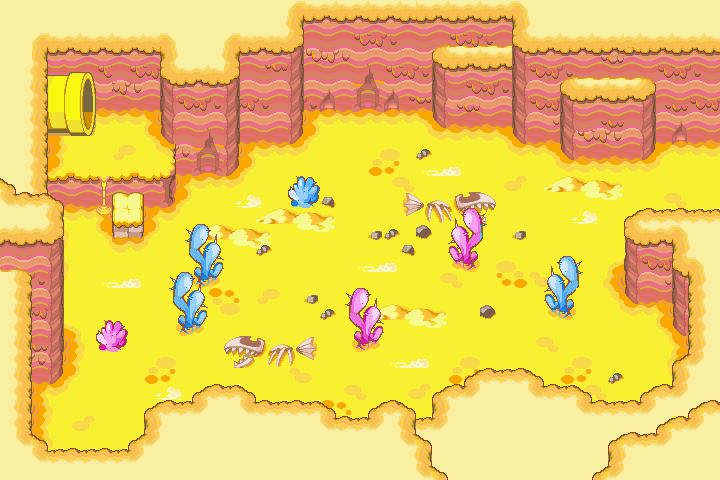
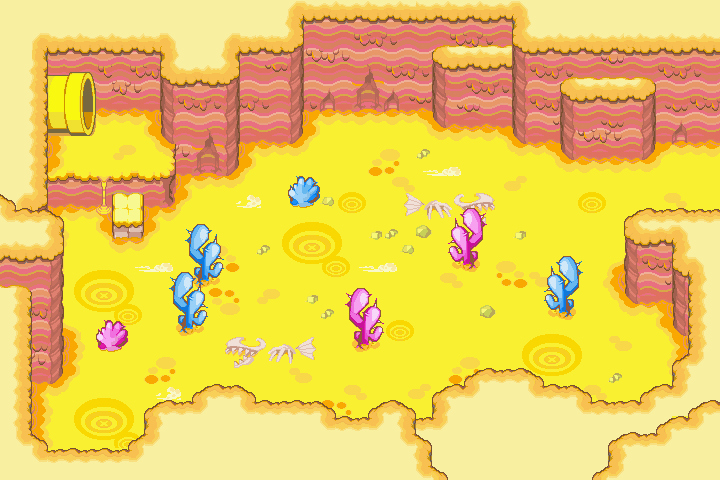
Map 289#
Hills of sand were removed and bean spots were added. The cliff that pokes out from the west side was also made a bit shorter.
|
E3 |
Final |
|---|---|
|
|
Map 320#
The rocks along the walls and ceiling look a bit different, and some green was added to the scene. The floor rock pattern is different, as well.
|
E3 |
Final |
|---|---|

|

|
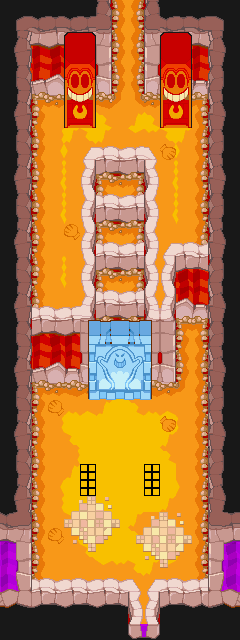
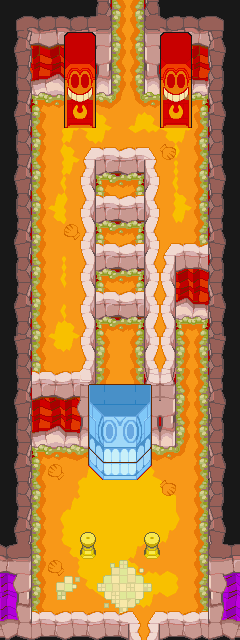
Map 321#
In line with the doors in Guffawha Ruins, the giant face door is instead a giant slab with a ghost on it. The door was also moved closer to the entrance to the room in the final. The torches were moved back towards the entrance, and use placeholder graphics. Floor rock pattern is a little different.
|
E3 |
Final |
|---|---|
|
|
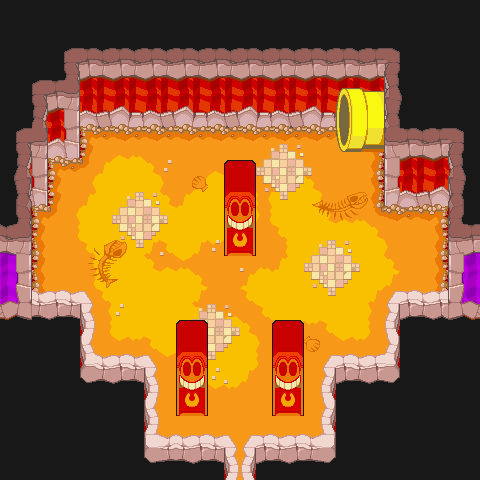
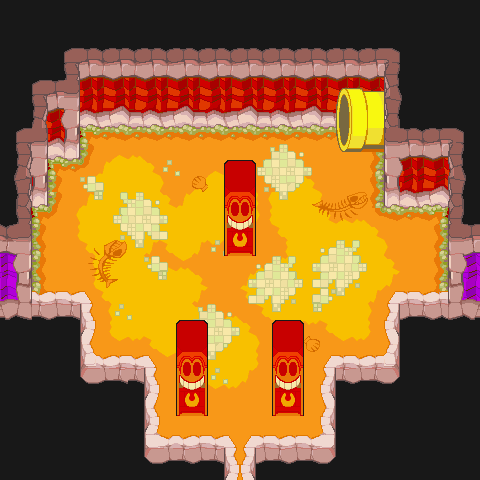
Map 322#
Different floor rock patterns.
|
E3 |
Final |
|---|---|
|
|
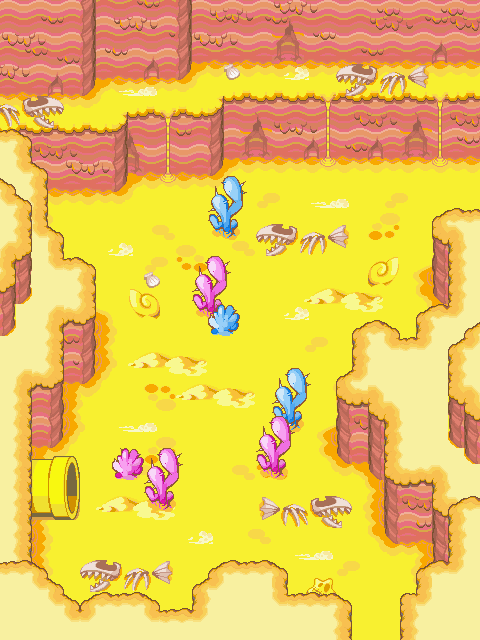
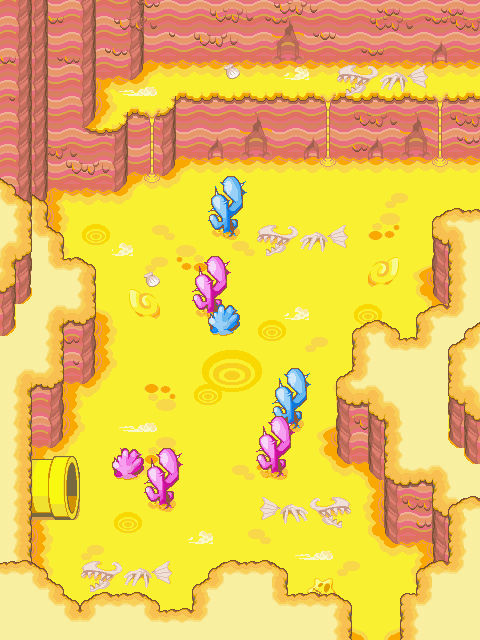
Map 292#
The yellow pipes that lead down underground in the final are non-functional in this build. Again, hills of sand were removed and replaced with different details. The backside cliff was changed a fair bit, as it originally was part of the path that lead to Guffawha Ruins. More on that in a bit.
|
E3 |
Final |
|---|---|
|
|
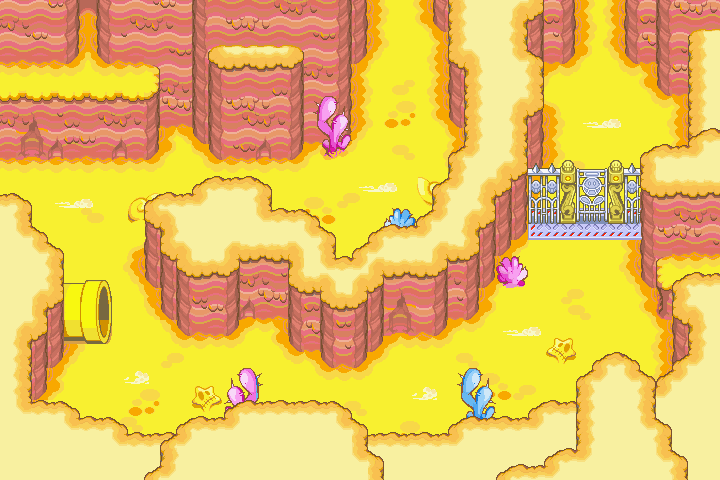
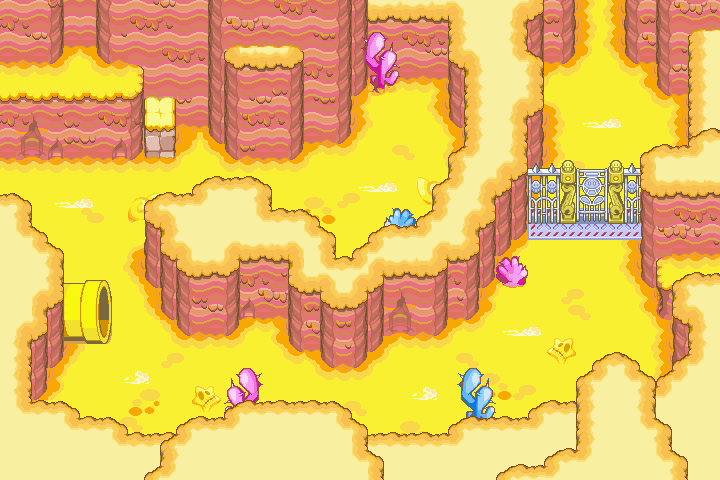
Map 293#
Now this is where things start getting...confusing. There is no way to open the gate in the prototype, and yet...there's a path that was removed in the final game that essentially lets you bypass the gate anyway. It's not known if something was meant to be blocking the way here to prevent skipping all the puzzles planned for the area, but as it stands in the prototype, you can just waltz on through with no effort. No need to bother with any gates.
|
E3 |
Final |
|---|---|
|
|
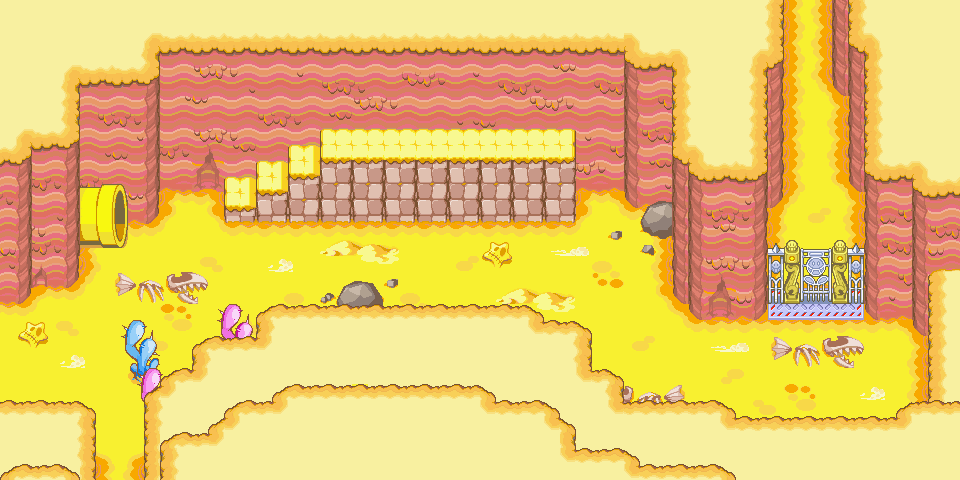
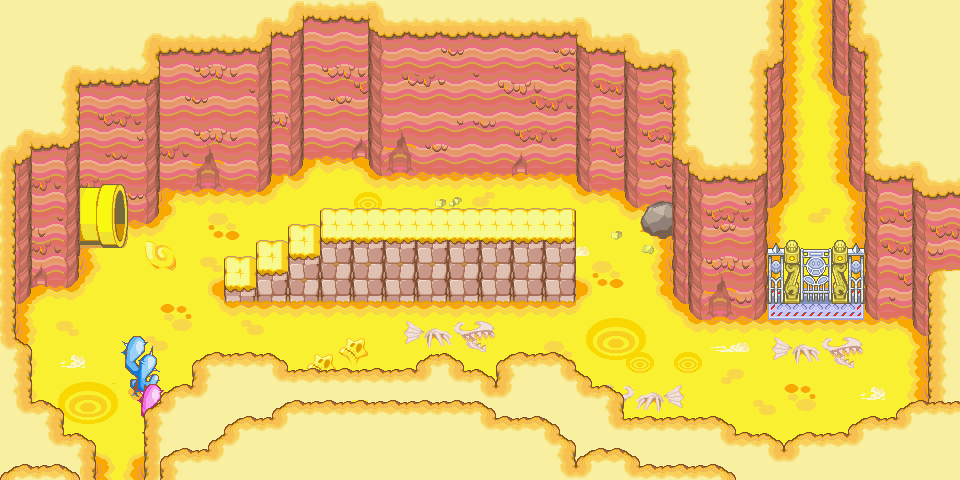
Map 295#
The left exit of this map was removed, and leads to a different map that connects to the previous one. The stairs were moved out and away from the back wall, which was changed to not be completely flat in the final. More hills of sand were removed, as well as a large stone in the middle of the room and a giant fishbone on the left.
|
E3 |
Final |
|---|---|
|
|
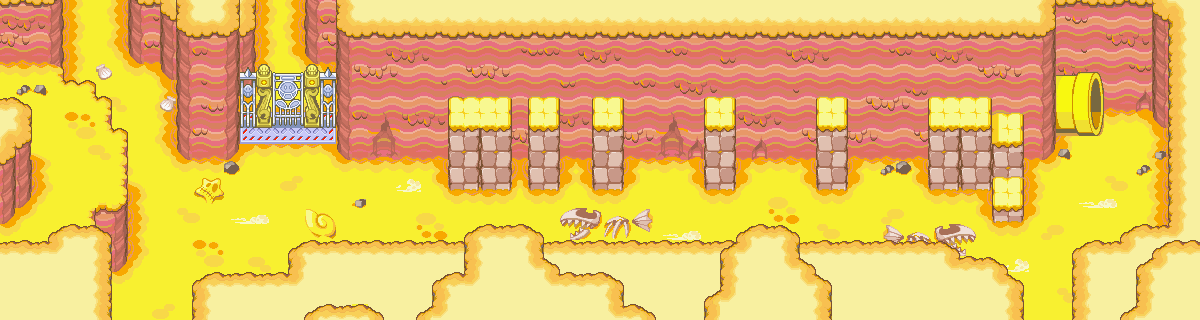
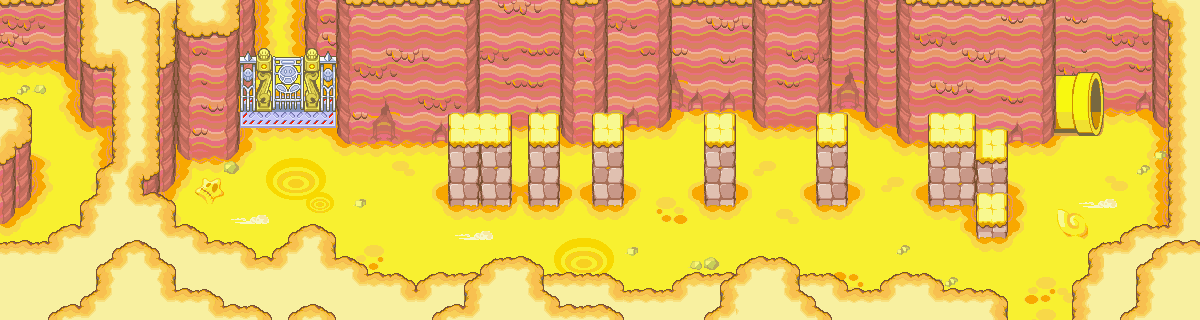
Map 297#
The foreground cliffs were moved down a bit to make way for the platforms, which were again moved out and away from the back wall. Many details on the sand changed. The exit at the bottom left was, again, removed, and the path on the left that leads to Guffawha Ruins was sealed off behind a wall.
|
E3 |
Final |
|---|---|
|
|
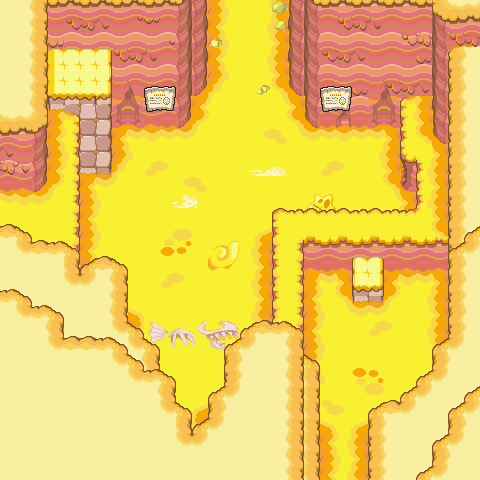
Map 298#
The room was made longer in the final. The platform that the Guffawha Ruins lift takes you to was originally a normal cliff instead of a stone platform. The second exit on the bottom left was removed, as well. A wall was added that needs to be scaled to reach Little Fungitown, and two signs were plastered onto the walls for good measure.
|
E3 |
Final |
|---|---|

|
|
Map 296#
A chunk of the path to Guffawha ruins. The left side was made less narrow in the final.
|
E3 |
Final |
|---|---|

|

|
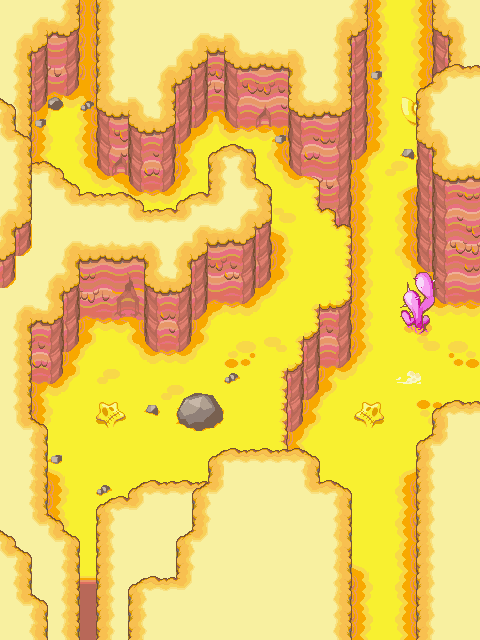
Map 294#
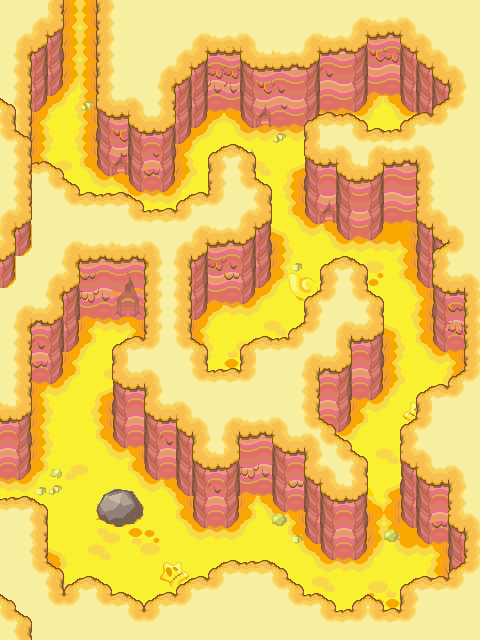
This is the room that was completely overhauled, and allowed the player to bypass all of the gates in the desert. Needless to say, all of that functionality was removed and the path was expanded upon, giving the area a more maze-like feel. The giant rock was also moved a bit further down. The exit at the bottom is what lead to that back ledge all the way back near the beginning of the desert. It was removed and instead changed to exit to the left.
|
E3 |
Final |
|---|---|
|
|
Map 291#
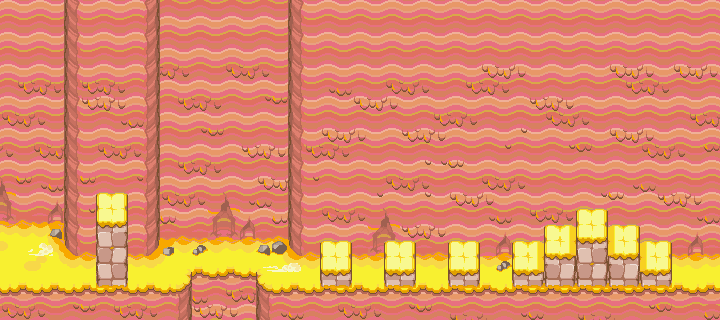
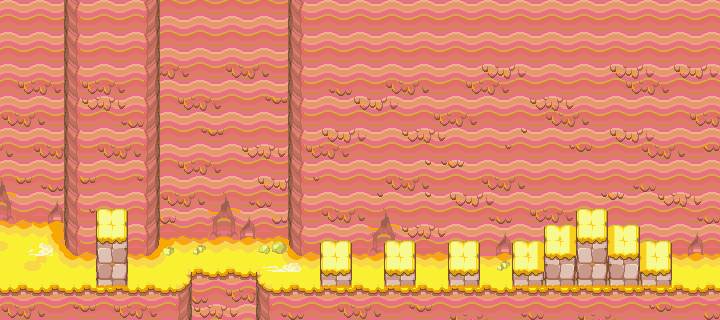
The pillar on the left was lowered a bit.
|
E3 |
Final |
|---|---|
|
|
Map 299#
The map was extended in the final to accommodate for the Trunkle boss fight, which doesn't exist in the prototype at all.
|
E3 |
Final |
|---|---|

|

|
S.S. Chuckola#
Map 303#
The captain's room had the globe on the opposite side of the desk, and one more bottle was put on that desk in the final. The entrance to the storage room in the back originally could only be entered by Mini Mario.
|
E3 |
Final |
|---|---|

|

|
Map 302#
The entrance originally had a metal plate on it.
|
E3 |
Final |
|---|---|

|

|
Map 304#
The door frame was originally a bit longer.
|
E3 |
Final |
|---|---|

|

|
Map 308#
The door frame was originally a bit longer.
|
E3 |
Final |
|---|---|

|

|
Map 309#
The door frame was originally a bit longer.
|
E3 |
Final |
|---|---|

|

|
Map 310#
The door frame was originally a bit longer.
|
E3 |
Final |
|---|---|

|

|
Map 311#
The door frame was originally a bit longer.
|
E3 |
Final |
|---|---|

|

|
Little Fungitown#
Little Fungitown's sky was a deeper blue, and it had a gradient, like Hoohoo Mountain and Stardust Fields. That gradient is not shown in any of the maps on this page.
Map 315#
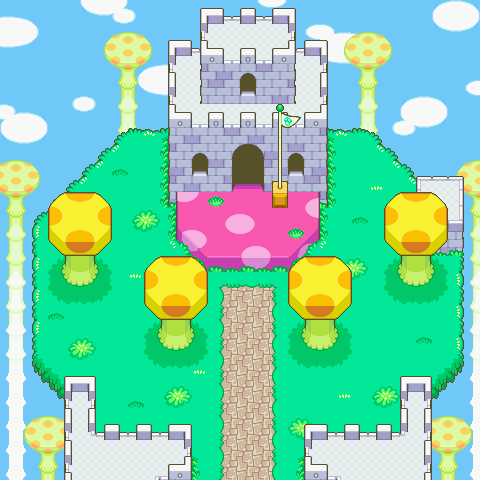
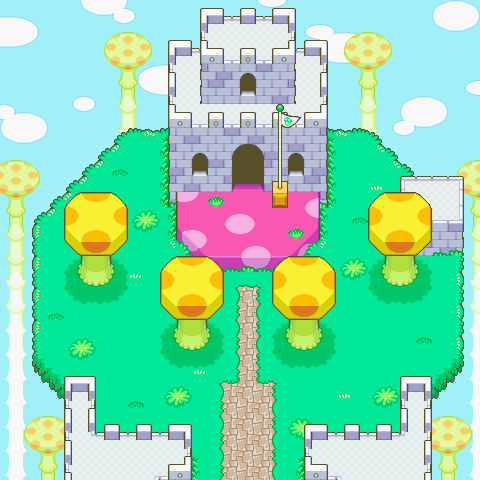
The mushroom platforms were moved a bit closer together, the platform on the right was extended slightly, and the brick path to the embassy was narrowed halfway through.
|
E3 |
Final |
|---|---|
|
|
Map 317#
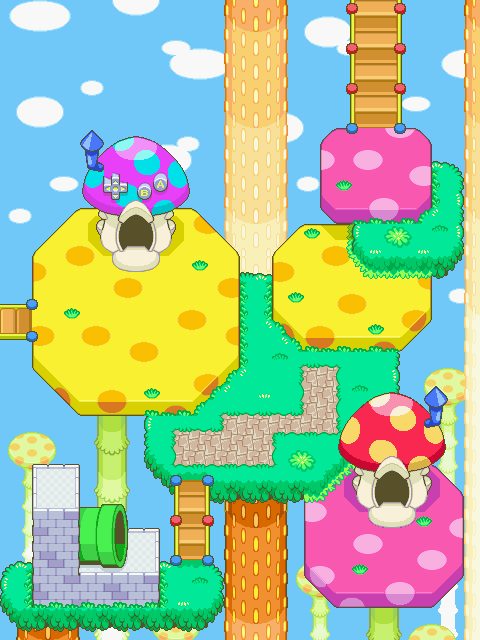
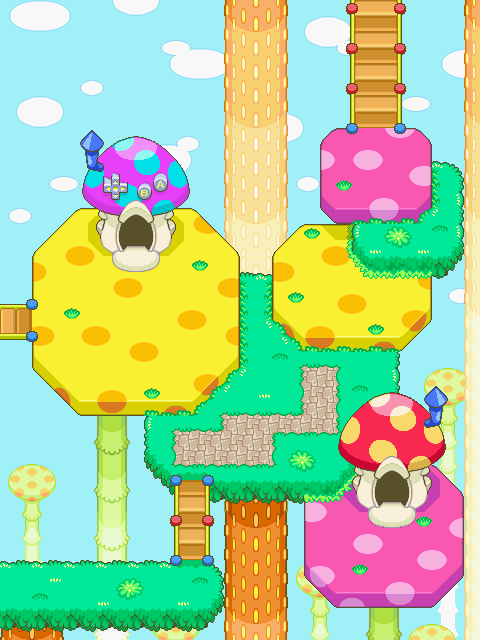
The warp pipe is part of this room instead of its own dedicated room and one of the mushrooms in the background was lowered a fair bit.
|
E3 |
Final |
|---|---|
|
|
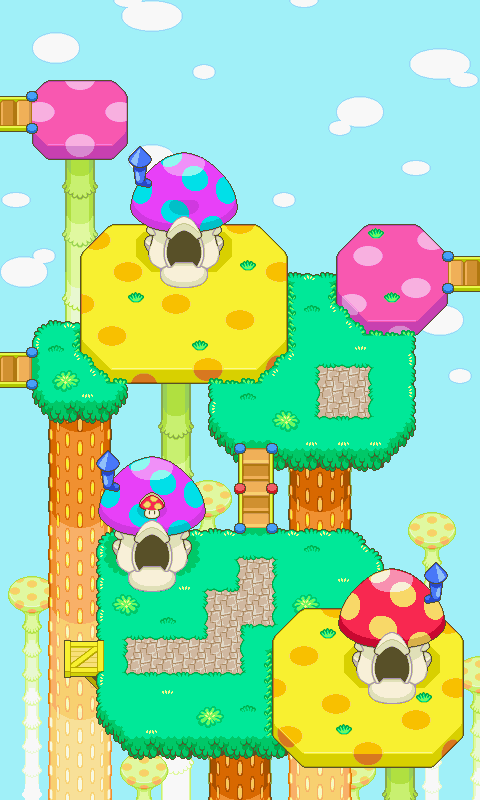
Map 318#
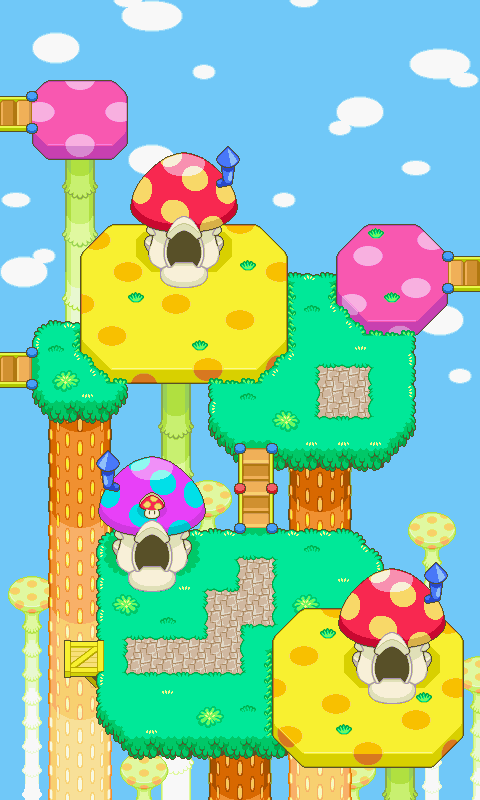
The roof color of the northern house was changed and the chimney on it swapped sides.
|
E3 |
Final |
|---|---|
|
|
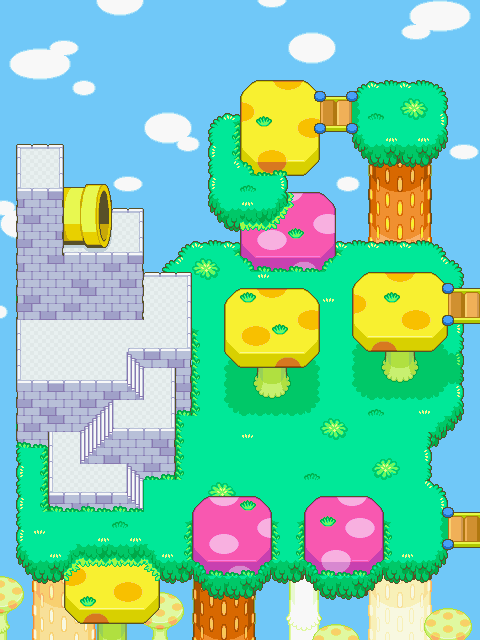
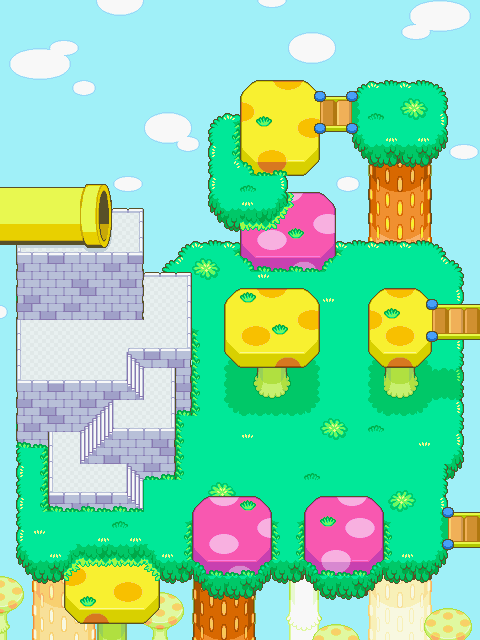
Map 319#
The yellow pipe was made to extend off-screen and the yellow mushroom platform on the right was moved down a little bit and made more narrow.
|
E3 |
Final |
|---|---|
|
|
Map 379#
The room was originally taller. The beanbag was redrawn, used different colors, and was re-positioned. The star carpet had a slightly different design.
|
E3 |
Final |
|---|---|

|

|
Map 380#
The item shop was also a bit taller. The second floor was redesigned and the first floor was updated with many new graphics. Also, a cash register was added, because it's always nice being able to keep track of your money.
|
E3 |
Final |
|---|---|

|

|
Map 384#
The arcade looked fairly different. It had a much more purple color scheme compared to the final's mix of pink-red and purple, along with the gold. The counter was redesigned, the entrance is more defined, more stars were added to the walls, and another green plant decoration was placed on the second floor.
|
E3 |
Final |
|---|---|

|

|
Map 386#
The badge shop originally didn't exist, and was just another normal house.
|
E3 |
Final |
|---|---|

|

|
Map 387#
Psycho Kamek's house, although he didn't exist in this build yet, either. An extra step was removed and the green plant decoration was relocated closer to the entrance. Meanwhile, the second floor was made completely barren, and lost its guardrail too.
|
E3 |
Final |
|---|---|

|

|
Unused
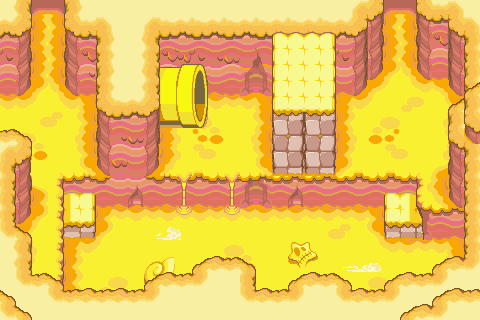
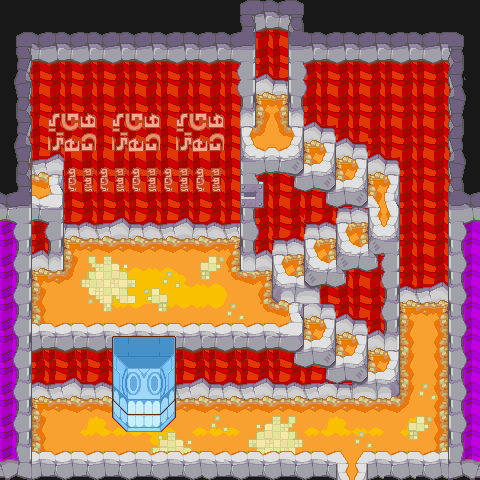
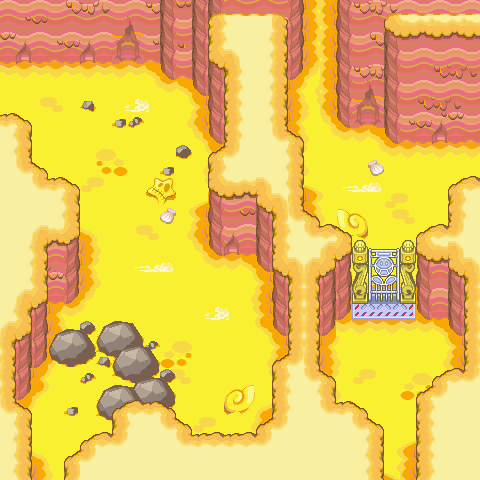
There exist three completely scrapped maps for Teehee Valley in the demo, none of which have any collision, events, or proper exits. All of them were replaced in the final and used elsewhere.
Map 283#
A map with a yellow pipe and some stairs, along with two apparent exits to the north and one to the west. Replaced with the "monster" room in Guffawha Ruins in the final, which didn't exist at all in the prototype.
|
E3 |
Final |
|---|---|
|
|
Map 284#
A map with another yellow pipe, sealed off by a gate. Two exits to the east, and one to the north. There's a lower bottom area that would've been blocked off by rocks. Replaced in the final with the transition room between Guffawha Ruins and Little Fungitown, which doesn't exist in this build, either.
|
E3 |
Final |
|---|---|

|

|
Map 285#
A map with two sides to it. One side has a gate, the other has a group of rocks blocking off a bottom area. Two exits to the south, one to the north, one to the east, and one to the west. Replaced in the final with a chunk of Oho Ocean.
|
E3 |
Final |
|---|---|
|

|
Map 300#
The rooms that Princess Peach are taken to during the escort quest are technically unused in this build due to the warp pipes in the desert being non-functional. The maps exist, though, and are very similar to the final's. This one has no rocky floor patterns.
|
E3 |
Final |
|---|---|

|

|
Map 301#
The design of the pedestal that Peach ends up on is different.
|
E3 |
Final |
|---|---|

|

|