 This article has a talk page!
This is a sub-page of Proto:Crash Bandicoot: Warped.

|
This prototype is documented on Hidden Palace. |
The September 26th, 1998 prototype of Crash Bandicoot: Warped is a review version of the game dated around two weeks before the final NTSC-U release version. It was released on April 17th, 2021.
Cheat Features#
Cheat Menu#
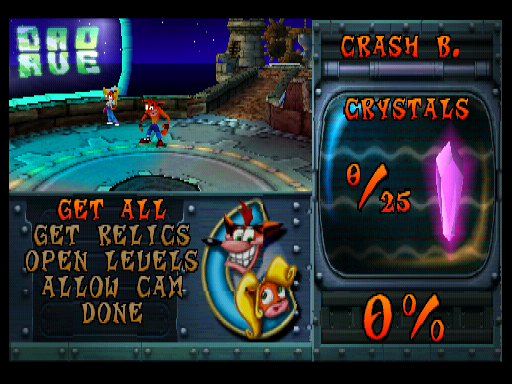
This build contains a small menu that can be accessed by inputting Up, Up, Down, Down, Left, Right, Left, Right, Circle while the game is paused. There are five features to be seen: GET ALL, GET RELICS, OPEN LEVELS, ALLOW CAM, and NO CHEATS.
- GET ALL: Gives 25 crystals and 25 Sapphire relics from the start, as well as all colored gems and all abilities for Crash.
- Notably, Tomb Time is the only level where the crystal is not retrieved when enabling this. Instead, a crystal will be assigned to ID 09, which does not belong to any level.
- GET RELICS: Gives 25 Sapphire relics from the start.
- OPEN LEVELS: Unlocks all areas of the warp room. Logically not available if you are not in the warp room.
- NO CHEATS: Locks the open areas. It only appears when the "OPEN LEVELS" option is enabled.
- ALLOW CAM: Does nothing. In earlier builds, this option enabled a free camera with the second controller.
Level Stats#
Holding R2 and opening a level portal lets you see time trial leaderboards without the level's crystal, but also shows a fourth value set in the bottom right corner. It applies to all levels, including bosses. This fourth set flashes between two categories:
- The first set displays the number of deaths and the playtime of the level before the level's crystal is retrieved.
- The second set displays two time trial values referred to as B and G. The B value stands for "bronze" and counts how many times you entered the mode before obtaining any relic, while the G value stands for "gold" and counts how many times you entered the mode after obtaining a Sapphire relic. Once you have obtained a Gold or Platinum relic, the game will stop tracking the level.
Debug Mode#
To enable debugging features, you can turn on debug mode with the following GameShark code:
80069010 0100
General Differences#
Startup#
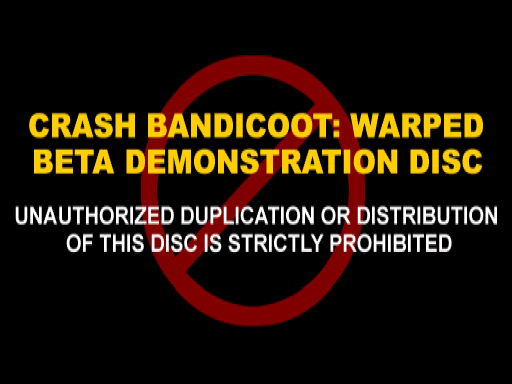
- The game starts with a warning screen labeling this review as a Beta Demonstration Disc and explicitly prohibiting any duplication or distribution of the disc content.
- In the Naughty Dog box screen, Aku Aku's sound effect plays at the end of the animation.
- You can skip the Sony and Universal startup screens as soon as they show up. In the final game, you must wait until the announcer stops talking.
- The logo animation features different sound effects.
- You cannot skip the logo animation.
- The buzz sound effect is missing.
- Demo mode has different inputs.
- Tiny Tiger, Tomb Wader, and Midnight Run demos are not present.
Gameplay#
Sep 26 |
Final |
Japanese |
|---|---|---|
 |
 |
 |
- Character icons are mostly the same, aside from Crash and Coco's, which are seemingly styled after Crash 2 in terms of size and shading:
- Crash's icon is a higher-res variant of his life icon - a re-drawn version of which is in fact used in the Japanese version.
- Coco's icon is closest in pose to her pause menu icon, only with a green flower in her hair as opposed to blue, and rather rough shading.
- Tiny, Dingodile, N. Tropy, N. Gin, and Cortex's icons feature a rough outline.
|
Sep 26 |
Final |
|---|---|

|

|
- The Time Twister's portal graphic features a totally different design for the load/save screen. The fifth chamber also seems to be missing.
- The music does not fade out when entering a portal.
- All music tracks are in mono, regardless of the output option.
- The bonus round and alternate route music tracks do not loop properly and they just start over.
- Music volume defaults to 100% as opposed to 75%.
- Coco does not blink her eyes in any of her animations.
- The music volume in the cutscenes are erroneously applied to the game's music settings even after they have ended. This results in the game starting with the music volume set to 50% after the opening cutscene.
- Skipping the opening at certain points can make the music volume go even lower.
- Double jumps can be only chained once with enemy and object bounces.
- Crash's spin range is smaller while hanging on meshes, like in Crash 2.
- The angel death animation reuses the wing flapping sound from Crash 2.
- The sound of swallows chirping when flying away does not play properly for the majority of them.
- Skipping a boss cutscene while they are talking will cause the audio to continue playing afterwards.
- Super Powers do not make a sound effect when showing up.
- Vibration option (labeled "Vibr." instead) is available at all times, regardless of the controller used.
- The Fruit Bazooka has some differences:
- Crash does not pull the bazooka in the direction he is currently facing, and tends to pull it forward in most areas.
- You have to wait until the animation of Crash putting the bazooka away ends before you can actually start moving after using it.
- Wumpa shots will despawn as soon as Crash puts the bazooka away.
- The Wumpa explosion visual effect shares the same one as the TNT explosion.
- Many objects can be seen through scenery, objects, or walls. For example, Crash's body can be seen through lifting platforms.
- The game over screen features the blue background from Crash 2.
- The clock in the logo turns black for a brief second after returning to the title screen through a game over.
- When you quit the game, the music and FX volumes will remain at their current values, rather than resetting to default - aside from the opening cutscene, which always resets the FX volume to default.
- The highest percentage you can normally achieve is 104%. The final 45th clear gem that spawns in the center of the warp room after collecting all relics (Gold or higher) is not present.
- The total amount of gems and relics in the pause menu does not increment when getting the remaining collectibles from Hot Coco and Eggipus Rex.
- Fake Crash's cameos are visible from the start, rather than appearing after the game has been completed.
Time Trial#
- Time crates do not count when destroyed by nearby explosions.
- Locked crates can still provide Wumpa fruit.
- The music volume will decrease during the Enter Name screen just like in the final game, but it will not reset to normal when restarting a level. This effect is cumulative, and one can make the volume go down to 0% by repeating the time trial multiple times.
Level |
Sep 26 |
Final |
|---|---|---|
Toad Village |
1:03:00 |
1:03:00 |
Under Pressure |
1:46:00 |
1:46:00 |
Orient Express |
0:41:00 |
0:41:00 |
Bone Yard |
1:45:00 |
1:45:00 |
Makin' Waves |
1:08:00 |
1:08:00 |
Gee Wiz |
1:35:00 |
1:35:00 |
Hang'em High |
1:24:00 |
1:24:00 |
Hog Ride |
0:45:00 |
0:45:00 |
Tomb Time |
1:42:00 |
1:42:00 |
Midnight Run |
0:53:00 |
0:53:00 |
Dino Might! |
1:34:00 |
1:34:00 |
Deep Trouble |
1:47:00 |
1:47:00 |
High Time |
2:12:00 |
2:12:00 |
Road Crash |
1:25:00 |
1:25:00 |
Double Header |
1:27:00 |
1:27:00 |
Sphynxinator |
1:42:00 |
1:42:00 |
Bye Bye Blimps |
1:09:00 |
1:09:00 |
Tell No Tales |
1:42:00 |
1:42:00 |
Future Frenzy |
2:01:00 |
2:01:00 |
Tomb Wader |
2:44:00 |
2:44:00 |
Gone Tomorrow |
2:05:00 |
2:05:00 |
Orange Asphalt |
1:36:00 |
1:36:00 |
Flaming Passion |
1:43:00 |
1:43:00 |
Mad Bombers |
2:08:00 |
2:08:00 |
Bug Lite |
1:49:00 |
1:49:00 |
Ski Crazed |
1:16:00 |
1:16:00 |
Area 51? |
1:53:00 |
1:53:00 |
Rings of Power |
1:20:00 |
1:20:00 |
Hot Coco |
1:00:00 |
1:00:00 |
Eggipus Rex |
0:55:00 |
0:55:00 |
- Most of the Platinum relic times are harder in this version.
Levels#
Medieval Levels#
- Chickens do not scream or drop feathers when shot by the Fruit Bazooka.
- There are no invisible boundaries preventing the player from standing on top of the stone bridge fences.
Atlantis Levels#
- Respawning at the starting point will cause Crash to spawn facing towards the camera.
- In Time Trial, the chronometer visually freezes for a few seconds when Crash loses a mask while being electrocuted.
China Levels#
- You cannot sprint by holding R2.
- Coco retains her default facial expression during her jump animation.
- Coco does not close her eyes during her landing animation.
- You can stand on the sides of the scenery, as invisible boundaries are less restrictive.
- Hanging life crates are ? crates but with extra lives.
- The tick made when breaking crates while you are sprinting gets higher and higher, as if you were racking up combos.
- It is not possible to use the player debug cheat to obtain Aku Aku masks for Coco.
Prehistoric Levels#
- Some minor differences can be seen in the scenery of the levels:
- Dinosaur skulls in the scenery have an extra hole in front of the eye sockets.
- Ground textures are different, featuring a different grass shape, with small rings inside.
- They also lack a proper transition to the swamp floor around chase sections.
- If Crash gets caught by the triceratops while in mid-air, his flattened body will remain floating.
- Time crates do not count if broken by triceratops.
- Crash can still be killed by the triceratops even after it has stopped moving if you get too close.
- Due to a bug, performing the super body slam close enough to Baby T will make him disappear.
- Performing it on his back also does not destroy vegetation, crates or enemies around Baby T.
- Body slamming on the egg will not hatch it either.
- Most of crates placed individually on swamp floors have different rotations.
- The reflection of Crash's torso when pulling out the bazooka erroneously appears on certain parts of the normal ground.
Jet Ski Levels#
- When entering the exit portal, the wake of the jet ski will not disappear.
Arabian Levels#
- No sound effect plays when the blades thrown by sword-throwing lab assistants hit the wall.
Highway Levels#
|
Sep 26 |
Final |
|---|---|

|

|
- The traffic lights textures received subtle tweaks in the final game.
- One of the engine noises when accelerating is missing.
- Winding signs cannot be taken down.
- In Time Trial, the chronometer visually freezes for a few seconds when Crash goes out of bounds.
Egyptian Levels#
|
Sep 26 |
Final |
|---|---|

|

|
- The black dog hieroglyph texture (a tribute to Naughty Dog's mascot, Morgan) that appears on the walls of the pyramid was redrawn.
- The stone blocks dropped by the lever pulling lab assistants retain their collision after crushing Crash, meaning he can be carried along by the blocks while in his squashed state.
- There is no explosion sound effect when Crash is hit by the jar monkeys' projectiles.
- You cannot bounce on the pull levers in succession.
- Moving platforms only make a sound when moving from right to left.
- In Time Trial, the chronometer visually freezes for a few seconds when Crash loses a mask while being crushed by doors or falling blocks.
Baron Levels#
- Pausing while the sunlight is shining the screen will make the pause screen look completely white.
Future Levels#
- Laser fences in the 3D sections play the same sound effect as the orange ones in the side-scrolling sections.
- Some checkpoint crates feature a proper reflection in the mirrors.
Cutscene Differences#
Opening#
- It can be skipped by pressing X or Start, as opposed to Triangle only.
- The screen shakes during the fall of the large chunks of debris from the Cortex Vortex down to Earth.
- One of the palmtrees textures in the temple scenery lacks shading.
- There is a black geometry in the Polar scene on the bottom right corner.
- An extra line of Aku Aku saying "Crash, now!" plays when everyone retreats inside and Crash is alone outside. Interestingly, this cut segment is present in earlier builds of Crash Team Racing, where the original dialogue was present as a placeholder in the audio files.
- The camera angle on Uka Uka's first apparition is further lower.
- There is no background music during the conversation between Uka Uka and Cortex.
- The early load/save monitor is present in the Time Twister, and contains some rendering issues behind Cortex's head.
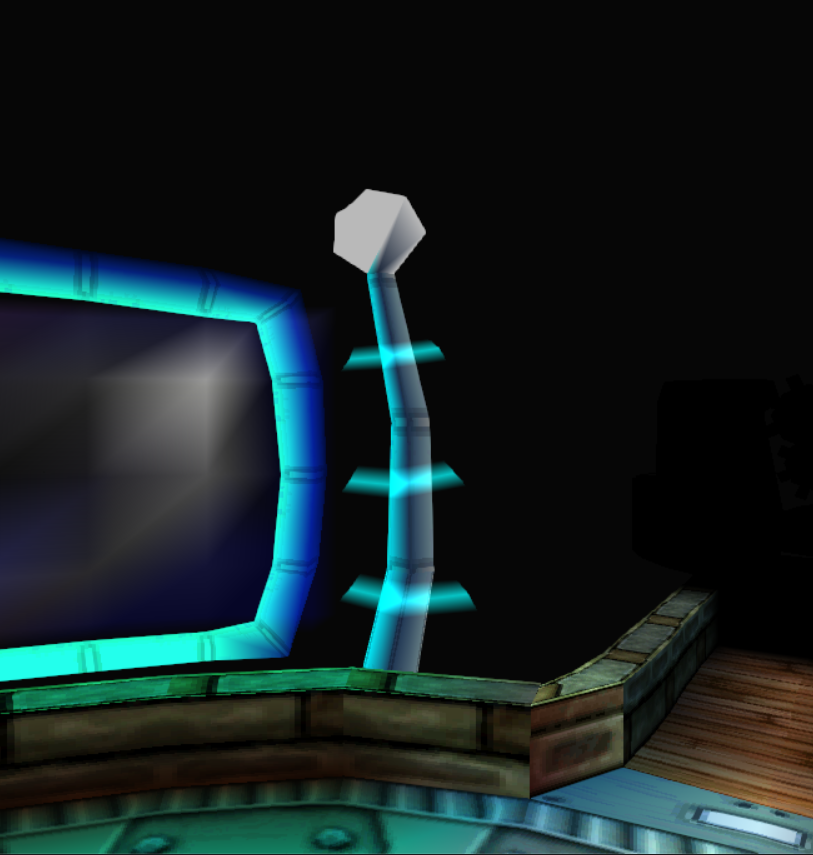
- A Tesla coil can be seen behind Cortex attached to the side of the monitor, which is not present in the actual warp room.
- No sound effect plays for N. Tropy's piston-driven time machine outfit.
- There is no background music during Aku Aku's storytelling.
- The top hat in the desk of Crash's house is upside down.
- The stone wall inside the fireplace is untextured.
- Aku Aku's facial expression when he goes outside the house is different.
Normal Ending#
- The sound made when Cortex falls on the floor reuses the footstep sound effect.
- The portal pad has an extra round texture in the center.
- The control room background is static.
True Ending#
- The sound made when Cortex falls on the floor reuses the footstep sound effect.
- The portal pad has an extra round texture in the center.
- The control room background is static.
- The electric noises made when electricity sparkles appear around Uka Uka is different.
- The warp sphere sucking sound effect is missing.
- The humming sound effect when the warp sphere is expanding in the Cortex's boss fight room is missing.
- Textures in Cortex's boss fight room are corrupted.
- The fence outside Crash's house is untextured and there are no falling snowflake particles.
- Trees also use the default coloration instead of a grey tone.
- The stone wall inside the fireplace is untextured.
- The top hat in the desk is upside down.
- Baby T is placed closer to the plant vase, making his face being covered by the foliage.
- The cushions are both colored beige instead of green and blue.
- Uka Uka is silent during the baby scene.
- He is also untextured on the sides.
- The music volume decreases before Aku Aku's final speech in the credits.
Warp Room#
|
Sep 26 |
Final |
|---|---|
|
|
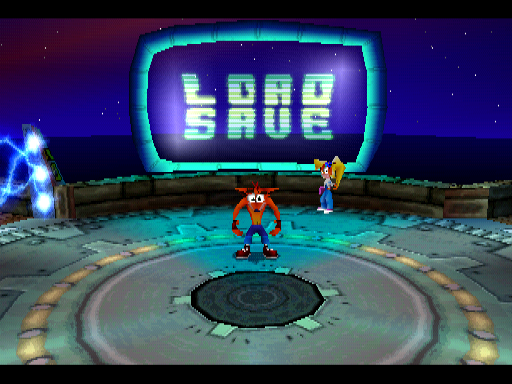
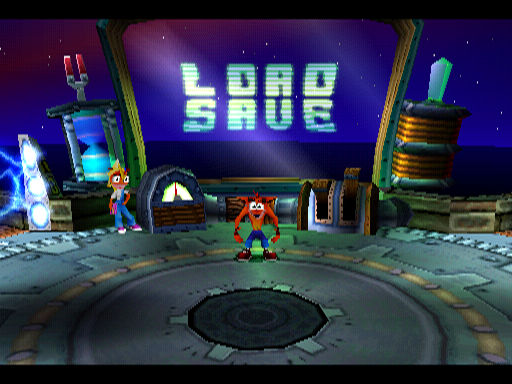
- The load/save screen has a much more minimalist design, lacking the ornamental assets around it. The monitor itself is also colored blue instead of yellow and turquoise.
- Coco stands on the right side of the screen, looking to the left, rather than standing on the left side, looking towards the center of the room.
|
Sep 26 |
Final |
|---|---|

|

|
- The default save file icon when starting a new game features Crash sighing in Gee Wiz.
- Hot Coco uses Totally Fly's icon from Crash 2 as a placeholder.
- Eggipus Rex uses the empty save slot icon as a placeholder.
- Tiny's icon in the level stats is placed lower, causing it to be overlapped with Crash's one.
- Electric gates feature blue textures.
- The controller does not rumble when touching the gate.
- Some of the textures have different lighting, such as the bricks.
- In the first chamber, one of the gears in the scenery is missing its shaft.
- Part of the wall textures on the bridge leading to the fifth chamber is broken.
- There are less invisible walls covering the fifth chamber.
|
Sep 26 |
Final |
|---|---|

|

|
- The middle platform has an earlier set of textures with minor differences, most notably being colored blue in the center rather than yellow. This resembles the design of the lamps from the bonus area of Gee Wiz, which is present in the E3 1998 build.
Secret Chamber#
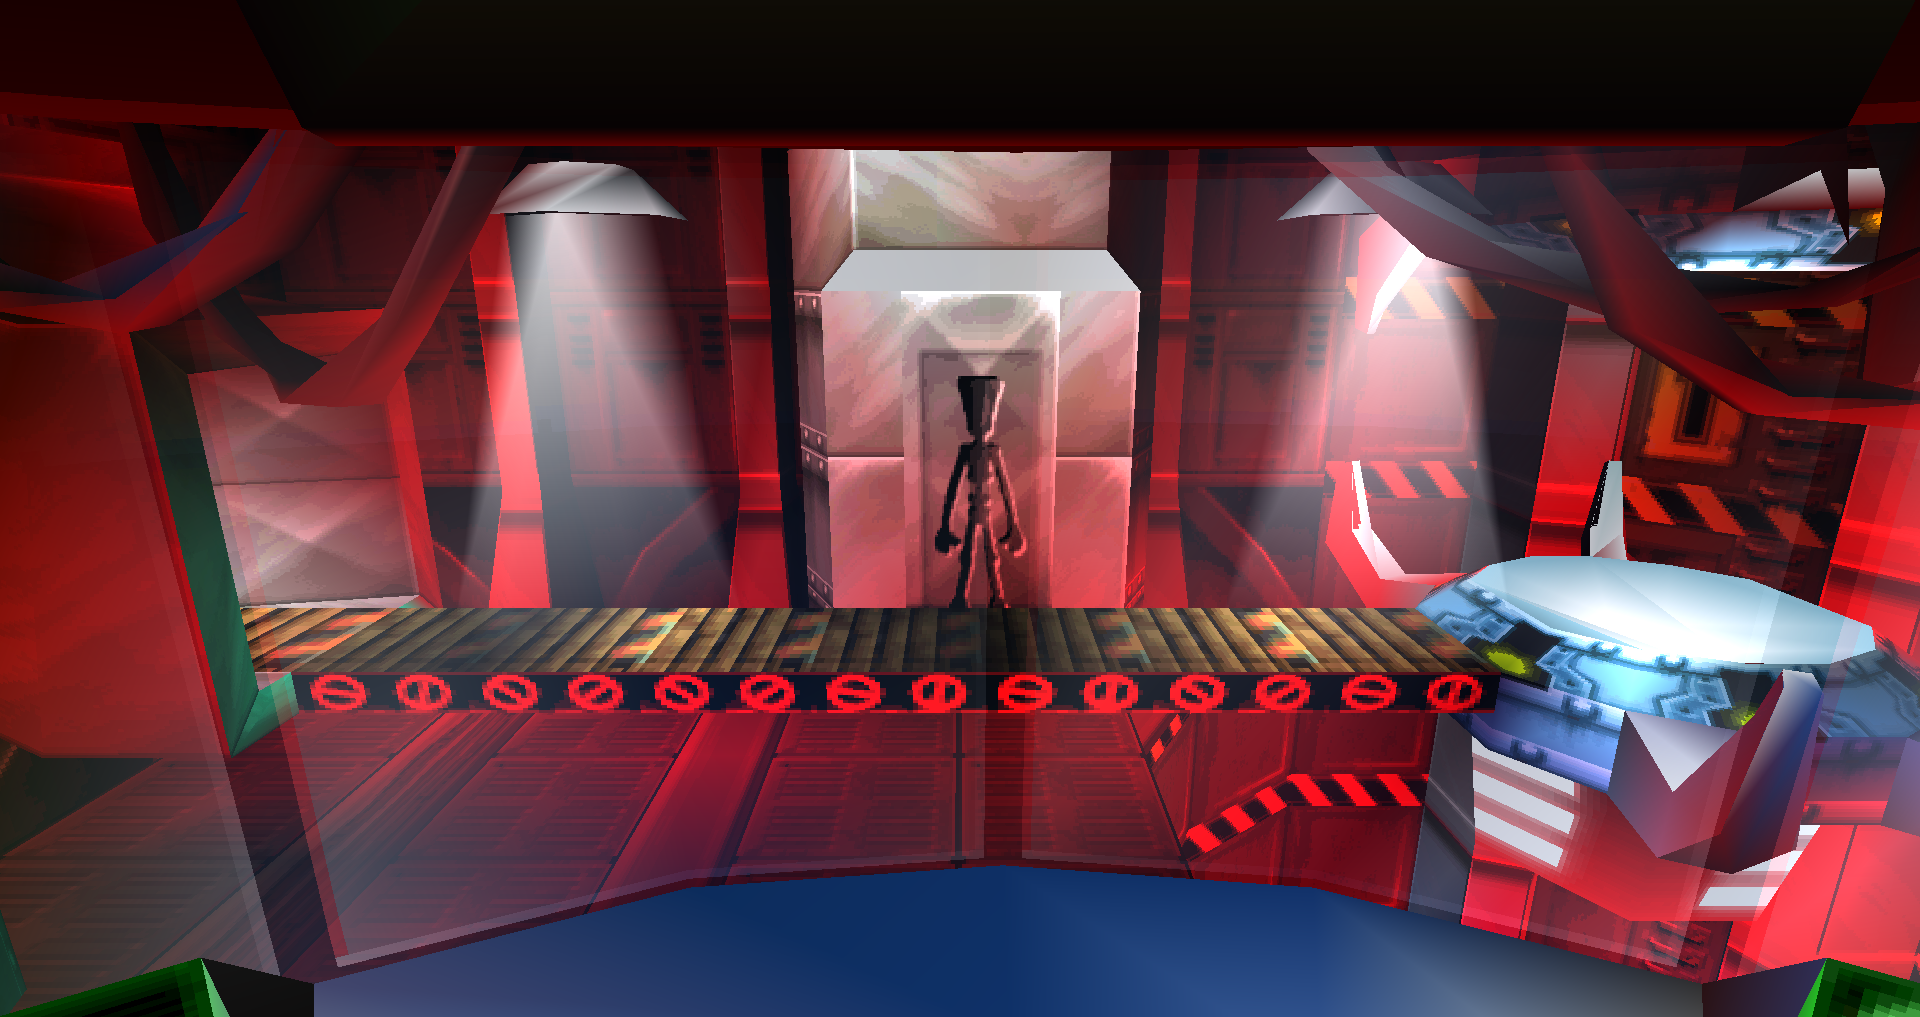
- The room sign reads "Neodyne Systems" in this version, a pun on "Cyberdyne Systems" from the Terminator series.
- There is a hidden texture behind the tissue generator that depicts the silhouette of a lab assistant android.
Level Differences#
Bone Yard#
Main Level#
- The camera may break at the end of the volcanic crater area and not follow the player when attempting to backtrack while walking on the edge.
Tiny Tiger#
|
Sep 26 |
Final |
|---|---|
|
|
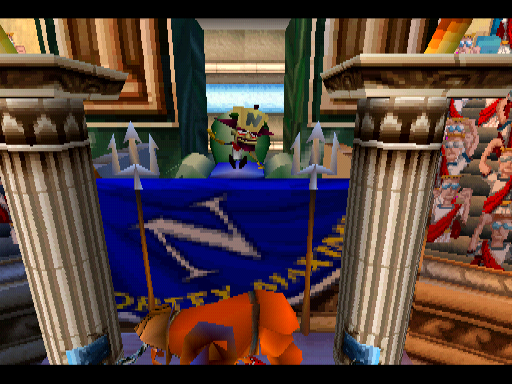
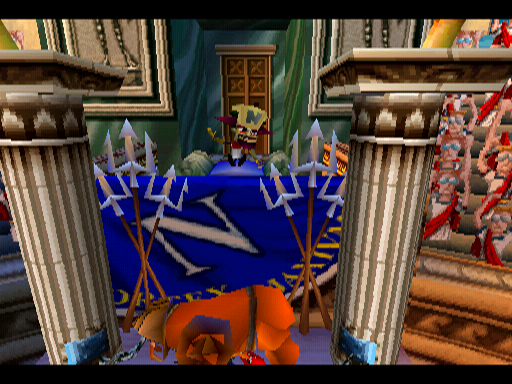
- The podium has only a single trident on each side of Tiny's platform, and the blue teal texture behind Tiny is of lower quality.
- The wall behind Cortex uses a different texture.
- Cortex's seat is untextured and contains a backrest.
- The walls around and floor are also untextured.
|
Sep 26 |
Final |
|---|---|

|

|
- The pillar paintings on either side of the Colosseum walls were replaced by a portrait of a lab assistant in Roman armor.
- Texture tiles also have a higher resolution in the final game.
- If you hit Tiny with a super body slam, he will lose his collision and will not be able to physically hurt Crash. You will not be able to attack him either, with the sole exception of body slams.
- There is no squash sound effect when Crash is flattened by Tiny.
Sep 26 |
Final |
|---|---|
SUPER BELLY FLOP |
SUPER CHARGED BODY SLAM |
- The Super Power is called "Super Belly Flop" instead of "Super Charged Body Slam".
- Due to the lack of "button", the line breaks are arranged differently.
Hang'em High#
Bonus Round#
- The exit platform is placed lower down.
Secret Path#
|
Sep 26 |
Final |
|---|---|
|
|
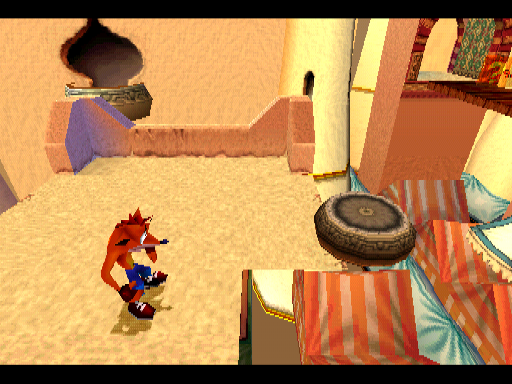
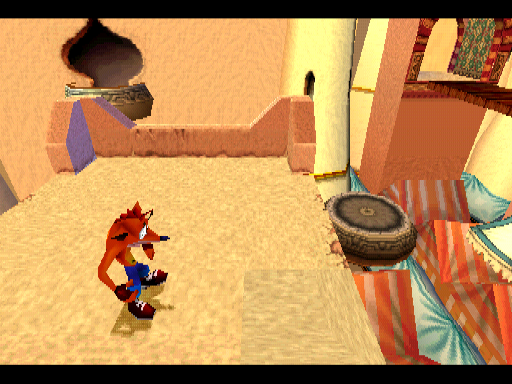
- A portion of the building holding the yellow gem was accidentally removed in this version.
Hog Ride#
- Driving at low speeds on the edges of the asphalt can cause the player to clip through the terrain and fall off the map, as there is no floor collision in certain spots.
Tomb Time#
- When Crash is killed by the jar monkeys in the first section, the death animation of him being covered in dust always plays, whereas in the final game an oversight causes the angel animation to be used interchangeably.
- The first lever pulling lab assistant pulls the lever much faster, rather than waiting a few seconds after each stone block slides into the pit.
Main Level#
|
Sep 26 |
Final |
|---|---|
|
|
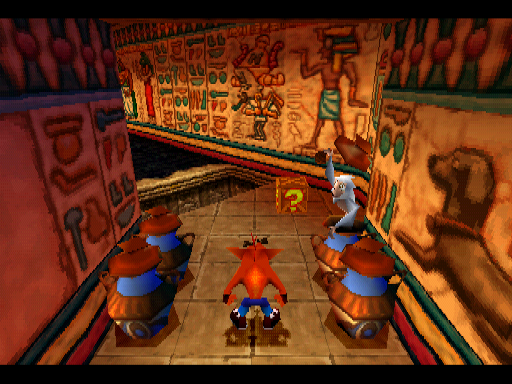
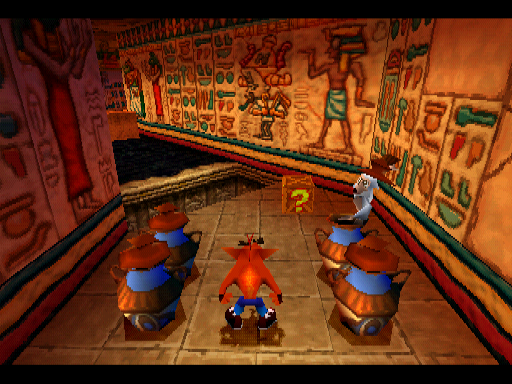
- The corridor with the first set of jar monkeys is narrower.
Gem Path#
- The collision for the walls in the gem path is extremely rough, making it easy to fall off through the walls.
Dingodile#
|
Sep 26 |
Final |
|---|---|

|

|
- Dingodile's pose in the portal is different and the image uses a picture of his actual model rather than the render created for the game's manual.
- Normal footsteps sound effects are used rather than the snow ones.
- The fragments released by the blue icicles have corrupted textures.
Sep 26 |
Final |
|---|---|
DOUBLE JUMP |
DOUBLE JUMP |
- Due to the lack of "button", the line breaks are arranged differently.
- Holding Triangle before the level starts triggers a glitch where the pre-fight cutscene plays during gameplay while you are able to move around.
Dino Might!#
|
Sep 26 |
Final |
|---|---|
|
|
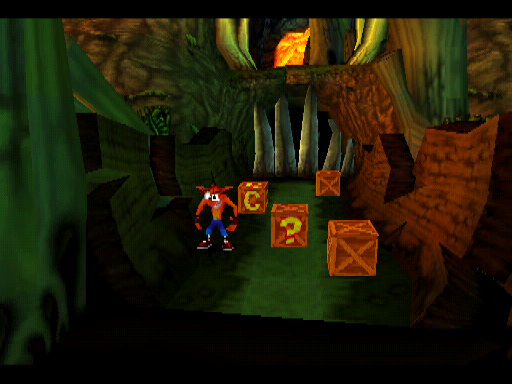
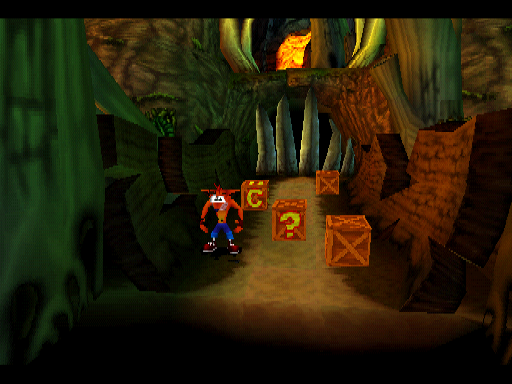
- Ground textures around the start of chase sections are more of a dark green color.
- When the Crash-fish spins, it does not make splash particles.
Main Level#
- The first two currents in the final chase are more greyish in color.
Gem Path#
- The triceratops does not appear in the chase section.
- The swamp floor at the end of the path lacks reflection.
- Some of the trees placements in the scenery at the end were removed in the final game.
Deep Trouble#
- Pufferfish in the tunnels will not die when Crash loses a mask.
Main Level#
- The blocked path of iron crates containing TNTs features four more TNTs.
- There is an extra Nitro crate covering the path afterwards, with a path of Wumpa fruit going over it, bringing the total number of crates to 88 instead of 83. The other Nitro above is also placed further up.
- The coral reef holding a ? crate before the first tunnel section is placed slightly to the right.
- The scenery on the right outside the first electric blades tunnel is filled with a few scenery elements not present in the final game.
- There is more vegetation in the scenery in the first downstream section after the first eel.
- The two basic crates inside the iron crates covering the death route are TNTs instead.
High Time#
Main Level#
- There are two extra basic crates making a line of three next to the TNTs at the end, bringing the total number of crates to 87 instead of 85.
Death Route#
- There are no Wumpa fruit throughout the path.
- There is a parapet wall extending to the middle in the left bottom edge of the upwards floor.
Road Crash#
Main Level#
|
Sep 26 |
Final |
|---|---|
|
|
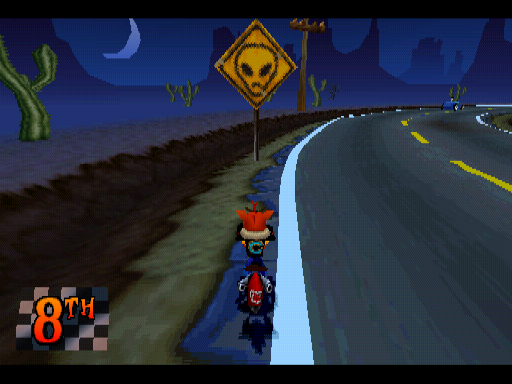
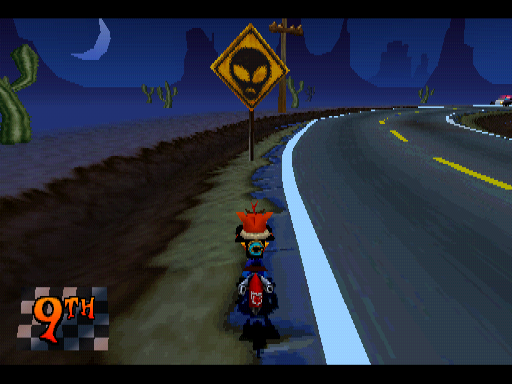
- The alien sign has smaller eyes and the coloring is reversed, featuring a black outline filled with yellow instead of a black face with yellow eyes and mouth.
- A gas station is present on the right side of the road next to the alien sign.
- There is a line of three basic crates before the third ramp. It was changed to a single one in the final game.
- The ? crate after the second boost pad is slightly detached from the ground.
- In the fourth ramp, there is an extra basic crate in mid-air.
- In the fifth ramp, there is an extra life crate in mid-air, bringing the total number of crates to 29 instead of 25.
Time Trial#
- The suspended 1-second time crate in the first ramp was replaced by a 2-second one.
- The 1-second time crate in the first set of roadblocks was replaced by a 2-second one.
- The two extra crates before the third ramp are also a 1-second one.
- The extra crate in the fourth ramp is a 1-second one.
- The 1-second time crate between the police cars afterwards was replaced by a 2-second one.
- The extra crate in the fifth ramp is a 1-second one, followed by another 1-second time crate that was replaced by a 2-second one.
Double Header#
- The rain is strong and always constant, unlike the final game, where the rain gets heavier as Crash progresses through the level.
- There is no rain and thunder ambience sound effects.
- A unique sound is made when the giant lab assistants swing their clubs and when you bounce on their bellies, whereas in the final game both actions reuse generic sound effects (jump and bounce).
Bonus Round#
- Raindrops do not fall diagonally.
N. Tropy#
- There is no sound effect when the clock hits the bottom in the pre-fight cutscene.
- The laser sound effect is shorter.
- The twinkling textures of tuning forks in the oriental scenery are corrupted.
- Tuning forks in the arabian scenery do not twinkle.
Sep 26 |
Final |
|---|---|
DEATH TORNADO SPIN |
DEATH TORNADO SPIN |
- The "button" word is missing.
Sphynxinator#
Main Level#
- The bonus platform is slightly clipped into the level's geometry on both sides.
Bye Bye Blimps#
- Due to a glitch, the number of pilot lab assistants flying around the player can be reduced by shooting down a blimp before they start spawning onscreen - you can get no pilots to spawn at all if you shoot down the nearest blimp quickly enough.
Main Level#
- The spawn point is placed slightly lower.
Future Frenzy#
Secret Path#
- There is an extra basic crate next to the first pair of Nitro crates, bringing the total number of crates to 134 instead of 133.
- The scenery at the end of the path features a trio of giant pillars.
Tomb Wader#
|
Sep 26 |
Final |
|---|---|

|

|
- Scarabs have different elytra textures.
- Crash will automatically crouch jump if he is deep enough into the water, as seen in the European release.
- Getting blown up by TNT crates will play the default explosion animation instead of the generic angel one.
- Bouncing over the shields of the shield lab assistants shares the same properties as a bounce crate - the bounce is higher and the sound pitch gets higher with each successive jump.
- They cannot be defeated with the spin attack when their shield is up or if you are bouncing over the shield.
- Performing the super body slam on the shield can cause Crash to get stuck inside the lab assistant.
- Timed doors do not make any sound when they come down.
- The wading animation contains an oversight which does not result in a death when spinning next to a TNT crate or getting crushed by a timed door while touching the water on its rising or flooded state, as Crash will instantly revive.
Main Level#
- The camera angle in the cinematic entrance comes from the right side of the level, flying over to the left and then zigzagging to the right again. In the final game, the camera simply approaches from the back.
- The camera angles in the second and third checkpoint corridors are higher up.
- The bonus platform is slightly clipped into the level's geometry on both sides.
- The crates behind the shield lab assistant after the final checkpoint are TNT crates instead of Nitro crates.
N. Gin#
- Some sound effects are missing.
- N. Gin's mech is silent when preparing to fly away after being defeated in the phase one.
- There is no sound when the mech is flying off the screen to become his second form.
- No sound effect plays when mounting the second form.
- The sound when the laser cannons launch purple energy balls is different.
Sep 26 |
Final |
|---|---|
FRUIT BAZOOKA |
FRUIT BAZOOKA |
- Due to the lack of "button", the line breaks are arranged differently.
- The definite article was most likely removed due to the tight space left.
Gone Tomorrow#
- Missile robots lack a sound effect when destroyed or when returning to the idle position.
- The wrecking animation does not play when defeated by invincibility.
Main Level#
|
Sep 26 |
Final |
|---|---|
|
|
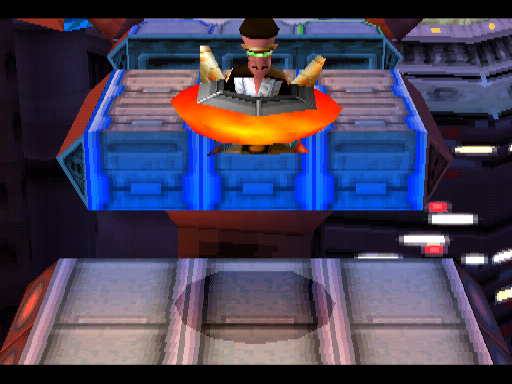
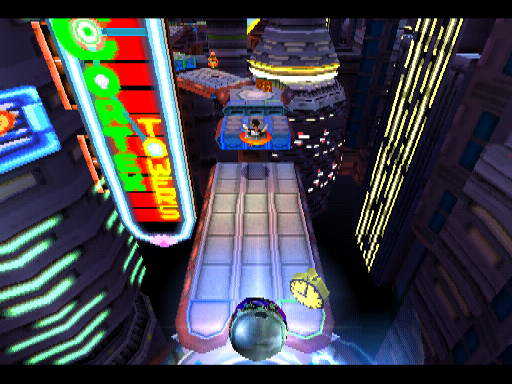
- The camera angle in the cinematic entrance is different.
- Crash spawns further behind.
|
Sep 26 |
Final |
|---|---|
|
|
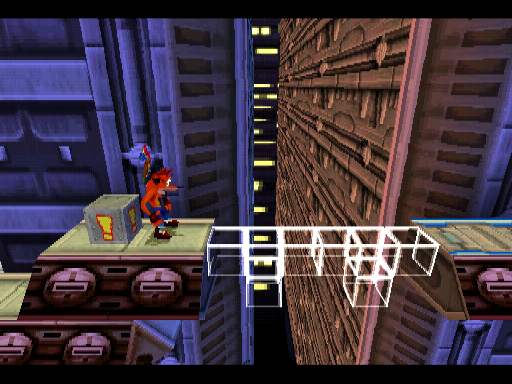
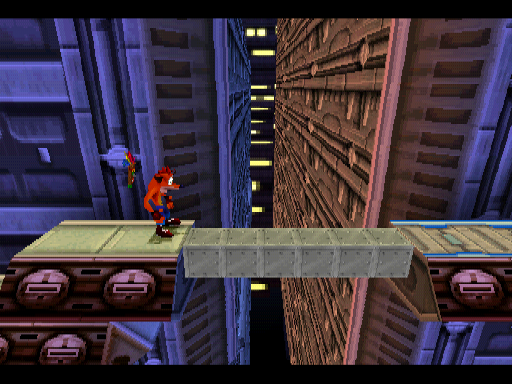
- The first crate bridge consists of two sets of outline crates. Hitting the ! crate will fill in the top row, which is supposed to make the bottom row inaccessible. The bottom row contains two extra basic crates which are triggered by a ! crate in the gem path, bringing the total number of crates to 89 instead of 87.
Gem Path#
- The skyscraper holding the "CORTEX TOWERS" billboard at the start of the path is placed almost offscreen.
Orange Asphalt#
- It shares the same portal graphic as Road Crash.
Main Level#
- The second pair of ramps are closer to each other.
- The suspended crate in the seventh ramp is easy to miss, due to Crash jumping too high by landing on the edge of it after jumping off the previous ramp.
- There is a pit on the right side of the fifth boost pad, which was removed in the final game.
Flaming Passion#
Main Level#
- The right building in the scenery before the first checkpoint is further down.
- There are four fire traps after the first checkpoint, instead of three.
- The crystal is placed a little further back.
- In the second checkpoint area, there are parapet walls on the bottom edge.
Death Route#
- Some buildings in the scenery are missing.
- A building is missing on the left side of the scenery, right before the second pair of arsonists.
- A pointed window texture at the end of the straight hallway was replaced by small cracks instead.
- A scimitar lab assistant was removed before the third sword-throwing lab assistant section.
- The second to last building on the final section is placed further down.
Mad Bombers#
Main Level#
- The spawn point is placed slightly lower.
Bug Lite#
- Pulling the Fruit Bazooka in the outside sections will cause the Wumpa fruit shots to turn black, and the explosion visual effect will not appear.
- Pits in the outside sections have a different texture around the corners.
- Spotlights always emit the same intensity of light, regardless of the ambience lighting.
Gem Path#
- Aside from the first one, an iron checkpoint crate is present at the beginning of every gem section.
N. Cortex#
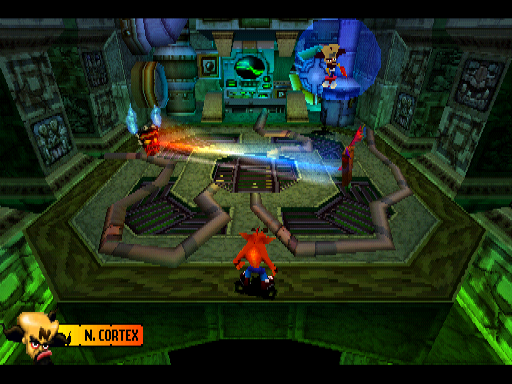
- The pre-fight cutscene lacks sound effects.
- The true ending pre-fight cutscene reuses the animations of the normal ending cutscene, but plays the audio from the second one, resulting in the dialogue to continue even after the battle starts.
- Skipping the cutscenes will result in a glitch where the camera goes out of bounds.
- Holding Triangle before the level starts triggers a glitch where the pre-fight cutscene plays during gameplay while you are able to move around.
- The control room background is static.
- The textures of the floor edge have a lower quality.
- Uka Uka's model is smaller and features two blue flames above his head, matching his concept arts.
- There is no white clashing sparkle between the mask lasers.
- Cortex's red energy bolts do not explode upon hitting Crash or the ground.
- The mask laser sound effect has a different pitch.
- Cortex's shots play a different sound effect.
- Dying by a red energy bolt or mine will play the default angel death animation instead.
- Some sound effects are missing.
- No sound effect is made when Cortex's force-field activates or shuts down.
- There is no sound when Cortex loses a health point.
- There is no explosion sound effect when Uka Uka brings Cortex back from the hole.
- The second mask tornado attack do not make any sound effect.
- The final mask tornado attack plays an incorrect sound effect upon explosion.
- Uka Uka stays in the corner when the battle is over.
Sep 26 |
Final |
|---|---|
SPEED SHOES |
SPEED SHOES |
- The "button" word is missing.
- Cortex will continue to attack when the player gains Aku Aku or debug invincibility using the player debug cheat. Doing the same in the final game will cause him to stop instead, and attempting to gain a mask will also freeze the game.
Area 51?#
|
Sep 26 |
Final |
|---|---|

|

|
- The UFO model in the portal features a dark blue color with red lights and stripes around it. This model matches the one seen in the save file icon in the final game.
|
Sep 26 |
Final |
|---|---|
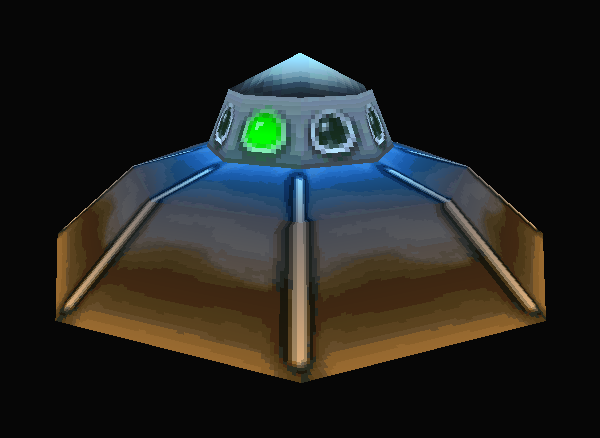
|
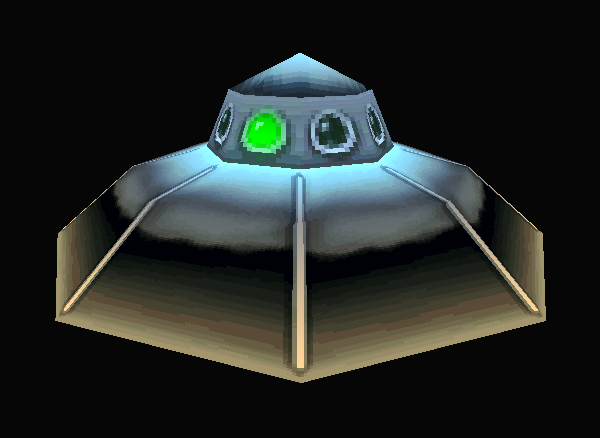
|
- The UFO model color is slightly different, featuring a brownish color on the bottom and blue on top. This model matches the one seen in the portal graphic in the final game.
- Traffic cones cannot be thrown away by UFOs.
- The checkered line texture and finish line structure are missing.
Rings of Power#
Main Level#
- The spawn point is further upwards.
Hot Coco#
- The sky coloration has an intense shade of red, which is the same one used in Ski Crazed.
Main Level#
- There are three bombs instead of two on each side behind the ramp close to the starting point.
- There are two extra bombs surrounding two ? crates in the eastern corner of the map.
- In the ramp next to a checkpoint crate near the volcano, the bombs behind it form a U-shape, whereas in the final game it's only the two parallel lines.
Eggipus Rex#
- Wall textures around the lava waterfalls are slightly different.
Credits#
The credit list is mostly complete, although it contains some roles and names that are either missing, or entirely removed.
Sep 26 |
Final |
|---|---|
SPECIAL THANKS: |
SPECIAL THANKS: |
SPECIAL THANKS: |
SPECIAL THANKS: |
ANALYSTS: |
ANALYSTS: |
JAPANESE TEXT DESIGNER: |
N/A |
TESTERS: |
TESTERS: |
THANKS: |
THANKS: |
VOICE OF DR. NEO CORTEX, |
VOICE OF DR. NEO CORTEX |
SPECIAL THANKS: |
N/A |
COPYRIGHT 1998 UNIVERSAL |
COPYRIGHT 1998 UNIVERSAL |
- In the Special Thanks list of the Naughty Dog staff:
- Missing Tony Black, Alias/Wavefront, Angus Guschwan, Hal Cook, and Richard Lehman.
- Removed Taylor Kurosaki, and Dan Kollmorgen.
- In the Special Thanks list of Universal Interactive Studios:
- Removed Terry Smith.
- In the Sony Computer Entertainment America row:
- There is no Business Coordinator role.
- Nicholas Consolo and Ara Demirgian were renamed to Nicholas Consola and Ara Demirjian, respectively.
- In the Sony Computer Entertainment Inc. row:
- Ryoichi Hasegawa was moved from Assistant Producer to Associate Producer.
- There are no Associate Producer and Assistant Product Manager roles.
- Product Manager was renamed to Senior Product Manager.
- Quality Assurance Manager was renamed to QA Manager.
- A lot of Japanese-related credits were removed. Some of these are also empty.
- A lot of names were removed in Testers and Thanks lists.
- In Sound Design, Michael Gollom was renamed to Michael Gollom M.P.S.E.
- In the voice cast, Aku Aku, N. Tropy, and Dingodile voice credits are all named "Foo" as a placeholder.
- There is another Special Thanks row after the voice cast that was removed.
- The source code still says 1997.
- There are no developer times list.
Soundtrack Differences#
Most of the tracks are early variants of their respective themes, featuring different melodies or rhythm.
Level |
Sep 26 |
Final |
Notes |
|---|---|---|---|
Title Screen |
|||
Warp Room |
|||
Medieval |
The differences are the lowered octave strings at the beginning and repeated harp samples. |
||
Medieval (Bonus) |
Some instruments have more release |
||
Atlantis |
It has different mixing and glitches out at the beginning as it plays two wrong samples (the sonar-like sound and the cymbal swell samples). |
||
China |
|||
Prehistoric (Bonus) |
|||
Prehistoric (Hard) |
|||
Jet Ski |
It has an unused supposed woodblock sample that is not present in the final as it was replaced by a marimba. |
||
Arabian (Bonus) |
|||
Arabian (Hard) |
|||
Highway |
The baritone sax sample is wrongly tuned, causing it to sound dissonant when compared to the rest of the song. |
||
Egyptian |
It lacks the tambourine beats that start playing at 0:07 and the ride cymbal and ride bell samples are quieter. |
||
Egyptian (Bonus) |
|||
Egyptian (Hard) |
The percussion notes have low release and sound cutoff |
||
Bye Bye Blimps |
The beginning glitches out and plays long and drown out trumpet notes. |
||
Future |
Multiple samples are swapped, like for example the synth that starts playing at 0:08 which uses the same sample as the lead instrument that plays in 0:35, and the guitar at 1:02 which uses the square lead sample. The bass has higher release. |
||
Future (Bonus) |
Multiple samples are swapped, for example, the square lead that plays at 0:10 is replaced by the muted distortion guitar sample, which is not properly tuned in this case and causes dissonance. |
||
Future (Hard) |
The bass has higher release and some samples are swapped, like the synth strings that play at 1:20 which are replaced by a short electric piano sample |
||
Mad Bombers |
The beginning glitches out and plays long and drown out trumpet notes, some snare notes are missing which causes the beat to sound different. |
||
Rings of Power |
The hi-hats are quieter |
||
Tiny Tiger |
The instruments are swapped for the first measure, causing the marimba to be replaced by the strings and drum channel to be replaced by the distortion guitar sample which ends up sounding really noisy and dissonant. The mixing for some of the instruments is different, the distortion guitar near the end sound very loud and the bass is one octave higher |
||
Dingodile |
The first few notes play the cymbal crash on repeat instead of it only being the first note. The muted guitar that starts playing at 0:05 uses a different guitar sample that comes from N. Gin's theme and stands out a lot more. The stronger snare drum samples that start playing on 0:20 are quieter. |
||
N. Tropy |
Some instruments are much louder like the noise at 0:36, while others are much quieter like the xylophones. |
||
N. Gin |
The bass and voice samples plays are one octave higher. The closed hi-hats are noticeably louder. |
||
N. Cortex |
The vibraphone melody matches the pre-console version more closely than the final version. |