Osu! Tatakae! Ouendan, or simply Ouendan, is the first in a series of rhythm games all about solving your problems with the power of inspirational dancing. Its success as an import title led to overseas territories getting a spiritual sequel in the form of Elite Beat Agents and Japan getting a full sequel.
Sub-Pages#

Unused Graphics#
Stage 3 - Gutz da ze!!#
PLA (Scene 1)
obj_s (14) |
obj_s (15) |
|---|---|


Biridon's rider facing left. Biridon knocks the rider off before any scenes where he runs towards the left.
Stage 4 - Melody#
IN (Intro)
bg0_s |
bg2_s |
|---|---|


An unused section of the intro with Shizu and her father looking down on Shin.
bg2_s transcript and translation
Japanese |
|---|
一人でかつげる |
Translation |
You think you got |
KNA (Midsection Cutscene 1)
obj_s (6) |
obj_s (7) |
obj_s (8) |
|---|---|---|


Sprites of the English-speaking tourists getting knocked off the mikoshi in the "bad ending" cutscene. Likely meant for Scene 4's cutscene, but Scene 3's cutscene is simply reused instead.

While this sprite is used, all but the girl's arms are obscured by the mikoshi.
ED (Ending)

Not unused, but everyone except the three leftmost characters are almost entirely obscured by Shizu's father and a speech bubble.
Stage 6 - Kokoro Odoru#
KNB (Midsection Cutscene 2)
bg0_s |
bg1_s |
bg2_s |
|---|---|---|


bg3_s |
bg4_s |
bg5_s |
|---|---|---|


For some reason, one of the fail scenes from Over the Distance is present in Kokoro Odoru's files. There is a minor difference, though not a visible one—the keyboard key graphics are contained in bg_4 here, but are in obj_s in OtD's files (bg_4 does not exist in the OtD files for this scene).
Stage 7 - Atsuki Kodō no Hate#
KNA (Midsection Cutscene 1)

Mizutani in tears. The head is meant to be placed on his body for the cutscenes where he encourages the students to participate in each activity. This tearful expression is likely meant to be used if the previous scene is failed, but Mizutani keeps his smile no matter what in the final.
PLB (Scene 2)

A scene of the pool. Meant to appear as the bottom screen background to Scene 2, but the bottom screen just uses the top screen's fence background. Oddly, this file is named differently than other background files (bg_m, as opposed to the standard bg0_m).
PLC (Scene 3)
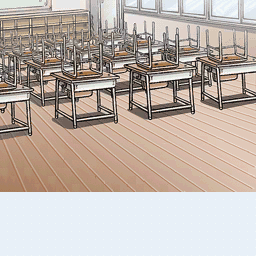
Like the above, this classroom scene is meant for the bottom screen's background during Scene 3, and like the above, the top screen's background is repeated in its place. This one, however, is named correctly in the files.


Shots of the two girls that appear during the 300s animation of Scene 3. These girls do appear, but it seems like they were planned to be animated—in the final, the first girl keeps her legs together as she moves, and the second always has her leg extended. Additional sprites also exist of these poses facing left instead of right.
KNC (Midsection Cutscene 3)

Mizutani wiping the chalkboard. Was likely meant to be used with the used sprite with his arm extended to make the scene animated, but his pose is static in the final.
Stage 8 - Thrill#

|
This page or section needs more images. |
IN (Intro)
bg1_s |
bg2_s |
|---|---|
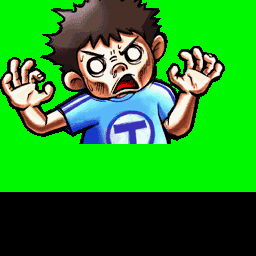

A...bizarre early version of Torao's "dejected" pose before the Ouendan cheer him on.
KNA (Midsection Cutscene 1)
The first intended midscene cutscene appears to be completely unique, appearing mostly complete (though missing a "good ending" variation) but being cut regardless.

A snippet of dialogue for Torao's speech bubble as he throws the dodgeball. "せいっ" is used, but not this.
bg0_s |
bg1_s |
bg2_s |
bg3_s |
|---|---|---|---|


bg4_s |
obj_s (1) |
obj_s (2) |
|---|---|---|


A shot of an unaware teacher presumably getting beaned from behind with the dodgeball.
bg1_s |
bg2_s |
bg3_s |
bg1_s/bg2_s (Final) |
|---|---|---|---|

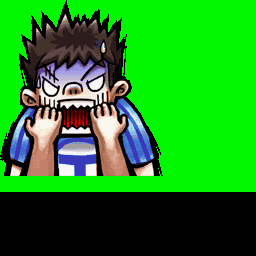

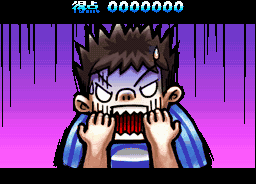
Torao, distraught at the destruction he's caused. bg1/bg2 are used in the final game as Torao's "dejected" pose (replacing IN_04 above), but the exclamation in bg3 is completely unused.
KNC (Midsection Cutscene 3)

Torao's "good ending" response to Shizuyama when confronted. Torao is silent in the final.
Stage 11 - One Night Carnival#
PLD (Scene 4)
obj_s (5) |
obj_s (6) |
obj_s (7) |
|---|---|---|


Sprites for tears. Possibly meant for the 50s/Miss scene, but neither the Bacteria Men nor the viruses cry.
OV (Game Over)

An unused character for the Game Over haiku. Its placement in obj_s indicates it was the second character of the second line, meaning the line ソリストの夢 could have originally been ソロストの夢.
Stage 12 - Over the Distance#
KND (Midsection Cutscene 4)
bg0_s |
obj_s (0) |
obj_s (1) |
|---|---|---|


Ishida aghast at something. The head seems to fit with the scene of him manipulating objects with his hand; presumably he'd react this way if the scene failed.
Stage 13 - Taiyō ga Moeteiru#
PLA (Scene 1)
bg5_s (Unused) |
bg6_s (Used) |
|---|---|


Ichirou barely holding onto his bike. Possibly meant to be used with the used frame as an animation.
PLB (Scene 2)
bg7_s |
bg4_s |
|---|---|


Salary-Man and Mousezilla facing off. Meant to be used for the 100s animation for Scene 2, but for unknown reasons (possibly a bug), the 50s/Miss animation plays in its place.

In fact, these sprites are even visible in the Scene 2 thumbnail on the ranking screen, further proving their intended purpose.
ED (Ending)

Meant to appear on the scene of Salary-Man knocking out Mousezilla.
Stage 14 - Shanghai Honey#
KNA (Midsection Cutscene 1)

A small upright robot. Intended to appear in the background of the scene of the robots being blasted by Joe and Dan.
obj_s (3) (Unused) |
obj_s (1) (Used) |
obj_s (2) (Used) |
|---|---|---|


A third variation of a UFO, meant for the cutscene of Joe and Dan hiding from the robots in the alley. Strangely, three UFOs do appear in the cutscene, but variation 2 is used twice. Note that the sprites have been enlarged for visibility.
Stage 15 - Ready Steady Go#
ED (Ending)

A shot of the meteor being destroyed. The game fades to white before this scene is visible.
Unused Audio#

|
This needs some investigation. |
Thrill - WAVE_OPEN08/SWAV_0 Electricity crackling. Sounds like the dodgeball charging with electricity in the game over, but without the deeper hum.
Taisetsu na Mono - WAVE_MOV09/SWAV_0 A booing crowd. Scene 3's fail cutscene has a booing crowd, but it seems to be a different sound effect.
One Night Carnival - WAVE_MOV11/SWAV_3 An odd violin sting. Failing Scenes 2 and 3 show a sprite of Kouji in pain with discordant music notes around him, so it's possible it was meant to play there.
|
The Osu! Tatakae! Ouendan series | |
|---|---|
|
Nintendo DS |
Osu! Tatakae! Ouendan • Moero! Nekketsu Rhythm Damashii Osu! Tatakae! Ouendan 2 |