 This article has a talk page!
Unused Graphics#
Album Images#
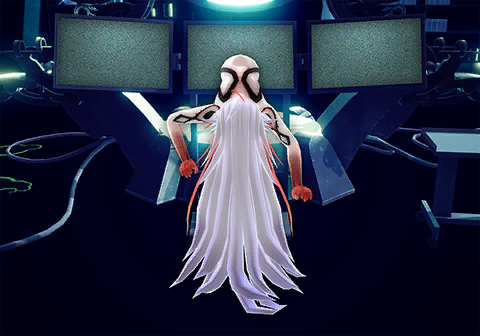
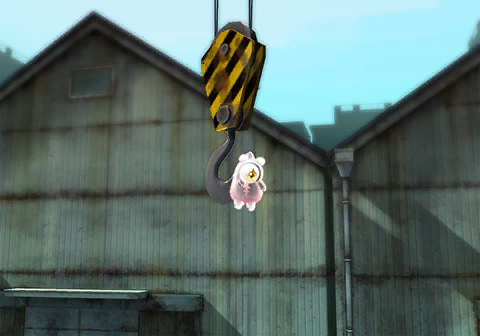
Thumbnail-size versions of every Dream Album image are in the game's files. However, two of these thumbnails do not match the full-size images and do not appear in the game. Compared to the final images, the first unused thumbnail is set in the Psync Control Room rather than the Kabasaki Chemical Plant, while the second is set inside the Okiura Fishery Cold Storage Warehouse rather than outside of it.
Unused Image |
Final Image |
|---|---|
 |
 |
 |
 |
Unused Map Icon#
This unused map-location icon appears to depict the Okutama Mountains, a location that is never directly visited in the final game. 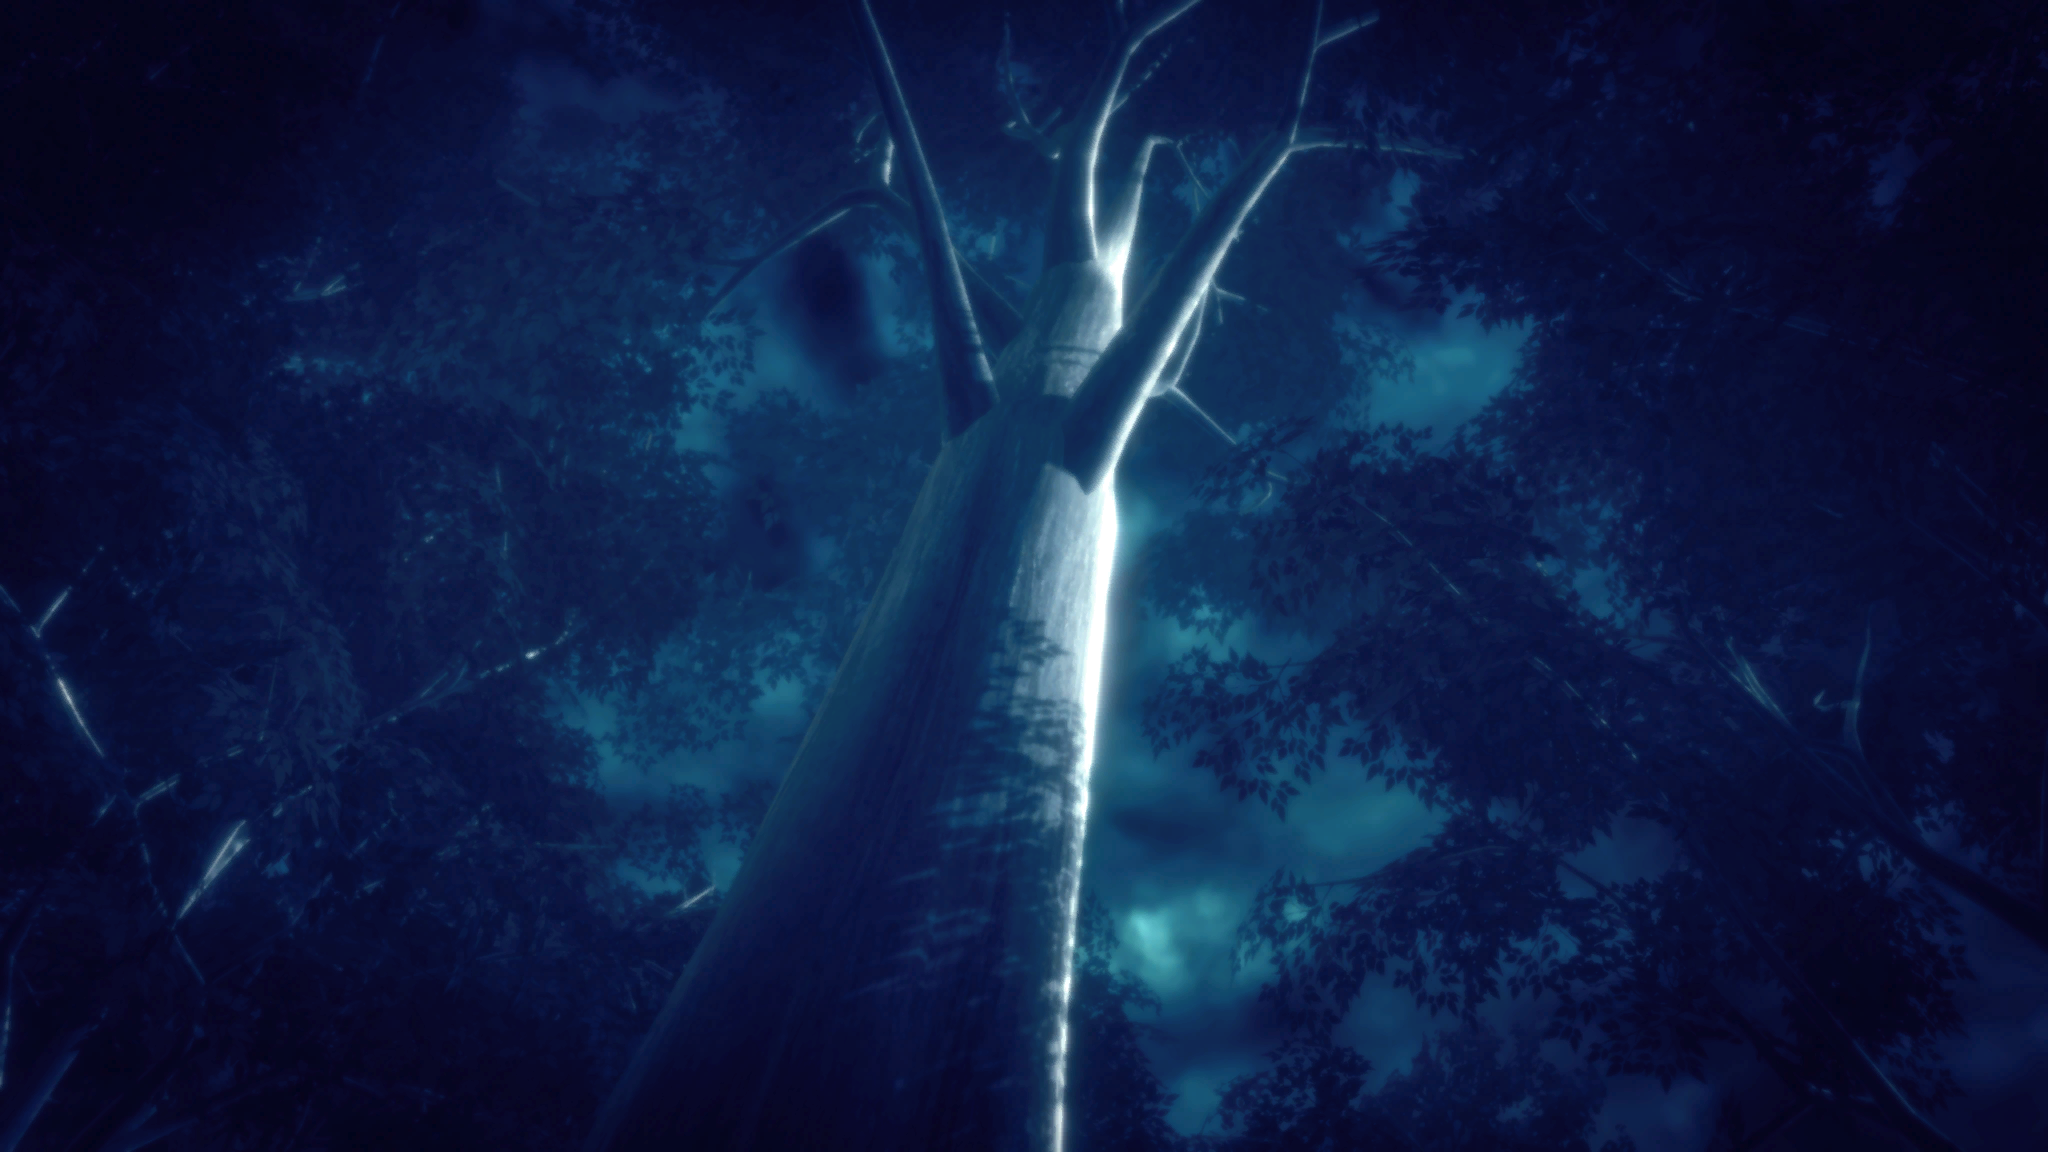
Cooking Magazine#
Hitomi's cooking magazine has more to it than what is shown in-game (specifically, the inside with blank text and the full back). The full texture is shown below.
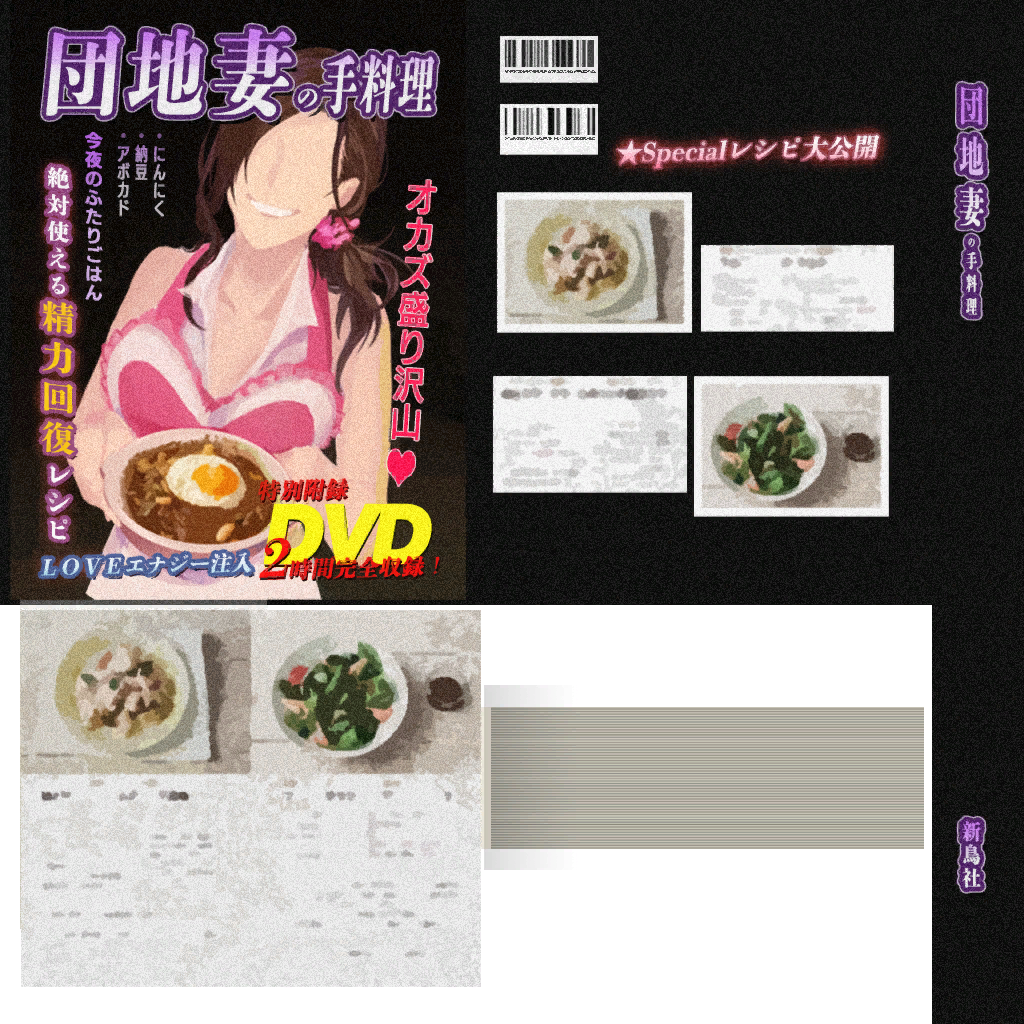
(Source: Robotortoise)
Unused iPhone Screen#
The textures for the option screen include - of all things - a screenshot of an iPhone.
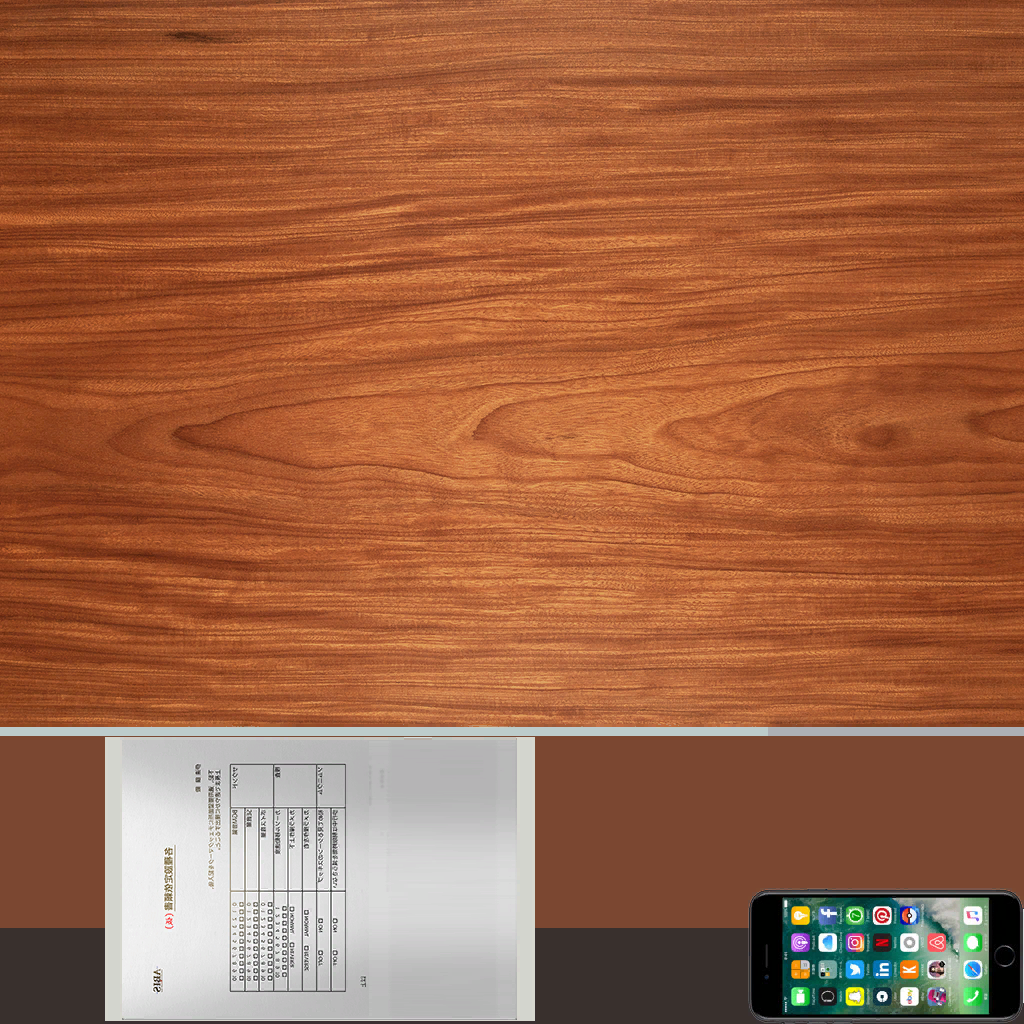

The apps shown are, in order: Facetime, Calculator, Podcasts, Notes, Watch, a Folder, iCloud Drive, Facebook, Snapchat, Twitter, Instagram, 7 Minute Workout Challenge, Uber, LinkedIn, Netflix, Pinterest, eBay, KAYAK, VSCO, Pokémon GO, Chameleon Run, Lara Croft GO, and Airbnb.
(Source: Robotortoise)
Unused Calendar#

|
To do: |
This calendar for November is included with the ui_options archive that contains the game options. It is unknown what this would have been used for.
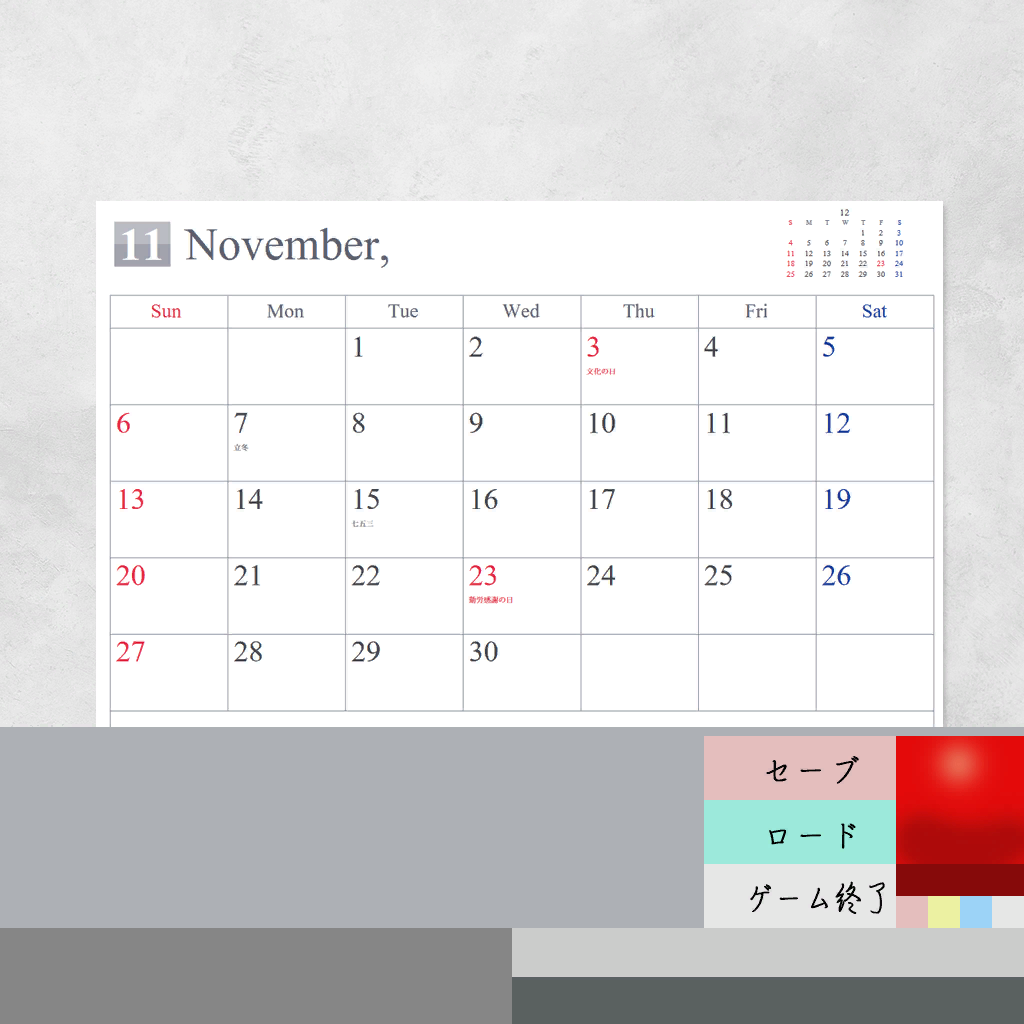
The Japanese translates as follows:
- Nov 3rd: Culture Day
- Nov 7th: First day of Winter
- Nov 15th: Shichi-go-san
- Nov 23rd: Labor Thanksgiving Day
- Red Box: Save
- Teal Box: Load
- Gray Box: Close Game
(Source: Robotortoise)
Partially Unseen Models#
Date in a Hospital Gown#
Despite being seen in a hospital bed in a brief flashback scene and in Mizuki Route, Kaname Date is never seen in a hospital gown in the final game.
He is seen in-depth in the Central Hospital during the Mizuki Route, but you cannot see under the sheets. It's a good thing, too, as he has no limbs! Taking the camera underneath the covers shows that he has a very subtle breathing animation. Oddly, his limbs and adorable hospital slippers are culled out in-game, but not in the model itself.
(Source: Robotortoise)
Kagami's Mask#
Kagami is never seen without his mask in the game and his mouth does not animate visibly in the game, as his mask is covering it. However, his model does have a mouth and nostrils, and his voice lines do have associated phenomes that play if you swap his portrait model (by modifying the model name, which is called in the script inc_const_variable.lua).
|
Kagami in-game |
Kagami with the mask removed |
|---|---|
|
|
(Source: Robotortoise)
Hitomi in a Hospital Gown#
Hitomi is never seen in a hospital gown in the final game. Ota and Date are seen in this same gown (when they are in the hospital, appropriately). While Hitomi is seen in Central Hospital during one of Date's flashbacks, her body is completely hidden under the bedsheets. Only her head is visible.
Taking the camera underneath the covers shows that she is using this model, and also that she has a very faint animation where she shakes her arm. This file is named "chara_md_c07_01" (as Hitomi is character number 7).
(Source: Robotortoise)
Unseen Back on Hitomi [Annihilation Route]#
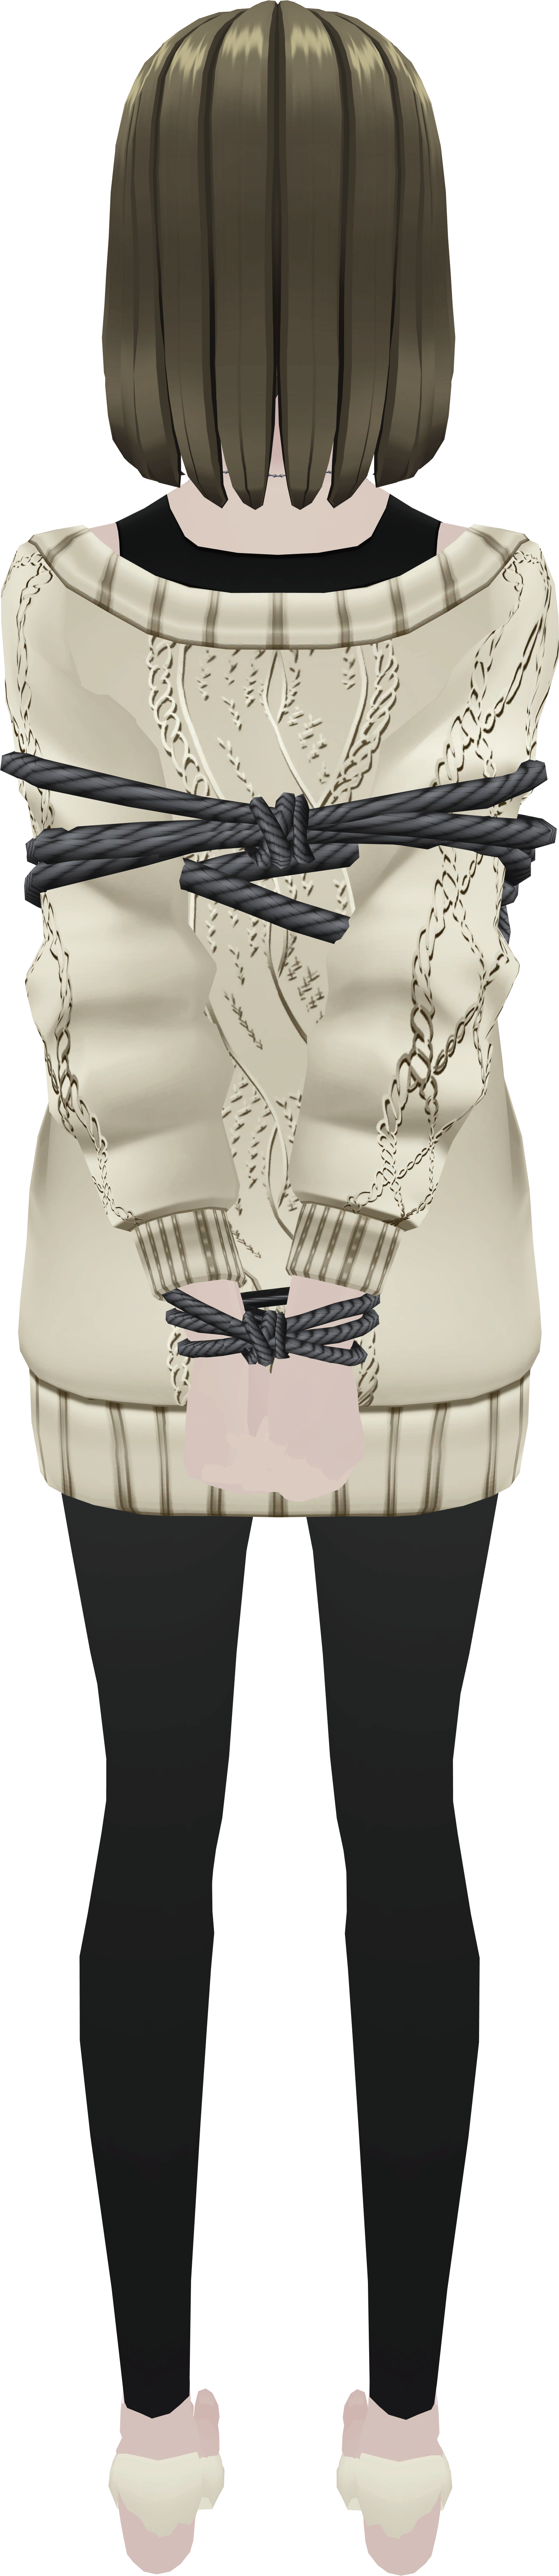
Hitomi is seen with bombs strapped to her torso in Annihilation Route. However, she is never seen from the rear, as she is shown on a 'computer screen' in the game itself. Viewing the model from this angle shows that Hitomi's arms and hands are restrained.
(Source: Robotortoise)
Younger Hitomi's Tights#
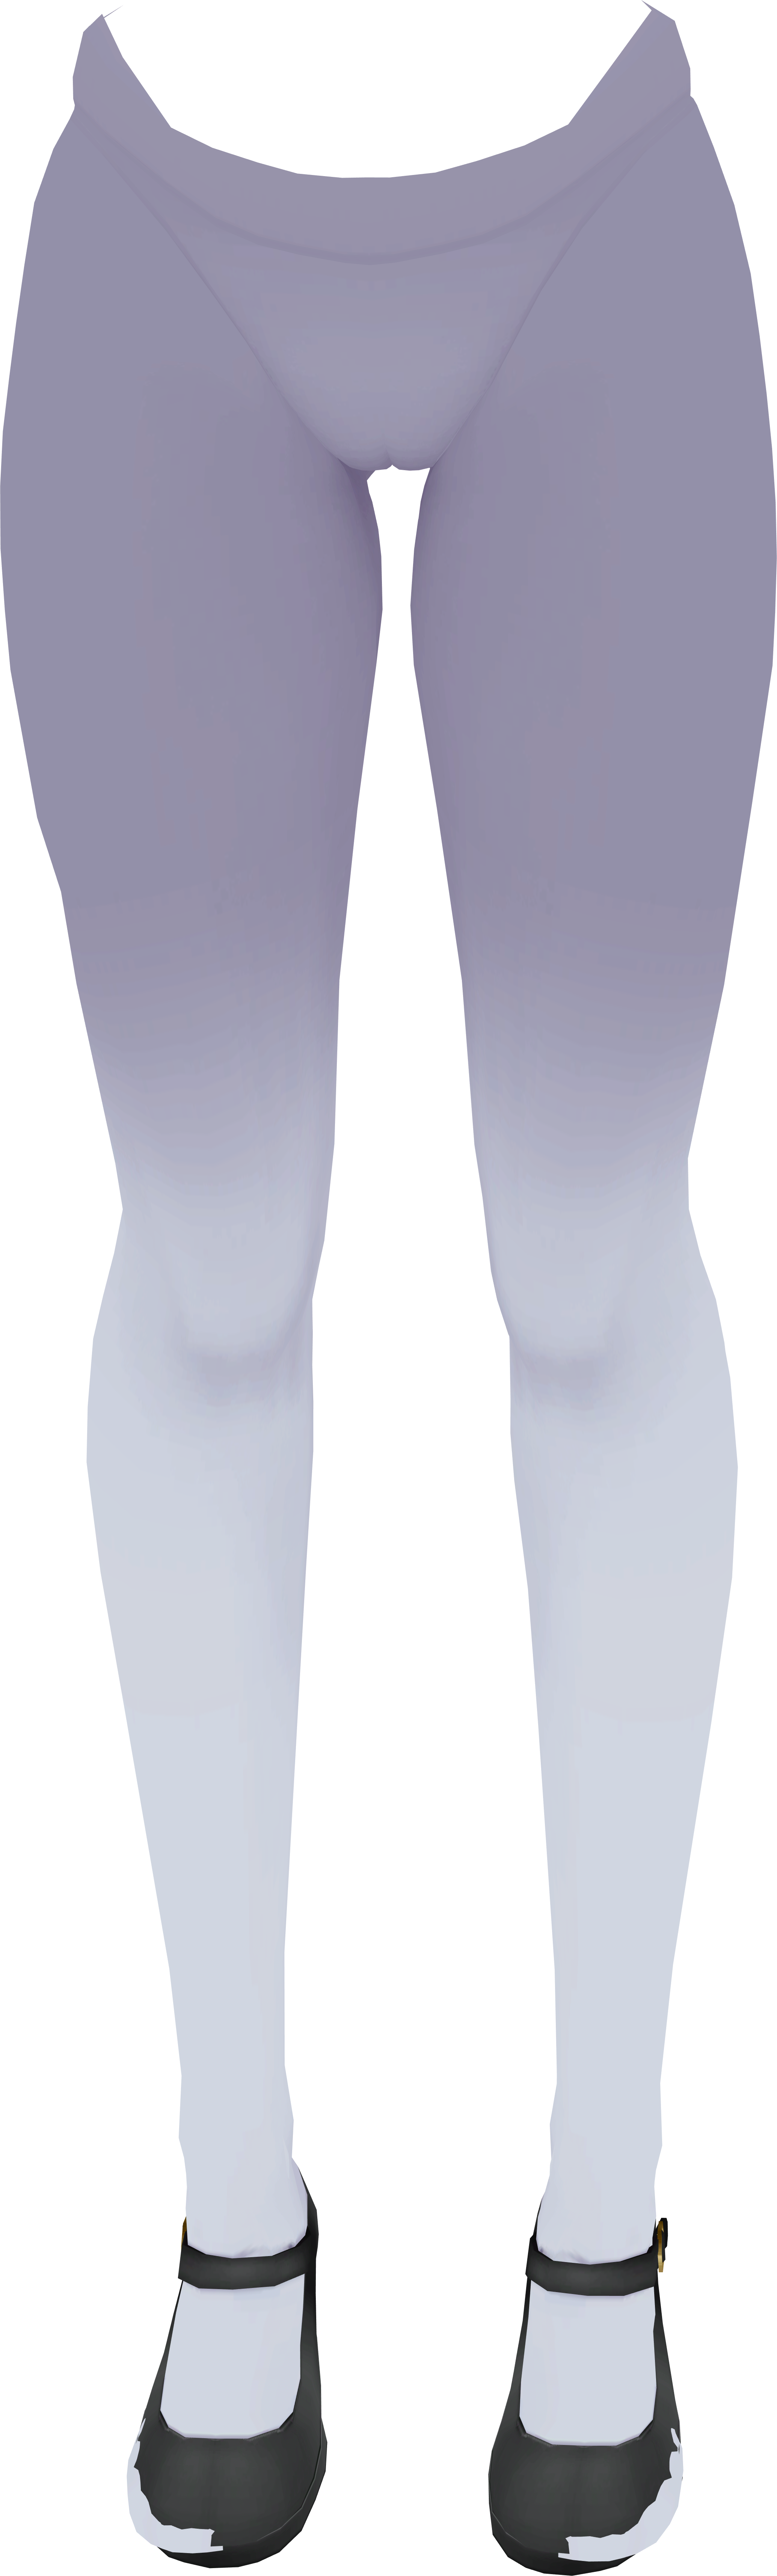
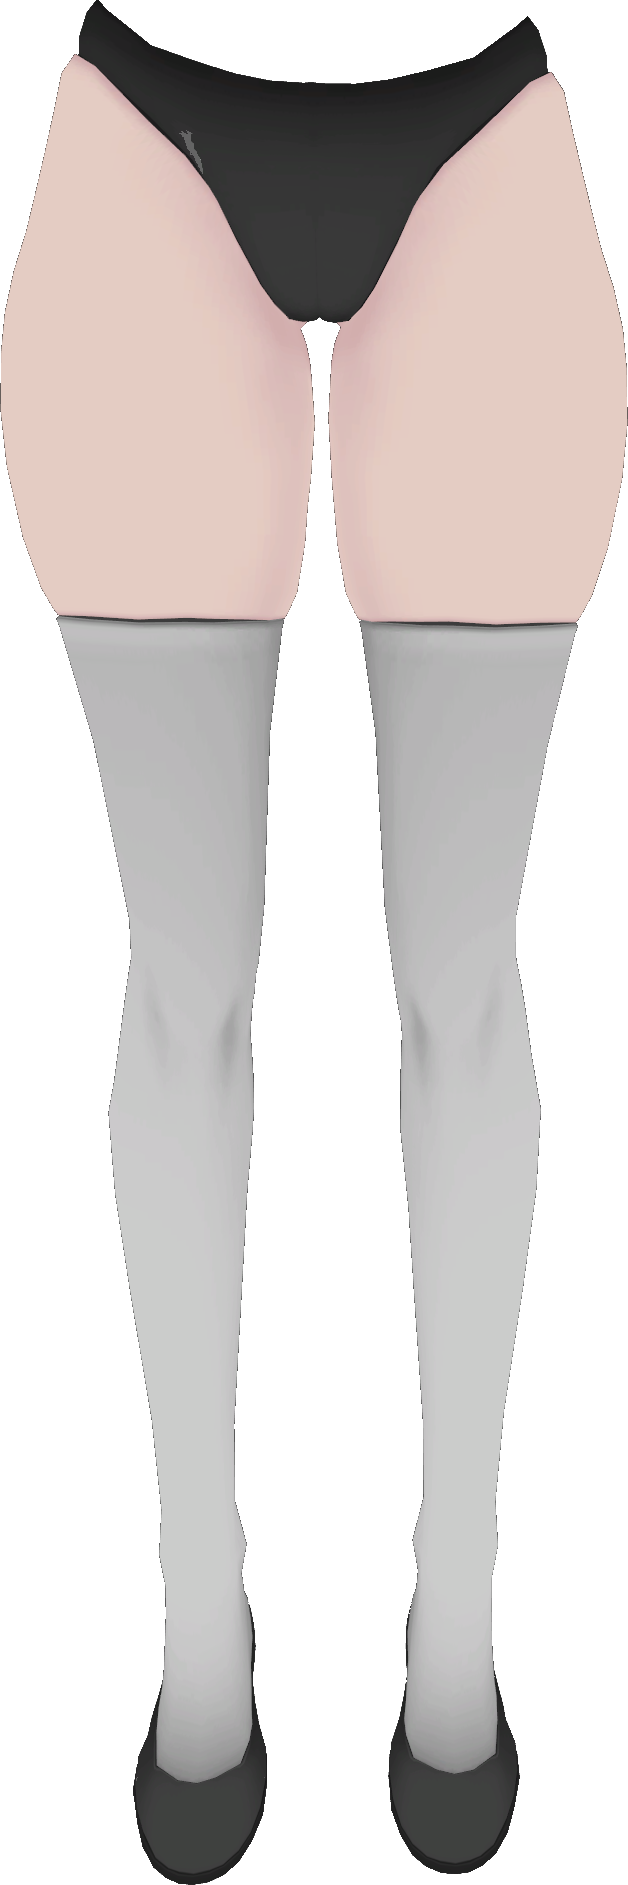
During Somnium segments, the camera is able to be moved around the playable character. Younger Hitomi is one of the few characters save for Aiba that appears inside a Somnium, and her tights are very detailed as a result. However, this is never visible during normal gameplay, and is still extremely difficult to notice even if the player tries their best to upskirt Younger Hitomi. It is worth noting that Hitomi is one of the only characters in the game with a model this detailed in that area. Most characters, save for Iris, the mermaids, and Aiba, simply have crotch voids.

The following content is |
|---|
|
(Source: Robotortoise)
Mermaid Underwear#
Most of the game takes place with a semi-fixed camera from Kaname Date's point of view. As such, the player can rarely move the camera freely.
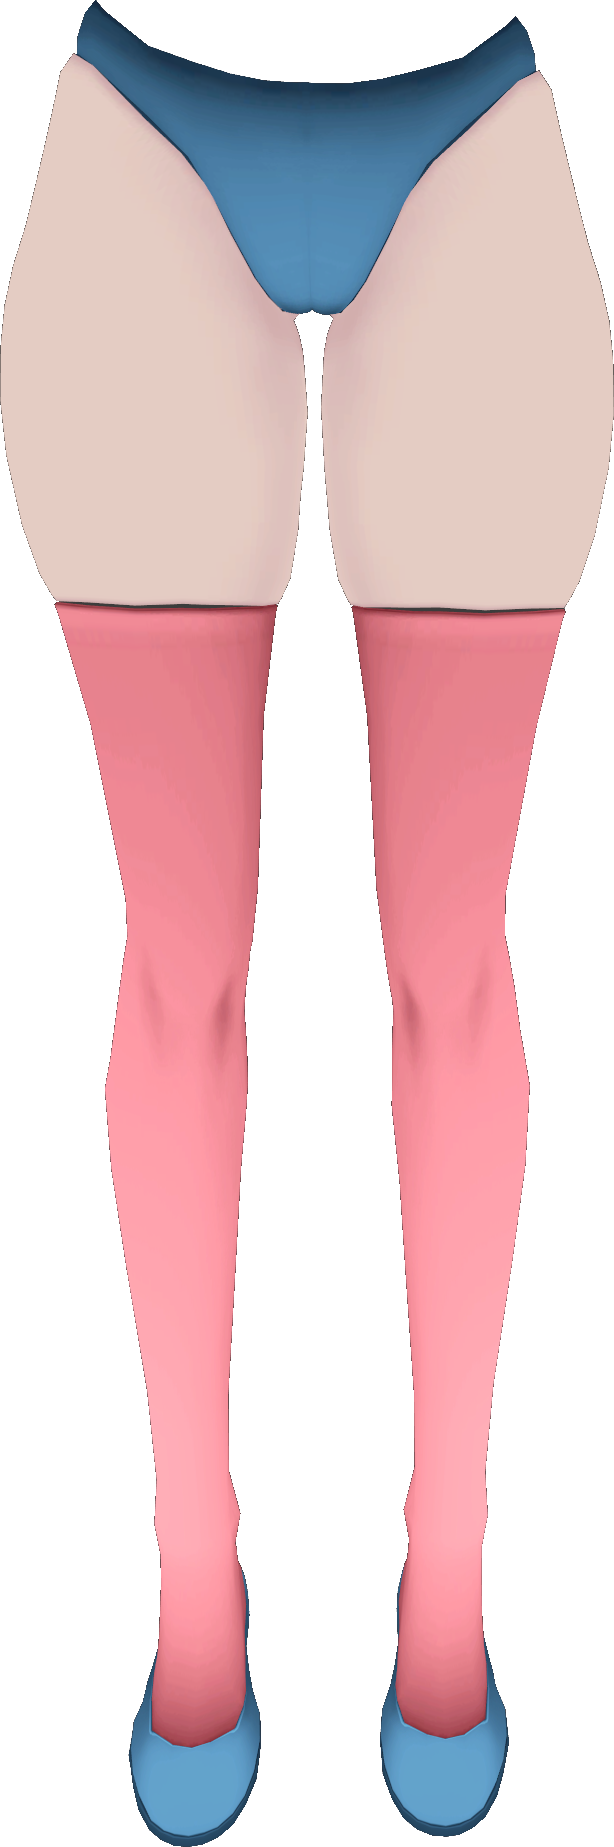
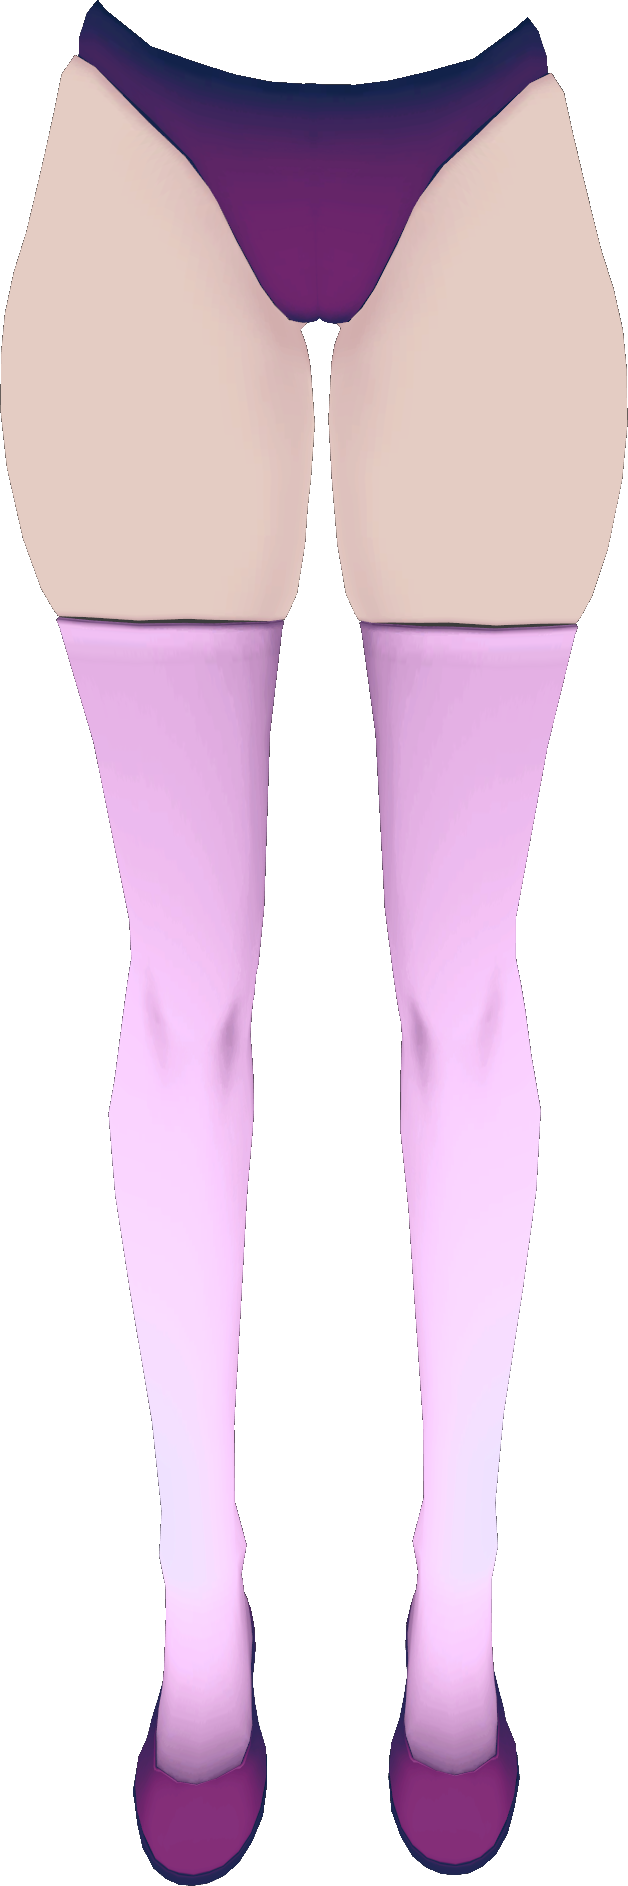
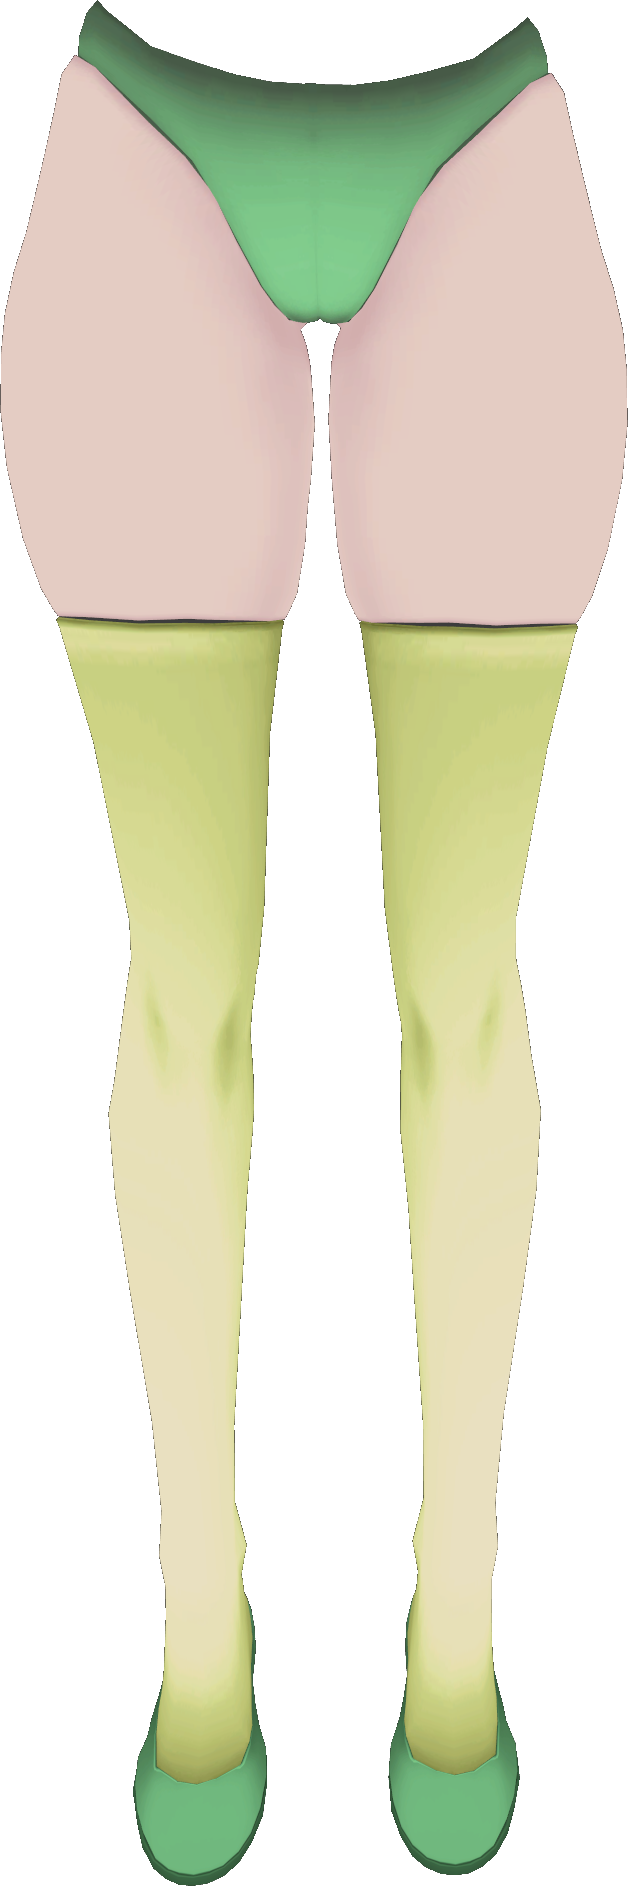
Despite this, the game's development team apparently thought it to be of the utmost importance that the Mermaids from Sunfish Pocket have fully-modeled panties, and that said panties were appropriately color-coordinated with their outfits.
These cannot be seen at all during normal gameplay, even during the unlockable DANCE mode.
The following content is |
||||||||
|---|---|---|---|---|---|---|---|---|
|
(Source: Discovered and rendered by TripleAce)
Iris's Split Corpse#
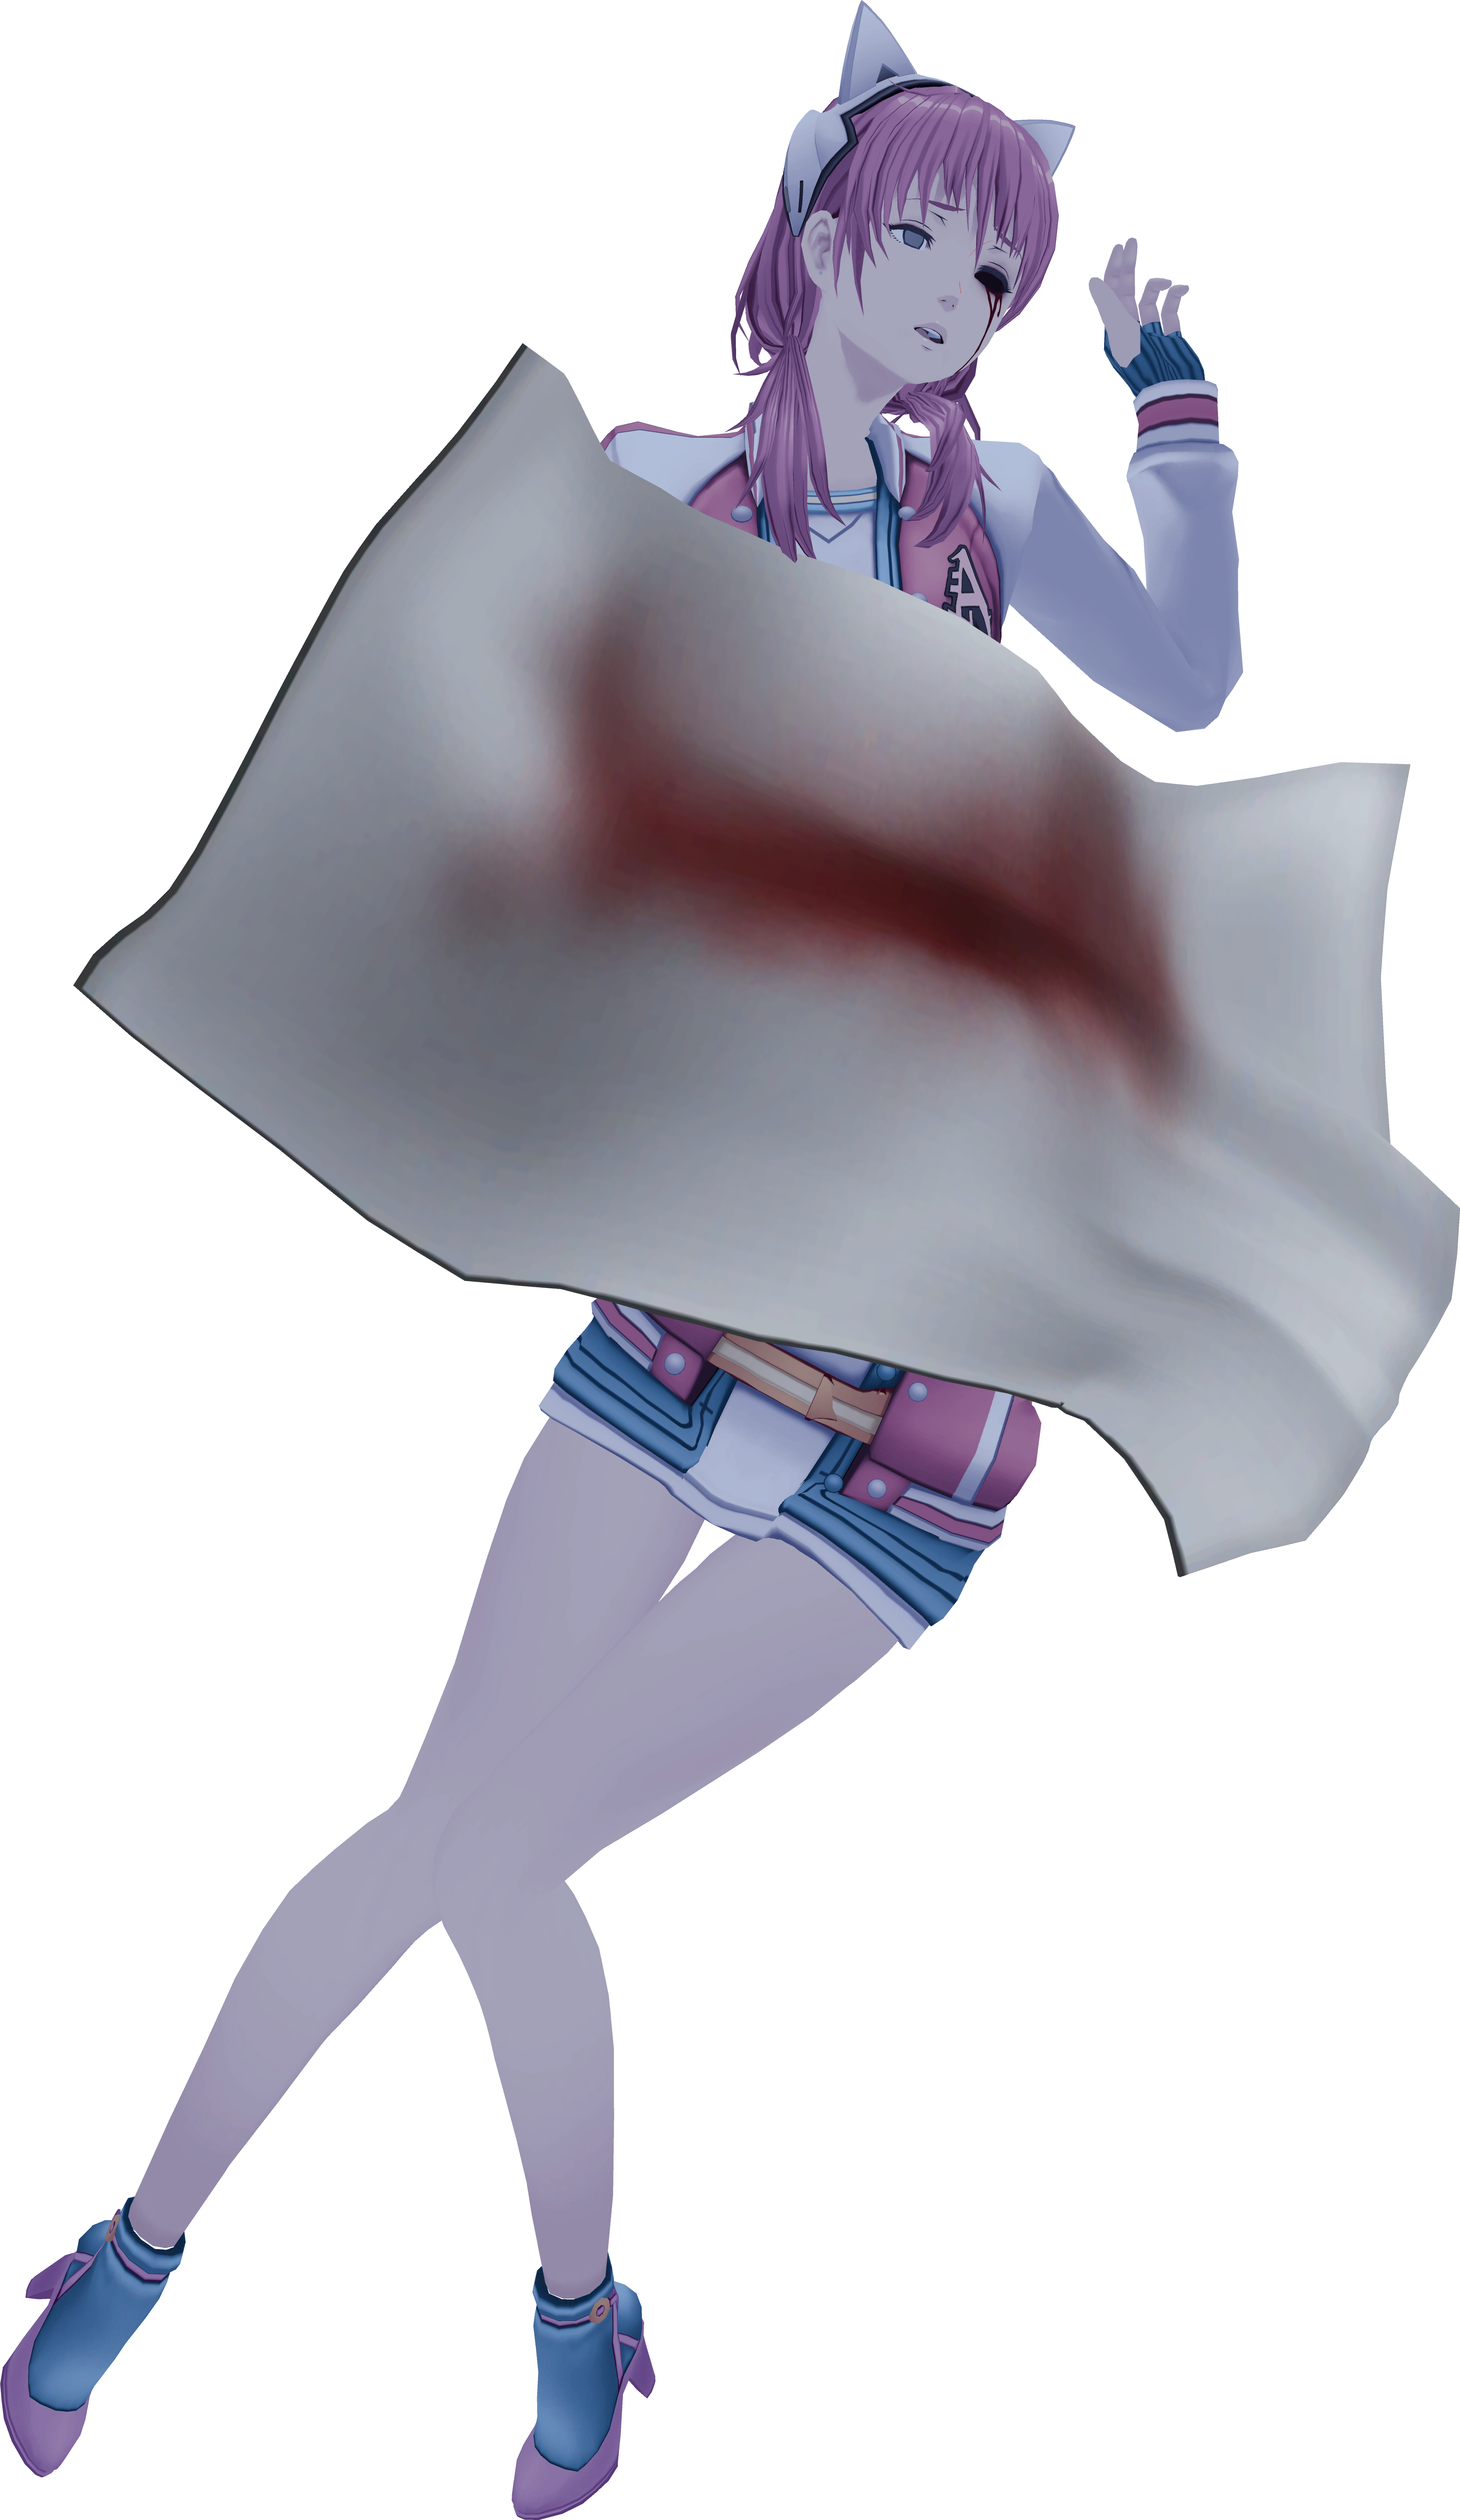
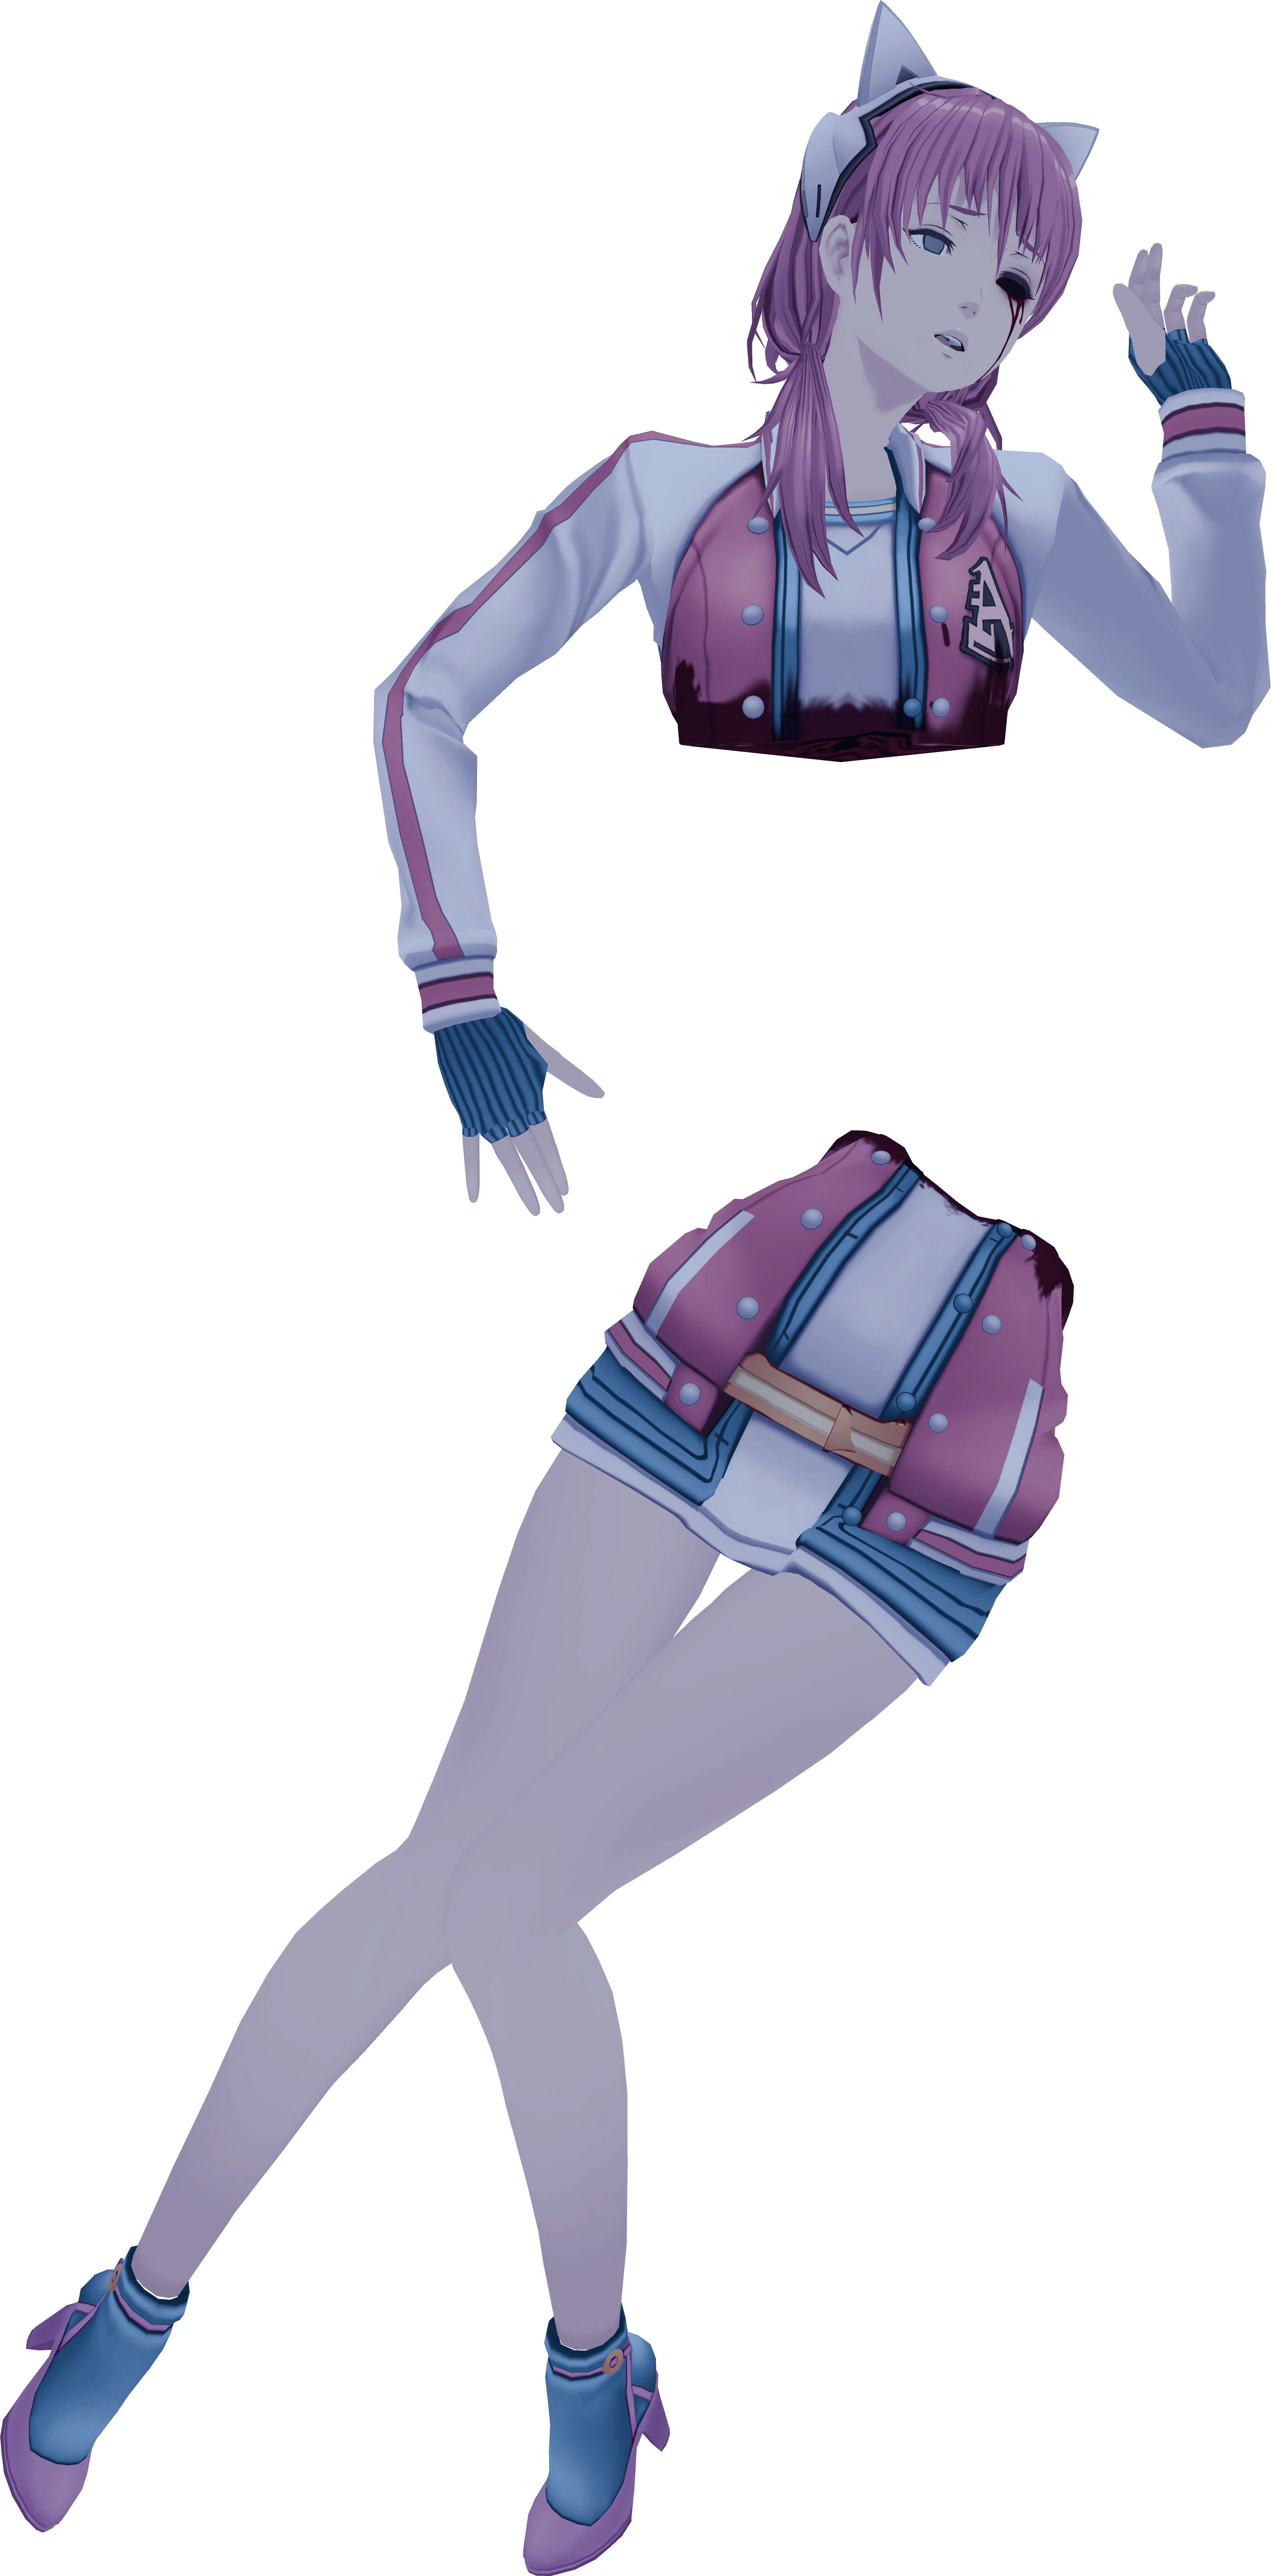
In one route, Iris's body is sawed in half. Due to the angle that the model is shown at along with the fog in the scene, it's impossible to tell that Iris's body has been sawed clean in two.
The following content is |
||||
|---|---|---|---|---|
|
(Source: Render by Robotortoise)
Unused Models#
Ritsuko's Skeleton#
The Lemniscate receptionist, Ritsuko, uses a similar model to that of Hitomi and thus shares some characteristics from the former's model - namely, that she also has Hitomi's bones. Literally. These skeleton bones are shown when Hitomi is x-rayed, and it is clearly Hitomi's skeleton in particular because of the metal plate over its right shoulder.
However, the game does not allow you to x-ray Ritsuko with Aiba, thus rendering this model unused. It is unknown if the intention was that Date would want to x-ray Ritsuko and this was a placeholder, or if this was simply a leftover. In either case, Date's reasoning for wanting to x-ray Ritsuko should be rather obvious.
(Source: Robotortoise)
Unseen Animations#
Sunfish Pocket & DANCE Mode Animation#
The DANCE feature appears on the main menu after the player beats the game. The same animation is used in Sunfish Pocket when Iris dances. The motion used for this, cm#E6-wrap79_M10_00#c05_00_mo_Iris_dance, is actually a bit longer than the player sees at the start.
The full start of the dance, where the actor holds their start position for a few seconds, can be seen in the video below. The animation is visible a few seconds later in Sunfish Pocket, and in the DANCE mode it starts with the character's arms raised half-way.
This animation was motion-captured, as listed in the credits, and if you look closely you can see the mocap actress shift her position a bit at the beginning.
(Source: Robotortoise)
Unseen Date-in-Boss Pose [Annihilation Route]#
At the very end of Annihilation Route, Date is forced into swapping bodies with Saito, who is then a parasite inside of Boss's body. A short cutscene plays out, and then Saito is laying on the floor and Date — now inside Boss's body — has fallen unceremoniously onto the floor.
Normally, the camera fades to black and shows a first-person view from Date's perspective. However, Boss's model does have a unique pose and animation for this single scene that can be seen with a modified camera. The animation is different from the scene prior, where Date is facing the ground.
(Source: Robotortoise)
Unused Videos#
|
|
To do: |
Throughout the game, prerendered video clips of past cutscenes are brought up as "AI Sight" during discussions. The debug mode used to record these also records some clips not used in the final game.
Young Iris Flashback#
While Date is driving Iris to Bloom Park during saikAI, he has a flashback to a younger Iris playing "ratty cakes". In the final game, this flashback is full screen, but the video recorder records an AI Sight clip of the same scene, and its filename "Video_A2_begin40_10_DatesCar_Iris_00" implies that it's supposed to play in this same chapter.
kekkAI Flashbacks#
While Iris is dying at the end of her route, a sequence of flashbacks plays of her time throughout the game. Like the above flashback, in the final game, these flashbacks are full screen, but the video recorder records an alternate sequence of AI Sight clips that seem to be intended for the same purpose. They have filenames beginning with "Video_D5_wrap_10_10_SaitoAgt_Iris", and feature a similar sequence of scenes, though notably not exactly the same sequence. Specifically, the sequence is Iris hugging Date in Lemniscate to blackmail him, Iris getting a piggyback ride in Bloom Park, Iris performing "Invincible Rainbow Arrow" at Sunfish Pocket, Iris being rescued at the harbor warehouse district, and a young Iris playing "ratty cakes". All of these scenes are included in the final game's flashback sequence, except for her performance at Sunfish Pocket.
Test Video#
One of the clips recorded has the filename "Video_Test", and features the same scene of Ota and Mizuki discovering Shoko's body that is seen in multiple other AI Sight clips. This file was presumably rendered to test the recording mode before the rest of the videos were added to it.
Somnium Video#
One of the clips recorded has the filename "Video_Somnium_A4_01_01", and features a recording of Ota's Somnium, "PSYNCIN' IN THE SWaiN", with nothing in particular in frame. This clip stands out for multiple reasons - it is the only clip with a filename that indicates a Somnium chapter rather than an Investigation chapter, no Somnium in the final game features an AI Sight clip, and the filename indicates it would play in the same chapter that it's a recording of.
Unused Text Strings#
|
|
To do:
|
Some internal labels for Somnium targets and actions have translations defined in the script despite never being seen by the player:
Source |
Line (EN) |
Line (JA) |
Line (ZH-TW) |
|---|---|---|---|
A1_somnium (SINKIN' IN THE BRaiN) |
Investigated Door |
ドア_調べろ |
調查門 |
A2_somnium (PSYNCIN' IN THE PaiN) |
First Item |
アイテム初ゲット |
第一次獲得道具 |
Open Control Room |
制御室のドア_開けろ |
控制室的門_打開 |
|
Bird Cage (Ripped Photo) |
鳥かご(バラ写側) |
鳥籠(碎照片) |
|
Bird Cage (Balloon) |
鳥かご(風船側) |
鳥籠(氣球) |
|
Torn Picture |
バラバラの写真 |
碎照片 |
|
Fixed Picture |
バラバラの写真_つなぎ合わせろ |
碎照片_拼起來 |
|
Balloon |
風船 |
氣球 |
|
Blown-up Balloon |
風船_ふくらませろ |
氣球_吹氣進去 |
|
Fixed Panda |
修復パンダカー |
修好的熊貓車 |
|
Floating Panda |
浮遊パンダカー |
飄浮熊貓車 |
|
Bird Cage |
巨大鳥かご |
巨大鳥籠 |
|
Broken Panda |
バラバラパンダカー |
四分五裂的熊貓車 |
|
A3_somnium (PSYNCIN' IN THE VaiN) |
Both |
両 |
兩 |
Both - TV Z |
両_テレビZ |
兩_電視Z |
|
Both - TV Z - Hit |
両_テレビZ_叩け |
兩_電視Z_叩け |
|
Both - TV Z - Turn Dial |
両_テレビZ_ダイヤルを回せ |
兩_電視Z_轉動旋轉鈕 |
|
Both - TV Z - Turn Dial - Movie |
両_テレビZ_ダイヤルを回せ_movie |
兩_電視Z_轉動旋轉鈕_movie |
|
Saito - Medicine Shelf |
世_薬品棚 |
世_藥櫃 |
|
Saito - Picture Book |
世_図鑑 |
世_圖鑑 |
|
Saito - Locker |
世_ロッカー |
世_置物櫃 |
|
Date - Locker |
伊_ロッカー |
伊_置物櫃 |
|
Both - Locker |
両_ロッカー |
兩_置物櫃 |
|
Saito - Knife |
世_ナイフ |
世_小刀 |
|
Saito - Operating Table - Do Surgery |
世_手術台_手術しろ |
世_手術台_動手術 |
|
Date - Operating Table |
伊_手術台 |
伊_手術台 |
|
Both - Operating Table |
両_手術台 |
兩_手術台 |
|
Saito - Oil Drum |
世_ドラム缶 |
世_鐵桶 |
|
Saito - Gun1 - Shoot |
世_銃1_撃て |
世_手槍1_射擊 |
|
Saito - Gun1 |
世_銃1 |
世_手槍1 |
|
Date - Torso A |
伊_トルソーA |
伊_人體模型A |
|
Date - TV A |
伊_テレビA |
伊_電視A |
|
Date - TV A - Turn Dial |
伊_テレビA_ダイヤルを回せ |
伊_電視A_ダイヤルを回せ |
|
Date - TV A - Turn Dial - movie |
伊_テレビA_ダイヤルを回せ_movie |
伊_電視A_ダイヤルを回せ_movie |
|
Date - Shelf |
伊_棚 |
伊_櫃子 |
|
Date - Iron Ball |
伊_鉄球 |
伊_鐵球 |
|
Date - Torso B |
伊_トルソーB |
伊_人體模型B |
|
Date - TV B |
伊_テレビB |
伊_電視B |
|
Date - TV B - Turn Dial |
伊_テレビB_ダイヤルを回せ |
伊_電視B_ダイヤルを回せ |
|
Date - TV B - Turn Dial - movie |
伊_テレビB_ダイヤルを回せ_movie |
伊_電視B_ダイヤルを回せ_movie |
|
Both - Doors |
両_扉 |
兩_門 |
|
Date - Gun A |
伊_銃A |
伊_手槍A |
|
Saito - Full-length Mirror |
世_姿見 |
世_照鏡 |
|
Date - Full-length Mirror |
伊_姿見 |
伊_照鏡 |
|
Both - Full-length Mirror |
両_姿見 |
兩_照鏡 |
|
Saito - TV 2 |
世_テレビ2 |
世_電視2 |
|
Saito - TV 3 |
世_テレビ3 |
世_電視3 |
|
Saito - TV 4 |
世_テレビ4 |
世_電視4 |
|
Saito - Torso 1 |
世_トルソー1 |
世_人體模型1 |
|
Both - Gas Canister |
両_ガスボンベ |
兩_瓦斯桶 |
|
Date - Medicine Bottle |
伊_薬瓶 |
伊_藥瓶 |
|
Date - Worn Out Reference Book |
伊_ボロボロの図鑑 |
伊_破破爛爛的圖鑑 |
|
TV Z |
テレビZ |
電視Z |
|
Collector's Item Acquired |
コレクションアイテムゲット |
獲得收集道具 |
|
Torso A |
トルソーA |
人體模型A |
|
TV A |
テレビA |
電視A |
|
Torso B |
トルソーB |
人體模型B |
|
TV B |
テレビB |
電視B |
|
Full-length Mirror |
姿見 |
照鏡 |
|
Gun A |
銃A |
手槍A |
|
Gun 1 |
銃1 |
手槍1 |
|
TV 2 |
テレビ2 |
電視2 |
|
TV 3 |
テレビ3 |
電視3 |
|
TV 4 |
テレビ4 |
電視4 |
|
Torso 1 |
トルソー1 |
人體模型1 |
|
A4_somnium (PSYNCIN' IN THE SWaiN) |
Breathed-on Plate |
棚Aのプレート_息を吐きかけろ |
置物櫃A的牌子_吹氣 |
Plate on Shelf A |
棚Aのプレート |
置物櫃A的牌子 |
|
Forklift: Sortie Ahead! |
フォークリフト_出撃だ!_先 |
堆高機_出擊!_前端 |
|
Forklift: Sortie! |
フォークリフト_出撃だ! |
堆高機_出擊! |
|
Rolling Oil Drum |
ドラム缶_転がせ |
鐵桶_滾動 |
|
Ota A |
応太A |
應太A |
|
Ota B |
応太B |
應太B |
|
Plate on Shelf B |
棚Bのプレート |
置物櫃B的牌子 |
|
Plate on Shelf C |
棚Cのプレート |
置物櫃C的牌子 |
|
Plate on Shelf D |
棚Dのプレート |
置物櫃D的牌子 |
|
Pressed Remote Control |
リモコン_ボタンを押せ |
遙控器_按按鈕 |
|
A5_somnium (PSYNCIN' IN THE SUSTaiN) |
Wall Clock (Past) |
掛け時計_時計の針を戻せ |
掛鐘_把時鐘的指針倒回去 |
B6_somnium (PSYNCIN' IN THE CAPTaiN) |
Sofa |
3人掛けソファ |
3人座沙發 |
Backpack Charm |
ランドセル_お守り… |
書包_護身符…… |
|
Date! Date! |
伊達_伊達! |
伊達_伊達! |
|
Shelf |
棚 |
櫃子 |
|
Lounge Chair |
1人掛けソファ |
單人座沙發 |
|
C4_somnium (PSYNCIN' IN THE CURTaiN) |
Wine |
ワイン |
葡萄酒 |
Book 1 |
本1 |
書1 |
|
Soup |
スープ |
湯 |
|
Book 2 |
本2 |
書2 |
|
Book 3 |
本3 |
書3 |
|
Book 4 |
本4 |
書4 |
|
Book 5 |
本5 |
書5 |
|
LOCK 1 |
LOCK1 |
LOCK1 |
|
LOCK 1 (Phone) |
LOCK1_電話が鳴る |
LOCK1_電話響起 |
|
LOCK 2 |
LOCK2 |
LOCK2 |
|
LOCK 2 (Phone) |
LOCK2_再度電話が鳴る |
LOCK2_電話再次響起 |
|
LOCK 3 |
LOCK3 |
LOCK3 |
|
LOCK 3 (Red Eye) |
LOCK3_巨大な赤い目 |
LOCK3_巨大的紅色眼睛 |
|
LOCK 4 |
LOCK4 |
LOCK4 |
|
LOCK 4 (Knocking) |
LOCK4_ノックする音 |
LOCK4_敲門的聲音 |
|
C5_somnium (PSYNCIN' IN THE REFRaiN) |
Key A - 1 |
鍵A_1 |
鑰匙A_1 |
Key A - 2 |
鍵A_2 |
鑰匙A_2 |
|
Key A - 3 |
鍵A_3 |
鑰匙A_3 |
|
Key A - 4 |
鍵A_4 |
鑰匙A_4 |
|
Key A - 5 |
鍵A_5 |
鑰匙A_5 |
|
Key A |
鍵A |
鑰匙A |
|
Key B - 1 |
鍵B_1 |
鑰匙B_1 |
|
Key B - 2 |
鍵B_2 |
鑰匙B_2 |
|
Key B - 3 |
鍵B_3 |
鑰匙B_3 |
|
Key B - 4 |
鍵B_4 |
鑰匙B_4 |
|
Key B - 5 |
鍵B_5 |
鑰匙B_5 |
|
Key B |
鍵B |
鑰匙B |
|
Ladder (2F) |
ハシゴ(2F) |
梯子(2F) |
|
Ladder (1F) |
ハシゴ(1F) |
梯子(1F) |
|
Door F' |
扉F’ |
門F' |
|
Collector's Item Acquired |
コレクションアイテムゲット |
獲得收集道具 |
|
Ladder (2F) |
ハシゴ2F |
梯子2F |
|
D3_somnium (PSYNCIN' IN THE VILLaiN) |
Control Panel |
操作盤 |
控制面板 |
Collector's Item Acquired |
コレクションアイテムゲット |
獲得收集道具 |
|
Portal C |
空間C |
空間C |
|
D4_somnium (PSYNCIN' IN THE MaiN: 1) |
Zombie |
ゾンビ |
喪屍 |
Monitor |
モニター |
螢幕 |
|
Collector's Item Acquired |
コレクションアイテムゲット |
獲得收集道具 |
|
D5_somnium (PSYNCIN' IN THE MaiN: 2) |
Egg-shaped Monument (Common) |
卵型の石碑(共通) |
蛋型石碑(共通) |
Pedestal (Common) |
灯籠(共通) |
石燈籠(共通) |
|
Guardian Dog_Look |
狛犬_見る |
石犬_看 |
|
Pedestal (Bugged) A |
灯籠(バグ)A |
石燈籠(BUG)A |
|
Pedestal (Bugged) B |
灯籠(バグ)B |
石燈籠(BUG)B |
|
Pedestal (Bugged) C |
灯籠(バグ)C |
石燈籠(BUG)C |
|
Pedestal (Bugged) D |
灯籠(バグ)D |
石燈籠(BUG)D |
|
Pedestal (Bugged) |
灯籠(バグ) |
石燈籠(BUG) |
|
Guardian Dog (Bugged) |
狛犬(バグ) |
石犬(BUG) |
|
Chozuya (Real) |
手水舎(リアル) |
手水舍(真實) |
|
Pedestal (Decor) |
灯籠(飾り) |
石燈籠(裝飾) |
|
Pedestal (Before UFO) |
灯籠(石碑あり:UFO等出現前) |
石燈籠(有石碑:UFO出現前) |
|
Guardian Dog (Real) |
狛犬(リアル) |
石犬(真實) |
|
Lantern (Real) |
灯籠(リアル) |
石燈籠(真實) |
|
Arch (Real) |
鳥居(リアル) |
鳥居(真實) |
|
Bell (Real) |
鈴(リアル) |
鈴鐺(真實) |
|
E5_somnium (PSYNCIN' IN THE MOUNTaiN) |
Renju (19 Years Old) |
沖浦(19歳) |
沖浦(19歲) |
Hitomi (19 Years Old) |
瞳(19歳) |
瞳(19歲) |
|
Common Rock |
岩共通 |
石頭共通 |
|
E6_somnium (PSYNCIN' IN THE CHaiN) |
Sea of Blood |
血の海 |
血海 |
There are also various unused or unseen character and object labels (from bgset.lua):
Line (EN) |
Line (JA) |
Line (ZH-TW) |
Notes |
|---|---|---|---|
Saito in Date |
犀人in伊達 |
犀人in伊達 |
Body-swapped characters are only ever visibly labeled by their current body or their current mind in-game, not both at once like this. |
Saito Boss |
犀人ボス |
犀人BOSS |
|
Saito #89 |
犀人89号 |
犀人89號 |
|
Date in #89 |
伊達in89号 |
伊達in89號 |
|
Date in Rohan |
伊達in狼範 |
伊達in狼範 |
|
Aiba v.2 |
アイボゥ2 |
瞳絆2 |
An internal label for Aiba's "hamster" form. |
Aiba v.3 |
アイボゥ3 |
瞳絆3 |
An internal label for Aiba's humanoid form. |
Origami Chain |
折り紙チェーン |
色紙做的紙鍊 |
For the origami chain in Boss's office, which isn't targetable in the final game despite having some examine dialogue assigned to it. |
Sleeping Gas |
催眠ガススプレー |
催眠瓦斯噴罐 |
An internal label for the can of sleeping gas Boss uses on Date during a scene in the Epilogue. |
Coffee |
コーヒー |
咖啡 |
This coffee is referenced in the code and dialogue for Iris's interrogation in syokubAI, but doesn't actually appear in the final game. |
Psync Chair 1 |
Psyncチェア1 |
Psync椅1 |
An internal label for the Psyncer's chair on each of the Psync machines. (By contrast, the subject's chair is internally labeled as just "Psyncチェア"/"Psync Chair" without the number, which is also what both chair types' hotspot names appear as in-game.) |
Large Speaker 2 |
大型スピーカー2 |
大型揚聲器2 |
An internal label for the speaker in the Date Residence, specifically after finding Mizuki in it in seisAI (when its examine dialogue updates). |
Threatening Letter |
脅迫文 |
恐嚇信 |
Possibly meant for the note attached to Mizuki in the above seisAI scene. |
SAT Officer A |
SAT隊員A |
SAT隊員A |
Internal labels for the SAT officers from the confrontation with "Boss" in jinnAI. |
SAT Officer B |
SAT隊員B |
SAT隊員B |
|
SAT Officer C |
SAT隊員C |
SAT隊員C |
|
SAT Officer D |
SAT隊員D |
SAT隊員D |
|
Apple |
リンゴ |
蘋果 |
More internal labels for objects from the confrontation with "Boss" in jinnAI. |
Flour Dust |
小麦粉の煙 |
麵粉煙霧 |
|
GPS |
GPS |
GPS |
An internal label for the GPS transmitter Renju gives to Manaka in a flashback during kokkAI. |
Floor X-ray |
床_Xray |
地板_Xray |
Originally meant for the confrontation with "Boss" at the Sagan Residence in jinnAI, as seen in the early script found in all_func.lua. In the final game, the floor there is never targetable. |
Floor |
床 |
地板 |
|
Mayumi Thermo |
サーモまゆみ |
熱感應真弓 |
Referenced in a scene in youdAI to show the Thermo-mode view of Mayumi's brain. |
Ota C |
C応太 |
C應太 |
An internal label for the younger Ota who appears in flashbacks in Mayumi's Somnium and syokuzAI but is never directly targetable. |
Tissues |
ティッシュ |
面紙 |
Likely refers to the (untargetable) box of tissues by one of the windows in Matsushita Diner. |
Iris's Smartphone |
イリスのスマホ |
伊麗絲的手機 |
Some more internal labels for cutscene objects, mostly from syuurAI. |
Spoon |
スプーン |
湯匙 |
|
Dropped Spoon |
落ちたスプーン |
掉在地上的湯匙 |
|
Water |
水 |
水 |
|
Omelet Rice |
オムライス |
蛋包飯 |
|
Omelet Rice 2 |
オムライス2 |
蛋包飯2 |
|
So's Smartphone |
世島のスマホ |
世島的手機 |
|
Bodyguard C |
ボディガードC |
保鑣C |
While So's bodyguards appear in various scenes, this particular variant of them is only ever referenced once, in the showdown at the Sejima Residence near the end of seisAI (which doesn't allow for examining any of them). |
Sliding Door 1 |
ふすま1 |
紙門1 |
Some cutscene objects for that same seisAI scene. |
Sliding Door 2 |
ふすま2 |
紙門2 |
|
Sliding Door 3 |
ふすま3 |
紙門3 |
|
Transparent Sliding Door |
透過ふすま |
透明紙門 |
|
Automatic Door |
自動自動ドア |
自動門 |
For the entrance door at Lemniscate, which isn't targetable in the final game despite having a line of examine dialogue assigned to it. |
Donuts |
ドーナツ |
甜甜圈 |
Despite the English name, this likely refers to a single "donut": the lifesaver at Sunfish Pocket, after Amame claims that it is one in optional dialogue from the visit there during gyoukAI. In the final game, its updated hotspot label at that point is taken from a line in that specific scene's script, which correctly localizes it to "Donut" instead. |
Golden Ball |
金玉 |
金色珠子 |
Cutscene objects from the Kumakura Office. |
Cracked Ball |
壊れた金玉 |
壞掉的金色珠子 |
|
Safe |
金庫 |
保險箱 |
|
Hunting Rifle |
猟銃 |
獵槍 |
|
Gatling Gun 2 |
ガトリング2 |
格林機關槍2 |
|
The AI: The Somnium Files series | |
|---|---|
|
Windows, Nintendo Switch |
The Somnium Files • nirvanA Initiative • No Sleep For Kaname Date |
|
PlayStation 4, Xbox One |
|
|
Nintendo Switch 2 |
|