 This article has a talk page!
This is a sub-page of Proto:The Legend of Zelda: Ocarina of Time/Late 1997 Overdump.

|
This page or section needs more images. |
Icons#
Equipment#
Hookshot#
A Link To The Past |
OOT Overdump |
OOT Final |
|---|---|---|
 |
 |
 |
The Hookshot's early design lacks a handle and resembles its look in A Link To The Past. It's more purple in color, like the final game's Longshot.
Magnifying Glass of Truth#
|
Overdump |
Final |
|---|---|

|

|
This build's version of the Lens of Truth has a yellow eyelid, and the lens part is more eye-shaped than the circular lens of the final design.
Landmine#
|
Overdump |
Final |
|---|---|

|

|
A scrapped item that was presumably reworked into the Bombchu.
Boomerang#
|
Overdump |
Final |
|---|---|

|

|
The Boomerang icon's orange colors is more saturated than the final game's icon. Additionally, the gem is green in the prototype.
Slingshot#
|
Overdump |
Final |
|---|---|

|

|
The Fairy Slingshot's icon was redrawn, with the string wrapping around the ends, as well as recolored.
Bow#
|
Overdump |
Final |
|---|---|

|

|
The Fairy Bow's icon was redrawn slightly as well as recolored. The grip was green and brown instead of blue and orange, the drawstring was grey instead of white, and the bow's tips are not red.
Magic Arrows#
|
Overdump |
Final |
|---|---|

|

|
Early graphics for the Fairy Bow with different magic arrows. The green (Wind), black (Shadow), and yellow (Soul/Spirit) arrows were cut from the final game, while the white (Light) arrows were recolored to yellow. The lighting on the early arrows is horizontal, while the final has them diagonal, lining up with the arrow shaft.
Ocarina of Time#
|
Overdump |
Final |
|---|---|

|

|
The Ocarina of Time icon has what appears to be blue, green, and red buttons in the three holes going towards the tip, and there is no metal band wrapped around the base of the mouthpiece. In a 1997 interview, Miyamoto stated that the Spiritual Stones would have to be inserted into the Ocarina.
Bottled Items#
|
Overdump |
Final |
|---|---|
|
|
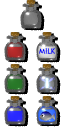
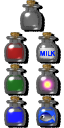
The bottles were redrawn to be slightly bigger. The fairy is white with small wings, whereas the final version is a glowing pink ball.
Chicken Egg#
|
Overdump |
Final |
|---|---|

|

|
At this point in development, the player could buy chicken eggs that could be eaten to restore health, or hatched. The final version limits the kinds of eggs to just two, both event items. There does not seem to be an icon for the hatched chicken/Cucco.
The chicken egg is much smaller than the final's eggs, and does not have a nest.
Horse Grass#
|
Overdump |
Final |
|---|---|

|
N/A |
In this build, the player used a special whistle made of "horse grass" to summon Epona, a concept later used in Twilight Princess. The final game replaces this with Epona's Song.
Swords#
|
Overdump |
Final |
|---|---|

|

|
The Kokiri and Master Sword icons went through a revision before the final game. Surprisingly, the Biggoron's Sword/Giant's Knife icon is already finalized at this point.
Shields#
|
Overdump |
Final |
|---|---|

|

|
The early Deku Shield icon is more saturated, while the early Hylian Shield icon is blockier. The shading, drop shadow, and the area around the star on the Mirror Shield were slightly cleaned up.
Boots#
|
Overdump |
Final |
|---|---|

|

|
The early boots have a more cartoony-looking design. Further, the Iron Boots are literal iron boots, whereas in the final version only the toes are covered in iron.
Bracelets#
|
Overdump |
Final |
|---|---|

|

|
The Silver and Golden Gauntlets are bracelets in this build.
There is no early version of the Goron Bracelet due to the item not existing at this point. Instead, the player simply needed Darunia's permission to pick the Bomb Flowers.
Quivers#
|
Overdump |
Final |
|---|---|

|

|
Early designs of the Quiver and its upgrades. Further, not only is each Quiver's maximum capacity displayed as part of the icon, but it uses a different upgrade structure and different maximums compared to the final's 30-40-50.
Bomb Bag#
|
Overdump |
Final |
|---|---|

|

|
Early designs of the Bomb Bag and its upgrades. Similarly to the Quivers, the maximum capacity is displayed as part of each icon and the upgrades double capacity rather than the final's 20-30-40.
Wallet#
|
Overdump |
Final |
|---|---|

|

|
Early wallet designs, again displaying their maximum capacity. Notably, the Adult's Wallet and Giant's Wallet could hold far more at this point, whereas in the final game they hold a mere 200 and 500 Rupees respectively.
Interestingly, the smallest wallet is also present (albeit unused) in Majora's Mask.
Warp Songs#
|
Overdump |
Final |
|---|---|

|

|
Music note graphics for the warp songs. There's just a single note icon in the final game that gets colorized by the pause screen.
Spiritual Stones#
|
Overdump |
Final |
|---|---|

|

|
Early icons for the Spiritual Stones. Their designs differ significantly from the final versions, resembling musical notation - specifically natural, flat, and sharp accidentals. Likely meant for the Ocarina of Time, as in this version they would have been inserted into it.
Medallions#
|
Overdump |
Final |
|---|---|

|

|
Early icons for the Medallions. Their designs are the same as the final version, but the Spirit, Shadow, and Light Medallions have different colors. These colors correspond with the six magic arrow types, three of which are unused in the final game, as well as the six colored keys, see below.
These icons are larger than the final game's icons, as they were originally C-button items used to cast spells, while the final versions appear only on the Quest Status subscreen.
Unknown Icon#

An unknown blue icon, possibly a placeholder for something else in Quest Status.
Quest Status Medallions#

The final game doesn't have separate medallion icons without a color.
Map Screen#
Dungeon Map#
|
Overdump |
Final |
|---|---|

|

|
Compass#
|
Overdump |
Final |
|---|---|

|

|
Key Icons#

Six keys whose colors match up perfectly to those of the Medallions, suggesting that each Temple once used a unique key icon. Notably, there's a key corresponding to the Light Medallion, rare evidence for a possible Light Temple.
It's not clear whether these represented Small Keys or Boss Keys, but it's a neat idea all the same.
Items#
Heart#
|
Overdump |
Final |
|---|---|

|

|
Menu Assets#
Screen Labels#
Quest Status#
Triforce#

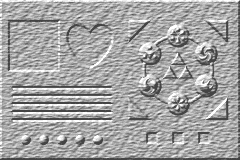
A type of icon or item that would be part of Quest Status. The final version has the Triforce as part of the Quest Status screen's submenu graphic render.
Heart Pieces#

Pieces of Heart from the Quest Status screen. In-game text further confirms that 8 Pieces were needed to make a Heart Container in this build, a marked departure from the 4-Piece requirement previously seen in A Link To The Past, Link's Awakening, and Inishie no Sekiban. They were probably thinking about doing a lot of sidequests for this game.
Twilight Princess would later require 5 Pieces to make a Heart Container, which is still an outlier for the series but not as insane as needing 8.
Equipment Screen#


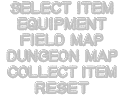
Labels to describe menu items and screens.
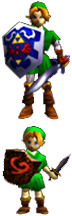
Prerendered images of Link as an adult and child. They served as placeholders for Link on the Equipment screen until a copy buffer had been added.
Map Screen#
Map (Field Map and Dungeon Map). Perhaps the label would be changed depending on where it is?
World Map#
Overdump |
Final |
|---|---|
 |
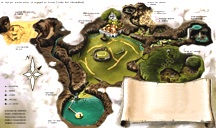 |
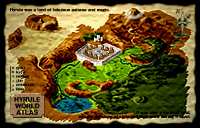
This beautiful work of cartography was only previously seen through a tiny photo from a booth at Space World '97.
The upper portion of the map reads "Hyrule was a land of fabulous palaces and magic.", while the bottom-right appears to say "It was also a troubled land, and the divisions of Light and Dark were tearing it apart." Both sentences originate from the A Link To The Past Player's Guide.
Texture Address: 0x01063F40
Format: CI8
Palette Address: 0x0106A340
Dungeons#
Texture |
Text |
Translation |
Notes |
|---|---|---|---|
 |
妖精デクの樹 |
Fairy Deku Tree |
Called デクの樹サマの中 ("Inside the Great Deku Tree") in Japanese and "Inside the Deku Tree" in English in the final version. |
 |
ドドンゴの洞窟 |
Dodongo's Cavern |
|
 |
スペシャルコース |
Special Course |
This was the name of the Gerudo's Training Ground in the Spaceworld '97 demo. |
 |
森の神殿 |
Forest Temple |
|
 |
炎の神殿 |
Fire Temple |
|
 |
水の神殿 |
Water Temple |
|
 |
邪神ディンの像 |
Statue of the Evil God Din |
This dungeon was renamed to "Spirit Temple" in the final version. In the final game, the area outside the temple is called 巨大邪神像 ("Giant Evil God Statue") in Japanese and "Desert Colossus" in English. |
 |
闇の神殿 |
Shadow Temple |
The position of the title in relation to the other dungeon title textures may imply that this was intended to be the last dungeon to be completed in the game, which is consistent with other internal and external file ordering. |
 |
ガノンの塔 |
Ganon's Tower |
In the final game, Ganon's Tower is part of a larger dungeon that uses the title texture ガノン城 内部 ("Ganon Castle: Interior") in Japanese and "Inside Ganon's Castle" in English. There is no title texture for the tower itself, though the dungeon is referred to as Ganon's Tower by Rauru in the final script. |
(Source: Fred Bronze, GlitterBerri)
Select Item/Save#
The screen used for selecting items and saving. Almost identical to the final version.
Pause Menu Text#
Starting at offset 010A33E0 in the overdump ROM are a series of IA8 textures displaying the names of items and locations.
Below are translations of each name. Titles in bold are unused. Official translations are used if present in the released version.
While the names of most of the locations are the same as in the final, these labels for the locations are meant for the Map Screen. This implies that the Map Screen would have had more location dots, but displaying the used location labels plus the unused labels listed here would have likely crowded the Map Screen a bit too much.
Texture |
Text |
Translation |
Notes |
|---|---|---|---|
 |
バクダン |
Bombs |
|
 |
デクの実 |
Deku Nut |
|
 |
地雷 |
Land Mine |
Removed from the final game, possibly replaced by Bombchus (ボムチュウ). |
 |
妖精の弓 |
Fairy Bow |
|
 |
パチンコ |
Slingshot |
Renamed to Fairy Slingshot (妖精のパチンコ) in the final. |
 |
ブーメラン |
Boomerang |
|
 |
デクの棒 |
Deku Stick |
|
 |
フックショット |
Hookshot |
|
 |
まことの虫メガネ |
Magnifying Glass of Truth |
Renamed to Lens of Truth (まことのメガネ) in the final. |
 |
時のオカリナ |
Ocarina of Time |
|
 |
メガトンハンマー |
Megaton Hammer |
|
 |
馬の草笛 |
Horse Reed Pipe |
An item removed from the final, with the functionality replaced by Epona's Song. |
 |
ニワトリタマゴ |
Chicken Egg |
Changed to Weird Egg (ふしぎなタマゴ) in the final. The in-game text of this build mentions that Chicken Eggs could be purchased, then eaten (to restore health) or hatched. The final Weird Egg is only used as a plot item to wake Talon. There is an unused shop still left over in the final game that sells the Weird Egg, which is probably a remnant of this mechanic. |

|
ゼルダの手紙 |
Zelda's Letter |
|
 |
炎のメダル |
Fire Medallion |
|
 |
氷のメダル |
Ice Medallion |
Renamed to Water Medallion (水のメダル) in the final. |
 |
風のメダル |
Wind Medallion |
Renamed to Forest Medallion (森のメダル) in the final. |
 |
魂のメダル |
Spirit Medallion |
|
 |
光のメダル |
Light Medallion |
|
 |
闇のメダル |
Shadow Medallion |
|
 |
からビン |
Empty Bottle |
The released Japanese version uses a different word for "Empty". |
 |
赤いくすり |
Red Potion |
The released Japanese version has "Potion" in katakana (クスリ). |
 |
青いくすり |
Blue Potion |
|
 |
緑のくすり |
Green Potion |
|

|
妖精の魂 |
Fairy's Spirit |
Simply known as Fairy in English, although it is called Fairy's Spirit in the Potion Shop. |
 |
さかな |
Fish |
The released Japanese version has this in katakana (サカナ). |
 |
ロンロン牛乳 |
Lon Lon Milk |
|
 |
風のメダル |
Wind Medallion |
Renamed to Forest Medallion (森のメダル) in the final. |
 |
炎のメダル |
Fire Medallion |
|
 |
氷のメダル |
Ice Medallion |
Renamed to Water Medallion (水のメダル) in the final. |
 |
魂のメダル |
Spirit Medallion |
|
 |
闇のメダル |
Shadow Medallion |
|
 |
光のメダル |
Light Medallion |
|
 |
ナイフ |
Knife |
Renamed to Kokiri Sword (コキリの剣) in the final. |
 |
マスターソード |
Master Sword |
|

|
巨人のナイフ |
Giant's Knife |
|
 |
デクの盾 |
Deku Shield |
|
 |
ハイリアの盾 |
Hylia Shield |
Known as the Hylian Shield in English. |
 |
ミラーシールド |
Mirror Shield |
|
 |
いつもの服 |
Normal Tunic |
Known as the Kokiri Tunic in English. The Japanese name likely refers to the tunic being what Link normally wears. |
 |
ゴロンの服 |
Goron Tunic |
|
 |
ゾーラの服 |
Zora Tunic |
|
 |
いつものブーツ |
Normal Boots |
Known as the Kokiri Boots in English. The Japanese name likely refers to the boots being what Link normally wears. |
 |
ヘビイブーツ |
Heavy Boots |
Known as Iron Boots in English. |
 |
ホバーブーツ |
Hover Boots |
|
 |
小さな矢立て |
Small Quiver |
"Small" was removed for the final version so as not to make the Quiver (矢立て) feel bad. |
 |
大きな矢立て |
Big Quiver |
|
 |
もっと大きな矢立て |
Bigger Quiver |
Renamed to Biggest Quiver (最大の矢立て) in the final. |
 |
小さな袋 |
Small Bag |
Renamed to Bomb Bag (ボム袋) in the final. |
 |
大きな袋 |
Big Bag |
Renamed to Big Bomb Bag (大きなボム袋) in the final. |
 |
もっと大きな袋 |
Bigger Bag |
Renamed to Biggest Bomb Bag (最大のボム袋) in the final. |
 |
銀のブレスレット |
Silver Bracelet |
Early version of the Silver Gauntlets (銀のグローブ). |
 |
金のブレスレット |
Gold Bracelet |
Early version of the Golden Gauntlets (金のグローブ). |

|
こどものサイフ |
Child's Wallet |
|

|
おとなのサイフ |
Adult's Wallet |
|

|
巨人のサイフ |
Giant's Wallet |
|
 |
マップ |
Map |
|
 |
コンパス |
Compass |
|
 |
ハートのかけら |
Piece of Heart |
|

|
サリアの封印 |
Saria's Seal |
|

|
ダルニアの封印 |
Darunia's Seal |
|

|
ルトの封印 |
Ruto's Seal |
|

|
ナボールの封印 |
Nabooru's Seal |
|

|
ミドの封印 |
Mido's Seal |
Interestingly, Mido is listed among the Sages instead of Impa, and the ordering of the Medallion name textures suggests he was tied to the Shadow Temple. |

|
ラウルの封印 |
Rauru's Seal |
|

|
ゼルダの封印 |
Zelda's Seal |
The only Seal to not have an associated Medallion. In the final, Zelda instead gives Link the Light Arrows. |
 |
コキリのヒスイ |
Kokiri's Jade |
Known as the Kokiri's Emerald in English. |
 |
ゴロンのルビー |
Goron's Ruby |
|
 |
ゾーラのサファイア |
Zora's Sapphire |
|
 |
風のメヌエット |
Minuet of Wind |
Renamed to Minuet of Forest (森のメヌエット) in the final. |
 |
炎のボレロ |
Bolero of Fire |
|
 |
水のワルツ |
Waltz of Water |
Renamed to Serenade of Water (水のセレナーデ) in the final. |
 |
魂のゴスペル |
Gospel of Spirit |
Renamed to Requiem of Spirit (魂のレクイエム) in the final. |
 |
闇のエチュード |
Etude of Shadow |
Renamed to Nocturne of Shadow (闇のノクターン) in the final. |
 |
光のプレリュード |
Prelude of Light |
|
 |
もだえ石 |
Stone of Agony |
It's not clear why this is present four times. |
 |
もだえ石 |
Stone of Agony |
|
|
もだえ石 |
Stone of Agony |
|
|
もだえ石 |
Stone of Agony |
|
|
ハートのかけら |
Piece of Heart |
|
|
マップ |
Map |
|
|
コンパス |
Compass |
|
 |
緑のカギ |
Green Key |
The fact these are listed after the Map and Compass indicates they were part of the Map Screen in dungeons, which in the final only tracks the Boss Key. The ordering lines up with the Medallion name textures and the Medallions' respective colors, suggesting that each Key color was exclusive to that Temple. |
 |
赤いカギ |
Red Key |
|
 |
青いカギ |
Blue Key |
|
 |
黄色のカギ |
Yellow Key |
|
 |
黒いカギ |
Black Key |
|
 |
白いカギ |
White Key |
|
 |
ハイラル平野 |
Hyrule Plain |
The released Japanese version uses a different kanji at the end (ハイラル平原). |
 |
城下町 |
Castle Town |
Known as Market in English. |
 |
ハイリア大聖堂 |
Hylia Cathedral |
Possibly an early name for the Temple of Time? |
 |
ハイラル城 |
Hyrule Castle |
Omitted from the Map Screen in the final. |

|
ガノンの塔 |
Ganon's Tower |
Omitted from the Map Screen in the final. |
 |
マロン&タラン牧場 |
Malon & Talan Ranch |
"Talan" seems to be a misspelling of "Talon" (タロン). Renamed to Lon Lon Ranch (ロンロン牧場) in the final. |
 |
ハイリア湖 |
Lake Hylia |
The released Japanese version has an additional kanji on the end (ハイリア湖畔), changing the meaning from lake to lakeside. |
 |
迷いの森 |
Lost Woods |
|
 |
デクの樹 |
Deku Tree |
Omitted from the Map Screen in the final. |
 |
森の神殿 |
Forest Temple |
Temples were omitted from the Map Screen in the final. |
 |
カカリコ村 |
Kakariko Village |
|
 |
墓地 |
Graveyard |
The Kakariko Graveyard was omitted from the Map Screen in the final. |
 |
闇の神殿 |
Shadow Temple |
Temples were omitted from the Map Screen in the final. |
 |
デスマウンテン |
Death Mountain |
|
 |
炎の神殿 |
Fire Temple |
Temples were omitted from the Map Screen in the final. |

|
ゾーラ川 |
Zora's River |
The final version refers to Zora's Domain (ゾーラの里), rather than the river area. |
 |
願いの滝 |
Waterfall of Wishing |
Same name as an area from A Link To The Past. Presumably meant for the falls near Zora's Domain, which would be a nifty callback, but it's not marked on the Map Screen in the final. |

|
ゾーラの泉 |
Zora's Fountain |
The final version refers to Zora's Domain (ゾーラの里), rather than the fountain area. |
 |
水の神殿 |
Water Temple |
Temples were omitted from the Map Screen in the final. |
 |
ゲルドの谷 |
Gerudo Valley |
|
 |
幻影の砂漠 |
Phantom Desert |
Known as the Haunted Wasteland in English. |

|
盜賊団のアジト |
Thieves' Hideout |
Omitted from the Map Screen in the final. |
 |
巨大邪神像 |
Giant Evil God Statue |
Known as the Desert Colossus in English. Omitted from the Map Screen in the final. |
Action Texts#
Texture |
Text |
Translation |
|---|---|---|
 |
チェック |
Check |
 |
ひらく |
Open |
 |
ジャンプ |
Jump |
 |
けってい |
Decide |
 |
ムチ |
Whip |
 |
みる |
View |
 |
もどる |
Return |
 |
なげる |
Throw |
 |
ナビィ |
Navi |
 |
のぼる |
Climb |
 |
のる |
Get On |
 |
おく |
Put |
 |
おりる |
Down |
 |
リセット |
Reset |
 |
セーブ |
Save |
 |
しらべる |
Examine |
 |
しゃべる |
Talk |
 |
つぎへ |
Next |
 |
つかむ |
Grab |
 |
やめる |
Quit |
Text Box#




Minimaps#

|
To do:
|
Overworld#
Older Hyrule Field
{| class="wikitable" style="text-align: center; margin: auto" ! Early || Final |- | ||
 |}
The map here matches the geography of the much older version of Hyrule Field also found on the overdump. Interestingly, the placement of Hyrule Castle is marked white, but nothing else behind the gate, where Castle Town would be, is.
Kokiri Forest
{| class="wikitable" style="text-align: center; margin: auto" ! Early || Final |- | ||
 |}
The layout looks very similar to the Kokiri Forest map seen in the overdump. Despite this, there's no detail to indicate the Great Deku Tree's presence, instead showing what looks more like water.
Hyrule Field
{| class="wikitable" style="text-align: center; margin: auto" ! Early || Final |- | || |}
Death Mountain Trail
{| class="wikitable" style="text-align: center; margin: auto" ! Early || Final |- | ||
 |}
Dungeons#
Inside the Deku Tree
Early |
Final |
|---|---|
 |
N/A |
Early |
Final |
|---|---|
 |
N/A |
Early |
Final |
|---|---|
 |
N/A |
Early |
Final |
|---|---|
 |
 |
Early |
Final |
|---|---|
 |
 |
Early |
Final |
|---|---|
 |
 |
Early |
Final |
|---|---|
 |
 |
Early |
Final |
|---|---|
N/A |
 |
Dodongo's Cavern
Early |
Final |
|---|---|
 |
 |
Early |
Final |
|---|---|
 |
 |
Early |
Final |
|---|---|
 |
N/A |
Gerudo's Training Ground

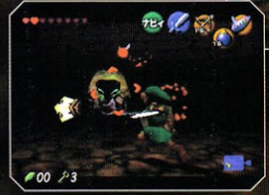
The separate minimap for the Poe maze area went unused in the game's Space World '97 demo. |
|---|
 |