 This article has a talk page!
This is a sub-page of Prerelease:The Legend of Zelda: Ocarina of Time.
Spots#

|
To do: |
Child#
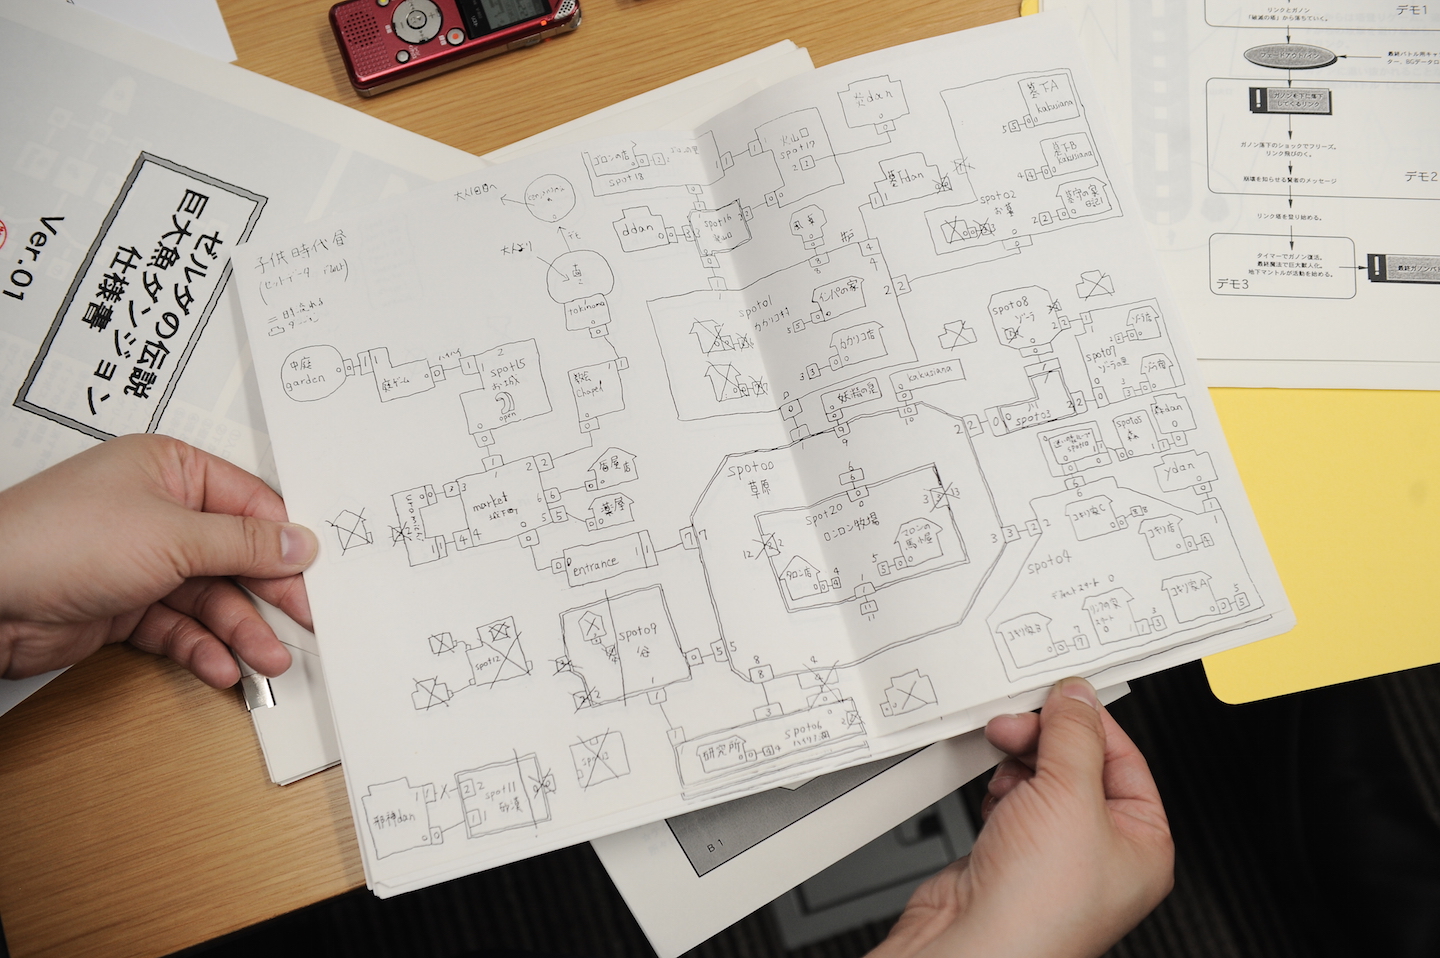
Adult#
Deku Tree#
|
|
To do: |
|
Design Document |
Late 1997 Overdump |
|---|---|

|
|
xxx
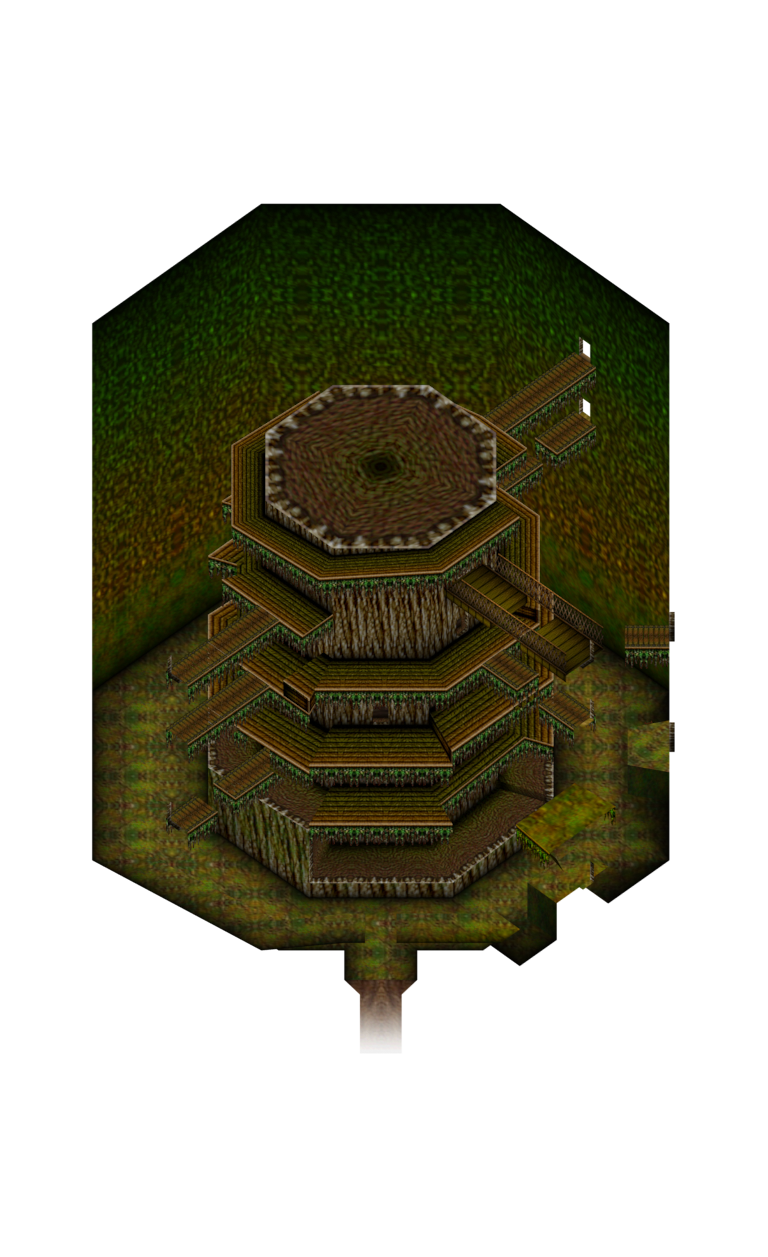
妖精の樹改造仕様(最終?) |
Fairy Tree Remodel Specifications (Final?) |
◯中央の柱を囲む無駄なスペースを削る。 |
Use the [?] space surrounding the central pillar. |
??の??に?び???の無い |
|
そうしてできる?で???と??は |
|
1階層 |
1 [?] |
通路 |
[?] |
????? |
[?] |
中央に必要なデータはここまで |
The [?] [?] in the center goes to here |
これをふまえて......。 |
Based on this... |
Jabu-Jabu's Belly#
Map Overview#
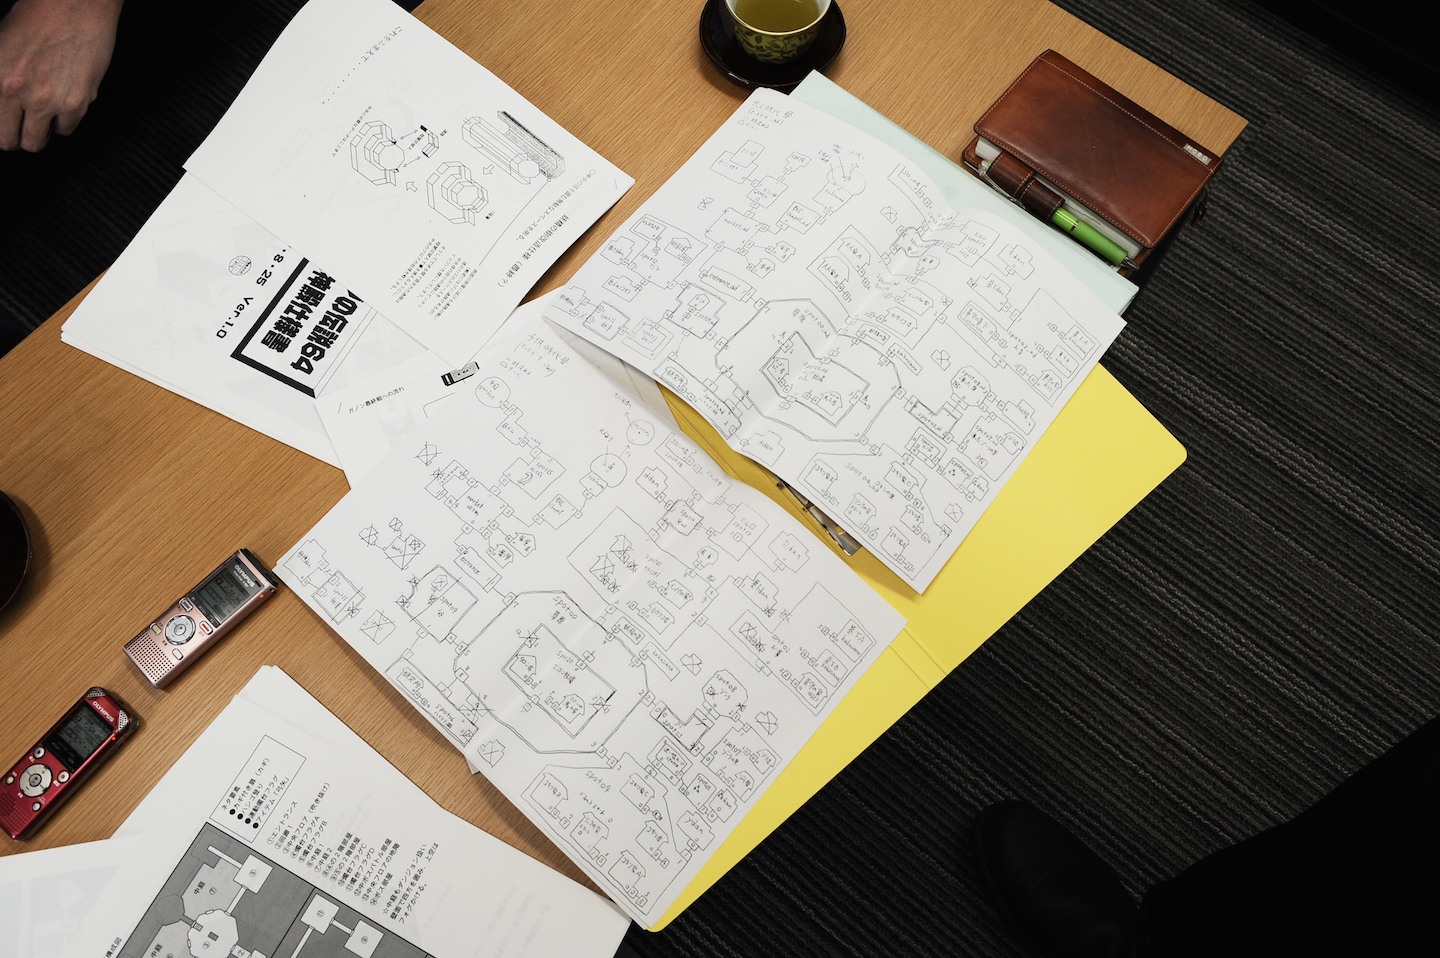
By darkening the image, an overview of the dungeon map with a partially cut-off legend can be seen in the sheaf of documents below the Child Spot map.
Legend |
|---|
➀入口 |
Tentacle Area#
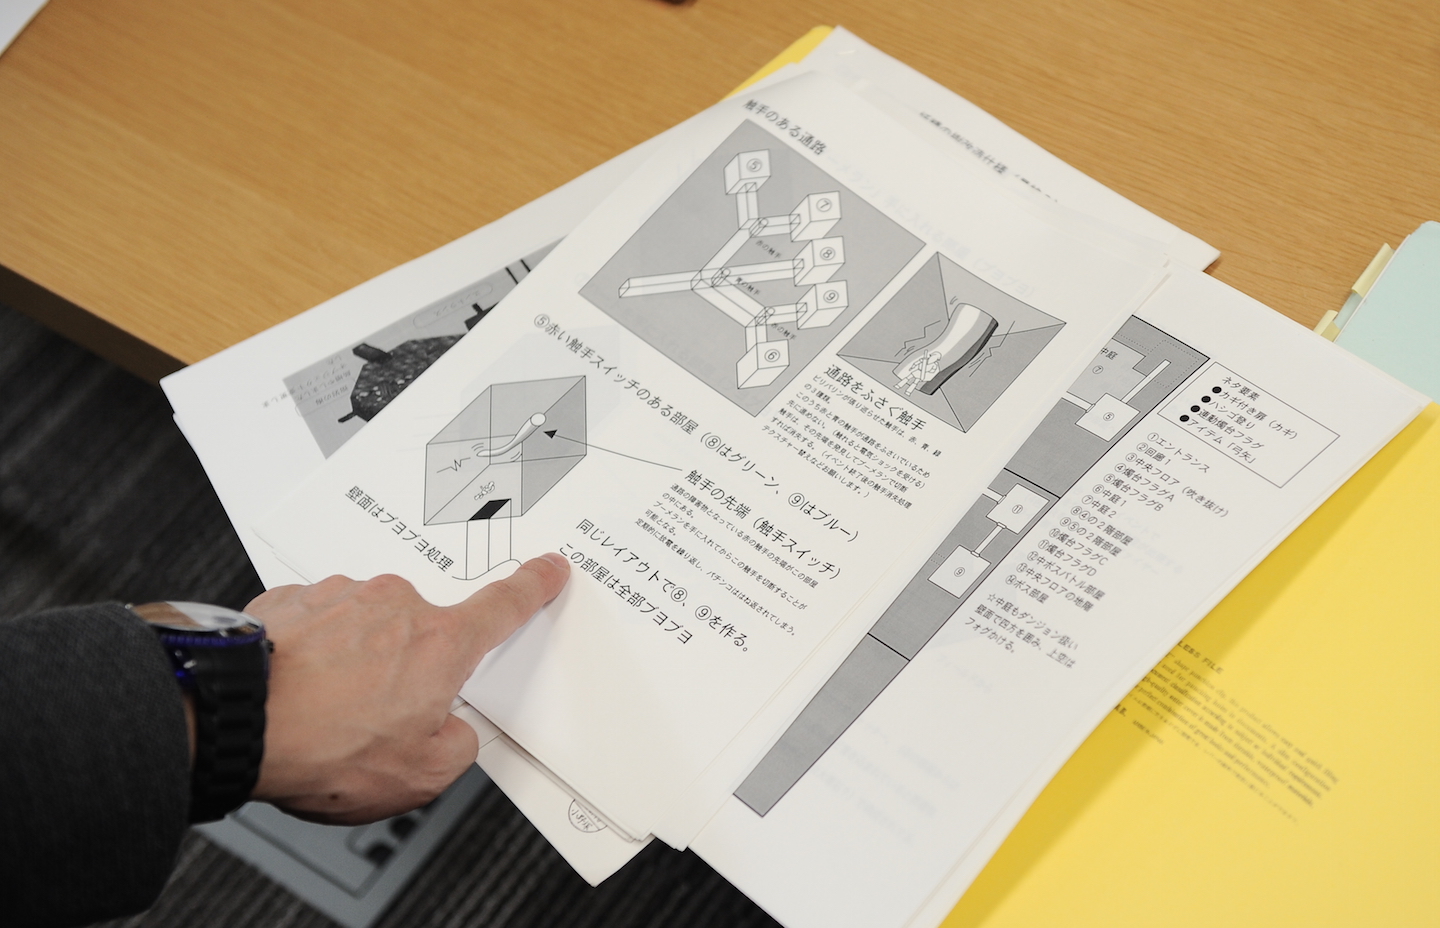
This page has an early name for Barinade, whose final Japanese name is also バリネード (Barinēdo).
Topmost Sheet |
|---|
触手のある通路 |
Room Layout Diagram |
赤の触手 |
青の触手 |
緑の触手 |
Note Beside Diagram |
通路をふさぐ触手 |
Text on Lower Half |
➄赤い触手スイッチのある部屋(➇はグリーン、➈はブルー) |
触手の先端(触手スイッチ) |
通路の・害物となっている赤の触手の先端がこの部屋 |
同じレイアウトで➇、➈を作る。 |
この部屋は全部ブヨブヨ |
Text Under Tentacle Room Diagram |
壁面はブヨブヨ処理 |
Forest Temple#
There's also a partially hidden sheet underneath that has a diagram of the Forest Temple.
Japanese |
English |
|---|---|
ネタ要素 |
Material Components |
➀エントランス |
(1) Entrance |
☆中庭もダンジョン扱い |
The courtyards are also treated like the dungeon, |
(Translations: GlitterBerri)
Fire Temple#
Fire Temple 1#
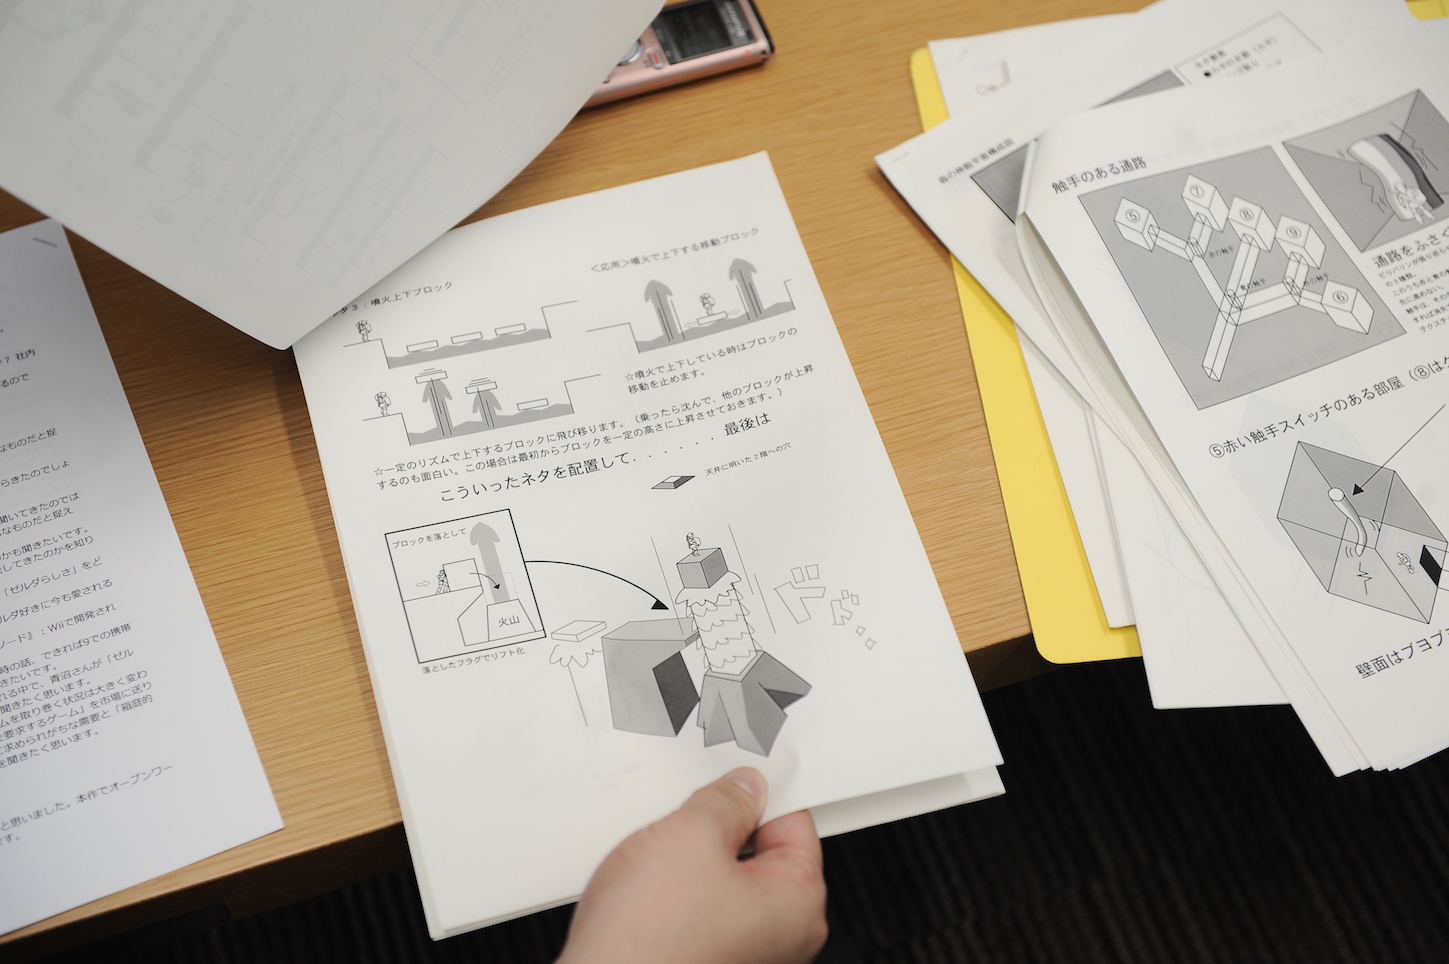
Upper Half |
|---|
ネタ3:噴火上下ブロック |
<応用>噴火で上下する移動ブロック |
☆噴火で上下している時はブロックの移動を止めます。 |
☆一定のリズムで上下するブロックに飛び移ります。(乗ったら沈んで、他のブロックが上昇 |
Lower Half |
こういったネタを配置して......最後は |
Text Beside Hole |
天井に明いた2階への穴 |
Text for Inset Image |
ブロックを落として |
火山 |
落としたフラグでリフト化 |
Main Illustration Sound Effect |
ドド.. |
Fire Temple 2#
|
|
To do: |
Late 1997 Overdump |
Design Document |
Final |
|---|---|---|
 |
 |
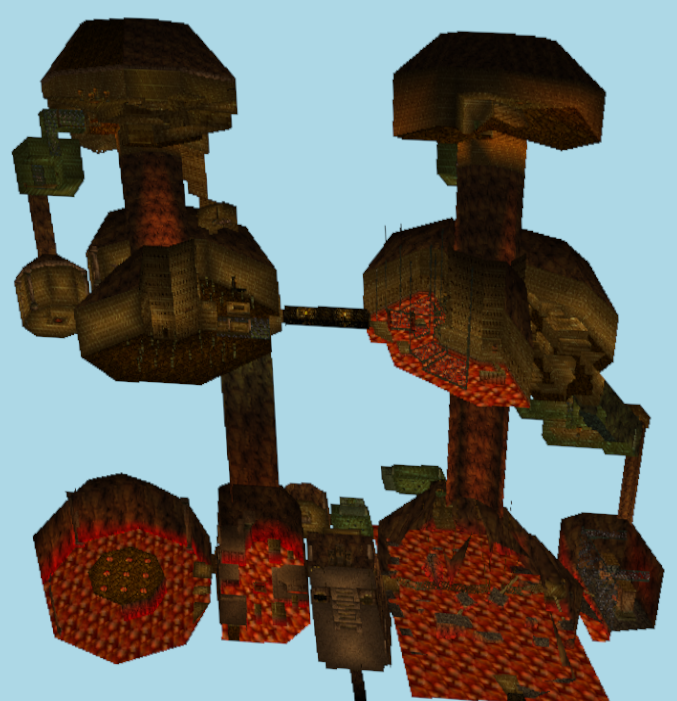 |
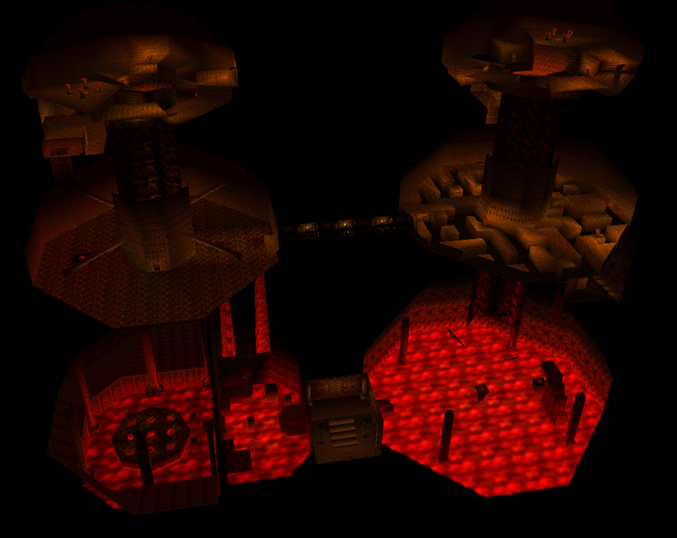
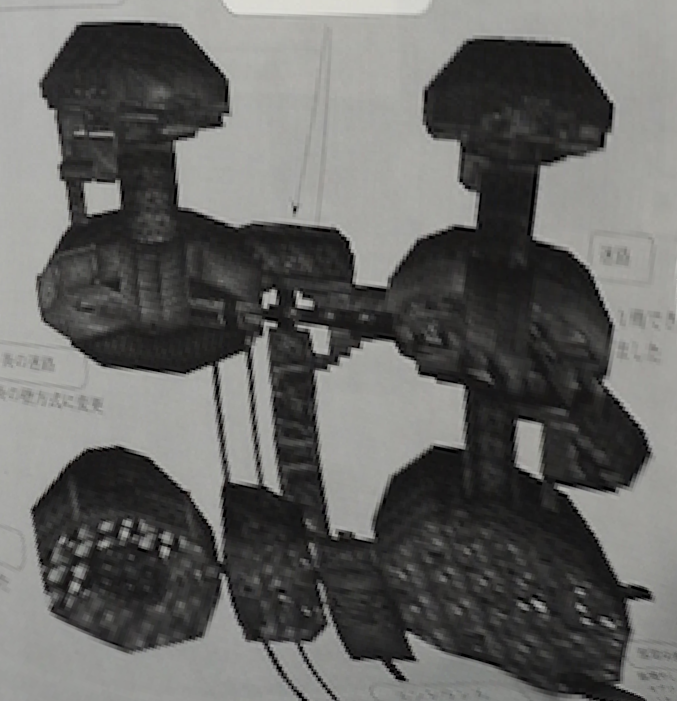
- Room 01 looks closer to final, but is still missing a separate room (15) for the fire elevator. It seems to be post-April 1998, since the room back then still resembled that of the late-1997 overdump design more. Room 13, 14, or 16 would've likely been where the separate fire elevator room is in the final game.
- Room 05, 06, and 10 were all part of the same room, which is the room with rolling boulders and Torch Slugs. It was later split into two to make room for the room that's covered in lava and has a fire wall chase Link. In June 1998 we see this in its final form.
- The Flare Dancer mini-boss took place in room 0A, which is the fire wall room. It was very likely moved to a room (18) of its own when room 0A got busy with various fire actors such as fire walls, fire totems, and spinning fire hazards.
- Room 0A had two blocks you had to hammer down to the pre-boss room and they didn't travel through the big tunnel that was between room 0A and 10 at this point in time, but rather through two tiny ones. The early version of the pre-boss room can still be found in the final game.
- There was a cut or relocated room behind room 09. The geometry of this section resembles that of taking the shortcut back to the entrance of the temple from the Megaton Hammer room.
(Source: Xiartic)
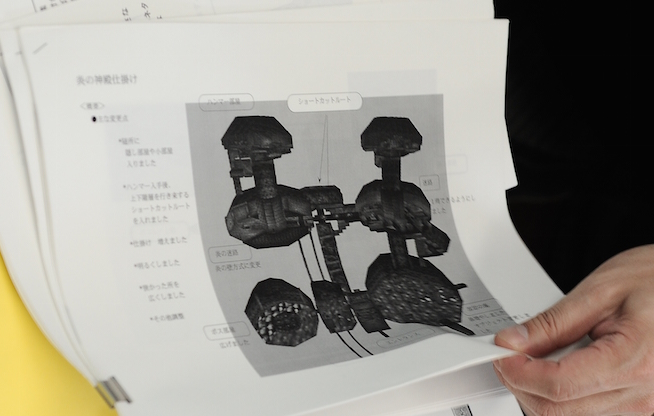
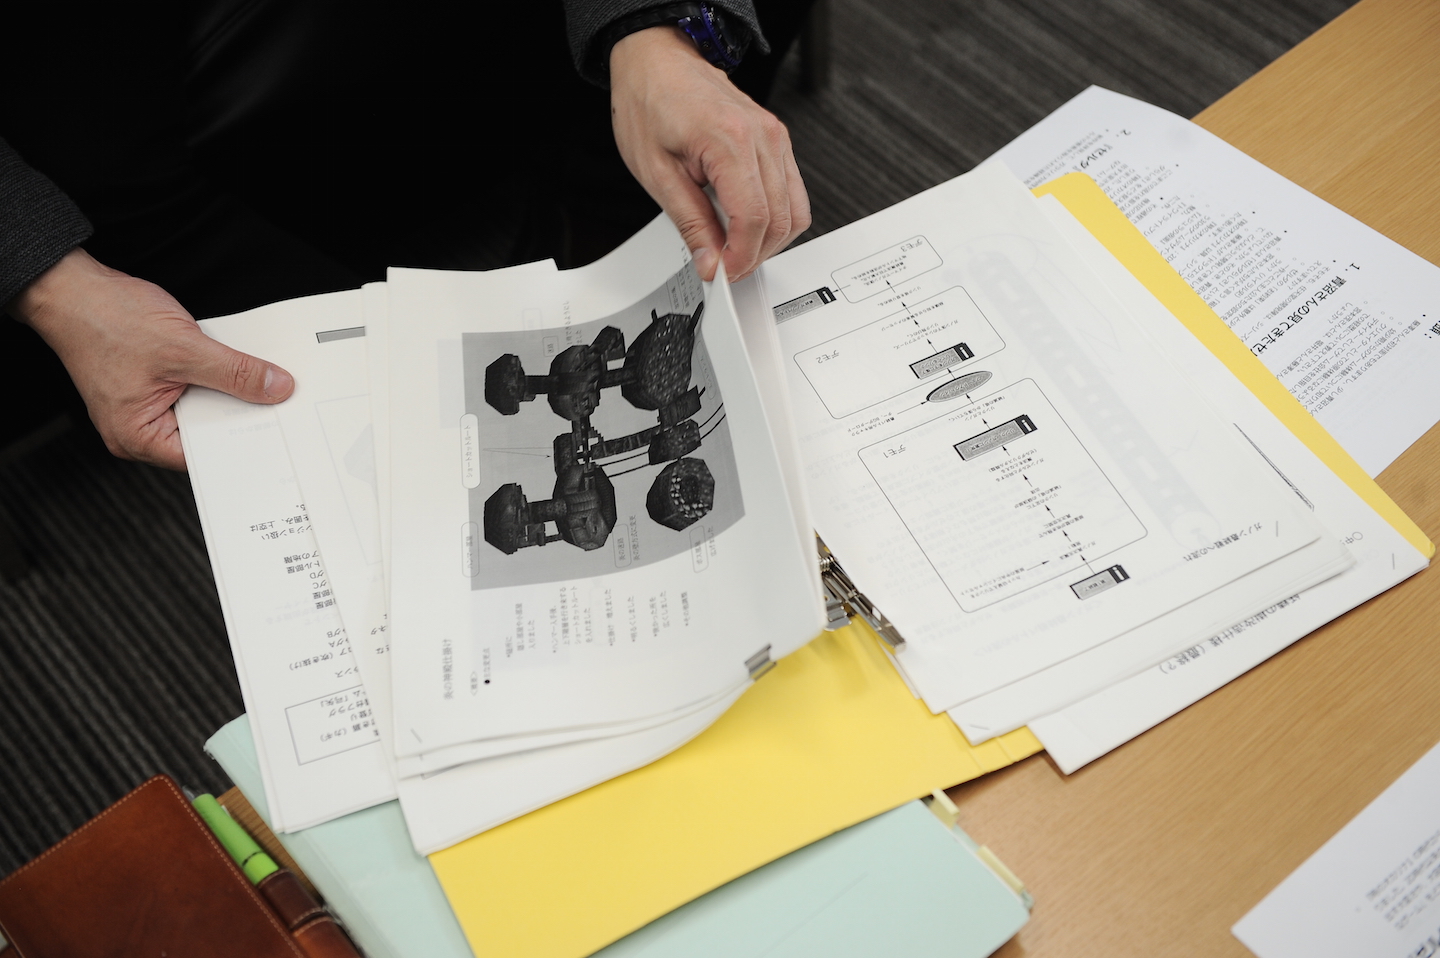
In addition to this image, some of the text at the bottom-left corner can be seen more clearly in the the document with the Ganon race outline.
Left Margin |
|---|
炎の神殿仕掛け |
<要素> |
・随所に |
・ハンマー入手後。 |
・仕掛け 増えました |
・明るくしました |
狭かった所を |
・その他?? |
Diagram (Clockwise from Top Left) |
ハンマー部屋 |
ショートカットルート |
迷路 |
??できるようにし |
溶岩の海 |
エントランス |
ボス部屋 |
炎の迷路 |
Fire Temple 3#
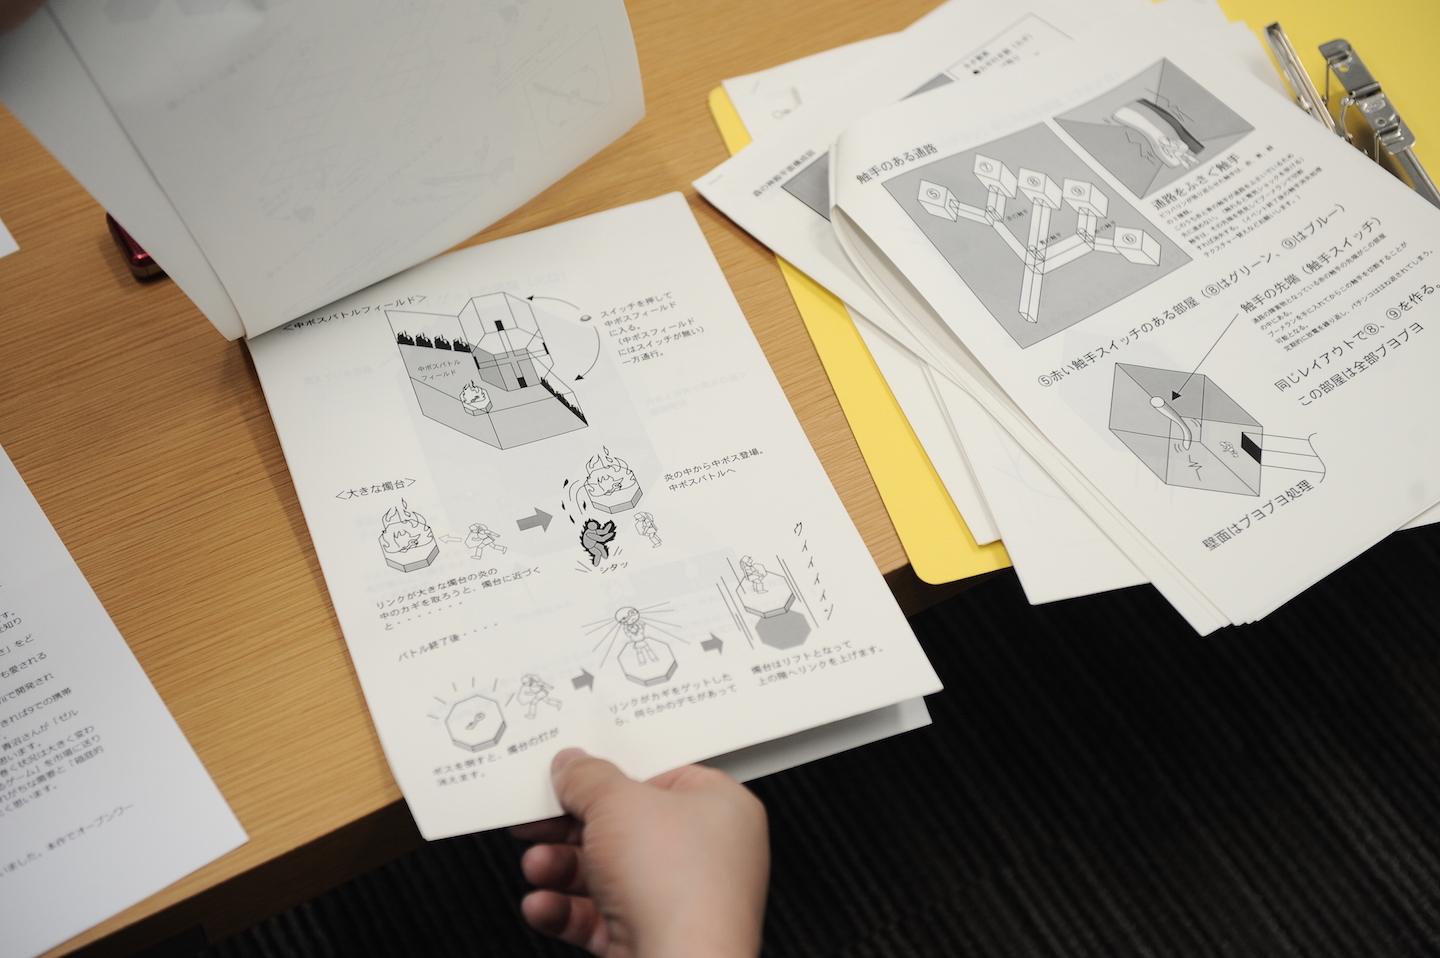
Upper Third |
|---|
<中ボスバトルフィールド> |
中ボスバトル |
スイッチを押して中ボスフィールド |
Middle Third |
<大きな燭台> |
リンクが大きな燭台の炎の |
シタッ |
炎の中から中ボス登場。 |
Lower Third |
バトル終末後.... |
ボスを倒すと、燭台の灯が |
リンクがカギをゲットした |
燭台はリフトとなって |
ウィィィィン |
Fire Temple 4#
Additionally, by darkening the image, some text can be made out on the page below.
Upper Third |
|---|
??ハンマー」ゲットの部屋(火口) |
燃えている宝箱 |
内角と外角で高さの違う |
?の??から |
リフトに???りてから |
[...]?で、外角によ????? |
???????く??りつける????????角の???け???でし? |
Fire Temple 5#
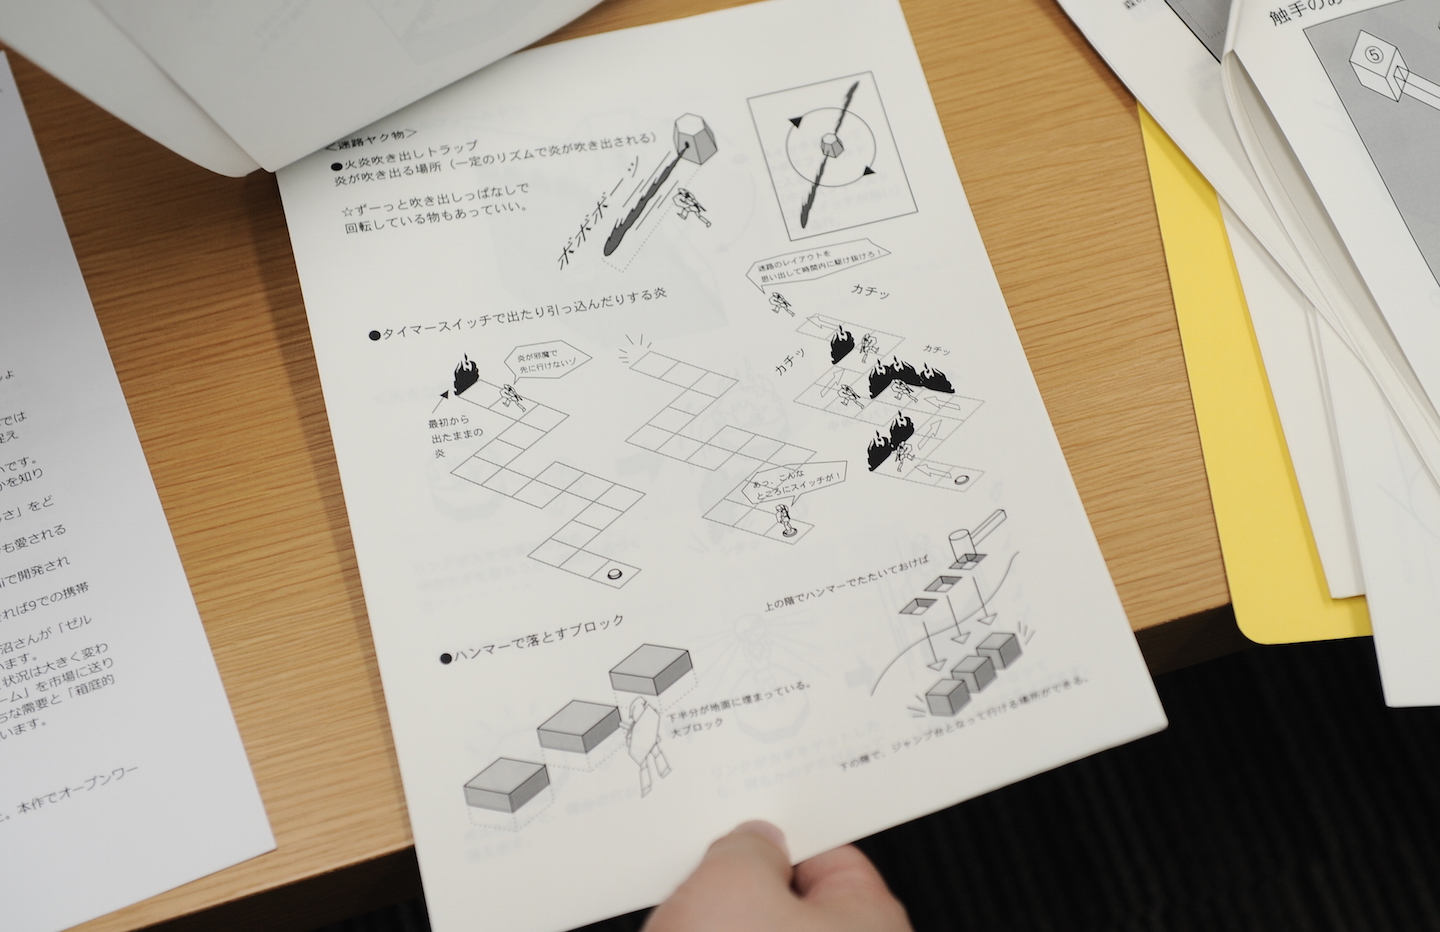
Upper Third |
|---|
<迷路ヤク物> |
◯火炎吹き出しトラップ |
☆ずーっと吹き出しっぱなしで |
ボボボーッ |
Middle Third |
◯タイマースイッチで出たり引っ込んだりする炎 |
最初から |
炎が邪魔で |
あっ、こんな |
迷路のレイアウトを |
カチッ |
カチッ |
カチッ |
Lower Third |
◯ハンマーで落とすブロック |
上半分が地面に埋まっている。 |
上の階でハンマーでたたいておけば |
下の隙で、ジャンプ台となって行ける場所ができる。 |
Water Temple#
Water Temple 1#
|
|
To do: |
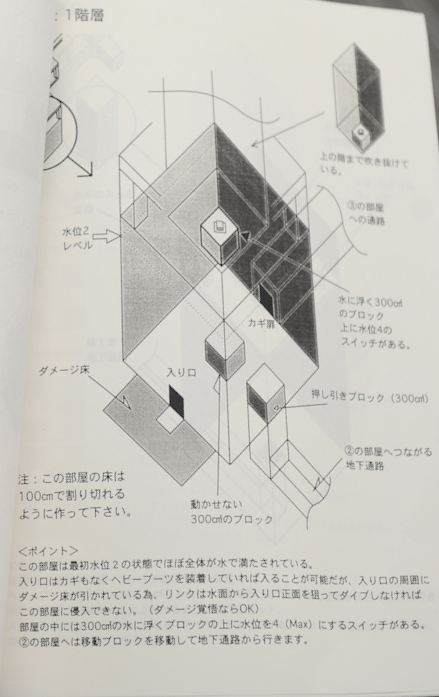
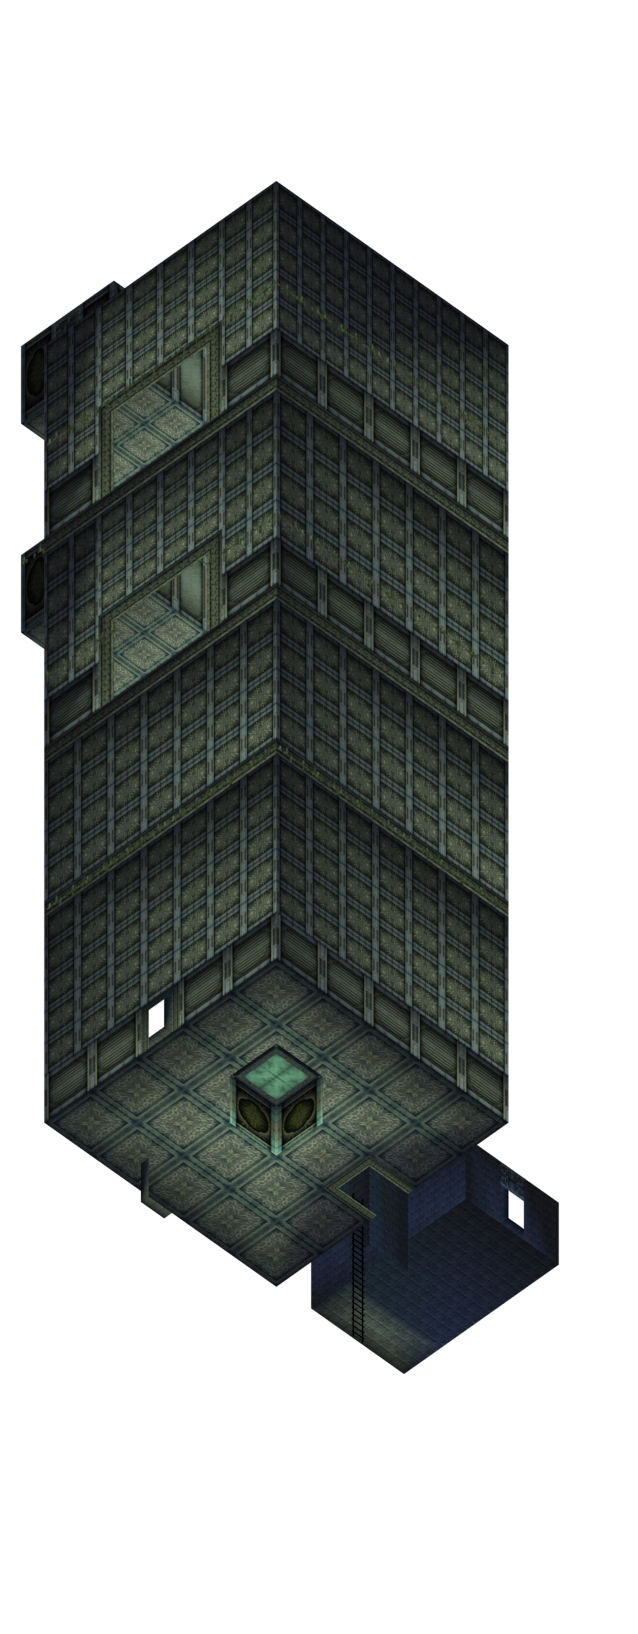
This version of the Water Temple seems to predate the one found inside the late 1997 Overdump. It depicts two pagodas, whereas the Overdump version already features only a single pagoda like the final version of the Water Temple.
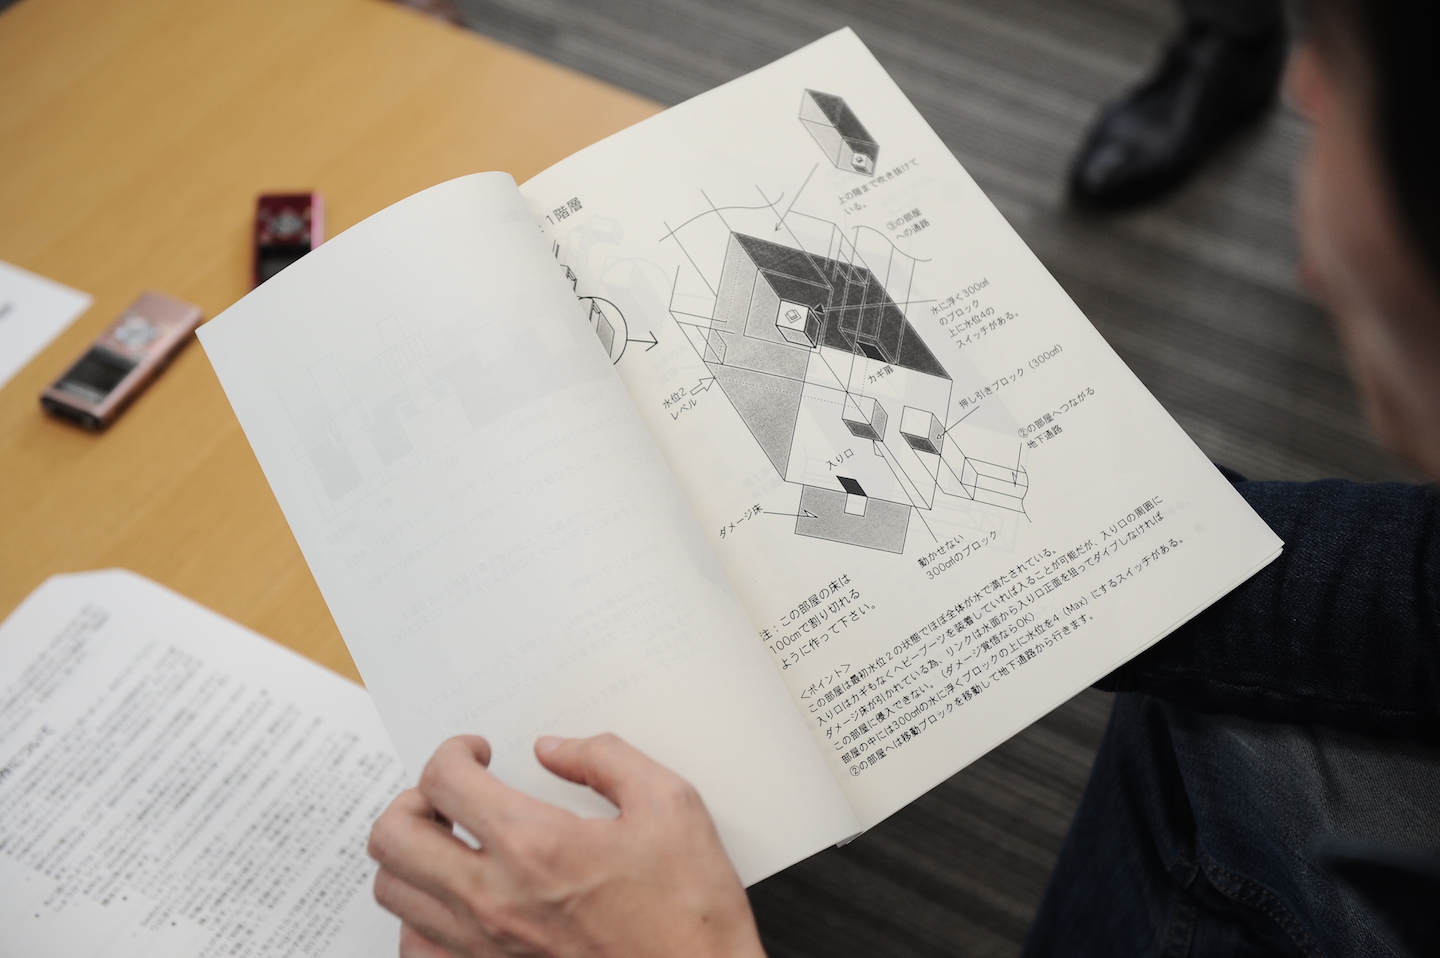
|
Design Document |
Late 1997 Overdump |
|---|---|
|
|
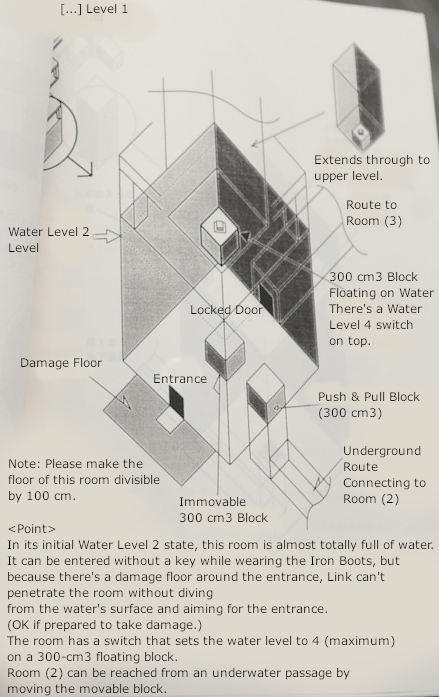
This page shows a layout which closely resembles Room 6 from the Overdump.
Clockwise from Top Left |
|---|
[...]1階層 |
上の階まで吹き抜けて |
➂の部屋 |
水に浮く300㎤ |
押し引きブロック(300㎤) |
動かせない |
注:この部屋の床は |
ダメージ床 |
水位2 |
Text in Room Diagram |
入り口 |
カギ扉 |
Note at Bottom |
<ポイント> |
(Translations: GlitterBerri)
Water Temple 2#
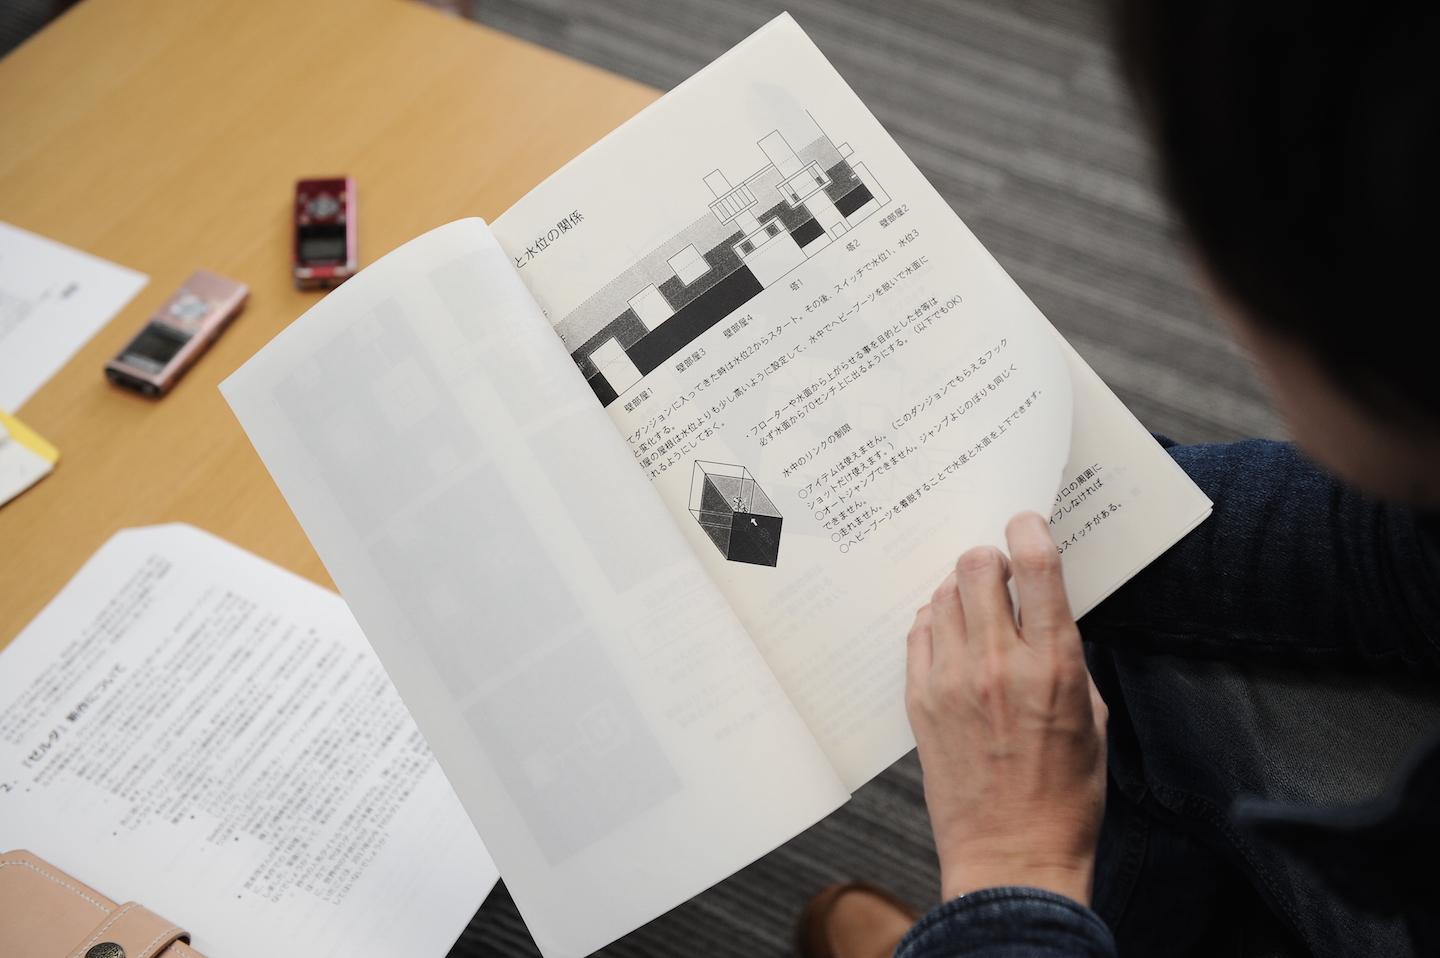
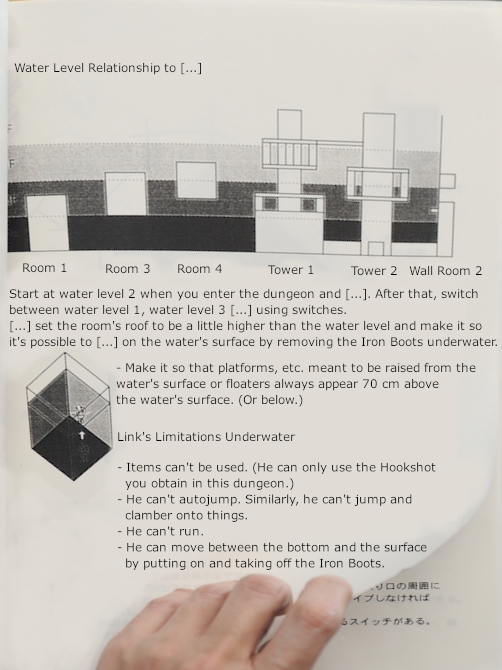
Header |
|---|
[...]と水位の関係 |
Upper Diagram |
壁部屋1 |
壁部屋3 |
壁部屋4 |
塔1 |
塔2 |
壁部屋2 |
Text Below Upper Diagram |
[...]てダンジョンに入ってきた時は水位2からスタート。その後、スイッチで水位1、水位3 |
[...]部屋の屋根は水位よりも少し高いように設定して、水中でヘビーブーツを脱いで水面に |
Text Alongside Lower Left Diagram |
・フローターや水面から上がらせる事を目的とした台等は |
水中のリンクの制限 |
◯アイテムは使えません。(このダンジョンでもらえるフック |
◯オートジャンプできません。ジャンプよじのぼりも同じく |
◯走れません。 |
◯ヘビーブーツを着脱することで水底と水面を上下できます。 |
Water Temple 3#
Additionally, by darkening and flipping the image, a page on the other side of the paper with some partially cut-off text can be seen.
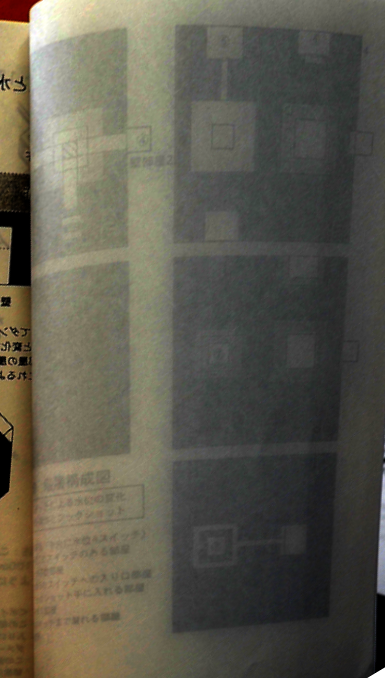
Diagram |
|---|
壁部屋2 |
Header |
??構成図 |
Text in Box |
?による水位の変化 |
List Below Box |
????水位4スイッチ) |
Ganon's Castle#
Ganon's Castle 1#

Japanese |
English |
|---|---|
20m |
20m |
雲の発生 |
Cloud Produced |
30m |
30m |
火山の火口 |
Volcano Mouth |
溶岩[流?]の上昇 |
Lava [Flow?] Rises |
50m |
50m |
Ganon's Castle 2#
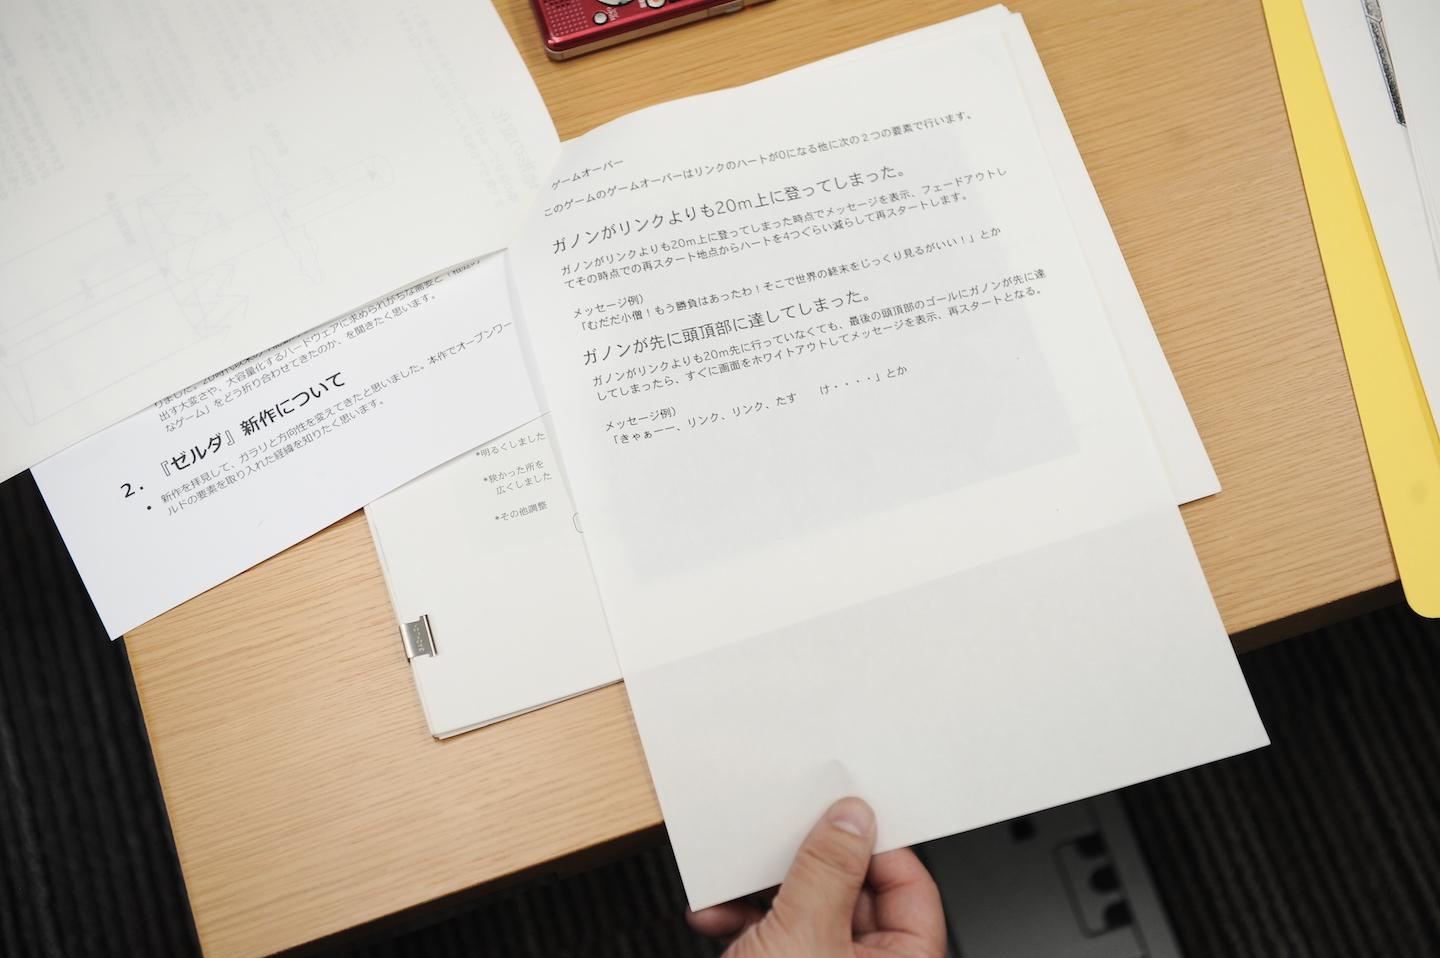
Instead of Link and Zelda escaping Ganon's Castle as it crumbled, Link was going to race Ganondorf to the top.
Page at Left |
|---|
出す大変さや、大容量化するハードウェアに求められがちな[...]と「[...] |
2.『ゼルダ』新作について |
Open Page |
ゲームオーバー |
このゲームのゲームオーバーはリンクのハートが0になる他に次の2つの要素で行います。 |
ガノンがリンクよりも20m上に登ってしまった。 |
ガノンがリンクよりも20m上に登ってしまった時点でメッセージを表示。フェードアウトし |
メッセージ例) |
ガノンがリンクよりも20m先に行っていなくても、最後の頭頂部のゴールにガノンが先に達してしまったら、すぐに画面にホワイトアウトしてメッセージを表示、再スタートとなる。 |
メッセージ例) |
(Translations: GlitterBerri)
Ganon's Tower#
Exclamation Mark Box |
|---|
第1戦終了 |
Demo 1 Text |
デモ1 |
ガノン???? |
カット切替えでリンクを |
??の?が???んで |
リンクの真下に |
ガノンゼルダと?化する |
Demo 1 Exclamation Mark Box |
リンク?ガノンに?? |
Demo 1 Text (Continued) |
リンクとガノン |
Gray Circle |
フェードアウト/イン |
Text to the Right of Gray Circle |
最終バトル用キャラク |
Demo 2 Text |
デモ2 |
Demo 2 Exclamation Mark Box |
ガノンと下に |
ガノン落下のショックでフリーズ。 |
破壊を?知らせる賢者のメッセージ |
Text Between Demo 2 and Demo 3 |
リンク?を?り始める。 |
Demo 3 Text |
デモ3 |
タイマーでガノン復活。 |
Bottom Right Exclamation Mark Box |
??ガノンバト |
By darkening the image, some text can also be made out from the page underneath the Ganon and Link battle flowchart.
Japanese |
English |
|---|---|
<ガノン最終戦バトルの流れ> |
{The Flow of the Final Battle with Ganon} |
ガノン第一形態の終了後、ゼルダと??する? |
The first Ganon [?] of [?], Zelda [?] |
??に?も?ガノンにダメージを受けて?リー |
[?] take damage from Ganon, [?] |
メッセージに従いプレイヤーがフィールドにあ |
[?] the message, the player [?] the field |
??からは塔登りゲーム、這い上がるガノンの |
From the [?], while [?] the tower-climbing game [?] |
ガノンに追い抜かれることなく???に?じ・ |
[?] without being overtaken by Ganon [?] [...] |
(Translations: GlitterBerri)