 This article has a talk page!
This is a sub-page of Proto:Resident Evil 2 (PlayStation).

|
To do:
|

|
This prototype is documented on Hidden Palace. |

Resident Evil 1.5 was dubbed by producer Shinji Mikami as the failed attempt at creating Resident Evil 2, resulting from Hideki Kamiya's then-immature directorial experience and the development team's arduous struggles with the game's scenario oversights, prosaic settings, maps, gameplay, etc.. All of which manifested into, in their own opinions, a sub-standard game. The bold proposition to scrap everything and start over was not something they took lightly at all.
The procurement of this build itself has a long and convoluted story. Essentially, it originated from a rogue collector in 2007, who obtained it from an estate sale of a deceased Capcom employee. After an unruly and protracted mess of the community organizing and gathering funds to obtain the prototype from said collector years later, it was eventually initially "leaked" to the public in 2013 through treachery amongst the fan-mod group Team IGAS, who, in secret, began a "restoration project" of 1.5 to restore the game as an envisioned final product, using actual assets and code from the very same build owned by that collector mentioned earlier. That leaked binary was a WIP build of that fan restoration project. The team later released the actual untouched build as a response to the breach. Yeeeeeeeah.
Dated November 5, 1996, made a year and two months prior to its final January 21, 1998 release, this prototype shows how disparate it is from the final version, let alone the rest of the later prototypes and provides many playable areas for the player to explore. Some, perhaps intriguingly, of which made it to the final release. Note that this page investigates the actual, official code and not the aforementioned IGAS fan restoration project.
Load/Save Screens#

 You can tell the Load/Save section simply exists in this build to make it seem more functional than it is. The real interesting detail here is that the section uses the international Resident Evil 2 provisional logo screen for its background.
Character Select Menu#
Character Selection Screen |
|
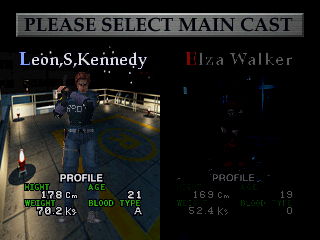
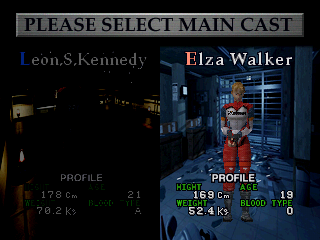
We're not even going to discuss how fundamentally different this Character Select screen is from the final -- there isn't any in the actual game. But this menu had a few of its own rough drafts within the DATA directory and each have their own names and dates even, oddly enough. What's actually seen on the select screen appears to display a mix of graphics from SELECT.TIM (PLEASE SELECT MAIN CAST) and SELECT3.TIM (the first letter of both the main characters' first names being emphasized by their signature colors).


Debug Menu#
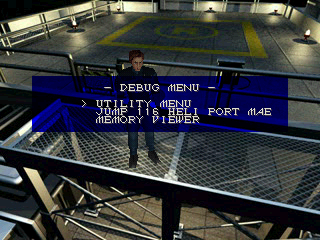
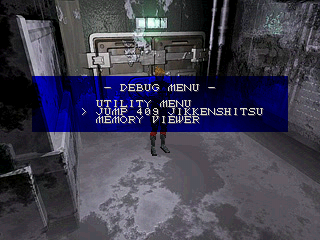
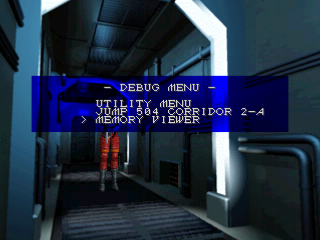
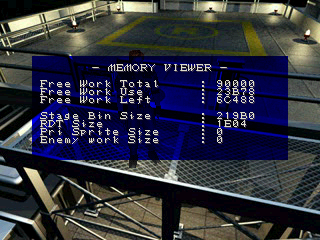 Out of the three categories provided by the prototype's DEBUG MENU, UTILITY MENU presumably gave developers the options to utilize (duh) whatever development tools they had to test out the game's functions (likely in real-time), JUMP handily grants the player to warp into any room in the game they wish regardless of scenario, and finally MEMORY VIEWER provides a chart of how much memory and resources are being used in real-time.
JUMP (Room Select)#
|
|
To do: |
Below is a breakdown of the rooms available to warp to.
POLICE STATION#
Room |
Floor |
Internal Name (romaji) |
Translated Name |
.BBS file exists? |
Accessible? |
Notes |
|---|---|---|---|---|---|---|
102 |
1F |
OFFICE B |
— |
Yes |
Yes |
Marvin's desk |
103 |
1F |
LOBBY |
— |
Yes |
Yes |
— |
104 |
1F |
LOBBY ROUKA |
Lobby Corridor |
Yes |
Yes |
— |
106 |
1F? |
KAIDAN |
Stairs |
No |
No |
— |
107 |
1F |
OFFICE A |
— |
Yes |
Yes |
— |
109 |
1F |
SOTO B |
Outside B |
Yes |
Yes |
Area where van is on fire |
10A |
1F? |
KAIDAN 2 — |
Stairs 2 |
No |
No |
The — is at the end of the entry, for some reason. |
10B |
1F |
SOTO A |
Outside A |
Yes |
Yes |
Path outside the RPD that leads to the manhole. |
110 |
2F? |
SIRYOUSITU MAE |
Reference Room (Way to) |
Yes |
No |
— |
115 |
3F |
SHOCHO ROOM |
Chief's Room |
Yes |
Yes |
Room where Chief Irons resides. |
116 |
3F |
HELI PORT MAE |
Heliport (Way to) |
Yes |
Yes |
Stairs to heliport. |
117 |
"4F" |
OKUJYOU |
Rooftop |
Yes |
Yes |
— |
118 |
B1 |
B1 ROUKA |
B1 Corridor |
Yes |
No |
— |
119 |
B1 |
SHOOTING RANGE |
— |
Yes |
Yes |
— |
11A |
B1 |
BUKI SOUKO |
Weapon Storage |
Yes |
Yes |
— |
11B |
B1 |
CHIKA CYUU B |
Parking Garage B |
Yes |
Yes |
Where you first find Sherry. |
11C |
B1 |
CHIKA CYUU A |
Parking Garage B |
Yes |
Yes |
The parking lot where the mutated baboons are fought (Leon). |
11E |
B2 |
B2 ROUKA |
B2 Corridor |
Yes |
Yes |
— |
11F |
B2 |
BOIRA SHITSU |
Boiler Room |
Yes |
No |
— |
120 |
B2 |
SHITAI OKIBA |
Morgue |
Yes |
Yes |
— |
121 |
B2 |
RYUUCHI SYO |
Jail Cell |
Yes |
Yes |
— |
122 |
B2 |
DOKUBOU 1 |
Prison Cell 1 |
Yes |
No |
— |
123 |
B2 |
DOKUBOU 2 |
Prison Cell 2 |
Yes |
No |
— |
124 |
B2 |
DOKUBOU 3 |
Prison Cell 3 |
Yes |
No |
— |
125 |
B2 |
DOKUBOU 4 |
Prison Cell 4 |
Yes |
No |
— |
126 |
B2 |
DOKUBOU 5 |
Prison Cell 5 |
Yes |
No |
— |
127 |
B1 |
L B1 ROUKA |
Light B1 Corridor |
No |
No |
Lit Up B1 |
DRAINS B2#
Room |
Internal Name (romaji) |
Translated Name |
.BBS file exists? |
Accessible? |
Notes |
|---|---|---|---|---|---|
200 |
L TSUURO |
Passage |
Yes |
Yes |
— |
201 |
UNKNOWN |
— |
Yes |
No |
— |
203 |
UNKNOWN |
— |
Yes |
No |
— |
207 |
UNKNOWN |
— |
Yes |
No |
— |
208 |
UNKNOWN |
— |
Yes |
No |
— |
209 |
UNKNOWN |
— |
Yes |
No |
— |
20B |
UNKNOWN |
— |
Yes |
No |
— |
FACTORY#
Room |
Internal Name (romaji) |
Translated Name |
.BBS file exists? |
Accessible? |
Notes |
|---|---|---|---|---|---|
300 |
SHIKICHI A |
Grounds A |
Yes |
Yes |
|
301 |
SHIKICHI B |
Grounds B |
Yes |
Yes |
|
303 |
WATARI ROUKA |
Transit Passage |
Yes |
Yes |
Overpass to the factory. |
304 |
KOUJYOU LINE |
Assembly Line |
Yes |
Yes (JUMP ONLY) |
Can only be accessed via jump function. |
306 |
SHIKICHI D |
Grounds D |
Yes |
Yes |
|
307 |
SOUKA |
Warehouse* |
Yes |
Yes |
*Romaji is likely misspelled for "SOUKO" because SOUKA literally means, among other wildly unrelated different meanings, "flower" in Japanese 1. |
308 |
SOUKA ELEVATOR |
Warehouse* Elevator |
Yes |
Yes |
See * above. |
309 |
ROUKA |
Corridor |
Yes |
Yes |
Sherry's puzzle room. |
30E |
FORKURIFUTO |
Forklift |
Yes |
Yes |
Serves as a cutscene room for escaping G-Birkin into the laboratory. |
LABORATORY#
Room |
Floor |
Internal Name (romaji) |
Translated Name |
.BBS file exists? |
Accessible? |
Notes |
|---|---|---|---|---|---|---|
400 |
B1 |
LABO ENTRANCE |
Laboratory Entrance |
Yes |
Yes |
|
401 |
B1 |
GUARDHOUSE |
— |
Yes |
Yes |
A more advanced version made it to final, as Room 607 - KEIBISITU. |
403 |
B1 |
MEINSYAFUTO |
Mainshaft |
Yes |
Yes |
|
404 |
B1 |
MIGITSUURO |
Right-side Passageway |
Yes |
No |
Does not load for some reason. |
409 |
B1 |
JIKKENSHITSU |
Laboratory |
Yes |
Yes |
The freezer room. |
40A |
B1 |
KENSASHITSU |
Examination Room |
Yes |
Yes |
The CT Scan Room. Another room retained for the retail release (referred internally as Room 610 - CT SCAN). |
501 |
B2 |
GUARDHOUSE |
— |
Yes |
Yes |
Same as Room 401 above. |
503 |
B2 |
KANSEISHITSU |
Control Room |
Yes |
Yes |
Another room that made it to the final release (referred internally under the same name (albeit misspelled) on Room 612). |
504 |
B2 |
CORRIDOR 2-A |
— |
Yes |
Yes |
T-shaped corridor where Manspider resides. |
505 |
B4 |
DENSANSHITSU |
Computer Room |
Yes |
No |
|
506 |
B2 |
P4 LABORATORY |
— |
Yes |
Yes |
Another major room retained for the final version. Different camera angles are rendered, and some objects in the area are arranged differently. |
50A |
B2 |
2-C TSUURO |
2-C Passage |
Yes |
Yes |
Hangar |
50C |
B3 |
3-A TSUURO |
3-A Passage |
Yes |
Yes |
|
510 |
B4 |
3-B TSUURO |
3-B Passage |
Yes |
Yes (JUMP ONLY) |
End lead to 3-A. |
511 |
B2 |
F KANSEISHITSU |
Fire Control Room |
Yes |
Yes |
|
512 |
B2 |
F CORRIDOR 2-A |
Fire 2-A Corridor |
Yes |
Yes |
Manspider encounter corridor but up in flames. |
514 |
B2 |
F 2-C TSUURO |
Fire 2-C Passage |
Yes |
Yes |
Hangar |
SUBWAY#
Room |
Internal Name (romaji) |
Translated Name |
.BBS file exists? |
Accessible? |
Notes |
|---|---|---|---|---|---|
603 |
UNTENSHITSU |
Operator's Room |
Yes |
Yes |
Room made it to final Resident Evil 2, merging with the latter room below to become Room 703 - SOUSYAJYOU (???). |
604 |
DOURYOKUSHITSU |
Power Room |
Yes |
Yes |
Also made it to final, but here twas it's own separate room. Intriguingly, the name and room number (minus the denoted "U") were later reused internally in the final, retail version for the room where Ada kisses and dies on Leon, the same room that also powers on the self-destruct system. |
Inventory Screen#

The prototype bore a completely different presentation for the inventory sub-screen compared to the final version. The design and arrangement of the menus appeared inspired by the first game's sub-screen, particularly the electrocardiography (ECG.) condition tab and Chris Redfield's sub-screen portrait seen on Leon S. Kennedy's ID, which is obviously a reused graphic from said predecessor.
Unique to this build was the ability to simply switch to MAP and FILE screens on the fly with the press of the L1 and R1 buttons similar to Mega Man Legends 2, but does not seem fully operational at all.
Soundtrack#
Composer Masami Ueda remarked about having to reuse most of the tracks he composed for the prototype onto the final version of Resident Evil 2. How much exactly is not certain, but the following are tracks that were never heard before prior to the prototype release in early 2013.
Many of the tracks that made it to retail would already be taking a mostly finalized shape by this point in development, most with timestamps between October 24th and October 30th, 1996.
Exclusive to Resident Evil 1.5#
Filename(s) |
Descriptor |
Audio |
Notes |
|---|---|---|---|
SUB_00.BGM |
R.P.D. Intro |
Used standalone on many promotional videos. In this build, it plays simultaneously with MAIN01 in the introductory cutscene of each scenario. |
|
MAIN01.BGM |
R.P.D. Heliport Stairs |
Used standalone as a background on promotional videos for Leon's intro that come from a later stage of production than this build with proper voice lines. In this build, it's mixed in the introductory cutscene of each scenario with "MAIN01". |
|
MAIN01.BGM |
See note. |
This build seems to play "SUB_00" and "MAIN01" simultaneously in the introductory cutscene upon reaching the Lobby area. It will not combine the tracks once it reaches a loop point and instead it will just play "MAIN01" alone. If you leave the area and return to the Lobby, the combined mix will be played again. Judging from the game's file structure, it's very unlikely this was its intended behavior. |
|
MAIN02.BGM |
Drains (Sewers) |
Used in the "Drains". The track contains a sub-channel with water effects which is muted on this preview file. |
|
MAIN05.BGM |
-Unknown- |
Unused. It is speculated to be a Factory track that would play during Marvin's playable part, or possibly another Laboratory track. |
|
MAIN0F.BGM |
Factory Corridor |
Used while in the "CORRIDOR (309)" area. For some reason it's lacking loop points, either suggesting it was meant for a cutscene or the sound programmer didn't get to implement a loop. |
|
MAIN13.BGM |
-Unknown- |
Unused. Likely a save room theme, a cutscene or some area with no enemies. |
|
MAIN14.BGM |
Laboratory Rooms |
Used in multiple laboratory areas. |
|
MAIN15.BGM |
R.P.D. Outdoors |
Used in the "OUTDOOR B" area. |
|
MAIN16.BGM |
Gorilla Boss |
Used during the gorilla boss fight in the parking lot. |
Tracks modified on the retail version#
Filename |
Descriptor |
Proto Audio |
Retail Audio |
Notes |
|---|---|---|---|---|
MAIN0B.BGM |
G Birkin Battle |
The 1st Malformation Of G The 3rd Malformation Of G |
Used during the battle with the malformed William Birkin. It's a rather early version of what evolved to become "The 1st Malformation Of G" and "The 3rd Malformation Of G", again, serving as themes for the malformed William Birkin boss battles. |
|
MAIN12.BGM |
Laboratory |
Used near the entrance of the Laboratory on the prototype. The updated version serves a similar function/location to the final. Interestingly, except from the slight production changes, the retail version seems to be faster. Unfortunately, the title of the retail version of the track is unknown since it's not included with any soundtrack release. |
Tracks repurposed with no modifications#
Filename |
Descriptor |
Final Track Title |
Notes |
|---|---|---|---|
MAIN00.BGM |
Police Station |
The Marshalling Yard (The First Half) |
Repurposed for the 1st Half of The Marshalling Yard. |
MAIN04.BGM |
Factory |
The Marshalling Yard (The Second Half) |
Repurposed for the 2nd Half of The Marshalling Yard. |
MAIN06.BGM |
Laboratory |
The Underground Laboratory |
Repurposed as a Laboratory track in final. Interestingly, the same room (with some modifications) is present in the final game but it's not playing this track! It was also the only track composed by Naoshi Mizuta3, who was listed under "Sound Cooperate" in the final version (this nomenclature was used to denote creators who specifically only worked on 1.5, according to sound designer Hideaki Utsumi 4 5). |
MAIN07.BGM |
Laboratory |
Fearful is no Word for it |
Repurposed for the 4th Survivor and Tofu modes. |
MAIN09.BGM |
Laboratory |
Wreckage of the Mad Experiment |
Repurposed as the theme for the Secret Laboratory Room (referred internally in the final as Room 60F - G KAPUSERU (G Capsule)). |
MAIN0E.BGM |
Laboratory |
Maximize Your Survival Instinct |
Repurposed as the second half theme for the 4th Survivor mode. |
Rooms#
The vast majority of all the rooms are in varying states of completion, ranging from fully developed rooms that would even make it to the retail release, to just simply solid blocks in white rooms.
All individual rooms listed here are and will be named after their internal names as seen in the JUMP function of the DEBUG MENU.
Note that the background images of presumably a majority of the latter half of 1.5 rooms made it to the preview versions of the final game, although they are unused and the rest of the rooms' data did not make it. Some of the backgrounds look similar to this version, but many are in a more advanced and detailed state which, among other things, such as the rendering dates on the background .BBS files, tells us that development of Resident Evil 1.5 ended at least one month after this build was compiled. The mere presence some of the assets in said later preview versions implies they were being considered for reuse after production restarted.
Police Station#
Likely the most infamous, well-known place of 1.5, this prototype's version of the station is far more dreary, darker, compact, and down-to-earth than the final Resident Evil 2`s take on the more eccentric art-museum-turned RPD. Instead of a stretched-out, elaborate map that has the player traverse across both wings of the RPD in the final, 1.5`s has no wings and thus smaller in proximity, leaving the player not much to explore.


RYUUCHI SYO (Room 121)#
The concept of encountering an NPC in the cells in a basement floor underneath the police station was present in this incarnation. 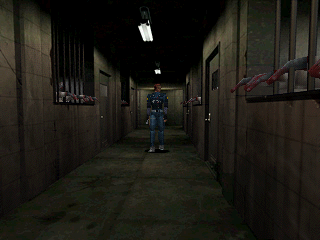
SHOCHO IRONS#
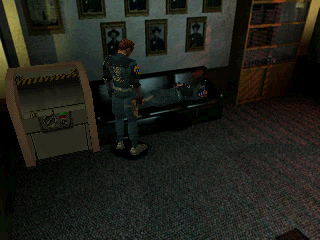
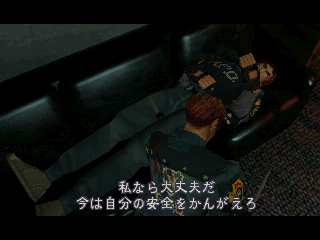

Although his conceptual design was done at this point in time, Chief Irons uses Leon's model as a placeholder in this prototype. This room also holds what appears to be an early model of a redesigned item box unique to 1.5.
Drains#
The sewers, called the "Drains" in 1.5, carries the same basic story concept of escaping the Police Station through the sewers but, aside of some ideas, that's where the similarities end. 
L TSUURO (Room 200)#
This is the only room in the Drains that doesn't require hacking or cheats to access. 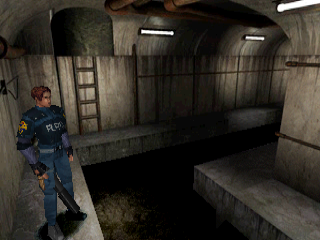
Factory#
Bears no resemblance to the chemical factory in the final release. Period. This part of the game is perhaps the most telling of the quality concerns that the development had with 1.5. The entire map looks like 3/4 of a whole box divided into smaller, stacked boxes.

SHIKICHI A (Room 300)#
The first Factory room you enter. Interestingly, despite mainly using Leon's model as a placeholder, Marvin uses John's model here. 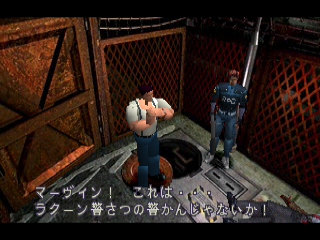
SOUKO (Room 307)#
Where the player would've fought William Birkin for the first time. He does not appear again in the prototype as the later boss fights had not yet been implemented.
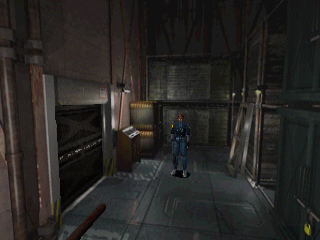
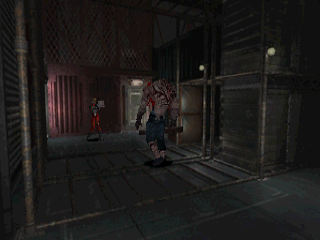
Laboratory#
The Umbrella Laboratory was quite massive in size in 1.5, but about a majority of it all was carried over to the final Resident Evil 2, with certain rooms being nearly identical or straight-up the same. As such, the locales in this prototype from this point forward start to resemble more of the final game. Across four basement floors, there many, many rooms in wildly varying states of completion, many of which were scrapped entirely, but are playable.


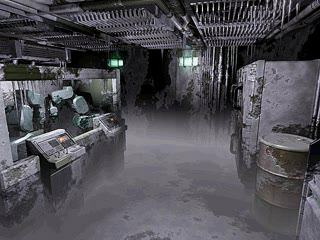
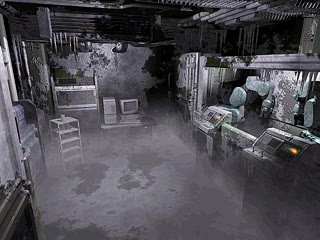
JIKKENSHITSU (Room 409)#
The Freezer Room from the final Resident Evil 2 was practically finished by this point. As such, you can see that barely anything was changed at all, except for some extremely subtle details in shadows that would be made two days later in the backgrounds found in the Trial Version. Though banally called Laboratory (translated from the Japanese romaji), when the whole stage is called as such, this would be one of the very, very few areas that made it to the retail release, wholesale. The room's final ID# becomes ROOM 60D.
November 5, 1996 prototype (internal .BSS file dated October 24, 1996) |
|---|
|
Trial Edition (internal .BSS file dated November 7, 1996) to Final'' |
|
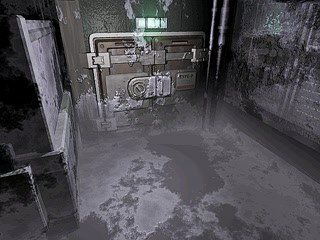
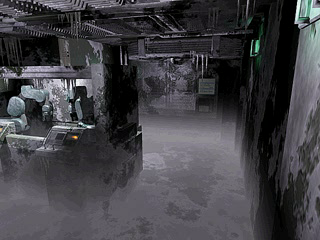
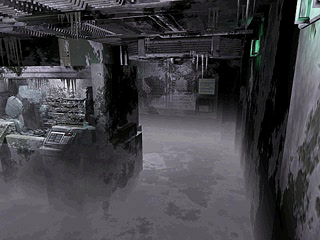
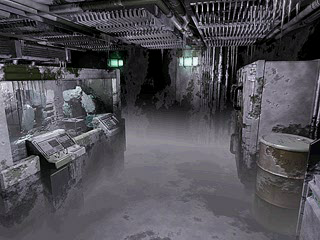
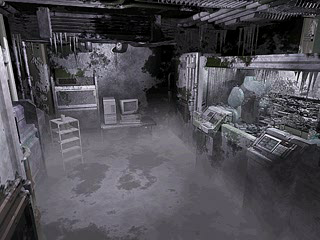
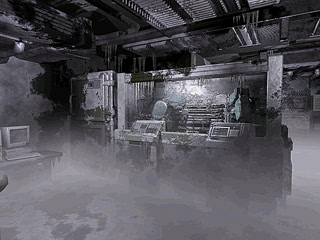
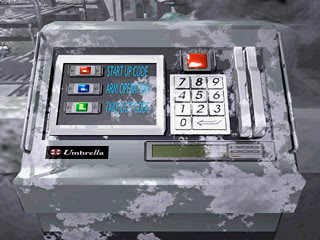
This card-reader control panel didn't make it to the November 5, 1996 build. But this slide inside the .BBS file (the file type that the bitmap backgrounds are assigned as in the game) surfaced in the Trial Edition and was rendered just two days later.
Trial Edition (internal .BSS file dated November 7, 1996) |
|---|
 |
Final |
|
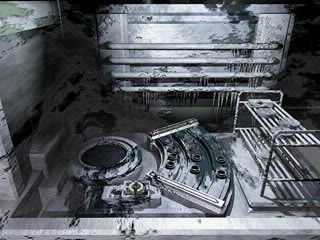
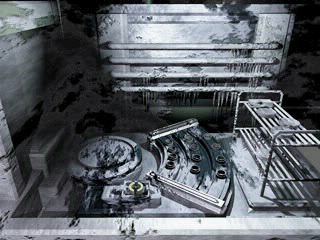
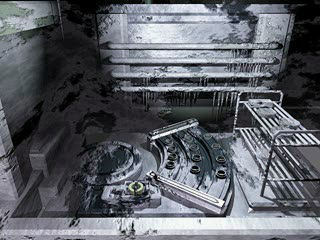
The background render for the Fuse Case "puzzle" appears mostly the same except for a little more haze seen in the area behind where the mechanical arm would be, and the lid appears to protrude further from the base of where said arm would rest on.
CORRIDOR 2-A (Room 504)#
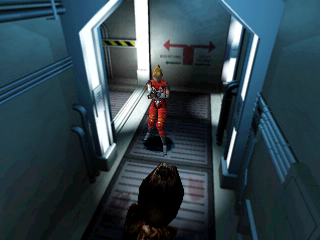
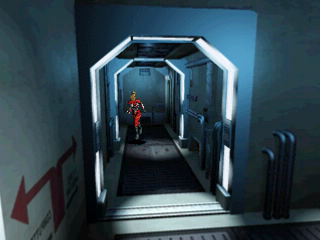
This is the corridor that structurally resembles the final version's (the room where Annette is slayed by G-Birken in Claire A's scenario), but with a radically different, comparatively sterile, design.
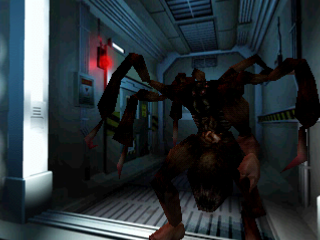
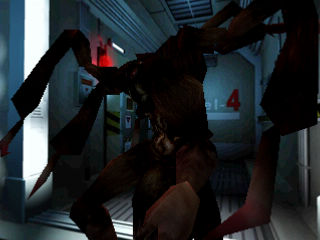
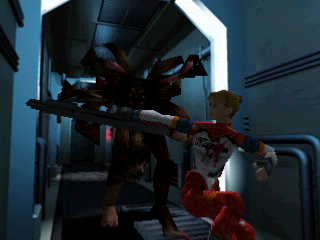
Most notably, the player first encounters the infamous, scrapped Manspider here.
F CORRIDOR 2-A (Room 512)#
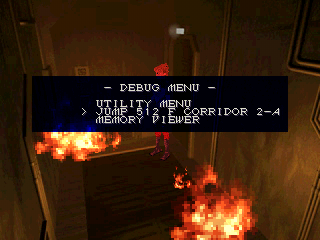
This is basically Room 504, but all up in flames. For what it's worth, the F likely stands for fire in F CORRIDOR 2-A.
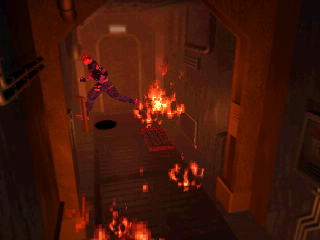
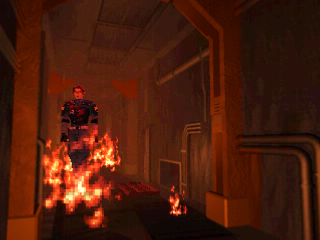
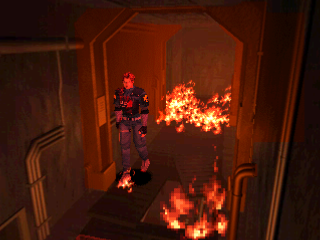
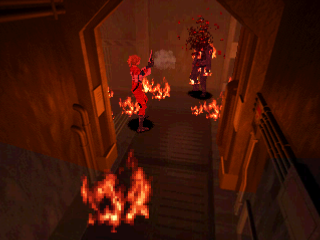
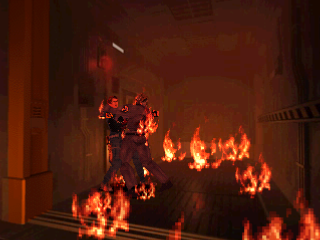
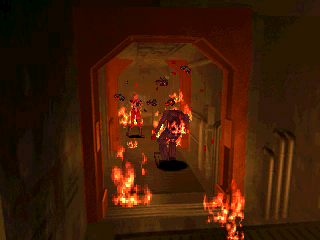
You are taken to this room when you exit the P4 LABORATORY (Room 506). The scenario originally called for the Laboratory to be incinerated, at some point at the end, with you having to fight your way through to escape to the Subway. This obviously did not make it to the final. Apparent in the backgrounds are incomplete shading at many spots around the arches in the hallway.
Subway#
This, what can be seen anyhow, was also more or less carried over to the final version with some minor adjustments to walls, objects, and misc. 
Only two whole rooms are playable, the subway operator's cab and the power room. You don't get to fight any G monsters or Jared Fogle here either.
UNTENSHITSU (Room 603)#
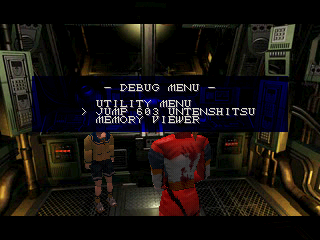
The Operator's Cab. Yet another room brought to retail, the cab was later also merged into the cabin of the train.
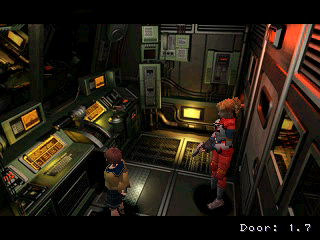
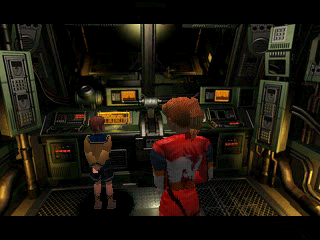
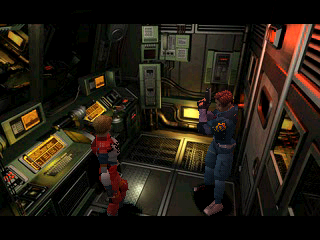
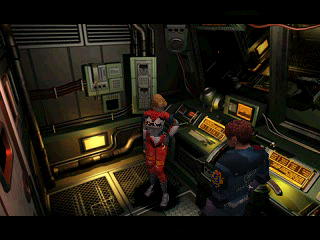
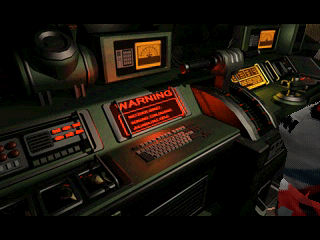
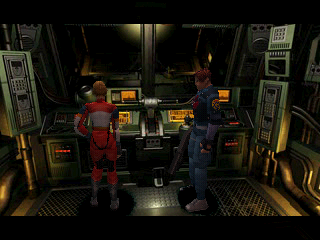
Either as Leon or Elsa, when you first enter the room, the game triggers a cutscene but nothing happens, aside of a shot of the train's control monitor flashing a Warning screen. If certain information is to be believed, then Elza's model, minus her ponytail, here is likely used as a placeholder for Annette in Leon's scenario.

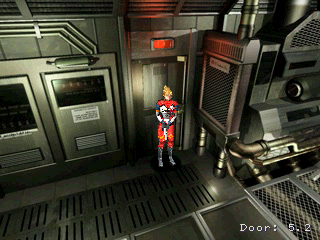
DOURYOKUSHITSU (Room 604)#
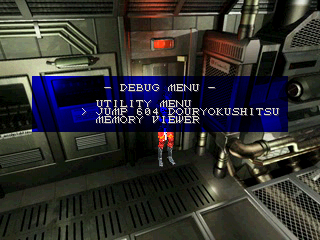
Called the Power Room, this is the last room to be seen that was carried over to retail but, yet again, possesses it's own differences. As stated in the section above, this room and the previous one were became one in the final.
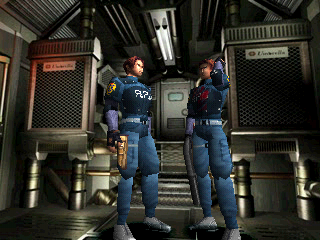
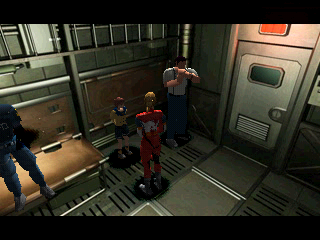
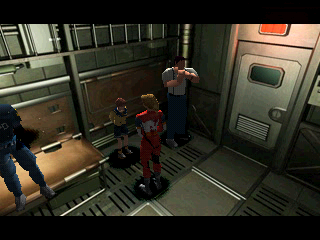
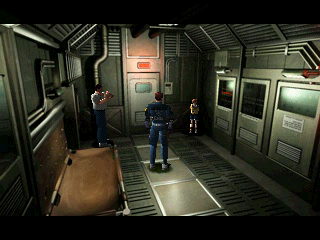
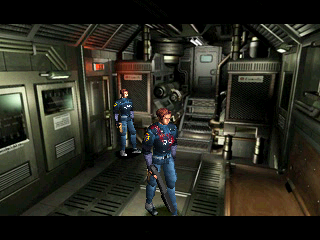
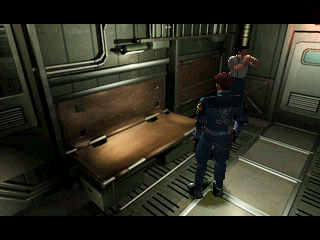
If you approach and try to talk to any of the NPCs as either Leon or Elsa, the game attempts to play a cutscene but despite displaying a letterbox there is no dialogue.
Items#
Hand Grenades#

These only exist in this prototype version, seeing the early design of the avatar itself. Leon would be able to use these, in response to Elza having the Grenade Launcher. It is unknown if there were actually two other versions of the grenades that match the grenade rounds for the Grenade Launcher.
Unused Enemy Animations and Models#
Potential Explosion Death#
Watch on YouTubeWatch on YouTube
These were found within the animation data for the zombies. They show a zombie flying and slamming into a wall, seemingly depicted in a manner of a explosion-related death or are pushed onto a wall. They're unique as they have both a forward and back-facing variant.
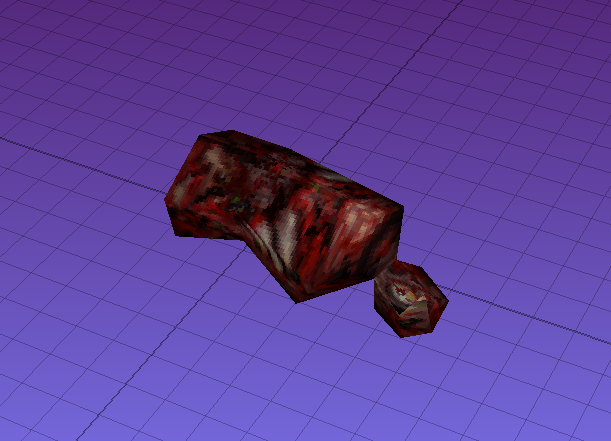
"shitai"#
Within the game's EMD files is a subfile listed under "shitai," which is Japanese for "corpse". They are present during gameplay with corrupt textures. Depending on the location, the corpses will display using a random zombie texture or the textures of the shutters found within the RPD. It's not exactly known what the intended implementation was, but based on gameplay, if you quickly re-enter a building that previously had zombies within it and you had already killed them, this model would take its place instead of the regular downed zombie corpse as a performance-cutting measure. Also noted is the "decayed" look it has; its textures share a resemblance to the Cerberus texture with some slight alterations and the addition of a blood pool that would constantly display from underneath the model; however, this is only seen within the texture and not in game. Below is the model that would be seen with the correct texture attached.