 This article has a talk page!
This is a sub-page of Proto:Crash Bandicoot.

Cheat Features#
Map Code#
In the map screen, a button combination can be inputted:
- Hold L1 + R2 + Left and press R1: Unlock all levels, keys, and colored gems (the third island still remains inaccessible).
Debug Mode#
To enable debugging features, you can turn on debug mode with the following GameShark code:
8005F314 0100
General Differences#
Startup#
- There is no "Sony Computer Entertainment America Presents" screen.
- It starts with the copyright messages. The copyright symbols are missing.
- The Universal logo is a separate screen, with no text consequently.
|
May 11 |
Final |
|---|---|

|
|
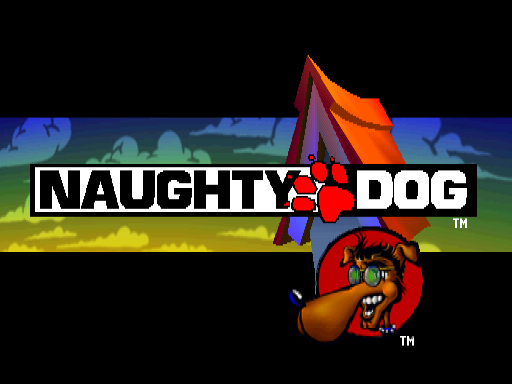
- Naughty Dog's screen doesn't have any animations and is accompanied by a blue gradient background. The dog logo is also missing.
|
May 11 |
Final |
|---|---|
|
|
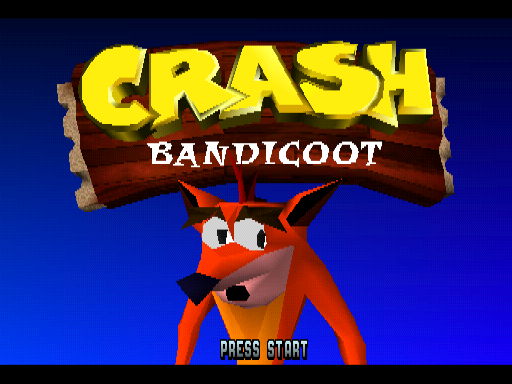
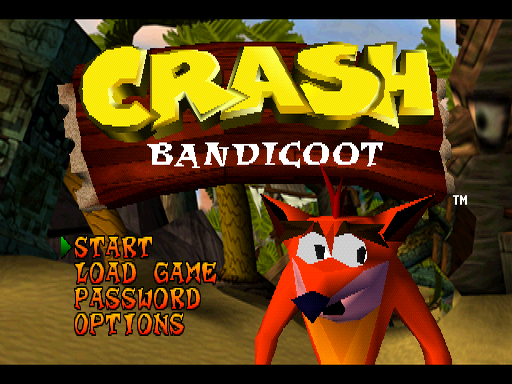
- The logo and Crash are centered and are accompanied by a blue gradient background. It also lacks a menu and instead has "Press Start".
- The trademark symbol is missing.
- Crash doesn't make the scream sound effect.
Demo Mode#
- The inputs are different.
- Crash spawns halfway or near the end in most of the levels.
- The Crash Bandicoot logo is huge.
- The texts "Loading Demo" and "Loading Main Menu" appear on the bottom of the screen during loading transitions, instead of just "Loading".
- Demos are played in a random order.
- The available demos are Jungle Rollers, The Great Gate, Papu Papu, The Lost City, Temple Ruins (spawn at start), Temple Ruins (spawn at halfway), and Jaws of Darkness.
- For some reason, the Jungle Rollers demo will always play over and over again if the player doesn't press a button to skip it.
Gameplay#
- Crash doesn't have any voice at all, lacking the classic "woah" sound effect when he dies, for example.
- The HUD is placed higher up.
- The idle animation where Crash picks up a Wumpa fruit and throws it up in the air is absent.
- Crash doesn't make the "yee-haw" animation when collecting three tokens or beating a boss.
- Respawning provides Crash temporary invincibility frames after losing a life.
- Crash's invincibility flash is brighter.
- When a level loads, Crash spawns almost instantly. In the final game, it takes a brief second before showing up.
- The Wumpa counter is also always displayed when Crash respawns.
- The music starts playing seconds before the level or map screen starts.
- Checkpoint crates still play the old continue point sound from earlier builds.
- Pressing Triangle doesn't show the collected tokens onscreen.
- If you die while an extra life is being added to the HUD, the current life number won't drop.
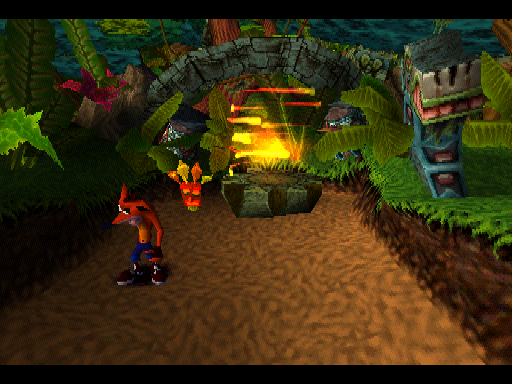
- Aku Aku's model has graphical issues on his nose and goatee leaf.
|
May 11 |
Final |
|---|---|
|
|
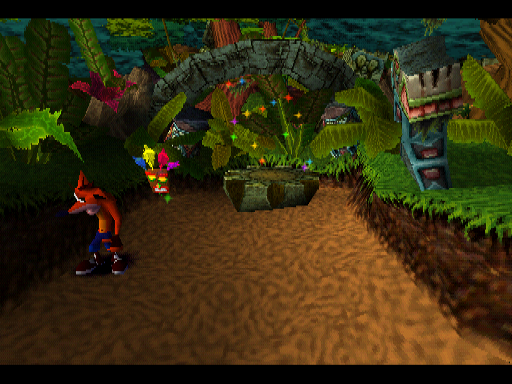
- Warps and exit portals are composed by a bunch of colorful and flickering sparkles, rather than bright and yellow swirly lights encircling it in the final.
- Warps have a smaller hitbox, making it possible to reach The Great Gate's yellow gem path without the yellow gem (this is still possible in the final game, but much harder).
- Aku Aku never turns golden in the second form. Instead, it just drops off multi-colored sparkles (which are the same ones used in the warp vortex). In the final game, they are all yellow and pop out rather than drip. Coincidence or not, the second form in Crash Twinsanity is mostly identical to the prototype.
- Aku Aku invincibility does not grab Wumpas from bounce crates automatically.
- Crash never runs any faster while invincible.
- You also get knocked back from explosions and flame torch hazards while invincible.
- Aku Aku's dropped feathers after hit have a darker shading.
- The screen freezes for a brief moment before respawning, rather than fading out.
|
May 11 |
Final |
|---|---|

|

|
- Tawna's color scheme is very different from the final one: blue mascara instead of grayish purple, brown fur instead of orange, a pink shirt instead of a red one and a green skirt instead of a blue one.
- Consequently, Tawna's icon also features different colors, matching her appearance at that point.
- When the player is returning from a bonus round, the loading screen shows the text "Return to Round", rather than displaying the name of the actual level.
- In the final game, the player can die and still get the gem as long as no checkpoint was hit. This feature isn't present in this version, making getting gems harder.
- Returning from a bonus round does not respawn Crash in the fixed checkpoint spot. Instead, he will spawn in the exact place and position he was when the third token was collected.
- Any other tokens you have when you go to a bonus round will disappear once you return to the level.
- Skipping cutscenes using an action button will make Crash perform the moves at the same time as well.
- The pause notice doesn't flash.
|
May 11 |
Final |
|---|---|
|
|
- Aku Aku has two hurt sounds - the first one plays when the invincibility ends or losing the second form, while the second one is used when he completely goes away. In the final game, there is just one sound effect for all occasions, although both sounds were actually merged into one. Interestingly, the original second form sound effect was later reused in Crash Twinsanity, and from Crash Bandicoot N. Sane Trilogy onwards.
|
May 11 |
Final |
|---|---|
- When Crash gets hit, a different sound effect can be heard.
- Bounce crates never give you the 10th Wumpa fruit when the crate breaks.
- The ! switches keep their bouncy properties even after they are activated, and also lack the animated effect of the exclamation mark going away and disappearing. You are able to keep spinning on them forever, just like how they work on The Lab.
- Spinning right after picking up a Wumpa fruit will cause the game not to count it.
- The boss health is indicated by dots, rather than having the boss's icon and their name written on colorful clusters. It's also always displayed on the bottom-right side of the screen.
- If Crash performs a spin in the corners of the exit portal - while on top or next to the pad - he will automatically get teleported away.
- You can keep any Aku Aku's you had after a boss fight, even if you quit prematurely.
- If you die while invincible, Crash will also keep temporarily flashing after respawn as if the invincibility is still present.
- The game over screen features a red gradient background. There are no sound effects, but you do get to see Crash fleeing from Cortex like in the final game.
- The Continue option is absent - the screen automatically redirects to the title screen.
- The level end screen works differently when collecting a gem: First, all previously acquired gems don't scroll at the bottom. Second, the acquired gem appears next to the gem count with no sound effects and Crash also doesn't celebrate.
- Since this version can't be saved, a flashing message appears in the bottom right corner which reads "Press Button to Return to Map".
- When Crash misses crates, the missed box counter disappears a split second after the last crate falls on Crash's head, and is replaced by the same message.
- There is no sound effect when the player presses any button.
- You can still throw an enemy away even if they are vanishing it already from a chain combo.
- Getting a Game Over is the only way to see which level a Save Point saved your progress at. All the others are like the final game up to Temple Ruins. After that, Sunset Vista saves you at Sunset Vista and Jaws of Darkness at Koala Kong.
- In the third island levels, entering the Tawna bonus round can mess up the box counter due to the last ? crate containing the Tawna token not turning into an open checkpoint upon returning to the level, thus making it worth two crates if you break it again after returning from the bonus. Consequently, this causes you to exceed the total number of crates in the level by one, rendering the gem unobtainable since it does not match the actual total. This glitch can be avoided by purposely leaving a box intact.
- If you grab the last Tawna token in a level (with exception of the third island ones) without having collected all three previously, that last crate will permanently turn into an opened checkpoint once you lose a life, even though you have not entered the bonus round.
- The sparks of electricity have no sound effects.
- The electric sound effects when Crash gets shocked have a different pitch.
- Occasionally, when collecting 100 Wumpa fruit, a minor glitch will prevent you from earning an extra life.
- Sometimes when you quit your current game to title screen, the text "Bandicoot" might come mirrored from right to left. This most often happens on the second island, after rotating the camera to the other side of the island.
Levels#
- Monkeys don't make the chatter sound effect when beating their chest.
- Lab assistants lack the animation where they shake the beaker before throwing it. The potion break sound effect is also missing.
|
May 11 |
Final |
|---|---|

|

|
- The vast majority of enemies lack textures, such as the man-eating plants (above), turtles, skunks, rats, etc.
|
May 11 |
Final |
|---|---|

|

|
- Surveillance robots have a more primitive orb-like appearance, and are invulnerable to damage, with only explosions or Aku Aku invincibility being capable of defeating them.
Jungle Levels#
- Crabs are more red on the sideways.
- Performing a spin attack next to a rolling stone does not hurt Crash.
- The scenery contains an extra piece of geometry of a round stone pillar with a purple foliage placed vertically. This decoration ended up being present only in N. Sanity Beach, at the end of the left path.
Boulder Levels#
- Aku Aku is banned.
- The boulder doesn't hit the screen once Crash is crushed.
Warthog Levels#
- Shield tribesmen have a simpler weaving animation, which was updated in the final game to be bouncier and more dynamic.
- There are more pots in the scenery.
- There are lumbers in some parts of the scenery that were removed in the final game.
- There is no curtain at the end of the levels. You can see the warthog simply disappear and Crash being transported away.
Temple Levels#
- Sound effects don't feature the ambient echo.
- Bats cannot be defeated.
2D Ruins Levels#
- Flying bats cannot be defeated.
- Water voids act like normal pitfalls, as there is no splash animation and Crash will always get the falling sound.
|
May 11 |
Final |
|---|---|
|
|
|


- Lizards' dorsal crest textures aren't corrupted.
- You can't defeat lizards and iguanas by spinning on them in mid-air, as it also knocks Crash back instead.
Bridge Levels#
- Both levels have graphical issues.
- Due to the corrupted textures, the pointed rock-like structures protruding from the bottom of the chasm are colored green.
- Red planks are actually left intact rather than featuring large holes in the middle, making them harder to distinguish from the planks you can step on.
- Spinning on turtles will normally throw them away towards the direction Crash is currently facing. In the final game, they will always fly to the sideways to avoid chaining other turtles in the distance if going straight forward, making it sometimes impossible to progress without using the rope.
- Hogs don't make the snort sound effect while running back and forth.
Factory Levels#
- Robot turtles lack sound effects.
- Falling on an acid pool will use the water splash sound effect.
Dark Levels#
- The lighting effects are in a very primitive state overall - the levels get darker as you get closer to it, rather than brighter as it should be.
- Windows in the corridors are more visible due to the lighting coming from outside. They don't affect the scenery's visibility, though.
- Aku Aku's sound effect does not play when breaking his crates if he is already present.
- Stationary platforms share the same color as the moving ones.
|
May 11 |
Final |
|---|---|

|

|
- Rats look dark grey and are completely textureless.
- Swinging blades make no sound effects.
- The exit portal particles are affected by the darkness, thus they barely can be seen.
Bonus Rounds#
- Sound effects don't play properly when there are multiple ones playing at the same time.
- There is no music for Brio and Cortex bonus rounds.
Tawna#
- The music doesn't loop properly.
- There are no butterflies at all.
- The sceneries have more tree canopies.
- There is no invisible barrier preventing you from backtracking once you reach the end.
Level Arrangement#
The level order is the same as the final version in the first island, but different in the other two:
May 11 |
Final |
|
|---|---|---|
The First Island |
N. Sanity Beach |
N. Sanity Beach |
The Second Island |
Up the Creek |
Up the Creek |
The Third Island |
Cortex Power |
Heavy Machinery |
- Jaws of Darkness was originally situated on the second island before being relocated midway through the third. Being a ruin-themed level in the same style as Temple Ruins would fit better in its original position, but difficulty likely pushed it to the third island. Road to Nowhere underwent the opposite shift, initially a very late level before being moved to an earlier spot between Temple Ruins and Boulder Dash.
- Cortex Power comes before Heavy Machinery and thus serving as the first level of the third island. Seeing as the level starts before Crash moves inside the building, this actually makes sense compared to the final where Crash sort of just starts inside an industrial location.
- Slippery Climb comes after Nitrus Brio, seamlessly blending into Cortex Castle and directly leading to The Lab as opposed to just kind of coming after The High Road.
- Castle Machinery and The Great Hall didn't exist at this point.
- The infamous unused level Stormy Ascent is featured as the penultimate level of the game. Additionally, it holds a key to unlock Fumbling in the Dark.
Map#
- The confirmation sound effect plays at different pitches.
- Crash's shading is darker.
- There are no clouds in the sky.
- You can enter a level while Crash is still moving to them.
- When the map loads, the camera always starts moving from the first or last level of the island, depending on where the player is closer.
- Crash also won't be able to progress to the next level until the camera reaches his current position.
- The camera spazzes out in 360 before moving on to the second island.
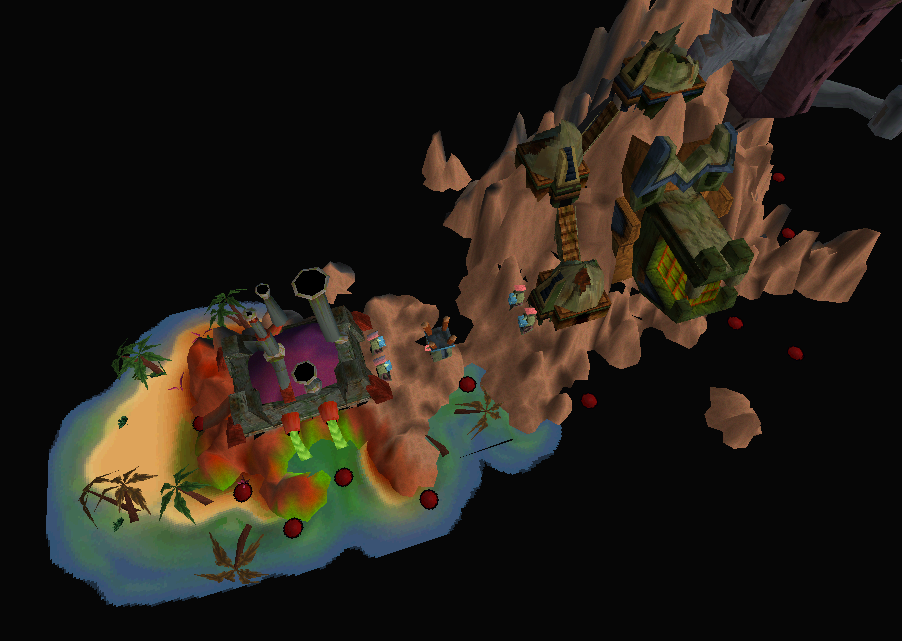
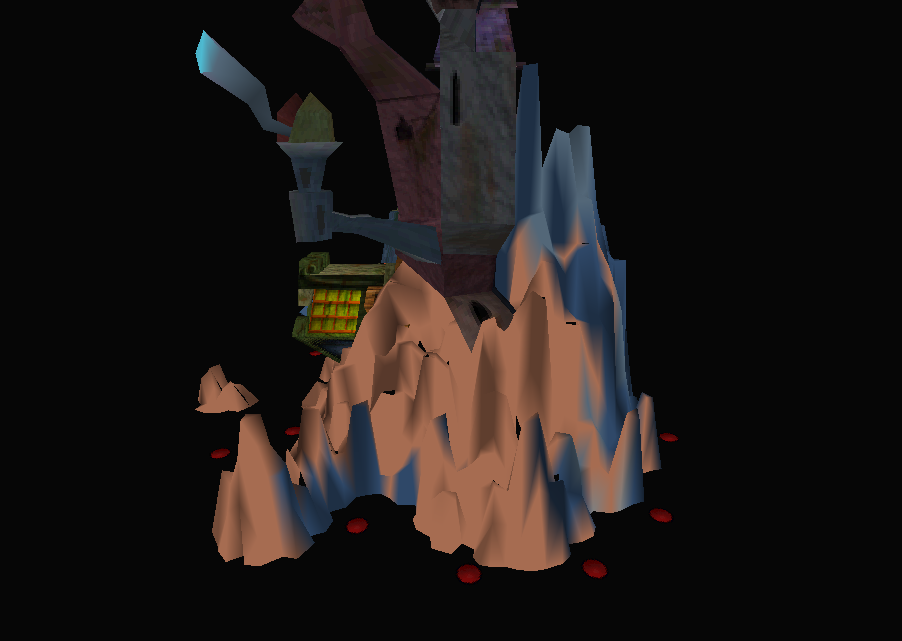
- Levels on the third island are not part of the island itself, but are rather placed in the water and lack the road path connecting them. They extend all the way to the back of the island.
Soundtrack Differences#
Some of the music is slightly different in this version.
Level |
May 11 |
Final |
Notes |
|---|---|---|---|
N. Sanity Beach |
It has an "intro" not present in the final version. |
||
Into the Jungle |
The music loop is cut off slightly earlier. |
||
Jungle |
Some notes are in different places. |
||
Boulders |
The drums use a different, more muted sound set. |
||
2D Temple |
Some notes are different in some sections. |
||
Factory |
One instrument is missing. |
||
Tawna |
Some instruments are missing, such as the cymbal crashes. |
||
Koala Kong |
It has cymbal crashes which are not present in the final. |
Unused Bonus Rounds#
The bonus round list goes up to address 14, resulting in seven missing ones. The remaining addresses are all duplicates of layout 00 (used in Jungle Rollers). Of these all, however, four bonus rounds cannot normally be accessed in this build:
Cortex Bonus Round#
The Cortex bonus round for Jaws of Darkness exists, but can't be entered normally due to the level having only two Cortex tokens. The bonus is the same as the final game, although the game is not programmed to open Whole Hog after obtaining the key.
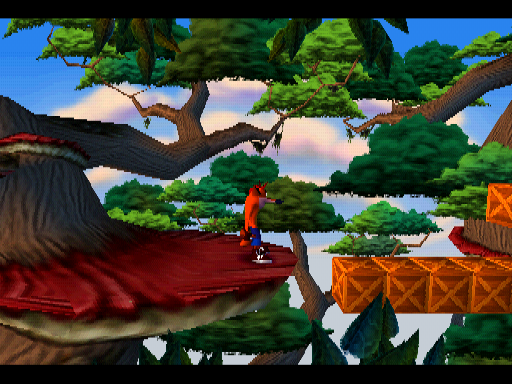
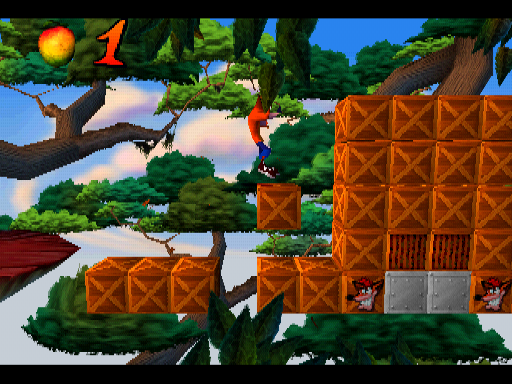
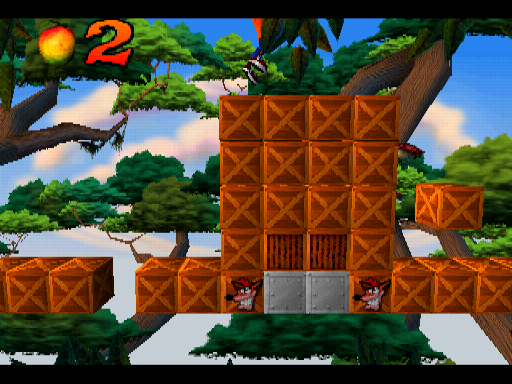
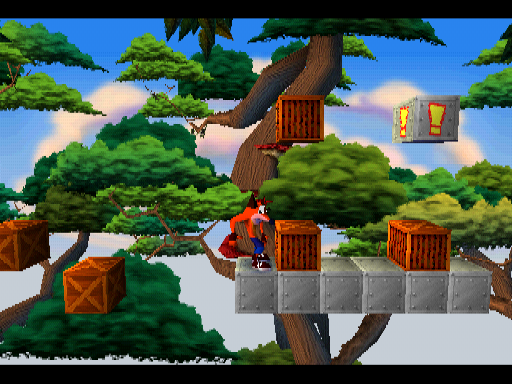
Unused Layout #3#
It starts with a bridge of basic crates, followed by a wall of crates containing two floating basic crates on each side, two iron crates underneath with life crates on the sideways, and two bounce crates above.
This bonus ID was later repurposed for The High Road in the final game.
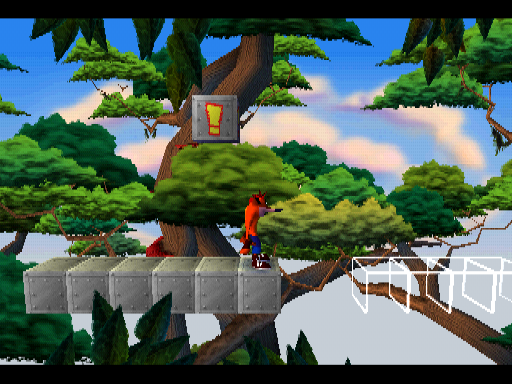
Unused Layout #5#
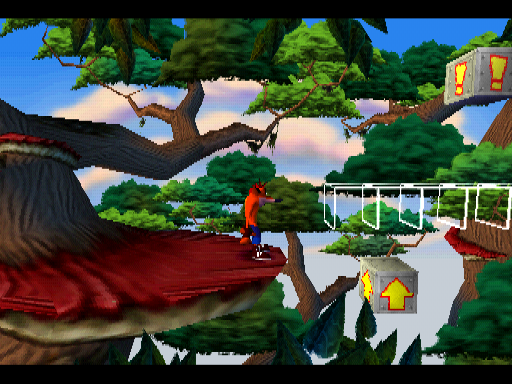
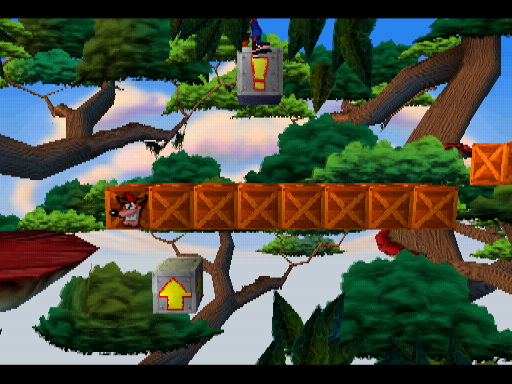
It starts with a bridge of outline basic crates (with a life one at the left end) that can be triggered by jumping over the iron bounce crate underneath and hitting the ! switch placed mid-air. Next, there is a second iron bounce crate leading to another ! switch in mid-air, which will trigger a smaller bridge of basic crates just ahead (with another life one in the middle). Finally, there will be a third iron bounce crate leading to two floating life crates ahead.
This bonus ID was later repurposed for Sunset Vista in the final game.
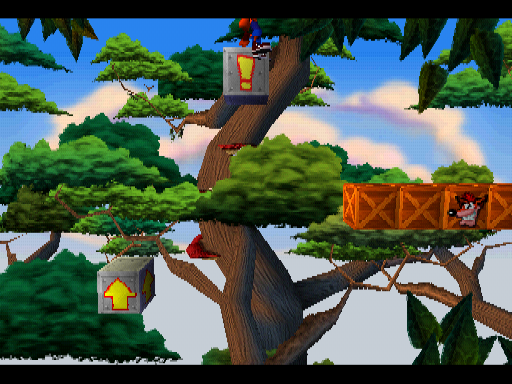
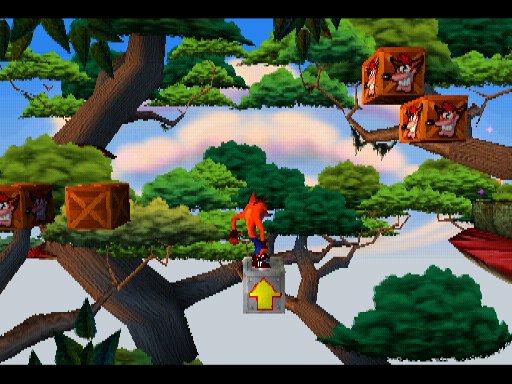
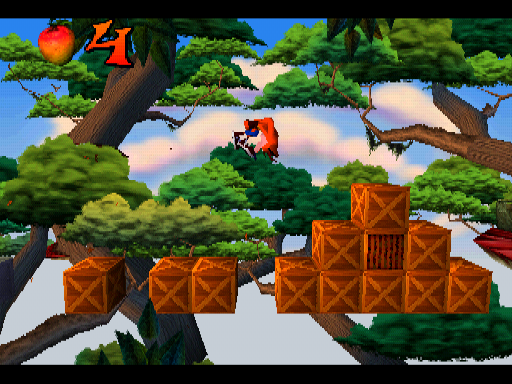
Unused Layout #6#
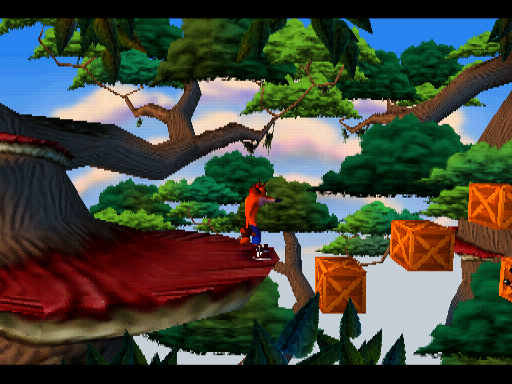
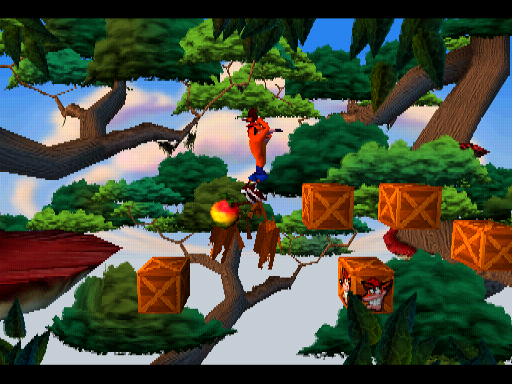
It starts with a small bridge of basic crates in an ascending shape, with a life box between the third and fourth ones. Next, there is a platform of iron crates with two bounce crates and a bounce with a ! switch above. This switch will trigger a smaller bridge of basic crates ahead, which is followed by a stack of crates with a bounce one among them.
This bonus ID was later repurposed for Toxic Waste in the final game.
Unused Animations#
Completion Screen Scream#
Crash's screaming/electrocution death animation used in the title screen and the lab levels also appears in the level completion screen, likely due to an error in data dependency settings.
Unused Graphics#
Character Icons#

The character icons for the old password system, where a sequence of six icons was used instead of button sequences. It can be seen in the April 8th, 1996 prototype.
Game Saved#


There are two unseen text sprites which read "Game Saved". The first one features a similar font used in-game but more basic, while the second one features a generic font.
Enter Password#

An unused graphic string which says "Enter password:". It appeared in the April 8th, 1996 prototype in the Load Game screen.
Early Pad Buttons#

Early icons for the pad buttons can be found within the rest of the font.
Executable Text#
The tty debug console displays memory allocation and a "Won level" message when a level is completed. This is not visible to the user.
...
...
...
Inited and Allocated 21 pages
page count 18
page count 17
page count 10
page count 17
page count 18
Inited and Allocated 22 pages
Inited and Allocated 22 pages
Inited and Allocated 21 pages
Won level 2
page count 18
...
...
...