 This article has a talk page!
This is a sub-page of Proto:Crash Bandicoot/May 11th, 1996 build.
The demo allows you to play all levels up to Koala Kong. Beating him won't let the player access the remaining levels, although they are present in the files. Most of the levels on the first and second island are far more closer to their final counterparts, however, levels of the third island onwards appear to be almost untouched since the April 8th, 1996 prototype, including the absence of music tracks for the majority of them.
N. Sanity Beach#
- The ? crate placement is slightly different at the beginning of the level.
Jungle Rollers#
- The bounce crate at the beginning of the level contains a hidden extra life on the 10th bounce.
- The pile of iron crates with an Aku Aku crate on top is placed on the left side of the scenery.
- The green gem path can be accessed by going up through the gems. In the final game, only a gem elevator was used.
Boulders#
- The pile of crates next to the checkpoint crate is placed further ahead.
Upstream#
- The platforms at the end of the level are swapped: after the final checkpoint there is a mossy one instead of wood and lacks the ? crate with the third Tawna token, while the platform before the exit portal was the wood one instead of the mossy, which instead contains the third Tawna token.
Papu Papu#
- You can skip the cutscene and move around until Papu Papu wakes up.
- The wall torches don't hurt Crash.
- If you spin while Papu Papu is moving his tribal stick, you won't get hurt.
- The sound effect for Papu Papu himself toppling over in defeat isn't present in this build, and so it reuses the "slam" sound file instead.
Rolling Stones#
- The second Aku Aku crate was present along with the third Tawna token crate. It was moved backward slightly in the final game.
- The blue gem path can be accessed by going down through the gems. In the final game, only a gem elevator was used.
Native Fortress#
- The first two checkpoint crates are missing.
- The second life crate below in the pile of crates is missing.
- The fourth checkpoint crate is missing.
- The life crate before the gem path is missing.
- The final set of life crates is missing, along with the floating life crate near the exit portal.
Up the Creek#
- A life crate is missing at the beginning of the level.
- The first checkpoint crate is missing. A river fish after the platform is also removed.
- A life crate over the mossy platform after the second waterfall climb is missing. The platform is also disconnected from the slippery log.
- Afterwards, a blue venus fly trap is present after the green one. It was replaced by a lily pad in the final game.
- Two iron crate platforms suspended over the water are present near the end of the level. These were replaced with lily pads in the final game.
- After the iron crates, a life crate is suspended over the water. In the final game, a stone platform holding that crate was added. Another lily pad is present afterwards.
Ripper Roo#
- The torches around the level deal fire damage. However, Crash doesn't have his burning animations in this level, so dying this way will cause the game to crash instantly.
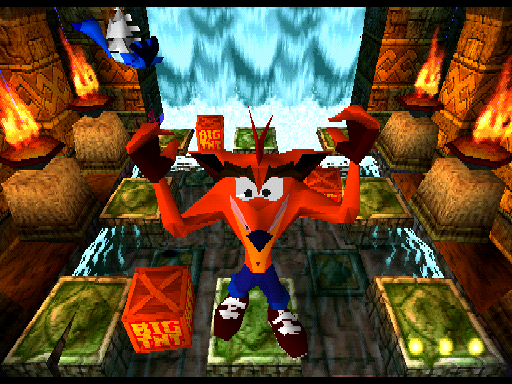
- It's possible to glitch out of the level by getting stuck inside the torch collision after being damaged by it and then spam-jumping out - you will end up on the roof of the level and can walk in any direction, although jumping off in any direction will drown Crash when he lands on the ground.
The Lost City#
- The invisible wall in the final version used to prevent the player from 3D-jumping is instead a pit-death zone wall, killing Crash if he jumps too close towards the camera.
- Stack of three life crates and a bounce one are missing inside the first room. Instead, there is just a life crate in the left corner.
- The first checkpoint crate is missing.
- An extra life next to the first Brio token is missing.
- The second floating extra life is placed further to the right.
- The second checkpoint crate is missing.
- The third floating extra life and the second Brio token are switched.
- The floating floor next to the pusher blocks in the first climb section is just two rectangular platforms.
- Respawning in the first checkpoint (third in final) will spawn Crash in a rotating platform.
- An extra life is missing in the climb, next to the ! switch.
- Another life is missing after reaching the top of the level.
- The fourth checkpoint crate is missing.
- An extra life is missing next to the end.
- A life crate is missing at the end of the level.
- For some reason, getting rid of the second and third pair of hanging bats renders the green gem unobtainable, as the outlines of the final two boxes will be missing - defeating the second pair of bats will make the right outline disappear, while defeating the third pair will delete the left outline.
- If you defeat just one of the hanging bats, the crates will break as soon as you get closer to it instead.
Temple Ruins#
- The first checkpoint crate is missing.
- Respawning in the second checkpoint will spawn Crash in the orbitating pillar arrays.
- The third checkpoint crate is missing.
- A life crate right is missing ahead.
- Another life crate is missing before the moving platforms.
- After the rotating platforms section, two life crates are missing, which the one in the right is a basic one instead.
Boulder Dash#
- Before the final chase section, the TNT crate is placed in the middle as opposed in the bottom.
- The purple gem path does not contain any crates.
Sunset Vista#
- This level holds the orange gem.
- Due to the level arrangement, the level doesn't contain any Cortex tokens and the Tawna bonus round layout ID is 02, the same one as Generator Room in the final game.
- The life crate at the beginning is missing.
- The first Tawna token is placed inside the second room, after the first pusher blocks section. It was replaced by an Aku Aku crate in the final game.
- The first checkpoint and life crates are missing.
- In the first set of rotating platforms, there is an extra platform with an iguana in the center.
- An extra stone platform is missing with a stack of two life crates between the two set of rotating platforms.
- In the second set of rotating platforms, an extra platform with an iguana is in the center.
- A log platform is missing afterwards.
- Inside the first alcove there is a ? crate with the second Tawna token.
- The second checkpoint is placed further ahead. Instead, four extra pusher blocks are present.
- In the first climb section, the platform above the torches was changed from a single rectangular one to a proper floor.
- The pile of crates in the climb is inverted - the ? crate is on the top, while the bounce one is on the bottom. The ? one also contains the third Tawna token, while it holds the first one in the final game.
- An extra rectangular platform is missing on the right edge before the second checkpoint (fourth in final).
|
May 11 |
Final |
|---|---|
|
|
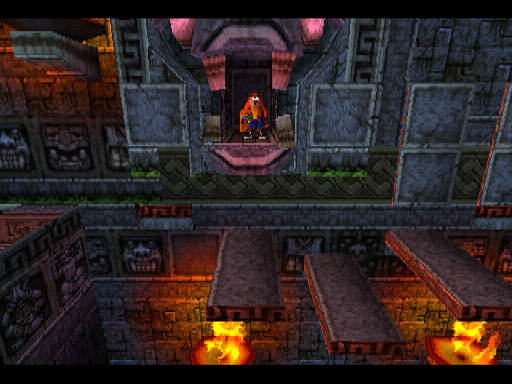
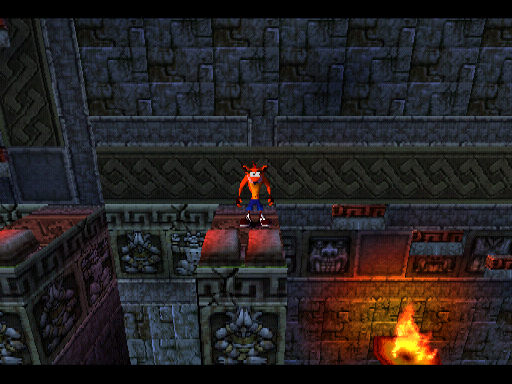
- There is an extra alcove containing an Aku Aku crate slightly before the second climb that was removed in the final game. That Aku Aku crate was later moved ahead next to the stack of crates before the second climb.
- The rectangular platform below the left bat is missing.
- The pile of crate in the climb has a TNT crate on the bottom instead of another bounce one.
- After the second climb, the ? crate that would hold the first Cortex token is a basic one instead.
- The first set of pusher blocks has a different pattern.
- The second set of pusher blocks also has a different pattern.
- The floating extra life is placed further to the right.
- The Aku Aku, life, checkpoint and ? crate with the second Tawna token afterwards are missing.
- The pile of crates in the gap contains two TNTs.
- The ? crate with the third Cortex token is missing behind the pillars in the background.
- There are two torches instead of three, and they are placed higher up. The ? crate with the third Tawna token is also missing.
- The rectangular platforms were changed to a proper floor in the final game in the climb.
- The seventh checkpoint at the middle of the third climb is missing.
- An extra pile of two bounce crates and a basic one in the middle is present at the top.
- The box counter is not set properly, as there will always be a single crate missing.
Whole Hog#
Whole Hog is considerably harder in this version, featuring boomerangs flying around and tribesmen coming out of barricades, along with bigger spiky poles.
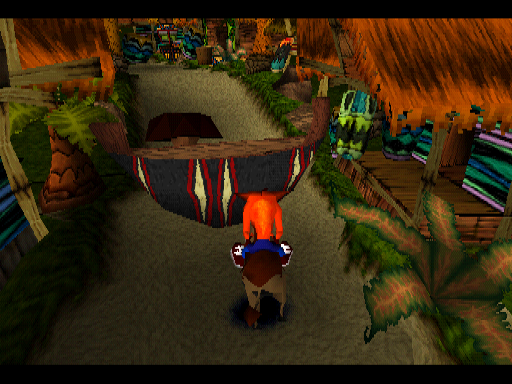
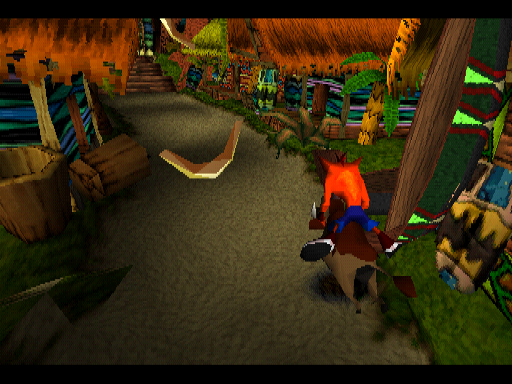
- The camera angle at the beginning of the level is slightly further down.
- The first two spiky poles are more enclosed, while the third one was removed.
- The fourth spiky pole is placed further behind and on the left side of the path.
- There are two extra spiky poles afterwards.
- There is a second extra ? crate before the first shield tribesman.
- There is an extra spiky pole before the first chasm.
- After the first roasted hog, the ? crates are positioned more centrally.
- There are two shield tribesmen afterwards, which were replaced by more ? crates.
- There are two extra ? crates before the second roasted hog.
- There is a third extra ? crate before the checkpoint.
- There is an extra spiky pole on the left afterwards.
- A barricade is present, which was replaced by a shield tribesman instead.
- More barricades are present before and after the fifth and sixth chasms, which were also replaced by shield tribesmen either.
- After the sixth chasm, the first basic crate afterwards was moved further ahead in the final game. There is also two flying boomerangs in this segment.
- There is a flying boomerang after the third roasted hog.
- Another flying boomerang is placed after the seventh chasm.
- There is an extra shield tribesman afterwards.
- After these final two shield tribesmen, there are three more flying boomerangs consecutively leading to the end of the level, which were replaced by three basic crates in the final game.
Jaws of Darkness#
- Due to the level arrangement, the Tawna bonus round layout ID is 13, the same one as Road to Nowhere in the final game.
- The bounce crate at the beginning of the level contains the first Cortex token.
- The ? crate in the corridor was changed to a life one.
- The ? crate next to first checkpoint contains the first Tawna token, which was replaced by the first Cortex token in the final game.
- The basic crate in the downside section right ahead was changed to a ? one with the first Tawna token.
- The second Tawna token is placed where the second Cortex token would be located.
- Before the last torch pad, there is a basic crate instead of ? one with the second Tawna token.
- The last ? crate holding the third Tawna token is placed right before the exit portal. There is a basic crate at the start of the final corridor instead.
- The box counter is not set properly, as there will always be at least 1 crate missing, regardless if the ones in the gem path were broken or not.
- Due to the missing third Cortex token, it is impossible to access the Cortex bonus round and get the key to unlock Whole Hog. However, even if you access it through hacks, you still won't be able to unlock it.
Koala Kong#
- Crash spawns in the center.
- The default death animation plays when Crash is killed by the lava river.
Cortex Power#
- The camera is set on a upright view rather than a top-down view.
- The entrance looks very different, with a textureless brown & red door opening up to reveal another door featuring the same Pinstripe "Safety first!" texture used in the Generator Room. The final game removes the first entrance, and switches the Pinstripe style door with the uniform "N" door used throughout the level.
- Doors make a different sound effect.
- The mafia slim lacks a laugh sound effect and features Pinstripe's gunshot sound effects, including the riccochet noises.
- The first split-path contains two basic crates on each side. In the final game, the crate on the left was removed and the right one was replaced by a life crate.
- On the first right path, the robot turtle has a longer navigation path, causing it to walk over the acid pool ahead.
- The checkpoint within the stack of crate afterwards is also missing.
- Before the split-path on the right path, there is a door.
- The life crates at the end of the split-paths are missing before the final checkpoint crate.
|
May 11 |
Final |
|---|---|
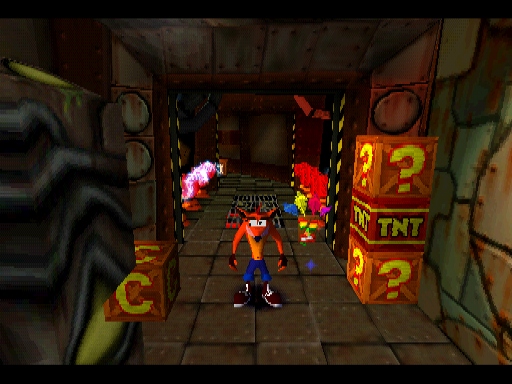
|
|
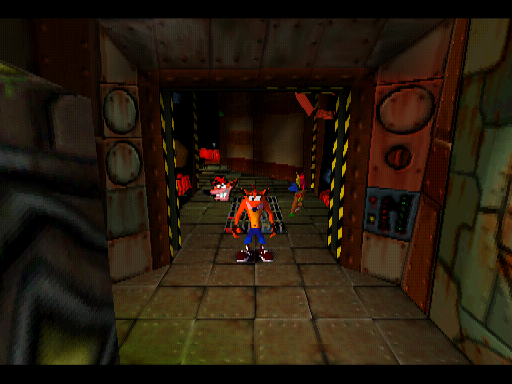
- Next to the mafia slim in the mafia slim section on the first left path, there is a checkpoint crate on the left, and a pile of crates on the right.
- The door behind is also missing.
- After that, there is a set of small electricity hazards that were removed and replaced by a single extra life instead.
- A basic crate was also removed ahead, and the corridor is narrower.
- Before the following split-path on the left path, there is a door.
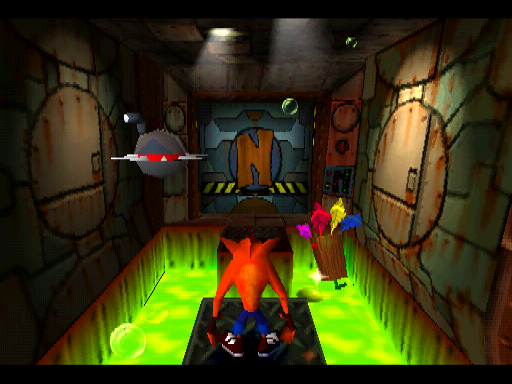
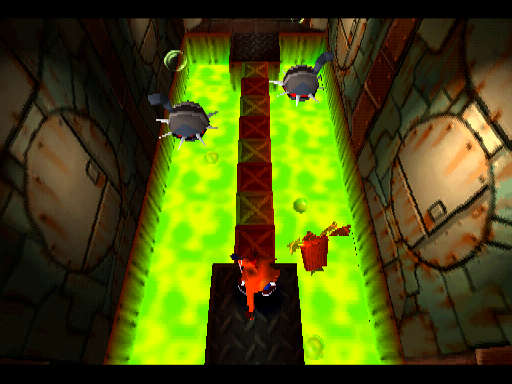
- The left route normally accessible via the blue gem platform has much narrower acid pool pits at both ends, which was changed to accommodate the gem platforms.
|
May 11 |
Final |
|---|---|
|
|
- The gem path lacks the bridge of TNT crates, leaving no crates on this path. In its place is a rather bland corridor with an extra platform above an acid pool.
- There is also one spiked saucer instead of two.
|
May 11 |
Final |
|---|---|
|
|
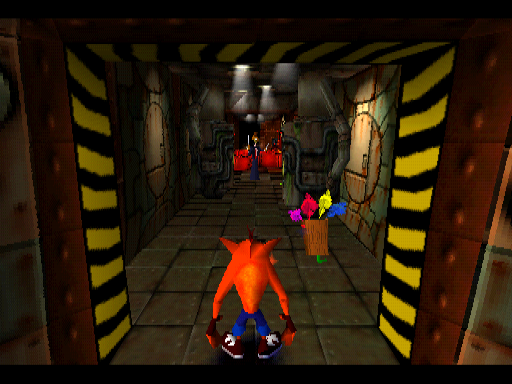
- The end of the last right split-path contains another segment with a mafia slim that was replaced in the final game with a set of small electricity hazards.
- The final bridge doesn't feature two crates activated by default, which means if the player doesn't trigger the ! switch, they won't be able to complete the level.
- It also contains a spiked saucer.
Heavy Machinery#
- The trampoline doesn't automatically spring when walking on it.
- The hidden area you drop down into early on in the level is a shortcut which allows you to skip to where the second checkpoint would be in the final game. It would later be repurposed into a secret area with a platform transporting you back to where you initially fell. Since you can't get back up, the gem can't be collected, unless you enter the bonus round to duplicate the crate upon returning to the level.
- There are two basic crates between the first falling platform.
- The extra Aku Aku mask is placed in the middle of the pit, featuring a Wumpa fruit on his sides.
- The hole is also larger, since a platform is missing on the right edge.
- The TNT is placed on the middle afterwards.
- There are two more TNT crates ahead, which were replaced by a single ? crate containing the first Tawna token. An extra hot pipe was removed, and a cold pipe was added on the edge.
- A hot pipe was removed in favor of another ? crate containing the second Brio token.
- The first arrow with a bounce crate was moved further to the right.
- After the first conveyor belt, an extra platform was added on the edge, and the crate was moved to it.
- After the first descent to the lower floor, the pile of Wumpa fruit and spiked saucer are switched in the stairs. The last platform is also placed further down.
- The spiked saucer in the falling platforms section goes up and down. In the final game, it's static.
- The ? crate ahead containing the second Tawna token in the final game is missing.
- The first set of steam vents have a different pattern.
- After the first steam vents, a hot pipe was replaced by a life crate.
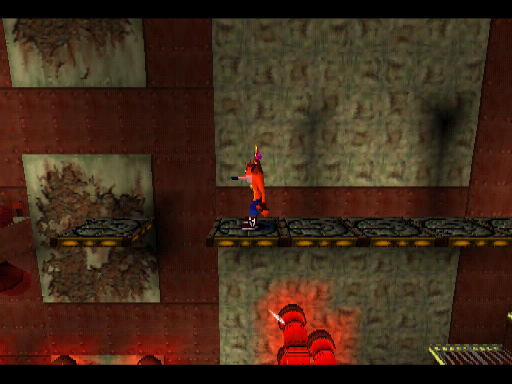
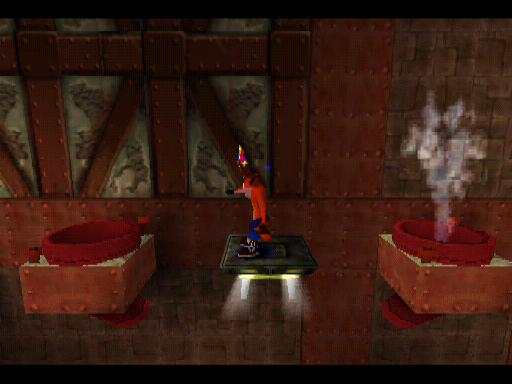
- The wall where the third Tawna token would be located in the final game extends itself leftwards until the end of the area. There are two steam vents, a falling platform, and another steam vent leading to a final platform containing a big pile of crates with the first Tawna token and a life crate on the top.
- A platform is present at the end that takes back the player.
- Two falling platforms are missing before the first trampoline.
- The crate placement in the trampoline section is different. There is a 2x3 stack of basic crates with three ones above them, with a ? containing the second Tawna token and Aku Aku on the top. In the final game, it's just a straight pile of crates.
- More falling platforms are missing afterwards.
- The camera after the first trampoline until the hot pipes gets zoomed out.
- An extra cold pipe was added in the middle, in the second conveyor belt section.
- The set of steam vents ahead have a slower pattern.
- The part where it contains the third Brio token in the final game holds the third Tawna token instead. There is also two TNTs below the ? crate.
- A hot pipe on the left side was removed in the final climb.
- A pile of three life crates is missing next to the exit portal.
Generator Room#
- There is no music.
- There are no Tawna tokens.
- The scenery doesn't electrocute Crash unlike in the final game.
- The frozen pipes feature a slightly different model.
- The small sparks around the pipes poles aren't animated.
- There is an extra surveillance robot before the ! switch.
- The falling platform placed next to the ! switch returns almost instantly.
- The first Aku Aku crate was replaced by a ? one with the first Tawna token.
- The bridge activated by the ! switch is made of basic crates only. The large platform also drops more quickly.
- The first checkpoint crate with a ? crate above are both missing.
- A single Wumpa fruit was replaced by a ? crate with the second Tawna token.
- A checkpoint crate is placed in the edge, next to where the ? crate with the third Tawna token would be present in the final game.
- A spiked saucer is placed between the first and second vertical moving platform, while a surveillance robot is placed between the second and third one.
- There is a vertical moving platform before leading to the moving one in the face camera section.
- The moving platform ahead moves back and forth by default. In the final game, it's static until the player steps on it.
- There is an Aku Aku crate afterwards that was removed in the final game.
- A generator was removed in the left side of the background.
- A life crate is missing in the stack of crates.
- The second spiked saucer moves slower afterwards.
- In the uphill after the TNT puzzle, two platforms forming a staircase are missing, including a surveillance robot.
- The moving platform was replaced by a bridge in the area preceding the airborne pipes.
- The three life crates at the end of the level are missing.
- The floor textures at the end of the level are messed up.
Toxic Waste#
The level is corrupted in this build. This seems to happen because of the mafia fats, as removing them allows you to play through the level without problems. If you kill the first guy, the game will freeze shortly after. Sometimes, they will disappear on their own, along with everything else in the level including the portal, so you can't finish it.
- There is no music.
- The light fixture textures are small and more abundant, and in some halls they are placed in the edges.
- Touching the mafia fat does not hurt the player.
- The mafia fat lacks a laugh sound effect when throwing the barrels.
- The scenery in the sideways that drop the barrels to the mafia fat doesn't harm Crash.
- If you fall in the edges of the ramp sections, the game does not play the falling on acid animation when Crash touch the acid pool and will instantly reset instead.
- There is ! switch above the acid pool on the left side in the second hall.
- The pile of crates on the sides are all basic ones in the third hall.
- There is a basic crate instead of two ? ones, which holds the first Tawna token in the final game.
- The basic crate on the left in the sixth hall was changed to a life one in the final game.
- In the ninth hall, there is a pile of crates with TNT in the middle, and two ? crates, which both of them contain Tawna tokens. It was changed to a single basic crate on a TNT.
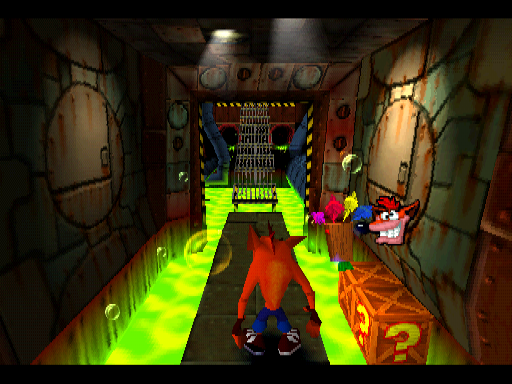
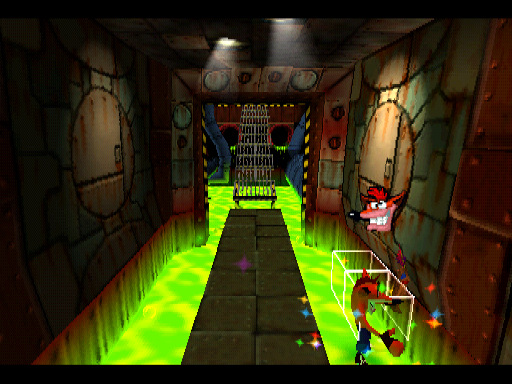
- After the second checkpoint, there are two floating crates above the acid pool on the right side, plus an extra life above them. One of these crates holds the third Tawna token, which can make Crash respawn over the acid pool if he collects the token while over the acid, killing him indefinitely if he does not immediately jump after spawning.
- The ? crate in the penultimate hall is missing, which holds the third Tawna token in the final game.
Pinstripe#
- There is no music.
- Pinstripe lacks a laugh sound effect.
- The ambient sounds produced by Pinstripe's gunshots and the generator in the background are significantly louder than in the final.
Road to Nowhere#
- There is no music.
- The first gem path is missing.
- The ? crate in the TNT puzzle contains the first Tawna token.
- The first checkpoint and the two crates around are missing, and the crate arrangement is differet: there are two iron crates on each side, and the left one contains a pile of crates. The pile contains a TNT, basic, and a arrow at the top. There is a life crate floating offscreen, which can be either destroyed by jumping on the arrow crate, or TNT's explosion.
- In the third section, an extra life floating offscreen is missing.
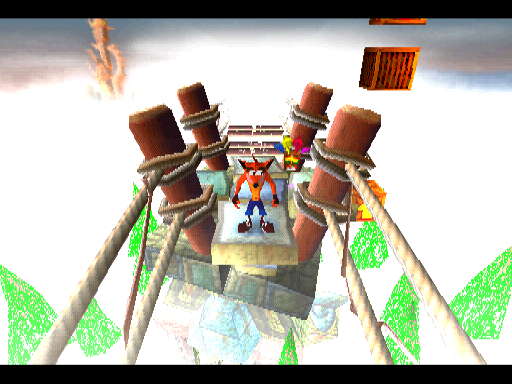
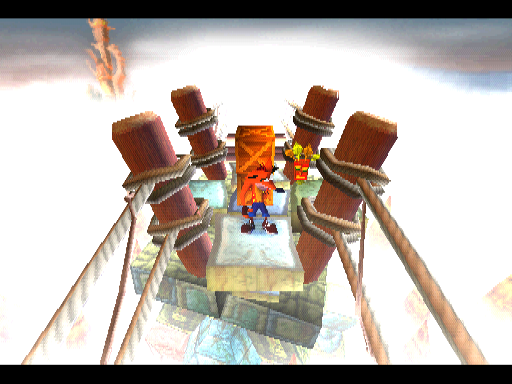
- In the fourth section, the checkpoint is placed on the edge and the life crate along with the extra life are missing. Instead, there are two basic crates floating outside the bridge, with a TNT in the middle.
|
May 11 |
Final |
|---|---|
|
|
- In the fifth section, the two crates in the middle are missing. Instead, there is an arrow crate in the right side outside the bridge with a bounce crate above, and another ? one on the top.
|
May 11 |
Final |
|---|---|
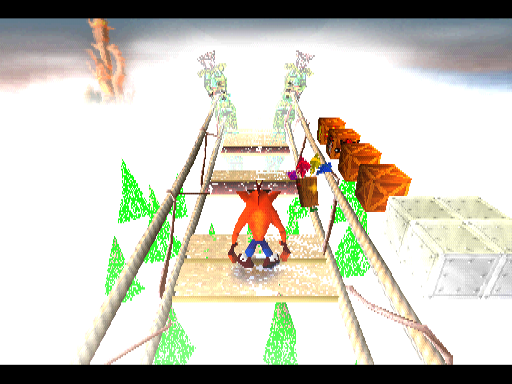
|

|
- After the second checkpoint, there is a small platform of iron crates on the right side outside the bridge with four crates ahead.
- The third checkpoint is missing, along with an extra life in the seventh section.
- Before the eight section, a wild hog was removed in the final game.
- The eight section contains the third checkpoint instead, along with a basic crate. In the final game, there is just a ? crate.
- In the ninth section, there is a TNT puzzle with the third Tawna token in the middle. It was changed to a ? crate containing her token and a pile of two basic ones.
- The invisible bridge path at the end of the level can be accessed, even with no gem platform being present.
The High Road#
- This level holds the blue gem.
- There is no music.
- There are no Tawna tokens.
- Instead of two extra lives on each side, there are two Wumpa fruit. But due to a glitch, they despawn when getting closer.
- The floor collision in the middle is not set properly, causing the player to fall through it at specific spots.
- There are extra Wumpa fruit above the crates in the secret area.
- The arrow crate in the first section is made of wood instead of iron.
- In the second section, the ? crate next to the first checkpoint with the first Tawna token is missing, including an extra life.
|
May 11 |
Final |
|---|---|
|
|
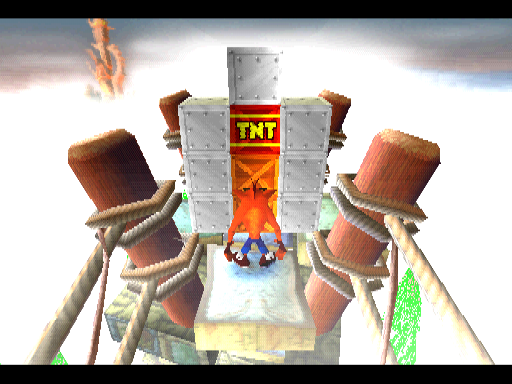
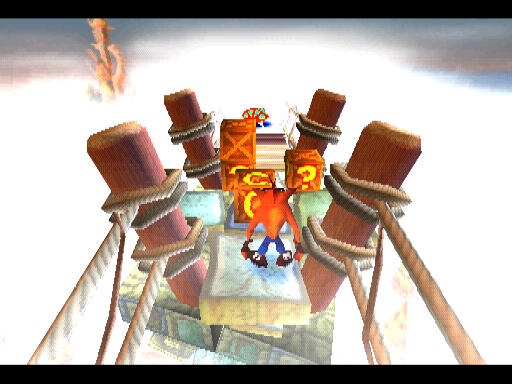
- The second checkpoint crate and the crates around it are missing in the third safe section. Instead, there is a TNT puzzle covered by an iron crate wall.
- In the fourth section, the second checkpoint (third one in final) is placed instead, and there is a wall of crates. It was changed to a single basic crate in the final game.
|
May 11 |
Final |
|---|---|
|

|
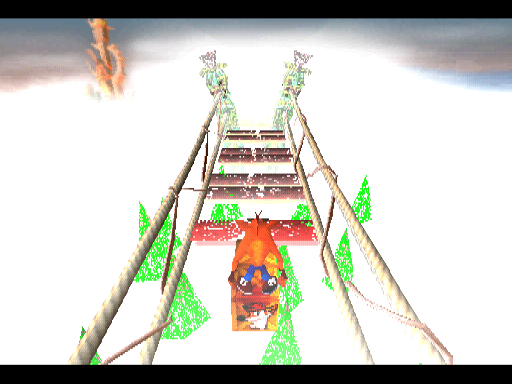
- Afterwards, two crates are placed in a hugely inconvenient position directly under a pair of crumbling planks. Needless to say, they were removed in the final game.
- The fourth checkpoint crate is missing. The basic crate in the stack was also replaced by a ? one here.
- There is a third checkpoint crate where the last ? crate containing the third Tawna token is located in the final game.
Lights Out#
- There is no music.
- Large chairs, tables, and patterned ribbons are missing halfway through the level.
- There are no life crates through the level.
- The first checkpoint crate is missing.
- The Aku Aku mask pickup after the swinging blades is inside a crate instead.
Fumbling in the Dark#
- There is no music.
- There are no light beams highlighting crates.
- Many ornamental details, such as the large chairs, tables, patterned ribbons, and wooden columns near the ceiling, are missing.
- Candles are missing from the lanterns.
- Most of the floor is textureless.
- Spiders don't give a chain combo Wumpa fruit when stomping on them in a row.
- The secret area right behind the start of the level is missing.
- There is no invisible barrier, meaning you can just walk backwards and fall into the void and die.
- The first Aku Aku crate is placed on the left side.
- The Aku Aku crate next to the first checkpoint is placed further behind.
- The Aku Aku crate right after the second and third spiders is placed more centrally.
- The Aku Aku crate next to the second checkpoint is placed further to the right.
- There is no light beam above the exit portal either.
- The background is a bright grey void at the end of the level.
Nitrus Brio#
- There is no music.
- This level has graphical issues.
- The only sound effects present are the beaker explosion and Brio's transformation, where the former reuses the TNT explosion.
- An extra decorative beaker was added to both of the desks behind Brio.
- The decorative candles next to the desk are missing.
- The room is longer, going further behind.
- The lightning actually flashes the room pitch black instead of making it bright.
- Brio's health bar is represented differently - dots appear depending on the number of slimes onscreen, rather than showing how many health points Brio himself has in total.
- Slimes are red and invulnerable when spawned. After chasing Crash for a while, they stop and become green and vulnerable. Waiting too long during this phase makes them turn yellow, before quickly shifting to the red phase again.
- The models for the slimes are less detailed, lacking the small cells inside.
- Taking a hit from the slimes does not knock them back away.
- Stomping on three slimes in a row you give you an extra life.
- After Brio transforms, his health bar shows three remaining health points as in the final game, except that you are actually supposed to hit him six times more to defeat him.
- Due to the incorrect amount of remaining points, that causes the final phase to take longer than the game expects, which can make Crash incapable of defeating Brio if he comes too close to Crash's edge of the screen, as no slabs drop down to let you jump on Brio's head, while Brio himself is locked into perpetual back and forth movement.
Slippery Climb#
- This level holds the yellow gem.
- There is no music.
- The rain effect is brighter.
- There is no rain and thunder sound effects.
- Collapsing stairs make no sound effect when opening.
- Timed platforms make no sound effect.
- The vulture uses the bounce sound effect when stepping on it.
- Vultures don't give a chain combo Wumpa fruit when stomping on them in a row.
- This level features Tawna tokens as opposed to the Brio tokens seen in the final game.
- Evil hand enemies are colored a pale blue as opposed to bright orange, and the eyes are further away from each other.
- There is a spike in the center of the second pair of rotating platforms.
- There is a spike under the recess in the third pair of rotating platforms.
- Two collapsing stairs are bizarrely placed in the first V-shaped staircase.
- A spike on the top was removed in the section with two evil hand enemies.
- Afterwards, the spikes placed under the vulture are placed slightly upwards.
- There is a ? crate instead of a bounce one before the first climb, which contains the second Tawna token.
- A spike was removed before the collapsing stairs after the first elevator.
- The basic crates ahead are placed inside the recess instead.
- The spike under the second elevator is larger.
- A spike was removed before the small staircase leading to the third elevator.
- The checkpoint and the basic crate above are also placed inside the recess instead.
- A spike was removed next to the fourth elevator on the right side of the climb before the top.
- A spike was removed at the bottom of the collapsing stairs after the first lab assistant.
- The rotating platform afterwards is a trio instead of a pair.
- A stationary platform is missing after the vulture. Instead, the second set of rotating platforms also move in a circular pattern surrounding a log.
- There are two spikes under the second vulture instead of one.
- There is a recess with a life and basic crates in the third set of rotating platforms, which is also a trio instead of a pair.
- An extra stationary platform is missing on the left edge.
- The two basic crates in the recess were replaced by a life crate and a ? one with the second Brio token.
- After the bonus round, the first set of rotating platforms is a trio instead of a pair.
- The second set of rotating platforms moves in a circular pattern surrounding a log.
- The vulture afterwards moves diagonally instead of up and down.
- The third set of rotating platforms is a trio instead of a pair.
- A vulture is missing afterwards.
- There is a bunch of spikes below the trio of vultures at the end.
- There is just one life crate at the end of the level, while the rest are just basic and ? ones.
- The lab assistant throws the beakers more quickly.
- The exit portal is placed closer to the edge.
- There is no pit-death zone at the very end of the level, allowing the player to walk under the scenery.
The Lab#
- This level holds the purple gem.
- There is no music.
- Iron gates have no sound effects.
- All boxes, with the exception of ! switches and checkpoint crates, are absent in this level.
- The floor is made of wood and features decorative carpets.
- Many of the iron gate frames through the level were rearranged or changed in the final game.
- The majority of iron gates from the first checkpoint onwards open up incredibly slowly (takes about 9 seconds), creak for half a second and shut down very quickly.
- Electric lab assistants don't scream when falling and can only electrify you after you attack them or while they approach you as opposed to their electrification being timed, making them easier to approach.
- The slimes are colored yellow instead of orange and turn green when defeated, which does not occur in the final game.
- Spinning on them in mid-air will knock Crash back instead of defeating them.
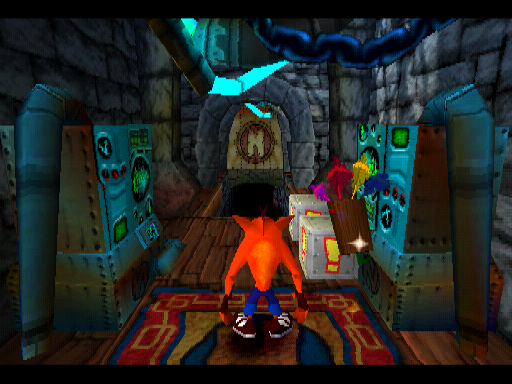
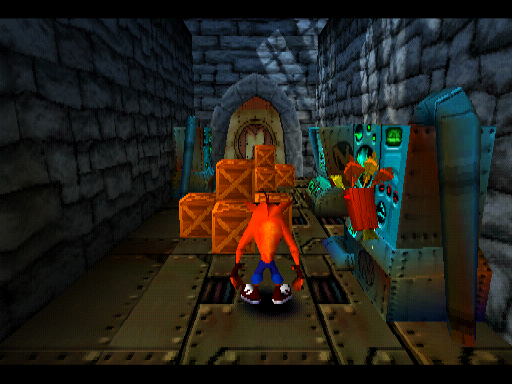
- Touching the electric gates will turn Crash into ashes.
|
May 11 |
Final |
|---|---|
|
|
- This section contains two wooden trapdoors, where the first one is triggered by the first ! switch, while the second one triggers the gate. In the final game, the gate is triggered by the ! switch inside the first set of crates.
- The door frame after the first electric lab assistant segment was moved after the two ! switches, while the columns holding the candles were moved behind.
|
May 11 |
Final |
|---|---|
|
|
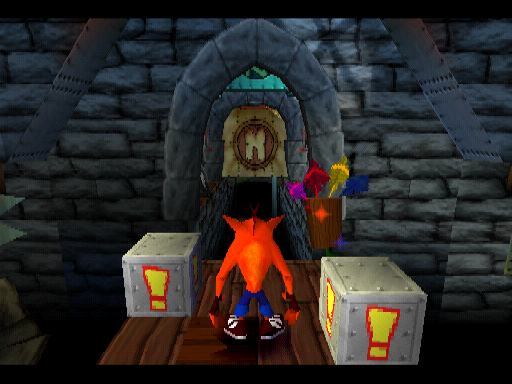
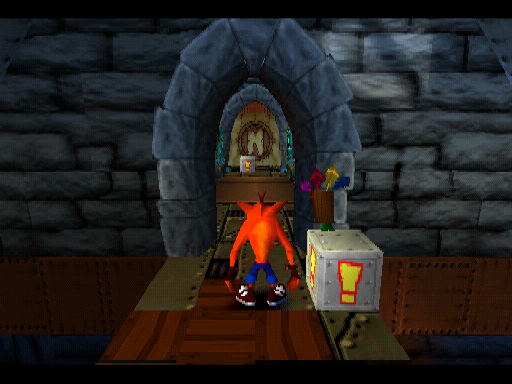
- After the second checkpoint, another ! switch is placed on the left side that triggers the gate ahead, while the right one does nothing (it should trigger the wooden trapdoor, but a bug prevents it from working). In the final game, the first trapdoor was replaced by a normal floor, with a gate added, and one of the switches was placed ahead, inside the stack of TNT crates.
- Afterwards, there is a pit after the gate, and the door frame is narrower and placed further ahead. The ! switch is also missing as the trapdoor before the second electric lab assistant is a timed one.
- Afterwards, the pit is present before the gate, and both ! switches are placed on the right side.
- Due to the wider floor, the second electric lab assistant ends up being clipping through the floor itself when pushing him closer to the edge.
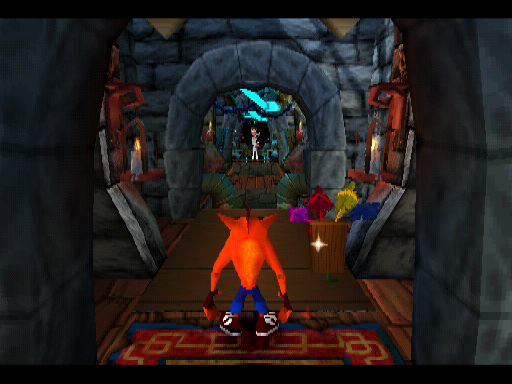
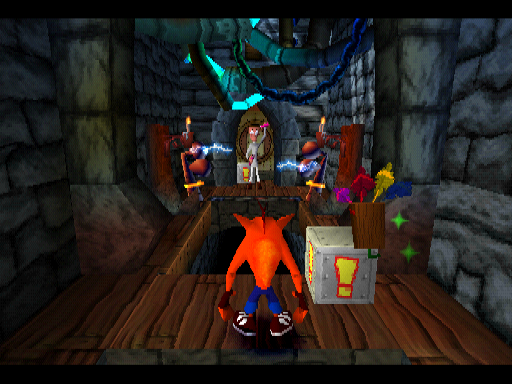
- The ending segment of the level is completely different, with the exit portal being revealed behind a closed door after a timed trapdoor segment, in a corridor similar to the finishing corridor in Lights Out. The first section features two a tigger trapdoor, followed by a timed trapdoor with a beaker lab assistant at the end. Afterwards, there is a pit and another trigger trapdoor leading to a gate. The second segment contains a trigger trapdoor, followed by electric fence with another beaker lab assistant. The final game requires Crash to cross a bridge of TNT crates, with the exit portal being in a far more narrow doorway instead.
- The box counter is not set properly.
Stormy Ascent#
- This level holds the red gem.
- There are visible Cortex tokens. Getting all three fades all sounds, but does not transfer you to a bonus round.
Dr. Neo Cortex#
- There is no music.
- This level has serious graphical issues with the background.
- Cortex has no dialogue or laughs.
- The level contains an Aku Aku mask pickup in the left side, allowing the player to become temporarily invincible during the boss fight.
- If you die while invincible, Crash will respawn doing the leap up animation and only with a single mask.
- The orange shots were changed to purple ones in the final game.
- During the last phase, where Cortex only shoots a single green plasma blast, the blast is colored purple instead (but can still be spun).
- The island background stops rotating when Crash dies.
- There is no ending upon beating Cortex - it instead sends you back to the map.