This is a sub-page of Shivers.
Museum Grounds#
An unused render, looking up at the museum from the pathway immediately after moving left from the game's starting point. It is unused because you can only look forwards or backwards from that left path at that position.
|
Unused |
Used |
|---|---|
|
|
|
An unused render of looking behind the weird maze-like statue. It was likely unused because the shadow obscures the symbol.
|
Unused |
Used |
|---|---|
|
|
|
An unused angle of looking at the wooden seat by the pond.
An unused render of standing besides the gazebo.
|
Early |
Final |
|---|---|
|
|
|
|
Early |
Final |
|---|---|
|
|
|
Early renders of walking up the stairs towards the left and right staircase after the 'Lion Paws' Monument.
|
Early |
Final |
|---|---|
|
|
|
|
Early |
Final |
|---|---|
|
|
|
Early renders of looking down the staircase above the Left / Right Staircase from two different elevations. Most of the obvious changes in the Earlies to Finals are in the distance, beyond the lookout.
An unused render of walking up the stairs towards the vase display. This render is unused likely for pace; The node before and after this in-game, is the bottom and top of the this staircase.
Secret Tunnel Entrance#
Unused (Near) |
Unused (Middle) |
Unused (Far) |
|---|---|---|
Used (Near) |
Used (Middle) |
Used (Far) |
|---|---|---|
Because the door cannot close to the outside world until the power switch is flipped in the Secret Tunnel Entrance, these three renders are unused.
|
Unused |
Used |
|---|---|
|
|
|
Because the door cannot close until the power is flipped, there's also an unused render of looking at the power box.
|
Unused |
Used |
|---|---|
|
|
|
At some point, it seems that one of the bulbs was meant to blow near the entrance. Potentially caused by the Electricity Ixupi, who knows?
This is one of the unused tunnel renders. I cannot match it to a final render, because it's much darker and harder to see than any of them, signalling that at one point the developers were probably considering making it much more difficult to see without switching the lights on.
Underground Lake Tunnel#
|
Unused |
Used |
|---|---|
|
|
|
This is not entirely unused. It's just impossible to see the elevator open from afar by anybody regularly playing the game, because the elevator closes if you turn or move away from it... Unless you were a Sierra developer or tester, and had a flag enabled to always have elevators always open.
You can't look down at the elevator floor. So, this render goes used.
Museum Office#
The newspaper in Professor Windlenot's coat can be interacted on from several angles, so this render of the player standing in front of his coat goes unused.
|
Unused |
Used |
|---|---|

|

|
While there is a pencil on this desk, it's normally not visible in the closeup of the tape recorder.
|
Unused |
Used |
|---|---|
|
|
|
The door to the Main Entry Hall opens from the used position above, so... A render of the player standing closer to the closed door is unused.
|
Early |
Final |
|---|---|
|
|
|
In an earlier render of the player standing in front of the door to the Workshop, the lighting makes the door very dark, and the spotlights stand out. I can see why they changed it!
Professor Windlenot's Bedroom#
|
Unused |
Reference Shot |
|---|---|
|
|
|
You can't click on the Windlenot Coat of Arms or the trunk for closeups of either, so this closeup render of the Windlenot Coat of Arms goes unused...
|
Unused (Early) |
Unused (Final) |
|---|---|
|
|
|
...As does this Early / Final Render of the trunk, closeup. As with most Early / Final Renders, the most obvious difference is the colouring and lighting of the scene, likely design to amp up the unease.
|
Early |
Final |
|---|---|
|
|
|
This is an Early / Final Render of standing towards the right side of Professor Windlenot's desk, facing the entrance / exit of the room. The only obvious change, other than colouring and lighting, is the size, positioning and design of both his journal and the photograph of Geoffrey as a child.
|
Early |
Final |
|---|---|
|
|
|
This is an Early / Final Render of standing to the right of Professor Windlenot's wardrobe, facing his bedroom window. The only obvious change, other than colouring and lighting, is a different graphic of the outside world behind the window.
|
Unused |
Used |
|---|---|
|
|
|
When you click on the ornate alarm clock next to Professor Windlenot's bed, it goes straight to the used closeup of the clock, leaving an unused closeup from slightly further away unused, it was likely cut for pacing.
Main Entry Hall#
The player cannot stand directly in front of the plaque for the Transforming Skulls in the Main Entry Hall, so this render goes unused.
|
Unused |
Used |
|---|---|
|
|
|
The door opens from the used position above, so a render of the player close to the Strange Beasts exhibit's door is unused.
This angle of looking at the Information Desk goes unused, and I don't know why. The "Information Desk" plaque is practically unreadable from every position except this one.
|
Early |
Final |
|---|---|
|
|
|
An early render of going down the spiral staircase shows that the developers originally were going to have the museum entrance padlocked, which doesn't make sense since the door itself can be locked.
Strange Beasts Exhibit#
|
Unused |
Used |
|---|---|
|
|
|
Entering the Strange Beasts Exhibit from the Main Entry Hall puts you rather close to the 'bird-eating spider' display; A render further back standing inside the Main Entry Hall's doorway to the exhibit is unused.
|
Unused |
Used |
|---|---|
|
|
|
When you exit the Mysteries of the Deep Exhibit, you re-enter Strange Beasts standing next to the plaque for the 'bird-eating spider'. This render further back with the player essentially in the doorway to Mysteries of the Deep goes unused.
Mysteries of the Deep Exhibit#
|
Unused |
Used |
|---|---|
|
|
|
It seems some point you were able to look down at the top of the stairs down into the Mysteries of the Deep Exhibit.
In the walkway behind Poseidon's statue, you cannot turn left or right, only forwards and backwards, so this render of looking at the statue from behind is never used.
|
Unused |
Closest Location |
|---|---|
|
|
|
Stepping forwards (after turning right at the Song of the Sirens puzzle) moves the player considerably more right and forwards, the same position as turning left from the boat and siren display / plaque, so this render from directly forwards is never used. Noticeable differences in the unused render is the floor being a much darker shade of blue with a less obvious checkerboard pattern, and a blue strip running down the black wall.
|
Unused |
Closest Location |
|---|---|
|
|
|
This angle that shows more of the boat when in front of the boat and siren display / plaque is unused for some reason. Turning left from the 'Closest Location' position, faces the player in front of the watercolour Atlantis Wall (which is partially visible in the previous unused render).
Subterranean World Exhibit#
|
Unused |
Used |
|---|---|
|
|
|
When entering the maze in the Subterranean World Exhibit from all three entrance corridors, a node in the middle of that corridor is skipped over (likely for pacing), leaving its render unused. It does make me think the player is at least 15ft tall with the amount of stride they can seemingly take in one step!
Unused |
Unused |
Unused |
|---|---|---|
Used |
|---|
For some unknown reason, when you move past one of the three elaborate red-painted murals, instead of using the corresponding corner render (which has part of the mural on the right wall), all three nodes at different locations in the maze use the exact same generic corner render. I think this is more likely to be developer oversight than something that was intentionally cut.
|
Unused |
Used |
|---|---|
|
|
|
This render of a dead end featuring part of a corner wall in shot is unused. This is likely to have been cut because having the render without that extra wall in shot means it can be used for many different rooms no matter if the corner before turns left or right.
|
Unused |
Used |
|---|---|
|
|
|
The middle node between the start and end of the final corridor of the maze is skipped over (likely for pacing), leaving a render of the player half way to the exit archway unused.
This shot looking towards the exit of the maze from the skulls dial next to the Dero display goes unused as you cannot turn around when you're facing the dial... You can only move back to where you were.
Theatre#
|
Unused |
Unused (Alternative) |
|---|---|
|
|
|
|
Unused |
Unused (Alternative) |
|---|---|
|
|
|
These two sets renders of looking right / left directly from the front of the left / right stairs towards the theatre's stage, and their alternative renders (for once you've got the projector working) are both unused.

This is Merrick's pocketknife which holds the note to the lectern in the final game. It appears that the pocketknife was initially going to be stuck in the front of the stage. This view can't be accessed through normal gameplay, however...
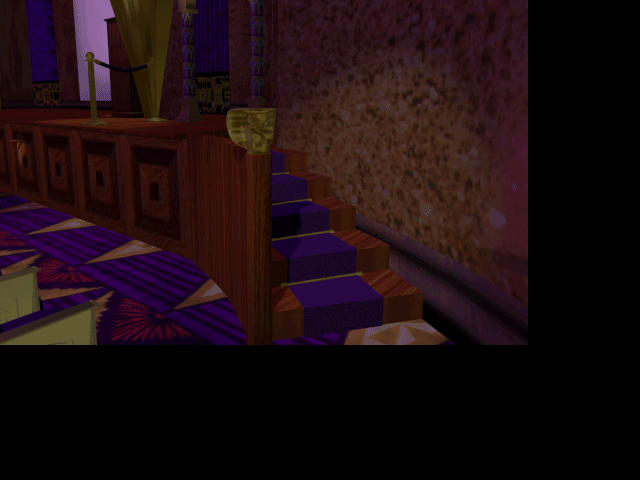
The knife can be seen, when viewed from either side of the seating from a distance. It's more obvious when the curtains are open and a spotlight shines on the knife, as seen to the left in this picture.
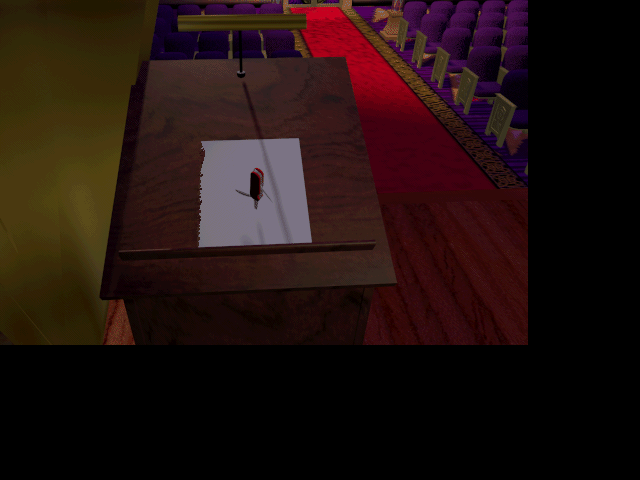
The knife also has been in two positions on the lectern. In the final it's stuck in the top of the note (which can be seen as a near-vertical line in the final note above, to the right of "Beth—"). Pictures with the knife in the bottom of the paper, such as this one, seem to be unused. This one in particular shows a blank note, and according to the shadows, a floating lamp and knife.
Theatre Corridors#
|
Early |
Final |
|---|---|
|
|
|
An early render of the bottom of the staircase to the theatre's projection room, facing one of the Theatre Corridors. The floor is a different wood with a different pattern, the room's lighting is less effective, the secret passageway is more recessed and everything generally looks more washed out.
This seems to be an early render of an unused shot, standing somewhere about a third up the stairs looking down towards the corridor, it is interesting in how low and zoomed in the camera is. It looks much more like some of the "look down" angles in the game than a typical positional render.
|
Early |
Final |
|---|---|
|
|
|
Generally the same with this early render facing the bottom of the staircase to the projection room. The sconces are not lighting the walls or the floor, making the staircase and walls overall look much darker and uninteresting than the final render.
|
Early |
Final |
|---|---|
|
|
|
This seems to be a early render of standing about two thirds of the way up the stairs, looking towards the corridor. The camera height seems to be much different in the early render, compared to the final, so most of the actual staircase is out of shot. It has the same kind of lighting and colour issues as other shots.
|
Early |
Final |
|---|---|
|
|
|
Another early render, this time at a higher elevation on the staircase. With this lighting, it's even less possible to tell where wall ends and ceiling begins! I would like to know why the door is so over-lit in the final renders of both staircase shots, though. It makes it look like it's being lit from below and not above.
|
Early |
Approximate Final |
|---|---|
|
|
|
I don't know if the camera was originally meant to be in the position of the early and they changed it in the final. Personally, I think the Projection Room would look more impressive if the door opened above you. It's also possible the early could be of a node was cut from the stairs for pacing, and its render was left in the resources.
Clock Tower#
|
Early |
Comparison Shot |
|---|---|
|
|
|
This early of the going down the Clock Tower's stone spiral staircase (at an unknown position). It early render looks more like actual stone. Whereas the final is shaded in a mix of bright and dark colours, to make it generally look more atmospheric. I also can't tell in the early, if there's a larger step below where the player is, which isn't a feature of the spiral staircase in any in-game view.
This is an unused angle standing near the top rung of the ladder into the Clock Tower Room. There's nothing noticeably different in this compared to other in-game shots of the room, except the that the camera itself is angled lower as somebody would be if they were climbing a ladder.
|
Unused Shot |
Unused Shot (Alternative) |
|---|---|
|
|
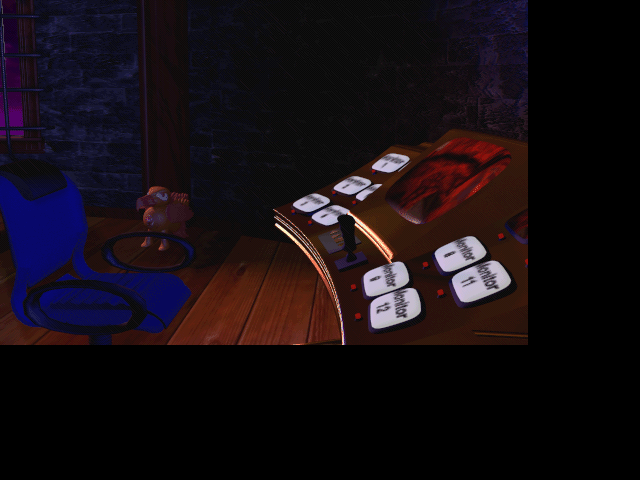
These views of the surveillance cameras in the Clock Tower are never accessible, so the monitors show their number instead of an actual image. Most likely, said numbers were used as reference in development.
Library#
|
Unused (Left) |
Unused (Right) |
|---|---|
|
|
|
The two cabinets where the sliding ladder is, were seemingly going to be storage containers or at the very least, viewable. This isn't the case in the game, making it the only bookshelf in the library where none of the cabinets are viewable.
Ground Floor / Basement Corridors#
Used |
Unused |
Used |
|---|---|---|
In the Ground Floor Corridor, there was originally a render between standing in front of the skull door, and the closeup of the security camera (which is an in-game animation positioned just below the black box in the second used render). As with most cut mid-positions, it was likely cut for pacing, so you wouldn't have to click twice to look at the security camera.
|
Unused |
Unused |
|---|---|
|
|
|
It seems that at some point you were able to stand in front of the skull door, whereas in the game the final node of the corridor is considerably further back (in line with the middle of the elevator doors), so these two renders of looking left and backwards practically directly in front of the skull door go unused.
|
Unused |
Unused |
|---|---|
|
|
|
There are renders of the player looking down at Beth's note with her friend, and her high school report card. Room numbers 10131 and 10141 exist in-game with full functionality, so it seems it was originally intended that you could look down at the floor before clicking on the note / report card, like you can with her school id. The above renders are not entirely unused, the edges of them are present behind the superimposed graphic of the item in question; In this form though, they are unused.
|
Unused |
Used |
|---|---|
|
|
|
The enemy of Myst-like games strikes again, pacing, and takes out a view of Beth's handbag from the bottom step of the first flight of stairs down to the basement corridor. Instead the node skips from the middle of the stairs to standing directly in front of her handbag from the middle of the landing between the two sets of stairs, leaving that render unused.
Similarly to Beth's note and report card, her handbag originally had a closeup render for looking down at it. Room 10201 also exists in the game with full functionality, so it seems it was also cut for pacing. When you click the handbag from multiple views, it goes straight to an interactable view of her handbag upright.
|
Unused |
Closest Location |
|---|---|
|
|
|
The only hotpoint(s) in the 'Closest Location' shot are the doorway to the right or turning back around, and clicking the doorway hotspot takes you to a render of standing in the doorway, leaving this render of standing in front of the wall to the left of the doorway unused.
Museum Power Plant#
|
Unused |
Used |
|---|---|
|
|
|
This closer shot of equipment distributing power from the Museum Power Plant to the museum, is unused. It's not obvious whether this was meant to be an extra node you could click on to from the used render, or if the positioning of the camera was later adjusted.
|
Unused |
Used |
|---|---|
|
|
|
I assume that's the fuel tank in the "Power Plant". This angle of it further back from the rough position of the previous unused render is never used; It makes it more likely that a node that was cut. It's obvious why it was cut, the room is rather pointless already. The whole room essentially exists to explain how the museum has power 15 years later.
|
Unused |
Used |
|---|---|
|
|
|
Similarly, this render of standing in front of the box with tubes coming out of it, looking towards the fuel tank and the barrels of petroleum goes unused. The used render is of the player looking in that direction next to the fuel tank.
|
Unused |
Used |
|---|---|
|
|
|
Finally, an unused render of standing in front of the door to the plant's generator room. Unlike the others, this render's camera is positioned next to the fuel tank. When you turn to the door from looking at the barrels, you are closeup to the door (the used render), so likely another example of cuts made to make the pacing feel better and reduce the overall amount of clicks.
Tombs and Curses Exhibit#
|
Unused |
Used |
|---|---|
|
|
|
There's an unused render of the player positioned further back, positioned essentially in the Second Floor Landing's doorway to the Tombs and Curses Exhibit. The only remnants of this render is that part of it is used as the image showing the room when those doors open. It implies that the player was originally going to step into the doorway, instead of the used render which is a step or two forwards from that position.
Unused |
Unused |
Used |
|---|---|---|
You cannot look at the speaker, there'd be little point in doing so anyway, since the button itself is interactable from other views inside and outside of the exhibit. I assume the first unused render was intended for if you look at it from outside the exhibit, and the second unused render was intended for looking at it from inside the exhibit.
|
Unused |
Reference Shot |
|---|---|
|
|
|
This is an unused angle of the pillars, tombstones (I think?), and stairs which lead to the door to the Funeral Rites Exhibit. Unlike the Reference Shot, which is visible in-game from the main entrance to Tombs and Curses, the unused render seems to have been taken from the other side of the exhibit. To get to the bottom of those stairs from the opposite wall of Tombs and Curses takes three clicks (forwards, right and forwards again), whereas including that render would've reduced it to two (towards the stairs, and towards the stairs again). So, no idea why it was cut.
|
Unused |
Used |
|---|---|
|
|
|
Presumably, in order to aid movement in front of the Tomb of the Ixupi: The render for when you turn right from the entrance (the wall with the secret panel), has an unused graphic positioned further away. Assuming both renders were intended to be used, this does have the benefit of not having to click three times to open the secret panel, which was probably the intention.
|
Unused |
Used |
|---|---|
|
|
|
This shot of slight further inside the entrance to the Tomb of the Ixupi is either an early version of the used doorway shot, or an unused node that was cut in favour of having the player clicking to get one of the three closeups of the plaques or mural. This render must have been cut rather early, as none of the plaques have had their respective Ixupi's South American Pictograph added.
|
Unused |
Unused |
|---|---|
|
|
|
These two "look down" shots of the symbol in the centre of the Tomb of the Ixupi's floor go unused. The first render goes unused because when you click the symbol from the entrance, the next render is a closeup of Beth's locket (featuring a taped-in picture of Merrick), which was abandoned in the middle of the symbol when Beth and Merrick decided it would be a great idea to open all of the pots constraining the Ixupi. The other render goes unused because the symbol is out of shot from the exit.
|
Unused |
Used |
|---|---|
|
|
|
This is one of those moments where you really have to question why something was cut. The cut version of standing in the doorway of the Tomb of the Ixupi (looking towards the entrance to the Funeral Rites Exhibit) looks more interesting, it feels more eye line (like you're looking forwards), and there's a lot more going on in the top third of the image. Who knows why it was cut.
|
Unused |
Unused |
|---|---|
|
|
|
This is actually rather simple to explain. You can't look left or right from the doorway of the Tomb of the Ixupi (looking towards Funeral Rites' entrance), doing so turns you back to the display itself, so these two renders of looking left towards the plaque for the display and right towards the display's skulls dial, were both cut.
An unused closeup of the back wall of Tombs and Curses, which leads into a sphinx and sarcophagus display about the 'Columns of Ra'. The camera seems to be placed in the archway into that particular part of the exhibit, a position that you can't stand in-game, so you never get to see this close up of Anubis giving you side eye.
Very few, if any, of the museum's plaques allow you to see a closeup like this. Like the others, the Sphinx Plaque can be clicked on from multiple different shots for an extreme closeup of the plaque's text. So, this render goes unused.
|
Unused |
Used |
|---|---|
|
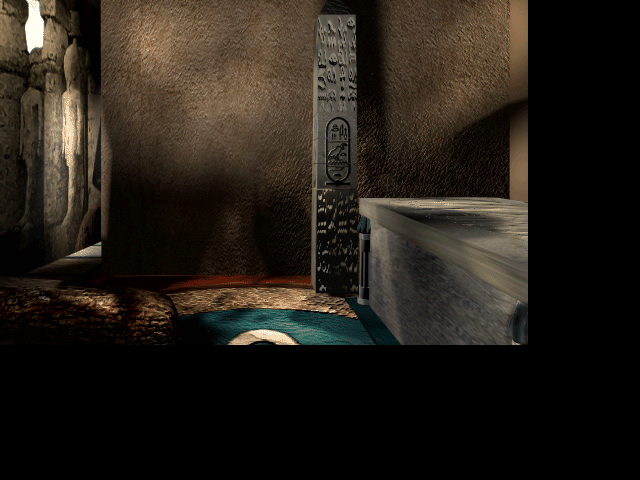
|
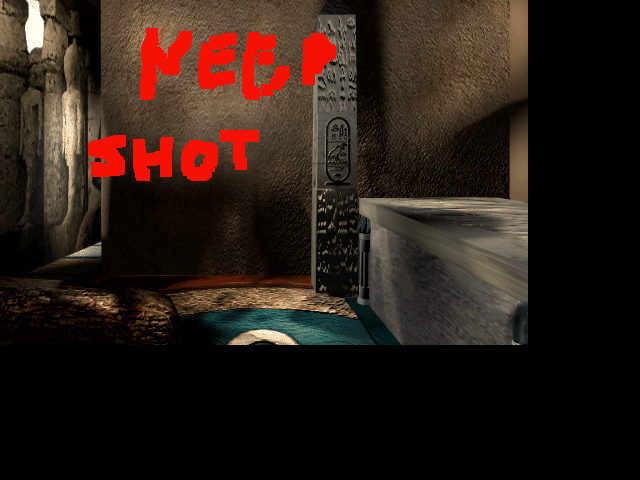
This picture has a duplicate with NEED SHOT crudely written over it. It's unknown what shot was needed, exactly. Possibly, it might've been that there wasn't yet a render of that shot with the sarcophagus open.
|
Unused |
Unused |
|---|---|
|
|
|
Two unused renders of looking at the 'Columns of Ra' Sphinx, from the left and right at an angle. There's already a lot of movement-related shots in that area of the exhibit, so it makes sense if they were cut to prevent navigating the area becoming annoying.
|
Unused |
Used |
|---|---|
|
|
|
An unused render of looking up at the representation of the Great Sphinx of Tanis above the sarcophagus, where the camera is zoomed out more and position further back than the used render. For looking up at what's above the sarcophagus... The unused render has a bit too much going on, whereas the used render is tight and focused.
|
Unused |
Used |
|---|---|
|
|
|
An unused render of the corner which leads to the Curse of Anubis Display, which is to the right of the sphinx. It might've been cut because the renders of looking at the sphinx from the left and right at an angle were cut; The positioning of the unused render here is a similar camera position to the right-sided render.
|
Early |
Final |
|---|---|
|
|
|
Finally, an early render of standing at the archway which leads into and out of the 'Columns of Ra' area, albeit considerably lower and more left than the final render. I'm leaning more towards it being an early render than an unused shot, because it hasn't had the column sections on the far left of the image blacked out (so views could be placed over them showing the front-faces of the three rotating sections of the second column).
Funeral Rites Exhibit#
|
Early |
Final |
|---|---|
|
|
|
This is an Early Render of inside the building next to the Paracas Burial plaque in the Funeral Rites Exhibit. Notable differences in the Early Render are a different stone texture, different lighting and shading, the basket being untextured, and the lack of cloths present in the Final.
Early |
Final |
Reference Shot |
|---|---|---|
This is an Early Render of the exit to that building from inside. Notable differences in the Early Render are a different stone texture, different lighting and shading, the table on the far left having a front face which isn't present in the final (it looks more like a shelf than a table in the final), and most notably, the skulls dial for 'Viking Burial' is placed in a wildly different location (compared to the Reference Shot), which seems uncomfortable to reach.
You cannot look dead on (no pun intended!) at the lion coffin next to the 'Spectacular Coffins of Ghana' plaque, only a side view and two closeup shots of it from similar angles are used in-game, so this render goes unused. It isn't notably different from other renders of this area of the exhibit, except that it features the same oversight as the three other renders of the coffin (where the renders are missing the Jade Skull, which in this the above render should be at least partially visible in the gap of its two front paws).
|
Early |
Final |
|---|---|
|
|
|
Finally, an Early Render of the exit to the Shaman Exhibit. In the Early Render, the camera is positioned higher up and slightly closer to the door. The noticeable differences are the ash table on the far right is lit differently in the Early, and the door and plaque has better lighting and shading in the Final.
Shaman Exhibit#
|
Unused |
Reference Screenshot |
|---|---|
|
|
|
In the above form, this is an unused render of Funeral Rites' entrance to the Shaman Exhibit. Part of this render is used as the graphic for when you open the door to the exhibit, as seen in the Reference Screenshot. The game's manual states that different artists worked on each exhibit of the game to make them stand out from one another, so it's likely that all the museum's rooms never existed in 3D one complete 3D space, leaving the developers having to piece together renders from different developers to create doorways.
|
Unused |
Reference Shot |
|---|---|
|
|
|
This is an unused render of looking at the wall to the right of the wax figurine of a person. It is unused because you cannot turn 90 degrees right in the Reference Shot, clicking the hotspot instead uses a render of the opposite direction, looking towards the Shaman Hut.
|
Unused |
Reference Screenshot |
|---|---|
|
|
|
Finally, this is an unused render of standing right at the front of the doorway of the Shaman Exhibit's entrance to Gods and Religious Items. You can't stand in that specific location in-game (the nearest node is the Reference Screenshot, and the next node is in the middle of the space between the two exhibits). The black background implies a View was going to be layered over it in-game (as is the case with most doorways), and an interesting thing to note is that the floor of the unused render doesn't have the wooden strip in the middle that goes about half way into the doorway (as seen in the Reference Screenshot).
Gods and Religious Items Exhibit#
|
Unused |
Used |
|---|---|
|
|
|
An unused render from the Gods and Religious Items Exhibit, standing slightly further away from the Giant Buddha made of stone. It was likely cut to make the reference point in the render more explicitly the Giant Buddha, and not the other statue to the left (which I think is a tino aitu?).
|
Unused |
Reference Shot |
|---|---|
|
|
|
I assume at some point, this wide shot was meant to be the render you saw when you turned around from looking at the Giant Buddha. Instead, when turning around, you see a partial closeup of the Ti'i (the Reference Shot), leaving a render unused.
|
Unused |
Unused |
|---|---|
|
|
|
|
Closest Location |
Closest Location |
|---|---|
|
|
|
There is an entire node cut from navigation in the exhibit's Celtic, Greek and Sumerian Gods section. It was almost definitely cut for pacing, given how many clicks it already takes to get from the door to Myths and Legends, to the Sumerian Lyre. The only noticeable difference in both unused render(s) compared to the Closest Location(s) is a near total overhaul of shading and lighting, making everything look more scary and defined.
|
Unused |
Unused |
|---|---|
|
|
|
|
Used |
Used |
|---|---|
|
|
|
There are unused closeup renders of the entrance and exit of the Sumerian Lyre & Bull display. It is unknown if the used renders were meant to directly replace the unused renders, or if there were originally closeup nodes of the entrance and exit, and they were cut for pacing.
Unused |
Unused |
Unused |
Unused |
|---|---|---|---|
Finally, four unused closeups of plaques in Gods and Religious Items. The first unused render is a closeup of the plaque next to Thor's horse-drawn carriage. The second unused render is a closeup of the plaque next to the Sumerian Bull God, An. The third unused render is a closeup of the plaque to the left of the Sumerian Lyre. The fourth unused render is a closeup of the plaque to the right of the door to the Myths and Legends Exhibit.
Myths and Legends Exhibit#
|
Unused |
Reference Shot |
|---|---|
|
|
|
Only one render was cut from the Myths and Legends Exhibit; It's of Merrick's bag. Clicking on the bag visible in the Reference Shot, takes you to an overhead closeup render of the now-opened bag, leaving this front closeup render of it unused.
Myths and Legends (Back Corridor)#
|
Unused |
Used |
|---|---|
|
|
|
An unused render of the entrance to the Janitor's Room / Toilet that's part of in Myths and Legends' Back Corridor to the Planetarium. Other than being closer, the noticeable differences are a different door design (featuring a different doorhandle / panelling, and a gold plaque), and the only visible shot of the room's lightbulb (it is not present in any other shot of this room, making it look as if the room is lit by the elusive invisible bulb).
|
Early |
Final |
|---|---|
|
|
|
An Early Render of looking out of the Janitor's Room / Toilet into the Myths and Legends' Back Corridor. Noticeable differences compared to the final, are a different floor colour for the corridor, the same differences in door design, plus some of the elements are rendered higher (revealing the top of the archway back to the Myths and Legends Exhibit. There's also a red tint (presumably from the bulb?) and considerable differences in shading and lighting, especially across the right side of the left doorframe.
Planetarium#
Used |
Unused |
Used |
|---|---|---|
This is a cut closeup render of the top railing of the stairs leading from the Planetarium into Myths and Legends' Back Corridor. Clicking forwards in the first used render of the staircase, takes you to the second used render, skipping the middle render, likely for pacing.
Unused (Early) |
Unused (Final) |
Used |
|---|---|---|
Here is an Early / Final Render of seemingly, looking at the Space Pool (for lack of a better word) below the Planetary Alignment Puzzle before its complete. You can only look there after you've completed the puzzle so the both renders go unused. The only difference between Early / Final are changes in colour and shading. The camera positioned slightly more forwards and left is the only real difference between the Unused / Used Render(s), as the change in position of the planets is puzzle-related.
|
Unused |
Unused (Alternative) |
|---|---|
|
|
|
|
Closest Location |
Closest Location (Alternative; Screenshot) |
|---|---|
|
|
|
Two unused "look down" renders of looking towards the UFO from the left of the space-themed pictogram puzzle. You can't look down from this location, so you don't get to see the constellation(?) that's been painted on the floor below the UFO. Personally, I think the unused renders could've been left in the game, they add something material that's hard to see from other angles.
|
Unused |
Used (Screenshot) |
|---|---|
|
|
|
This is an unused render of looking towards the UFO from the left of the space-themed pictogram puzzle, after the UFO has been opened by completing the puzzle. The render of the UFO closed (Closest Location in the previous set of images) has a view of the opened UFO layered over it, leaving an unused full render of it opened. Material differences in the Unused Render are the UFO opening more, the polaroid camera being larger and without its polaroid (this could have been a view intended to be added later), a minute change in camera position and differences in colour and shading.
|
Unused |
Used |
|---|---|
|
|
|
This is an unused closeup of the polaroid camera underneath the UFO. When you click on the polaroid camera, the other closeup is used. Instead of being cut for pacing, it was likely cut because the polaroid camera has major differences when compared to the used closeup, and other renders featuring it. Consistent with other unused renders of the polaroid camera, it seems it was originally going to be larger, and featuring a slot for the image to come out of. In the unused closeup, it also isn't casting a shadow towards you.
|
Unused |
Used |
|---|---|
|
|
|
Finally, an unused closeup of the door to the Strange Inventions Exhibit. The door opens from the render further away, and clicking on the opened door from that render takes you into the exhibit, leaving the render standing closer to the door unused. Strangely, the closeup render of the door is Pic30490, the 30xxx range of picture numbers are reserved for renders in the Strange Inventions Exhibit, not the Planetarium.
Strange Inventions Exhibit#
An unused render positioned roughly at the door of the Strange Inventions Exhibit, which leads back to the Planetarium, aiming diagonally across the first half of the exhibit, towards the pyramid secret entrance and the sealed 'Par Avion' box.
|
Unused |
Used |
|---|---|
|
|
|
By the time you've clicked for a closeup of the box containing the scythe, you've already opened the box by clicking on it from further away, so this closeup render of the box with its lid closed is never used.
|
Unused |
Used |
|---|---|
|
|
|
This is an unused render of standing further back from a sealed 'Par Avion' box, roughly from a reversed 180 degree render of the box containing the scythe.
|
Unused |
Used (Screenshot) |
|---|---|
|
|
|
When you click forwards in the opening of the opened pyramid, you go straight into the third floor portion of the Second / Third Floor Secret Passages, leaving this closeup render of the opened passageway unused.
|
Unused |
Used |
|---|---|
|
|
|
This is an unused render of standing further back from the box containing the axe, roughly from a reversed 180 degree render of the box containing a wooden sculpture.
|
Unused |
Used |
|---|---|
|
|
|
By the time you've clicked for a closeup of the box containing the axe, you've already opened the box by clicking on it from further away, so this closeup render of the box with its lid closed is never used.
|
Unused |
Used |
|---|---|
|
|
|
This is an unused render of standing further back from the box containing a wooden sculpture, roughly from a reversed 180 degree render of the box containing the axe.
|
Unused |
Used |
|---|---|
|
|
|
By the time you've clicked for a closeup of the box containing a wooden sculpture, you've already opened the box by clicking on it from further away, so this closeup render of the box with its lid closed is never used.
|
Unused |
Closest Location |
|---|---|
|
|
|
This is a render of an unused node that would've presumably been accessible by clicking forwards, after turning left from looking at the front of the Alchemical Machine box. Likely this was cut for pacing, not giving the player a larger than necessary amount of nodes to travel to and from.
Unused (Early) |
Unused (Final) |
Unused (Opened) |
|---|---|---|
These are three unused renders from that node, with the camera rotated a further 90 degrees to look towards the back wall of the exhibit and the left side of the Alchemical Machine box. The only obvious difference between the Early and Final Renders of the box closed is that the Final seems to have considerably better colouring and shading.
|
Unused |
Unused |
|---|---|
|
|
|
These are two unused renders from that node, with the camera rotated a further 90 degrees to look towards the Alchemical Machine box, and the rest of the exhibit.
This is an unused render from that node, with the camera rotated a further 90 degrees to look towards the door to the Man's Inhumanity to Man Exhibit.
Unused (Closed) |
Unused (Opened) |
Unused (Completed) |
|---|---|---|
All three renders of the Alchemical Machine's box (one of the closed box, one of it opened, and one of the machine's secret compartment opened by completing the puzzle) from an entirely different cut node, are also unused. As with the other cut node, they were likely cut to aid the player's movement in the area, for pacing.
|
Unused |
Used |
|---|---|
|
|
|
Finally, you can't get a closeup of the Alchemical Machine puzzle once its complete, and the Ixupi piece can be taken from the machine's compartment once you've completed puzzle from a render positioned further back, leaving this render unused.
Second / Third Floor Secret Corridors#
Second Floor Secret Corridors#
Early Renders
Above is a TON of Early Renders of the Second Floor Secret Corridors. Generally, the floor and walls are textured slightly differently in the Final Renders, while the colouring and lighting is considerably less foreboding and ominous in the Early Renders.
|
Early |
Final |
|---|---|
|
|
|
|
Early |
Final |
|---|---|
|
|
|
An early render of facing two of the paintings in the Second Floor Secret Corridors. In both Final Renders, the image has been flipped horizontally and has a different frame, and the camera / painting are both in different locations. In the first Early / Final Render, the wallpaper isn't ripped in the Early Render.
|
Unused (Facing Left) |
Unused (Facing Right) |
|---|---|
|
|
|
|
Used (Facing Left) |
Used (Facing Right) |
|---|---|
|
|
|
The elevators need a special flag (presumably for Sierra On-Line's developers and testers) to keep them open. So, to the general public, these are unused.
|
Unused |
Used |
|---|---|
|
|
|
This is an Unused Render of one of the corridors. The only notable different is in colouring and lighting, but personally I think they've made a mistake: I think they've mistakenly used the earlier version of the corridor in the script for this position, because the lighting in the unused render is much more consistent with the other corridors, whereas the used render looks quite washed out.
Staircase - Early

Staircase - Final

These are Early / Final Renders of the Staircase between the Second Floor Corridors and Third Floor Corridors. The floor has an entirely different texture in the Early Renders, and the stairs are a different style too. Also, the walls and ceiling have different colouring and shading, which makes them look less scary in the Early Renders.
Fortune Teller Room#
|
Unused |
Used |
|---|---|
|
|
|
Unlike the Ixupi Vessel trapping Beth's spirit inside of it, you cannot get a closeup of the Ixupi Vessel trapping Merrick's spirit inside of it in the Fortune Teller Room, until you've broken it and witnessed his ghost, so the closeup render of the complete vessel is never used.
|
Unused |
Used |
|---|---|
|
|
|
Since the door back to the Second Floor Secret Corridors can be opened and walked through from the used render, the closeup render of that door goes unused.
Third Floor Secret Corridors#
Used |
Unused |
Used |
|---|---|---|
An unused render of walking down the stairs from the Third Floor Secret Corridors back into the Second Floor Secret Corridors. It was a node likely skipped over for pacing; The reason the corridor beyond the stairs is black is either because it would've been added as a view, or that the render of the corridor was never added to it.
Third Floor Secret Corridors - Early
Third Floor Secret Corridors - Final
A bunch of Early / Final Renders of the Third Floor Secret Corridors. As with the Second Floor Secret Corridors, there are major differences to do with colouring and lighting, as well as different textures for the floor, walls and ceiling. Additionally, the Final Renders have different object placement(s) in some shots.
Unused (Early) |
Unused (Early) |
Unused (Early) |
|---|---|---|
Three unused Early Renders of the Third Floor Secret Corridors that cannot be matched to a Final. The first Early is facing the opposite wall of the long corridor to the secret exit, which you cannot look at in game. The second Early is a side-on look at elevator doors, which you also can't do in-game. The third Early is looking at an unknown corner piece (it might mean that the 3D layout of the corridors were slightly different when then the Early Render(s) were created).
|
Early |
Final |
|---|---|
|
|
|
An Early Render of the secret exit from the Third Floor Corridors into the Strange Inventions Exhibit. The only major difference is colouring and shading, there's also considerable, but relatively subtle, graphic manipulation in the Final, on the right edge of the frame of the doorway.
I have no idea what this is. The first two digits of this room picture (Pic33290), 33 is allocated for renders of the Third Floor Secret Corridors, but this wall... Doesn't exist anywhere!
Man's Inhumanity to Man Exhibit#
|
Early |
Final |
|---|---|
|
|
|
This is an Early Render of the door which leads from the Man's Inhumanity to Man Exhibit, back into Strange Inventions. The only difference between the Early / Final Render is a difference in colouring and shading, which makes the door look slightly more ominous in the Final Render.
|
Unused |
Reference Shot |
|---|---|
|
|
|
When you are looking towards the side of the gallows (the Reference Shot), there is no option to turn around 180 degrees, which leaves this render of looking at a wall unused. There's already a lot of shots of the gallows display, so this being unused makes sense; You don't gain anything interesting or useful from the unused position.
|
Unused |
Used |
|---|---|
|
|
|
This is an unused closeup of standing in the middle of the landing between the two sets of stairs up to the gallows itself. I have no idea why the unused render was even created, because the used render makes it pretty clear where you are.
|
Unused |
Closest Location |
|---|---|
|
|
|
The door to the Puzzle Exhibit opens from the Closest Location shot, and you can go through it from that render, which leaves a closeup render of the door unused. The only interesting difference in the unused closeup is the lack of a doorhandle.
|
Unused |
Closest Location (Screenshot) |
|---|---|
|
|
|
This render positioned roughly inside the door, facing back towards the corridor and the gallows, in this form, is unused. It is only partially used as the doorway image for the door back to Man's Inhumanity to Man in the Puzzle Exhibit.
Puzzle Exhibit#
|
Unused |
Reference Shot |
|---|---|
|
|
|
This is an unused closeup of the button for getting an audio description of the Puzzle Exhibit from the museum announcer. As seen in the Reference Shot, the design of the button is entirely different in the unused render; The model seems to be reused from the one used in the Tombs and Curses Exhibit. It is also placed further closer to the wall in the Reference Shot.
|
Unused |
Used |
|---|---|
|
|
|
This is an unused render of the wall which leads to the pinball puzzle. The only difference between the Used / Unused Render is the inclusion of part of the floor in the Used Render.
|
Unused |
Used |
|---|---|
|
|
|
This is an unused "look down" render of the closeup of the wall which leads to the pinball puzzle. It seems that at some point you were able to look down at this location, to see more of the floor, which is relatively pointless.
Unused |
Unused |
Unused |
Unused |
|---|---|---|---|
A node was apparently cut, positioned in the middle of the far right wall of the first room of the Puzzle Exhibit, so all four of these renders go unused. The first unused render is facing the wall. The second and third unused renders are looking left towards the wall pinball puzzle corridor (I think its good these two renders are cut because they ruin the optical illusion of the wall). The fourth unused render is right towards the wall with the secret panel leading to the exhibit's entrance / exit corridor.
|
Unused |
Used |
|---|---|
|
|
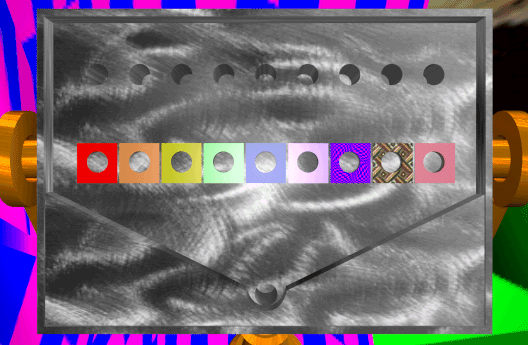
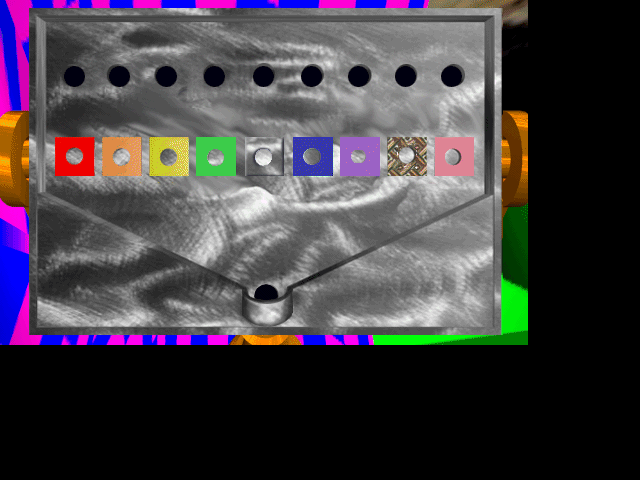
The third slot from the right originally had the same pattern as the walls of the room (visible behind the puzzle itself). This was later replaced with a more place light-purple color. The top row of holes change from indents to actual holes, and a catcher was placed at the bottom of the device.
Puzzle Room#
|
Unused |
Used |
|---|---|
|
|
|
The door in the Puzzle Room (which leads back into the bridge in the Puzzle Exhibit) never closes from inside, so this render of the door closed from the inside goes unused.
You cannot turn around when you're standing on top of the closed trapdoor. So, this shot of the door closed from further back goes unused.