 This article has a talk page!
This is a sub-page of Proto:Mega Man X5.
|
This prototype is documented on Hidden Palace. |
A later build of Mega Man X5, dated July 28, 2000, and released during Project Deluge. Although this build is far more complete than the May 1, 2000 prototype, it is still unfinished in many places (particularly cutscenes) and has many debugging features enabled.
General Differences#
- Cutscene stills are incomplete in this build, generally taking the form of low-quality drawings or storyboards.
- Most of the prototype-exclusive music tracks found in the May, 1st, 2000 prototype have replaced with the final music tracks.
- All stages can be accessed and played through.
- The Enigma Cannon has a much higher chance of success with all four parts than in the final.
- As in the May 1st, 2000 prototype, all characters still retain their X4 voice clips. The X Buster's charging motion still uses the X4 sprites, as well.
- Story dialogue is partially implemented - multiple sections in later stages re-use dialogue from the Intro stage.
- Although most menus, starting with the pause menu, can be accessed in this build by default, they're still more or less incomplete, and use leftover graphics from X4. This is likely because, unlike the May 1st, 2000 prototype, this build was not designed to be shown to the public.
- Both the main route (Zero remains on the Maverick Hunters' side) and alternate story route (Zero turns Maverick) are partially complete, with bare-bones graphics acting as temporary cutscenes. Notably, the cutscene that plays in retail builds after the X VS. Zero fight does not play in this build.
- Both X's regular ending and Zero's ending use the same template.
- Unlike the May 1st, 2000 prototype, Eurasia's timer mechanic and the events that occur when the timer expires function in this build as in the final.
- Boss Level mechanic is bugged; It seems the non- Lv.96 bosses will always use the level increasing rate under MEH/MMH rank regardless of X/Zero's current rank.
- The credits are re-used from X4's, though the music is not present. The credits instead play the Shadow Devil theme.
- Unlike the May 1st, 2000 prototype, Zero's ground slash combos can be cancelled via crouching.
- You can hold Start and Select to force the game to soft reset just like in X4, the May 1st, 2000 prototype and the final version of X5. Unlike the retail builds of X4 and X5 and the May prototype, however, this functionality also works in cutscenes.
- The "Load from Previous Data" mechanic has a glitch in this build related to this. If the timer ends, and the player soft resets after loading the incomplete "Zero Virus Discovered" scene, that cutscene will loop infinitely.
Opening Cutscene#
|
July Prototype |
Final (Japan) |
|---|---|
Noticeably incomplete compared to the final build. No music is present at this point, and various illustrations use provisional sketches as placeholders. Dynamo does not appear alongside the 8 Maverick bosses, and certain animation effects and transitions are missing.
|
July Prototype |
Final (Japan) |
|---|---|

|
|
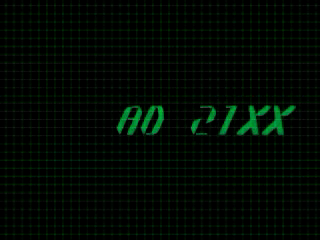
The text shows 2XXX instead of 21XX which was used in final.
|
July Prototype |
Final (Japan) |
|---|---|
|
|
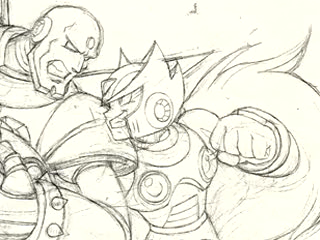
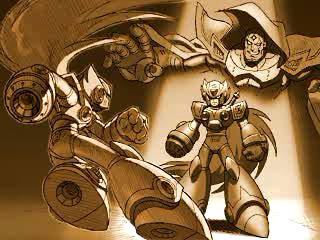
Both July prototype and final displayed a scenario which Zero is fighting Sigma; the July prototype used barebone sketches of one flashback scene in Zero's ending (Maverick Zero fighting Commander Sigma, prior to the first Mega Man X), while the final version was given a new flashback scene (Zero fighting fake Zero and Neo Sigma in Mega Man X2).

|
To do: |
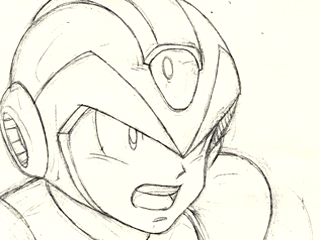
Different barebone sketch #1.
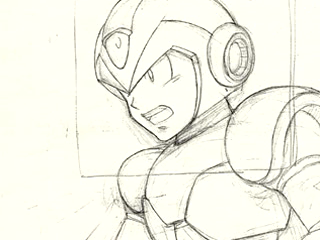
Different barebone sketch #2.
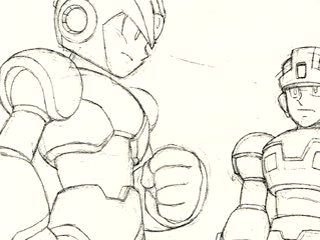
Different barebone sketch #3.
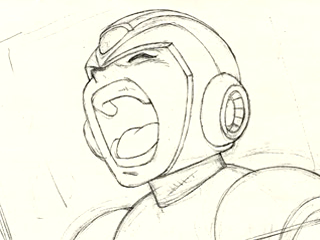
Different barebone sketch #4. This sketch is noticeable as it went unused and couldn't match any finalized variant in final cutscene.
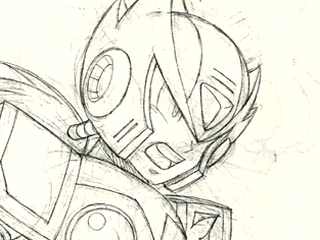
Different barebone sketch #5.
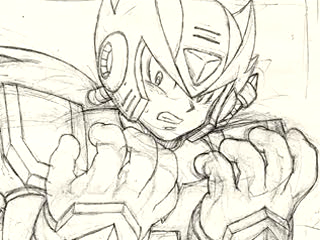
Different barebone sketch #6.
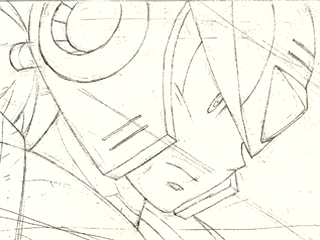
Different barebone sketch #7.
|
July Prototype |
Final (Japan) |
|---|---|
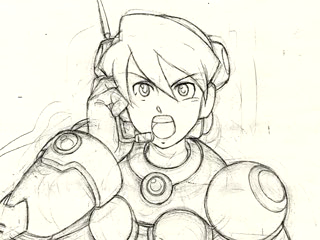
|
|
|
July Prototype |
Final (Japan) |
|---|---|
|

|
|
July Prototype |
Final (Japan) |
|---|---|
|
|
|
July Prototype |
Final (Japan) |
|---|---|
|
|
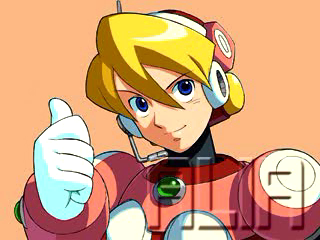
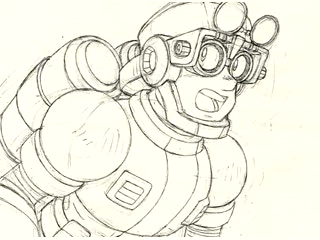
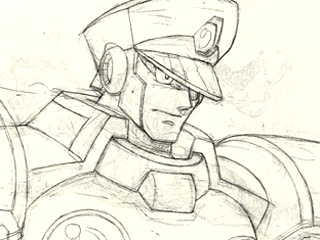
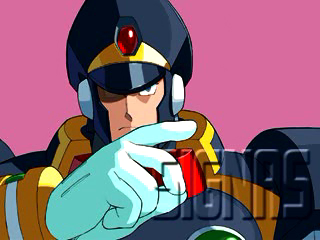
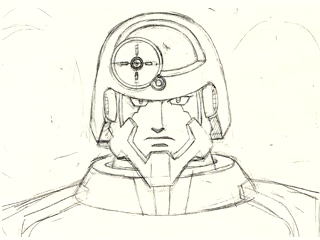
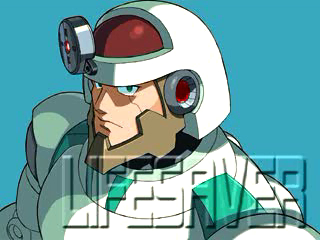
All four mugshots use different artwork in this prototype. In addition, they're ordered differently than in the release version — Alia, then Signas, then Douglas, then Lifesaver. The sketches seen in the prototype would later be finalized and used as certain cutscene mugshots for Alia, Signas and Douglas, with the latter two also being repurposed as promotional artwork.
|
July Prototype |
Final (Japan) |
|---|---|
|
|
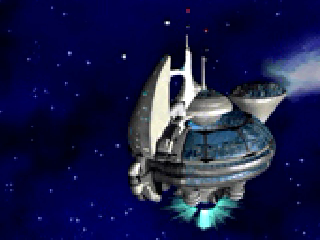
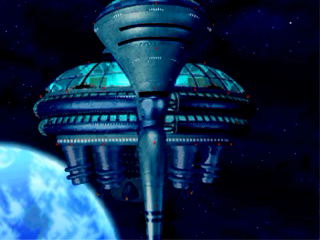
The shot of the Eurasia colony prior to the shuttle was redrawn and animated for the final version
|
July Prototype |
Final |
|---|---|
|
|
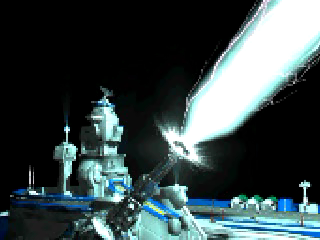
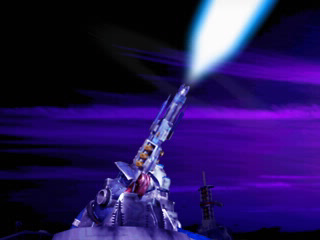
The Enigma cannon is rendered at a different angle, and does not yet have the blue filter present in the final.
|
July Prototype |
Final (Japan) |
|---|---|
|
|
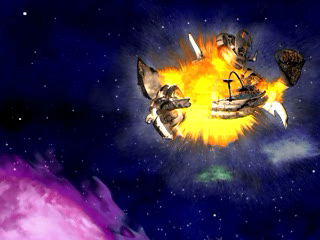
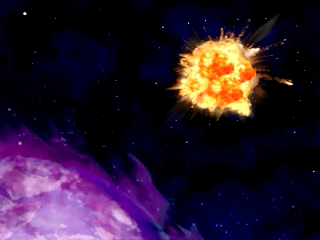
The July prototype has a close-up of the explosion, while the final version has it as large as in the rest of the cutscene.
Title Screen and Player Select#
|
May Prototype |
July Prototype |
|---|---|
|
|
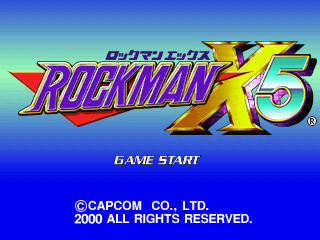
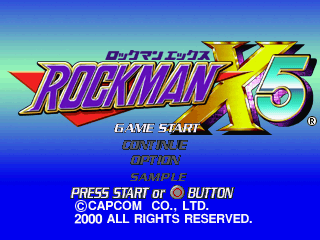
You can now continue from a previous save file and access controller configuration from the title screen, newly implemented since the May build. The "SAMPLE" button allows access to the Training stage -- which was inaccessible in the May 1st prototype.
|
July Prototype |
Final (Japan) |
|---|---|
|
|
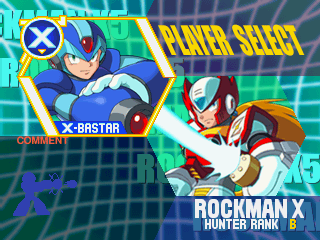
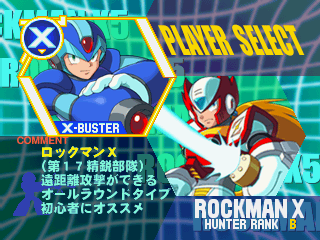
The player select screen from the May 1st, 2000 prototype has been updated to the final design, though the retail game's comments on X and Zero's characteristics are not yet present.
- On the player select screen, the X-Buster is misspelled as "X-Bastar", and the Z-Sabre is spelled Z-Saber, like the international version.
- Unlike the May build, the codes for unlocking Ultimate Armor/Black Zero work as in the final, mostly. A chime can only be heard when Ultimate Armor is activated -- no sound plays to indicate Black Zero's activation.
Weapon Menu#
|
July Prototype |
Final (Japan) |
|---|---|

|

|
|
July Prototype |
Final (Japan) |
|---|---|

|

|
Both weapon menus are slightly different from their final incarnation. The portrait image is a re-drawn version of the art from the player select screen, rather than the matching artwork X and Zero have in the final. Health & Energy tanks are centered, rather than in the top-right. The main weapon icon is not present, nor is the difficulty text at the bottom-center. Equipment & Ranking are positioned in the top-right corner, rather than the top-left. The colors on the hexagons which serve as icons for each special weapon are different, as well - red for Zero and blue for X, rather than the respective green and purple of the final release.
|
July Prototype |
Final (Japan) |
|---|---|

|

|
In Zero's in-game weapon menu, if Zero's Z-Buster is broken at Intro Stage, Z-Saber would replace Z-Buster's label and icon. However, in the July Prototype, what should be Z-Saber's label instead incorrectly says "ギガアタック (Giga Attack)". Interestingly, although final Japanese version corrected it, this oversight is not caught in final International versions.
Armors and Weapons#
- While Armor designs and special weapons were completed at this point, some sound effects are reused from X4. Zero's Quake Blazer reuses the sound of Hyouretsuzan in X4, X's Flash Laser reuses the sound of Aiming Laser.
- Although Black Zero has the Shock Absorber, Virus Buster and Shot Eraser, the shock absorber seems to not always work; Black Zero still receives knockback from certain attacks. The afterimage color for his black armor is still red like its X4 and May 1st, 2000 counterparts.
- Unlike in final builds, Dark Hold can be charged, and lasts significantly longer. The charged version seems identical to the uncharged version.
- Unlike in final builds, Ultimate Armor's Nova Strike can be executed infinitely and is capable to perform even after air dash or dash jump. This is probably a code oversight since Nova Strike can only be executed once in the air in X4.
- The Z-Buster's animation has been implemented, but it still uses a placeholder sound like its May 1st, 2000 counterpart.
|
Prototype |
Final(Japan) |
|---|---|
|
|
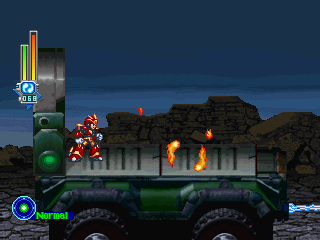
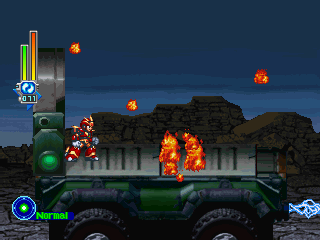
- Ground Fire was resprited for the final version. The sprite is much thinner and smaller in this build
Stage Select#
May Prototype |
July Prototype |
Final |
|---|---|---|
 |
 |
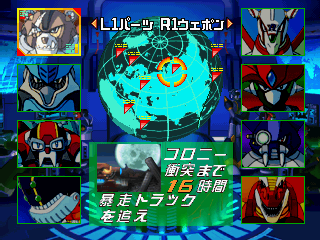 |
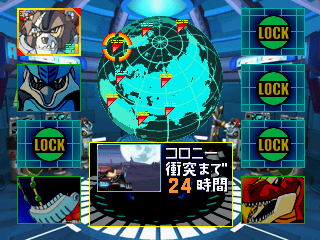
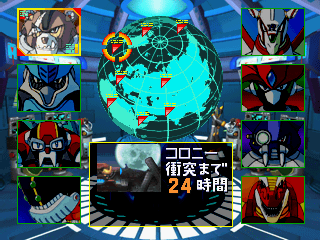
All Maverick stages are unlocked and playable. Character mugshots use their final design, though the stage locations on the globe are still the same as those seen in the May 1st build. Despite the labels are missing, the (relatively incomplete) screens for parts select and Eurasia operations are made functional.
- The intro stage, Crescent Grizzly/Grizzly Slash, Duff McWhalen/Tidal Whale, The Skiver/Spiral Pegasus, and Mattrex/Burn Dinorex have enemies placed near-identically to the retail build.
- Heart Tanks and Armor Capsules are in their final locations, although Sub Tanks and EX Items only appear using the debug menu. No Life or Weapon Energy drops are present in stages as in the final -- they only drop from enemies.
- The timer has 24 hours, like the previous build, and unlike the final game. The timer was evidently reduced very late in development.
- Players still have one last hour to choose stages/operations if the timer runs out. If the timer runs out upon returning to the stage select in the final game, Eurasia will crash immediately.
|
July Prototype |
Final (Japan) |
|---|---|
|
|
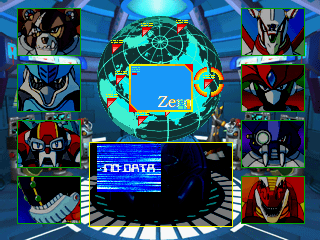
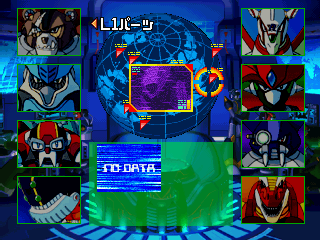
The world map graphic does not change for the bad ending route, the Dynamo fights, or the Sigma stages in this build.
Story Scenario#
|
|
To do: |
|
July Prototype |
Final (Japan) |
|---|---|
|
|
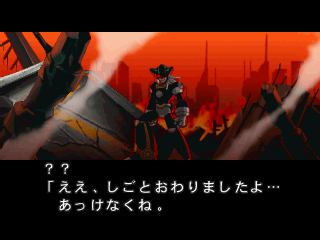
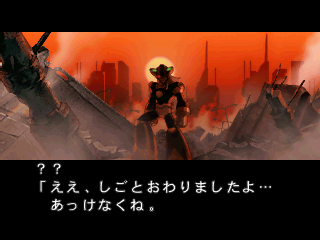
The foreground for Dynamo's introduction was redrawn for the Final, and the background (and Dynamo himself) received some shading and coloring adjustments.
|
July Prototype |
Final (Japan) |
|---|---|

|
|
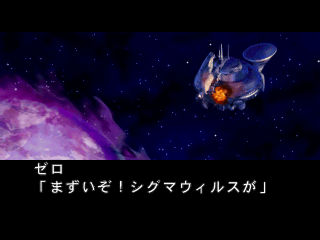
The angle of the Eurasia colony in the cutscene after the intro stage was changed between this build and the final, and a purple graphical effect was applied to Earth. Interestingly, the discolored image in the final version's staff credits uses the prototype variation.
|
July Prototype |
Final (Japan) |
|---|---|

|
|
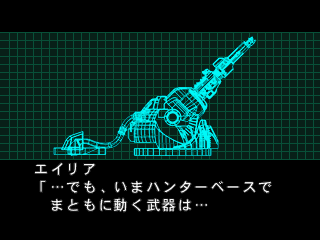
The model for the Enigma Cannon is fully modeled and textured here - it was rendered as a wireframe in final builds. The pre-release trailer included within Mega Man X Legacy Collection 2, interestingly, shows the prototype variation of this scene.
|
July Prototype |
Final (Japan) |
|---|---|
|
|
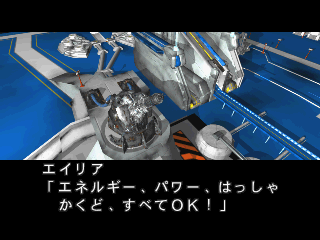
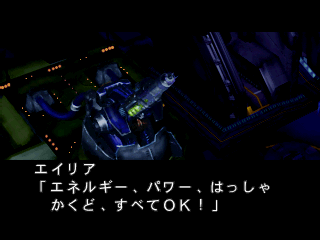
The preparation of the Enigma Cannon is rendered at a different angle, and doesn't have the final build's blue filter.
|
July Prototype |
Final (Japan) |
|---|---|
|
|
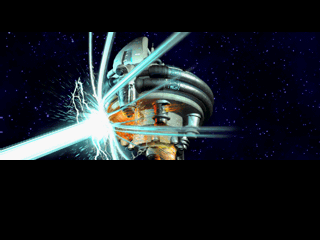
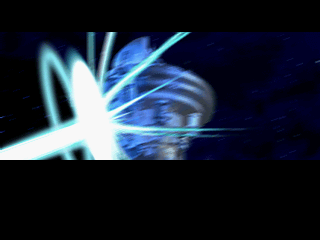
A blue effect was applied to the Eurasia colony, and the beam was given an oval-shaped starting point and a ring surrounding it.
|
July Prototype |
Final (Japan) |
|---|---|
|
|
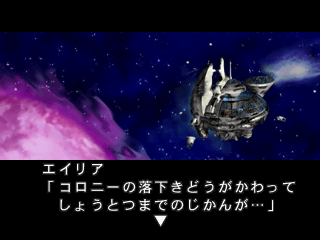
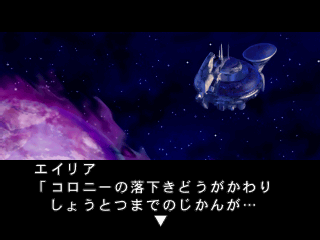
Eurasia is yet again rendered at a different angle, and the opacity of the purple effects over the earth is much lower - Earth is visible through it in the final, where it is completely opaque in this prototype. Eurasia is shaded a dark blue in the final, but not in this build.
|
July Prototype |
Final (Japan) |
|---|---|
|
|
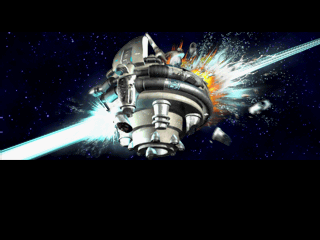
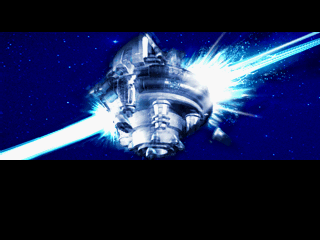
Eurasia is blue again, and an effect was added to make it appear as though shaking from the impact of the beam.
|
July Prototype |
Final (Japan) |
|---|---|
|
|
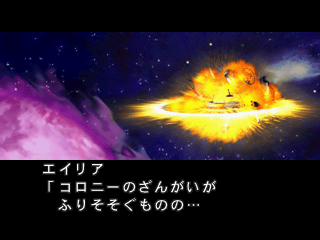
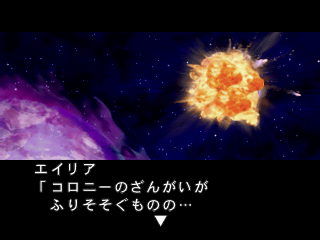
The explosion graphic was changed here. It is smaller, lacks the ring present in the prototype, and is positioned to match the location of the colony in the final build's version of this cutscene.
|
July Prototype |
Final (Japan) |
|---|---|

|

|
A detailed horizontal image of the rocket seen carrying the Repliforce Space Shuttle. Like the Enigma Cannon, this is rendered in wireframe in the final build.
|
July Prototype |
Final (Japan) |
|---|---|
|
|
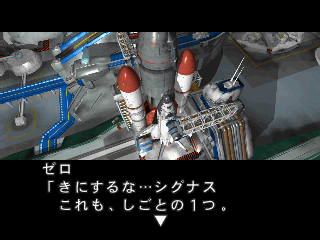
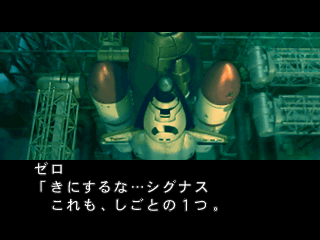
The Repliforce space shuttle is rendered at a different angle here than in the final. A green filter was applied to the final shot which is, like the other colored filters, not present in this build.
|
July Prototype |
Final (Japan) |
|---|---|
|
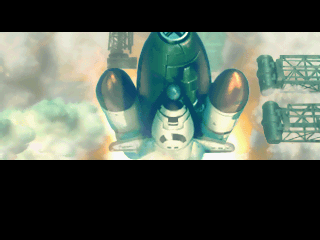
|
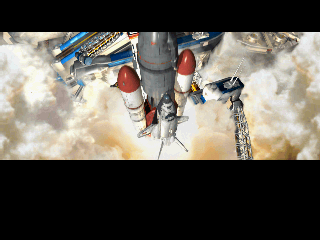
The shuttle launching. Both versions resemble the previous screen in both angle and color.
|
July Prototype |
Final (Japan) |
|---|---|
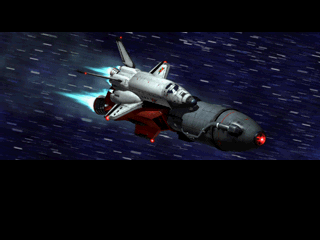
|
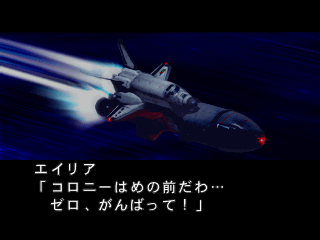
|
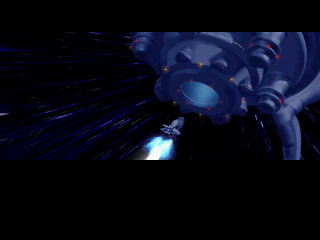
The speed-lines seen in the prototype were cut for the final, but the thrust effect was made much longer at the back of the shuttle. A blue filter was added, as well.
|
July Prototype |
Final (Japan) |
|---|---|
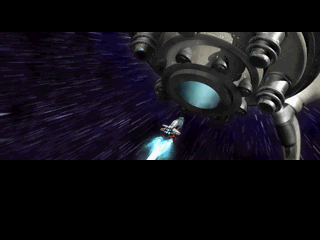
|
|
Eurasia has some red and yellow lights on it in the final which were not present in the prototype. This shot, too, has had a blue filter applied.
|
July Prototype |
Final (Japan) |
|---|---|
|
|
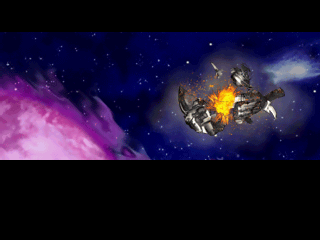
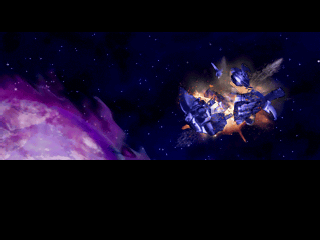
The explosion effect is much larger in the final, the purple effect on Earth is more transparant there than in this prototype, and there is a blue filter in the final.
|
July Prototype |
Final (Japan) |
|---|---|

|
|
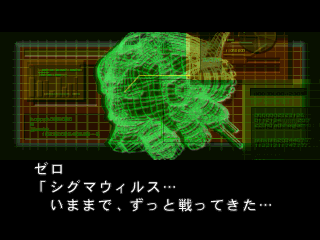
The scene where Zero reports to Hunter HQ about the Sigma Virus is completely different here - likely a placeholder, as it is far simpler than the final game's wireframe render of Sigma. Here we get a drawn wireframe of a circle, with some lines attached to boxes coming off it.
|
July Prototype |
Final (Japan) |
|---|---|
|
|
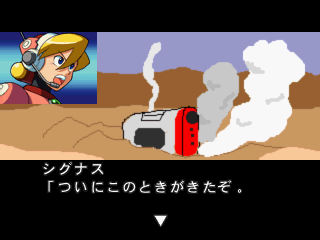
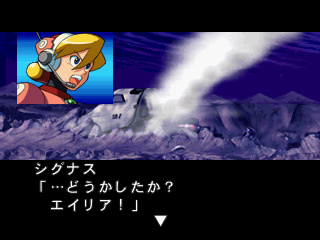
After Alia discovered Awakened Zero when the Shuttle operation failed, the July prototype uses barebone sketches as a workbook to indicate elements that should be detailed later. This is a common trait which also applies to, most story cutscene not directly related to Enigma/Shuttle operation and Eurasia Colony.
|
July Prototype |
Final (Japan) |
|---|---|

|
|
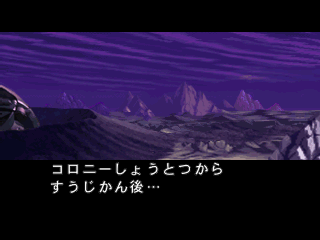
The prototype version of the scene where Eurasia crashes is completely different here, seemingly a picture taken with a real-life camera and then blurred to the point of unrecognizability. This is likely a placeholder.
Opening Stage#
May Prototype |
July Prototype |
Final |
|---|---|---|
 |
 |
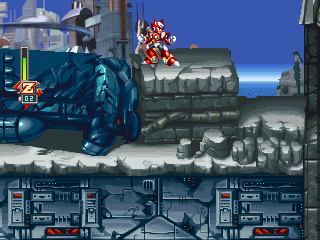 |
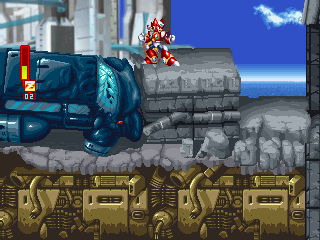
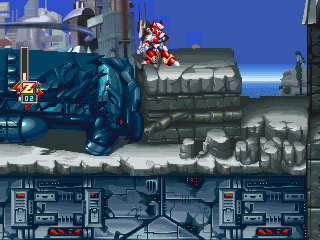
Although hard to notice, the background tiles use wrong transparency in the July build, which was fixed in the final. The old May, 1st design of foreground has been discarded in favor for final.
May Prototype |
July Prototype |
Final |
|---|---|---|
 |
 |
 |
The statue's foot parts already uses final design in July build, there's a minor tile error which would be fixed in final.
May Prototype |
July Prototype |
Final |
|---|---|---|
 |
 |
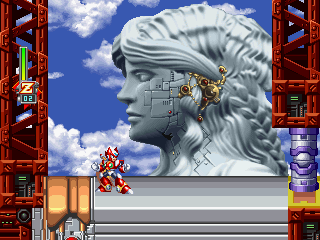 |
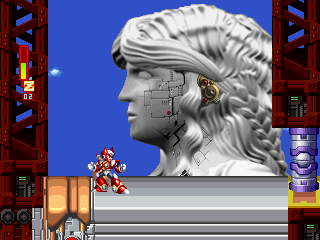
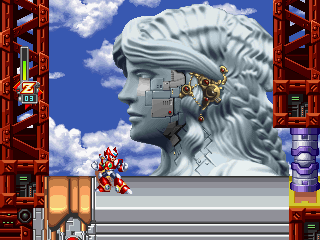
The statue is already finalized, but it has a few face plate pieces colored wrongly in the July build.
|
May Prototype |
July Prototype |
|---|---|

|

|
The player character still performs victory pose in the July build, which was excluded in the final version.
Maverick Stages#
The 8 Maverick stages already use their final stage layout, with only a few small differences.
Izzy Glow/Shining Firefly Stage#
|
July Prototype |
Final (Japan) |
|---|---|
|
|
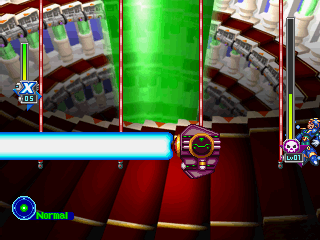
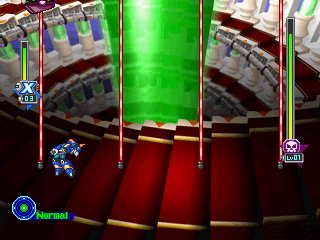
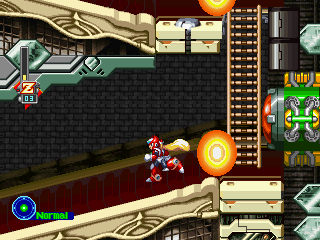
- Oddly, Prism Guardians, when spinning, will knock the player back, but will not deal any damage. This possible oversight was fixed by the final release.
|
July Prototype |
Final (Japan) |
|---|---|
|
|
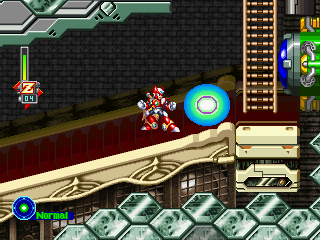
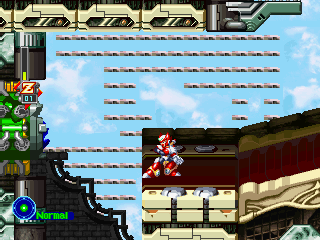
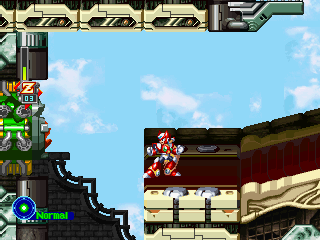
- Prism Generators are colored differently than in the final.
|
July Prototype |
Final (Japan) |
|---|---|
|
|
- Upper background of part 2 has glitched tiles in the July build.
The Skiver/Spiral Pegasus Stage#
|
July Prototype |
Final (Japan) |
|---|---|
|
|
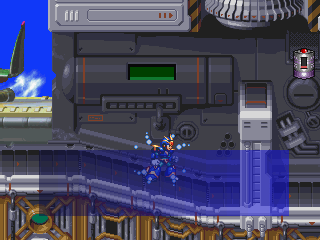
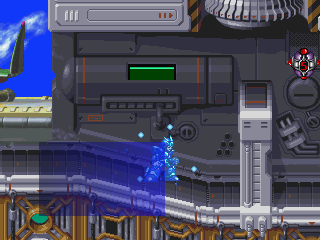
- Time bombs have a different design from the final version.
Dark Dizzy/Dark Necrobat Stage#
|
July Prototype |
Final (Japan) |
|---|---|

|

|
- Minor background redesign.
|
July Prototype |
Final (Japan) |
|---|---|

|

|
- The July build (presumably) incorrectly indexed several enemy IDs at part 1 as the correct enemy is already in previous builds.
|
July Prototype |
Final (Japan) |
|---|---|
|
|
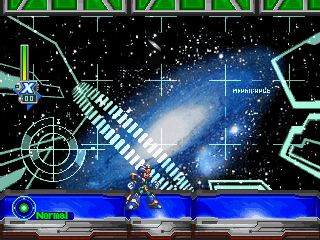
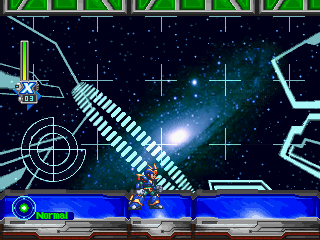
- Minor background redesign #2. Final uses the July build's design for the stage select icon.
- Necrobat moves much faster than in final and has less cooldown in between his attacks.
Axle the Red/Spike Rosered Stage#
|
July Prototype |
Final (Japan) |
|---|---|
|
|
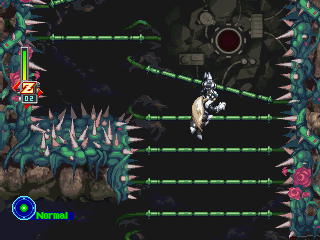
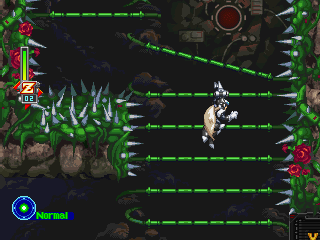
- Foreground and background color tweaks.
|
July Prototype |
Final (Japan) |
|---|---|
|
|
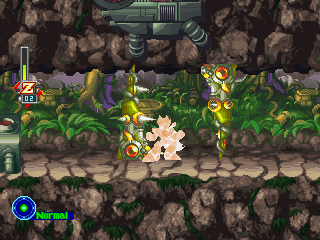
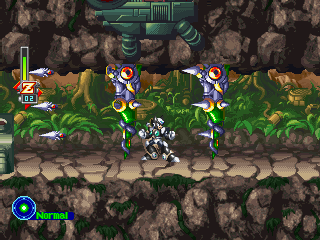
- The thorn enemies still use their color palettes seen in the May 1st build.
- When entering Rosered's boss room, noises will occur. This is probably a side effect as the data of Rosered's room is not correctly updated from May 1st build, which also has this noise bug when entering where should be Rosered's room.
Burn Dinorex/Mattrex Stage#
|
July Prototype |
Final (Japan) |
|---|---|
|
|
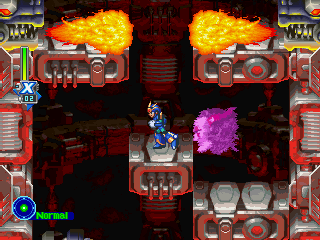
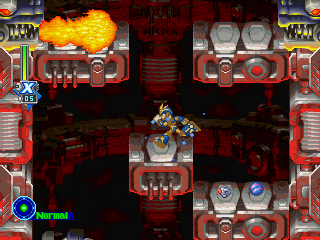
- A Sigma Virus located near the start point has been removed in the final version.
|
July Prototype |
Final (Japan) |
|---|---|
|
|
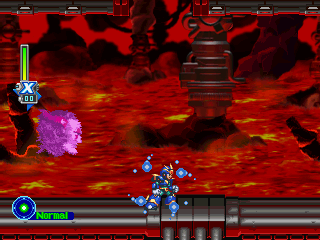
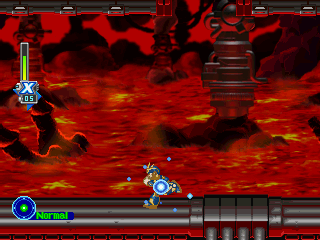
- A Sigma Virus enemy located near the Life Up has been removed in final version.
|
July Prototype |
Final (Japan) |
|---|---|
|
|
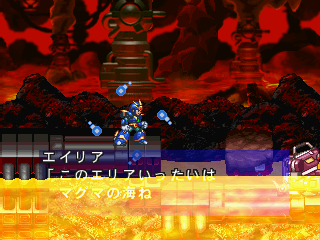
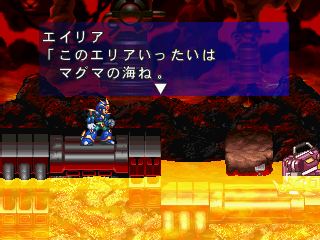
- The position of the first dialogue box at Dinorex stage Area 2 has been changed in order to not get overlapped by lava graphic.
|
July Prototype |
Final (Japan) |
|---|---|
|
|
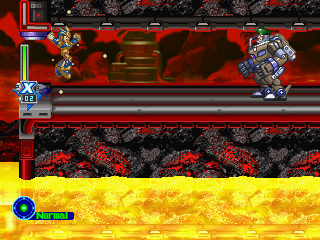
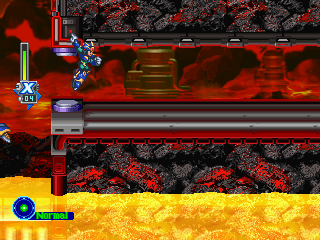
- A Raiden Ride Armor soldier is blocking the path near the end of the second part's upper route; it is removed in the final version.
|
July Prototype |
Final (Japan) |
|---|---|
|
|
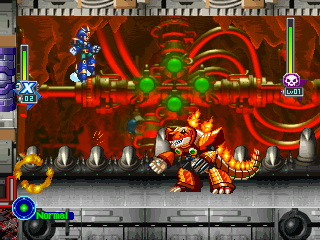
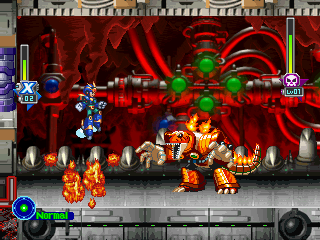
Dinorex's Ground Fire received redesign just like X's special weapon variant.
- Dinorex dashes much faster than in final and has less cooldown in between his attacks.
Zero Space#
Zero Space has its design seen in the final, though the level design was changed more significantly than the Maverick stages in the final.
Zero Stage 1#
|
July Prototype |
Final (Japan) |
|---|---|
|
|
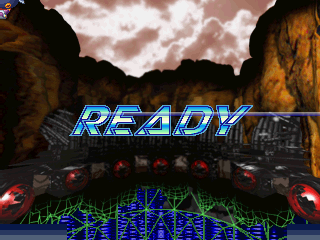
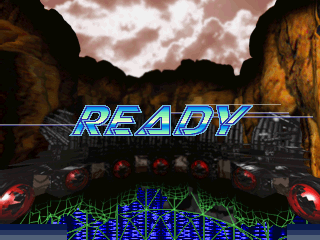
Unlike the final build, a floating platform appears at the start point of Zero Virus Stage 1. This may be a leftover from a previous, significantly different version of the stage.
|
July Prototype |
Final (Japan) |
|---|---|

|

|
The Shadow Devil's design is mostly complete, but when he tries to split into parts, one silhouette appears on each side of the stage. Both silhouettes can hurt the player, leaving very little room to dodge Shadow Devil's parts. A similar concept would return later in the Yellow Devil fight in Mega Man: Powered Up where cyclones appear on either side of the arena, similarly limiting player movement.
- The Shadow Devil fight uses Rangda Bangda's battle theme in this build - likely a bug, as the correct song appears in the prototype credits.
- Shadow Devil's collision box is bigger in the July build.
Zero Stage 2#
|
July Prototype |
Final (Japan) |
|---|---|
|
|
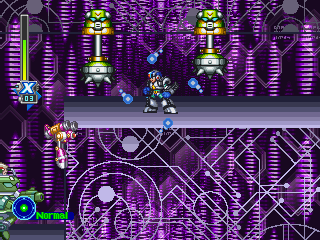
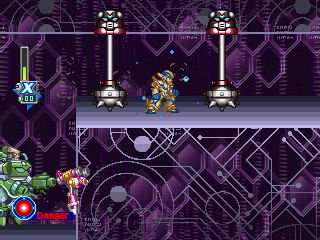
The stationery Crusher variant uses the same palette as Crusher NEO and can be destroyed, rather than the unique color scheme it uses in the retail build which is fully invincible. It also uses a different sound effect.
|
July Prototype |
Final (Japan) |
|---|---|
|
|
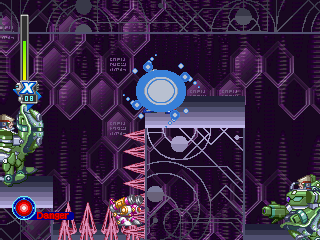
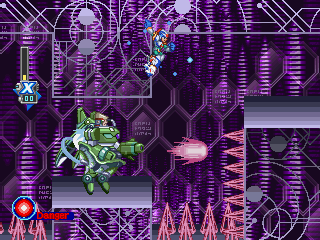
The spiked wall is set slightly higher in the final, with no wall present to the left. This set-up makes this jump more precise for unarmored X, which is likely why it was altered.
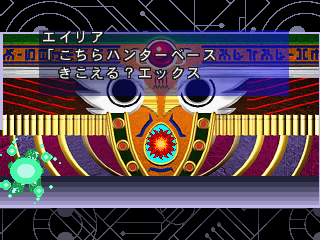
A dialogue box is triggered before the Rangda Bangda W fight in this build, which reuses the first Navigation dialogue in the Intro stage. This is likely either a leftover from X4, or leftover from a previous revision which would contain different story dialogue plans.
|
July Prototype |
Final (Japan) |
|---|---|
|
|
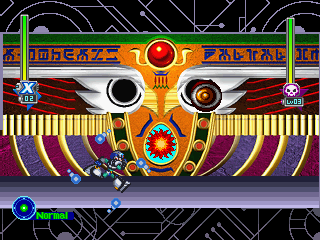
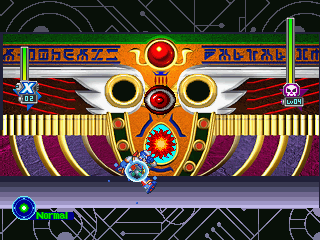
Rangda Bangda's design is mostly complete, though it is missing the golden rings around its eyes.

One of Rangda Bangda's attacks has walls close in to limit the player's movement. In this build, when below half health, it will further extend the walls to crush X or Zero. This is a bit buggy as the extended walls would overlap foreground incorrectly, and doesn't have unique graphics except for the tiny metalic spikes that appears on the extended part, likely leading to it having been cut for the final build.
|
July Prototype |
Final (Japan) |
|---|---|
|
|
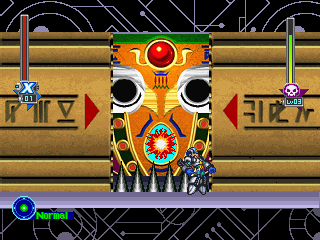
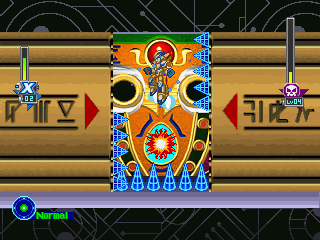
The spikes on the floor are metal instead of wireframe, and can still kill X even with the Gaea Armor's spike protection. In the final build, they can not do this.
- Rangda Bangda W's fight uses the Enigma/Shuttle event music in this build, likely another oversight like Shadow Devil's music.
Zero Stage 3#
|
July Prototype |
Final (Japan) |
|---|---|
|
|
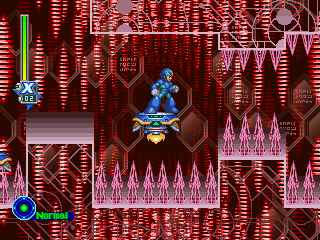
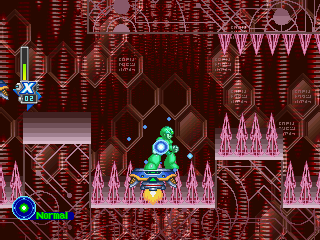
After the mid-way checkpoint, unarmored X will have difficulty progressing due to the small gap, but can still get through with careful usage of wall jumping or Wing Spiral. In the final build, this was alleviated by moving the spikes upward and making the platform constantly rise and fall, letting the player dash jump through, instead. The section just before the small gap has a lower ceiling in the prototype, making platforming more difficult.
|
July Prototype |
Final (Japan) |
|---|---|
|
|
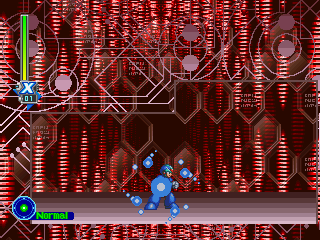
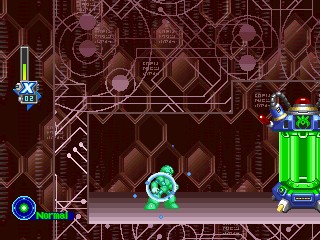
The capsules for Black Zero and the Ultimate Armor are not yet present. The camera sometimes refuses to follow the player into the secret area in this build, killing them as if a bottomless pit. This was fixed for the retail release.
|
July Prototype |
Final (Japan) |
|---|---|
|
|
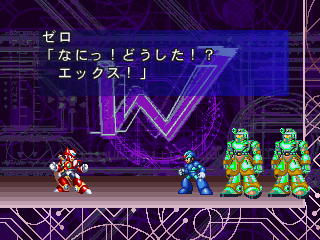
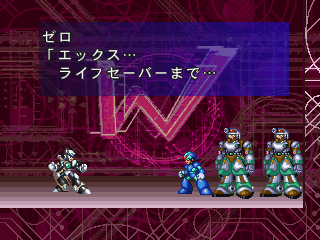
Before Zero fights Boss X, the Lifesavers appeared with incorrect palette in July builds. Dialogue box reuses the dialogue which Zero was checking the injured X before fighting Sigma Head; it's a common problem in July build as the dialogue is still not finalized yet.
|
July Prototype |
Final (Japan) |
|---|---|
|
|
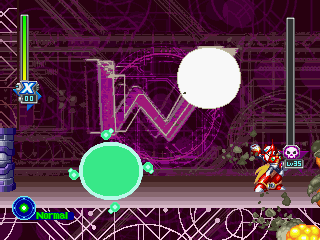
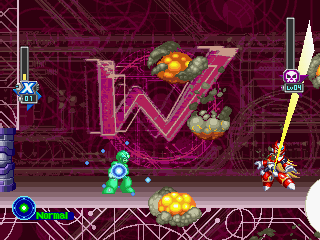
All versions of the X vs Zero fight are mostly finished in this build, with a few small differences from release.
- Boss Zero appears to be firing the Z-Buster when X defeats him in this build, rather than using his flinch animation.
- Boss X has more cooldown between each shot of Soul Body than he does in the final.
- Boss X is not weak to the C-Flasher in this prototype.
Final Stage#
|
July Prototype |
Final (Japan) |
|---|---|
|
|
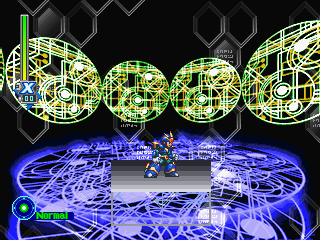
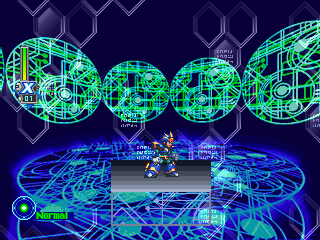
The final stage was recolored between this prototype and the retail build.
|
July Prototype |
Final (Japan) |
|---|---|
|
|
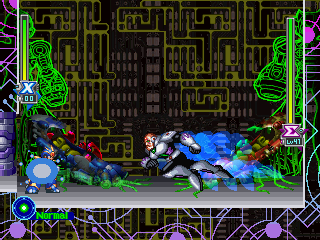
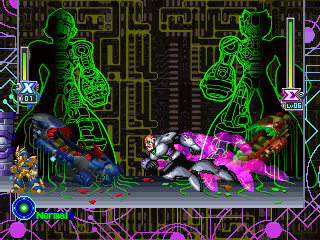
Sigma's afterimage was recolored from blue to purple. The sprites for the capsules are much less detailed here than in the final. X and Zero's silhouettes are further toward the edges of the screen than in the final. The particles on the floor are also absent in the prototype.
|
July Prototype |
Final (Japan) |
|---|---|
|
|
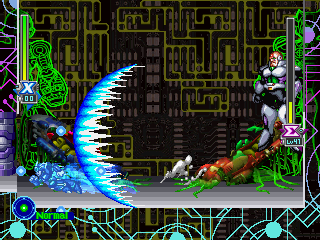
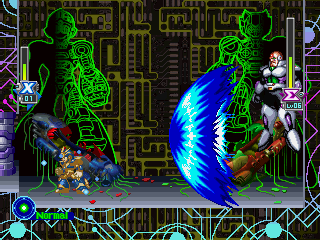
The large projectile Sigma launches at low HP was redesigned for the final build.
|
July Prototype |
Final (Japan) |
|---|---|
|
|
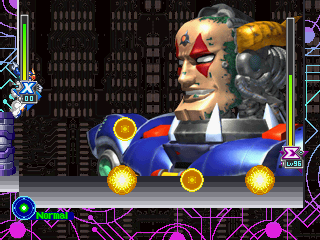
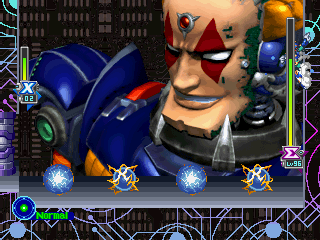
Final Sigma W is rendered at a different angle. The spark projectile was completely redesigned for the final build.
Gameplay differences:
- Sigma has fewer invincibility frames when struck by Tri-Thunder in this build.
- Final Sigma W is immune to all of Zero's special skills in this build, including the C-Slash.
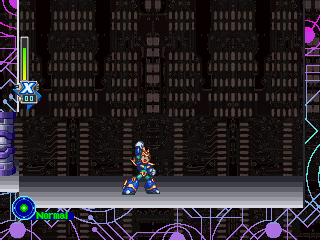
- Although Sigma's themes are in the game, both Sigma forms use 8 bosses fight theme as placeholders.
- Unlike in final, after defeating Final Sigma W, X/Zero will perform their victory pose before leaving the stage.
Music Differences#
At this point, nearly the entire soundtrack had been finalized, although there are still a few differences.
Opening Theme
This version uses different instrumentation from the one seen in the final build, though it is otherwise extremely similar to its final incarnation - the melody had already clearly been finalized.
Zero Opening Stage
Very close to being finalized, although the opening has slightly different synths.
Stage Start
Now matches the final melody, although it still uses the May 1, 2000 instruments.
Spiral Pegasus/The Skiver
Different guitar sample, although everything else appears to be the same.
Zero Dead
Although the instrumentation is closer to the final than the May 1, 2000 build, it still isn't the exactly the same same.
Bad Ending
Although X5's credits had not been implemented in this build, the song used for them in the final is present, and goes on significantly longer than the version in the final — four minutes, compared to the final's 90 seconds, even having proper ending (included above). It was likely cut down to save space on the disk.
Debug Mode/Debug Command#

|
|
To do: |
The debug menu can be accessed by pressing Select on Player 1's controller during gameplay. Pressing Select with this menu open will close it. Pressing Start on 1P controller will open the pause menu as normal, which will overlap the Debug menu but not disable it; it will still need to be closed when you return from the pause menu. Holding L1 on the second player's controller will slow down the game, while holding L2 will cause it to stop until the button is released.
There are lots of options in here. Press O to select a flag, X to unselect it, Triangle to select all flags, and Square to unselect all flags.
- PLAYER DEBUG MODE: Sets various flags related to the player's current conditions.
- Vitality: Current HP\Maximum HP.
- Weapon Gauge: Current Weapon Energy\Maximum. Only displays the selected weapon.
- Rest Number: Extra lives remaining.
- Retry Point: Currently active checkpoint - sets where the player spawns on death.
- Stage Clear: Sets if the stage you're in is cleared or not. If set to 1, the game will act like you have defeated the Maverick upon reaching their chamber, and X/Zero will teleport out.
- No Hit Mode: Allows you to freely move your character around the stage in the camera location currently available for the area. Does not disable collision on spikes, boss doors, or some other objects - their effects will activate as soon as you switch this flag off if they were touched.
- No Death: Automatically recovers the player to full HP if their HP reaches 0. Doesn't always work.
- Virus Gauge: Sets the Virus Level, as displayed in the bottom right
- Virus Cnt: A hidden mechanics that also applies to all retail builds of the game known as "Virus Counter". Raises by 1 if Zero is infected by the Sigma/Zero virus enemies (Zero fully restored his HP, glows purple and turns invincible). If set to 10, the success rate of Shuttle operation will be greatly decreased, while Shuttle operation being almost impossible to success if set to 13 or higher.
- Weapon and Boss: Set if the 8 special weapons are obtained and if the main 8 Bosses are defeated. These can cause glitches if set to 1 in the intro stage.
- PLAYER SETUP MODE: Set various flags related to the player character's equipment, including armors and Enhancement Parts.
- ARMOR FLAG: Sets which armors have been collected. Most armors use internal names here; X4 = Fourth Armor, WING = Falcon Armor, HEAVY = Gaea Armor. ULTIMATE and BLACK ZERO use their final names.
- ARMOR TYPE: Unknown.
- PARTS FLAG: Set equipped enhancement parts. No upper limit on equipped parts, unlike normal gameplay.
- ENEMY SET TEST: Allows you to see enemy coordinates, and use the D-pad to freely move your character.
- ITEM SET/RESET MODE: Set whether collectibles, including Sub Tanks, EX item, Energy Ups and Life Ups, have been obtained. Energy and Life meters can be set longer than 32 units, though this will cause graphical glitches.
- XA TEST: Meant for .XA streamed audio tracks. Left and Right on the D-pad changes which track is selected, X starts playback, Square and Circle stop playback, Triangle pauses playback, L1 lowers volume, and L2 raises volume.
- SOUND TEST: Lists values of loaded sound effects. Up\down on the D-pad changes which effect is selected, left raises volume, and right lowers volume. R2 switches banks between "Common SE", "Player SE", "Enemy SE", "Player VOICE", and "Stage SE". L1 raises master volume, L2 lowers it. Loaded sounds depend on the area.
- DEBUG WORK CONTROL: Most of the options menu from the final game, plus a few debug settings.
- 0 Player Free Move: Disables collision in stages, allowing free movement.
- 1 Slow Flag: Works like the final game's "Slow" speed option.
- 2 Difficulty: Likely meant to set difficulty, though it doesn't work quite right. Oddly, four values (0=Easy, 1=Normal, 2 and 3=Xtreme) can be selected, though the final game only has three difficulty settings. Values 2 and 3 seem to carry no visible difference; both of them represent the enemy placement of Xtreme difficulty with no item drops.
- 3 AUTO CHARGE: Same as the auto charge option in the final build.
- 4 RENSSYA: Same as the rapid fire option in the final build.
- 5 DUAL SHOCK Same as the vibration option in final game.
- 6 SQUAT Enables/disabled crouching. Default value is 1, prevents you from crouching when set to 0. Possibly indicates that crouching would be possible to disable in the game's menu at some point of development.
- 7 Hit Size Display: Displays hitboxes of the player, enemies, and projectiles. Disables the Scroll 1, Scroll 2, and Scroll 3 layers by default, and displays debug tiles if set to 1.
- 8 Obj Disp Kind: Displays collision boxes. Default value is 0. If set to 0, stage and player collision boxes will be displayed. If set to 1,player attacks will be highlighted with red boxes and enemy hurtboxes will show as yellow boxes. If set to 2, the player's hitbox is displayed in yellow, while enemies and projectiles will show red boxes.
- 9 Scr Disp Kind: If set to 1 or 2, hides terrain map when Hit Size Display is active.
- A Scroll Test Mode: If set to 1 1 the camera will not scroll, Tiles will be changed to debug-related tiles, and debug values will appear on screen. In this mode, the D-pad on the second player's controller can be used to adjust camera position.
- Scroll 1 Display: Hides foreground objects if set to 1.
- Scroll 2 Display: Hides middleground objects if set to 1.
- Scroll 3 Display: Hides background objects if set to 1.