 This article has a talk page!
This is a sub-page of Proto:Fire Emblem: The Sacred Stones.

L01 TUTO#
Known as Chapter 1: Escape! in the final release. Called 章1 (Chapter 1) here in the prototype.
The map and gameplay are very close to those in the final release. The map has minor tile placement differences and a different palette.
|
Prototype |
Final |
|---|---|

|

|
The story events are very similar to the final release. Once again, the boss uses the placeholder name イビル (Evil), including in dialogue, which is... somewhat amusing. His name in the final version is Breguet.
Also, once again, generic brigands are used instead of the generic fighters that are used in the final release.
L02 TUTO#
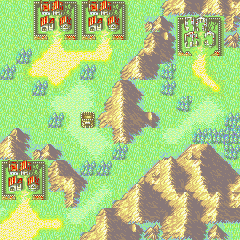
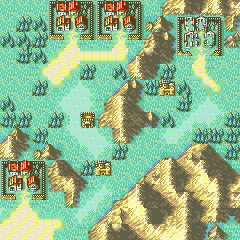
Known as Chapter 2: The Protected in the final release. Called 章2 (Chapter 2) here in the prototype.
Another map very close to the final release.
|
Prototype |
Final |
|---|---|
|
|
Here comes イビル (Evil) again, this boss is named Bone in the final game.
The upper left village gives 3000 Gold, it instead gives a Red Gem in the final release, considering a Red Gem sells for 5000 gold, the prototype is a bit more stingy. The upper right village gives an Elixir, same as the final release. The bottom left village gives a Pure Water, same as the final release, though this village only has a placeholder line of text, unlike the other two which have proper dialogue.
Also of note, since the Hatchet weapon does not yet exist, Ross starts with an Iron Axe instead.
The chapter's ending scenes are missing a flashback involving Eirika reminiscing about her brother teaching her swordplay.
L03 TUTO#
Known as Chapter 3: The Bandits of Borgo in the final release. Called 章3 (Chapter 3) here in the prototype.
Another little-changed map.
|
Prototype |
Final |
|---|---|

|

|
Once again, the boss is named イビル (Evil), he is called Bazba in the final game.
The chapter's opening flow is a bit different. The thief character, Colm, opens the door in the upper left before his turn. Then, he moves through the door to the first chest on his actual turn, meaning the player has to play a bit of catch-up to get to him. In the final release he opens the door then waits there, making him recruitable on the second turn.
Differing from final, the chests in the upper middle room contain, from left to right, an Iron Sword, a Slim Sword, and a Steel Sword. The chest in the bottom middle contains a Silver Sword. This is presumably some sort of test, as these are the first four weapons in internal order.
L04 TUTO#
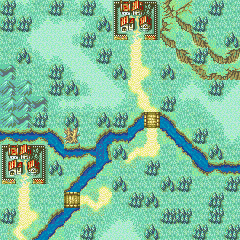
Known as Chapter 4: Ancient Horrors in the final release. Called 章4 (Chapter 4) here in the prototype.
The map is somewhat different, with the most notable change being the movement of the right-hand village to the upper part of the map in the final.
|
Prototype |
Final |
|---|---|

|
|
The opening events are slightly different. The characters Artur and Lute appear on the map talking about the monsters. Lute then goes into the lower left village. In the final game this scene is moved to into the village, so Lute does not appear on the map at that point.
In the final game the character Artur has a scripted fight with a monster, which he kills. This scripted fight does not occur in the prototype at all.
The mid-chapter cutscene foreshadowing the arrival of the trio of NPCs, L'Arachel, Dozla, and Rennac does not exist, though they still show up at the end of the chapter.
The bottom right village contains only a test message and gives an Elixir. This is different from the final game, where the village is moved to the top of the map and instead gives an Iron Axe. The bottom left village results in Lute joining the player in both versions.
The deployment limit is higher in the prototype, allowing 11 characters, in other words, all characters recruited to this point, to be deployed. In the final game only 9 characters can be deployed.
There is an unused boss quote that seems to be intended for the Entombed serving as the boss of this chapter. Stored at text IDs 012D and 012E respectively:
Text |
Translation |
|---|---|
ぐるるるる・・・ |
Grrrr... |
ぐ・・る・・・ |
G...rr... |
No monsters in the final game have dialogue at all.
L05 TUTO#
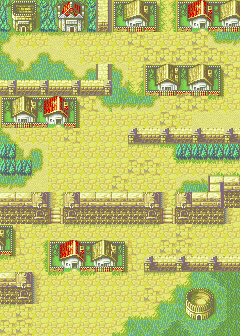
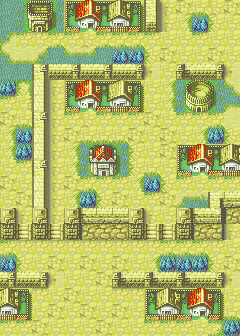
Known as Chapter 5: The Empire's Reach in the final release. Called 章5 (Chapter 5) here in the prototype.
The map layout is very different.
|
Prototype |
Final |
|---|---|
|
|
Another boss named イビル (Evil)! Wow! He's called Saar in the final release.
This chapter demonstrates one of the first fairly significant character differences. Cormag appears in this chapter as a mercenary, in the final game Joshua appears as a myrmidon. Cormag's recruitment is moved to much later in the final game.
The house in the middle left gives an Armor Slayer, this item is also given by a house in the final game. The bottom-left and upper-right red houses give nothing, and don't even have placeholder text for visiting them.
In the prototype the player units deploy in the middle-left of the map, in the final the player units deploy in the bottom-left.
Again, the deployment limit is higher in the prototype, allowing 11 characters, in other words, all characters recruited to this point, to be deployed. In the final game only 9 characters can be deployed.
L06 TUTO#
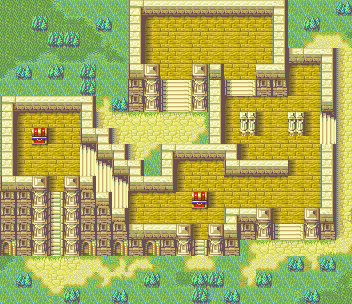
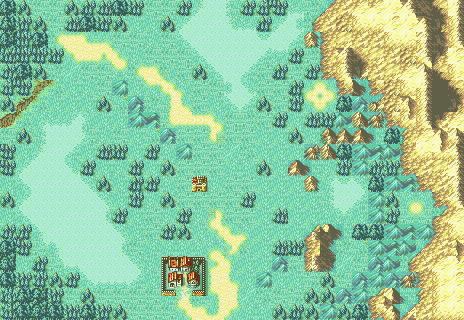
Known as Chapter 6: Victims of War in the final release. Called 章6 (Chapter 6) here in the prototype.
This chapter uses a completely different map in the prototype. This prototype map was moved to Chapter 11 Eirika route, and a new map was made for it in the final.
|
Prototype |
Final |
|---|---|
|
|
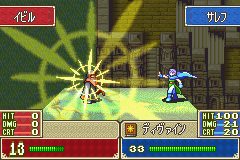
This boss is called... you guessed it, イビル (Evil)! In the final game he's called Novala.
The gist of the story is the same, once again, though there are a few key differences here. At the start of the chapter, in the prototype and final, the boss is holding some helpless civilians hostage. In the final release, the boss places them off in the lower-right of the map, and rescuing them from approaching monsters is a minor optional side-objective that gives a little bonus item at the end of the chapter. The prototype treats these poor souls far differently, as the boss just straight up kills them himself, giving the player no opportunity to save them at all.
Another difference is at the end of the chapter, a scene that has no equivalent in the final release occurs. The character Saleh appears and finishes the boss in a scripted fight. This fight does not exist in the final game, though Saleh does appear in this chapter shortly for a dialogue scene.
All chests in this chapter contain placeholder Iron Swords.
L07 TUTO#
Known as Chapter 7: Waterside Renvall in the final release. Called 章7 (Chapter 7) here in the prototype.
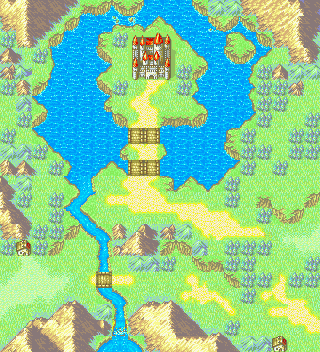
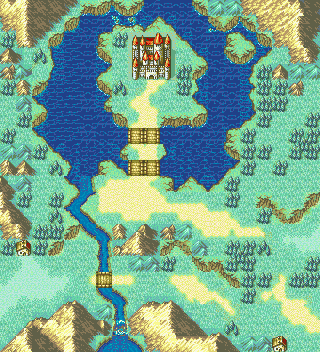
The map is pretty much the same, but it features Fog of War in the prototype.
|
Prototype |
Final |
|---|---|
|
|
イビル (Evil) strikes again! He's called Murray in the final game. He is a cavalier in the final game, but a mercenary in the prototype.
Aside from being unable to visit the houses and there being Fog of War, (which Seth warns about before it happens) this chapter is fairly similar to the final release, though they continue to use brigands instead of fighters for whatever reason...
Amusingly, despite Seth mentioning ballistae, there are not yet any ballistae present on the map. There is one on the final's version of the map.
L08 TUTO#
Known as Chapter 8: It's a Trap! in the final release. Called 章8 (Chapter 8) here in the prototype.
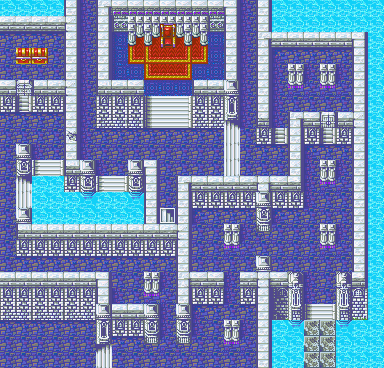
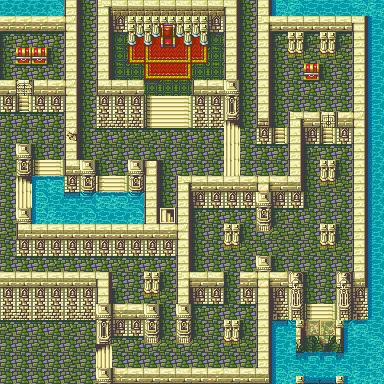
The map is very close to the one in the final release.
|
Prototype |
Final |
|---|---|
|
|

The boss names himself in dialogue as ジュード・ルーバルト (Jude Rubert), unfortunately, the actual boss of the map is called イビル (Evil) regardless. Seth seems to think this Jude fella is pretty important, saying he's one of Grado's seven imperial generals. This is another difference from the final, as there are only six generals and Jude Rubert does not exist in the final game at all. The boss of this chapter in the final game is called Tirado.
This chapter also has a tutorial not present in the final game. It has a unit class change tutorial, performed by the character Forde.
Once again, the chests contain placeholder Iron Swords.
This is the last chapter with any story events or dialogue, after this the game automatically throws you into Eirika's route without allowing the player to choose.
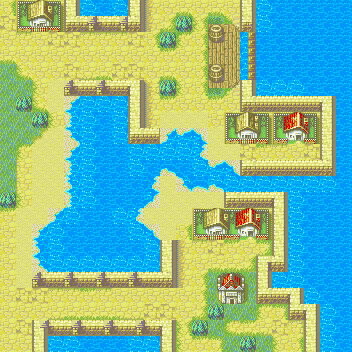
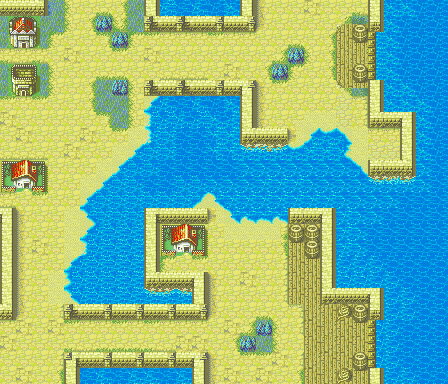
E09 EIRIKR#
|
Prototype |
Final |
|---|---|
|
|
The map is vaguely similar. The starting position differs in the prototype, with the player units starting in the center left of the map, in the final version they start in the upper right.
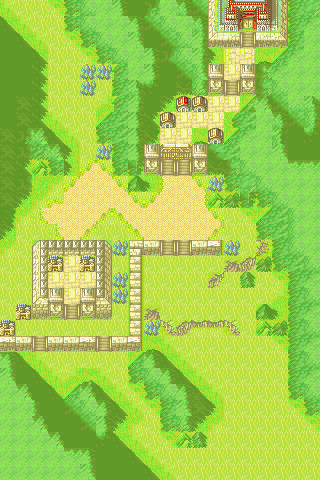
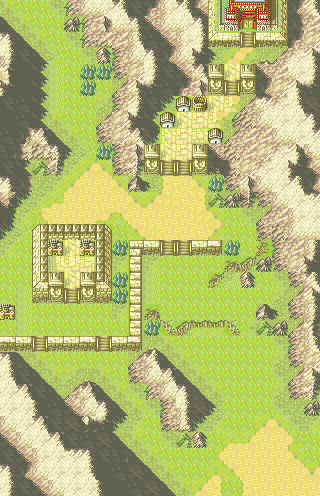
E10 EIRIKR#
|
Prototype |
Final |
|---|---|
|
|
The most obvious changes are the mountains being cleaned up and swapping to a different palette. The building in the middle-left of the map was moved up one tile. One of the fortresses near it was removed. The arena is absent in the prototype.
E11 EIRIKR#
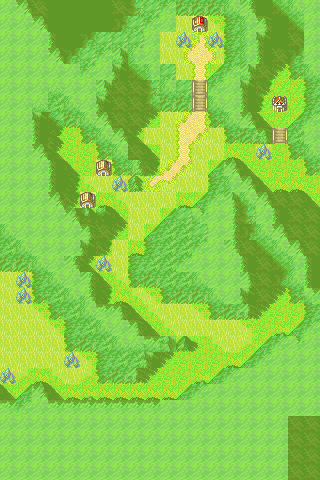
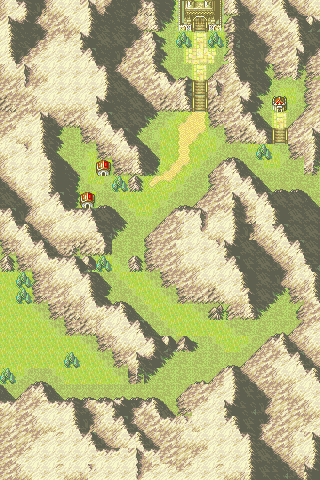
Note that in the final version this is actually Chapter 12 due to an entirely new Chapter 11 being inserted between the old chapter 10 and 11 later in development.
|
Prototype |
Final |
|---|---|
|
|
Clearly just an unrefined version of the final map with no particularly major changes aside from implementation of a much larger building for the seize point.
E12 EIRIKR#
|
Prototype |
Final |
|---|---|
|
|
E13 EIRIKR#
|
Prototype |
Final |
|---|---|
|
|
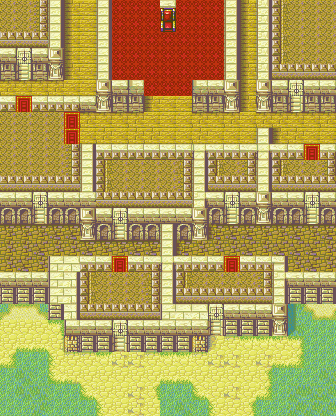
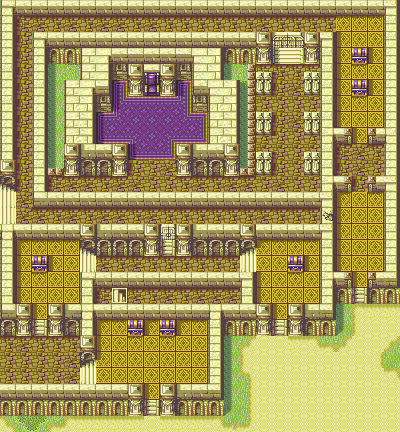
While the maps are clearly similar conceptually, the layout was changed significantly for final. Unfortunately map data does not yet exist for what is in the covered rooms in the prototype, so their layouts are unknown. The prototype's enemy layout is clearly placeholder as the player units are placed right at the throne room and the only enemy present is the boss waiting on the throne.
I09 IRZARK#
|
Prototype |
Final |
|---|---|

|
|
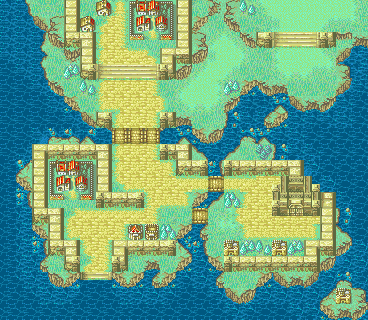
I10 IRZARK#
|
Prototype |
Final |
|---|---|
|
|
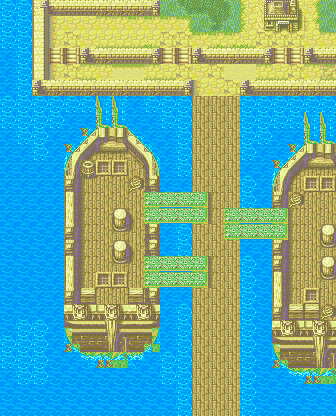
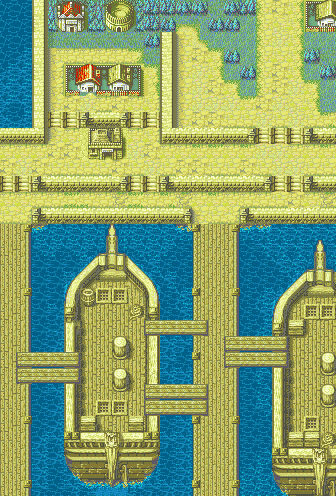
I11 IRZARK#
|
Prototype |
Final |
|---|---|
|
|
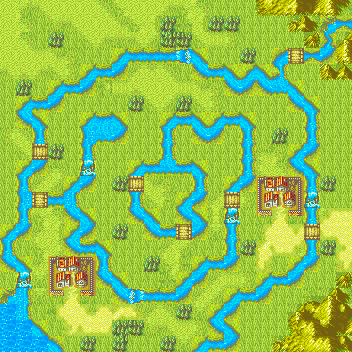
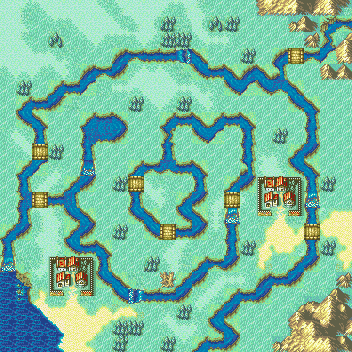
I12 IRZARK#
|
Prototype |
Final |
|---|---|
|
|
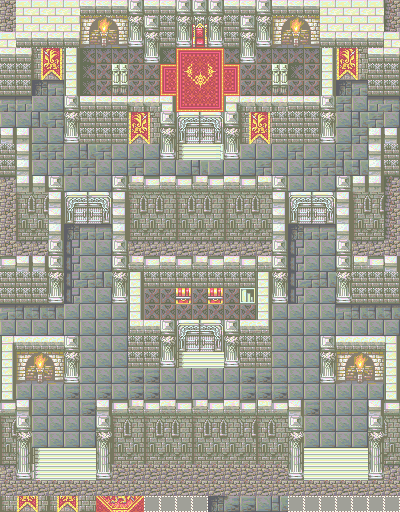
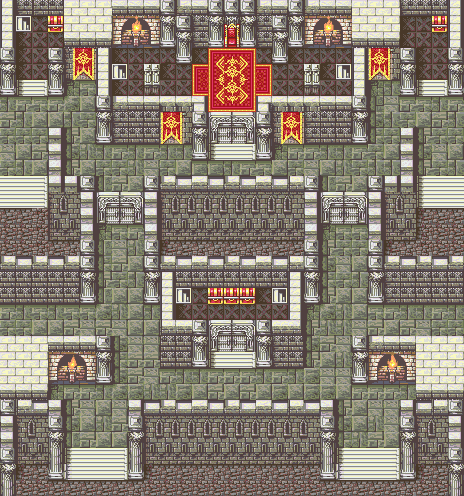
I13 IRZARK#
|
Prototype |
Final |
|---|---|
|
|
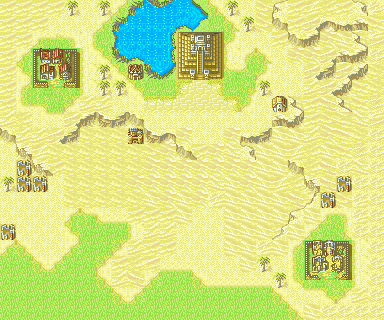
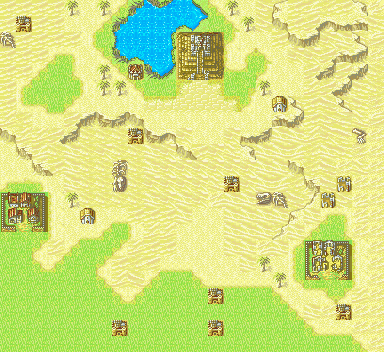
E14 EIRIKR/I14 IRZARK#
|
Prototype |
Final |
|---|---|
|
|
E15 EIRIKR/I15 IRZARK#
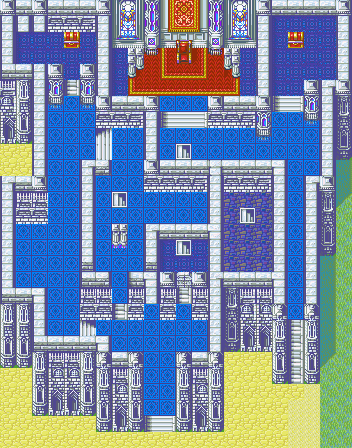
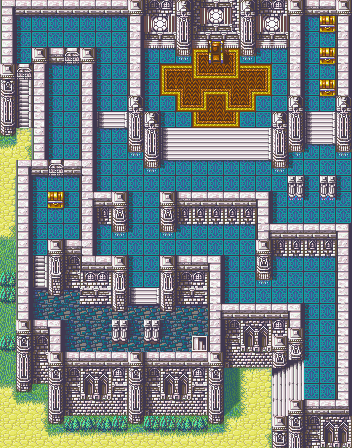
From this point onward, both routes share maps but have differing enemy layout, just like the final game. In the final game, there were also deviations in the dialogue scripts, but no scripts yet exist for these in the prototype.
|
Prototype |
Final |
|---|---|
|
|
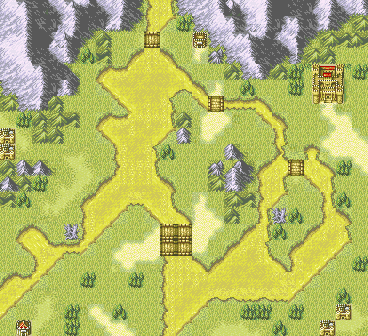
E16 EIRIKR/I16 IRZARK#
|
Prototype |
Final |
|---|---|

|
|
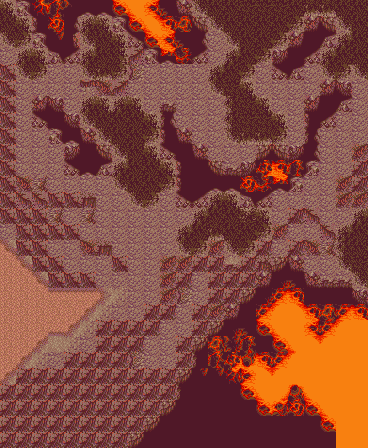
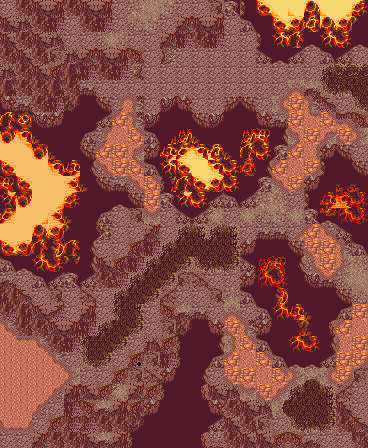
E17 EIRIKR/I17 IRZARK#
|
Prototype |
Final |
|---|---|
|
|
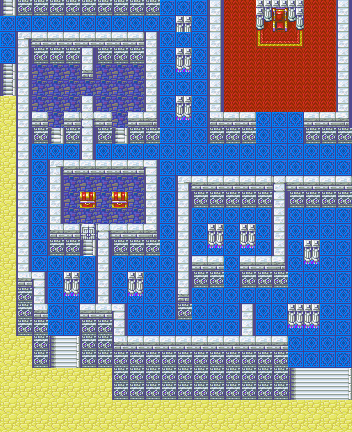
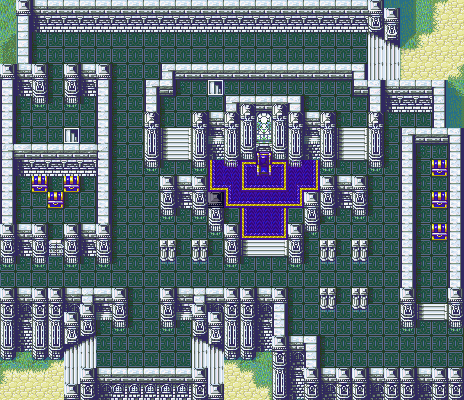
E18 EIRIKR/I18 IRZARK#
|
Prototype |
Final |
|---|---|
|
|
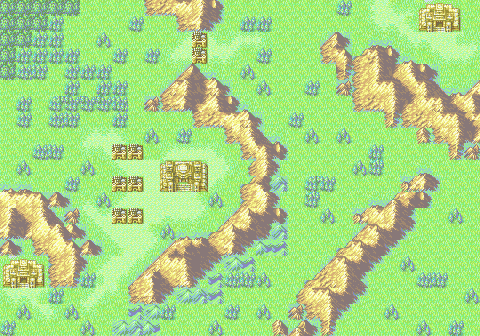
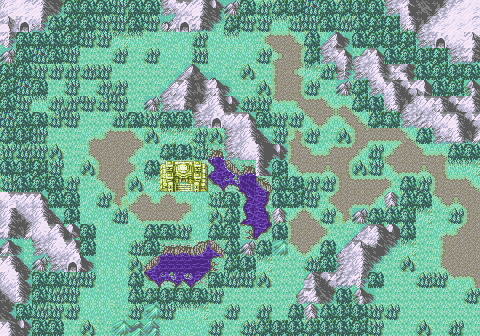
E19 EIRIKR/I19 IRZARK#
|
Prototype |
Final |
|---|---|
|
|
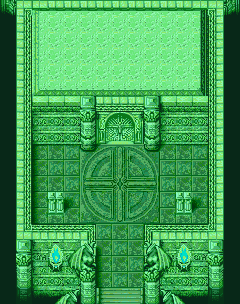
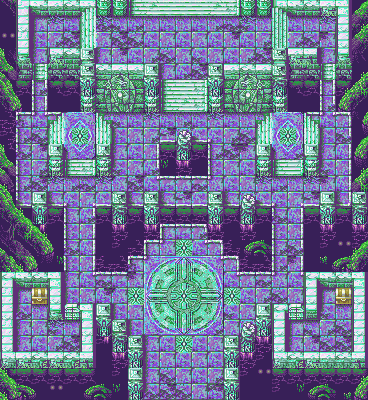
E20 EIRIKR/I20 IRZARK#
|
Prototype |
Final |
|---|---|
|
|
Tower of Valni#
T01 EIRIKR#
|
Prototype |
Final |
|---|---|

|

|
T02 EIRIKR#
The second floor of the Tower of Valni. This design was cut from the game entirely, though a screenshot of it managed to appear in some pre-release materials. For the final version of the game, the prototype's sixth floor design was moved here.
|
Prototype |
Final |
|---|---|

|

|
T03 EIRIKR#
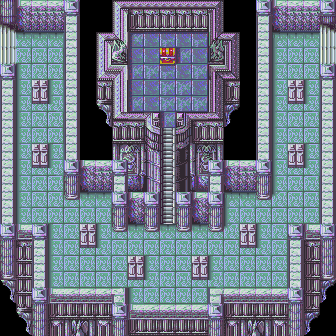
The third floor of the Tower of Valni. This design was cut from the game entirely. For the final version of the game, the prototype's eighth floor design was moved here.
|
Prototype |
Final |
|---|---|

|
|
T04 EIRIKR#
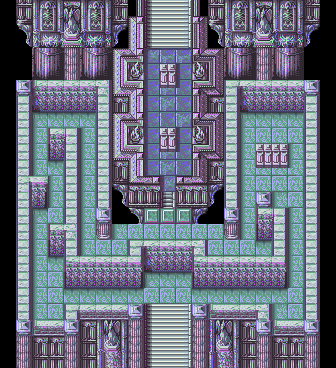
The fourth floor of the Tower of Valni. Not much changed here.
|
Prototype |
Final |
|---|---|

|
|
T05 EIRIKR#
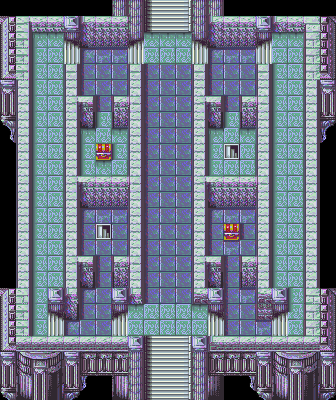
The fifth floor of the Tower of Valni. Not much changed here either, though some chests were added and some stairs removed.
|
Prototype |
Final |
|---|---|

|
|
T06 EIRIKR#
The sixth floor of the tower of Valni. The prototype design was moved to the second floor, while the seventh floor got shifted down to here.
|
Prototype |
Final |
|---|---|

|

|
T07 EIRIKR#
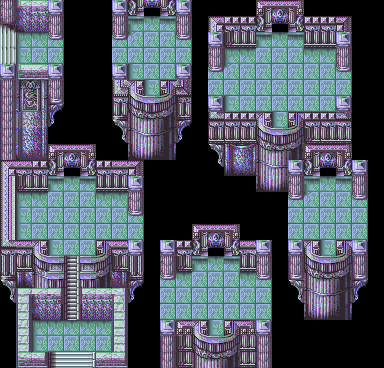
The seventh floor of the Tower of Valni. The prototype design was shifted down to the sixth floor. The map data for the walls breaking does not yet exist. If any of the walls have their HP depleted, the game will crash, rendering this floor impossible to complete normally. Chests haven't been added yet.
Prototype |
Final |
Final (6th Floor) |
|---|---|---|
 |
 |
|
T08 EIRIKR#
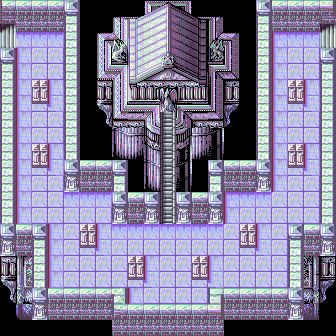
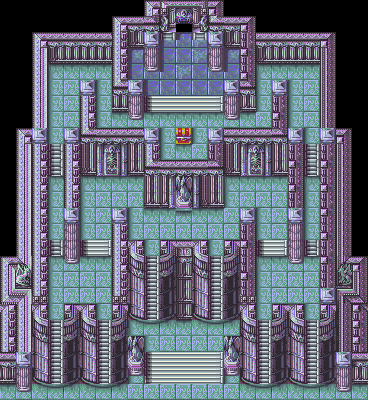
The eighth floor of the Tower of Valni. The prototype design was moved to the third floor, shifting the prototype's tenth floor here for the final version. The area that appears to be a covered room cannot be uncovered, and no map data for what the uncovered version looks like exists in the prototype.
|
Prototype |
Final |
|---|---|
|
|
T09 EIRIKR#
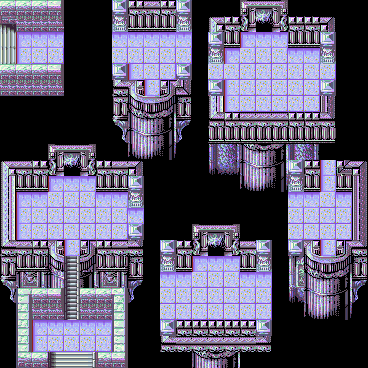
The ninth floor of the Tower of Valni. Ended up shifted to the seventh floor in the final version due to two floors being cut. The floating paths that appear between rooms when all enemies in one room are defeated do not yet exist, rendering this floor impossible to complete normally.
|
Prototype |
Final (7th floor) |
|---|---|
|
|
T10 EIRIKR#
The tenth floor of the tower of Valni. Ended up shifted to the eighth floor in the final version due to two floors being cut. The light arrows featuring on the equivalent floor in the final version are not yet present.
|
Prototype |
Final (8th floor) |
|---|---|

|
|
Lagdou Ruins#
R01 EIRIKR#
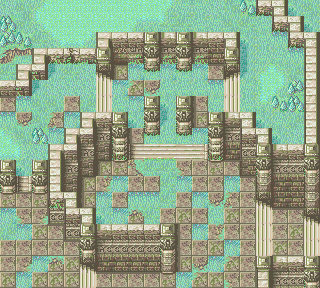
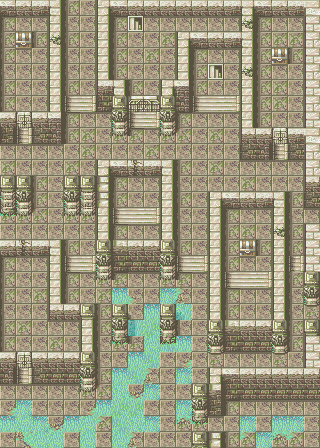
The first floor of Lagdou Ruins. For the final version it was given an entirely different layout, and may have been the inspiration for the final game's third floor.
Prototype |
Final |
Final (3rd Floor) |
|---|---|---|
 |
 |
 |
R02 EIRIKR#
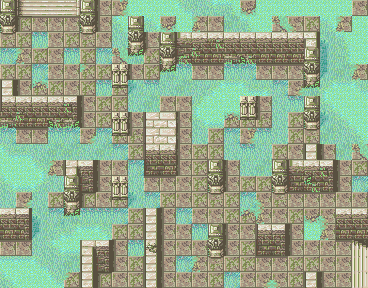
The second floor of Lagdou Ruins. It appears to use an incorrect tileset. It does not resemble any of the floors in the final game. The design appears to have been discarded and doesn't feature in the final game anywhere.
Prototype |
Prototype (Corrected) |
Final |
|---|---|---|
 |
 |
 |
R03 EIRIKR#
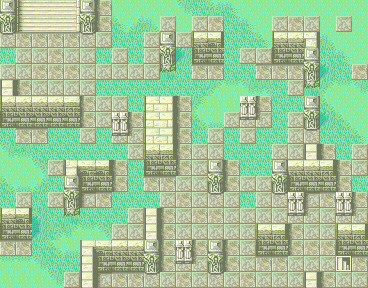
The third floor of Lagdou Ruins. This floor became the second floor in the final version.
Prototype |
Final |
Final (2nd Floor) |
|---|---|---|
 |
|
|
R04 EIRIKR#
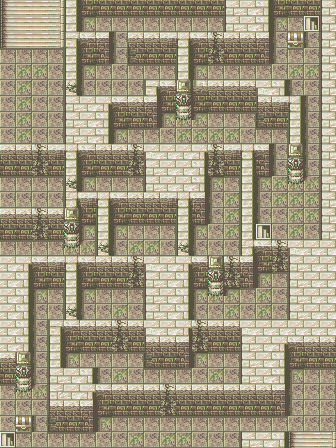
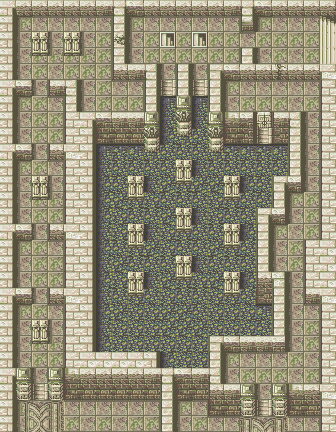
The fourth floor in Lagdou Ruins. The map for this floor was moved to the sixth floor in the final version.
Prototype |
Final |
Final (6th Floor) |
|---|---|---|
 |
 |
 |
R05 EIRIKR#
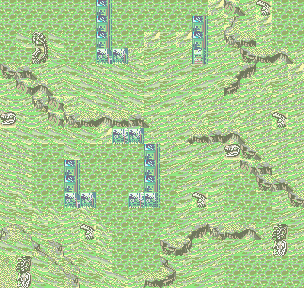
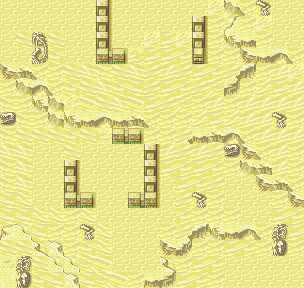
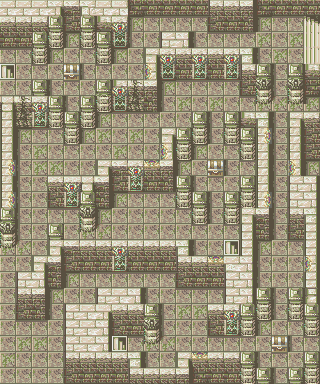
The fifth floor in Lagdou Ruins. An entirely discarded layout. Also uses what appears to be a messed up tileset.
Prototype |
Prototype (Corrected) |
Final |
|---|---|---|
 |
 |
 |
R06 EIRIKR#
The sixth floor in Lagdou Ruins. Crashes when access is attempted. The map assigned to it appears to be a duplicate of R02, though with a different (also incorrect) tileset.
Prototype |
Prototype (Corrected) |
Final |
|---|---|---|
 |
|
|
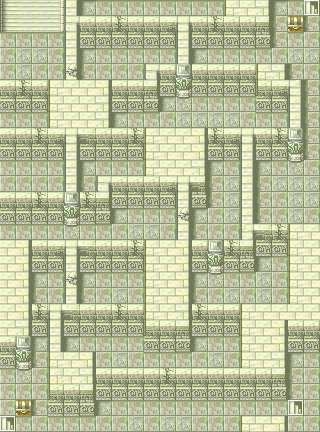
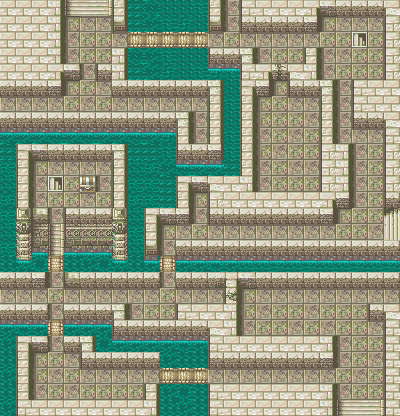
R07 EIRIKR#
The seventh floor in Lagdou Ruins. Resembles the fourth floor in the final version of the game.
Prototype |
Final |
Final (4th Floor) |
|---|---|---|
 |
 |
|
R08 EIRIKR#
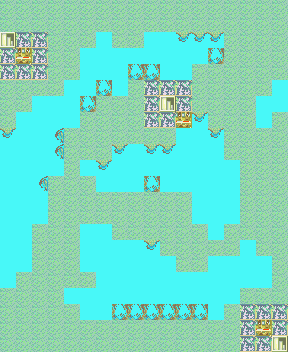
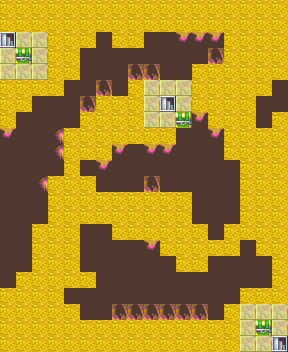
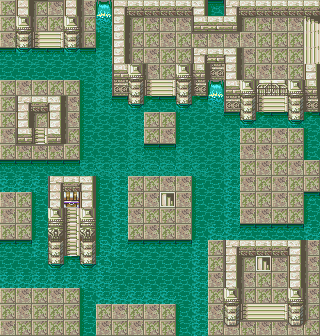
The eighth floor in Lagdou Ruins. This map appears to actually use the... "correct" tileset, but said tileset itself seems to be messed up. A more comprehensible version can be seen if one applies the cave tileset from the earlier GBA FE titles to it.
The layout vaguely resembles the fifth floor in the final version of the game. If the map were to have been functional, it is highly likely that the holes in the cave walls would have been poison vents, like the previous two GBA FE titles. While the final version no longer uses the cave tileset, it still features poison vents.
Prototype |
Prototype (Corrected) |
Final |
Final (5th Floor) |
|---|---|---|---|
 |
 |
 |
|
R09 EIRIKR#
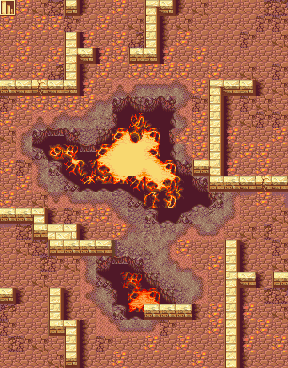
The ninth floor of Lagdou Ruins. This map's design was moved to the seventh floor in the final game.
Prototype |
Final |
Final (7th Floor) |
|---|---|---|
 |
 |
|
R10 EIRIKR#
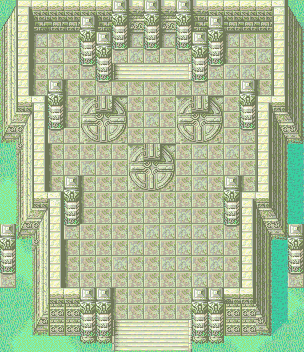
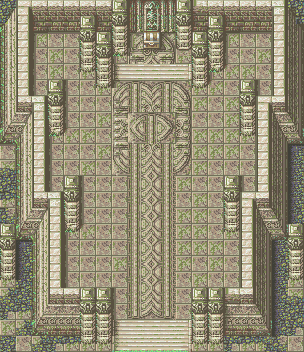
The tenth, and final, floor of Lagdou Ruins. Compared to the other floors, this one actually made it into the final game relatively unscathed and unshuffled.
|
Prototype |
Final |
|---|---|
|
|
C00 EIRIKR#
Takes the player to cutscenes before chapter 2. See L02 TUTO. It's essentially the same thing as L02 TUTO in terms of where the player ends up...
H00 EIRIKR#
Leads to what appears to be a placeholder map. In "normal" gameplay, this map can be accessed on the world map location for Melkaen Coast.
D00 EIRIKR#
This leads to the test map, which also remains in the final version of the game. The left house leads to a map viewer, and the right leads to a portrait viewer. The map viewer simply forces the actual chapter map to cycle through other maps in the game, and the portrait viewer loads every portrait in the game in (what appears to be) a fairly standard dialogue sequence.
VS EIRIKR#
Name seems to imply something about the link arena, though it crashes when accessed, so it is not known for sure.