 This article has a talk page!
This is a sub-page of Proto:Final Fantasy VII.
The Final Fantasy VII Sampler Disc is the first customer available demo version of Final Fantasy VII. It seems to almost exactly match what was shown of the game at V-Jump Festival 1996.
It has three different revisions:
- Square's Preview (SLPS-00401): Included with the Japanese version of Tobal No.1. The demo's main executable last modified date is 1996-06-27.
- Square's Preview Extra - FFVII Sample & SIGGRAPH'95 Works (SLPM-80048): Standalone version of the demo, distributed by Square at the 1996 Tokyo Game Show. The demo's main executable last modified date is 1996-07-05.
- Final Fantasy VII Interactive Sampler CD (SCUS-94961): English version of the demo. Included with the North America version of Tobal No.1. The demo's main executable last modified date is 1996-08-17.
General Differences#
- The prelude is absent, but a remix of its music is present in the menu at the beginning of the disc.
- In the final game, you start off with only Cloud and shortly after add Barret to the party. In the demo, you start off with Cloud, Barret, and Aerith, a party formation also seen in a lot of early prerelease material. Aerith being here is most likely just to show her off as part of the demo.
- There are no save points, which you wouldn't need anyway since the demo only covers the very first bombing mission of the game.
- The demo skips over the name selection for Cloud and Barret. This means that Cloud isn't named "Ex-SOLDIER" at the beginning of the game, and that both characters have their names visible from their dialogue at all times.
- Internally, most elements outside the first bombing mission are absent. Cloud, Barret, and Aerith are the only characters that contain any data in the demo.
- The currency is called GP like in previous English installments. It is worth noting that in the final game, the currency used in the Gold Saucer is called GP.
Gameplay Differences#

|
To do:
|
Battle#
|
Proto |
Final |
|---|---|
|

|
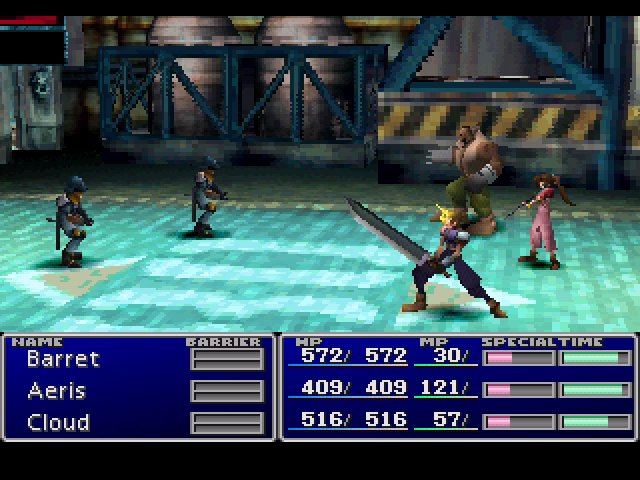
- Graphically, there are many differences. The character models, many of the enemies, and the battle backgrounds have different colors and details.
- The camera movement at the start of a battle is different.
- Help prompts in the demo have a smaller width, but larger height than the final. They can also overlap each other.
- The "NAME" header is aligned further to the left in the demo.
- Winning a battle doesn't play the victory fanfare, so the battle music just continues to play on.
- Nobody in the party can level up. (the meter stops filling once the character gets enough experience to level up)
- There is no way to run from battle.
- There is a "/" next to the character's current MP.
- After choosing an action in battle but before it executes, the characters perform a sort of prepping animation, not dissimilar to previous games in the series.
- You cannot pause the game in battle.
- In the final, holding down the accept button will quickly go through every subsequent option. In this version, you have to press the button each time.
- Characters and enemies turn to face whoever last targeted them. This is most obvious when casting recovery magic on an ally, as they will turn away from the enemies toward the ally casting the spell. Moreover, if the battle ends at the next turn, the characters will still be in their turned state, resulting in the victory animations facing the wrong direction.
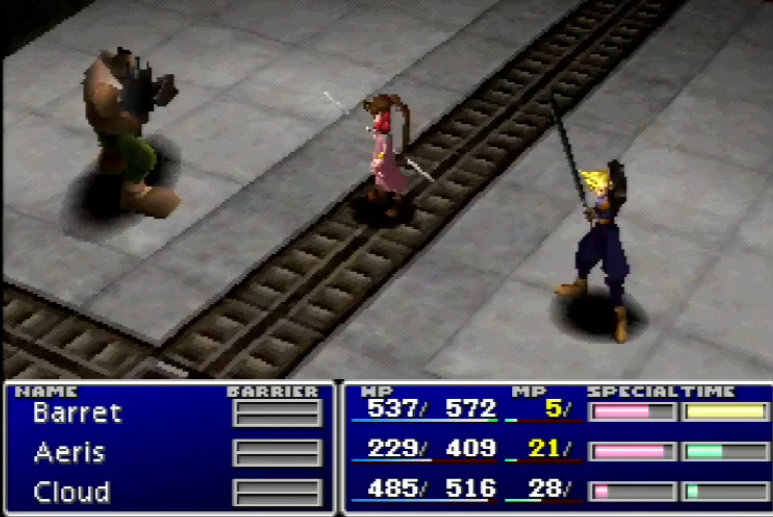
- In the final, Cloud takes a step backward with his right foot as he places the sword over his shoulder. In the proto, he does not move his foot when he puts away his sword.
- Certain entry sequences during battle can break the visuals and cause elements in the environment to disappear while selection cursor is visible.
- The font used for the display of HP numbers (either gained or lost) is the Chicago font used in earlier Final Fantasy games. This was updated for the final.
- There is no sound effect for changing targets.
- The screen fades in and out of the post-battle item screen much slower.
- The help text box that appears after pressing Select is placed at the same spot as the other battle text boxes and styled the same way as well.
- Cloud's limit breaks have swapped properties: Braver can paralyze enemies while Cross-Slash only does damage.
- When an enemy is paralyzed, a text box comes up informing you of it.
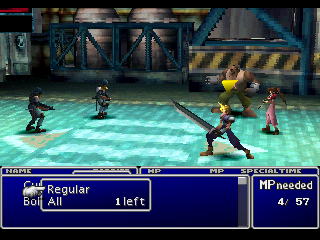
- When using magic equipped with All, instead of automatically targeting all opponents and having to press L1 or R1 to choose a single target, a new window pops up asking if you want to use All or regular.
- Text for MP Needed looks different.
- Instead of having an "x" next to the number of uses a summon has, it has "left" (e.g. "1 left" instead of "1x"). This also applies to the All menu.
Overworld#
- Using L1 or R1 while moving will slowly rotate Cloud relative to the way he is facing. In the final version, pressing L1 or R1 will instantly snap Cloud's direction roughly 45 degrees to the left or right relative to the direction he was moving.
- NPCs have no collision unless you are able to talk to them.
- There is no on-screen timer for the reactor detonation; instead, the timer is shown through dialogue boxes. You only have 3 minutes to escape as opposed to 10, although the timer only seems to be active outside of battle.
- You cannot access the menu. This means you can only use items and healing magic while in battle.
- There are no item pickups on the field. The only way to obtain more items is from battles.
- Pressing Select on the field does not bring up a hand cursor showing you your current position.
- Cloud will automatically climb ladders simply by running into them.
Area Differences#
|
|
To do:
|
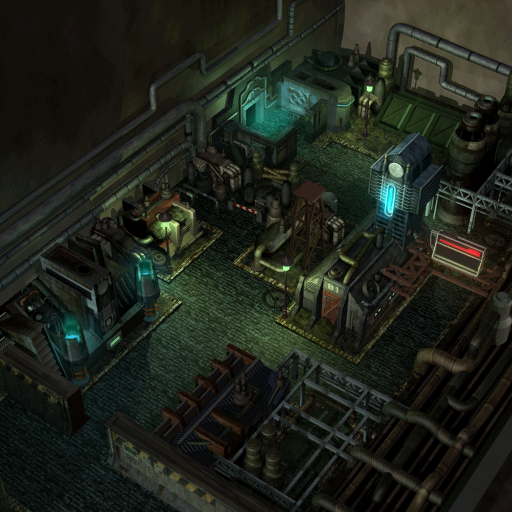
md1_2#
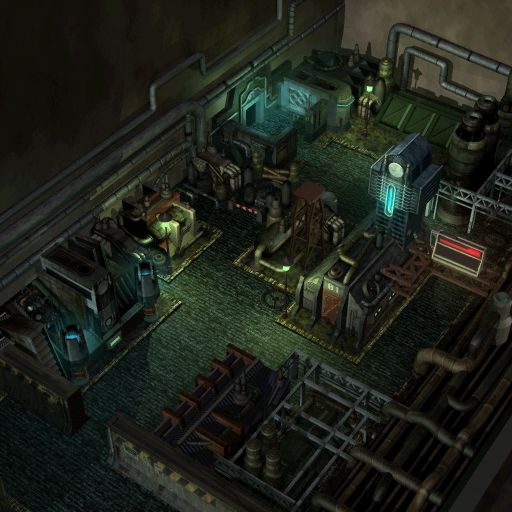
The screen after speaking to the AVALANCHE members for the first time.
|
Proto |
Final |
|---|---|
|
|
Mostly the same, the only difference is that the blue lights would gain a glowing effect in the final.
|
Proto |
Final |
|---|---|

|

|
The walkmesh is slightly different near the west wall, but the more noticeable difference is one of the paths representing the previous area being much more extended than the final, not that it really matters though as you can't access that area in either version.
nrthmk#
The screen where Wedge secures the escape passage and where the escape sequence ends.
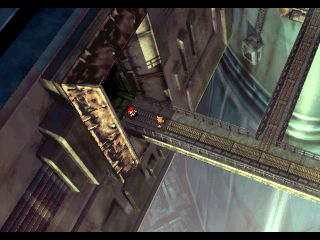
- While this area looks the same as the final, the door behind Wedge is always open.
- Likely because the door is open, walking up to Wedge will automatically trigger his dialogue and once it finishes, you are automatically moved away.
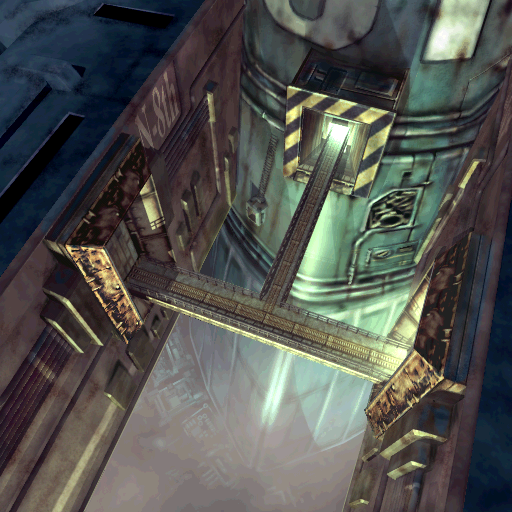
- Despite the fact that the door is always open, the state for it being closed exists, rendering it unused in this version.
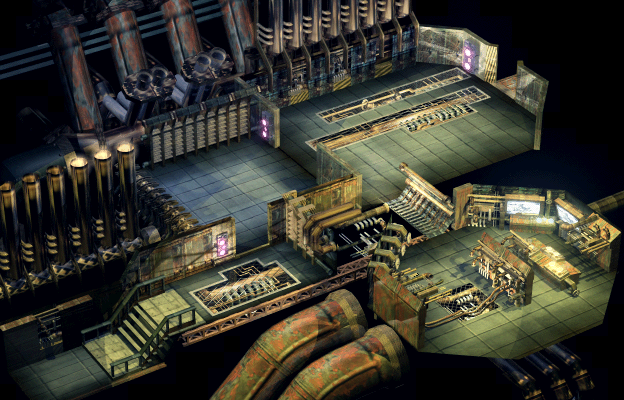
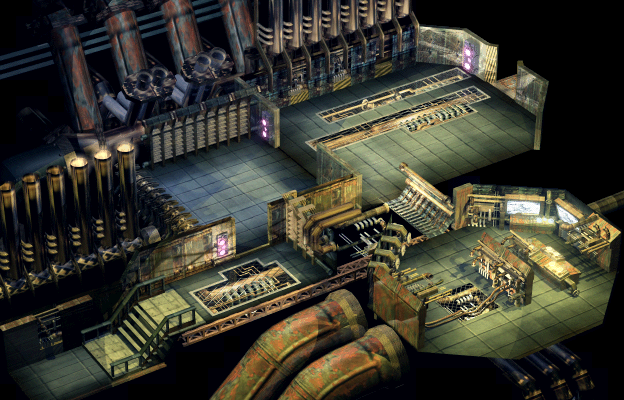
nmkin_1#
The room where Biggs and Jessie open doors for you.
|
Proto |
Final |
|---|---|
|
|
- Near the south room, a blue glow was removed and some missing pixels were filled in.
- You cannot talk to Biggs or Jessie. You instead need to walk up to the door in order to get them to open it for you.
- Once you set the bomb, Biggs is not automatically here. You need to rescue him much like Jessie.
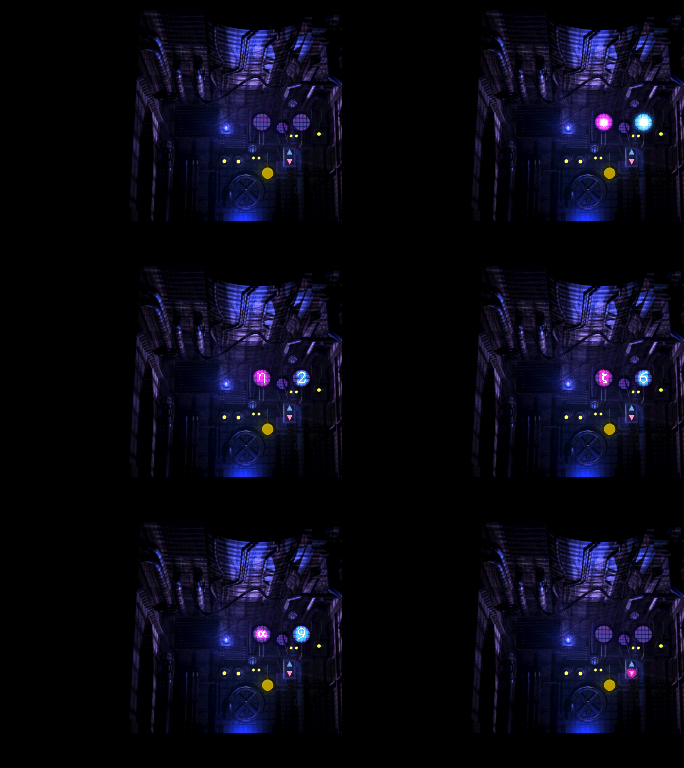
elevtr1#
The elevator.
|
Proto |
Final |
|---|---|

|
|
While the main part of the map looks identical, the version used in the demo extends much farther offscreen, there are about half as many map states, and they are all completely different, including one that has a stray blue bar appear at the top of the of the map, which may explain why it's so much larger than the final. (The above images go through each state one by one to better compare the two.)
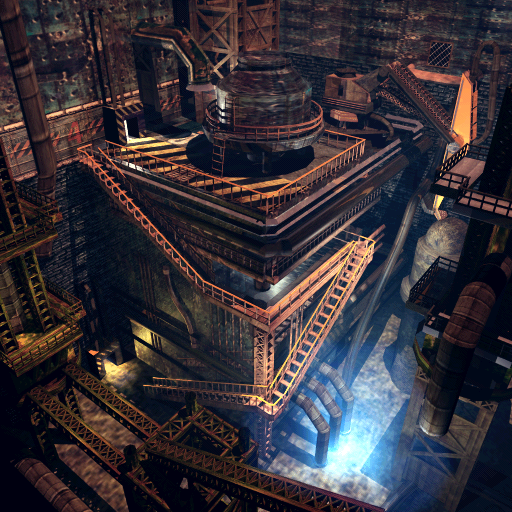
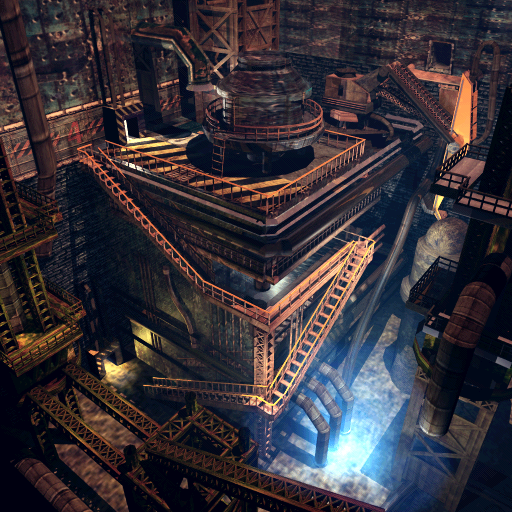
nmkin_2#
The tower-like room after the elevator.
|
Proto |
Final |
|---|---|
|
|
- The base of the small dome on the top platform is slightly wider, and as a result the roof sticks out less.
- The door at the bottom is always open. Unlike nrthmk, the state for the closed door does not exist.
- The doorway at the upper-right is closed off.
|
Proto |
Final |
|---|---|

|

|
- The closed-off doorway is also reflected in the walkmesh. Despite this, this area is inaccessible in both versions.
- There is a walkmesh where the ladder is that isn't in the final.
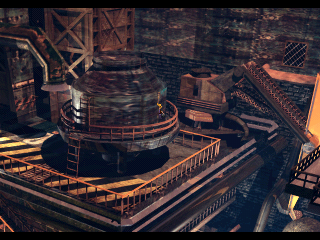
- Despite the dome being slightly wider, part of the walkmesh surrounding it actually extends further inward than the final. As a result, Cloud appears to clip through it.
- There are other minor changes to the walkmesh.
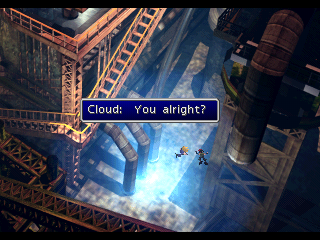
- As mentioned before, Biggs also needs to be rescued after setting the bomb. He is located in the open area next to the tower.
nmkin_3#
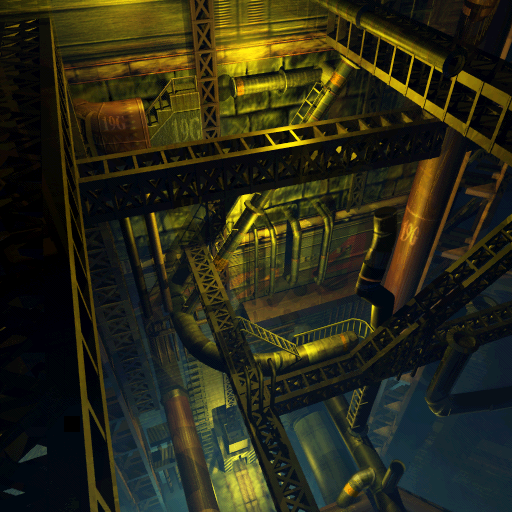
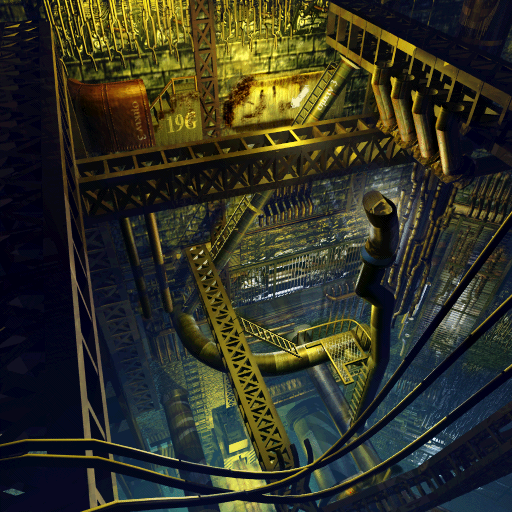
The area with all the ladders and where Jessie later gets stuck. This is by far the area with the most differences.
Proto nmkin_3 |
Final nmkin_3 |
Final smkin_3 |
|---|---|---|
 |
 |
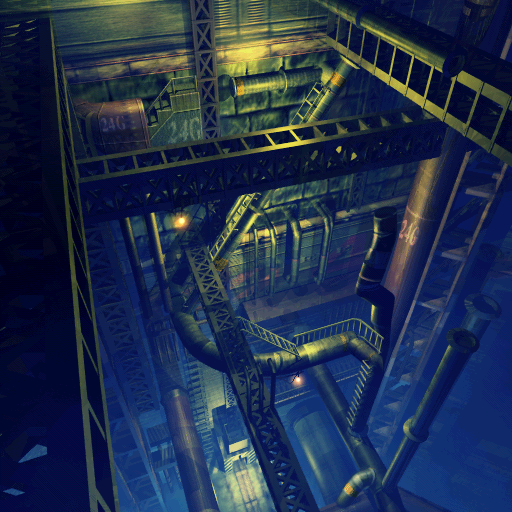 |
- While much of this map looks very different to its final game counterpart, it actually bears much more of a resemblance to the map used in the No. 5 Reactor (smkin_3), though there are still a couple of differenes when compared to that version as well.
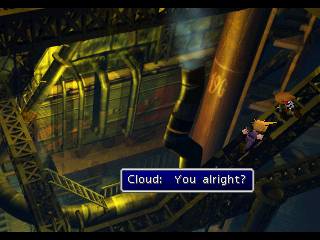
Some notable differences when compared to smkin_3:
- The pipe in the bottom right corner turns and goes offscreen instead of connecting to the pipe below it.
- There are no hanging lights.
- The first ladder you climb down is broken. Note that this doesn't hinder your ability to climb it, Cloud will simply keep climbing as normal.
- The final ladder you climb down has bars to the sides.
- Two of the only true similarities this map has with the final's nmkin_3 as opposed to smkin_3 are the numbers on various walls and pipes, and the lack of a blue tint.
One significant difference that isn't in either of the final maps is the presence of a long walkway to the right of the dead end past the first ladder. This is actually where Jessie gets stuck in this version.
Possibly due to the way ladders work in this version, Jessie's explanation on how to use ladders doesn't exist and she immediately runs ahead, and instead of waiting where she later gets stuck, she waits at the bottom of the first ladder and cannot be spoken to.
Proto nmkin_3 |
Final nmkin_3 |
Final smkin_3 |
|---|---|---|
 |
 |
 |
The walkmesh is also very different, even when compared to smkin_3. The walkmesh is all connected, with no gaps where Cloud jumps or climbs ladders.
nmkin_4#
The next-to-last area. This area is identical visually.
|
Proto |
Final |
|---|---|

|

|
The only main differences in the walkmesh are again due to there being no gaps where the ladders are.
nmkin_5#
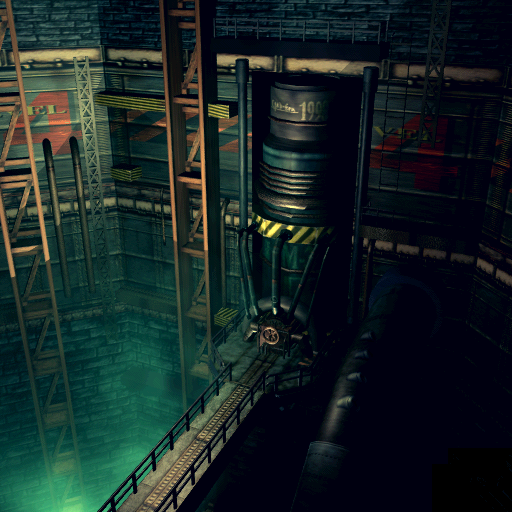
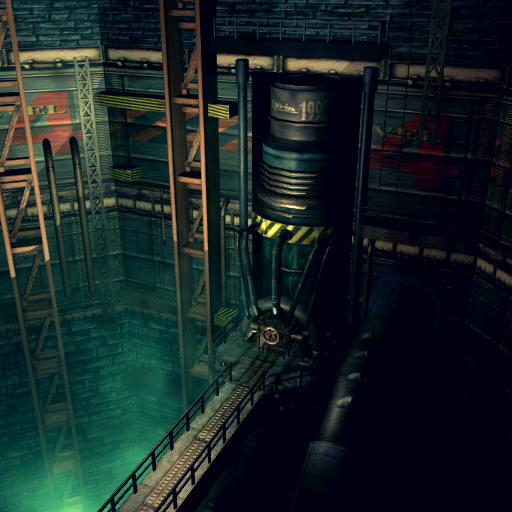
The final room where you set the bomb.
|
Proto |
Final |
|---|---|
|
|
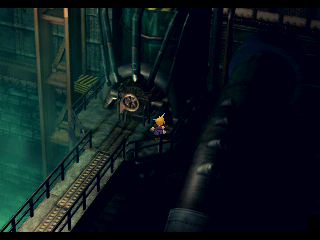
- This area is identical with the exception of a missing chunk in the bottom-right corner that was filled in the final. This can just barely be seen in-game by standing as far right as possible.
- The scene where Cloud hallucinates and the screen gets tinted in red is missing, though Cloud is still reluctant to set the bomb off.
Enemy Differences#
|
|
To do: |
There are many differences regarding the enemies included in this demo.
- Strangely, nearly all of the enemy names are written in plural, even when there's only one of them present.
- In addition to this, when there are multiple of the same enemy, there is no letter added to their name to differentiate them. (e.g. Guard Hound A, Guard Hound B, etc.)
- Beyond the pluralization of their names, there are two enemies that have completely different names.
- MPs are called Security Troops.
- Grunts are called Combatants. (Interestingly, a recolor of the Grunt found later in the game is named Special Combatant.)
- There are also some enemies in the demo that can't normally be found until later in the game:
- Hedgehog Pies, which are normally found in the Sector 5 Slums and the Church.
- Deenglows, which are normally found in the Train Graveyard. (Strangely, this is the only enemy name that isn't pluralized in the demo.)
- There is also an enemy present called Grenadiers that has the same appearance as the final's Underwater MP, an enemy that appears much later in the game.
Graphical Differences#
Character Models#
|
|
To do:
|
|
Proto |
Final |
|---|---|
|
|
Name |
Proto |
Final |
|---|---|---|
Cloud |
 |
 |
Barret |
 |
 |
Aerith (?) |
 |
 |
Biggs |
 |
 |
Jessie |
 |
 |
Wedge |
 |
 |
Train Guard |
 |
 |
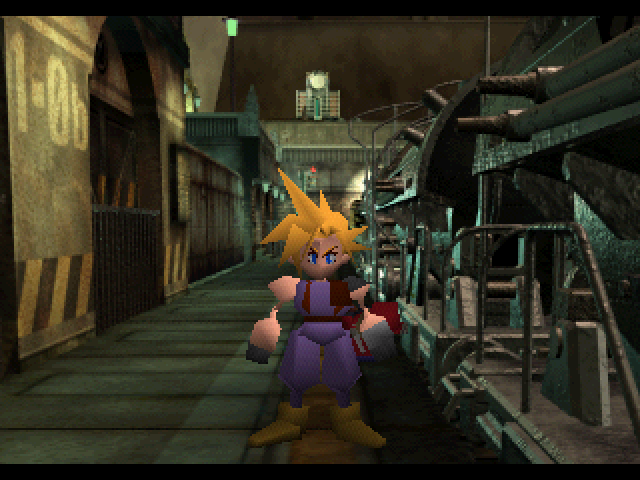
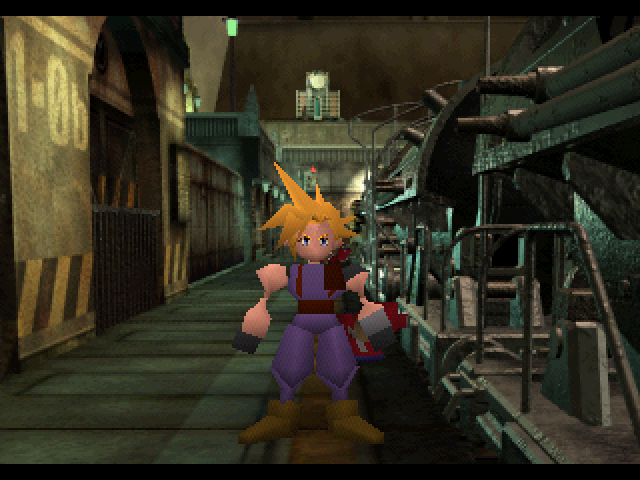
- The field models for Cloud and Barret have different textures, cruder shading, and less geometric detail in the demo.
- In the final game, the disc contains only the right eye, and it is flipped to render the left eye (they are duplicated and mirrored here to help the comparison). The demo contains different left and right eye textures.
- The game incorrectly uses the palette meant for the unused Barret's mouth when rendering his eyes, resulting in a glitched apparence. See the Unused Eyes for the correct palette.
- As Aerith model is not present in the demo, it's impossible to tell if the texture shown above is actually hers. The palette is also not present (the one used here was based on her final game palette)
- Characters don't blink in the demo. Closed eyes textures are present for Cloud and Barret, but they are unused.
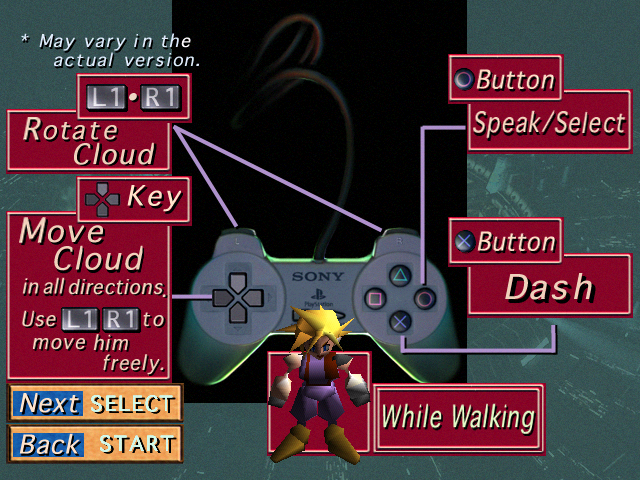
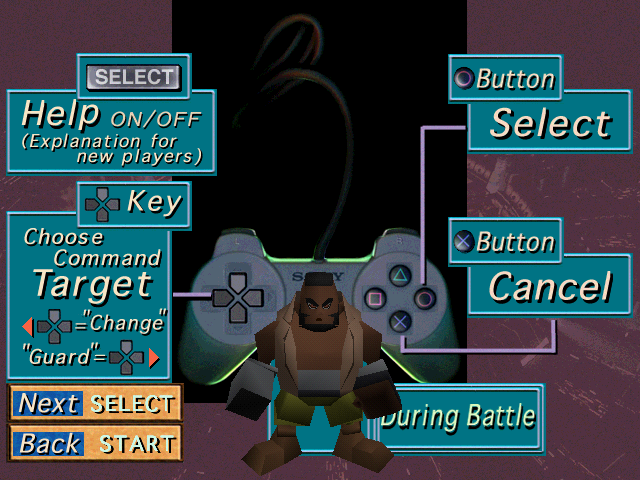
- The controls screen has even earlier models! The shading is even cruder, and the face textures have a mouth and more spaced-out eyes.
Character Portraits#
Proto |
Final |
|---|---|
 |
 |
 |
 |
 |
 |
- The character portraits for Cloud, Barret, and Aerith are slightly different. Cloud uses the portrait he uses in the Nibelheim flashback, and Aerith has a slightly altered smile. All of the portraits have altered colors and are positioned differently to the final ones.
FMV Differences#
Intro#
|
Proto |
Final |
|---|---|
The game's intro FMV contains unique English text plastered on that acts as a brief exposition for the story.
"Shinra Company" --- A large conglomerate that possesses all of the world's energy and controls its politics. |
Outraged by the Shinra, the inhabitants formed the rebel group 'Avalanche' to resist them. |
After coming into contact with Avalanche in a bar, Cloud joins their demolition mission in return for a large reward. |
Their target is the Shinra power plant Makoro. |
Sound effects/ambience are different, as a lot of them are lower-pitched or missing entirely. The Final Fantasy logo is missing the registered mark it would have in the final English release, and the copyright date is 1996. It's also interesting to note that the FMV in the final English version of the game has an "E" at the end of its filename whereas here it is omitted as in the final Japanese releases.
Cloud Looking Up at Shinra HQ#
|
Proto |
Final |
|---|---|
No differences here other than the filename and compression method.
Sector 1 Explodes#
|
Proto |
Final |
|---|---|
The demo ends at the destruction of the first Mako Reactor, with the text "MISSION COMPLETE" closing in, cutting off the video by a few seconds. "FINAL FANTASY 7 - coming in DECEMBER" quickly closes in as well and the text zooms out.
(Turns out the game wouldn't be released until January 1997 in Japan and August '97 in the US. Oops.)
Text Differences#
|
|
To do:
|
The English version of the demo contains an early English translation, which is full of strange differences.
- There are minor translation differences with the menu choices in battle, such as "Attack" being labeled as "Fight".
- Limit Breaks are referred to as "Special Techniques".
- None of the dialogue is boxed in quotation marks like the final game.
- Groups like SOLDIER are referred to as "soldiers" instead of a specific group name, AVALANCHE is referred to as "Avalanche" or "the ’Avalanche’", and Shinra is referred to as "The Shinra" instead. Neither are capitalized.
- Mako is referred to as Makoro. This is likely a translation error, as in Japan it is the same as in the final.
- Jessie is referred to as "Jesse". Likely another translation error.
- Profanities like "hell" are censored in this build.
Breaking Into Sector 1's Gate#
Character |
Proto |
Final |
Notes |
|---|---|---|---|
Biggs |
Wow! He’s an ex-soldier alright! |
Wow! You used to be in SOLDIER all right! ...Not everyday ya find one in a group like AVALANCHE. |
|
Jessie |
Soldiers? |
SOLDIER? Aren't they the enemy? |
|
Jessie |
...Then why’s there one |
What's he doing with us in AVALANCHE? |
|
Biggs |
Don’t jump the gun Jesse. |
Hold it, Jessie. He WAS in SOLDIER. |
|
Biggs |
He quit them and is now one of us. |
The prototype's line is mixed in with the last dialogue box in this demo. |
|
Biggs |
Didn’t catch your name. |
Didn't catch your name... |
|
Cloud |
...Cloud. |
...Cloud. |
These are only different if you input a different name, which you cannot do in the demo. |
Biggs |
Cloud, eh? |
Cloud, eh? I'm... |
|
Cloud |
I don’t care about your names. |
I don't care what your names are. Once this job's over...I'm outta here. |
|
Barret |
The heck are you guys doin’?! |
The hell you all doin'!? I thought I told you never to move in a group! |
|
Barret |
Our target is the |
Our target's the North Mako Reactor. We'll meet on the bridge in front of it. |
|
Barret |
Ex-soldiers.... |
Ex-SOLDIER, huh? Don't trust ya! |
|
Barret |
If you push the Directional button while pushing the [CANCEL] button to run. (earlier marked X) |
There's no early counterpart to this dialogue, since there's a dedicated controls screen in the demo. This sentence was added at the end of the scene to make up for the lack of an explanatory screen, but the grammatical error got missed. |
|
Talking to Wedge by Sector 1#
Character |
Proto |
Final |
Notes |
|---|---|---|---|
Wedge |
I’ll secure the escape passage. |
I'll secure the escape passage. Concentrate on the mission, Cloud. |
Grammatical error (missing a space). |
Wedge |
Geez, they’re really gonna blow |
Geez, we're really gonna blow this huge furnace up? This'll be something to see! |
|
Talking to Barret in Sector 1#
Character |
Proto |
Final |
Notes |
|---|---|---|---|
Barret |
...Hey. |
Yo! This your first time in a reactor? |
Another grammatical error. Note that Barret, instead of just standing there, comes out of Cloud (like a party member) instead. It's likely that Barret was meant to be with you since the beginning, but they already decided to change that, since he still runs ahead of you at the beginning of the game. |
Cloud |
Well. |
No, After all, I did work for Shinra, y'know. |
|
Barret |
This planet is full of Mako |
The planet's full of Mako energy. People here use it every day. |
For some reason, this is one of the only instances where "Mako" is used instead of "Makoro". |
Barret |
It’s the life blood of this |
It's the life blood of this planet. But Shinra keeps suckin' the blood out with these weird machines. |
|
Cloud |
I'm not here for a lecture. Let's just hurry. |
Not present in the demo |
|
Barret |
That's it! You're comin' with me from now on. |
Not present in the demo, but there's an unused line similar to this. |
|
Music#
The music uses an earlier version of the game's soundbank. The piano, trombone, and choir section samples all have different samples.
Song Title |
Proto |
Final |
Notes |
|---|---|---|---|
Prelude |
It seems the demo prelude was originally a music loop test (filename LOOPTEST.SND). An enhanced version of the prototype theme is reused on later Square demo discs. |
||
Opening - Bombing Mission |
This is the song that usually plays from the opening FMV up until you enter the reactor (looping just the bombing mission part of the song). |
||
Bombing Mission |
Only played if you backtrack from the reactor back to Sector 1. |
||
Let the Battles Begin! |
The "metal clanks" are more audible, the song is baked in less reverb, and the main melody's trumpets are instead a synth instrument. |
||
Mako Reactor |
Samples are different. |
(Source: joshw (Music rips))
- Various sound effects during battle are changed between the proto and the final builds (e.g., magic casting, limit break activation, sound effect for setting the bomb at the base of the reactor).
Unused Graphics#
|
|
To do: |
Isometric Character Portraits#


Isometric sprites of Cloud, Barret, and Aerith as seen in Final Fantasy VII: Perfect Guide (the fourth disc of Final Fantasy VII International), used in place of the character portraits
Timer Graphics#
|
Proto |
Final |
|---|---|

|

|
Despite this demo only using periodic text boxes for the bomb timer, graphics for the timer can be found, albeit missing two sections that the final has.
Possible Materia Menu Graphics#

A set of what appears to be early graphics for the Materia menu alongside a trash can.
Number Graphics#

A set of numbers 1-5 likely meant for labeling what level of Limit/Special you're on. This version just uses a separate Level 1 graphic.

Another set of numbers 1-5, this time using Roman numerals.
Item Icons#
|
|
To do: |

A group of weapon and item icons not dissimilar to that of previous entries in the series.
Arrows#

A simple pair of arrows not used anywhere.
Japanese Demo Leftovers#


Leftovers from the Japanese version of the demo, albeit crossed out.
Unused Font Image#

The Japanese version has three different images with different characters for its font. This one is completely unused (the game does not use those Kanji in any text), but it is fully functional.
Unused Face Textures#
Eyes#
The game's TDB.LZS file contains the textures of all field models found in the demo. There are 3 pairs of eyes textures for every playable character, but the game only uses one (the first one).
There are also 3 additional pairs of eyes, probably meant for a playable character, that are unused. They may be Aerith's, but as she never appears as a field model in the demo it is impossible to say for sure.
The textures palettes are stored in each field's BSC file, and not in the TDB.LZS. As such, palettes are only available for models that are used in a field.
As Aerith never appears in a field model, the palette shown for that set of eyes is inaccurate (palette shown here was created based on the one used by the final game).
The game incorrectly uses the palette meant for Barret's mouth when rendering his eyes, resulting in a glitched appearance. The correct palette is unused, and it is the one shown here.
Cloud |
Barret |
Aerith (?) |
|---|---|---|
 |
 |
 |
Mouths#
Unused mouth textures are also present for each playable character, along with a generic one attached to Biggs model, but may have meant to be a generic one used by NPCs. Their palettes can be found in the BSC file corresponding to fields the models are used.
Duplicate textures of Cloud and Barret's mouth textures, found alongside their models in KEY.BSC, are used in the Controls demo screen.
Cloud |
Barret |
Aerith (?) |
Biggs |
|---|---|---|---|
 |
 |
 |
 |
(Source: Original TCRF research)
Unused Commands#
The Japanese version contains the name and description of unused battle commands.
Some of them did not make it to the final version of the game, others are simply unused in the demo.
When hacked in the game, they do not seem to be functional.
The English version had the command names and descriptions replaced by a ".".
In the Square's Preview version, the address 801570DA contains the command id for Aerith's first slot (in battle). Change it to one of the ids below to see them in-game.
Absent From The Final Game#
Id |
Name (JP) |
Name (Translation) |
Description |
Description (Translation) |
Notes |
|---|---|---|---|---|---|
0x07 |
ほうそく |
Law |
相手が予想した条件通りだと死にます。 |
If your opponent meets the expected conditions, they will die. |
There is a ほうそく(Law) Materia in the original Japanese release, but it is unused and it teaches the Coin Toss command instead. The description of this command brings to mind gimmicky abilities such as Level 5 Death in previous titles. |
0x08 |
かなでる |
Play Instrument |
持っている楽器で相手に効果。 |
Affects opponents based on the instrument you're holding. |
The description seems to indicate that this command would work similarly to the series's recurring Sing (うたう) command, particularly its behavior in its debut in Final Fantasy III, but no such ability appears in the final game. While the final game does have a couple equippable musical instruments (Cait Sith's Trumpet Shell and Battle Trumpet), as well as two harp key items (the Lunar and Earth Harps), none of them can actually be used to activate musical abilities in battle. |
0x09 |
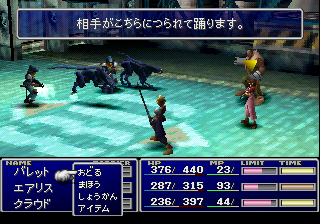
おどる |
Dance |
相手がこちらにつられて踊ります。 |
The opponent will be lured into dancing with you. |
The Dance command is a recurring ability or ability set in Final Fantasy, but no official game has it working quite the way it's described here. Oddly enough, the function described does match the recurring "Sultry Dance" ability from the Dragon Quest series, a major competitor of Final Fantasy's prior to Squaresoft's merger with Enix. |
0x0B |
ふうじる |
Seal |
相手を封じ込めてミニマテリアに変化させます。 |
Trap an opponent and turn them into Mini-Materia. |
The final game does have a Seal (ふうじる) Materia, but it's simply a standard Magic Materia that teaches the Sleepel and Silence spells. Judging from the description, this may have been an early form of the Morph ability, which did ultimately make it into the game and transforms a weakened enemy into an item, but there's nothing called Mini-Materia in the demo or the final game. |
0x0E |
ペースト |
Paste |
自分の直前の攻撃を真似します。 |
Mimic the attack just before your own. |
The description is the same as the Mime command. Perhaps "Paste" (as in copy-and-paste) was an early name for Mime? |
0x10/0x11 |
なし |
None |
<empty> |
<empty> |
Empty command slots. |
(Source: Original TCRF research)
Present in The Final Game#
Id |
Name (JP) |
Name (Translation) |
Description |
Description (Translation) |
|---|---|---|---|---|
0x05 |
ぬすむ |
Steal |
相手の持ち物をある確率でぬすみます。 |
You'll have a certain chance to steal your opponent's possessions. |
0x06 |
みやぶる |
Sense |
相手のHPやMPや特徴をみやぶります。 |
Discover an opponent's HP, MP, and other characteristics. |
0x0A |
なげる |
Throw |
持ちものを投げ付けてダメージを与えます。 |
Throw one of your items to inflict damage. |
0x0C |
ひっさつ |
Deathblow |
クリティカル攻撃になるかスカになります。 |
Can result in either a critical hit or a complete failure. |
0x0D |
あやつる |
Manipulate |
相手の行動をこちらが入力できます。 |
Your side can input your opponent's actions. |
0x0F |
ものまね |
Mime |
自分の直前の攻撃を真似します。 |
Mimic the attack just before your own. |
(Source: Original TCRF research)
Unused Magic Sub-Menu Commands#
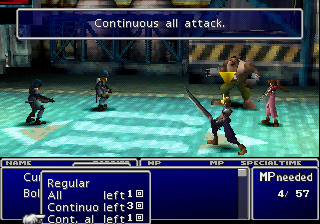
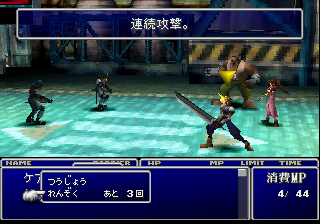
In the demo, you can use a sub-menu to make use the Bolt magic in multiple targets (as if it were paired with an "All" Materia). There are two unused commands to the same submenu ("Continuous" and "Cont. All").
"Cont. All" seems to be a combination of both "Continuous" and "All" attributes.
When hacked into the game, "Continuous" seem to do nothing (a regular attack is executed), and "Cont. All" seems to work the same as "All".
"Cont. All" was probably supposed to be the combination of both "Continuous" and "All" attributes: It only shows up in the sub-menu if the magic is flagged to be both "Continuous" and "All", and the number of times you can use it is the lowest between the number of remaining "All" uses and the number of remaining "Continuous" uses.
The text is cropped in the English version.
Addresses 801574C6 (Square's Preview version) and 80157706 (Final Fantasy VII Interactive Sampler CD version) contains the number of remaining "Continuous" uses for Bolt 1.
Addresses 801574C9 (Square's Preview version) and 80157709 (Final Fantasy VII Interactive Sampler CD version) controls whether "Continuous" or "All" is attached to the magic. Can be set to 0x00 for None, 0x14 for All, 0x18 for Continuous, and 0x1C for both.
Name (JP) |
Name (US) |
Description (JP) |
Description (US) |
|---|---|---|---|
れんぞく |
Continuous |
連続攻撃。 |
Continuous attack. |
れんぜん |
Cont. all |
連続全体攻撃。 |
Continuous all attack. |

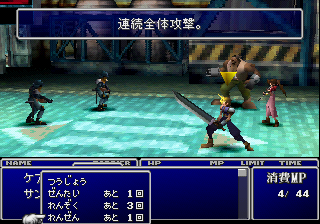
(Source: Original TCRF research)
Unused Text#
Dialogue#
Most of the lines are only present in the Japanese version of the demo. The unused English lines are between double quotes, but this is not the case for the used lines.
Text (JP) |
Translation |
Text (US) |
Notes |
|---|---|---|---|
「だれだ。きさまら!」 |
"Who are you? You bastards!" |
It is the first dialog in the game texts, which is roughly ordered in chronological order, so it was probably meant for the guards that see you jumping from the train. |
|
デモプレイはここまでです。 |
Here is the end of the Demo Play. |
The message with the release date appears in the end FMV instead. |
|
バレット |
Barret: |
Barret: |
Probably removed because Barret is always in the party in the demo version. |
「ここはまかせとき!」 |
"Leave it to us this time!" |
Probably meant for one of the AVALANCHE members. |
|
「たのんだぜソルジャーさんよ!」 |
"We're counting on you, Mr. SOLDIER!" |
Probably meant for one of the AVALANCHE members. |
|
「バレットをよろしくな!」 |
"Take care of Barret!" |
Probably meant for one of the AVALANCHE members. |
|
バレット |
Barrett |
Judging by its location, it was probably meant to be displayed when Barret is visibly angered at the end of the elevator dialog with Cloud and Jessie. |
|
クラウド |
Cloud: |
Cloud: |
Judging by its location, it was probably meant to be displayed when the alarm starts right before the boss fight. |
(Source: Original TCRF research)
Debug Text#
Found in the main demo PSX.EXE
Final Fantasy VII Debug Console.Battle Text#
The following names are found mixed with other battle related strings in KERNEL.BIN (part 8)
Text (JP) |
Translation |
Text (US) |
Notes |
|---|---|---|---|
年月日時分秒前 |
YearMonthDayHourMinuteSecondAgo |
(not present) |
A series of characters for telling time |
山田 |
Yamada |
Yamada |
Extremely common Japanese surname; probably a placeholder |
ピカード |
Picard |
Piccard |
Possible Star Trek reference |
(Source: Original TCRF research)
Magic Description#
The Japanese versions contain an unused Magic description.
Text (JP) |
Translation |
Text (US) |
Notes |
|---|---|---|---|
かなり強い氷の魔法です。 |
A fairly powerful ice spell. |
It is located right after the Ice 2 description, so it probably was meant to be used with Ice 3. |
Unused Enemy Attack Names#
Some of the following attacks may be used by enemies, but their names are never shown.
Name (JP) |
Name (US) |
|---|---|
トンファー |
Tonfa |
噛みつき |
Snapper |
ダッシュ殴り |
Dash hit |
ファットプレス |
Fat press |
ニードルプレス |
Needle press |
連続ニードル |
Non-stop Needles |
ウイングカッター |
Wing cutter |
サンダー |
Bolt |
(Source: Original TCRF research)
Unused videos#
Included in the Square's Preview Extra - FFVII Sample & SIGGRAPH'95 Works are five videos showing a camera approaching a cube from different angles.
ANG10.STR |
ANG30.STR |
ANG45.STR |
ANG60.STR |
ANG90.STR |
|---|---|---|---|---|
(Source: Original TCRF research)