 This article has a talk page!
This is a sub-page of Proto:Crash Team Racing.
 Level DifferencesMinor changes to the tracks and battle arenas.
 Unused AudioUnused sound effects, voice lines, and music present within the files.
Codes#
To unlock all of the characters and tracks, use the following GameShark codes:
8008B764 FFFF
8008B766 FFFF
General Differences#
Startup and Menus#
- The startup is incredibly basic, featuring splash screens with simple text along with promotional renders identical to the ones used in demo versions.
- There is neither music, nor narration, nor the animated Naughty Dog box screen.
- The fourth screen shows the CTR logo with the "Coming Soon!" message below. After this screen, the regular menu is immediately loaded.
- The checkered flag is much darker and is positioned facing the screen.
- The animated title screen sequence makes no sound effects, and Crash's model has bigger pupils and his eyes have a darker tone.
- Crash does not blink while in the idle pose.
- The trademark symbol next to the game's logo is missing.
- No sound effects play in the menus (aside from the Enter Your Name screen when creating a save profile).
- The menu screens pop up instantly when navigating around, rather than having an animated transition.
- Only X and Square buttons are used to confirm and go back, respectively. In the final game, Circle and Triangle are also mapped for such actions.
- The green outline around the menu borders has a stronger shade.
- The outline around the level thumbnails also lacks transparency.
- Cup tournaments in Arcade and VS. modes did not exist at this time.
- The autodemos and the intro cutscene are absent, so nothing will play when you are idle in the main menu.
- Cheat codes were not implemented yet, so holding L1 and R1 does not lock the inputs. Thus, it is impossible to unlock certain characters such as Penta Penguin without hacking. Consequently, the secret demo for Spyro 2: Ripto's Rage! is not present either.
- Two, three and four-player options are always available, regardless of whether or not the controllers are plugged in.
- There is no unlockable Scrapbook menu option. The
TEST.STRvideo file is also entirely missing from the game. - No "LOADING..." text appears during the loading screens.
Adventure#
- The New/Load sub-menu is positioned higher.
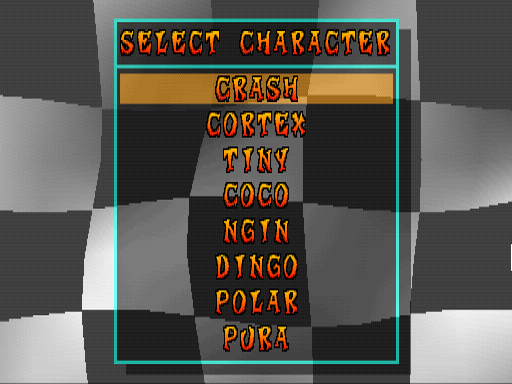
- The character select screen is just a basic list containing the eight starter characters instead of the 3D garage.
- Character names are written in a shortened form:
- Crash instead of Crash Bandicoot
- Cortex instead of Dr. Neo Cortex
- Tiny instead of Tiny Tiger
- Coco instead of Coco Bandicoot
- Ngin instead of N. Gin
- Dingo instead of Dingodile
- The Enter Your Name screen is the only part of the menus that actually has sound effects. Still, it lacks proper sounds for entering or deleting a character (even though these are already present in the sound banks).
- The background box of the character icons in the save files lack transparency.
Character Select#
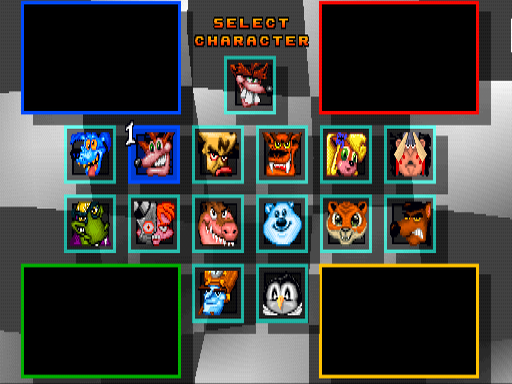
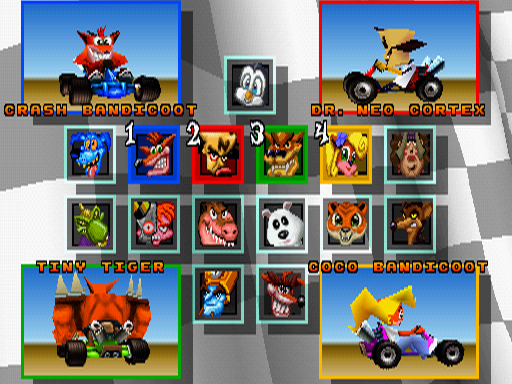
- The character select screen is defaulted to the four-player setup featuring four display slots, regardless of how many human players are in the game.
- There are no rotating character models. Instead, character names are simply displayed in the center of the blank squares when selected.
- Icons do not turn black after choosing a character. Rather, the colored outlines will stop flashing.
|
Aug 5 |
Final |
|---|---|
|
|
- Most of the character icons are in a rather primitive state:
- Crash has bigger eyes and muzzle, and more realistic teeth.
- Tiny Tiger is based on his boss portrait from Cortex Strikes Back.
- Coco uses a very similar version of her warp room portrait from Warped.
- Polar's icon has an overall cyan tone to it, and uses an earlier design. His final icon was changed to his Japanese icon, which was based on his 3D render.
- N. Gin's missile was changed from grey to yellow and has a slightly different texture under his bionic eye.
- N. Tropy's headgear textures were simplified, and his eyebrows were altered.
- Ripper Roo reuses the textures of his boss portrait from Crash Bandicoot.
- Papu Papu, Pinstripe and Komodo Joe reuse the boss portraits from their previous debuts.
- Penta Penguin has a quite different depiction, with black eyes with white pupils, a larger pointed beak and a white scarf.
- Fake Crash features three big crooked teeth and different eyes.
- Most character names are abbreviated.
- Crash instead of Crash Bandicoot
- Cortex instead of Dr. Neo Cortex
- Tiny instead of Tiny Tiger
- Coco instead of Coco Bandicoot
- Ngin instead of N. Gin
- Dingo instead of Dingodile
- Roo instead of Ripper Roo
- Papu instead of Papu Papu
- Joe instead of Komodo Joe
- NTropy instead of Dr. N. Tropy
- Penguin instead of Penta Penguin
- The small font is used for both character names and the "Select Character" title string. This string is also always onscreen, unlike in the final game where it is removed from the four-player screen once all characters are unlocked.
- Penta Penguin and Fake Crash have swapped places.
- Fake Crash's icon is slightly off-center.
Level Select#
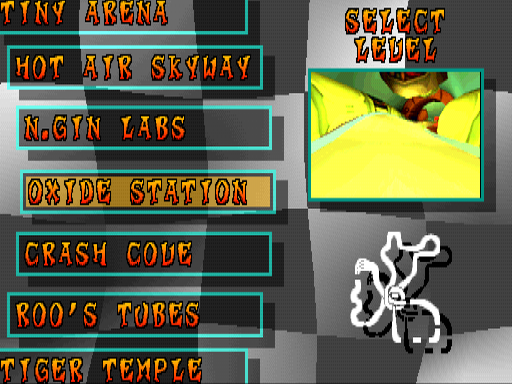
- There are no track preview videos.
- The track previews were taken from earlier revisions of the levels, causing many of them to have differences no longer present at this point in development.
- The brightness is also very high for the preview images.
- The track maps do not have blue outlines as they would in the final.
- Slide Coliseum was originally an unlockable track along with Turbo Track.
|
Aug 5 |
Final |
|---|---|

|

|
- Oxide Station's map reveals some drastic changes in the level's layout:
- The map shows an earlier version of the track that is seen in a prerelease video, where the first ramp jump went into four small tunnels, rather than one big one.
- The open space jump section has an extra geometry in the middle of the chasm, along with a larger curve leading to it, and a longer straight after it.
- Overall, the map design appears to have a crooked shape, as can be noticed by the different proportions at some spots, such as the low-gravity and the large drop down sections being longer and narrower.
- In the Time Trial menu, the ghost select screen will be available only if there is an existing ghost data for the selected track.
- The "Insert any memory card with ghost data in memory card slot 1" bottom text is missing.
Racetracks#
Aug 5 |
Final |
Notes |
|---|---|---|
 |
 |
The checkered line pattern is smaller and thinner. |
 |
 |
The glass ceiling has different structures. |
 |
 |
The vegetation is darker and the dirt textures are grey. |
 |
 |
The first large curve in the distance has "COCO" written with purple flowers. |
 |
 |
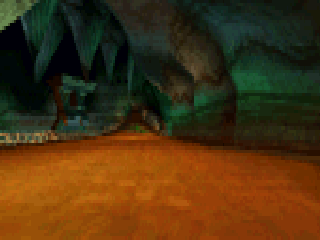
The tiki head statue lacks glowing eyes. |
 |
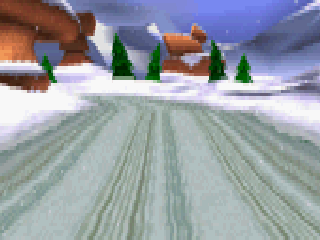 |
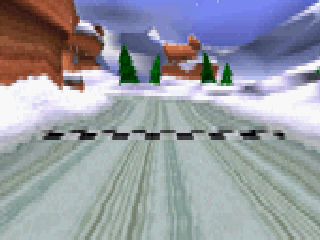
The checkered line pattern is smaller and thinner. |
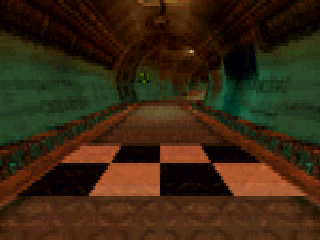 |
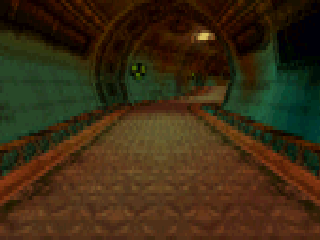 |
The checkered line texture does not cover the off-road sides. |
 |
 |
The checkered line pattern is smaller and thinner. |
 |
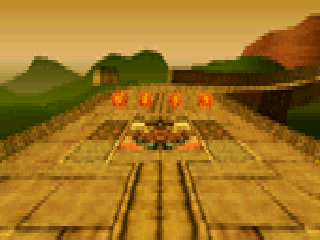 |
|
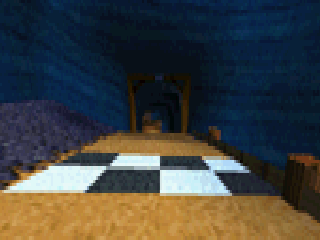 |
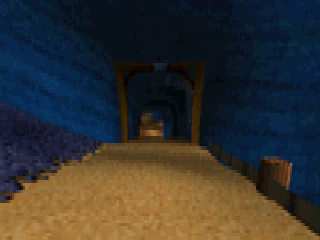 |
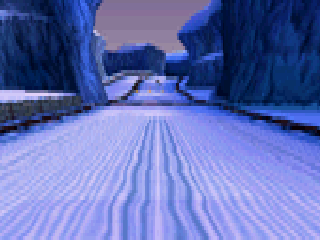
The checkered line texture does not cover the off-road side. |
 |
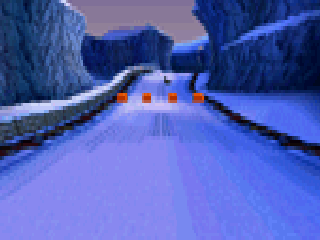 |
The wall on the left after the finish line is more open and has a snowy off-road. |
 |
 |
|
 |
 |
|
 |
 |
|
 |
 |
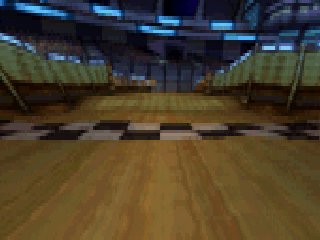
Some extra directional arrows are present in the left side. |
 |
 |
The textures of the track are heavily unfinished. |
 |
 |
There seems to be a screen with green text in the distance, and the wall textures on the right are less detailed. |
 |
 |
The asphalt road is larger, lacking the grassy off-road. |
Arenas#
- Parking Lot, Lab Basement, and The North Bowl are already available from the start, while Skull Rock was originally an unlockable arena.
Aug 5 |
Final |
|---|---|
 |
 |
 |
 |
 |
 |
 |
 |
 |
 |
 |
 |
 |
 |
- The arena thumbnails do not seem to feature any notable differences other than the camera angle.
Setup Battle#
|
Aug 5 |
Final |
|---|---|
|
|
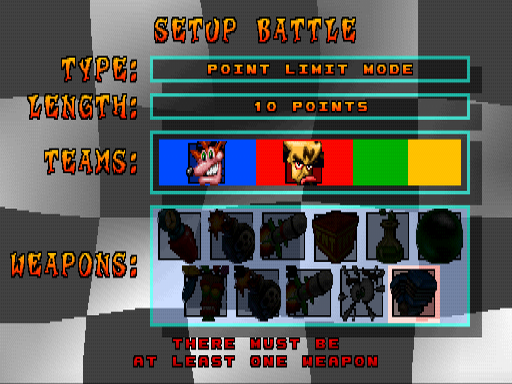
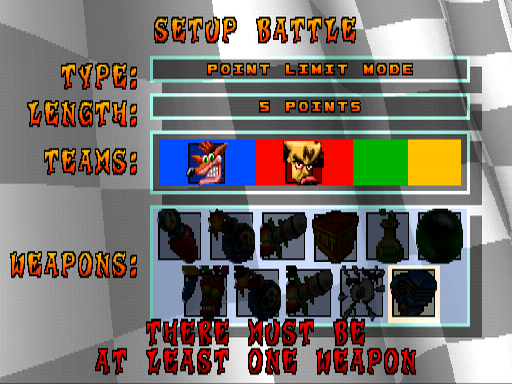
- The available point options for Point Limit Mode are 10, 15, and 20. It was reduced to 5, 10, and 15 in the final game.
- In Life Limit Mode, the available life options are 3, 10, and 20. It was reduced to 3, 6, and 9 in the final game.
- The "TYPE:" and "LENGTH:" strings were moved further down in the final game.
- Warning messages use the small font.
- The type and length settings reset to default every time you return to the menu.
High Score#
|
Aug 5 |
Final |
|---|---|
|
|
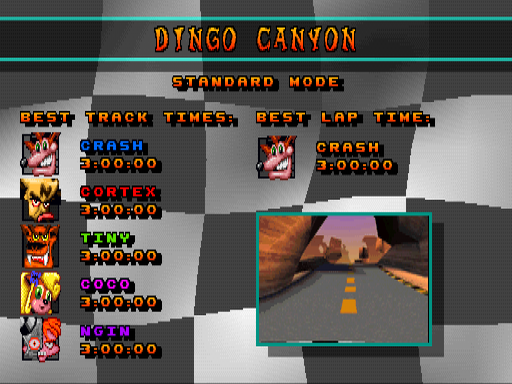
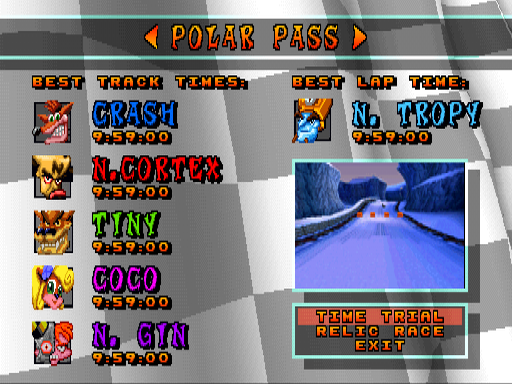
- The small font is used for the character names.
- Drop shadows are much larger.
- Directional arrows next to the track names are missing.
- Only the eight starter characters are shown in the default rankings. In the final game, Ripper Roo, Papu Papu, Komodo Joe, Pinstripe, and N. Tropy are also present.
- Default scores are set to 3:00:00, whereas in the final North American release it is 9:59:00.
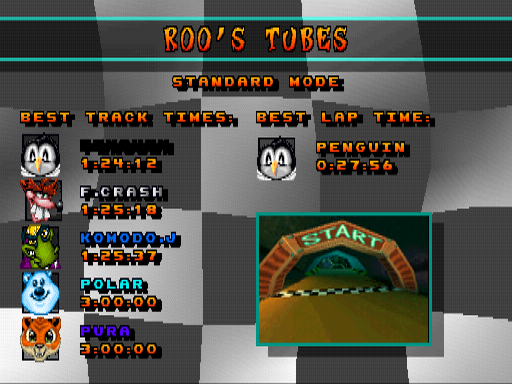
- Best Lap Time names use the standard font color, rather than the character's unique color.
- The top character in the Best Track Time rankings is also featured in the default Best Lap Time scores.
- There is no sub-menu featuring selectable Time Trial and Relic Race options. Instead, pressing Up/Down will switch between Time Trial (referred to as "Standard Mode" here) and Relic Race.
- Best Lap Time scores are also present in the Relic Race screen. These were removed in the final game since there is no lap score in this mode.
- The default character names share the same string array used in the character select screens. In the final game, a separate array of characters names was made for this menu, featuring proper name abbreviations for the rankings.
- Slide Coliseum and Turbo Track score screens are accessible even if the tracks are not unlocked.
- Pressing X will return to the main menu.
- Penta Penguin's color is black, which has the same tone as the drop shadows, rendering the text unreadable. In the final game, his color was changed to white.
- Fake Crash's color is greyish-white, whereas in the final game his color is grey.
- Komodo Joe's color is blue, which is the same as Crash's. It was later changed to mustard.
Gameplay#
- At this point in development, the voice recording sessions had not started yet, so the characters are completely silent throughout the game.
- The checkered flag immediately appears and disappears without slowly transitioning on and off during the loading screen.
- There is no checkered flag transition when restarting/replaying a level either, so the map will reload instantly.
- Pressing Triangle to skip the race intro will also switch between track map and speedometer.
- Menu interfaces throughout the gameplay (pause menu, results screens, etc.) do not feature green outlines.
- Navigating the menu options makes no sound effect as well.
- The weapon fire function is also mapped to the R2 button, in addition to the Circle button. Therefore, there is no rear view camera.
|
Aug 5 |
Final |
|---|---|
|
|
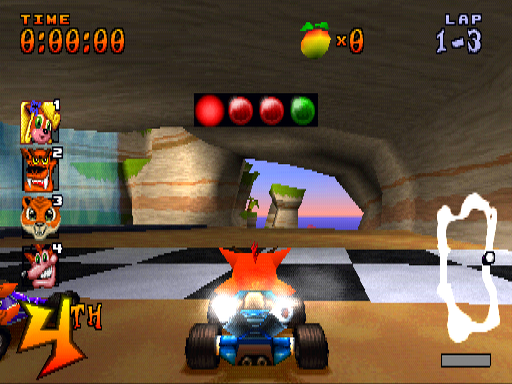
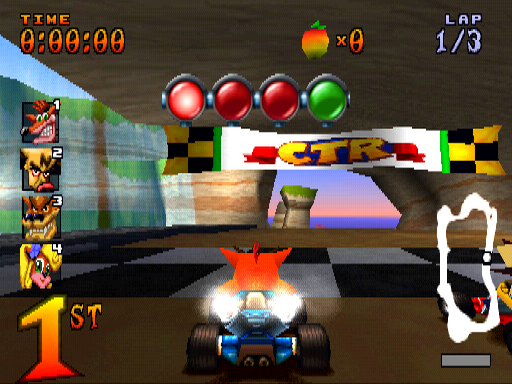
- The starting lights are different, their textures share the same design used on Highway levels in Crash Bandicoot: Warped. but arranged in a horizontal line.
- The lap counter is separated by a hyphen instead of a slash.
- Lap times are recorded once the lap is completed, whereas in the final game, the time of the current lap is displayed in real time.
- There is no chime sound effect after crossing the finish line on each lap.
- There is no CTR start banner in any of the tracks - with the sole exception of Coco Park.
- Aku Aku's model exposes his teeth, just like his previous in-game apparitions.
- Uka Uka's model is taken from his in-game model used in the final boss fight of Crash Bandicoot: Warped.
|
Aug 5 |
Final |
|---|---|
- The "FINAL LAP!" notice is absent, and the jingle is very different.
- The victory fanfare is always used, regardless of the player's position at the end of the race.
- The level music does not continue after the fanfare ends.
- The X button symbol has a golden color due to the orange gradient mistakenly applied to it.
- The game does not take a monochrome screenshot when paused.
- You can switch between the track map and speedometer while the game is paused.
- The FX slider does not play the humming sound effect while the player is in a hub world.
- In the Voice slider, developers' voice impressions can be heard for the eight starter characters as a placeholder.
- The Controller option lacks the "VIBRATE" text.
- Selecting the "QUIT" option will make you immediately exit the level. In the final, the game will offer the player an extra prompt with "YES" and "NO" options to ensure the option had not been selected accidentally.
- If you pause the game and select "RESTART" while the race intro fanfare is playing, the level will restart without the fanfare.
- Super Turbo Pads allow the player to maintain maximum speed throughout the race, similar to the Blue Fire mechanic in Crash Team Racing Nitro-Fueled. This happens because you do not lose your accumulated turbos when getting any kind of boost. A piece of code that limits this action was added in the final game.
- If you finish a race at the exact moment you are colliding with a wall, the crash animation will freeze after the race is over.
- When backtracking 25% or more of the track in a single jump after already completing more than 50% of the track, the game simply does not count as a valid region and resets your position when you fall off the track. In the final game, the mask will immediately rescue you upon touching the ground instead.
- No controller messages are displayed when a controller is unplugged.
- The game does not yet support Namco's neGcon or JOGCON controllers. As such, the respective controller setup menus are missing.
Race#
- The player and CPU racers always start at random positions, switching places whenever a race starts in both Arcade and Adventure modes. In the final game, the player will always start in first place in Arcade mode - with the CPU racers arranged based on the character select screen, and eighth place in Adventure mode - with CPU racers arranged semi-randomly.
- There are no exhaust fumes coming out of CPU karts.
- The same applies to the players on each other's screen.
Aug 5 |
Final |
|
|---|---|---|
Normal |
||
Juiced Up |
- A different sound effect is heard when a power-up is obtained or the player is juiced up.
- Bumping into a TNT while spinning out or squashed does not instantly blow it up in the player's head.
- The Warp Orb path is broken in this build and has a tendency to get stuck in many sections of the tracks.
- CPU paths are mostly different in many tracks.
- CPU racers are not affected by crushing hazards, such as rolling barrels, boulders, and minecarts.
- Getting blasted while being squashed will result in the kart flipping in the squashed state. In the final game, the character immediately pops back to normal once the kart starts to flip.
|
Aug 5 |
Final |
|---|---|
|
|
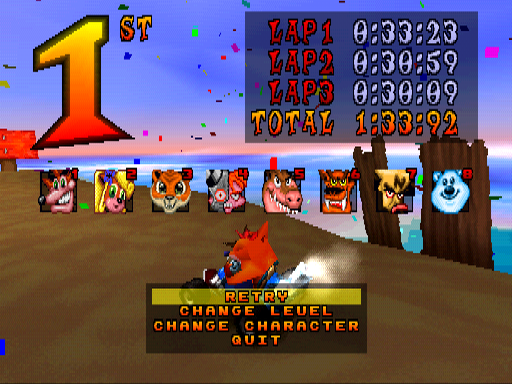
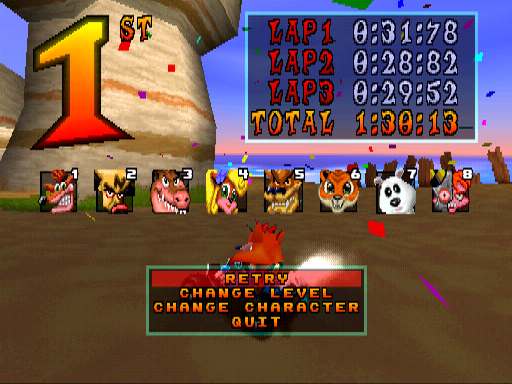
- The position numbers after finishing an Arcade race are colored red.
- The menu placement is further down the screen.
- During the icons transitions, pressing a button to skip the HUD animation before they all appear will cause the remaining icons to pop up on the screen one by one.
Time Trial#
- Since there are no voice lines in this build, Dr. N. Tropy's end-of-race quotes do not play.
- Some characters ghosts have textures that show brighter than intended, along with having portions of black filling sections of the texture. These are textures that usually have transparency when not displayed as a ghost. In the final game, these black parts are still present when the characters show as ghosts, but the rest of the texture is the correct brightness. These differences are visible on:
- Tiny Tiger's spikes.
- The tips of Polar's ears.
- The top of Papu Papu's hair.
- Komodo Joe's paws.
- Fake Crash's eyebrows and eyes.
- Dr. N. Tropy's skinny beard and the tuning fork on his helmet.
- Nitros Oxide's eyebrows.
- All of the tracks have a default time requirement of 3:00:00 to open Dr. N. Tropy's ghost. In the final, each track has an appropriate time required to open his ghosts.
- Beating ghosts does not add any gold or platinum stars next to the track names.
- Retrying a track without leaving the current track does create a ghost of your previous run, but only on the first track you play every time the game is booted. The game will stop tracking your attempts once you switch to another track.
- Results screens pop up instantly, rather than having a smooth transition.
- End-of-race messages lack an exclamation mark - notably, the British English text in the European version removes it as well.
- The track time and fastest lap scores do not flash white.
- The confirm button on the Enter Your Name screen reads "SAVE" instead of "SAVE HIGH SCORE".
- The menu can be also skipped using the Square button.
- Character names in the Best Times ranking use the small font as well, such as the High Score menu.
- The position numbers are also colored red.
- Dr. N. Tropy's ghost times are different:
- He takes the shortcut on every lap of Crash Cove and Blizzard Bluff.
- He spawns out of bounds but teleports right before the countdown in Mystery Caves and Blizzard Bluff. Oddly, he also starts before the green light in these scenarios.
- He races out of bounds in Sewer Speedway, Dingo Canyon, Cortex Castle, Oxide Station, Slide Coliseum, and Turbo Track. Therefore, it is impossible to beat him on these tracks, except if you use the clock stop exploit.
- It is near impossible to open his ghost in Tiny Arena due to the lower time requirement.
- Nitros Oxide's ghosts were not implemented yet. Instead, the final challenger copies the character the player is currently using.
- This ghost drives around in circles, going back and forth at the beginning of Crash Cove for almost a minute before immediately finishing the race. It is impossible to beat him, except if you use the clock stop exploit.
- This ghost spawns out of bounds but teleports right before the countdown in Tiger Temple, Coco Park, Mystery Caves, and Blizzard Bluff. Just like Dr. N. Tropy, the character also starts before the green light in these scenarios.
- This ghost races out of bounds in all tracks that Dr. N. Tropy's ghost is also broken, in addition to Papu's Pyramid and Dragon Mines.
- The ghost save screen reads "Choose a slot to save to" instead of "Choose a memory card slot to save to".
- Attempting to save a ghost without a memory card will display an error message saying to press X to continue without saving. However, the button is not programmed to do anything, thus the player is forced to use Square to return instead.
- Dr. N. Tropy cannot be unlocked without hacking, since the game was not yet programmed to make him available after beating his ghosts.
- Beating all of the ghosts of the final challenger does not provide any reward either.
Multiplayer#
- In two-player Arcade, the start positions of the last three CPU racers in the row are swapped with each other. The fourth character is the fifth one in this build, the fifth is the sixth one, and the sixth is the fourth one.
- When the first player crosses the finish line, the victory fanfare will not play until the race is officially over for everyone.
- The race intro jingle is enabled during the countdown in Battle mode.
- After killing a player in Life Limit Mode, the marking over the player's head will still appear at the death location when the other players are further away.
- Killing a player while they are invisible will make them reappear even after the death.
- There is no limit to how many Tracking Missiles can be on screen at once, which impacts the frame rate. In the final game, there is a restriction in Vs. mode to prevent too many rockets from being on screen by setting that only 2 players out of 4 can receive Triple Missiles at the same time, while if the weapon roulette RNG wants to give more players the Triple Missiles, it gets changed to a single missile instead.
- The end of race comments used for Battle and Vs. has some strings changed, some missing, and others removed altogether. Most of the changed comments have been shortened to fit the screen, as the final game uses the standard large font, whereas the prototype uses the small font for both comments and "YOUT HIT/HIT YOU" strings.
- The strings are also stored somewhere else, rather than along with the rest of the game text in the en.lng file.
Aug 5 |
Final |
|
|---|---|---|
Changed Comments |
ASLEEP AT THE WHEEL |
ASLEEP AT WHEEL |
BAD SHORT |
BAD SHOT |
|
BEST BEAKER THROWS |
BEAKER ACE |
|
BRONZE MEDAL BLUES |
BLACK N' BLUE |
|
CAME AND CONQUERED! |
CONQUERED ALL! |
|
COME BACK KID |
COMEBACK KID |
|
CONTROLLER PLUGGED IN? |
BUTTON PROBLEMS? |
|
KING OF THE RING! |
RING KING! |
|
LAST TOON STANDING! |
LAST STANDING! |
|
LEADER OF THE SMACK |
KING OF THE PACK |
|
LICENSE TO SQUEAL! |
JUST SQUEAL! |
|
MASTER OF DISASTER! |
DISASTER MASTER! |
|
NOTHING BUT NOTHING |
NOTHING DOING |
|
SILVER MEDAL WHO? |
SILVER MEDAL |
|
SINGING IN THE PAIN |
HARD KNOCKS |
|
SKUNKED! |
TOASTED! |
|
SOMEBODY STOP ME! |
SPEED DEMON! |
|
SQUASHED LIKE A BUG |
SQUASHED BUG! |
|
THE COMEBACK KID! |
COMEBACK KID! |
|
THE TURKEY'S DONE |
STUFFED TURKEY |
|
WINNER BY A NOSE! |
WINNER! |
|
Removed Comments |
ZIPPO |
N/A |
Missing Comments |
N/A |
EASY MONEY! |
SMACK MAN |
||
Characters#
- Komodo Joe's minimap dot is blue - which is the same as Crash's - instead of mustard.
- Penta Penguin is protected by Uka Uka in this version, since internally, he is programmed as the default mask, but Penta Penguin was never intended to be an evil character. A remnant of this programming can be seen in the final North American release when he gets a mask power-up, as the icon still shows up as Uka Uka, but when activated, Aku Aku appears.
- His track map dot is black instead of white.
- Bumping into a TNT crate will cover the entire kart body.
- Fake Crash's track map dot is greyish-white instead of grey.
- Bumping into a TNT crate will cover the entire kart body.
- Nitros Oxide does not have a proper icon yet, and so he uses Fake Crash's icon as a placeholder.
- His track map dot is also grey instead of lime green - which is Fake Crash's own color in the final game. This was possibly due to Oxide being a copy of Fake Crash, which is internally listed before him.
- His hovercrafts windshield frame is silver colored. In the final game, it was changed to black.
- Regular kart wheels can be seen under the hovercraft.
- Bumping into a TNT crate will cover the hovercraft body.
Weapons#
- Activating another Invincibility Mask power-up while the current one is almost going away will make them reappear without the trail effect.
- The Red Beaker can inflict six different effects to the player by default:
- Randomize item roulette (if holding an item) / Cannot pick up weapons from crates (if holding no items)
- Slippery wheels
- Unable to hop
- Wobble kart
- Wobble kart when hopping
- Drain Wumpa fruit (removed effect)
- In the final game, only three status effects can affect the player under normal circumstances: if no items are being held, the victim may have the wobble kart or wobble kart when hopping effects applied randomly. But if an item is being held, the victim will always have their item roulette randomized. The remaining effects can only be chosen if the victim hits another Red Beaker while the effect of the current one is still active.
- The Power Shield does not wobble when active.
- Colliding with an opponent does not cause the screen to flash.
- Super Engine works in a different way: rather than providing a constant turbo boost for a short period of time, it makes your kart permanently faster for the rest of the round. Each time the power-up is used, your top speed will increase slightly - you can upgrade it up to five times if you are not juiced up, otherwise you can get up to three times.
- It also makes a sound when activated - which is still present in the final game, but unused.
- The sound of the kart's engine becomes higher pitched as it is upgraded.
Memory Card Notices#
- There is no background box surrounding the warning messages screens.
Aug 5 |
Final |
|---|---|
...DATA ON CARD IS OUT OF DATE... |
...DATA ON MEMORY CARD IS OUT OF DATE... |
WRITING TO CARD... |
SAVING TO MEMORY CARD... |
DELETING GAME SLOT... |
|
WARNING: |
WARNING: |
WARNING: |
WARNING: |
UNFORMATTED |
WARNING: |
WARNING: |
WARNING: |
ERROR: |
ERROR: |
NO DATA |
NO DATA |
- All warning instances call the memory card as just "card".
- There is no proper message for when you delete a save slot. Instead, the generic "Writing to card" message is used.
- Most of the text is written with lowercase letters, while in the final game all letters are capitalized. This does not affect how the text is displayed in-game, though.
- In order to format the memory card, you have to press X instead of Circle.
- The format and read error messages do not inform you about using Triangle to go back - which in this case, you have to press Square.
- Messages use the letter X to represent the button instead of the actual icon.
Adventure Mode#
- The start point is located in Gem Stone Valley, meaning that the player was originally going to be able to navigate between areas in order to collect trophies, aiming for a more open exploration.
- The player can initially access both N. Sanity Beach and The Lost Ruins areas, each one with two available tracks from the beginning (Crash Cove, Roo's Tubes, Coco Park, and Tiger Temple).
- If the player starts in N. Sanity Beach, four trophies are required to unlock Sewer Speedway, however you can only get three in this area, forcing the player to access The Lost Ruins to continue progressing.
- If the player starts in The Lost Ruins, three trophies are required to unlock Dingo Canyon, however you can only get two in this area, forcing the player to access N. Sanity Beach.
- The player can initially access both N. Sanity Beach and The Lost Ruins areas, each one with two available tracks from the beginning (Crash Cove, Roo's Tubes, Coco Park, and Tiger Temple).
- Trophy Race and CTR Challenge used to be a single game mode before being split into two. In this version, you must collect the letters C, T, and R during regular Trophy Races, thus allowing you to get both the trophy and the token concurrently. Each letter will be available on specific laps - meaning that if you miss any, you cannot find it again on the next lap. As such, C can be found on the first lap, T on the second lap, and R on the third lap.
- Consequently, the Choose Race Type sub-menu reads "Trophy Race" instead of "CTR Challenge".
- There are no cutscenes throughout the game.
- Mask hints are completely missing.
- The minimap lacks a lot of details, such as the Load-Save Screen, Boss Star and Zone Arrows.
- Blinking waves from active warp pads are also missing.
- The symbol representing the player is the default giant blinking ball, rather than an orange arrow.
- Due to the lack of icons, one can notice the maps featuring arrow figures drawn as part of the map graphic, which are normally not visible in the final game as the actual icons overlap them.
- You can immediately access the side challenges of the race tracks after earning the trophy for them. In the final game, boss keys will be required once the trophy has been earned, which will only open the side challenges once the current area's boss has been defeated.
- You are able to switch between the map and speedometer in the World Maps.
- CTR Tokens are referred to as "CTR Coins".
- There are no area emblems in the hubs with the unusual exception of N. Sanity Beach in Gem Stone Valley entrance, which is represented by a 3D model of a Sun in a silver frame, rather than a drawing of palm tree with a Sun.
- Gem cups are automatically unlocked once you have collected the trophy from the all race tracks of a particular token, not requiring to get all tokens beforehand.
Aug 5 |
Sep 3 |
Final |
|---|---|---|
 |
 |
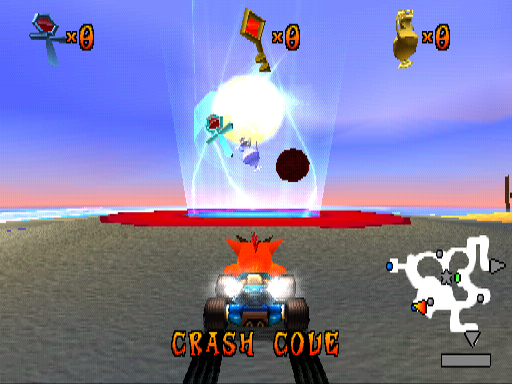 |
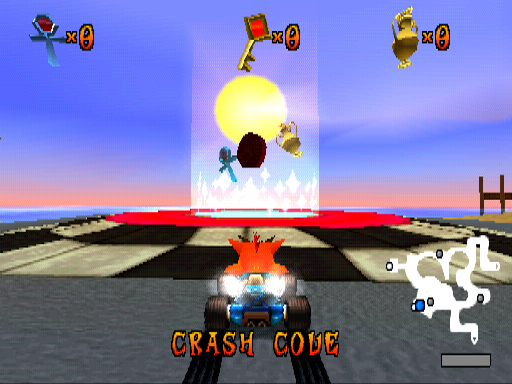
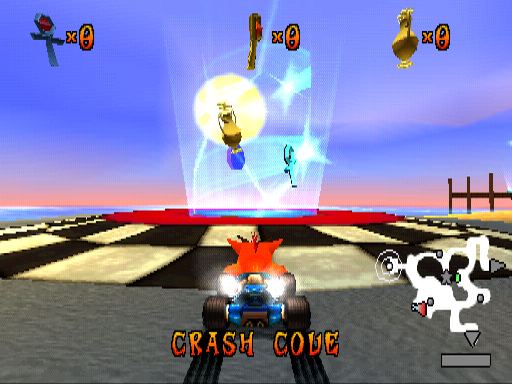
- Some warp pads are surrounded by a checkered pattern. This pattern was later updated in the September 3rd, 1999 build before being completely scrapped. According to former Naughty Dog developer Rob Titus, this was scrapped because they did not like the way it looked.
- Track pads that feature checkered patterns are Crash Cove, Sewer Speedway, Coco Park, Dingo Canyon, Dragon Mines, Blizzard Bluff (Polar Pass in the final), and Tiny Arena.
- Warp pads have a straight shape with a bunch of sparkles coming out of it.
- The sound effect when the player is close to it is absent.
- No sound effect is made when the player enters the vortex either.
- The floor has a lighter tone of blue.
- Entering in mid-air will cause the characters to perform the big air jump animation.
- Entering while sliding will make the skid sound effect continue to play as the character is warping.
- The prizes floating inside do not shrink as the player moves away.
- Items floating above inactive warp pads flash black.
|
Aug 5 |
Final |
|---|---|
|
|
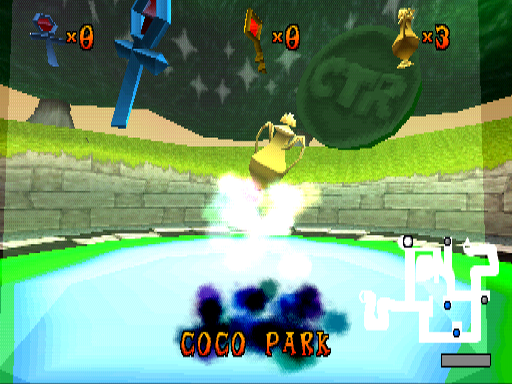
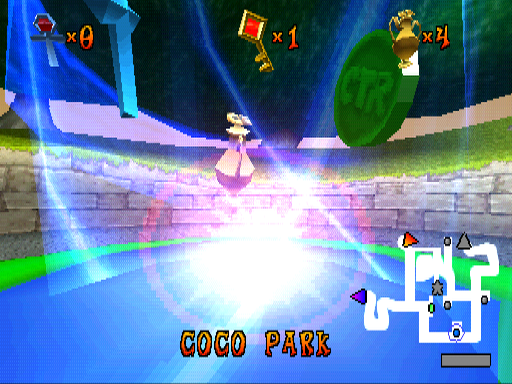
- Warping particles emit a blue smoke that emerges out of the vortex. The final game changed it to a shining light.
- The blue CTR Token has a cyan tone, just like its gem counterpart.
- The music will turn off when accessing the Load-Save Screen.
- There is no scanline sound effect.
- The file save title reads "Choose a slot to save to" instead of "Choose a memory card slot to save to".
- The cursor does not automatically highlight the Exit option when returning to the main screen.
- The controls are unlocked during the item inventory animation. The inventory also automatically adds up the earned prize after the race, rather than increasing the value after the prize goes to the HUD.
- Similar to the other prizes, boss keys are also added to the key counter after a boss race. This was likely removed as a result of being deemed redundant, as the bosses congratulate you themselves in an in-game cutscene in the final game.
- Percentage values are mostly different:
Aug 5 |
Final |
|
|---|---|---|
Trophy |
1% |
2% |
CTR Token |
1% |
1% |
Relic |
2% |
2% |
Bonus Round |
2% |
1% |
Gem |
2% |
1% |
Boss Key |
2% |
1% |
N. Oxide's Challenge |
1% |
2% |
N. Oxide's Final Challenge |
N/A |
1% |
All Gold/Platinum Relics |
0% |
1% |
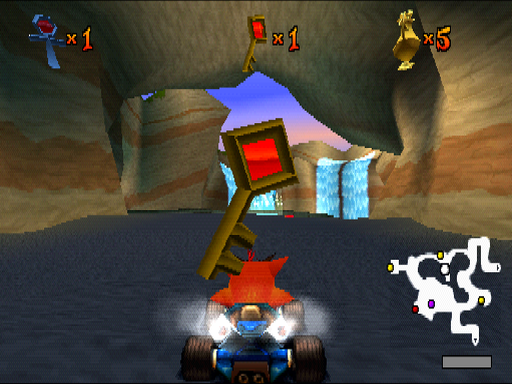
- If you go out of bounds in the World Maps, the masks will appear to rescue you. In the final game, masks are not loaded into memory, thus they do not appear.
- No sound effect is made for opening and closing a boss garage.
- Opening a new door will freeze everything (including sound effects) while the door opens.
- There is also no proper sound effects present.
- Pinstripe's garage uses his full name.
- You get up to five keys due to N. Oxide's Challenge giving you another key, rather than just displaying a unique star graphic in your inventory. This turns out to be meaningless, since there are no doors or boss garages left that require more than four keys.
- There is no credits sequence at this stage, so beating Nitros Oxide will simply return to the World Map instead.
- Pressing Square in the Choose Race Type sub-menu will always load Trophy Race, regardless of the highlighted option. In the final game, this button has no effect.
- After completing the game, whenever you enter a warp pad, the Trophy Race will remain highlighted by default, whereas in the final game the Relic Race is highlighted.
- The maximum completion percentage you can achieve is 92%. Attempting to enter Turbo Track and Slide Coliseum will crash the game due to a variable related to the hubs not turning off when entering the tracks. As a result, the game tries to allocate memory for the hub and the track you are loading at the same time. There is not enough memory for both, so the game crashes. To remedy this, it is possible to turn it off with the following GameShark codes:
800ADCB4 4008
800ADCB6 3C02
- There is no Nitros Oxide rematch after collecting all 18 relics (although the title string and the code to detect if he was beaten twice are already present).
- It is impossible to unlock Skull Rock, Slide Coliseum and Turbo Track without hacking, as the game was not programmed to make them available after collecting the level prizes.
- Therefore, the unlock requirement for Skull Rock is unknown.
- Loading a save file in N. Sanity Beach, The Lost Ruins, and Glacier Park can spawn the player at different placements every time the file is loaded. In the final game, the spawn point is always fixed in one spot.
- Beating the Gem Cups does not unlock characters permanently. To make them available permanently, you must save a Relic Race or Time Trial record while they are unlocked, otherwise you will have to replay the Gem Cups every time you boot the game in order to unlock them.
- However, if you save the Adventure mode data after beating the Gem Cups without saving a record, you will no longer be able to unlock the characters again unless you start a new save file.
Progression#
The number of trophies required to unlock the racetracks throughout the game was vastly different due to the unrestricted exploration across the hubs. This setup allowed the player to collect trophies without following a specific order, where you could even unlock other areas earlier and collect enough trophies to defeat the boss before even beating the previous hubs.
Area |
Level |
Aug 5 Requirements |
Final Requirements |
|---|---|---|---|
N. Sanity Beach |
Crash Cove |
- |
- |
Roo's Tubes |
- |
- |
|
Mystery Caves |
1 Trophy |
1 Trophy |
|
Sewer Speedway |
4 Trophies |
3 Trophies |
|
Skull Rock |
1 Key |
1 Key |
|
The Lost Ruins |
Coco Park |
- |
1 Key + 4 Trophies |
Tiger Temple |
- |
1 Key + 4 Trophies |
|
Papu's Pyramid |
7 Trophies |
1 Key + 6 Trophies |
|
Dingo Canyon |
3 Trophies |
1 Key + 7 Trophies |
|
Rampage Ruins |
2 Keys |
2 Keys |
|
Glacier Park |
Blizzard Bluff |
1 Key + 5 Trophies |
2 Keys + 8 Trophies |
Dragon Mines |
1 Key + 7 Trophies |
2 Keys + 9 Trophies |
|
Polar Pass |
1 Key + 9 Trophies |
2 Keys + 10 Trophies |
|
Tiny Arena |
1 Key + 11 Trophies |
2 Keys + 11 Trophies |
|
Rocky Road |
3 Keys |
3 Keys |
|
Citadel City |
N. Gin Labs |
2 Keys + 14 Trophies |
3 Keys + 12 Trophies |
Cortex Castle |
2 Keys + 10 Trophies |
3 Keys + 12 Trophies |
|
Hot Air Skyway |
2 Keys + 12 Trophies |
3 Keys + 14 Trophies |
|
Oxide Station |
2 Keys + 14 Trophies |
3 Keys + 15 Trophies |
|
Nitro Court |
4 Keys |
4 Keys |
|
Gem Stone Valley |
Slide Coliseum |
10 Relics |
1 Key + 10 Relics |
Turbo Track |
15 Relics |
1 Key + 5 Gems |
|
- Glacier Park requires 1 key to open, instead of 2.
- Citadel City requires 2 keys to open, instead of 3.
- The requirement to unlock Turbo Track is 15 relics, instead of 5 gems.
Inventory Menu#
|
Aug 5 |
Final |
|---|---|
|
|
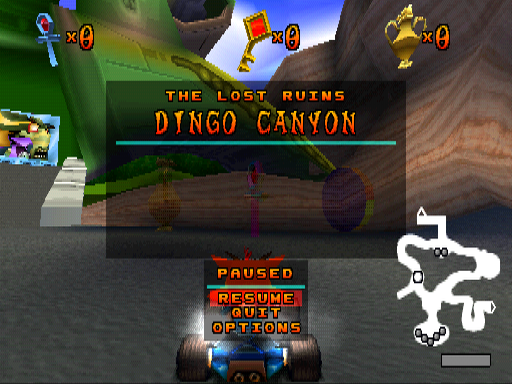
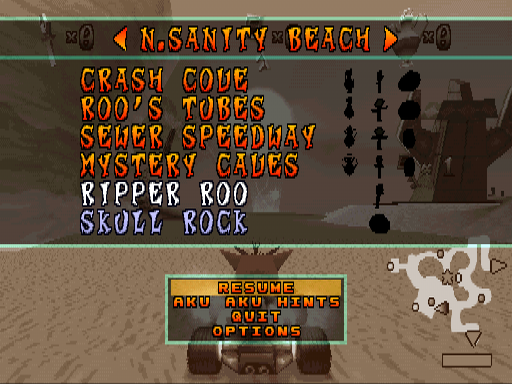
- The pause/inventory menu was completely revamped. Here rather than showing a full tab per area containing all tracks and challenges for each hub, there is a small box showing each level and its collectibles individually.
- Uncollected relics, tokens, and gems models are displayed in the "default" non-shaded forms.
Area |
Menu Order |
Rewards |
|---|---|---|
The Lost Ruins |
Dingo Canyon |
Trophy, Relic, Token |
Glacier Park |
Dragon Mines |
Trophy, Relic, Token |
Glacier Park |
Blizzard Bluff |
Trophy, Relic, Token |
N.Santiy Beach |
Crash Cove |
Trophy, Relic, Token |
The Lost Ruins |
Tiger Temple |
Trophy, Relic, Token |
The Lost Ruins |
Papu's Pyramid |
Trophy, Relic, Token |
N.Santiy Beach |
Roo's Tubes |
Trophy, Relic, Token |
Citadel City |
Hot Air Skyway |
Trophy, Relic, Token |
N.Santiy Beach |
Down the Drain |
Trophy, Relic, Token |
N.Santiy Beach |
Mystery Caves |
Trophy, Relic, Token |
Citadel City |
Cortex Castle |
Trophy, Relic, Token |
Citadel City |
N.Gin Labs |
Trophy, Relic, Token |
Glacier Park |
Polar Pass |
Trophy, Relic, Token |
Citadel City |
Oxide Station |
Trophy, Relic, Token |
The Lost Ruins |
Coco Park |
Trophy, Relic, Token |
Glacier Park |
Tiny Arena |
Trophy, Relic, Token |
Gem Stone Valley |
Slide Coliseum |
Relic |
Gem Stone Valley |
Turbo Track |
Relic |
N.Santiy Beach |
Ripper Roo's Challenge |
Key |
The Lost Ruins |
Papu Papu's Challenge |
Key |
Glacier Park |
Komodo Joe's Challenge |
Key |
Citadel City |
Pinstripe Potoroo's Challenge |
Key |
Gem Stone Valley |
N. Oxide's Challenge |
Key |
N.Santiy Beach |
Skull Rock |
Token |
The Lost Ruins |
Rampage Ruins |
Token |
Glacier Park |
Rocky Road |
Token |
Citadel City |
Nitro Court |
Token |
Gems |
5 Colored Gems |
|
CTR Coins |
5 Colored Tokens |
|
Relics |
Sapphire, Gold, Platinum |
|
- The level order is based on the internal level ID values (00 for Dingo Canyon, 01 for Dragon Mines, 02 for Blizzard Bluff, 03 for Crash Cove, etc.)
- N. Sanity Beach is misspelled as "N. Santiy Beach".
- Mask hints option is missing due to their absence in this build.
- The menu always shows Dingo Canyon as the standard screen. In the final game, it automatically changes the tab according to the current world.
- The "PAUSED" text is present here. In the final game, this string is not displayed in the inventory menu.
- The menu border has no green outlines.
World Maps#
In the area transition segments, there is no back-face culling, so you can see the other sides of walls.
Gem Stone Valley#
- The player's spawn point is different. The character spawns towards Nitros Oxide's spaceship, while in the final game they are facing the waterfalls.
- The rocky scenery on the right side of the spaceship is taller.
- The wall around the map is more retracted, making the area more open.
- The sky background behind the spaceship has clouds like the rest of the map. These were removed in the final game.
|
Aug 5 |
Final |
|---|---|
|
|
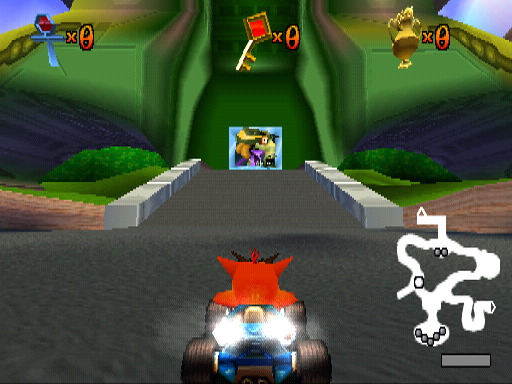
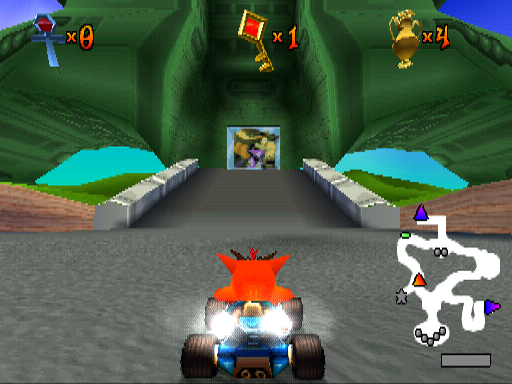
- The spaceship is less detailed around the boss garage area and has a light-green tone.
- The scenery behind the spaceship is full of trees that were removed in the final game.
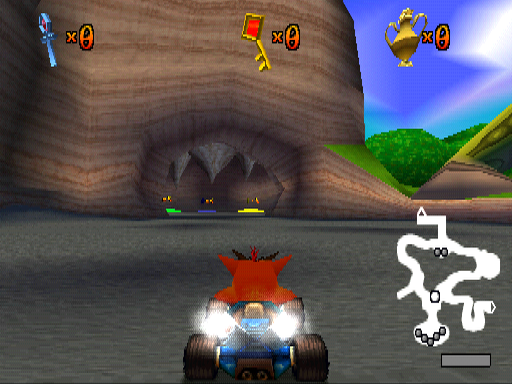
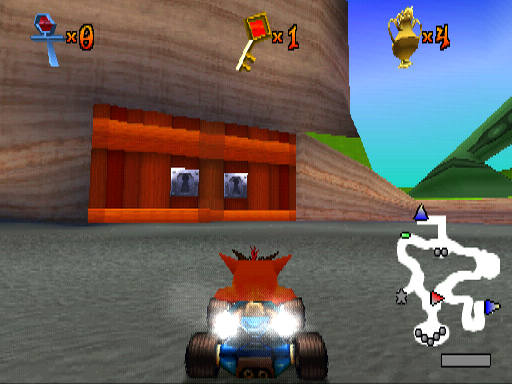
- There are no invisible barriers over the walls of the boss garage entrance. Therefore, it is possible to go out of bounds by jumping with enough speed and height.
|
Aug 5 |
Final |
|---|---|
|
|
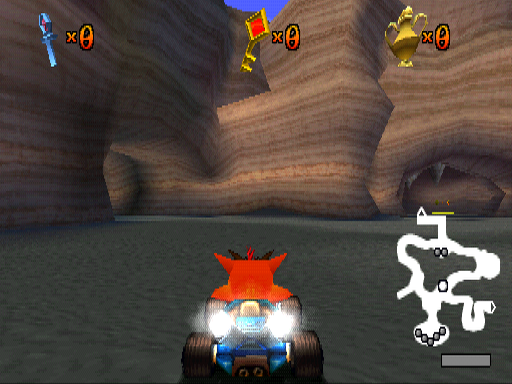
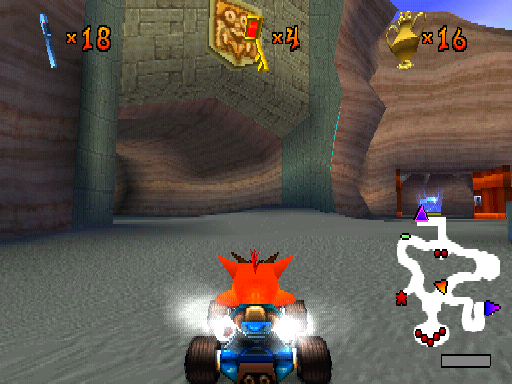
- There is no door locking the Gem Cups cave.
|
Aug 5 |
Final |
|---|---|
|
|
- The entrance for The Lost Ruins was completely reworked.
|
Aug 5 |
Final |
|---|---|
|
|
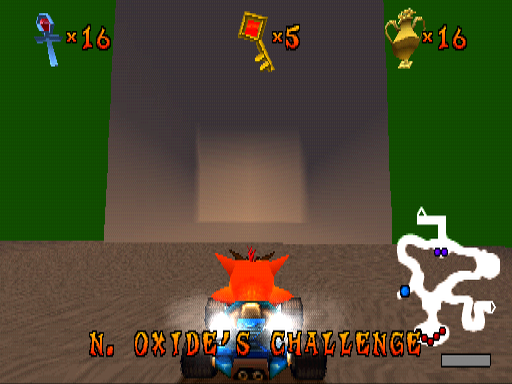
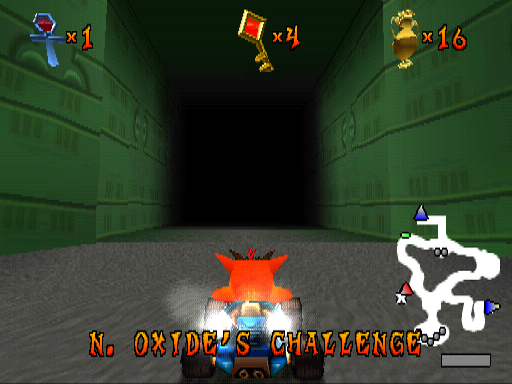
- The textures inside Nitros Oxide's garage are heavily unfinished.
- The floor textures have brown vertex coloring on the ramp leading to the garage door.
N. Sanity Beach#
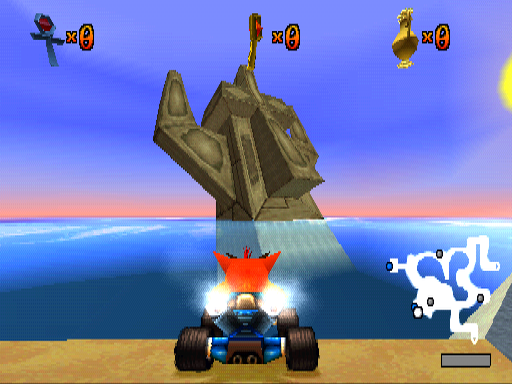
- A tiki head statue was removed from the sea background near to the Crash Cove warp pad.
- The sand textures are darker.
- N. Sanity Beach's theme is slightly different.
- There is no door connecting Gem Stone Valley to N. Sanity Beach.
|
Aug 5 |
Final |
|---|---|
|
|
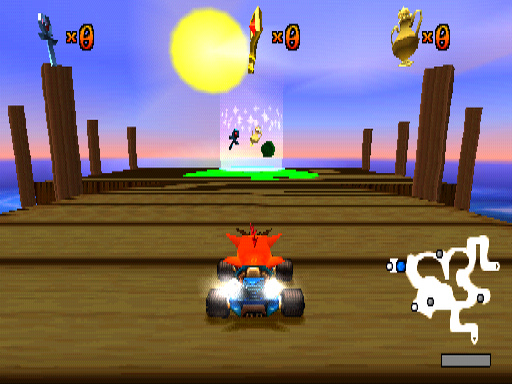
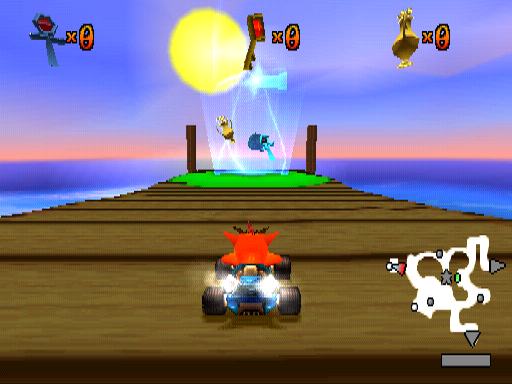
- There is an additional extension on the dock leading to Roo's Tubes. This remained on the map in the final game.
- There are two palm trees instead of one next to the dock.
- The pipes around the Sewer Speedway warp pad have a darker tone.
The Lost Ruins#
- Some grass textures over the stone walls are missing.
- Shadows under the trees are missing.
- A direction sign pointing to Papu's Pyramid is missing.
|
Aug 5 |
Final |
|---|---|
|
|
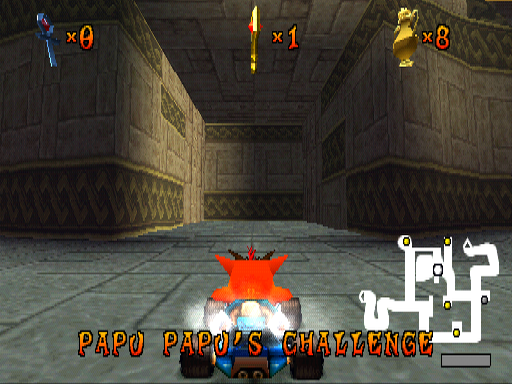
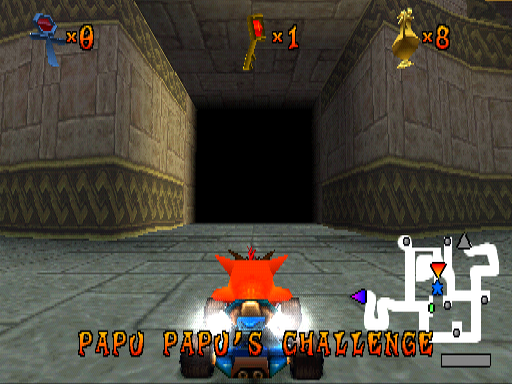
- There is no dark background inside Papu Papu's garage.
- It is possible to go out of bounds by jumping with enough speed on the right side of the scenery, located in the right ramp, next to the Load-Save Screen. Falling off from this area spawns you out of bounds, softlocking the game.
Glacier Park#
- Polar Pass and Blizzard Bluff warp pads are swapped.
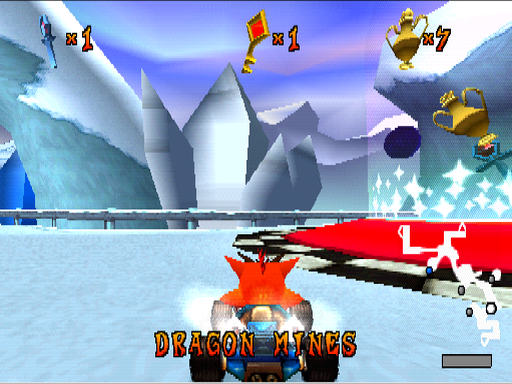
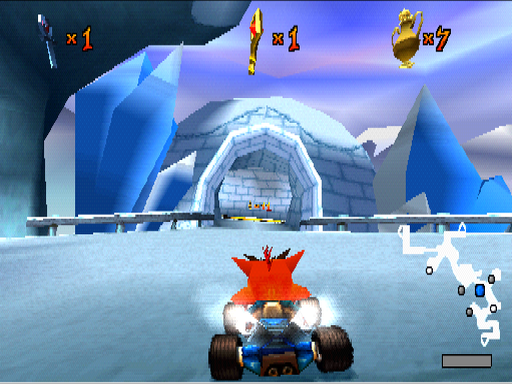
- Some crystal clusters around the igloo were removed in the final game.
- The color of the Dragon Mines warp pad is red instead of blue.
- The podium scene and the player spawn are both facing in the opposite direction of the boss garage.
- Falling off from this area spawns you out of bounds, softlocking the game.
Citadel City#
- Chandeliers in the Cortex Castle area have different textures.
|
Aug 5 |
Final |
|---|---|
|
|
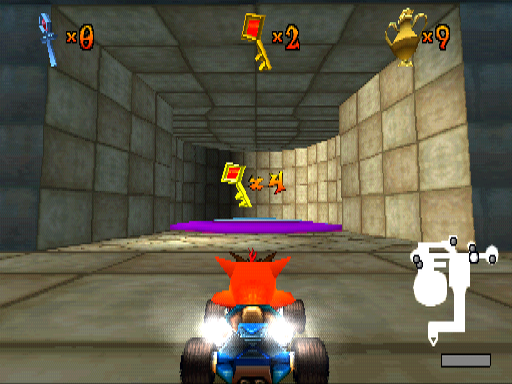
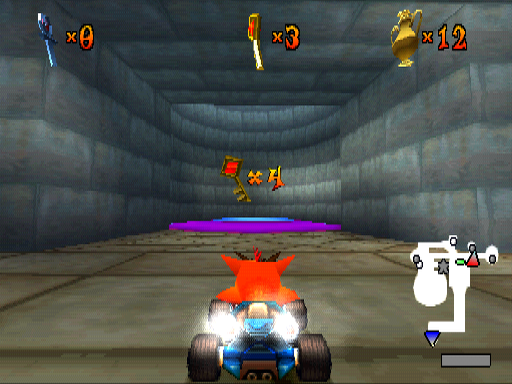
- Floor textures are used to cover the area around the Nitro Court warp pad.
- The ceiling above the warp pad was removed in the final game.
- There is no invisible barrier over the walls of the N. Gin Labs area and the spiral ramp, making it possible to get out of bounds by jumping with enough speed.
Podium#
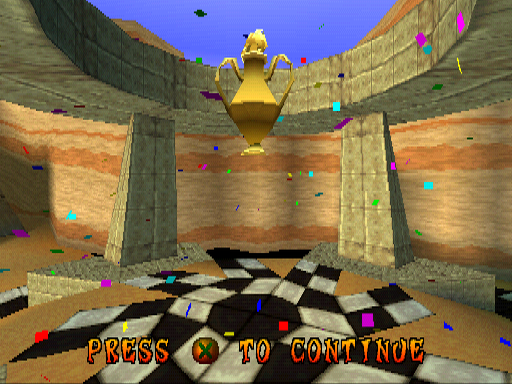
- The podium is in a very primitive state. There are no characters, pedestals, or the Trophy Girl - only the obtained prize appears on the top.
- There are no victory fanfares either. Instead, the area theme plays all the time.
Boss Challenges#
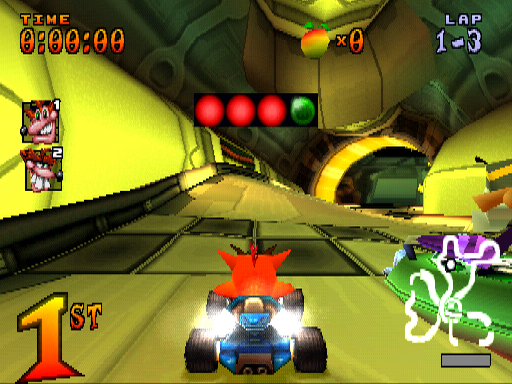
- There is no boss race theme.
- Bosses do not drop their arsenal of infinite weapons. Instead, they act as a regular opponent, using random items.
- The Invincibility Mask, Warp Orb, and N. Tropy Clock power-ups are available by default during the boss races. In the final game, these weapons will only appear as part of the dynamic difficulty adjustment system when the player loses the race multiple times.
- After beating Ripper Roo, the player will spawn outside his garage, rather than at the gate to Gem Stone Valley.
- After beating Pinstripe, the player will spawn outside his garage, rather than in front of Nitros Oxide's garage.
- Nitros Oxide does not start before the green light.
- Nitros Oxide's model will change its LOD when he is further away from the camera. In the later prototype builds, and in the final game, his model always stays at its highest LOD.
- Attacking him using any weapons will cause him to bounce up and down like a regular opponent. In the final game, he will always spin around in circles when hit by most types of weapons - with the exception of Power Shields and Invincibility Masks.
CTR Challenge#

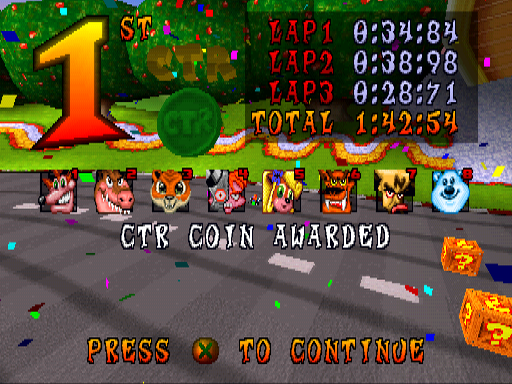
- Picking up a letter shares the same "slurp" sound effect when collecting a Wumpa fruit.
|
Aug 5 |
Final |
|---|---|
|
|
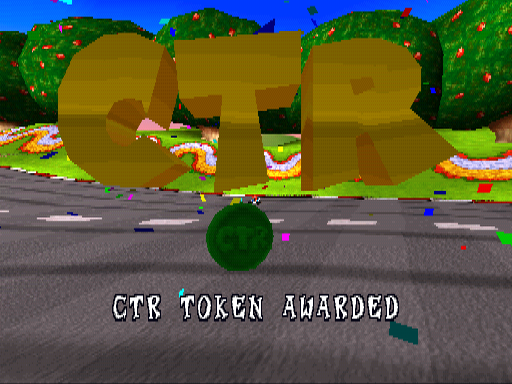
- The token message is shown along with the race results.
- Pressing X while the letters are falling from the HUD after failing the challenge will freeze them onscreen.
Relic Race#
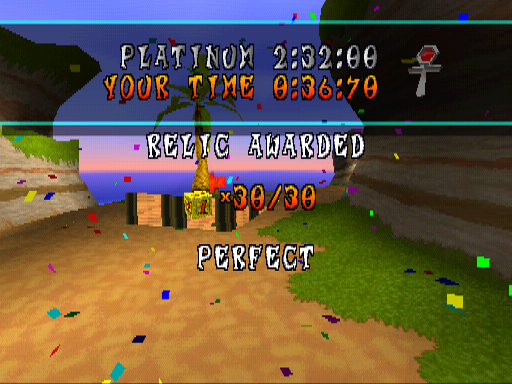
- The requirements for all relic records are placeholder times. Sapphire times vary between 2:18:00 and 2:35:00.
- Gold and Platinum times are 10 and 30 seconds less than Sapphire times, respectively.
- There is no time crate counter during the race.
- You cannot save your score if the clock passes 3:00:00, even if subtracting the final time by 10 seconds with a Perfect bonus.
|
Aug 5 |
Final |
|---|---|
|
|
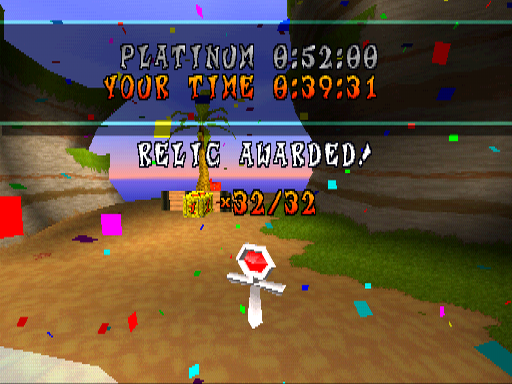
- Platinum relic has been changed from grey to white.
- The Platinum font has white shading on the left side of the characters - this is also the same color that Fake Crash uses in this version.
- The relic obtained at the end of the race appears very small in the top right corner next to the relic time requirement, and will enlarge once the time is beaten.
- There is no sound effect during the time subtraction.
- Messages are positioned a little higher on the screen.
- "RELIC AWARDED" and "NEW HIGH SCORE" lack an exclamation mark - notably, the British English text in the European version removes it as well.
- The time crate counter is slightly off-center.
- The results screen displays the same relic time as the in-race HUD, rather than using the actual time of the relic tier you earned, resulting in the requirement being displayed incorrectly onscreen if the tiers are different.
- The confirm button on the Enter Your Name screen reads "SAVE" instead of "SAVE HIGH SCORE". The menu can be also skipped using the Square button.
- The Best Times ranking does not show up during the results screens.
- Regardless of the relic you get, the podium and inventory add up animation always display the Sapphire relic.
Track |
Aug 5 |
Final |
Aug 5 |
Final |
|---|---|---|---|---|
Crash Cove |
2:32:00 |
1:17:00 |
30 boxes |
32 boxes |
Roo's Tubes |
2:29:00 |
1:15:00 |
32 boxes |
32 boxes |
Mystery Caves |
2:26:00 |
1:55:00 |
40 boxes |
40 boxes |
Sewer Speedway |
2:27:00 |
1:33:00 |
65 boxes |
65 boxes |
Coco Park |
2:21:00 |
1:35:00 |
40 boxes (*) |
40 boxes |
Tiger Temple |
2:31:00 |
1:20:00 |
52 boxes |
52 boxes |
Papu's Pyramid |
2:30:00 |
1:34:00 |
48 boxes |
48 boxes |
Dingo Canyon |
2:35:00 |
1:25:00 |
38 boxes |
38 boxes |
Blizzard Bluff |
2:33:00 |
1:30:00 |
36 boxes (*) |
40 boxes |
Dragon Mines |
2:34:00 |
1:28:00 |
39 boxes |
39 boxes |
Polar Pass |
2:23:00 |
3:00:00 |
38 boxes |
38 boxes |
Tiny Arena |
2:20:00 |
3:45:00 |
57 boxes |
60 boxes |
N. Gin Labs |
2:24:00 |
2:15:00 |
70 boxes |
70 boxes |
Cortex Castle |
2:25:00 |
2:35:00 |
62 boxes |
62 boxes |
Hot Air Skyway |
2:28:00 |
3:05:00 |
60 boxes |
56 boxes |
Oxide Station |
2:22:00 |
3:17:00 |
47 boxes (*) |
49 boxes |
Slide Coliseum |
2:19:00 |
1:55:00 |
45 boxes |
45 boxes |
Turbo Track |
2:18:00 |
1:45:00 |
52 boxes (*) |
52 boxes |
- Relic times are actually based on the internal level ID list. The first track has the highest relic times, while the last track has the lowest times. Each track discounts one second of each relic requirement compared to its previous track. For example, Dingo Canyon (ID 00) has a Sapphire time of 2:35:00, which is followed by Dragon Mines (ID 01) featuring 2:34:00, then Blizzard Bluff (ID 02) featuring 2:33:00, Crash Cove (ID 03) with 2:32:00, Tiger Temple (ID 04) with 2:31:00, and so on.
- In Coco Park, the box counter indicates there are 40 boxes on the track, however only 38 are possible to collect due to two misplaced invisible crate pointers at the beginning of the track that can be triggered when passing through - which will break two existing time crates further behind.
- In Blizzard Bluff, the box counter indicates there are 36 boxes on the track, however only 33 are possible to collect. Two time crates are misplaced under the floor before the hut, and the other one is at the end of the track and you can actually see it misplaced under the frozen ice surface.
- In Tiny Arena, it is insanely hard to obtain at least a Sapphire relic due to the low requirement. Consequently, Gold and Platinum relics are unreachable, unless if you perform the clock stop exploit.
- In Oxide Station, it is insanely hard to obtain a Platinum relic due to the low requirement. It gets easier if you perform the clock stop exploit.
- The box counter indicates there are 47 boxes on the track, however only 45 are possible to collect. Two time crates are misplaced under the floor in the first ramp section, which is a leftover of an earlier level layout that originally featured a split-path leading to four tubes.
- In Turbo Track, the box counter indicates there are 52 boxes on the track, however only 51 are possible to collect. A time crate is misplaced under the floor in the final set of time crates.
Clock Stop Exploit#
Restarting a Relic Race while the clock is frozen causes it to remain frozen even after the race has started. This glitch can be exploited not only in Relic Race, but throughout the entire game.
By repeatedly breaking the 4x3 formation of 3-second time crates behind the start line in N. Gin Labs and restarting the race, the clock can be kept frozen for several minutes. This can be used to easily obtain relics on any track and achieve the lowest possible time in Time Trial mode. As a result, you can also earn otherwise unobtainable relics and unlock or beat impossible ghosts in this version.
The clock also remains frozen outside of tracks, although it will still be ticking. The glitch works in every game mode and challenge.
Bonus Round#
- The race intro jingle is enabled during the countdown.
- The kart does not brake immediately after the challenge ends.
- Time limits are different in most arenas, with the exception of Nitro Court.
Arena |
Aug 5 |
Final |
|---|---|---|
Skull Rock |
1:10:00 |
1:23:00 |
Rampage Ruins |
1:30:00 |
1:25:00 |
Rocky Road |
1:30:00 |
1:20:00 |
- In Rocky Road, there are two regular boxes inside two specific Nitro crates in the bottom edges, so using a Bowling Bomb to explode it, you can receive free crystals ranging from 5 to 8, acting just like Wumpa crates.
Gem Cups#
- The Restart option is available in the pause menu. Selecting it resets only the current race rather than the entire cup.
- The race standings screen does not have a smooth transition.
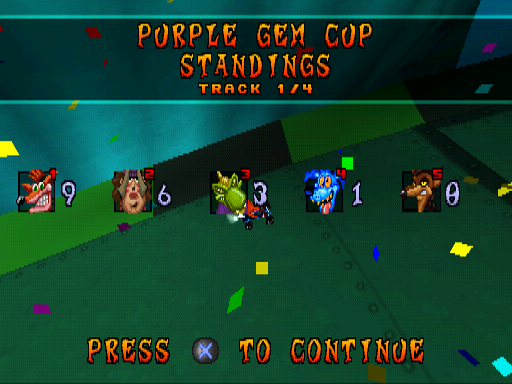
- In Purple Gem Cup, the RNG percentage is not set properly, as you can receive Invincibility Masks, Warp Orbs, Triple Bowling Bombs and Tracking Missiles, and Clocks even if in first or second place.
|
Aug 5 |
Final |
|---|---|
|
|
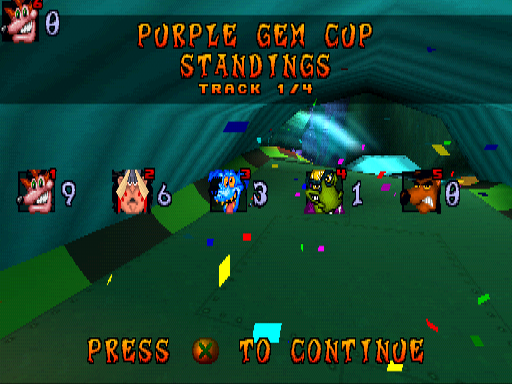
- There are overlapping icons for 6th, 7th, and 8th positions on the top left corner in Purple Gem Cup.
Cup |
Aug 5 |
Final |
|---|---|---|
Red Gem Cup |
Crash Cove |
Crash Cove |
Blue Gem Cup |
Tiger Temple |
Sewer Speedway |
- The track order is based on the old trophy requirements order, which also applies to the level select menu order. In the final game, it is based on the area order.
Soundtrack Differences#
The following themes have a cut extension at the end of the track. These parts were present in the original "pre-console" version.
Level |
Aug 5 |
Final |
Notes |
|---|---|---|---|
N. Sanity Beach |
|||
Mystery Caves |
|||
Tiger Temple |
|||
Polar Pass |
|||
Tiny Arena |
|||
Hot Air Skyway |
|||
Oxide Station |
Unused Content#
Unused Text#
CONTROLLER 1 IS UNPLUGGED!
CONTROLLER 2 IS UNPLUGGED!
CONTROLLER 3 IS UNPLUGGED!
CONTROLLER 4 IS UNPLUGGED!
PLEASE INSERT A CONTROLLER
As there are no controller messages when a controller is unplugged, they went unused in this build. The numeration is also different, as in the final game the controllers are called 1A, 1B, 1C and 1D when plugged into the multitap.
UNLIMITED MODE
A High Score menu title related to a scrapped mode.
N.OXIDE'S FINAL CHALLENGE
Even though there was no Final Challenge at this point, the title string was already present - albeit missing a space on Nitros Oxide's name.
Early Japanese Localization#
A primitive Japanese localization is present in the files. It contains only a few translated strings related to race HUD, pause menu, and controller port messages, which are leftovers strings used in the old Japanese demo version.
Original |
Aug 5 |
Final |
|---|---|---|
PAUSED |
ポ-ズ |
Same as final |
RESTART |
やりなおす |
もういちど はじめる |
RESUME |
もどる |
Same as final |
QUIT |
やめる |
タイトルがめんに もどる |
TIME |
タイム |
Same as final |
Timing Out - Exiting Demo |
いっていじかん |
いっていじかん にゅうりょくがないので |
LAP |
ラップ |
Same as final |
ST |
ばん |
Same as final |
ND |
ばん |
Same as final |
RD |
ばん |
Same as final |
TH |
ばん |
Same as final |
WRONG WAY! |
ぎゃくそう |
むきが はんたいだよ! |
FINISHED! |
ゴ-ル! |
Same as final |
CONTROLLER 1 IS UNPLUGGED! |
1Pコントロ-ラが ぬけているよ |
コントロ-ラ1が ぬけています |
PLEASE INSERT A CONTROLLER |
コントロ-ラをつないでね |
コントロ-ラを つなげてください |
Coco's Hologram Head#
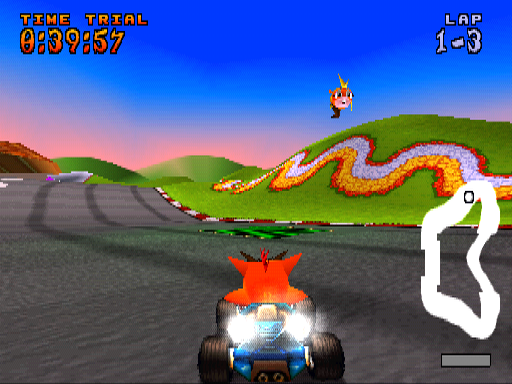
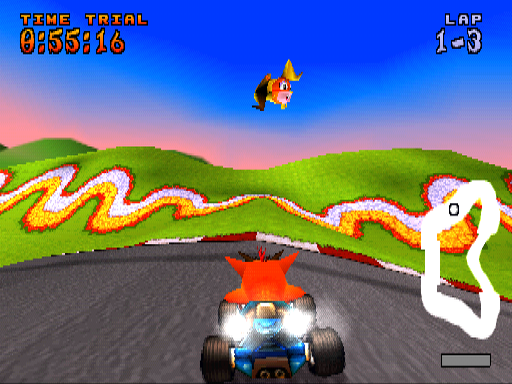
Coco Park features a hidden model of Coco Bandicoot's head, which is her hologram model from Crash 2. It is placed floating in the sky just before the final corner with her face posed as an open smile. Its purpose is currently unknown, but it is possible that it would have displayed as a hologram in the sky when the track had an even more Coco focused theme early on, such as when her name was written in purple flowers on the first large corner.
It appeared only once in officially released gameplay during a Japanese pre-release trailer. The model and textures of the head still exist in the track data of the final game for all three regions, but the head is no longer placed in the sky.
It cannot normally be seen due to a thread that makes it invisible, but it can be drawn again by using the following GameShark codes:
800B33A8 0000
800B33B0 0000
After the code is activated, the track needs to be restarted for the head to appear.
Early Podium Data#
Watch on YouTubeVictory poses for Crash, Coco, Tiny Tiger, Dingodile, Papu Papu, Komodo Joe, Fake Crash, and the Trophy Girls already exist in the data - although some of them are in a primitive state. These files are also duplicated in the defeat animation poses as placeholders. By replacing the data of later builds of the game, it is possible to load them, although most of the textures do not work properly.
- Crash, Coco, Tiny, and Fake Crash do not have any noticeable differences.
- Komodo Joe does a clapping animation while he dances.
- Ami does the wagging finger animation instead of the hand-waving one.
- Megumi does not have any animations.
Oddities#
Internal Track Names#
The internal names for Coco Park and Tiny Arena are called coco1 and arena2, respectively. Oddly, these names were eventually reverted back to asphalt1 and asphalt2, which sound less accurate to the themes of the tracks, especially for Tiny Arena.
Game Version#
The memory card header contains a version number, which is set to 9.
Save Information#
The information stored on a memory card when saving the game differs in this version compared to the final release.
- The hand icon is a sample memory card icon from an Psy-Q library.
- The title of the ghost replay data contains an additional period before the track's name.
- Character names share the same string array used in the character select screens. In the final game, the separate array of characters names for High Score is also used for the ghost data, featuring proper name abbreviations.
Info |
Aug 5 |
Final |
|---|---|---|
Save icon |
 |
|
Title |
CTR Saved Games and Scores |
CTR:Saved Games and Scores |
Product Code |
SCUS-12345 |
SCUS-94426 |


Dongle Protection#
This build is dongle protected with the use of a memory card dongle, so attempting to run it via normal means will not boot the game. It seems this dongle was made specifically for the E3 demo, but was later reused in subsequent builds.
E3 dongle Copyright 1999 Naughty Dog, Inc.