 This article has a talk page!
This is a sub-page of Proto:Super Mario World 2: Yoshi's Island/ys romX 0.

|
This page is rather stubbly and could use some expansion. |
|
|
To do:
|
As can be seen above, the World 1 map is much different than the final game, vibrant and better animated.
Introduction Level#
Intro stage map(s) |
|---|
Intro stage (level $30) |
When starting this level from a new file, that isn't File 1, a small prologue level is loaded before the real World 1-1. It is a very basic jump stage with a few coins. No enemies or eggs are present. When the end of the prologue is reached, the beginning of World 1-1 loads.

World 1-1#

W1-1 map(s) |
|---|
1st room (level $00) |
A showcase for basic game mechanics. These include the falling Chain Chomps that punch holes through the level, though they're shown breaking through the wooden yellow platforms, something which they don't do in the final game's World 1-2: Watch Out Below!
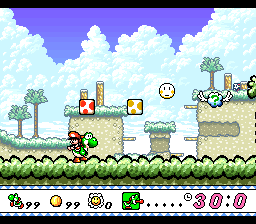

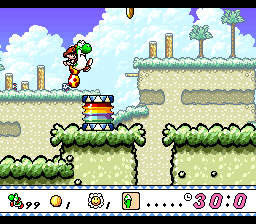
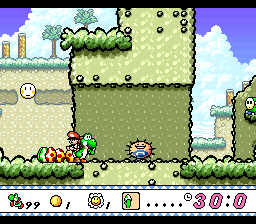
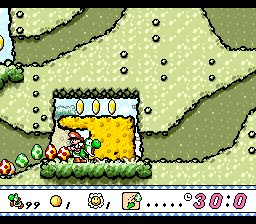
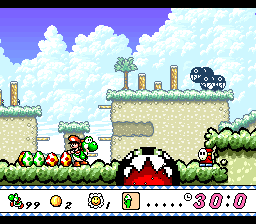
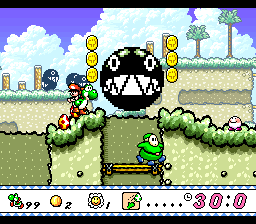
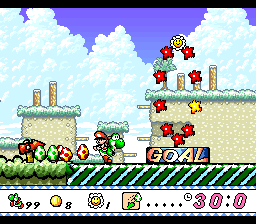
The first part of the advice given by the first Hint Block is similar to an unused message that can be found in the final version (ID #01C0).

World 1-2#

W1-2 map(s) |
|---|
1st room (level $01) |
2nd room (level $31) |
A jungle-themed level that doesn't seem to resemble any particular level of the final game.

The bottom part of it features a Flower, a Melon (uses a different design from the final game), four Goombas, and three eggs to collect inside a block.
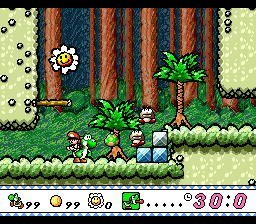
The ? Cloud at the beginning of the level, when hit by an egg or a watermelon seed, activates another staircase that makes it possible to reach the upper part of the level and a graphically-glitched monkey.


When moving to the right, some Piranha Plants can be found. They can be defeated by hitting them with an egg or by spitting watermelon seeds, then stomping on them.


After the Piranha Plants, an Advice Block can be found before a box. Hitting the block displays another message that goes unused in the final game (ID #0180). The version of the message that is used here lacks only a D-Pad icon.


The box contains five coins.
After the Shy Guys, a hidden zone reveals more Piranha Plants and a star that, when collected, detaches Baby Mario from Yoshi and lets the player control him. He is invincible, but the egg that contains Yoshi and the Baby Mario sprite use a wrong palette.
Also, Baby Mario's sprite is displayed floating on the ground, but his collision is correctly positioned on the ground. Probably the sprite of the transformed Baby Mario was taller in earlier builds where Mario had a bigger form for special cases, or this is simply a mistake made by the developers. When the transformation of Baby Mario ends, Yoshi can stay separated from him without losing Time Points.


In this level Baby Mario cannot continue running straight because an obstacle obstructs his way, but he cannot ground pound to remove it.

Removing the obstacle reveals another hidden area with a door in it.

The door leads to an underground area that contains two ? Clouds (the first contains one or two Time Points, the other one spawns a ring made of coins). There is also a door (leads to the very top area of the level) and a Flower that can only be collected by ricocheting an egg from a charged throw and hoping that it hits the Flower on its way.


If Yoshi manages to re-enter the door that fell down when entering this area, before it disappears, he will be warped to the top-left corner of the World 1-1 (this glitch still exists in the final game).

The area on the top of first hidden area features more Piranha Plants. Using the bouncing arrows, a cliff can be reached.

In one of the ? Clouds Yoshi can find an Helicopter morph bubble. Before Yoshi transforms, Baby Mario briefly becomes a strange-looking baby with a hat that uses a magic wand to transform Yoshi.


Now Helicopter Yoshi can reach the very top of the level and touch a WARP block that warps Baby Mario and the collected eggs and gets transformed back to Yoshi. The ? Clouds in this area spawn a ring made of coins, except for the central one that appears to do nothing.


If Yoshi can't transform or he fails to reach the WARP block before the time ends, he needs to access this area by navigating the hidden parts of the level, as the morph bubble doesn't respawn.

To complete this level Yoshi needs to find a hidden area, then he must keep moving on the right until finding two ? Clouds. The door that spawns leads again to the top-left corner of the World 1-1.


To reach the GOAL ring, Yoshi must hit the cloud on the right to spawn a staircase, hit the other cloud on the top, then reach the floating platforms and go to the GOAL ring.

World 1-3#

W1-3 map(s) |
|---|
1st room (level $02) |
A level featuring Shy-Guys On Stilts, a pretty straightforward level.
World 1-4#

W1-4 map(s) |
|---|
1st room (level $03) |
2nd room (level $32) |
3rd room (level $51) |
World 1-5#

W1-5 map(s) |
|---|
1st room (level $04) |
An earlier version of 1-5: Hop! Hop! Donut Lifts.
World 1-6#

W1-6 map(s) |
|---|
1st room (level $05) |
Would be retooled for 2-3's second room in the final.
World 1-7#

W1-7 map(s) |
|---|
1st room (level $06) |
A short level that was likely the basis for the final's World 2-7: Lakitu's Wall, featuring a similar preview icon.
Apart from the usual enemies, it features the Huffin Puffins, specifically an adult with two chicks, a Slugger, a Green Glove, and several Wall Lakitus.


The two Huffin Puffin chicks can be used as a replacement for eggs like in the final version.

Unlike the final game, the Wall Lakitus cannot be defeated by stomping on them. They can only be defeated using eggs, even when the pump launches them from the ground.


The other sections of the level feature more walls with Wall Lakitus inside them and other enemies on the ground.


After the last part of the level with Wall Lakitus, the level can be completed by touching the GOAL ring.

World 1-8#

W1-8 map(s) |
|---|
1st room (level $07) (see version with correct lava tiles) |
2nd room (Boss: Salvo) (level $33) |
